( ENG)
Hello beautiful people from @diyhub, I hope this is a great and blessed di for all of you, I am pleased to be with all of you today, on this occasion, I come to offer you a step by step, to make some tender and very delicate mini chicks, ideal to use as pendants, keychains, or if you prefer, it could be a cute and delicate toy, one of the smallest in the house. Without further ado, the invitation is to continue, and I show you how to do it. I hope you enjoy the tour.

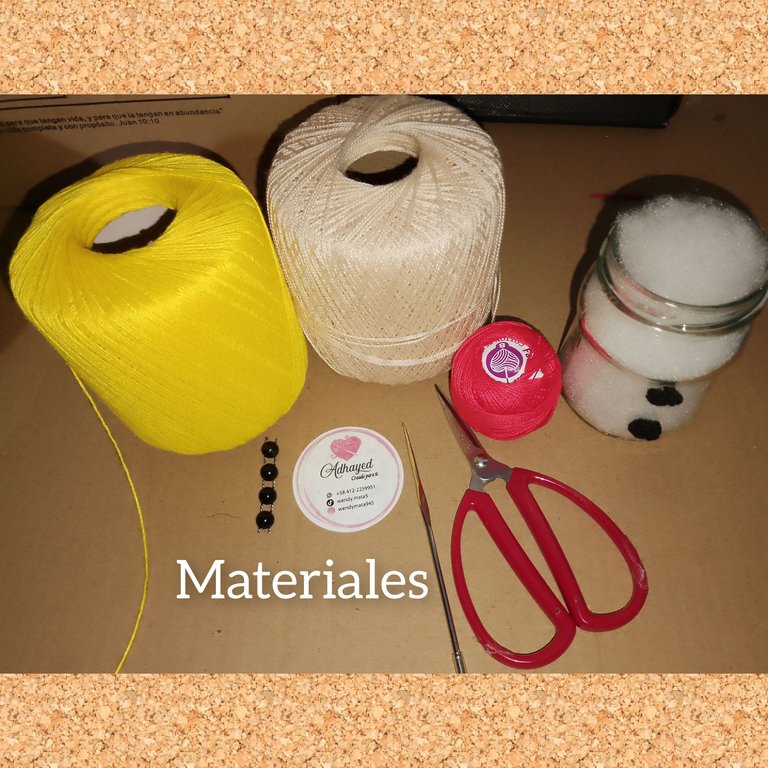
Materials used:
. Threads for knitting, colors (fuchsia, yellow, cream).
. Knitting needle.
. Stuffed.
. Wool needle.
. Half pearls n4, black color.
. Glue.
. scissors.
Creative process:
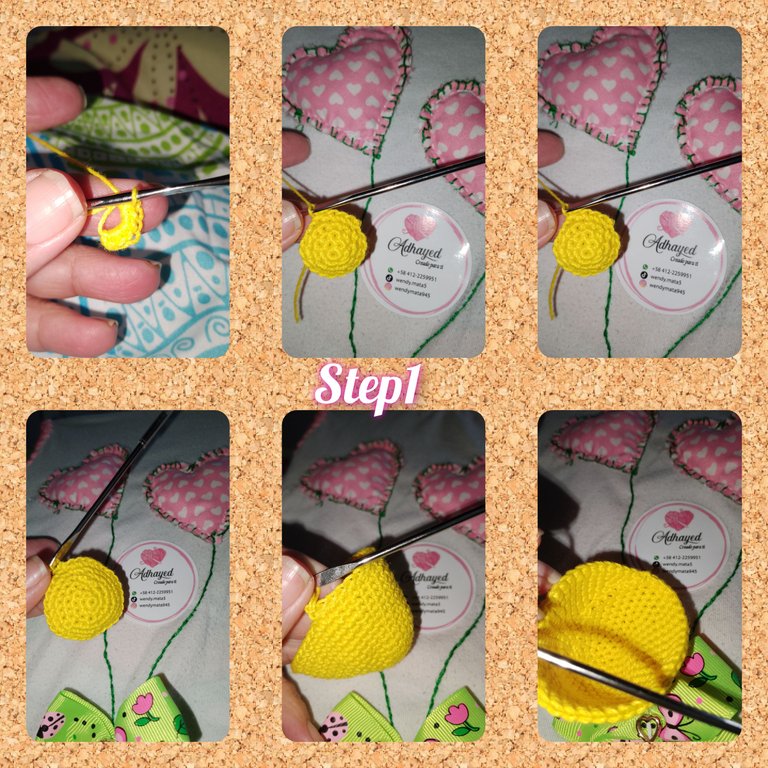
1.) In a magic ring, I will knit six half stitches, I close the ring with a slip stitch. I continue making six attentive stitches, for twelve single crochets, always closing with a delicate stitch. I continue making an increase, after a low point, the next passes with, with increase after two, three and four passes. At this point, I have thirty-six single crochets, two three passes of thirty-six single crochets. For the next pass, I will knit the increase, after five single crochets, I repeat the next one with forty half stitches. And for the next ones, I will start knitting the reductions. Making a stop in the, decrease, past the three half points.
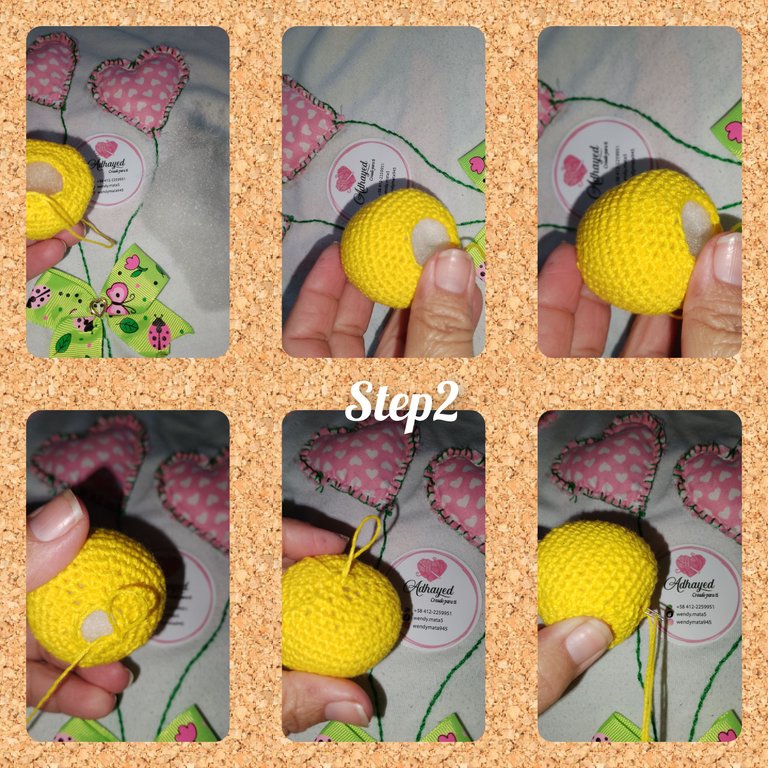
2.) Once this point has been made, in the fabric, the next thing will be to place the filling on the egg-shaped sphere, already woven, and continue, with the reductions, until the sphere is closed, cut and finish.
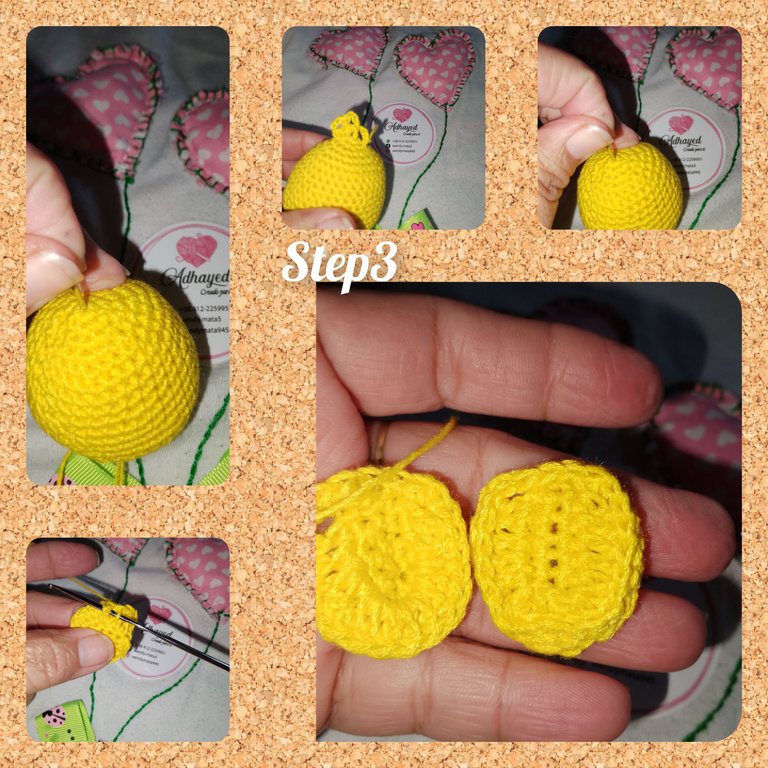
3.) For the pompadour, of the chick, I lift three chain stitches at the top of the sphere and knit one double crochet. I pick up three chain stitches, and with a slipped stitch, at the starting or completion point of the double stitch, I repeat, cast off and cut the thread. For the wings, I knit four half crochets, and go around it, increasing at the ends of three half crochets. I repeat two more rounds, I make one last round, with half-dots in relief, to give a better finish. I finish off and cut the thread, thus forming the wings of the chick.
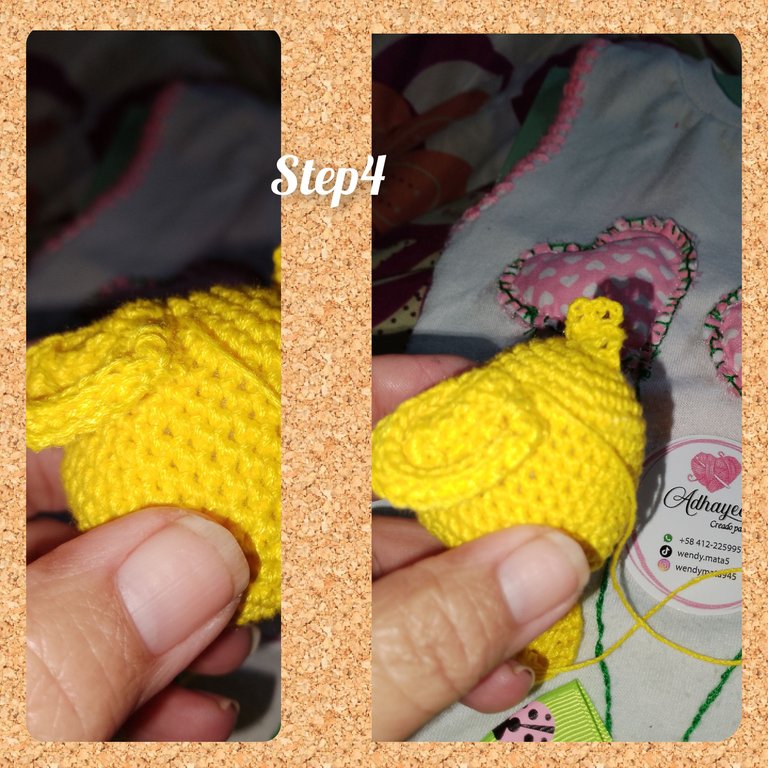
4.) I put thread on the wool needle, of the same color, and glue on both sides of the chick, maintaining the level. Between them and calculating and centering, where to place your face.
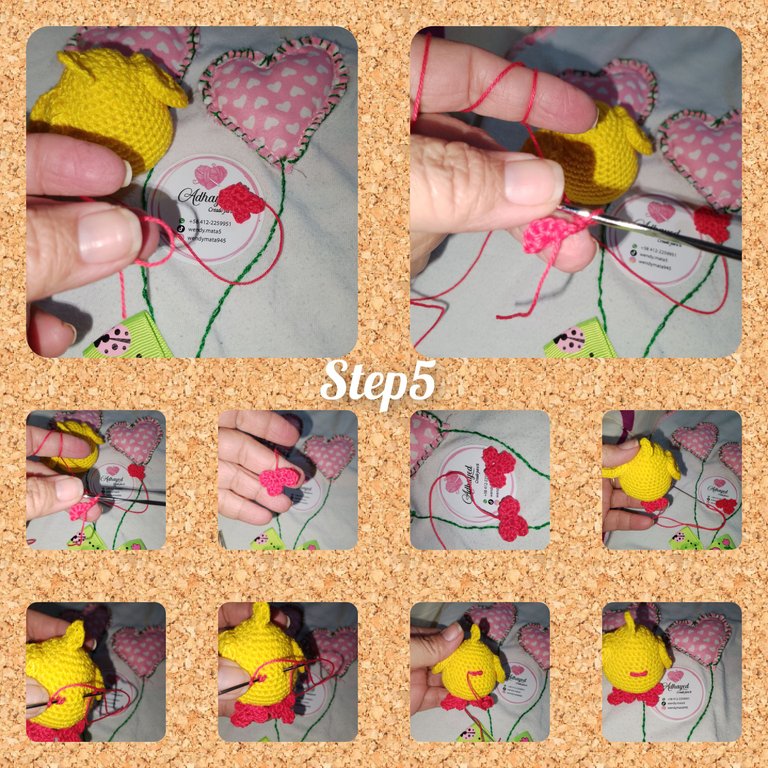
5.) Using the fuchsia-colored thread, I make a magic ring, and inside it I knit eight single crochets, I pick up the ring, but I don't close it completely, so I turn the ring, I pick up four high stitches and I go down to the next half crochet space, and I knit a slip stitch. In the next one I repeat the group of double crochets. In this way, I knit three groups of double crochets, to simulate the chicken's legs. With the needle, I sew on the bottom of the chick, and also embroider the mouth.
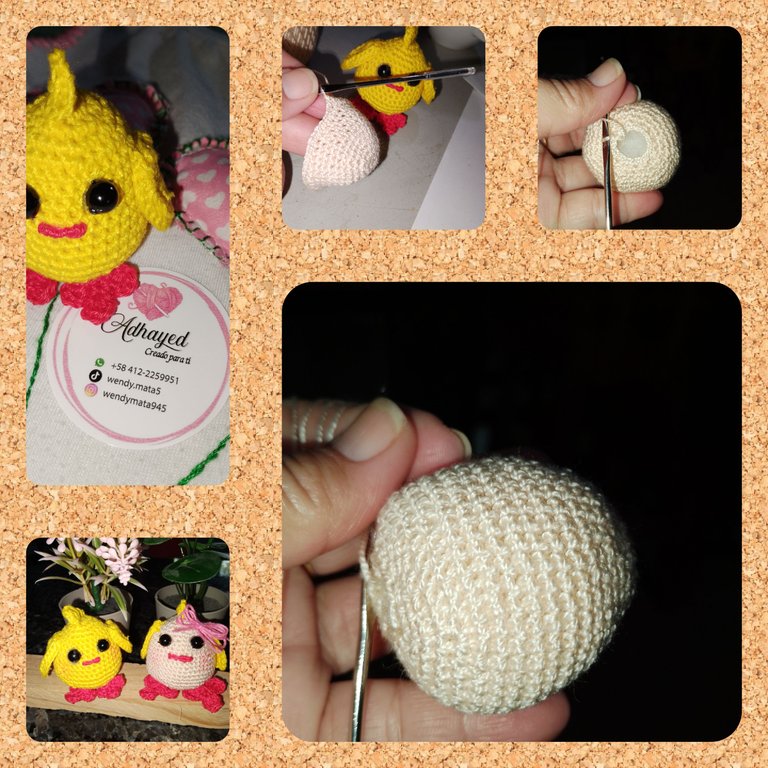
6.) Finally, I close my eyes. And I make him the companion of this first chick.
. All photos are my property.
. Use incollage to show the steps.
. Use gif videos to show the final result of today's project.
. Use language translator.
(Esp)
Hola gente linda de @diyhub, deseo este sea un gran y bendecido di para todos, ustedes, me complace estar el día de hoy con todos ustedes, en esta oportunidad, les vengo a ofrecer un paso a paso, para elaborar unos tiernos y muy delicados mini pollitos, ideal para usar como colgantes, llaveros, o si lo prefieres, podría ser un lindo y delicado juguete, de los más pequeños de la casa. Sin más, la invitación es a seguir, y les muestro como hacerlo. Espero disfruten el recorrido.

Materiales usados:
. Hilos para tejer, colores (fucsia, amarillos, crema).
. Aguja para tejer.
. Relleno.
. Aguja lanera.
. Medias perlas n4, color negro.
. Pegamento.
. tijeras.

Proceso creativo:
1.) En un anillo mágico, tejere seis medios puntos, cierro el anillo con un punto deslizado. Continuo haciendo seis atentos, para doce puntos bajos, siempre cerrando con punto delicado. Continuo haciendo un aumento, luego de un punto bajo, la siguientes pasadas con, con aumento luego de dos, tres y cuatro pasadas. Llegado a este punto, tengo,treinta y seis puntos bajos, dos tres pasadas de treinta y seis puntos bajos. Para la siguiente pasada, tejere el aumento, luego de cinco puntos bajos, repito la siguiente con cuarenta medios puntos. Y para las siguiente, comenzaré ha tejer las reducciones. Haciendo un alto en la, disminución, pasado los tres medios puntos.

2.) hecho este alto, en el tejido, lo siguiente será, colocar el relleno a la esfera en forma de huevo, ya tejida, y continuo, con las reducciones, hasta cerrar la esfera, corto y remato.

3.) para el copete, de el pollito, levanto en la parte, superior de la esfera, tres puntos cadenas y tejo, un punto altos. Levanto tres puntos cadenas, y con un punto deslizado, en punto de partida o culminación de el punto alto, repito, remato y corto el hilo. Para las alas, tejo cuatro medios puntos, y lo recorro, haciendo aumento en los extremos de tres medios puntos. Repito dos vueltas más, doy una última vuelta, de medios puntos en relieve, para dar mejor acabado. remato y corto el hilo, quedando formado de esta manera, las alas de el pollito.

4.) Coloco hilo a la aguja lanera, de mismo color, y pego en ambos lados de el pollito, manteni ndo el nivel. Entre ellas y calculando y centrando,.dónde ubicarte el rostro.

5.) Usando el hilo de color fucsia, hago un anillo mágico, y dentro de el tejo ocho puntos bajos, recojo el anillo, Pero no cierro en su totalidad, de manera qué, doy vuelta a el anillo, levanto cuatro puntos alto y bajo a el siguiente espacio de medio punto, y tejo un punto deslizado. En el siguiente repito el grupo de puntos altos. De esta manera, tejo,tres grupos de puntos altos, para simular las patitas de el pollo. Con la aguja, coso en la parte inferior de el pollito, así mismo bordo la boca.

6.) Finalmente,pego los ojos. Y le hago el compañero, de este primer pollito.

. Todas las fotos son de mí propiedad.
. Use incollage para mostrar los pasos.
. Use videos gif para, mostrar el resultado final, de el proyecto de hoy.
. Use traductor lenguaje.
Demasiado tierno y bello 😍 quiero uno jajaja 🙏🏽 tienes un talento increíble 🥹
Made with yarn this wonderful chic which always delights the kids. Thank you so much for sharing this wonderful art.
que belleza, está genial como quedaron!
What a beauty, it looks great how they turned out!