¡Bienvenido a mi blog!
Welcome to my blog!
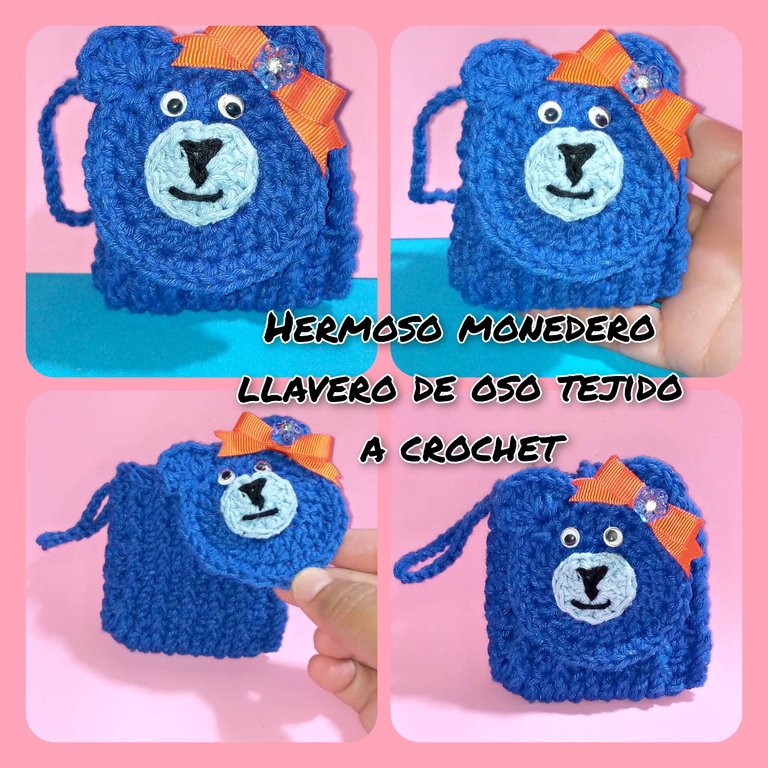
Buenas noches mis hivers de esta linda comunidad #diyhub, feliz Lunes , espero que estén bien y que hayan pasado un día estupendo. Muchas bendiciones.
El día de hoy quiero mostrar a través de un tutorial: Como hacer un hermoso mini bolso con cara de oso tejido a crochet. Es especial para : llaveros, monederos, recuerdos de bautizos y cumpleaños. Se que a los niños le gusta mucho, para las hembras con el lazo en la cabeza y para los varones con lazo cerca del cuello. Quedan muy lindas las mini bolsas de oso 🐻 tejidas a crochet. Espero sea de su agrado.
Good evening my hivers of this nice community #diyhub, happy Monday , I hope you are well and have had a great day. Many blessings.
Today I want to show through a tutorial: How to make a beautiful mini bear face bag crocheted. It is special for : key chains, purses, baptism and birthday favors. I know that children like it very much, for girls with a bow on the head and for boys with a bow near the neck. They look very cute mini bear bags 🐻 crocheted. I hope you like it.
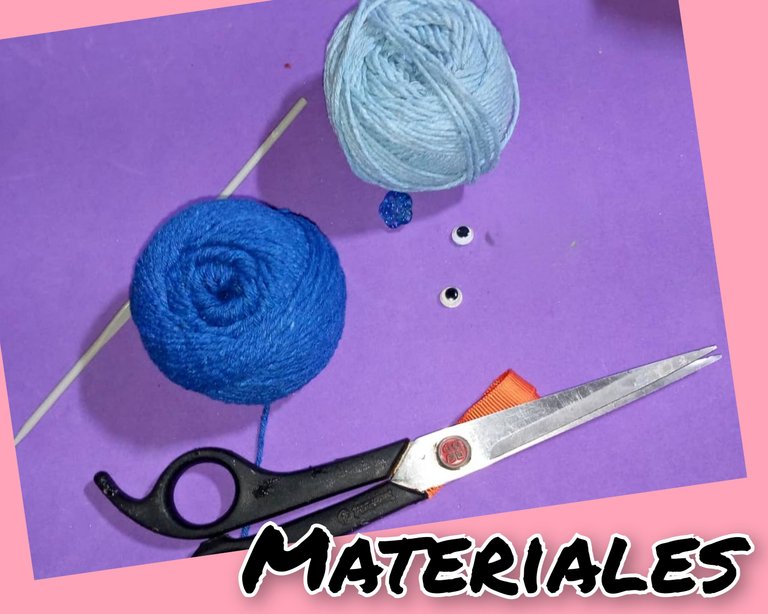
Los materiales que se necesitan para la realización del mini bolso tejido a crochet 🐻:
- Hilo de tejer, color: azul oscuro y azul claro.
- Aguja.Número 3
- Aguja lanera.
- Silicon .
- Ojos.
- Cinta para el lazo .
- Botón con brillantes.
- Tijera
Materials needed for the realization of the mini crochet knitted bag 🐻:
- Knitting yarn, color: dark blue and light blue.
- Number 3 needle.
- Wool needle.
- Silicon.
- Eyes.
- Ribbon for the loop .
- Button with rhinestones.
- Scissors
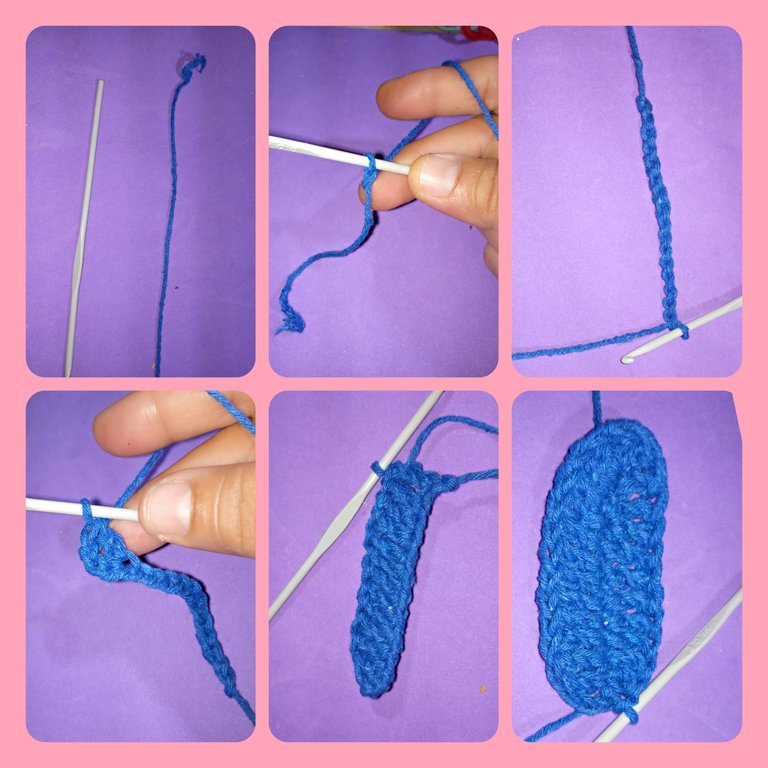
Paso a paso de la realización del mini bolso tejido a crochet 🐻:
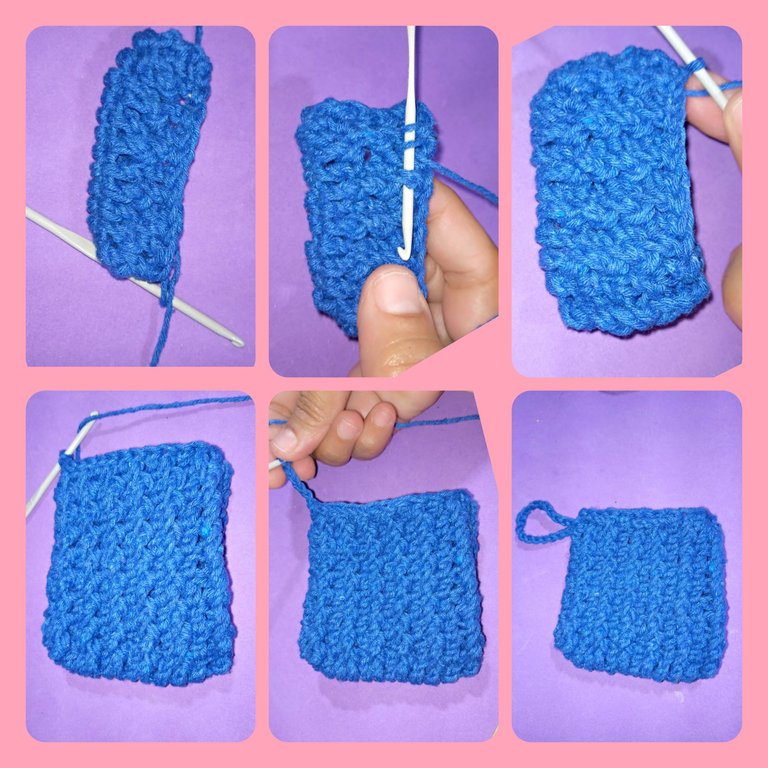
- Lo primero que haremos es tomar la aguja con el hilo, hacer un lazo corredizo, luego una cadena de 15 puntos.
- Al terminar la cadena , dejamos 3 puntos y en el cuarto punto metemos la aguja, tomamos lazada hacemos 11 puntos altos en cada punto y en el último hacemos tres. Para un total de 15 puntos altos. Metiendo los tres que se hizo en un mismo punto.
- Seguimos dando la vuelta, hacemos 12 puntos, cuando llegamos al final, cerramos con un punto deslizado y tenemos la primera vuelta.
Step by step of the realization of the crochet knitted mini bag 🐻:
- The first thing we will do is take the needle with the yarn, make a slip loop, then a chain of 15 stitches.
- At the end of the chain, we leave 3 stitches and in the fourth stitch we put the needle in, we take the loop, we make 11 high stitches in each stitch and in the last stitch we make three. For a total of 15 high stitches. Putting the three stitches in the same stitch.
- We continue going around, we make 12 stitches, when we reach the end, we close with a slipped stitch and we have the first round.
- Levantamos tres cadenas, en el mismo punto hacemos un punto alto. Luego en el siguiente, tomamos de adentro el punto alto y lo sacamos por fuera. Ahora hacemos un punto alto normal en el punto que sigue, hacemos un punto tomando el punto alto de adentro y sacamos con el hilo hacia afuera. Así vamos ha tejer el mini bolso hasta tener 8 vueltas . Pueden guiarse por la imagen.
- Después que se hace las 8 vueltas , levantar una cadena de 50 puntos y ese es el cordón que vamos a introducir dentro del mini bolso en la parte de arriba.
- We pick up three chains, in the same stitch we make a high stitch. Then in the next stitch, we pick up the double crochet stitch from the inside and cast it out. Now we knit a normal single crochet in the next stitch, we knit a stitch taking the single crochet from the inside and we pull the yarn to the outside. In this way we are going to knit the mini bag until we have 8 rows. You can be guided by the picture.
- After the 8 rows are done, we will raise a chain of 50 stitches and this is the cord that we are going to introduce inside the mini bag at the top.
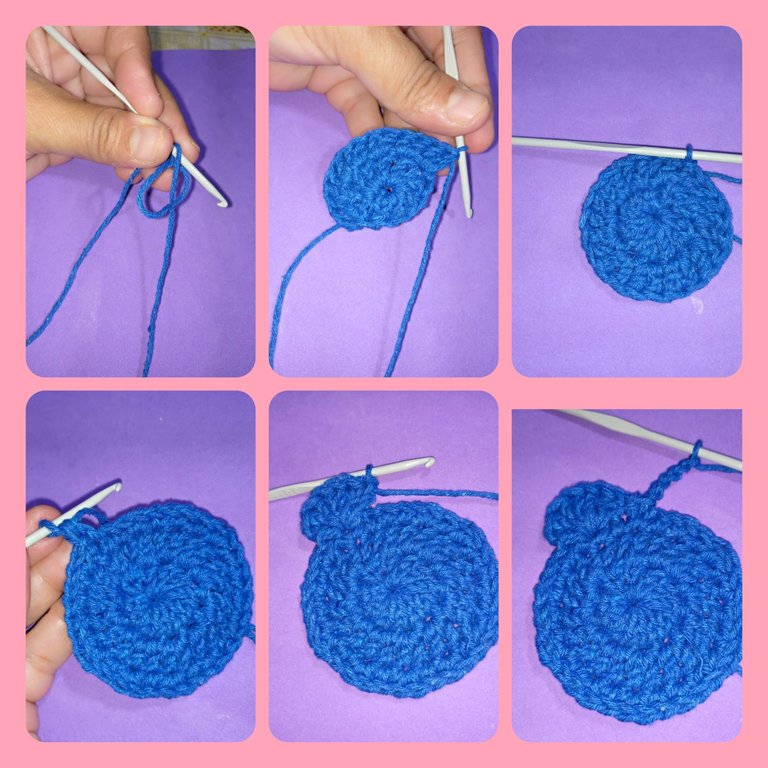
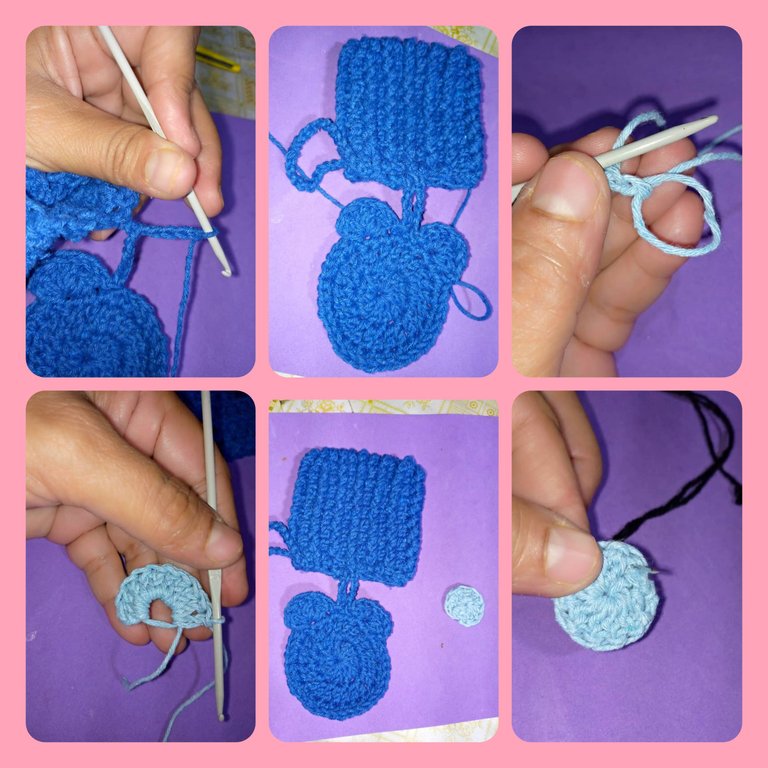
- Ahora vamos a realizar la cara del oso 🐻, hacemos una anillo mágico y dentro del anillo metemos 12 puntos altos , cerramos con un punto deslizado, para la siguiente vuelta hacemos un aumento en cada punto , en total 24 puntos altos. - Cerramos con punto deslizados. Tejemos 7 puntos altos en un mismo punto, esos puntos es una oreja, luego dos puntos deslizados, hacemos una cadena de 5 y pegamos la cabeza con la mini cartera con puntos deslizados, hacemos 5 puntos más y lo pegamos a la mini cartera con puntos deslizados, seguimos con dos puntos deslizados más , hacemos 7 puntos altos en un mismo punto (la otra oreja), terminamos con un punto deslizado.
- Para hacer en donde van la nariz y la boca. Hacemos un anillo mágico , dentro del anillo metemos 10 puntos altos . Recortamos los excedentes de hilos con la tijera.
- Con la aguja lanera y un pedacito de hilo negro hacemos la nariz y la boca.
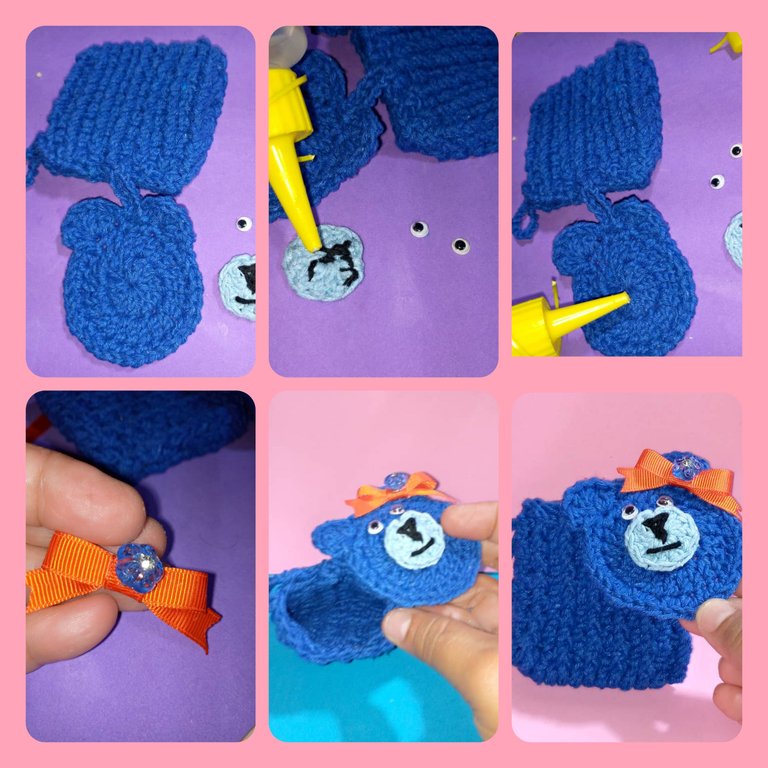
- Pegamos cada parte en su lugar con silicona líquida. Hacemos el lacito con la cinta y pegamos el botón . Ya tenemos listos el hermoso mini bolso de oso 🐻 🐻
- Now we are going to make the face of the bear 🐻, we make a magic ring and inside the ring we put 12 high stitches, we close with a slip stitch, for the next round we make an increase in each stitch, in total 24 high stitches. >- Close with slip stitch. We knit 7 double crochet stitches in the same stitch, those stitches is an ear, then two slip stitches, we make a chain of 5 and we glue the head with the mini purse with slip stitches, we make 5 more stitches and we glue it to the mini purse with slip stitches, we continue with two more slip stitches, we make 7 double crochets in the same stitch (the other ear), we finish with a slip stitch.
- To make where the nose and mouth go. We make a magic ring, inside the ring we put 10 high stitches. Cut the excess yarn with the scissors.
- With the wool needle and a small piece of black thread we make the nose and mouth.
- Glue each part in place with liquid silicone. We make the bow with the ribbon and glue the button. Now we have ready the beautiful mini bear bag 🐻 🐻
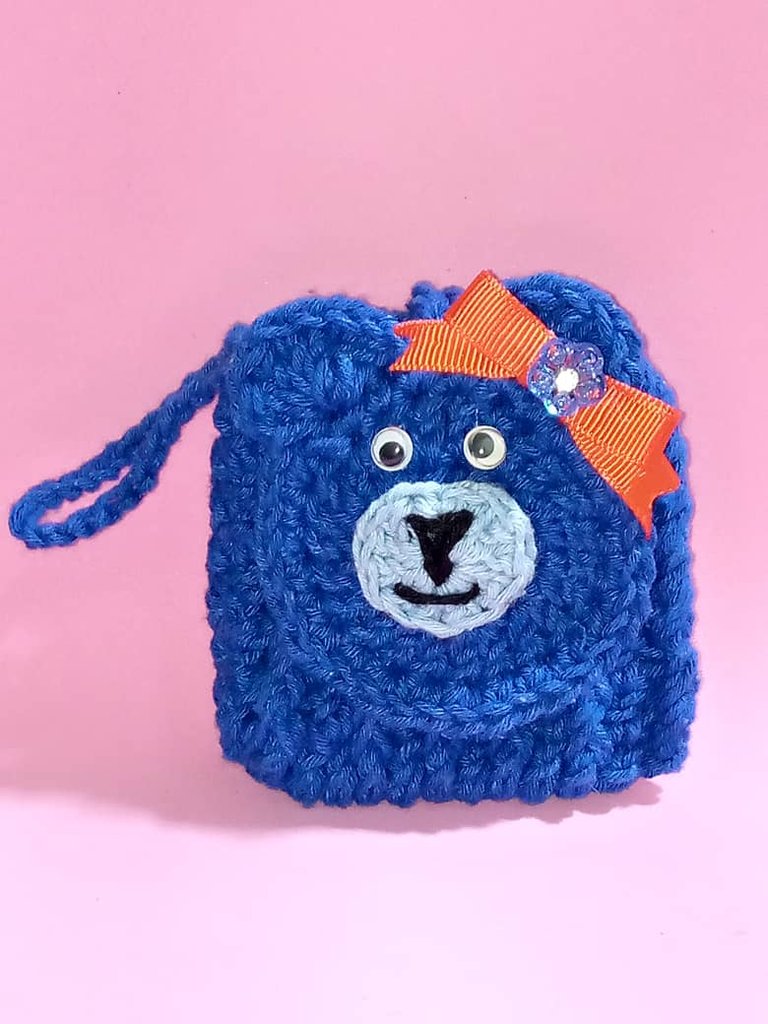
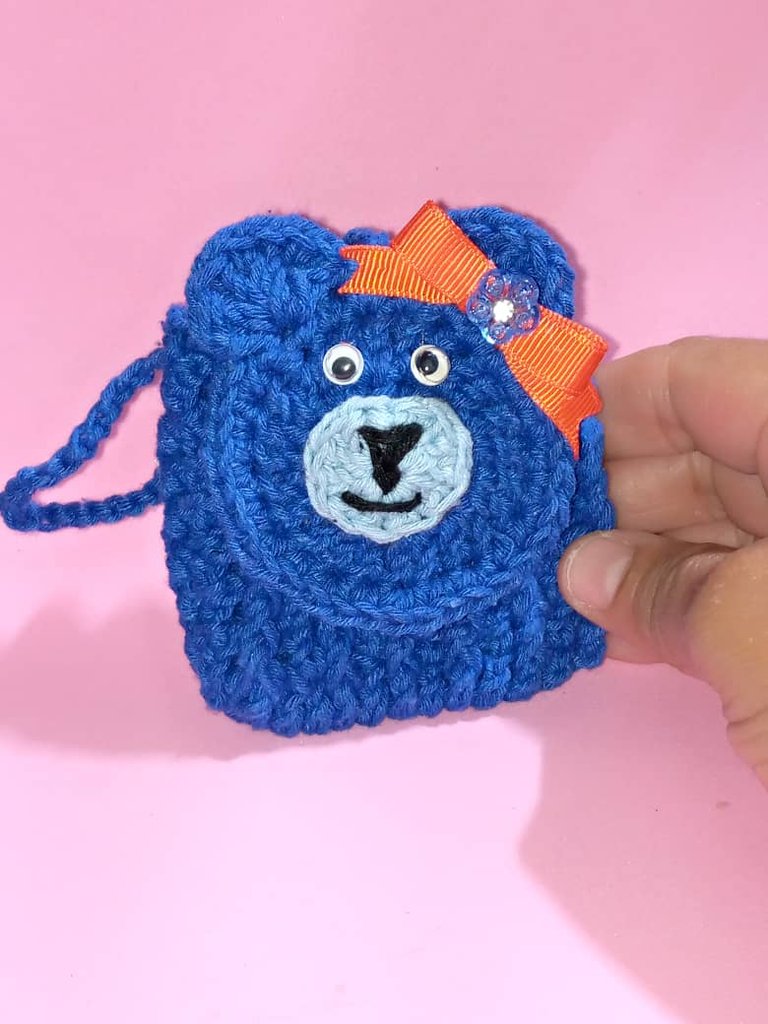
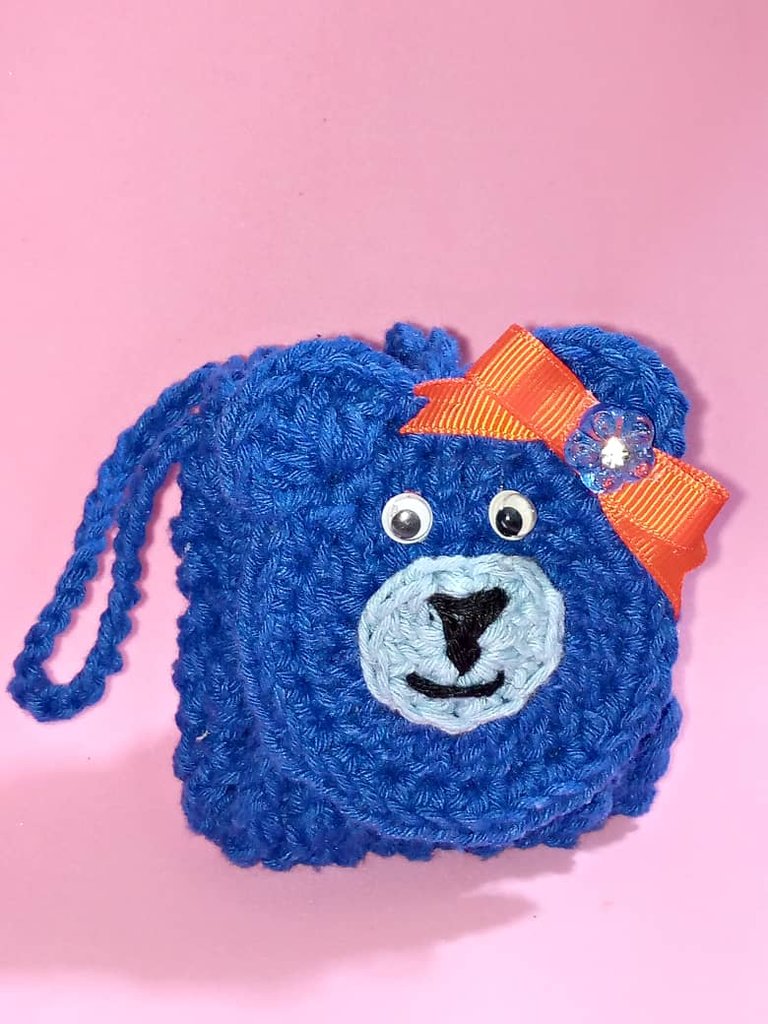
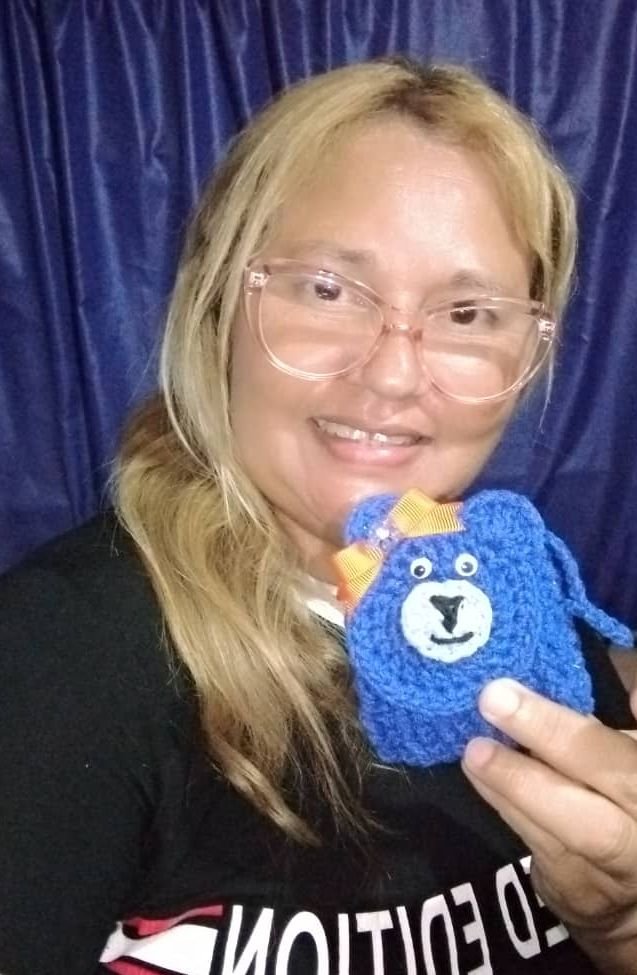
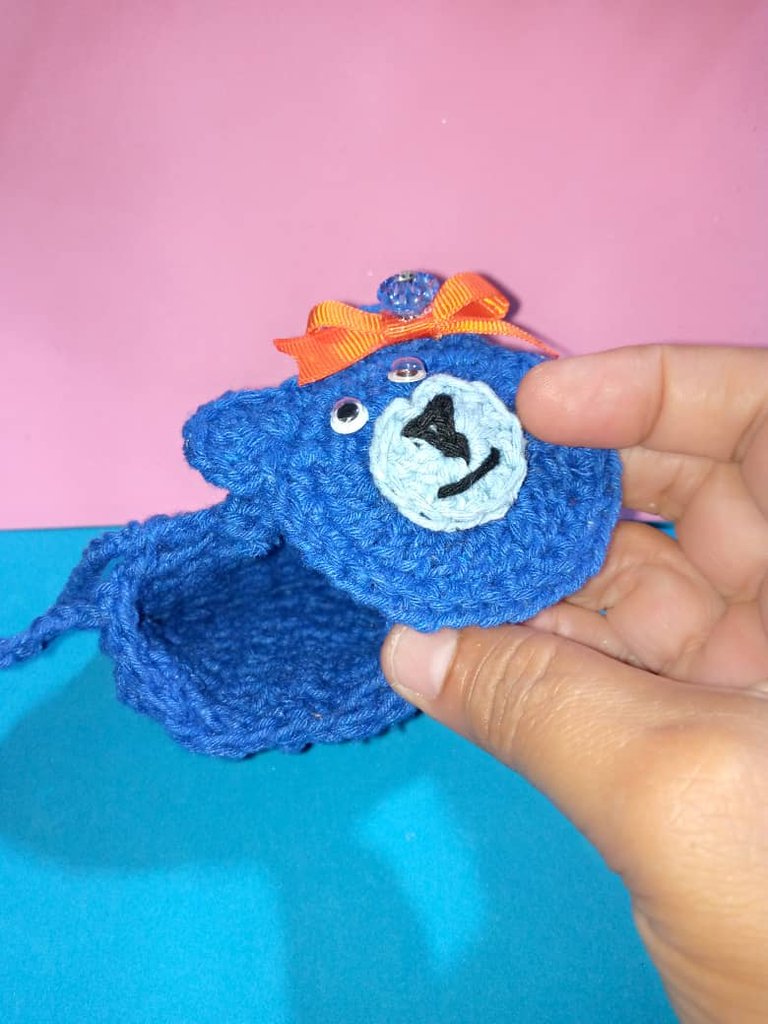
Aquí podemos ver el resultado final del hermoso mini bolso de oso 🐻 tejido a crochet.
Here we can see the final result of the beautiful mini bear bag 🐻 crochete
Gracias por leer y comentar mi post. Muchas bendiciones, hasta la próxima.
Las fotos son mías , tomadas con telefono INfinix, editadas con incollage y traducidas con Deepl.
Thank you for reading and commenting on my post. Many blessings, see you next time.
The photos are mine, taken with INfinix phone, edited with incollage and translated with Deepl.
The craft of yarn always reminds us of the emergence of a new industry. People used to prepare many historical things with yarn. Now that we are so digital we have forgotten the works of some of them. Thank you very much for following. Also Beautiful bear keychain purse is really fun to make. May the Creator always bless you with all abilities.
Amén, gracias por esas hermosas palabras @mdakash62 .
Saludos y bendiciones.
you are most welcome my pleasure
demasiado cute, está lindo y se ve cada detalle bien realizado!
too cute, it is beautiful and you can see every detail well done!
Si amiga @yasmarit , muy hermoso , gracias por visitar mi blog. Saludos.
𝘽𝙚𝙖𝙪𝙩𝙞𝙛𝙪𝙡❤
Si, muy bello @cryptomother . Saludos🤗😘
Welcome dear
Excelente idea ☺️👍 te quedó bonito!
This is such a cute keychain. The bear is adorable
Fantástica creación. Muy original
This is so beautiful and i love how detailed your steps and pictures are.
Weldone @josdelmi
Ay ,me alegran muchos esas palabras , gracias @udygold . Saludos