
Hello everyone! I'm going to show you my handy sketchpad today. My desire to improve my artistic abilities stems from the fact that I need to remember how to draw. 😅 I already have many ideas for drawings, but I only have limited time. I have no excuse for not practicing because the sketchpad is so convenient, and I can take it with me wherever I go.
You might wonder why I should not just buy a sketchpad instead. There are things we need to buy, and some things are unnecessary. I prefer to use my abilities and skills rather than keep buying things. Using my abilities and skills will help me hone every ability, such as resourcefulness, creativity, analytic, and artistic ability. So that in the future, we know how to strategize things in times of crisis. Does it make sense?
Further still, when customizing or doing it yourself, you can do whatever you want for those things you'd like to make. You have freedom. But if you're not really into it, you'll be content with what's in there. But being content is not an issue. Making my own helps me think of what I can make differently. I mean creating something using all that I have to make it unique. That's why I'd love to do it.
Before I thought of making a handy sketchpad, I was staring at sketch papers that were still unused. It is supposed to be for portrait commissions, but I have yet to be able to do so, and I have stopped receiving commissions since I started working. That is the reason why the art materials remained stuck. To make use of it, I made it into a new item out of the materials below:
Sketch/Drawing Paper
Board
Scissor/cutter
Glue
Sliding Stick
Double-Sided Tape
Rubber Band
Cartolina (it depends on the design you want for the cover)
Pencil
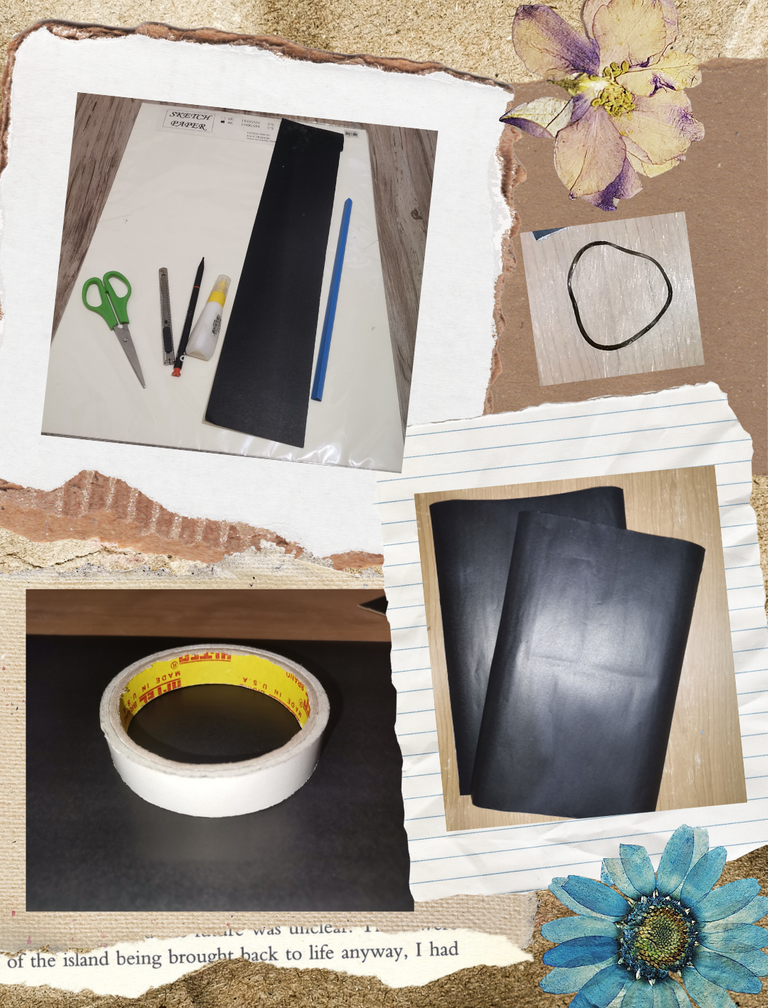
MATERIALS
THE PROCESS
Thank you for watching the video! ❤️
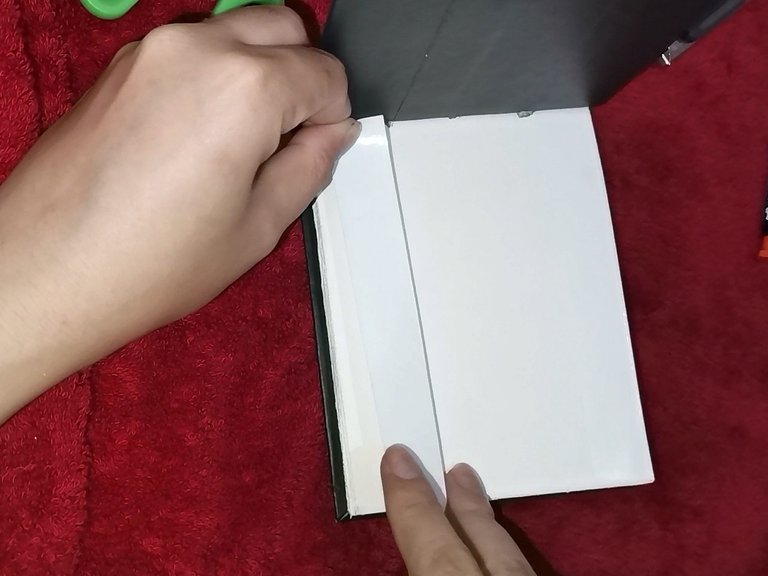
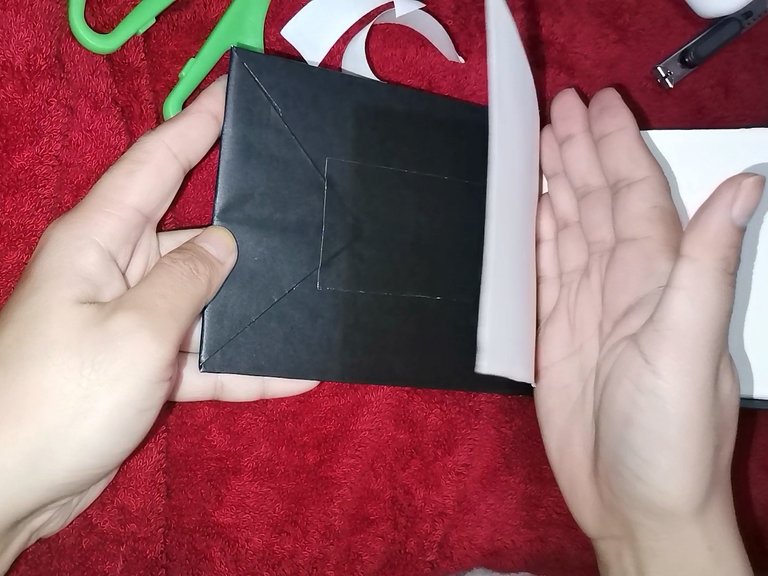
Now that you've just done watching the video, there was a part that I forgot to include, but I can share it with you. As you notice in the pictures below, the first and last pages of the pad still needed to be attached to the cover, both front and back. I used double-sided tape for us to avoid stretching the papers.
The reason why I need to attach those pages to the cover is to hold the inside. It will strengthen the attachment and cannot easily pull out the pages. Aside from that, it will also make the sketchpad neat to look at.
For the cover design of your handy sketchpad, don't limit yourself. I keep my handy sketchpad plain black because I just want to keep it simple. You can use such as colorful paper or cloth. You can also add stickers or pictures.

I chose to bind it vertically because it is so convenient to use if you are left-handed or right-handed. You can position it horizontally or vertically where you are comfortable using it. You can use a sliding stick and glue to bind it easily. There's no need for you to spend money on binding. It's easy to make it, right?
You can also do your handy sketchpad to discover how to draw. The handy sketchpad will also help you see how much you've improved from the first to the last page. You can learn even if you only have a little time to practice stroking or anything. Just start with small objects until you can control everything in your hands. So start making your handy sketchpad, friend! 😁
🌼🌼🌼🌼🌼🌼🌼🌼🌼🌼
ALL PICTURES AND VIDEOS ARE MINE UNLESS OTHERWISE CREDITED.
🌼🌼🌼🌼🌼🌼🌼🌼🌼🌼
What a detailed video. It's so wonderful that you're able to make such beautiful things with your hands. Sketchpad coming in so nicely and beautifully too. I guess this is the first time I'm reading your post and it's wonderful. You look absolutely gorgeous too. Lots of love.
thank you so much! 😁💕
Congratulations @jirahscreation! You have completed the following achievement on the Hive blockchain And have been rewarded with New badge(s)
Your next target is to reach 900 upvotes.
You can view your badges on your board and compare yourself to others in the Ranking
If you no longer want to receive notifications, reply to this comment with the word
STOPCheck out our last posts:
😊👍💰 yes, no need to BUY what u can MAKE. I like to DIY whenever I can.
Yeah, it's also fun! 😁
😊😉
That was a very detailed video. Your sketchpad looks really nice. !diy
Thank you so much for the support, I really appreciate you for that! 💞
You're very much welcome dear😃✨