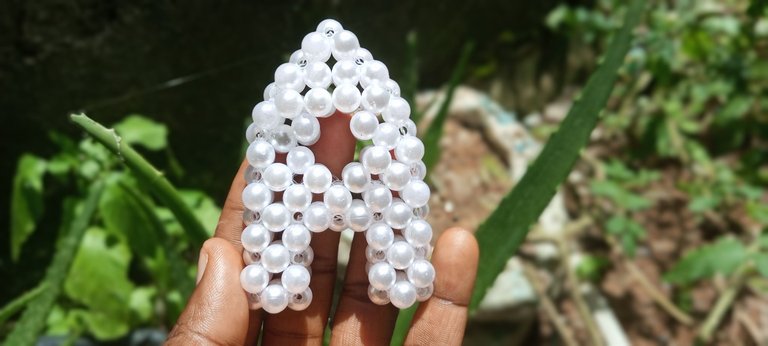
Hello, dearest gentle Hivers; 😊 Today, we continue our little adventure of creating beaded alphabets for my son. If you missed my previous post on it, don't worry, as you can simply check it out here. Today we will be making A. A is a special letter to my son; both his name and surname start with A, and white is his favorite color, so we are making A with white color beads. You can already tell how close this letter is to my heart ❣️
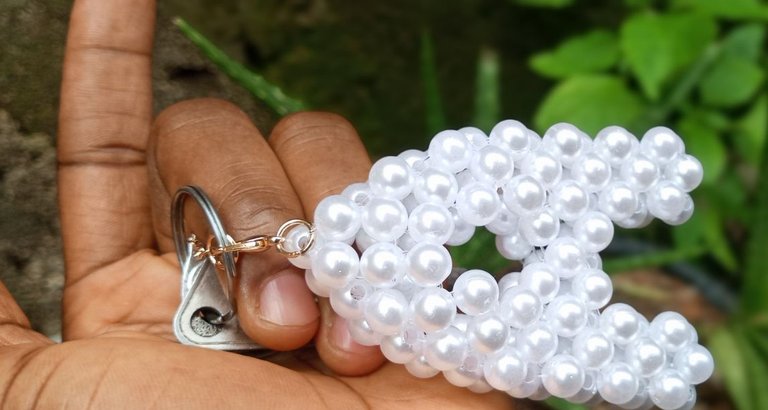
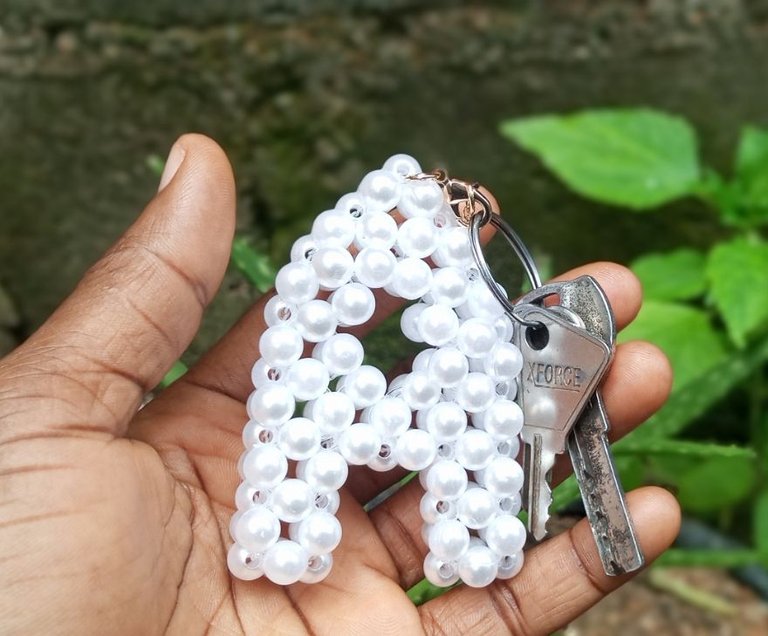
 Also, these beaded alphabets can as well serve as a beautiful fancy keychain.
But before I proceed, thank you all so much for your encouragement and suggestions in my previous letter. You rock. And inspired me to continue to share this project with us. So, without much digression, come along and let our creative energy flow together.
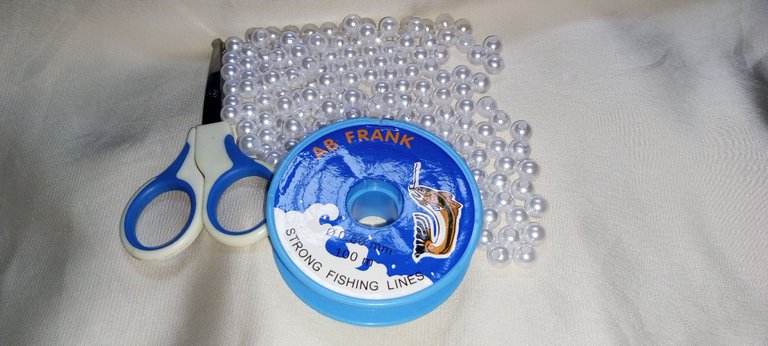
Material used:
✓ Pearl beads 6mm, 106 piece
√ Fishline 0.5mm
✓scissors
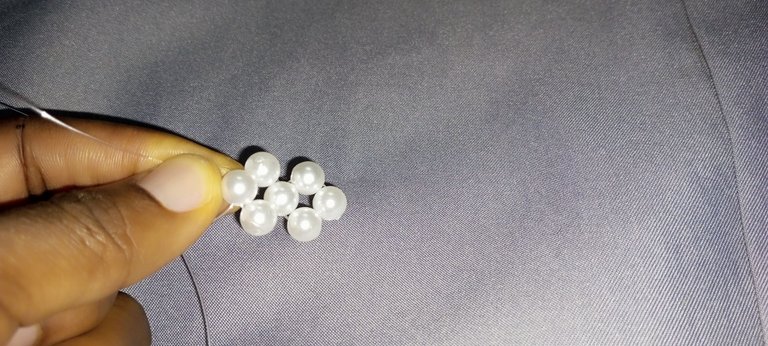
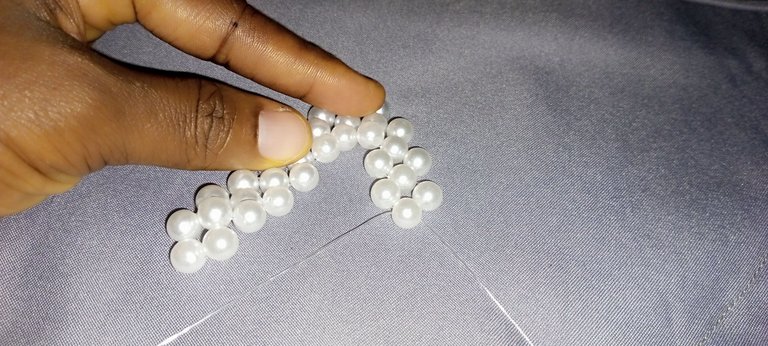
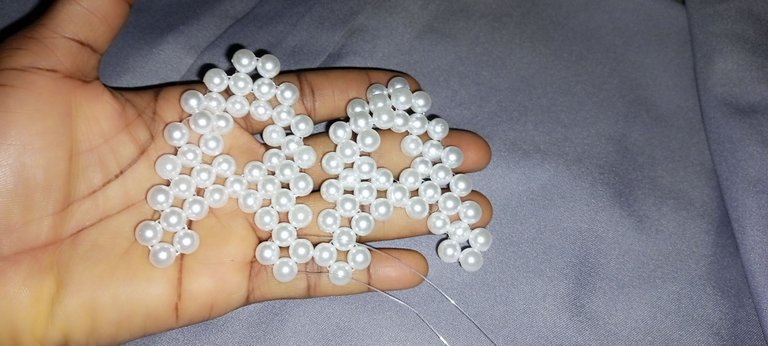
First thing we are going to make are two 7 rings of beads joining each other at the top.
Step-by-step process:
I make sure to simplify the process as much as I can, and I hope that it will be very helpful if you decide to make your beaded A.
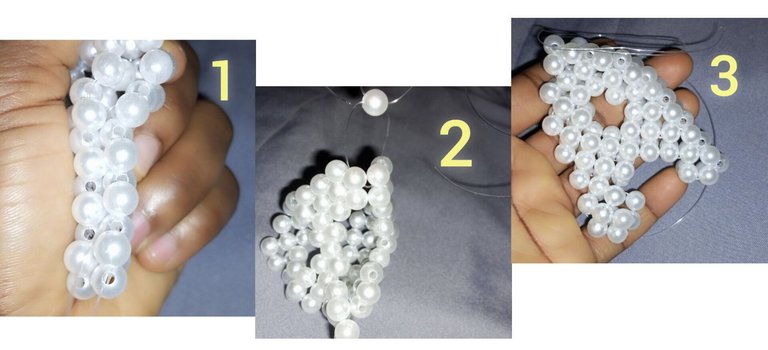
Step 1:
I cut a 50 cm long fishline and put 4 pearl beads in it, then crossed one of the lines with the 4th bead.
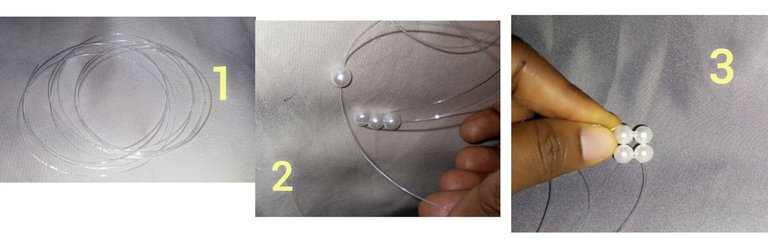
Step 2:
I put 1 bead to the left.
1 bead to the right
1 bead to cross both lines
Step 3:
I put 1 bead to the left.
1 bead to the right
1 bead to cross both lines
Step 4:
I put 1 bead to the left.
1 bead to the right.
1 bead to cross both lines.
Step 5:
I put 1 bead to the left.
1 bead to the right.
1 bead to cross both lines.
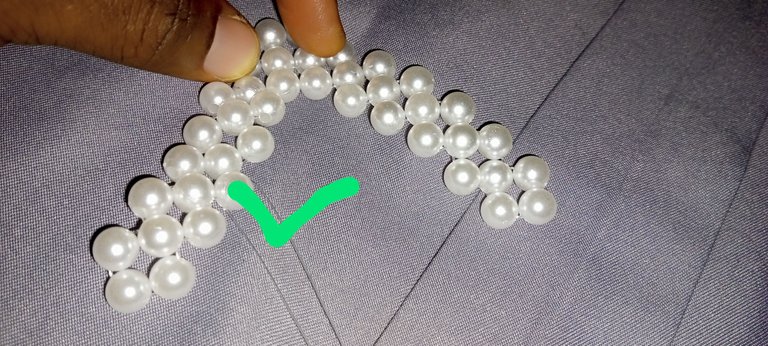
Step 6:
I put 2 beads to the left.
1 bead crosses both lines.
This makes the beads turn as shown below.
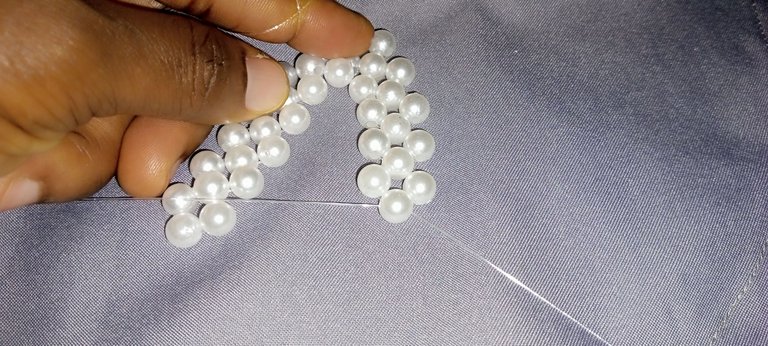
Step 7:
I put 1 bead to the left
1 bead to the right
1 bead to cross both lines
This will make the beads completely turn, and then we continue to build on a downward
Step 8:
I put 1 bead to the left
1 bead to the right
1 bead to cross both lines
Step 9:
I put 1 bead to the left.
1 bead to the right
1 bead to cross both lines
Step 10:
I put 1 bead to the left.
1 bead to the right
1 bead to cross both lines
Step 11:
I put 1 bead to the left.
1 bead to the right
1 bead to cross both lines
Step 12:
I put 1 bead to the left.
1 bead to the right
1 bead to cross both lines
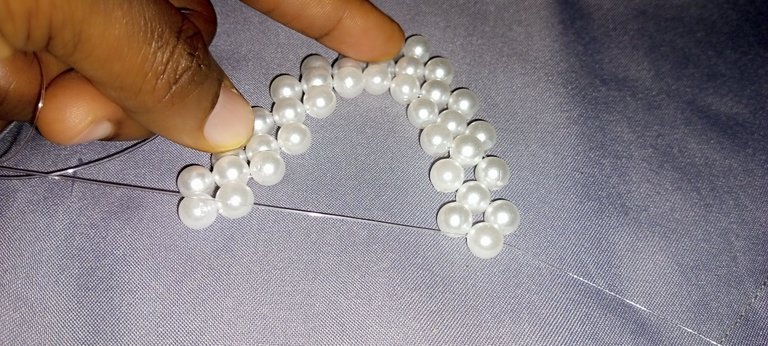
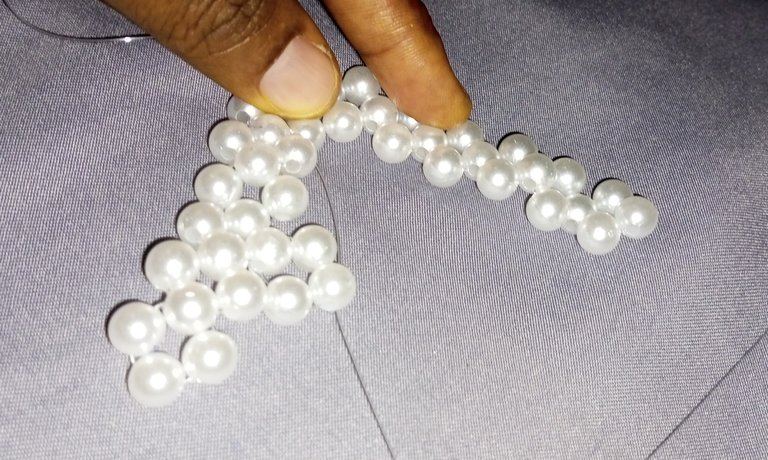
Step 13:
Put 1 bead to the left.
1 bead to the right
1 bead to cross both lines
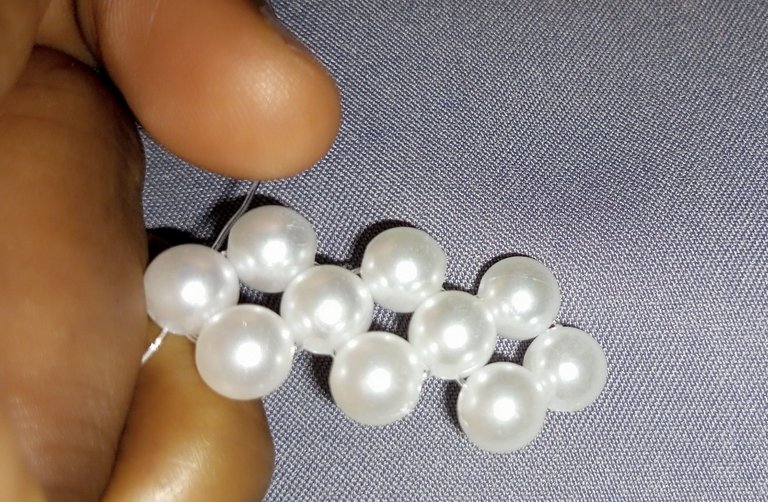
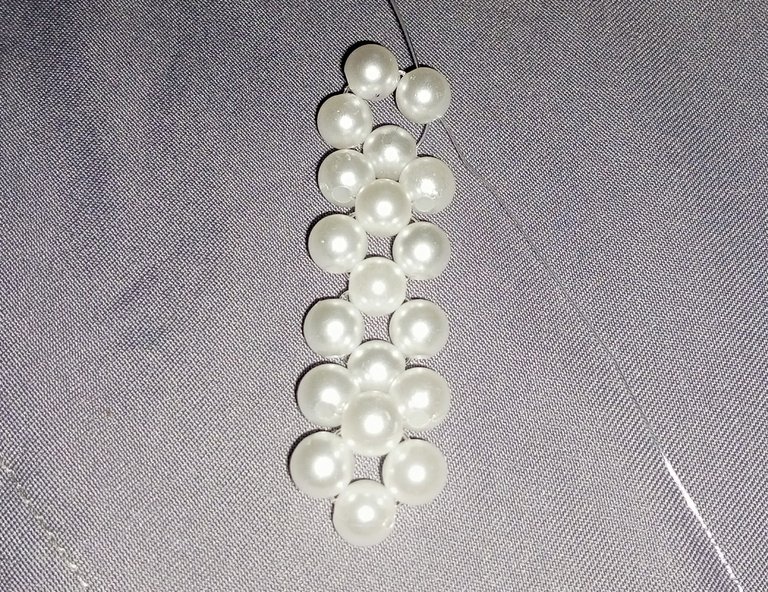
This gives us the desired length as shown below.
Step 14:
I pass the two threads and let it out on the third bead, as marked below.
Step 15:
I Put 1 bead to the left
1 bead to the right
1 bead to cross both lines
Step 16:
I put 1 bead to the right
1 bead to the left
Then pass the thread through the third bead as marked with yellow below
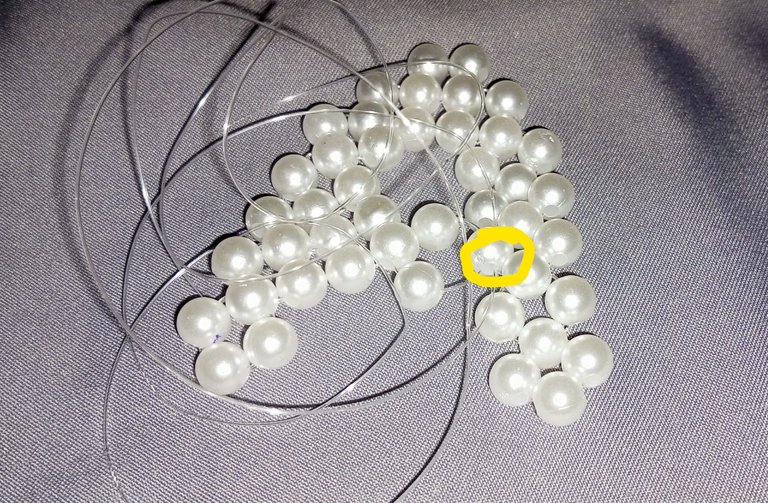
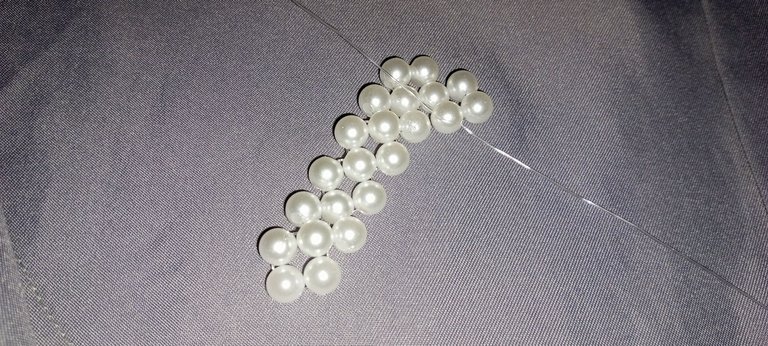
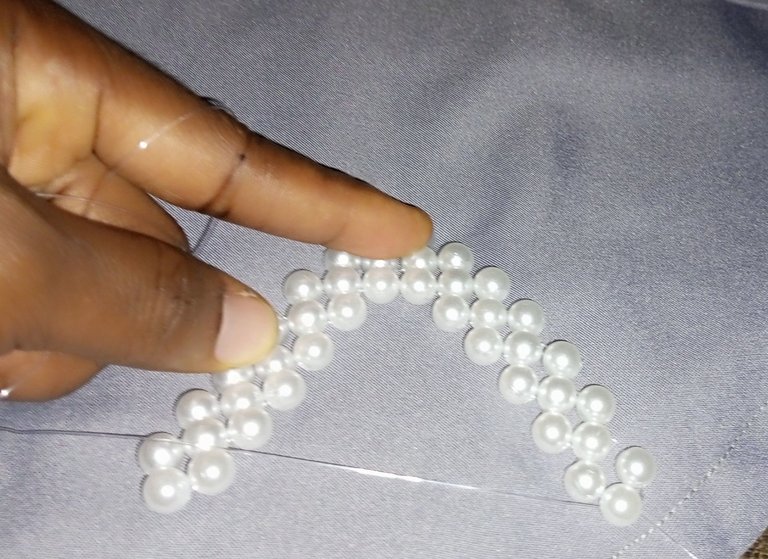
Tied the knot, passed the two threads among the beads, and trimmed the excess thread. Our half part of the A is ready.
Step 17:
I Repeated steps 1-16 to make the other half of the A.
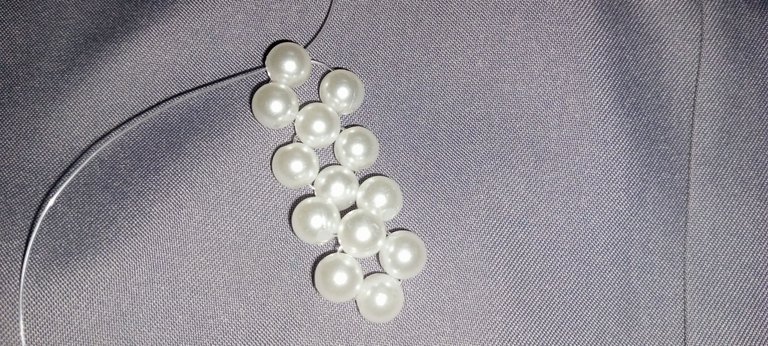
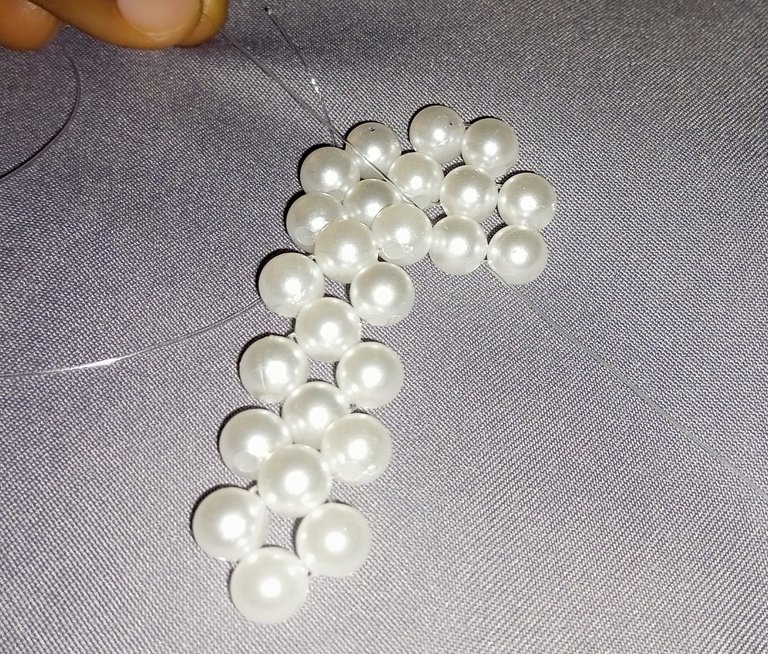
Step 18:
Bring the two A's together, cut a few new lines of 25 cm, and pass it through the first beads of both A's Then, Cross one bead with both fishlines.
Step 19
I Continue to use 1 bead to join the two A's until it goes round
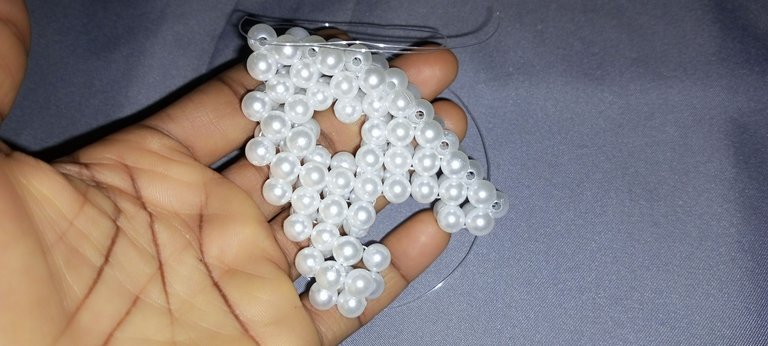
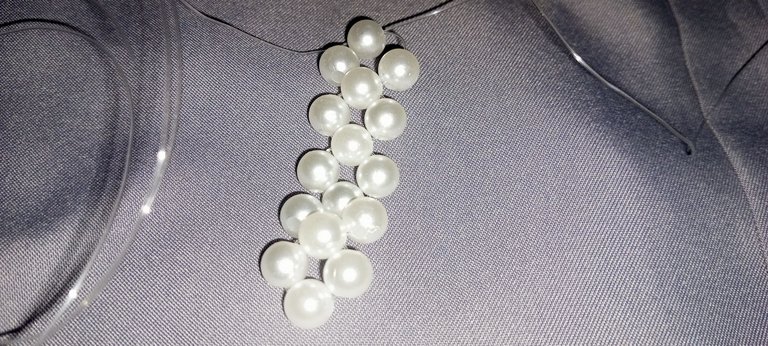
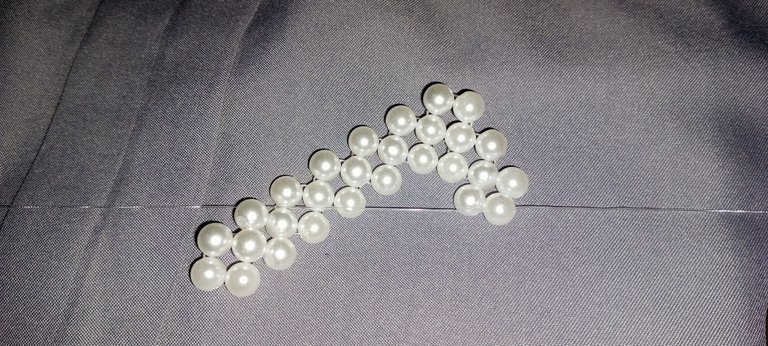
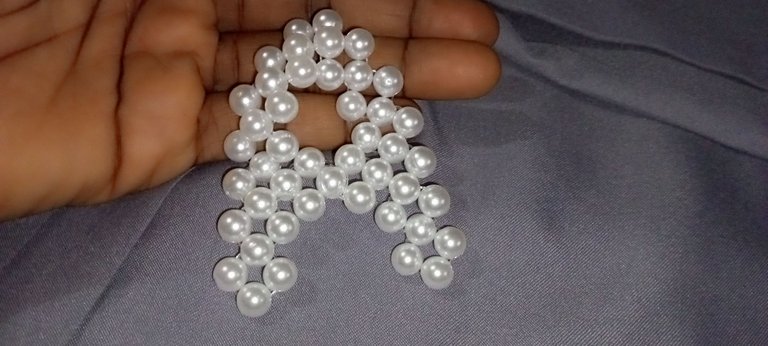
That is all friends 😊we have our neatly made A ready. So I will leave you with some photos in different backgrounds for your pleasure view 🥰
 what do you say to this keychain, is it a yes or nay? I look forward to your answer at the comment section.
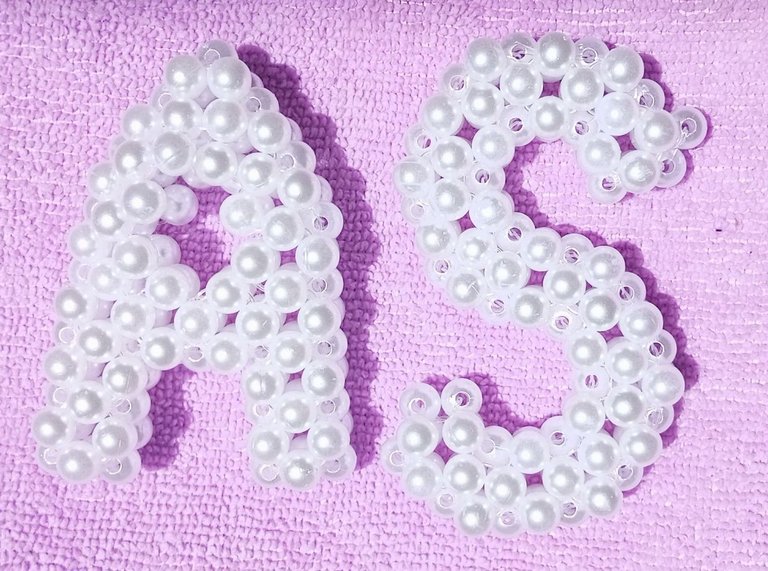
And look at that, our beautiful two-letter words.
The end
All Images are mine, taken with my Tecno Spark 8 plus
Thank you so much for coming along in this little adventure, do have a productive new month.
@funshee✍️😊🙏
I'm loving this alphabet with beads, I can't wait to see more of it.
Fantastic work. The letter is really beautiful.
Thank you so much, I'm very happy to share. !LUV
@rosana6, @funshee(1/4) sent you LUV. | tools | discord | community | HiveWiki | <>< daily
See me getting all excited the moment I saw your post on my feed. The letter A is so cute. I can’t wait to see you make all the alphabets!!
Good job Funshee you are killing it!
Does this consumes a lot of bead?
I'm glad you are happy to see this dear Fredaa🥰😊 thank you for following my little adventure journey. !LUV !HBIT
It consumed 106 beads to make the A.
@fredaa, @funshee(2/4) sent you LUV. | tools | discord | community | HiveWiki | <>< daily
Success! @funshee(4/1) You mined .9 HBIT and the user you replied to received .1 HBIT on your behalf. You can receive 100% of the HBIT by replying to one of your own posts or comments. When you mine HBIT, you're also playing the Wusang: Isle of Blaq game. 🏴☠️ | tools | wallet | discord | community | daily <><

What's more, you found a BLAQ pearl (BLAQ) as a bonus treasure token!
You can see your random number generated in the Discord server, #hbit-wusang-log channel. Check for bonus treasure tokens by entering your username at a block explorer explorer A, explorer B, or take a look at your wallet. Read about Hivebits (HBIT) or read the story of Wusang: Isle of Blaq.
Wow, this is really beautiful. The letter A come out neat . Thanks for sharing
Thank you so much, I'm glad it came out beautiful 😍!LUV
@mosupholstery, @funshee(3/4) sent you LUV. | tools | discord | community | HiveWiki | <>< daily
This is really nice and creative
It's so thoughtful. I'd like to try it out, Probably with the letter "R" for a necklace pendant.
Thanks for sharing.
Thank you very much, 🥰
Letter R for a pendant will make sense, and I will post about the step-by-step process in the coming days.
!LUV
@reggiesart, @funshee(1/4) sent you LUV. | tools | discord | community | HiveWiki | <>< daily
Awesome, I'd be anticipating the post😃.
🙏😊
que hermoso, es un trabajo impecable, y bueno para usarlo en las llaves!
what a beautiful, impeccable job, and good to use on the keys!
Thank you very much, Dear Yasmarit.
!LUV
Awwwww she did it!! She made the letter A! Well done Funshee at this rate you just might finish making all the alphabet in no time. We love your work and we just can’t wait to see your finished project. All the best and thanks for sharing😃
Thank you , you are amazing as well, DIYHUB with comments like this, my creative spirit is getting higher by the day, and I'm loving the outcome.
I simply can not wait to share the remaining alphabets with us. !LUV
Congratulations @funshee! You have completed the following achievement on the Hive blockchain And have been rewarded with New badge(s)
Your next target is to reach 12000 comments.
You can view your badges on your board and compare yourself to others in the Ranking
If you no longer want to receive notifications, reply to this comment with the word
STOPCheck out our last posts:
Thank you HB😊🙏
That's great @funshee! We're thrilled with your progress on Hive! Don't stop before achieving this new goal!