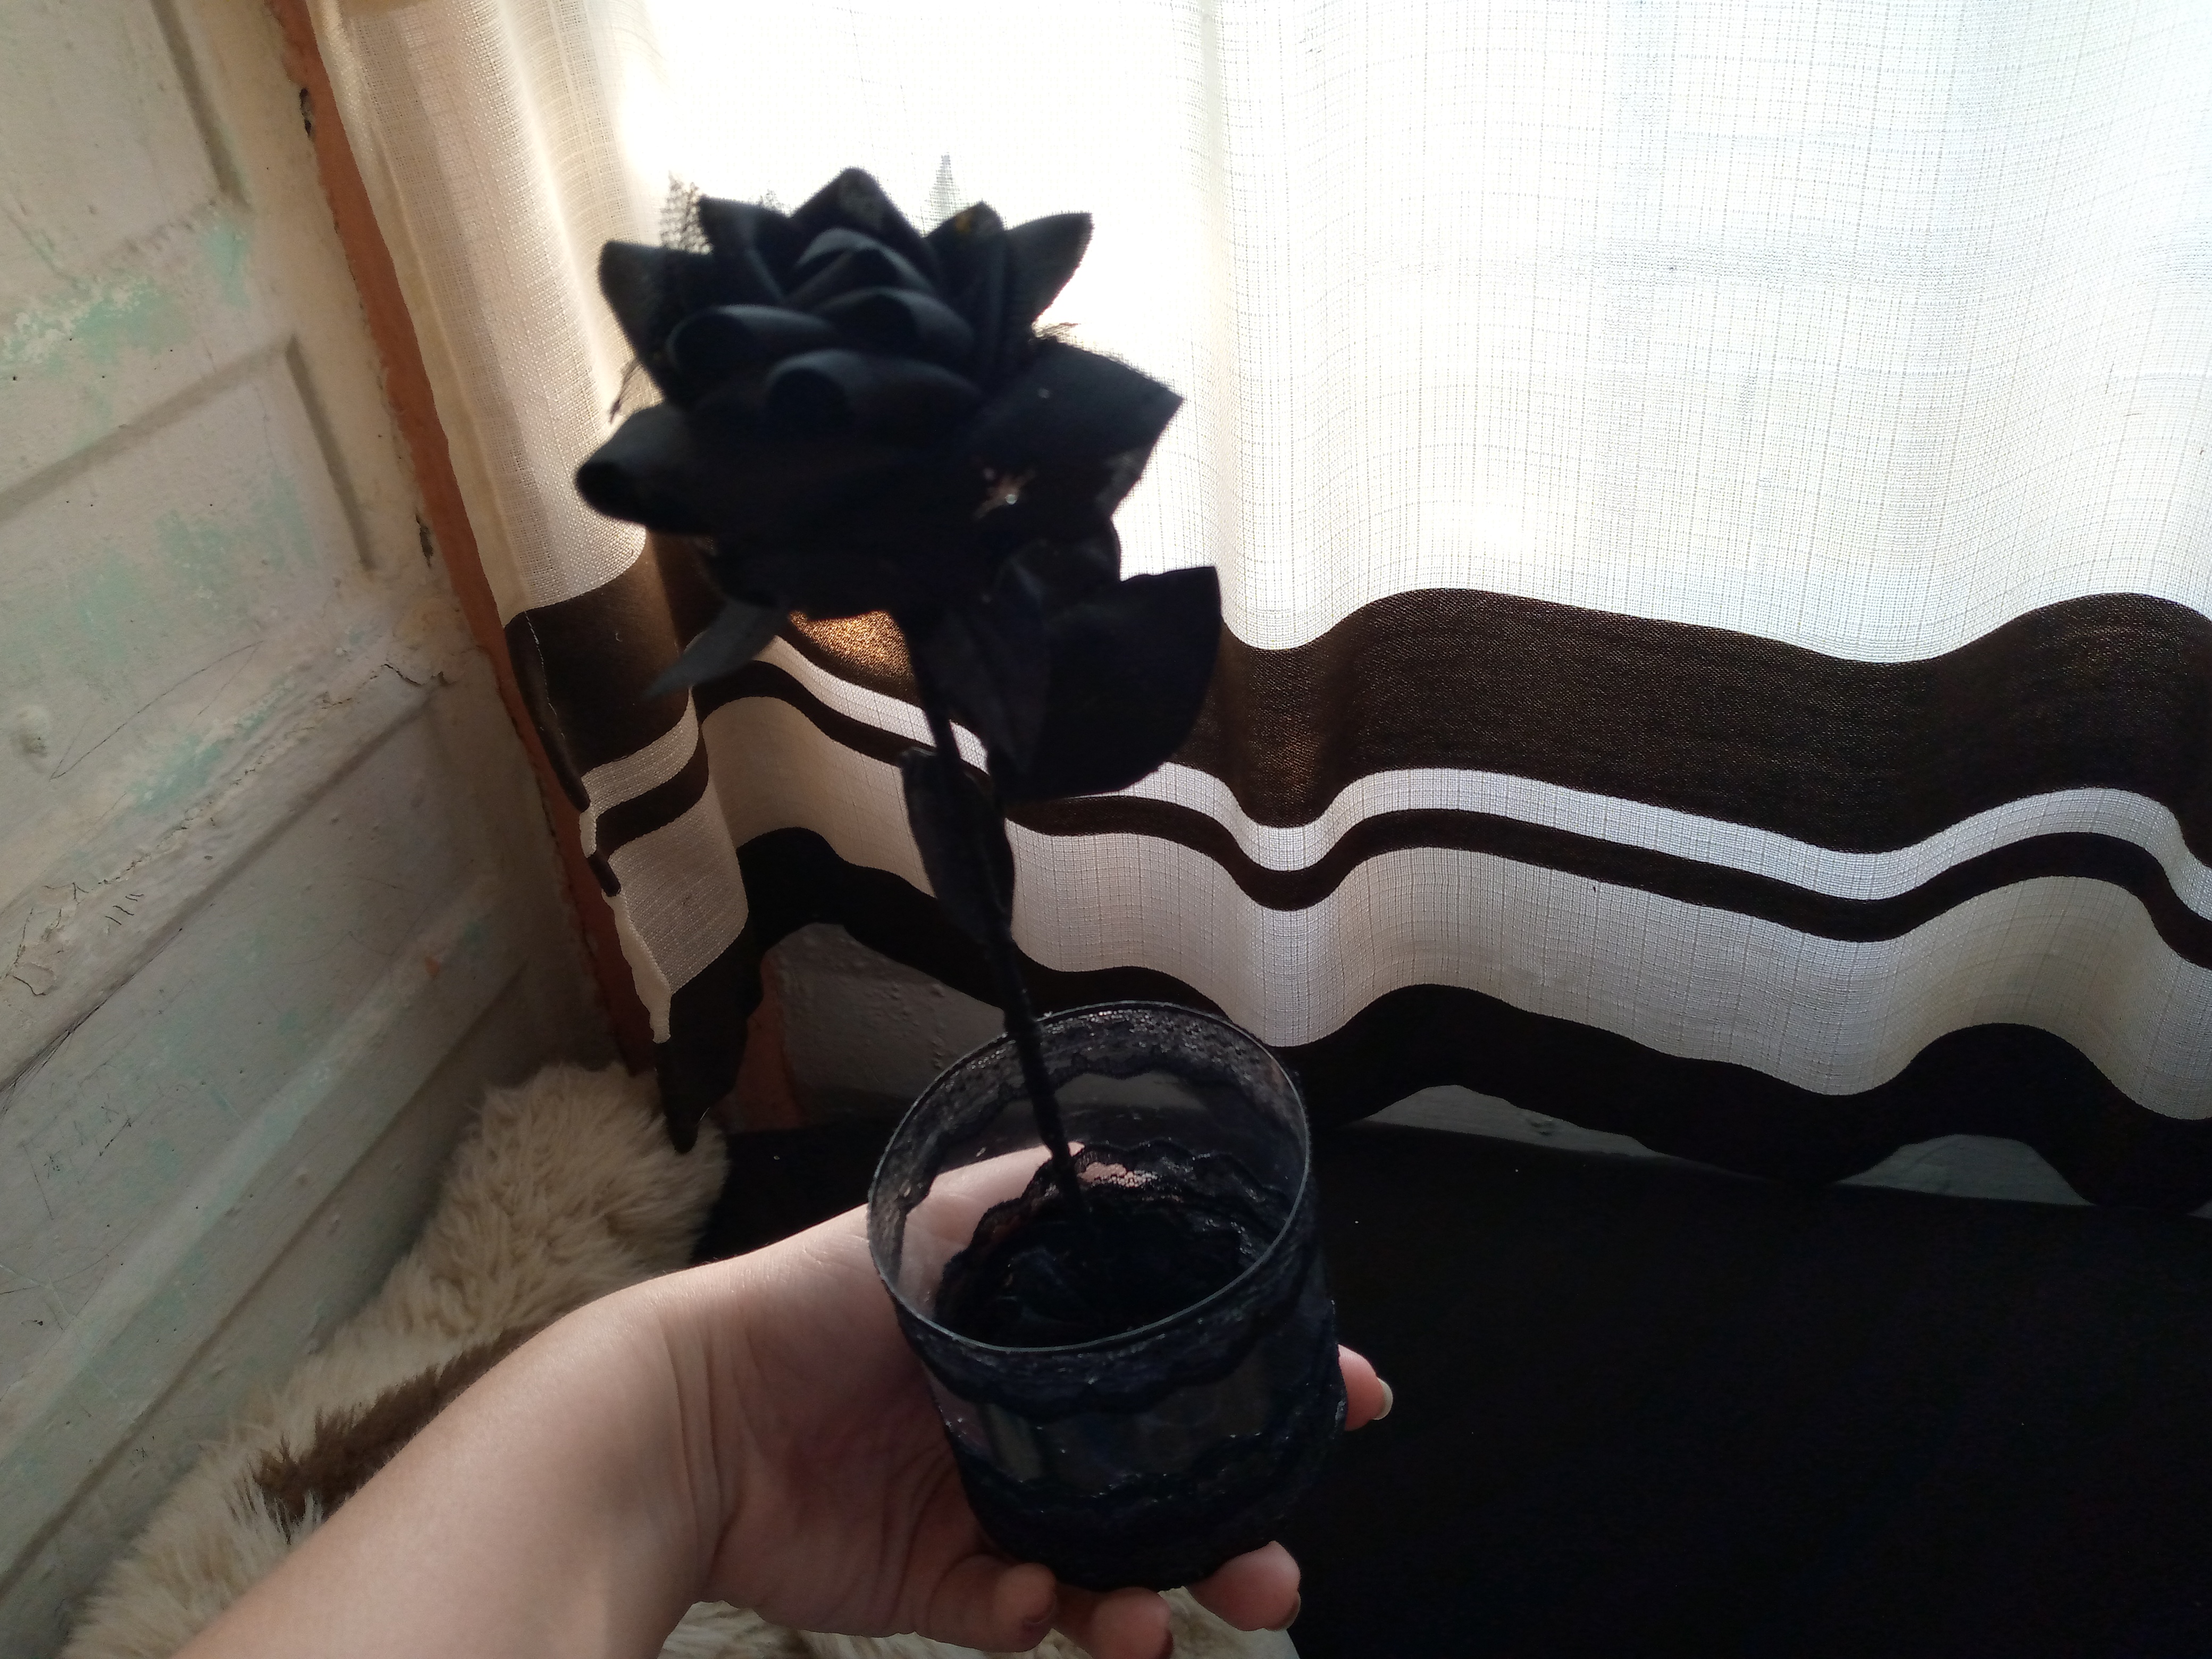
Cómo hacer un arreglo de una rosa negra eterna para regalar o adornar tu hogar🖤🌹 //How to make an arrangement of an eternal black rose to give as a gift or decorate your home🖤🌹[Esp~Eng]

in DIYHub2 months ago (edited)

Beige Red Modern Cake Tutorial Youtube Thumbnail_20240923_184608_0000 (1).png

Picsart_24-09-23_18-53-00-357 (1).jpg

Tengan ustedes un hermoso y caluroso día mis amigos al menos aquí en mi pueblo,espero se encuentren genial el día de hoy ,estoy de vuelta con ustedes mostrándoles un lindo detalle que he querido hacer desde ya hace días porque me inspiraron muchas imágenes bonitas de Instagram con respecto a hacer este tipo de rosas.

Have a beautiful and warm day my friends, at least here in my town, I hope you are doing great today, I am back with you showing you a nice detail that I have wanted to do for days now because I was inspired by many beautiful images on Instagram regarding making this type of roses.

Aunque estás rosas bueno las imágenes que ví estaban encapsuladas dentro de una base tipo cristal muy hermosas y con lucecitas ,pero la verdad no tenía estos materiales así que la he realizado con media botella de plástico como un centro de mesa adornado con un lindo encaje negro para darle un toque dark.

Although they are pink, well the images I saw were encapsulated within a very beautiful glass-type base and with little lights, but the truth is I did not have these materials so I made it with half a plastic bottle as a centerpiece decorated with a nice black lace to give it a dark touch.

Fue una linda experiencia realizando está rosa eterna con tela en color negro ya que no es muy común este color pero siento que estás rosas también son muy lindas muy aestetic y algo góticas y a mí me gustan estás cositas que son poco comunes para decoración ,creo la pondré en mi tocador y si tengo la oportunidad le agregaré algunas luces porque si siento asi se veria más linda,así que acá te muestro como la he realizado ,se que te encantará mucho este tutorial ,tutorial que te puede servir oara hacer detalles y centros de mesa para alguna fiesta,así que vamos con los materiales y el proceso.

It was a nice experience making this eternal rose with black fabric since this color is not very common but I feel that these roses are also very pretty, very aesthetic and somewhat gothic and I like these little things that are uncommon for decoration, I think I will put it on my dressing table and if I have the opportunity I will add some lights because if I feel that way it would look prettier, so here I will show you how I made it, I know you will love this tutorial a lot, a tutorial that can be useful to you to make details and centerpieces for a party, so let's go with the materials and the process.

IMG_20240923_155323_301.jpg

Picsart_24-09-23_18-53-00-357 (1).jpg

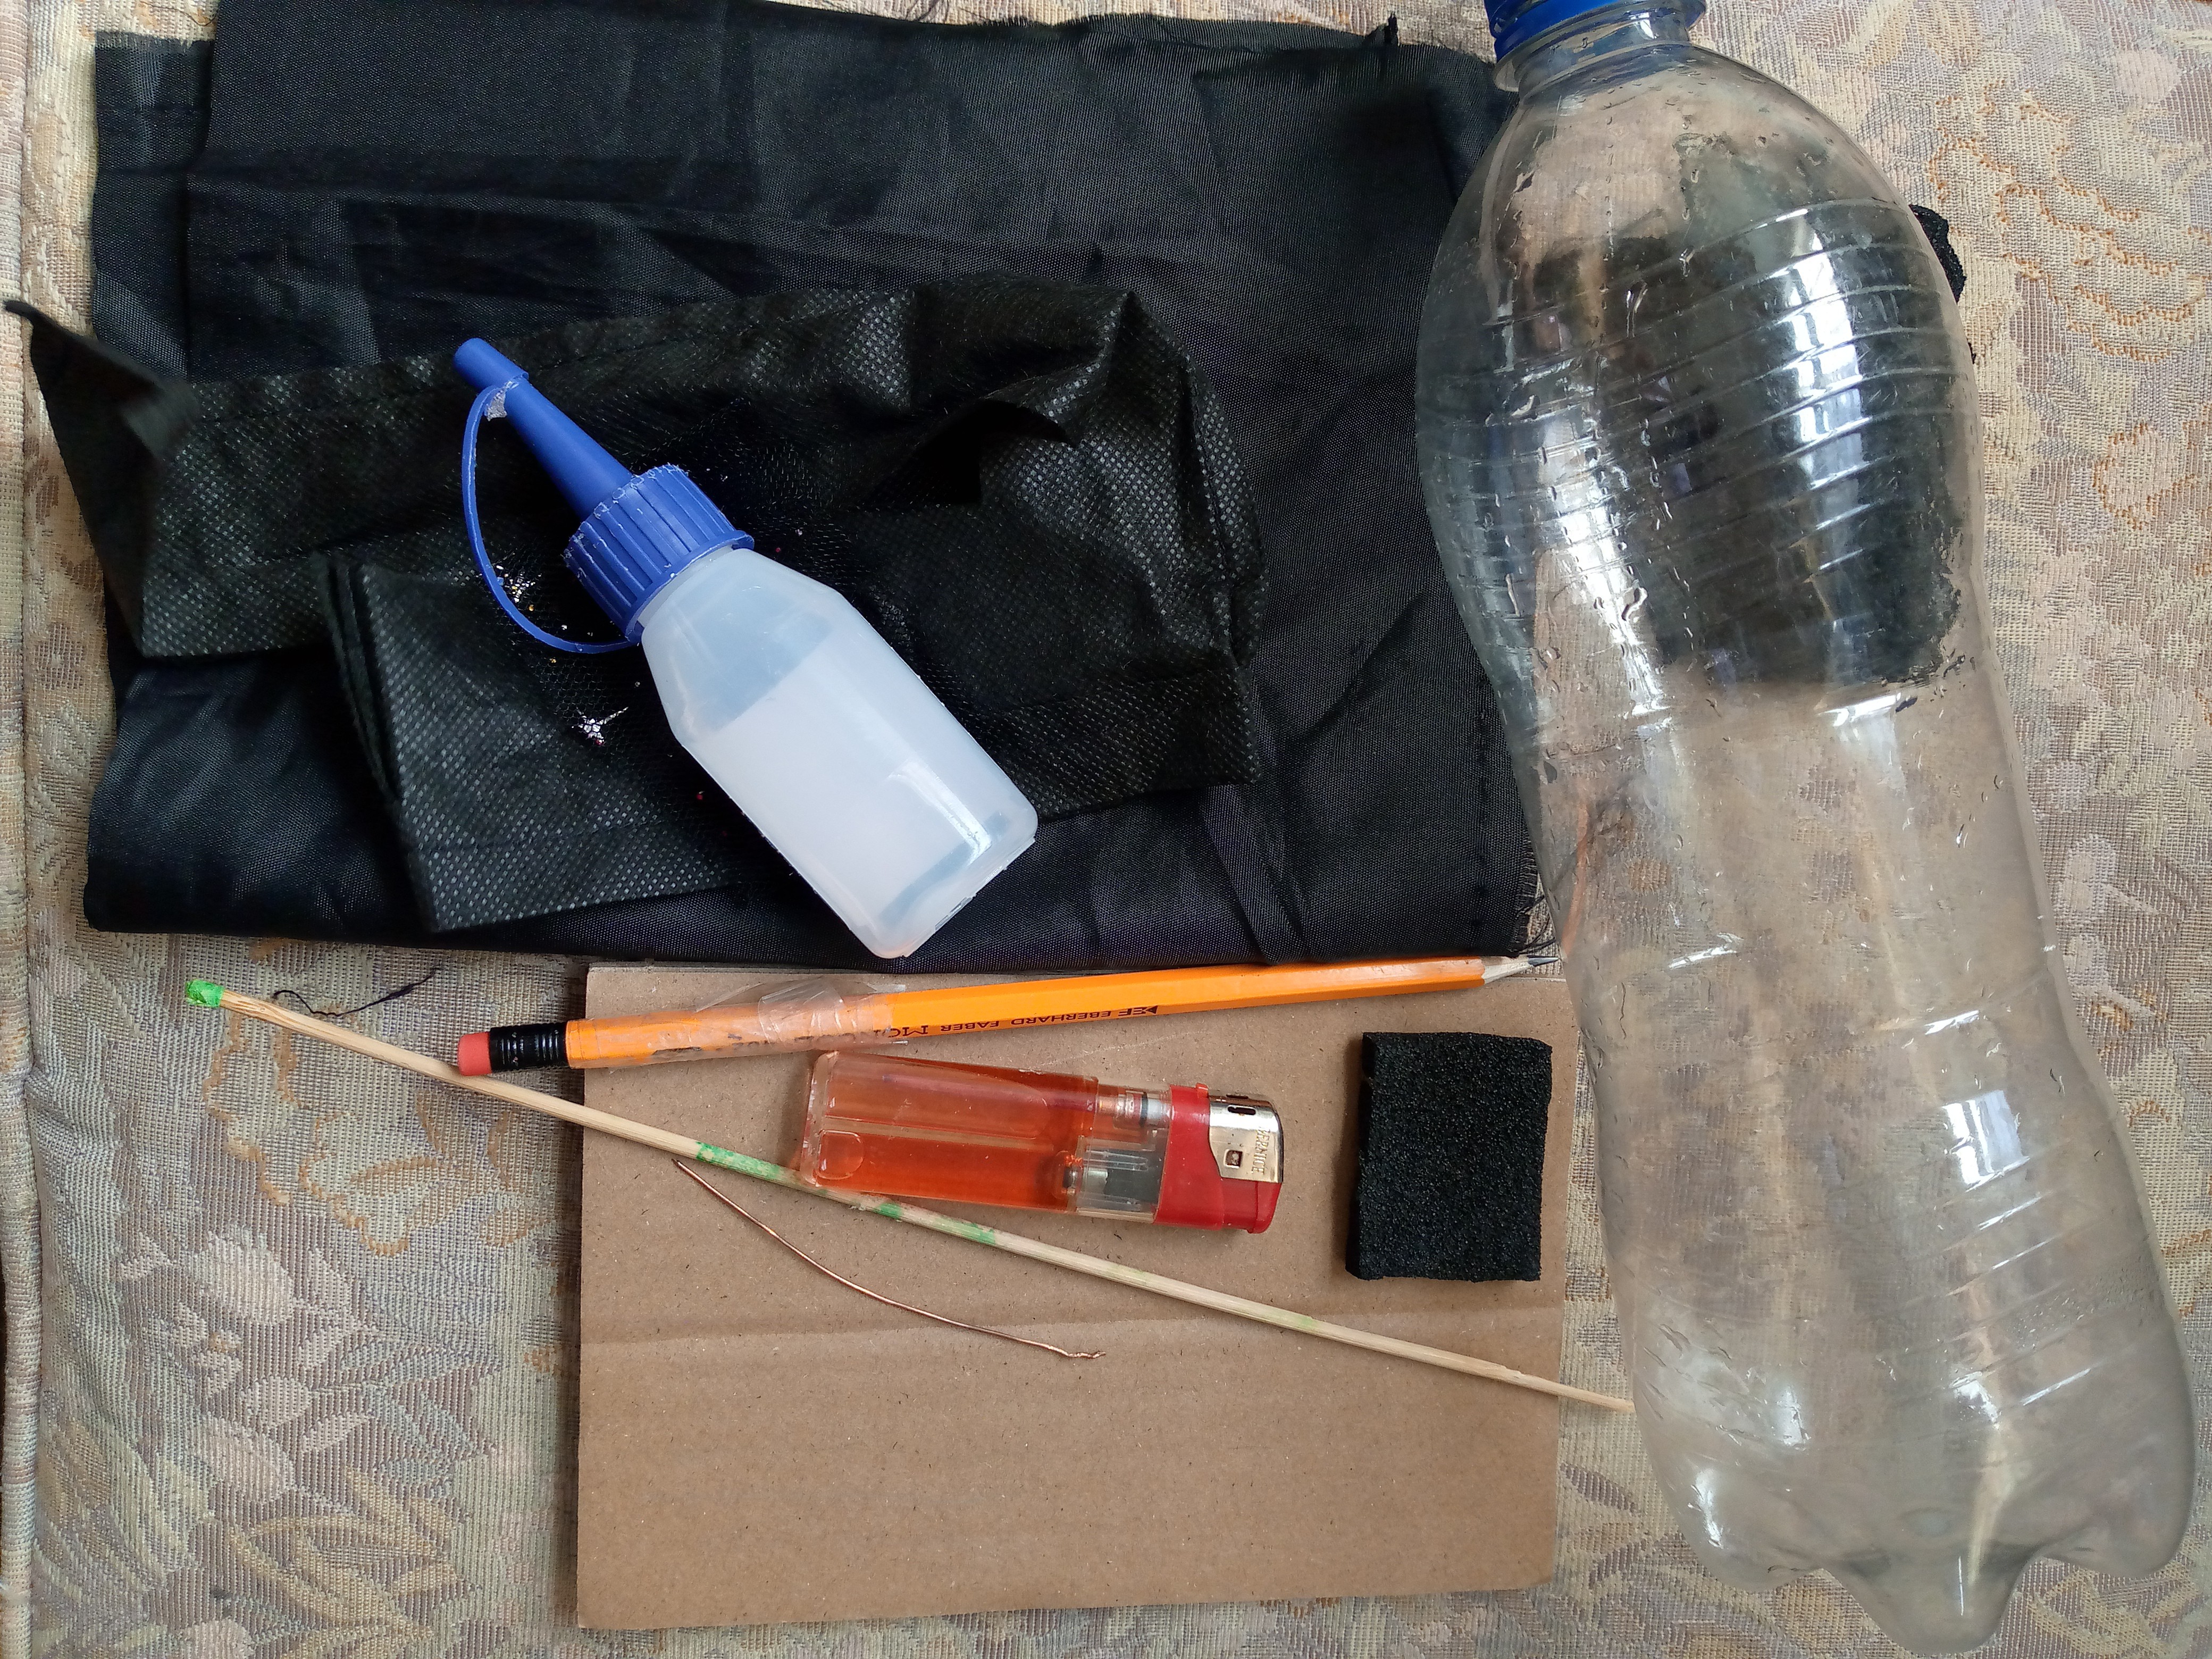
Materiales que usé:

Materials i used:

Picsart_24-09-23_18-53-00-357 (1).jpg

  • Tela negra o tela pop negra,tela de tul
  • Silicón
  • Trozo de cartón
  • Lápiz
  • Trozo pequeño de alambre
  • Palo de madera
  • Vela y encendedor
  • Botella de refresco mediana
  • Encajes
  • Tijera
  • Trozo de esponja

  • Black fabric or black pop fabric, tulle fabric
  • Silicone
  • Piece of cardboard
  • Pencil
  • Small piece of wire
  • Wooden stick
  • Candle and lighter
  • Medium soda bottle
  • Lace
  • Scissors
  • Piece of sponge

Picsart_24-09-23_18-53-00-357 (1).jpg

Pasos a seguir:

Steps to follow:

Picsart_24-09-23_18-53-00-357 (1).jpg

Paso 01

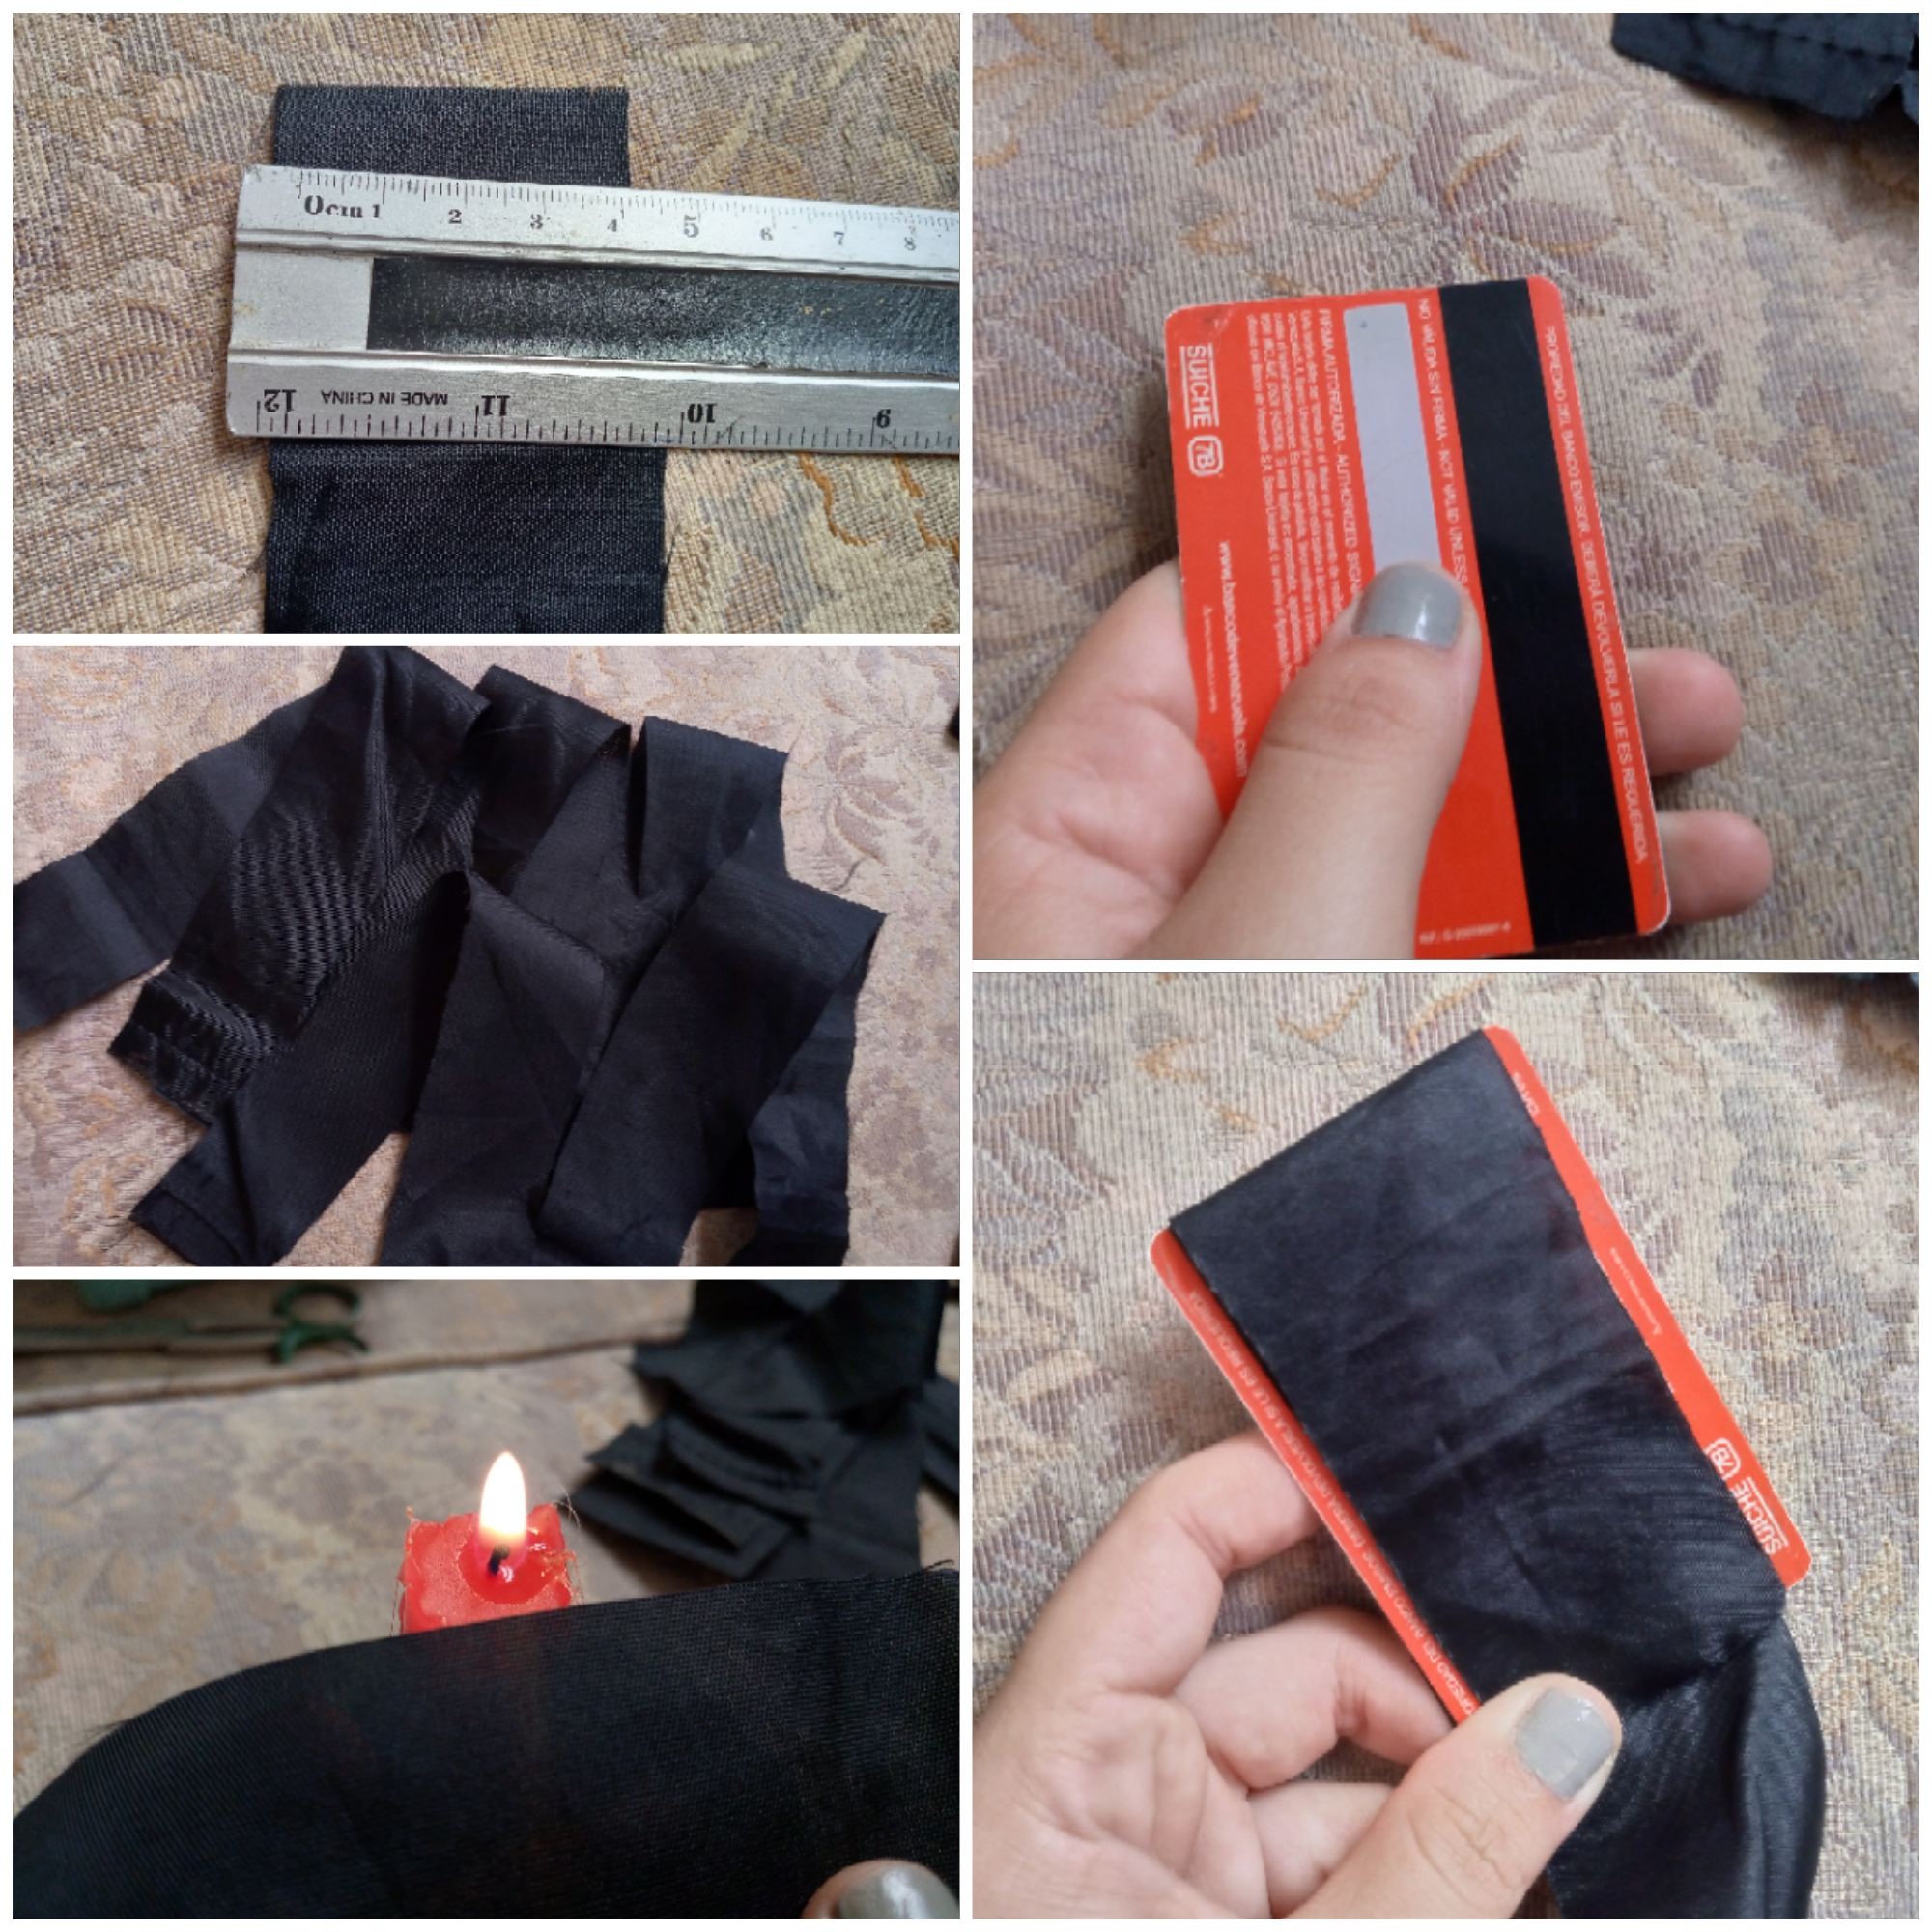
Iniciamos con nuestro tutorial contando tiras de la tela de 4 cm de ancho para el largo exacto de los pétalos de la rosa eterna es usar una tarjeta de la que tu tengas y vamos a estar midiendo nuestras tiras por el largo de ella y vamos a cortar 15 rectángulos que usaremos para armar la flor ,si ustedes desean hacer una flor más rellena de pétalos os recomiendo cortar 20 pétalos así obtendremos una flor mas grande,una vez corté los pétalos con ayuda de mi cels quemé los bordes de los pétalos para que no se deshilaran los pétalos.

Step 01

We start with our tutorial by counting strips of fabric 4 cm wide for the exact length of the petals of the eternal rose. Use a card that you have and we will be measuring our strips by its length and we will cut 15 rectangles that we will use to assemble the flower. If you want to make a flower fuller of petals, I recommend cutting 20 petals so we will get a larger flower. Once I cut the petals with the help of my cels I burned the edges of the petals so that the petals would not fray.
Picsart_24-09-23_18-54-17-399.jpg


Paso 02

Voy a cortar también hojitas para colocarle al tallo ,voy a quemar los bordes también de las mismas y procedo a enrollar mi alambre con tiras de la misma tela negra para forrarlo y pegar las hojas esto lo voy a estar pegando al tallo la pequeña ramita y sus hojitas ,recuerden pegar bien la rama al tallo y luego forramos el tallo completo con tiras de la misma tela.

Step 02

I'm also going to cut out some leaves to place on the stem. I'm going to burn the edges of them as well and proceed to wrap my wire with strips of the same black fabric to cover it and glue the leaves. I'm going to glue the small twig and its leaves to the stem. Remember to glue the branch well to the stem and then we'll cover the entire stem with strips of the same fabric.

Picsart_24-09-23_18-55-17-972.jpg


Paso 03

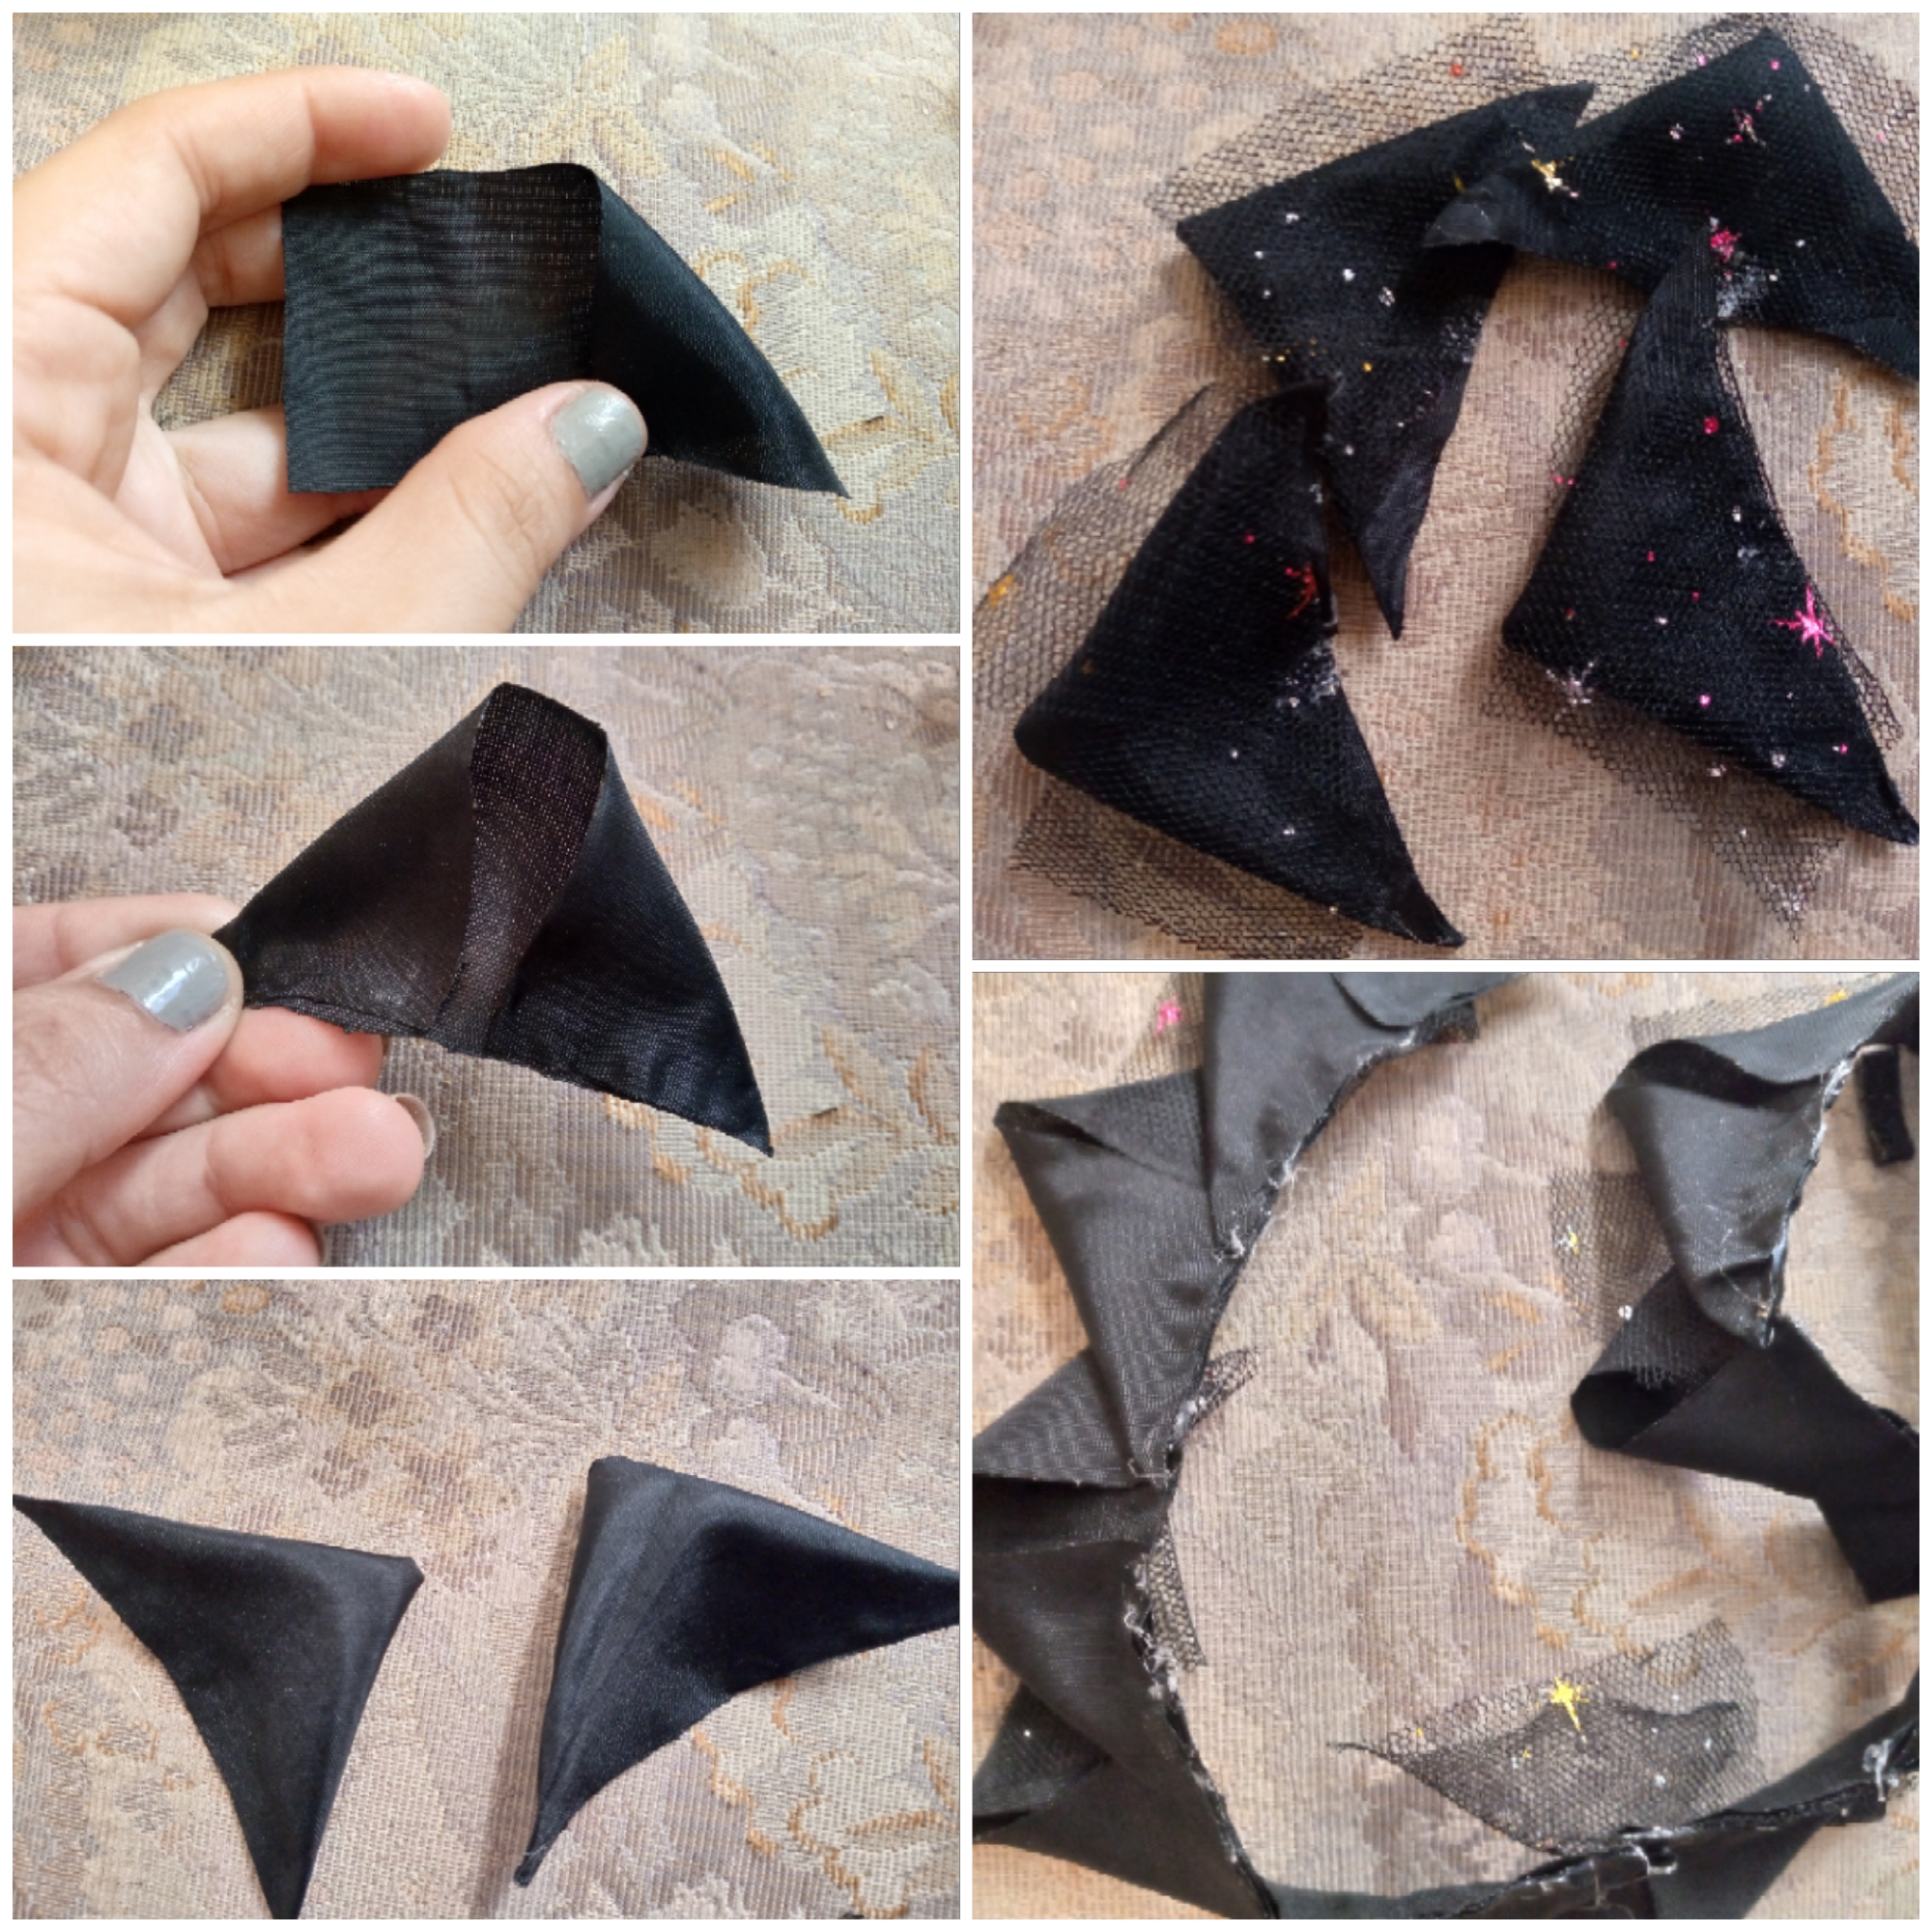
Para formar mis pétalos estaré tomando un rectangulo y doblare una esquina del mismo formando una pequeña pirámide y voy a pegarlo hacia la parte de abajo igual estaré haciendo esto con la otra esquina oara formar así un triangulo y estaré pegando del lado inferior cada pétalo uno encima de otro formando una cadena,al final ya le coloqué encima de los pétalos triangulos que he cortado en tela de tul o malla para adornar mejor la rosa.

Step 03

To form my petals I will be taking a rectangle and I will fold one corner of it forming a small pyramid and I will glue it to the bottom. I will be doing the same with the other corner to form a triangle and I will be gluing each petal on top of the other on the bottom side forming a chain. Finally I placed triangles that I cut out of tulle or mesh fabric on top of the petals to better decorate the rose.
Picsart_24-09-23_18-56-12-566.jpg


Paso 04

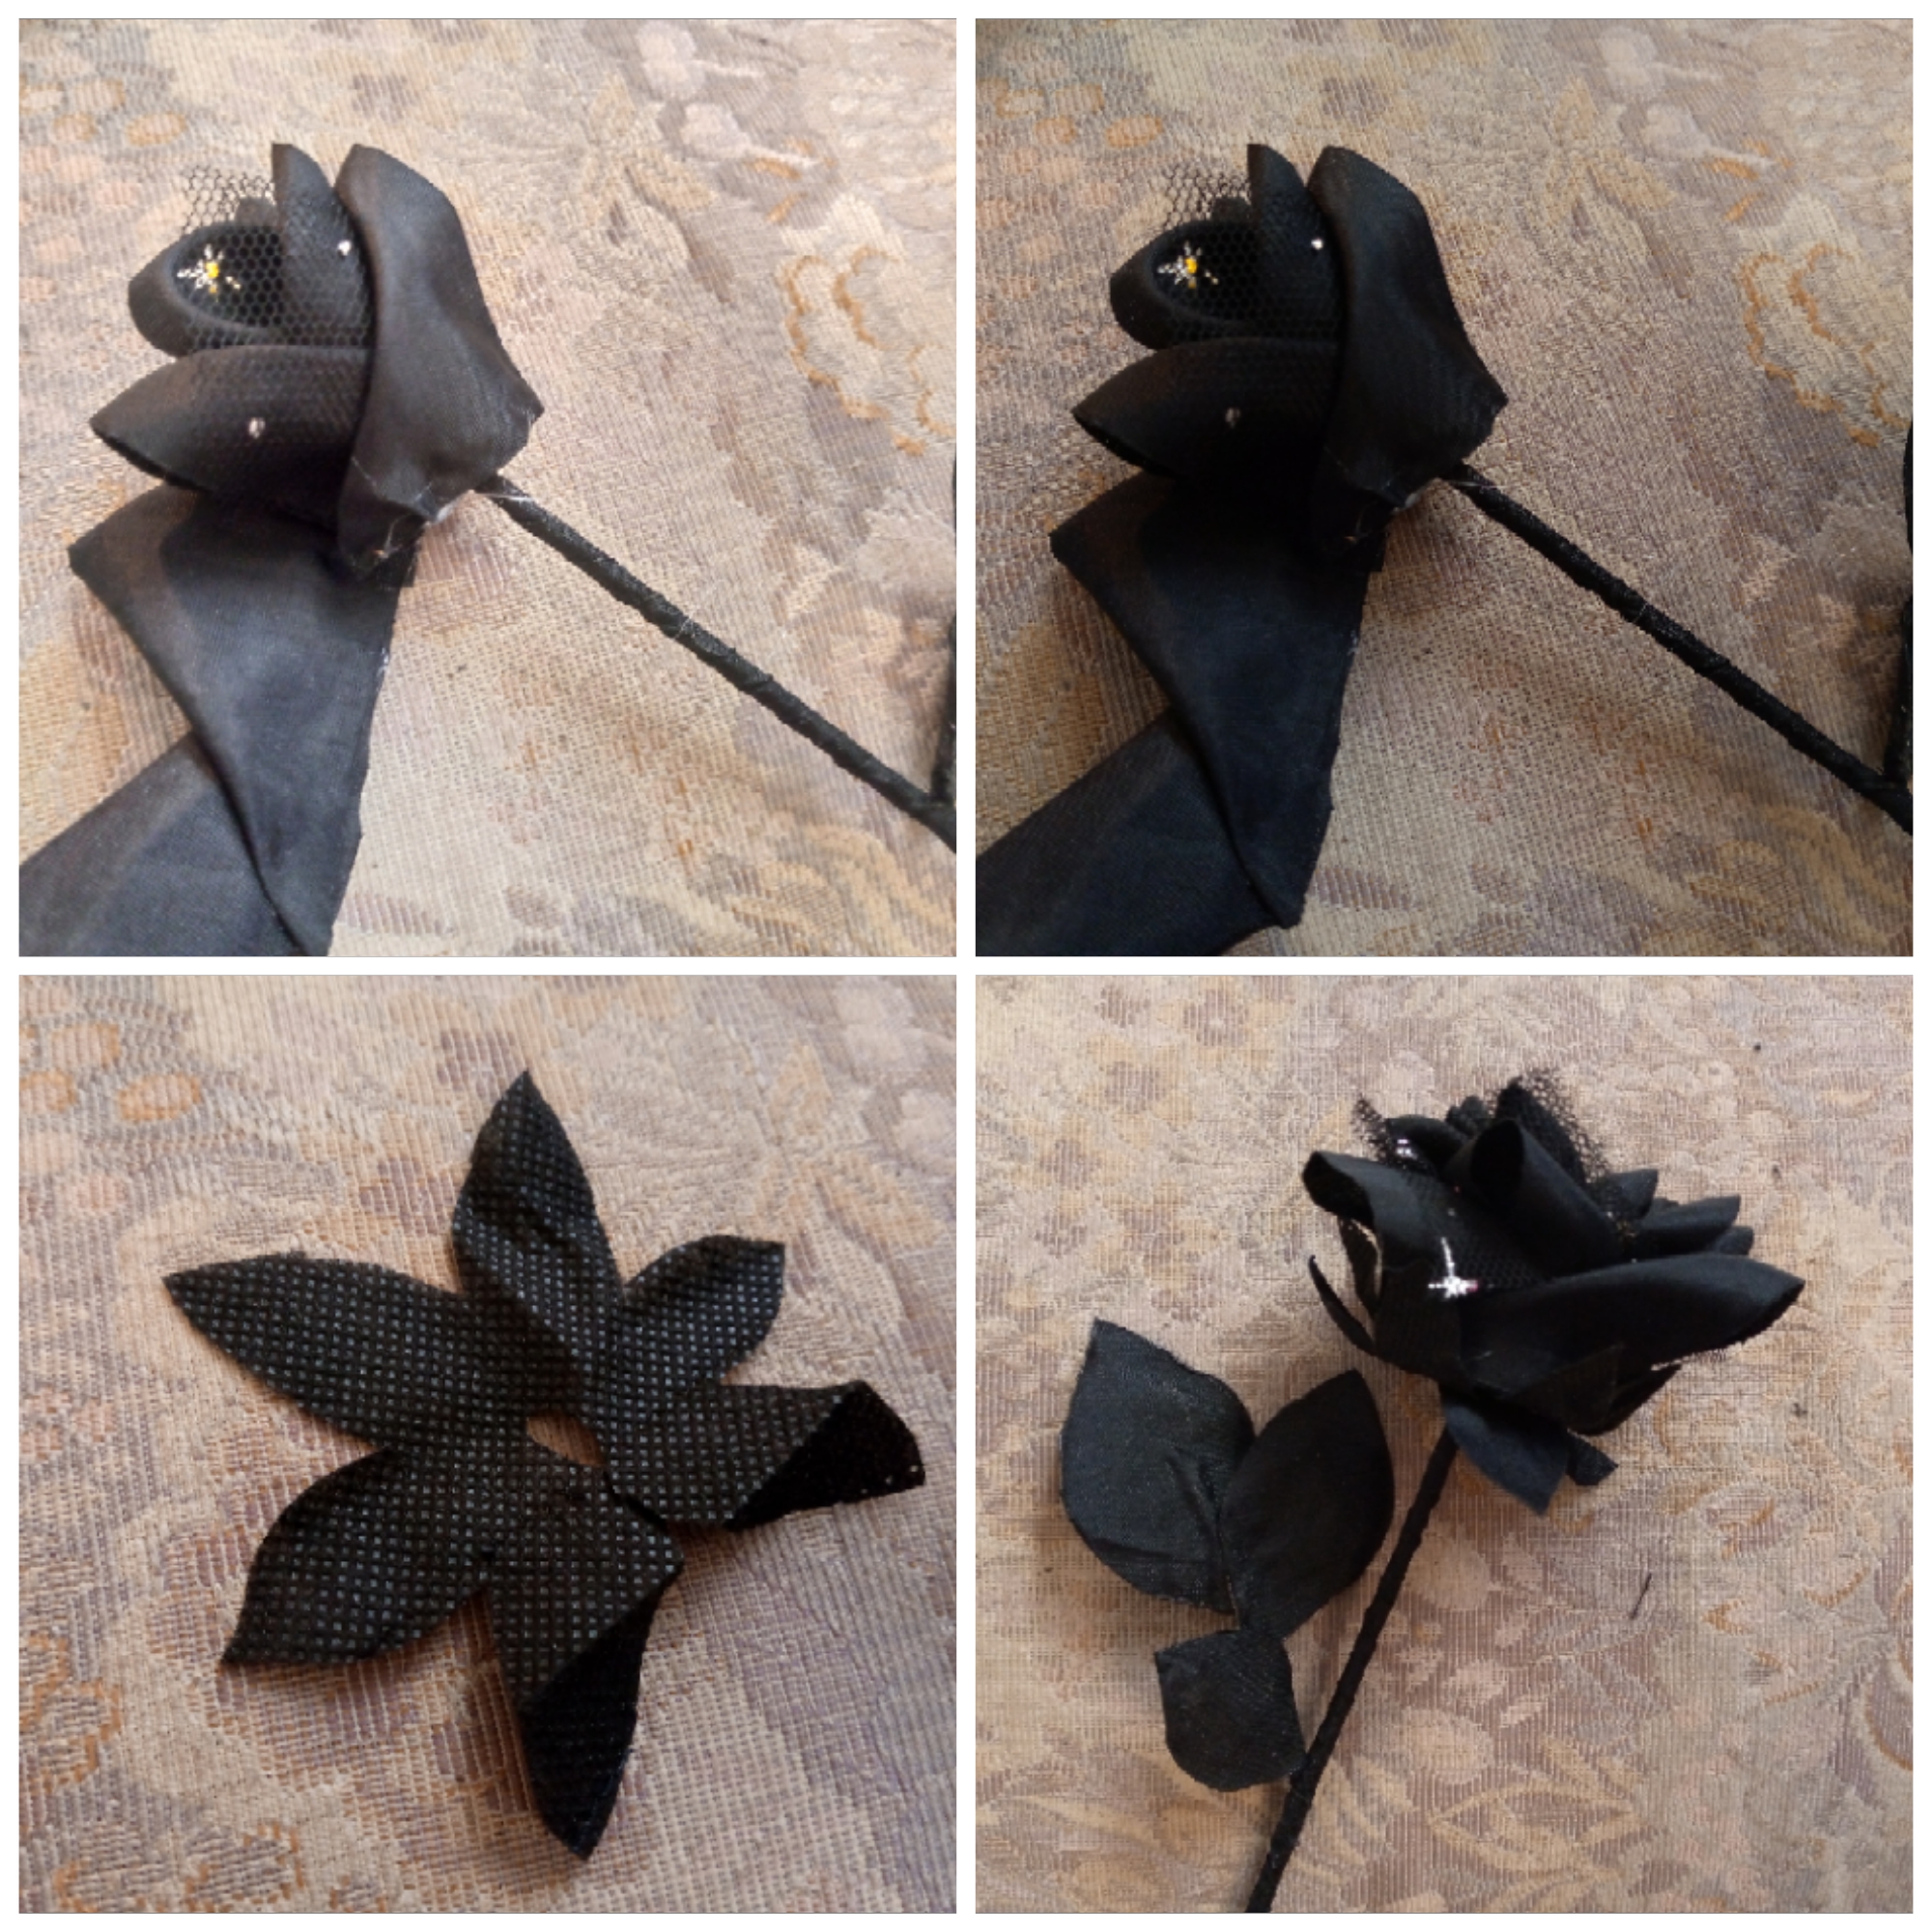
Acá se me pasó capturarles como coloqué la esponjita arriba en el tallo pero está es para hacer el capullo ustedes van a pegar un trocito allí arriba y a partir de allí es que vamos a estar enrrollando nuestros pétalos del lado superior enrollamos y vamos pegando ,finalizamos y pegamos el último pétalo ,he realizado unas hojas completas con tela pop y en la base de la rosa lo he pegado junto von otras hojitas de la tela y paso a pegarselas así formamos esta rosa.

Step 04

Here I forgot to capture how I placed the sponge on top of the stem, but this is to make the bud. You are going to glue a small piece up there and from there we are going to roll up our petals. From the top side, we roll them up and glue them, we finish and glue the last petal. I made some complete leaves with pop fabric and at the base of the rose I glued it together with other leaves of the fabric and I proceed to glue them, that is how we form this rose.
Picsart_24-09-23_18-57-48-275.jpg


Paso 05

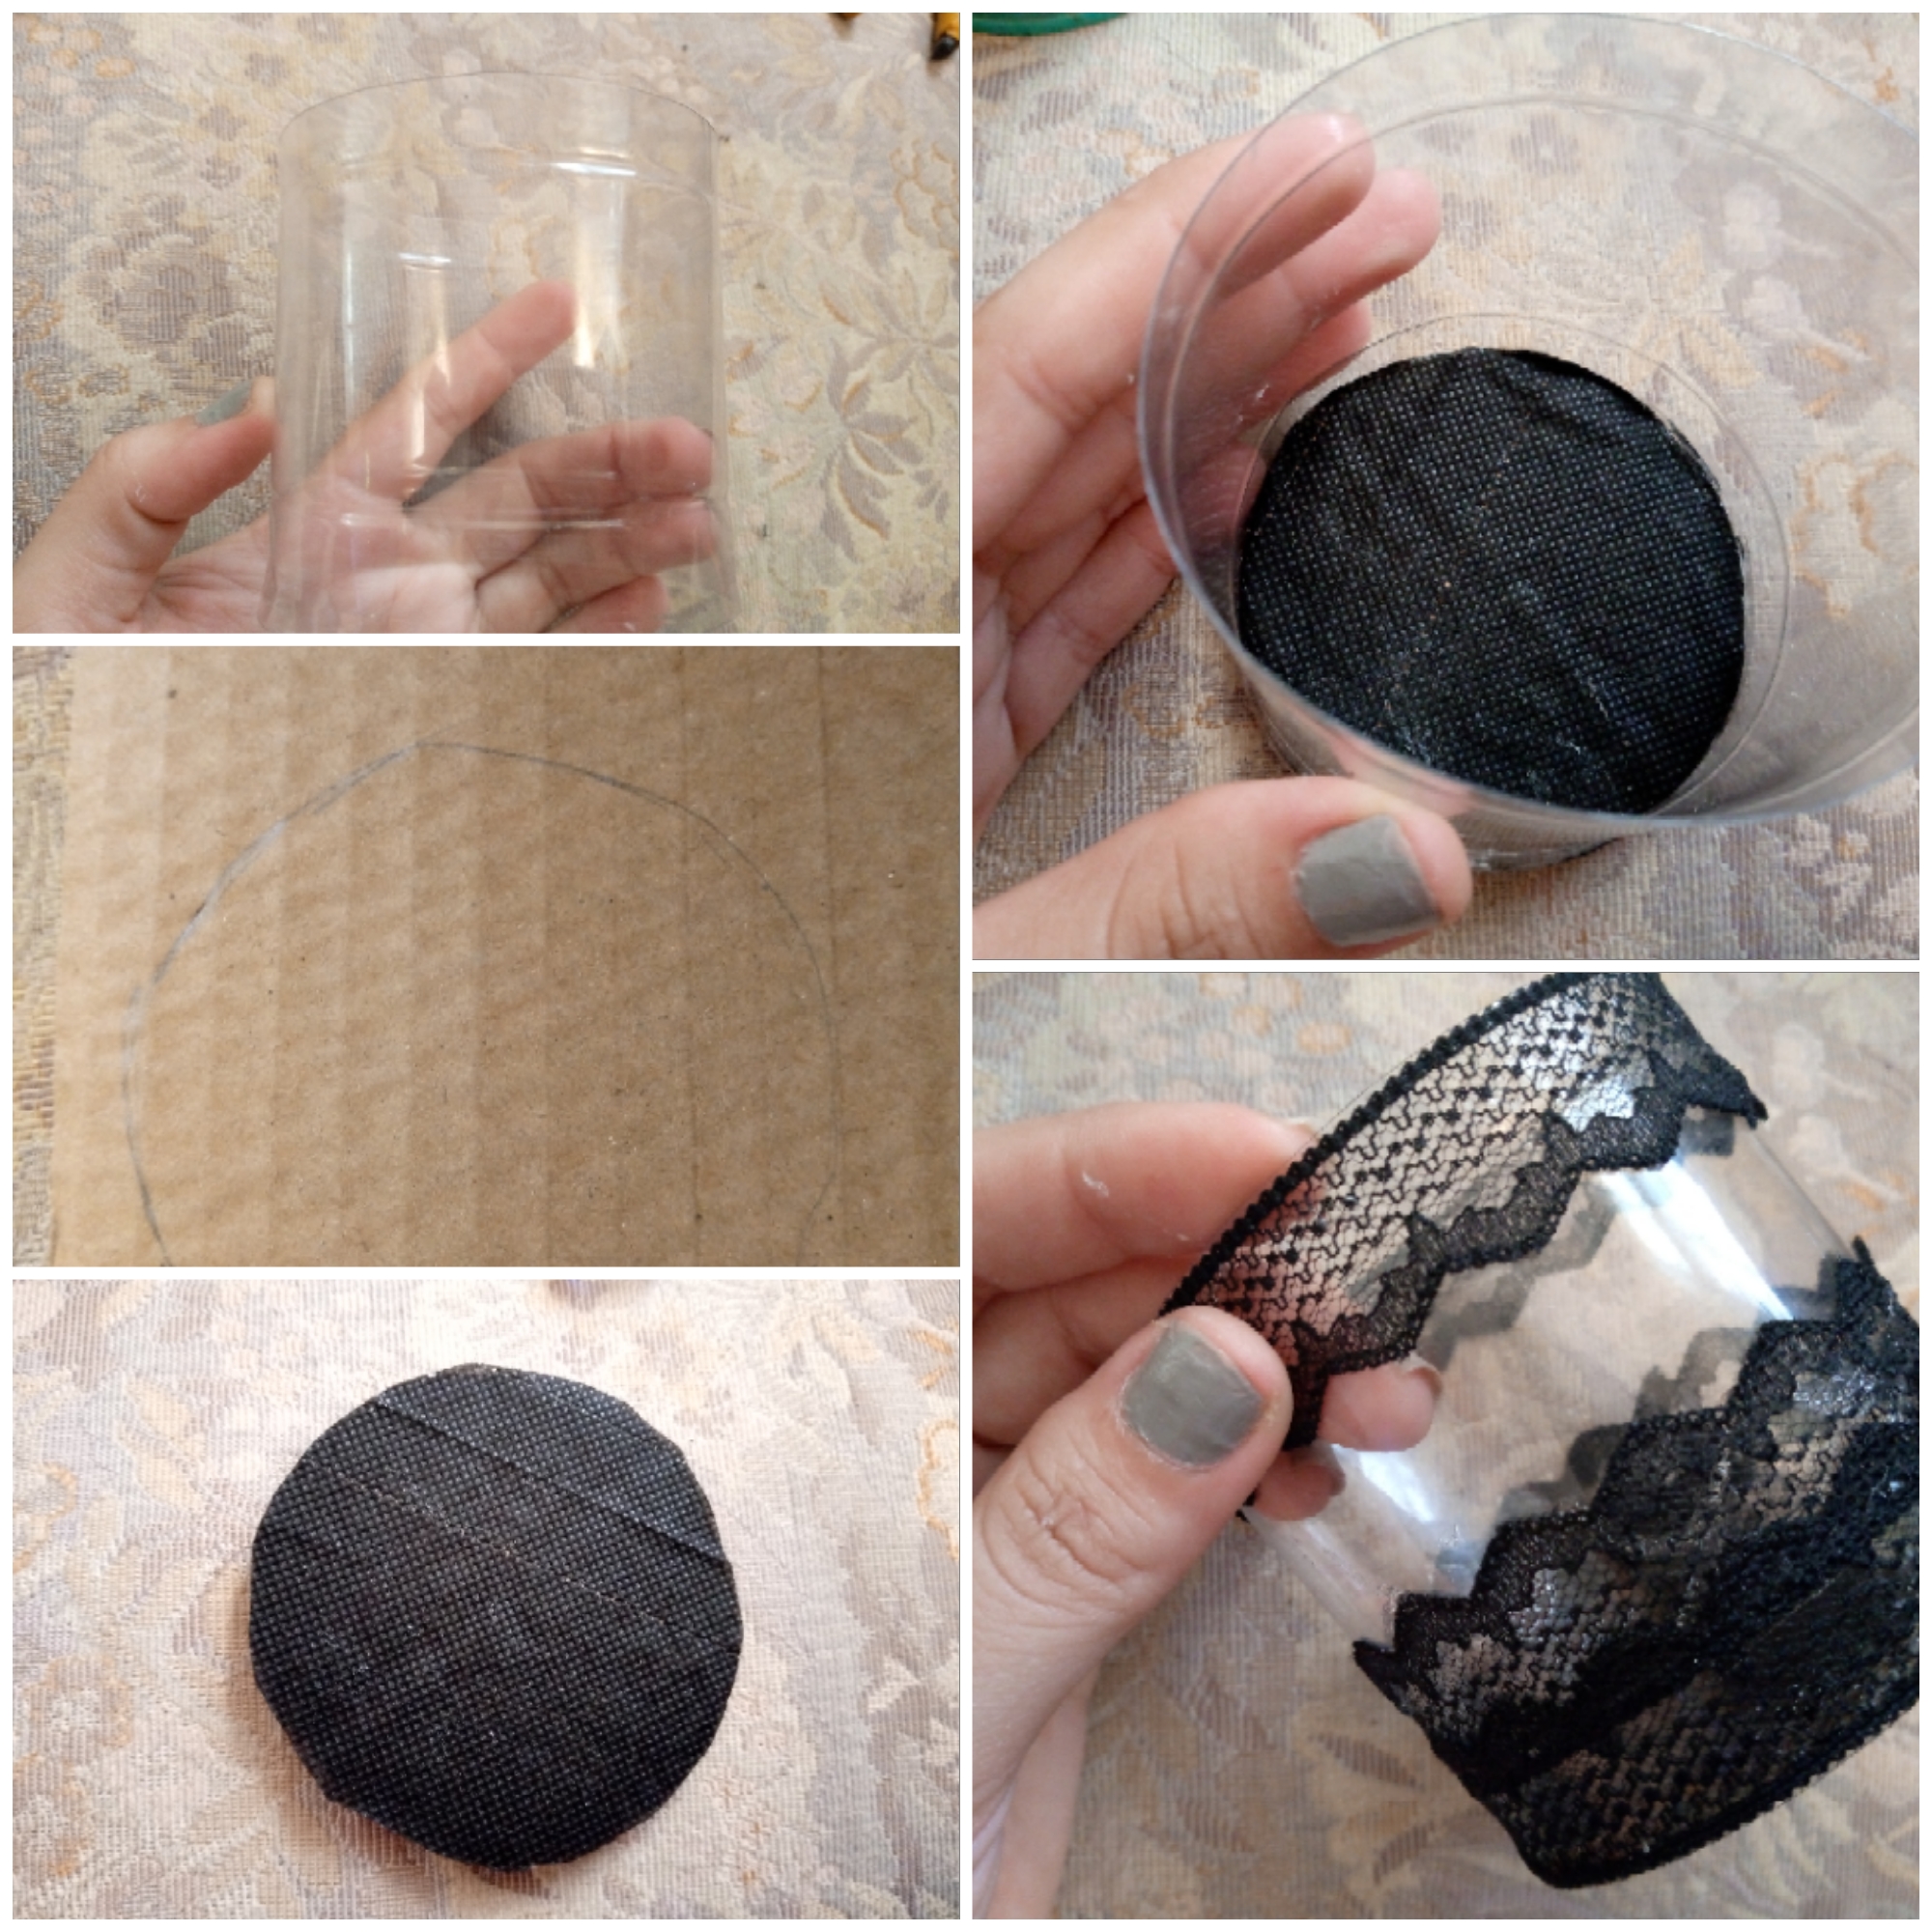
Hacemos la base donde meteremos ésta rosa ,para ello cortamos el centro de la botella de plástico y con nuestro pedazo de carton voy a dibujar un circulo del mismo diametro de la botella,voy a forrar esta pieza con tela pop y paso a pegarlo en la parte de abajo de la botella y lo diseño con encaje por los bordes de ella para adornarlos a como queremos que se vea este lindo arreglo.

Step 05

We make the base where we will put this rose, for this we cut the center of the plastic bottle and with our piece of cardboard I will draw a circle of the same diameter as the bottle, I will cover this piece with pop fabric and I will glue it to the bottom of the bottle and design it with lace around the edges to decorate them how we want this pretty arrangement to look.
Picsart_24-09-23_18-59-13-238.jpg


Paso 06

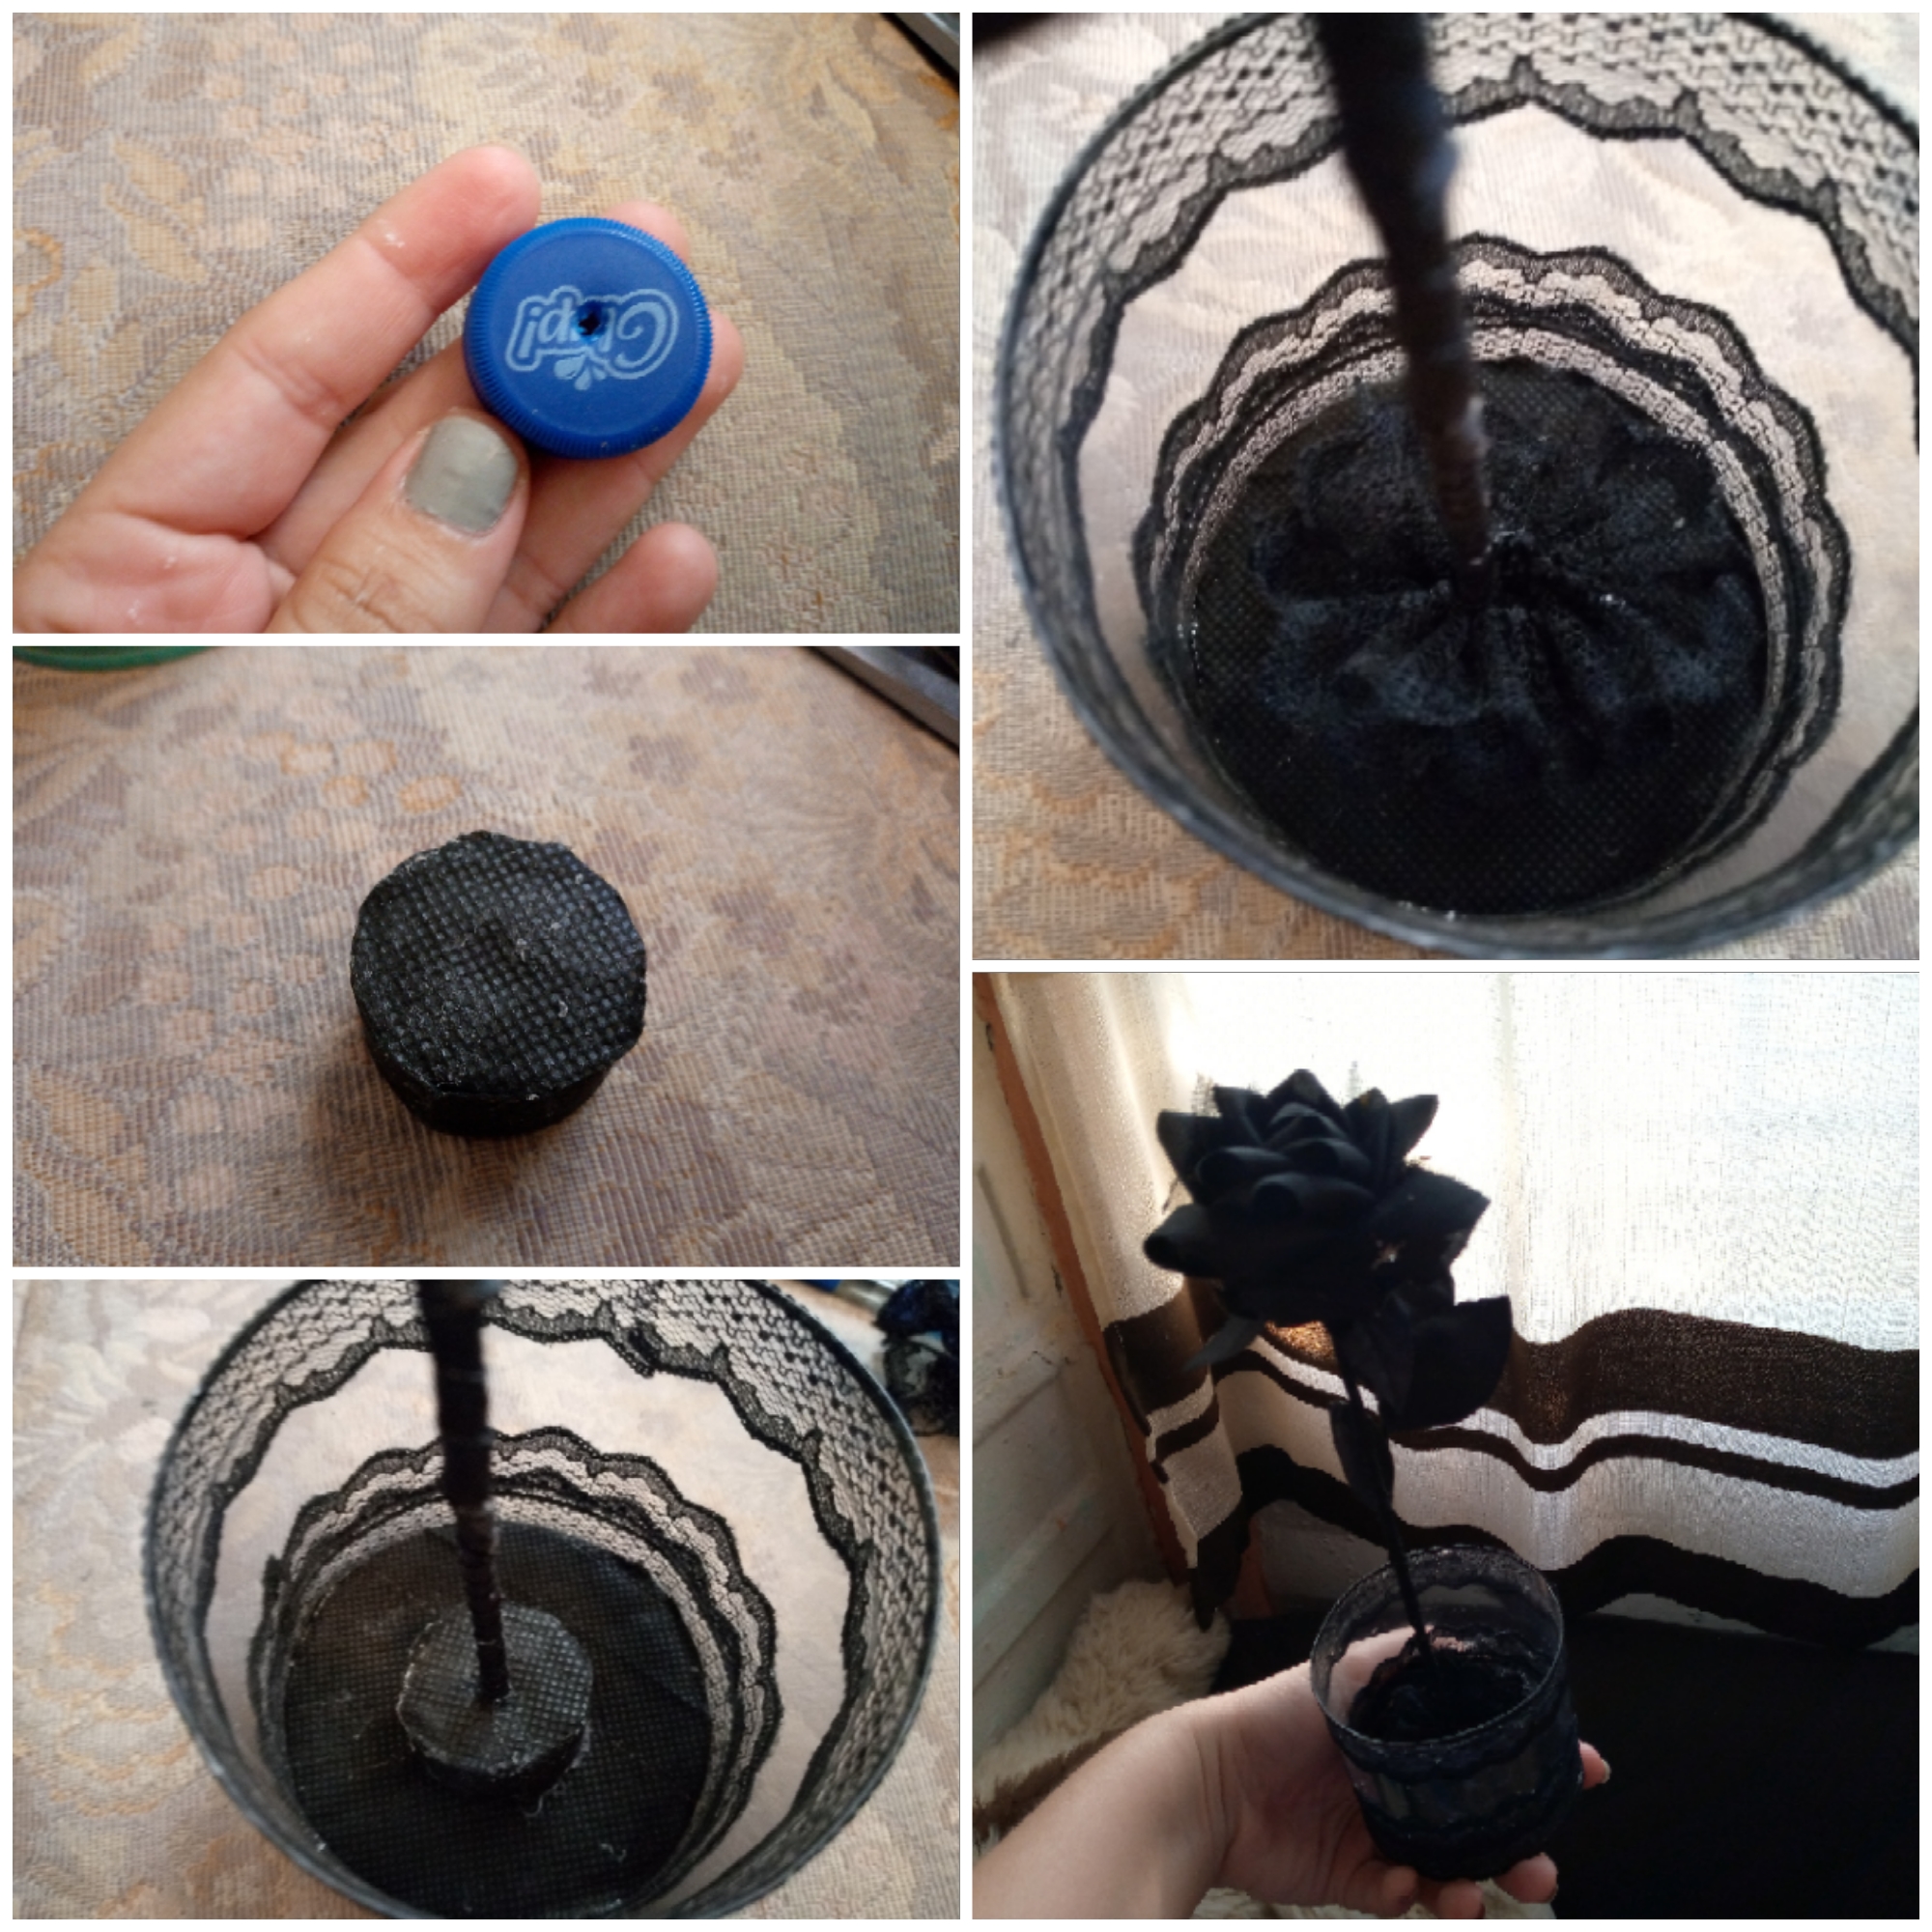
Estaremos usando la tapita para sostener la rosa al arreglo y solo le haré un pequeño agujero por el centro con la misma punta de la tijera y con cuidado ,voy a forrarlo con tela e insertare el tallo de mi rosa por el agujero y le agrego un poco de silicón para que se adhiera mas ,lo pego a la base del arreglo y listo asi he armado este centro de mesa.

Step 06

We will be using the lid to hold the rose in the arrangement and I will just make a small hole in the center with the same tip of the scissors and carefully, I will cover it with fabric and insert the stem of my rose through the hole and add a little silicone so it adheres better, I will glue it to the base of the arrangement and that's it, that's how I have put together this centerpiece.
Picsart_24-09-23_18-59-49-118.jpg


Picsart_24-09-23_18-53-00-357 (1).jpg

Resultado:

Result:

Picsart_24-09-23_18-53-00-357 (1).jpg

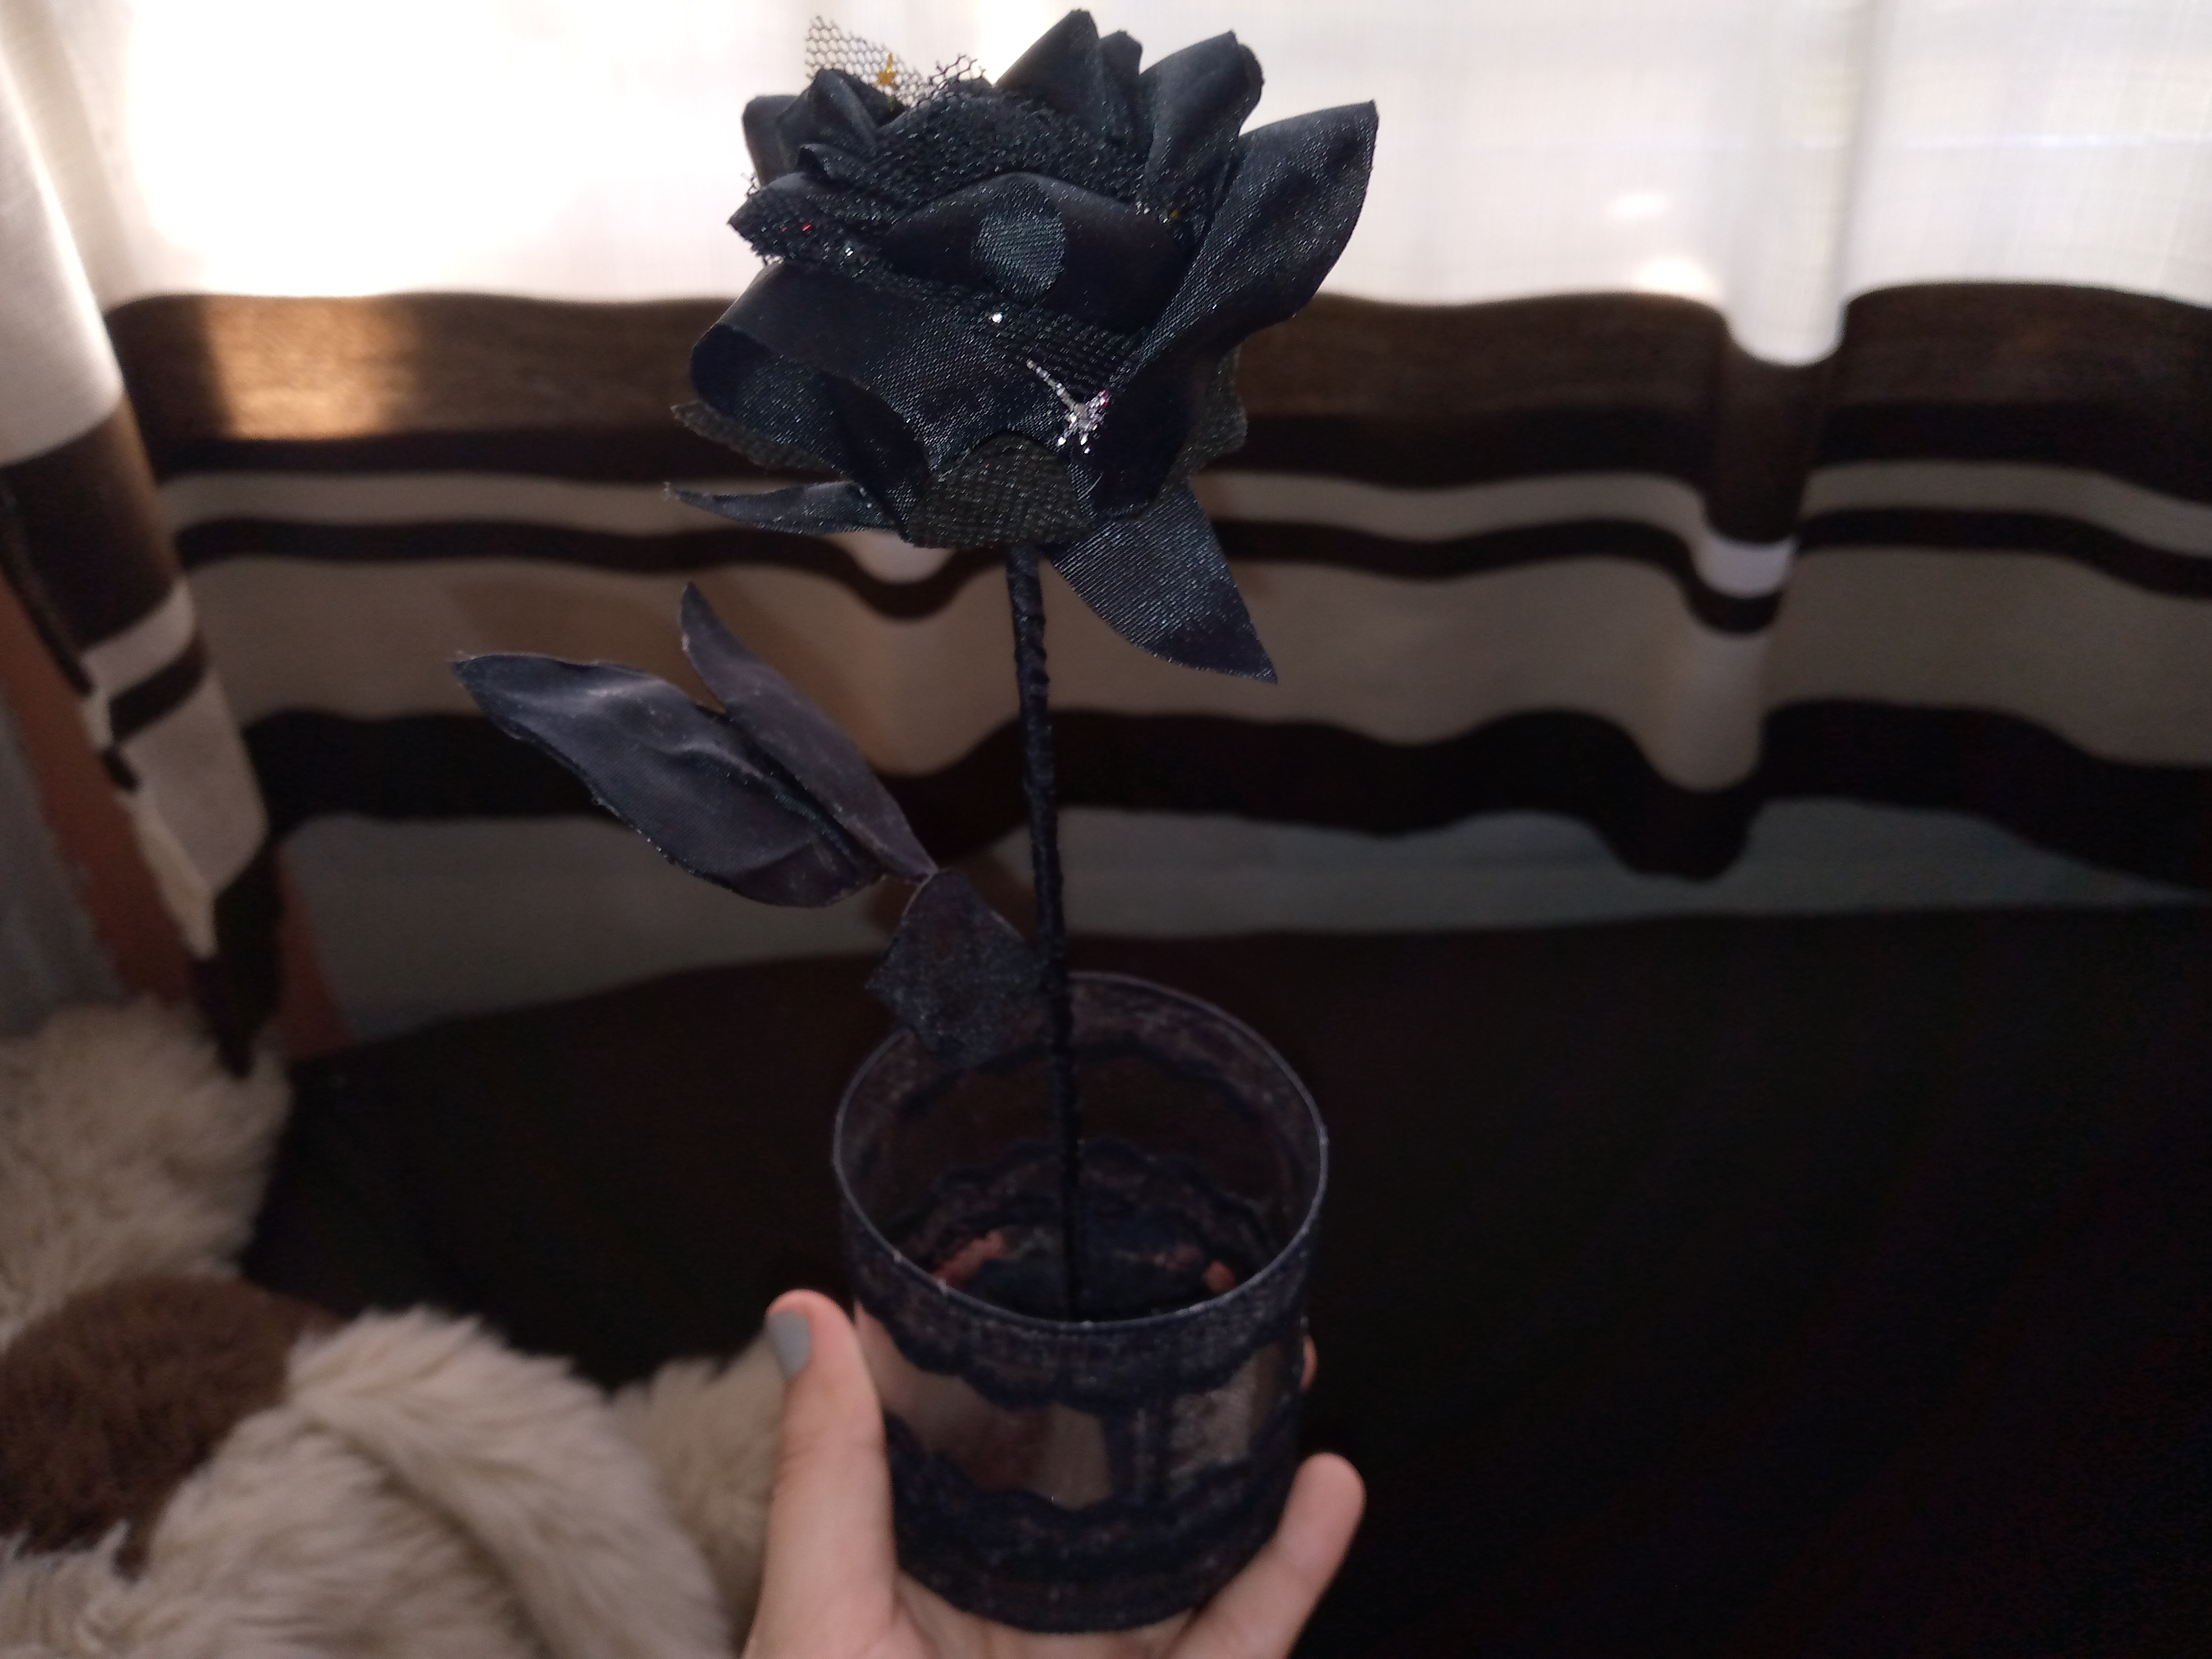
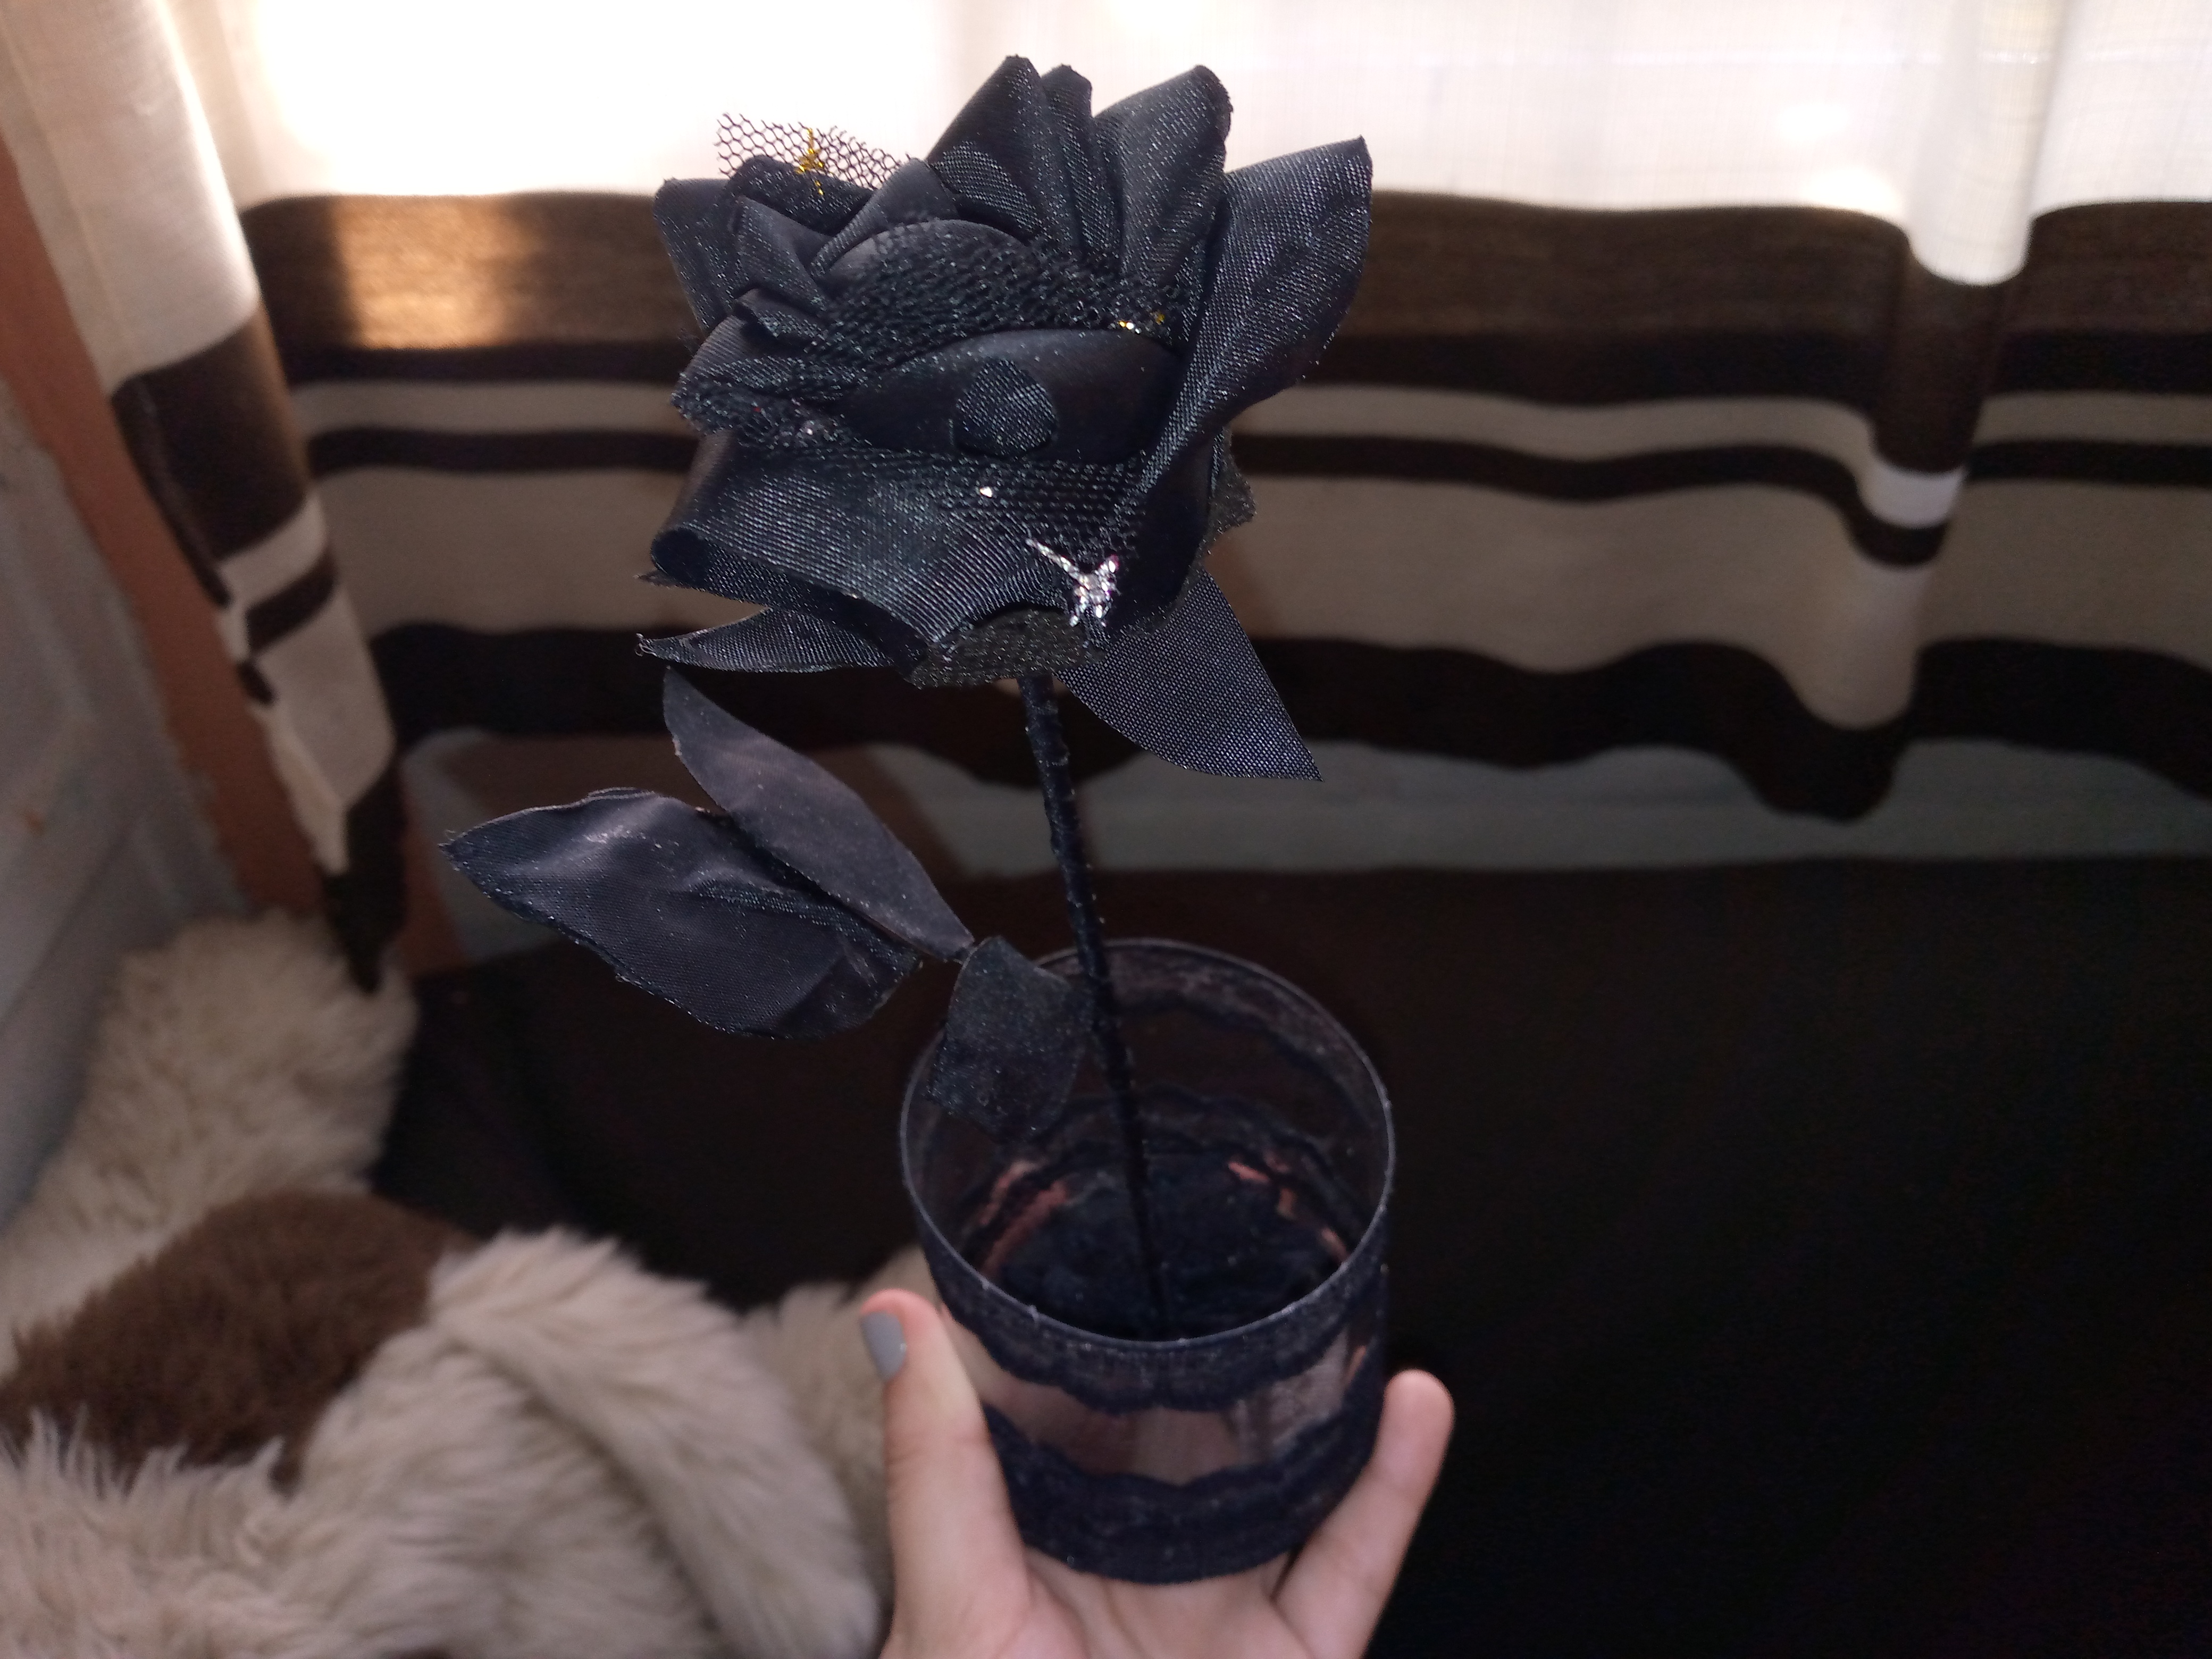
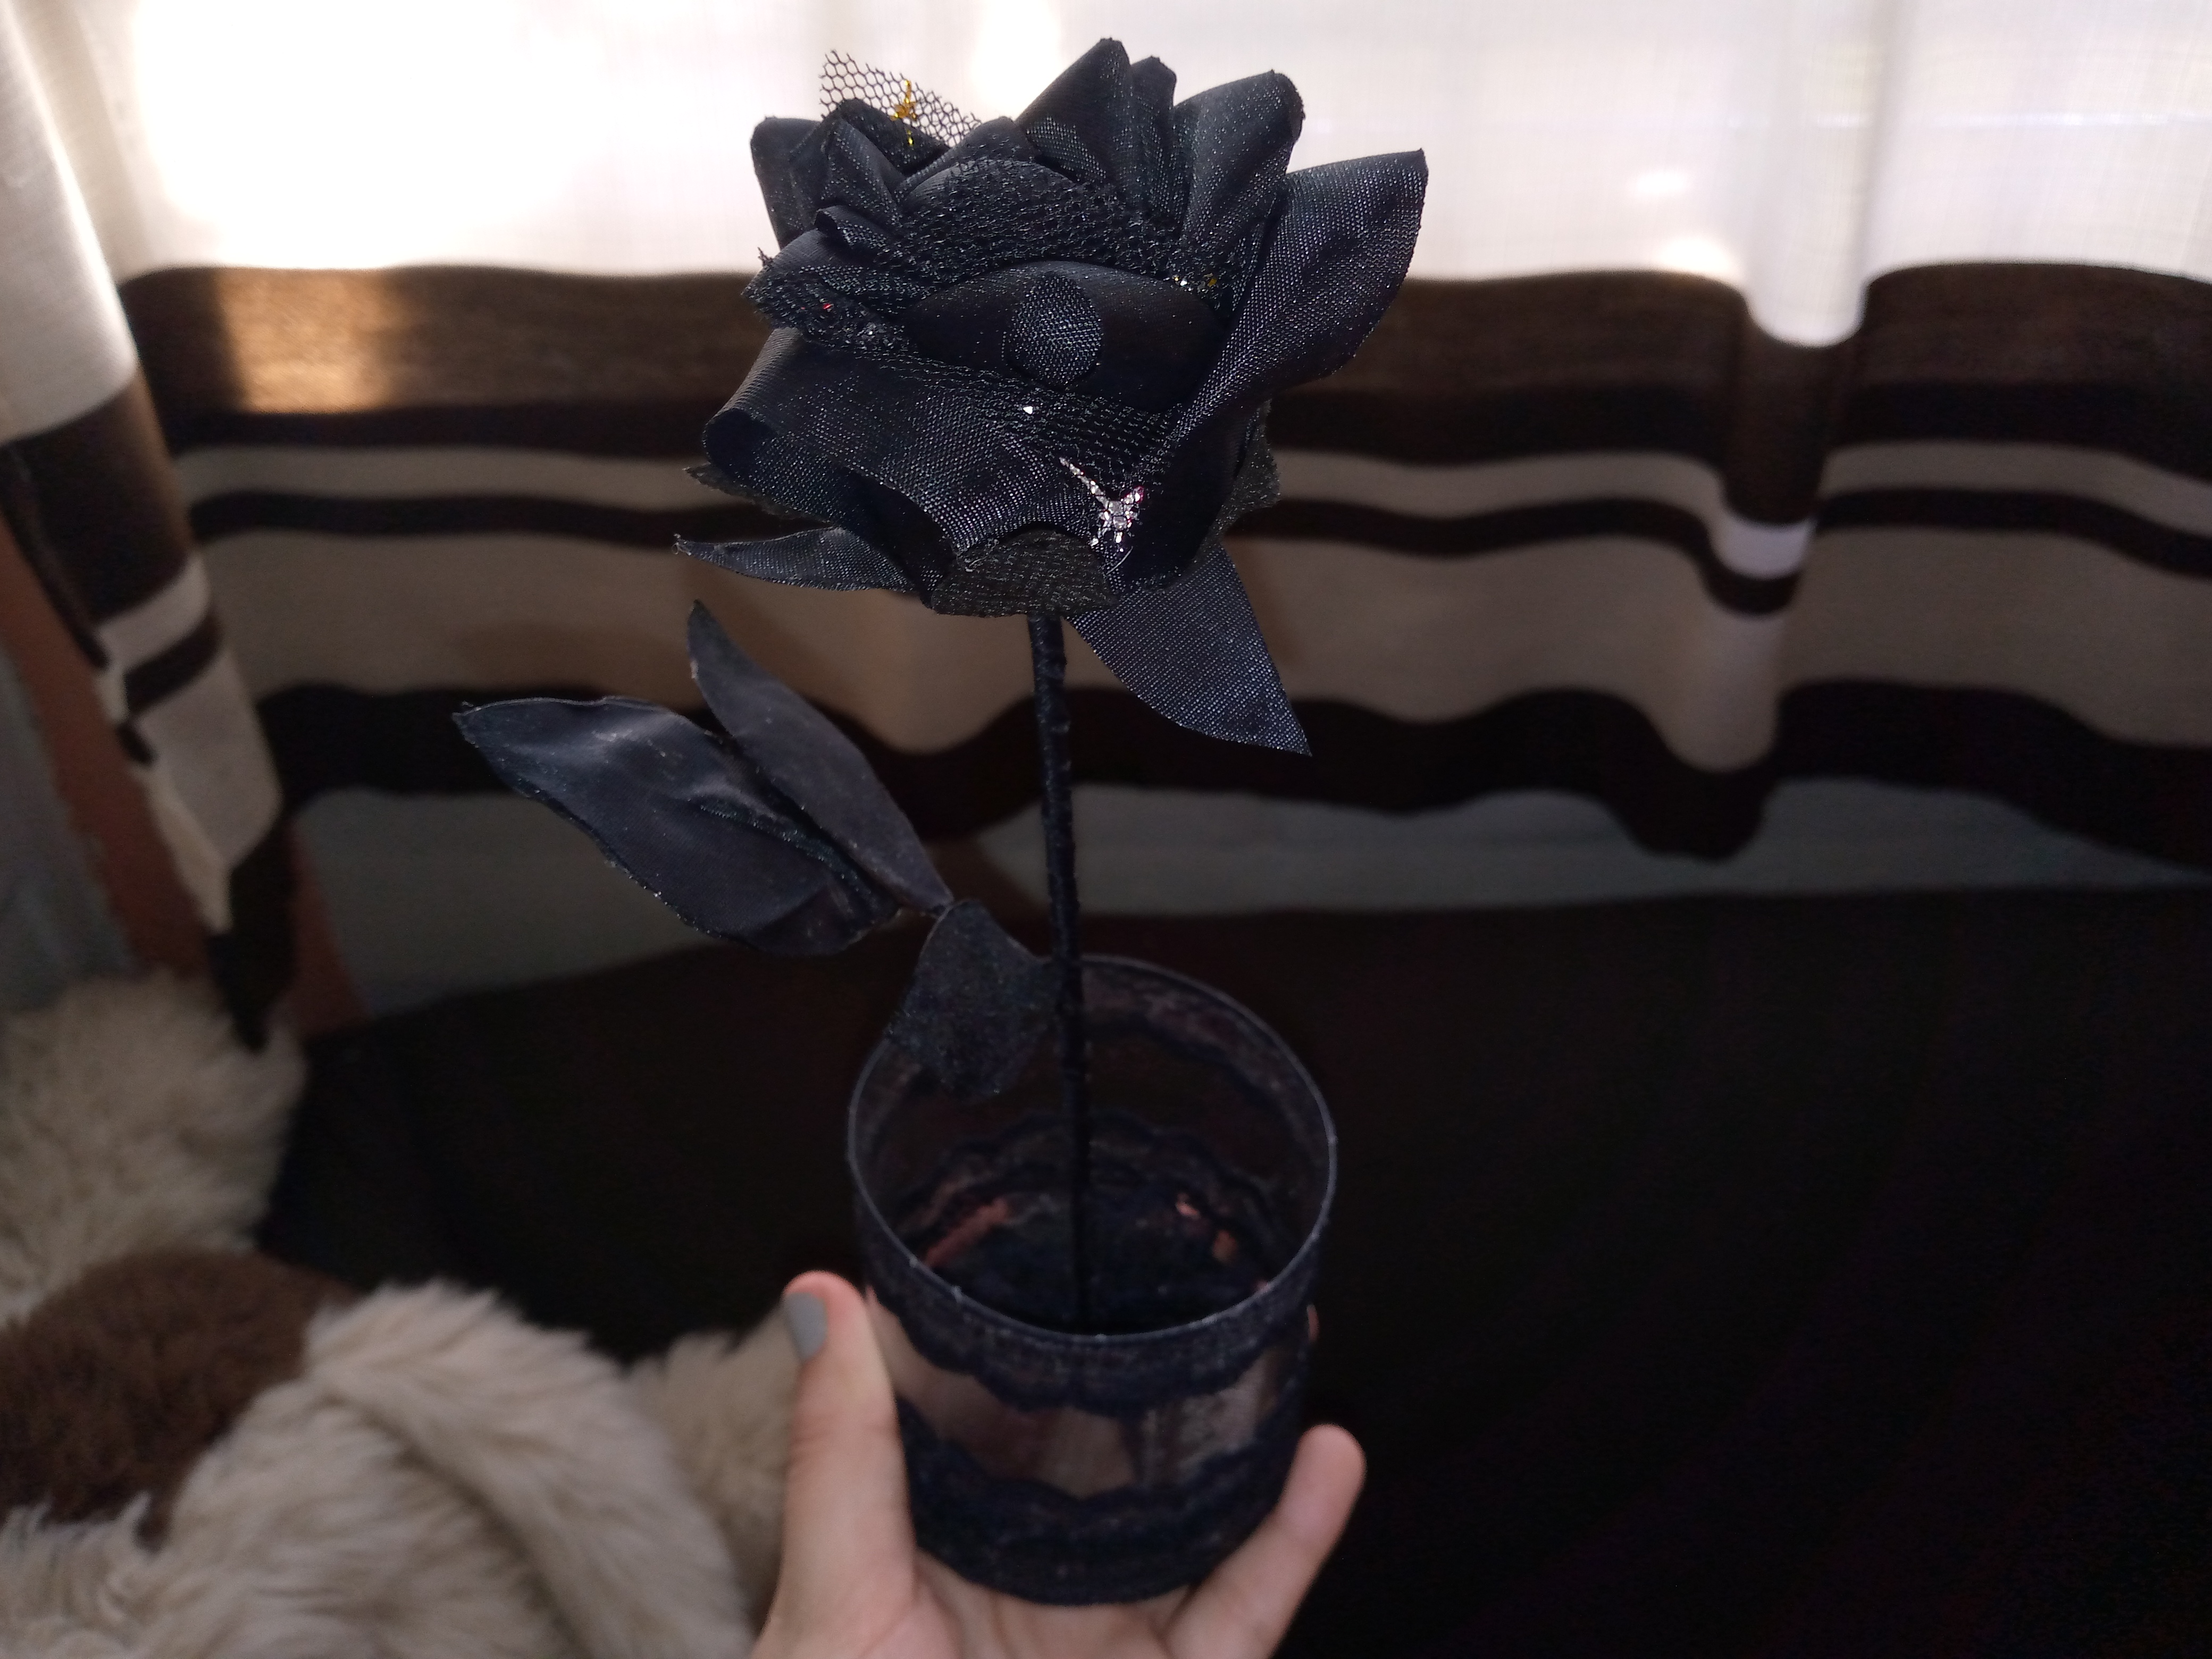
Con estas lindas fotos del resultado te enseño como puedes elaborar este lindo arreglo que se puede convertir en un lindo detalle para esa persona que le encantan estás rosas negras como a mi 🤭🥰🖤🌹espero te guste y que haya sido de su agrado este tutorial,gracias por tomarte tu tiempo a leer mi blog 🥺♥️y te deseo un feliz día , bendiciones para ustedes ,los quiero mucho,nos vemos en otra ocasión.

With these beautiful photos of the result I show you how you can make this cute arrangement that can become a nice detail for that person who loves these black roses like me 🤭🥰🖤🌹 I hope you like it and that you liked this tutorial, thank you for taking your time to read my blog 🥺♥️ and I wish you a happy day, blessings for you, I love you very much, see you another time.
IMG_20240923_172952_048.jpg

IMG_20240923_172944_436.jpg

IMG_20240923_172530_684.jpg

IMG_20240923_172942_185.jpg

Picsart_24-09-23_18-53-00-357 (1).jpg

🦋✨Todas las imágenes de esta publicación son de mi autoria ,📱tomadas con mi celular TecnoSpark8C |📸Fotos editadas en PicsArt y Canva. Texto traducido en el traductor de Google.

🦋✨ All the images in this publication are my author ,📱taken with my TecnoSpark8C cell phone |📸Photos edited in PicsArt and Canva. Text translated in Google Translate.


Picsart_24-08-15_13-46-37-839.jpg


Sort:  

Amiga realmente me encantó la forma en como trabajaste me encanta el color negro y más en rosas, gracias por compartir saludos para ti 🍀🌵😁🥰😻

Hola amiga muchas gracias me alegra que te guste esta rosa preciosa 🥺🖤✨

A black rose?
This is so unique
If I had something like this at home
I would sit close to it and meditate.

Aaaaw thanks friend 😍😊

Making this rose in black brings out its beauty, I must confess . It is nice for decor.
!DIY

Te quedó hermosa la rosa 😍. Felicidadesssss.

Gracias Rocío 🥰😍

Esta abejita te manda un abrazo ❤️🐝

Jajaja 😃 gracias, que tierna 😊. Otro para tí

 2 months ago  

Now this is a masterpiece!! You didn't have all the materials, but you made good use of the ones you had, that is commendable friend, well done.

Hi, thank you so much for appreciating this blog and the support. I definitely love taking advantage of the materials I have at home and turning them into a masterpiece 🥰
🥰

 2 months ago  
@ladyfoth just sent you a DIY token as a little appreciation for your post dear @anne002! Feel free to multiply it by sending someone else !DIY in a comment :) You can do that x times a day depending on your balance so:

Don't be shy - share some DIY!

You can query your personal balance by !DIYSTATS