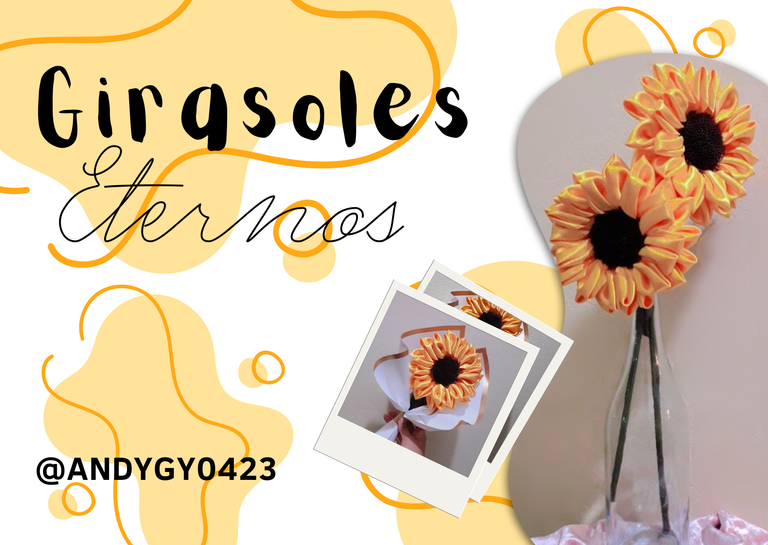

¿Cómo no ser amante de los girasoles?
How not to be a sunflower lover?
Desde hace un par de años se ha hecho popular el regalar flores amarillas a tu persona especial el 21 de Marzo por el inicio de la primevera en el hemisferio Norte; y no por nada, una de las flores más populares ha sido el girasol.
For a couple of years now it has been popular to give yellow flowers to your special someone on March 21, the beginning of spring in the Northern Hemisphere; and not for nothing, one of the most popular flowers has been the sunflower.
Por mi parte, aproveché la oportunidad para elaborar girasoles eternos y compartir mis aprendizajes con ustedes.
For my part, I took the opportunity to make everlasting sunflowers and share my learnings with you.

| materiales | materials |
|---|---|
| tela amarilla | yellow fabric |
| tela verde | green fabric |
| foami marrón | brown foami |
| alambre dulce | soft wire |
| bara de madera | wooden stick |
| cinta de floristería | Florist's tape |
| cilicón | hot glue |
| tijeras | scissors |
| encendedor | firelighter |
Pasos / Steps
Paso 1: cortar 32 tiras de tela amarilla de 4×10 cm, y con el encendedor quemar los bordes de cada tira de tela. Estas tiras próximamente serán los pétalos del girasol. También se puede utilizar cinta de tela, pero en mi caso estoy usando Podesua Royal, una tela satinada con bastante firmeza.
Step 1:cut 32 strips of yellow fabric of 4×10 cm, and with the lighter burn the edges of each strip of fabric. These strips will soon be the petals of the sunflower. You can also use fabric tape, but in my case I am using Podesua Royal, a satin fabric with quite firmness.
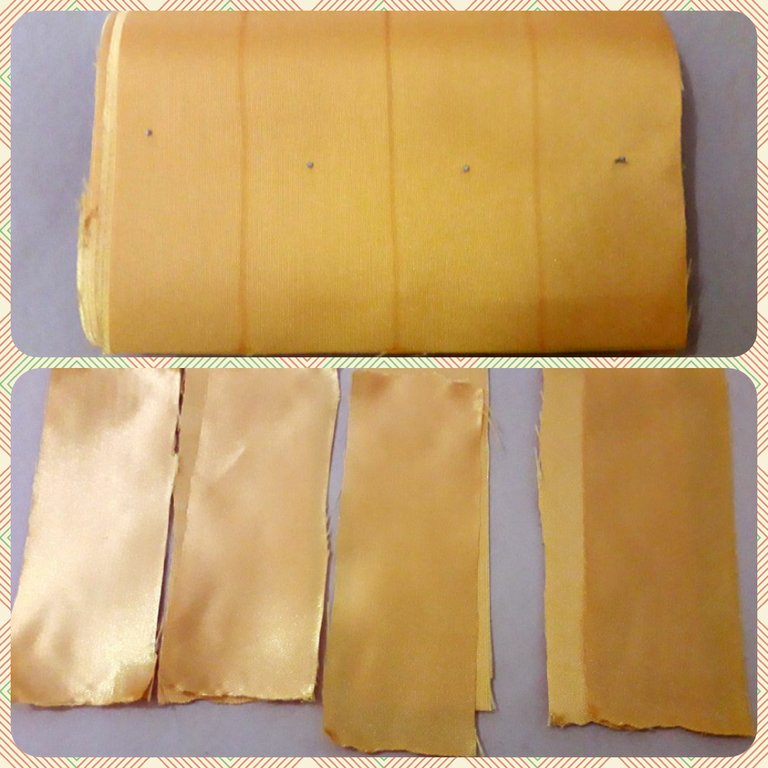
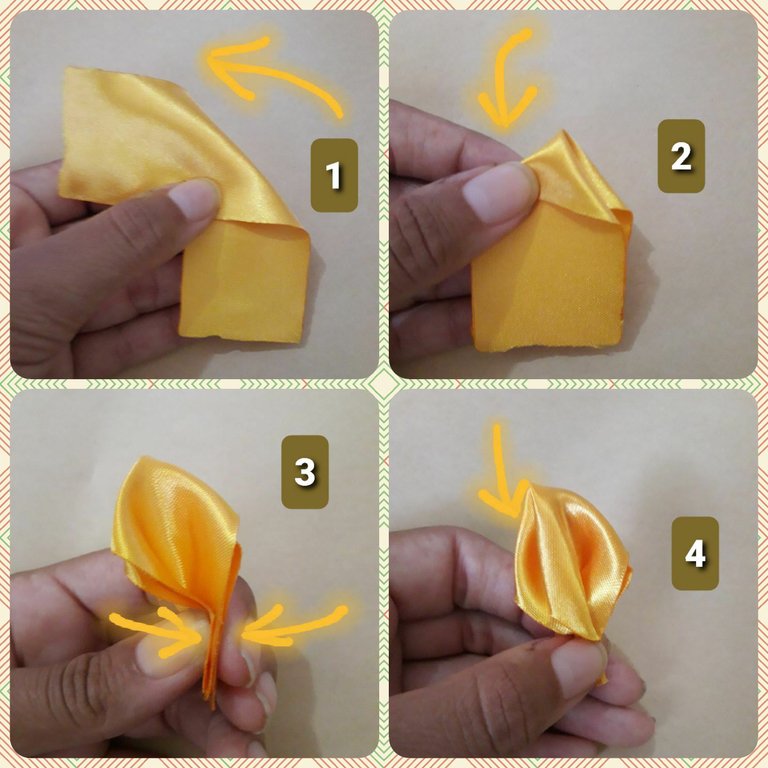
Paso 2: para formar los pétalos, seguir con exactitud los dobleces especificados en la siguiente imagen. Es importente fijarse que la parte satinada de la tela quede visible al momento de hacer los dobleces.
Step 2: to form the petals, follow exactly the folds specified in the following image. It is important to make sure that the satin part of the fabric is visible when making the folds.
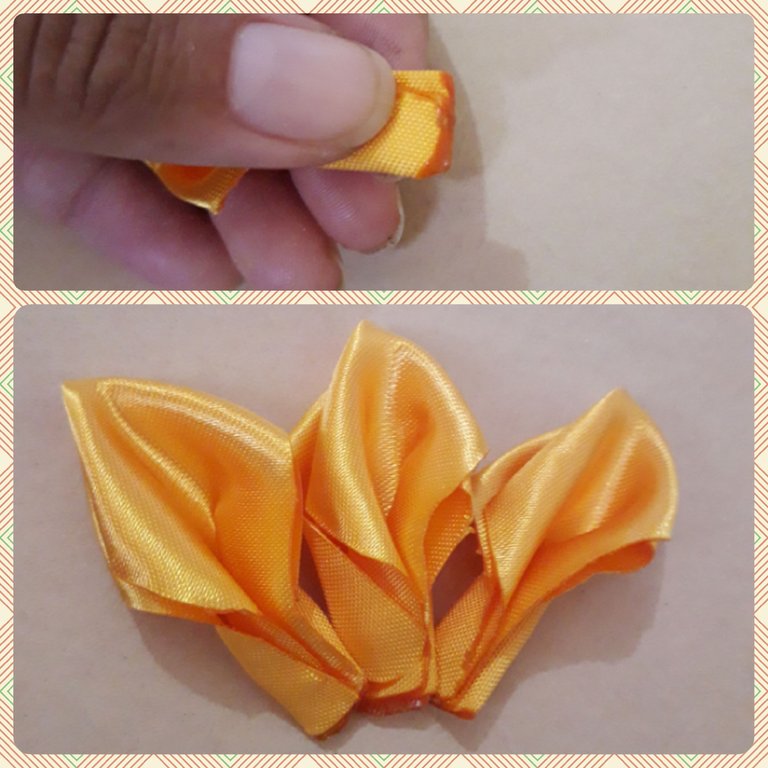
Paso 3: con el encendedor, sellar el extremo inferior de cada pétalo, en donde se unen las puntas de la tela, para que el pétalo no se desarme.
Step 4: With the lighter, seal the lower end of each petal, where the ends of the fabric meet, so that the petal does not fall apart.
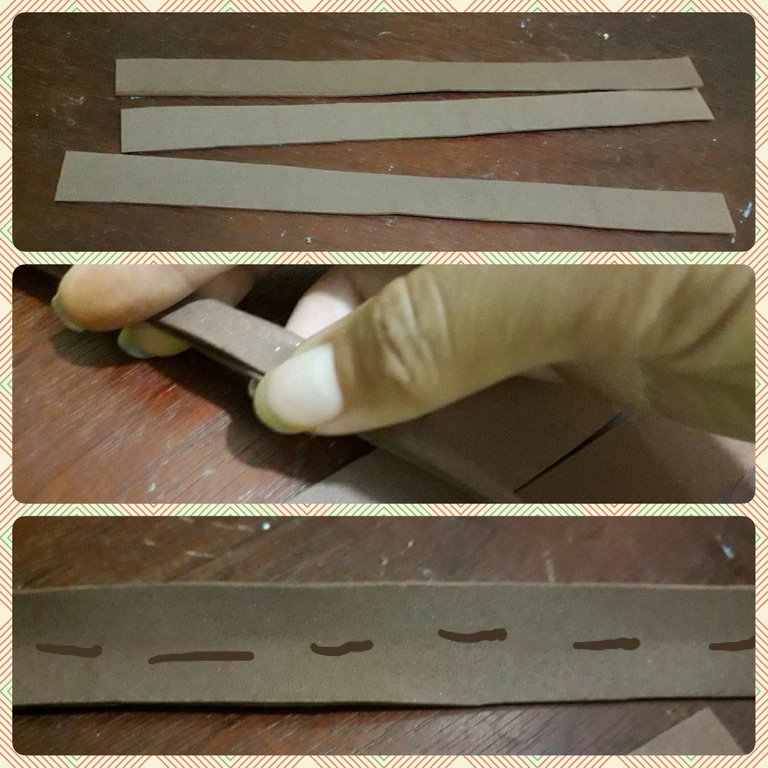
Paso 4: cortar 3 tiras de foami de 28×2 cm. Doblar cada tira a la mitad, como se muestra en la imagen. De esta manera se marcará 1 cm de cada lado de la tira. Esto es para elaborar el centro del girasol.
Step 4: Cut 3 strips of foami of 28×2 cm. Fold each strip in half, as shown in the picture. This will mark 1 cm on each side of the strip. This is to make the center of the sunflower.
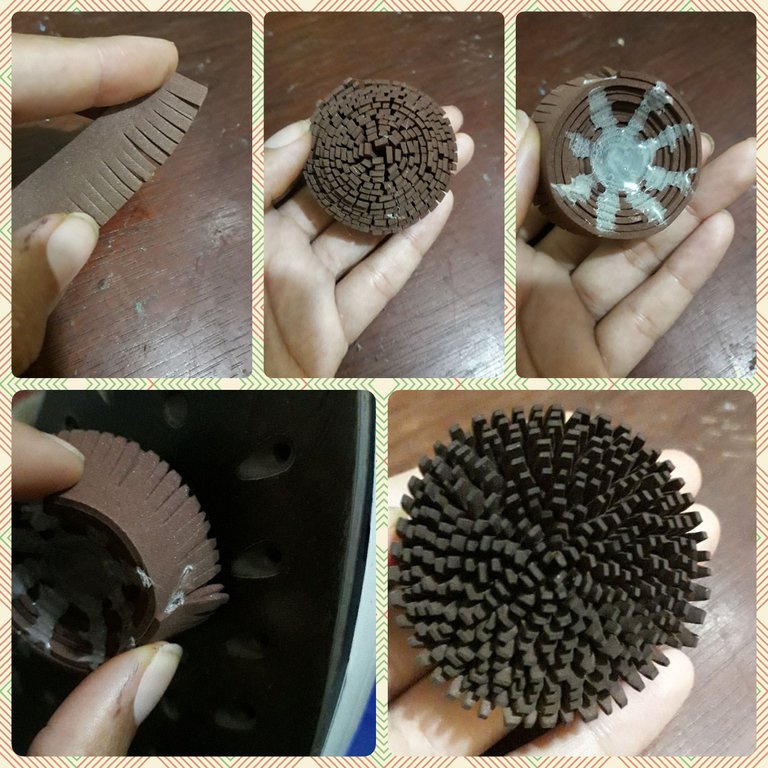
Paso 5: Hacer pequeños cortes por uno de los lados de cada tira de foami, enrollarlos hasta formar un centro, haciendo un poco de presión en el centro para darle una forma más esférica en la parte superior. Fijar con cilicón caliente, y por último, con ayuda de una plancha de ropa, aplicarle calor a la parte cortada del foami para darle un mejor acabado.
Step 5: Make small cuts on one side of each strip of foami, roll them up to form a center, making a little pressure in the center to give it a more spherical shape at the top. Fix with hot glue, and finally, with the help of a clothes iron, apply heat to the cut part of the foami to give it a better look.
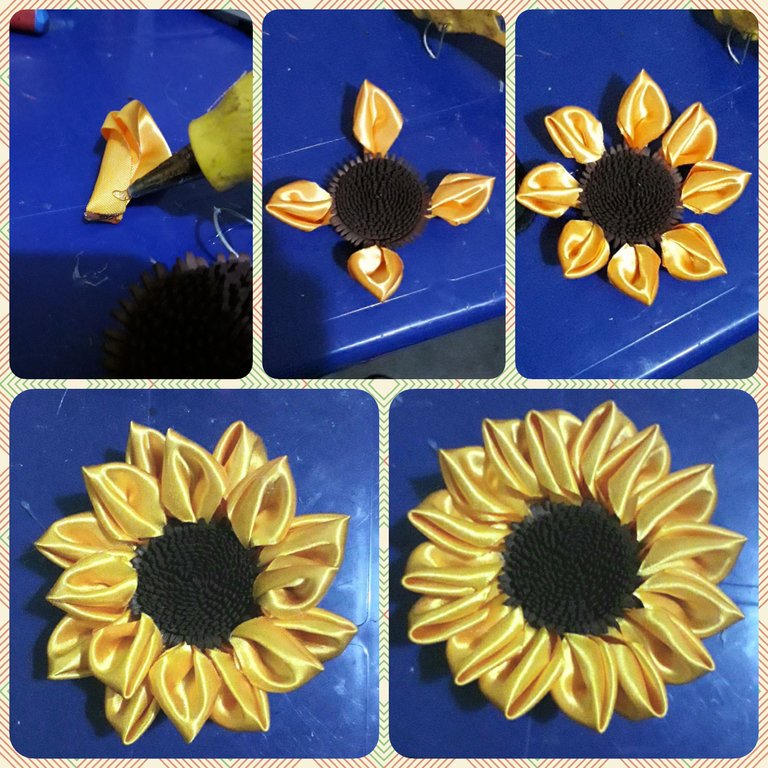
Paso 6: con el cilicón caliente, pegar los pétalos, usando como guia los puntos cardinales, luego seguir pegando hasta completar los primeros 16 pétalos. Si nos fijamos bien, cada pétalo tiene un lado doble, así que ordenamos pétalos de modo de se vea ese lado sobre el pétalo siguiente. Tepetir el proceso hasta terminar la segunda capa de 16 pétalos, esta vez sólo cuidando de que las puntas de los pétalos de abajo sean visibles entre las puntas de los pétalos de arriba.
Step 6: with the hot glue, glue the petals, using the cardinal points as a guide, then continue gluing until the first 16 petals are completed. If you look closely, each petal has a double side, so arrange the petals in such a way that this side is visible on the next petal. Repeat the process until the second layer of 16 petals is completed, this time only making sure that the tips of the bottom petals are visible between the tips of the top petals.
Paso 7: cortar hojas de tela verde, y hacer un soporte de alambre, el cual pegaremos con cilicón caliente en la parte posterior del centro del girasol. Esto se hace con el fin de darle movilidad a la parte superior del tallo de la flor. Cubrir la parte de la unión del sopote de alambre y el centro del girasol con papel, de modo de quede una semi-esfera.
Step 7: cut leaves of green fabric, and make a wire support, which we will glue with hot glue to the back of the center of the sunflower. This is done in order to give mobility to the upper part of the flower stem. Cover the part of the junction of the wire support and the center of the sunflower with paper, so that it is a semi-sphere.
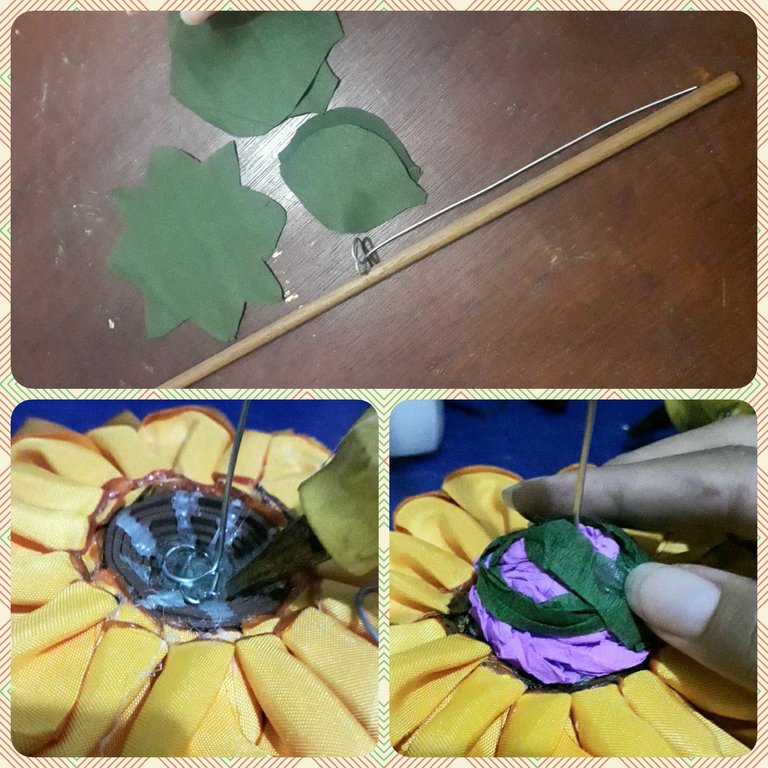
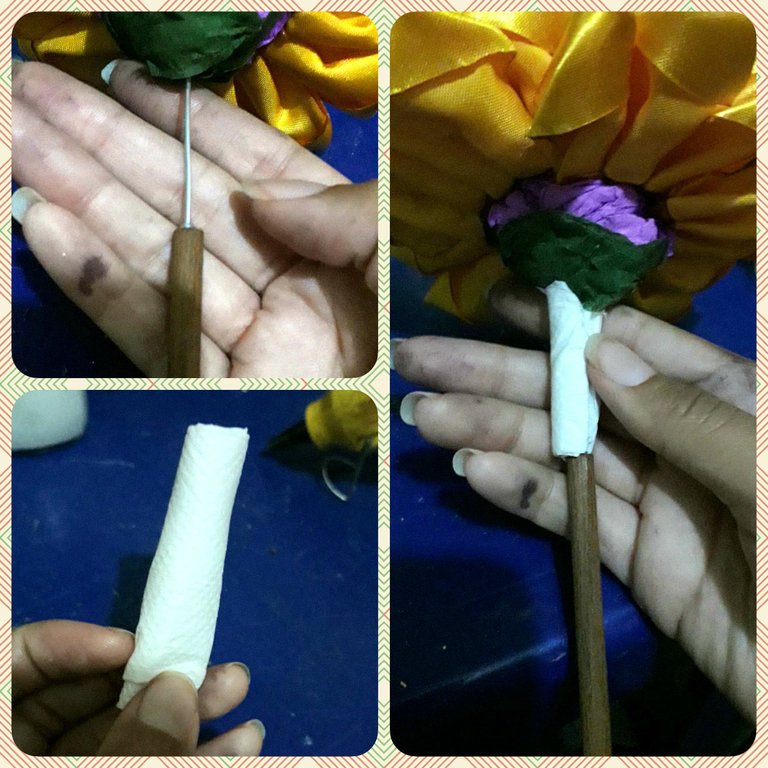
Paso 8: unir el alambre a la bara de madera, que será el tallo del girasol. Como el alambre es muy delgado, debemos envolverlo con un trozo papel de cocina hasta que alcance el grosor aproximado de la bara de madera.
Step 8: attach the wire to the wooden stick, which will be the stem of the sunflower. As the wire is very thin, we must wrap it with a piece of kitchen paper until it reaches the approximate thickness of the wooden stick.
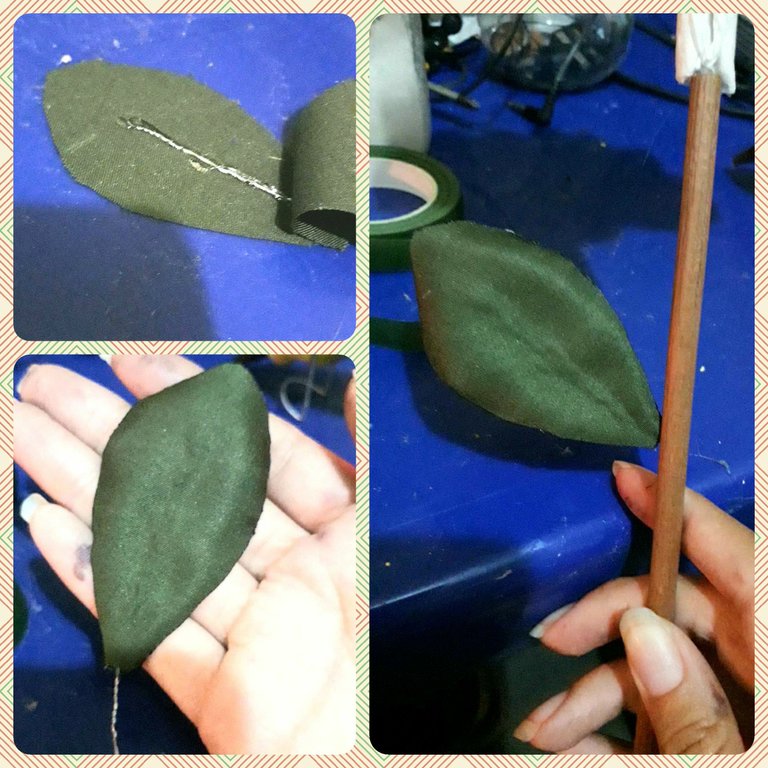
Paso 9: tomar un pequeño trozo de alambre y las hojas previamente cortadas, y pegarlas enfrentando el revés de la tela con el trozo de alambre en medio de cada una. Sellar las orillas con el encendedor y pegar al tallo de la flor con cilicón caliente.
Step 9: Take a small piece of wire and the previously cut leaves, and glue them facing the back of the fabric with the piece of wire in the middle of each one. Seal the edges with the lighter and glue to the stem of the flower with hot glue.
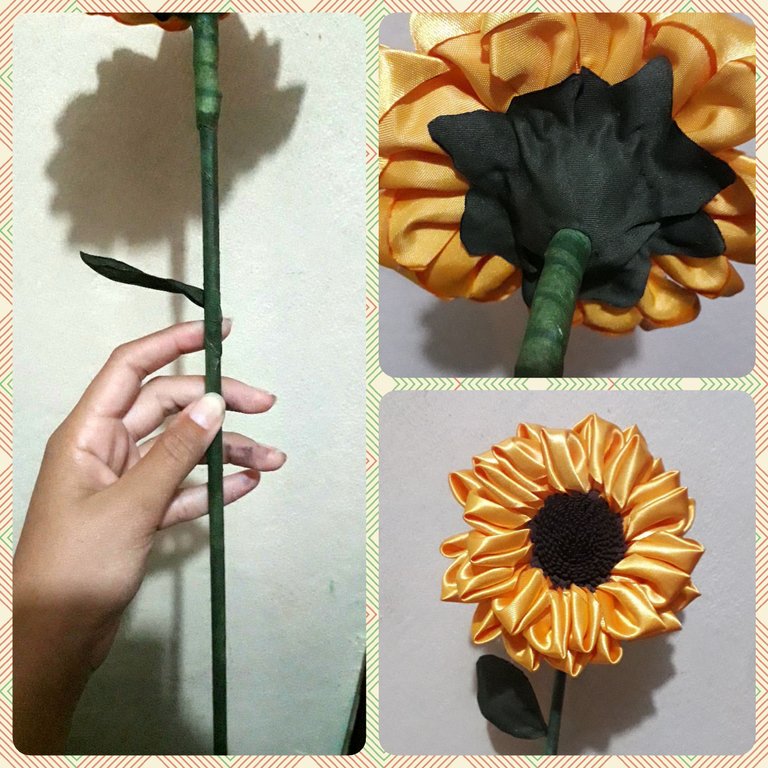
Paso 10: por último, cubrir todo el tallo del girasol con cinta de floristería y cubrir con una hoja en forma de estrella la parte posterior del centro de la flor.
Step 10: Finally, cover the entire stem of the sunflower with florist's tape and cover the back of the center of the flower with a star-shaped leaf.
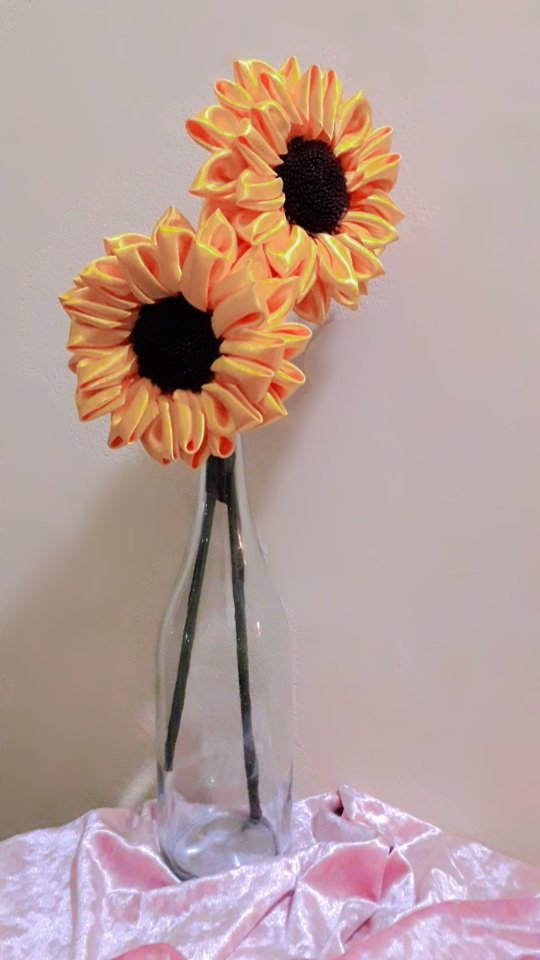
Así queda el resultado del girasol. Puedes usarlo como decoración para tus espacios o para regalarlo a alguien especial.
This is the result of the sunflower. You can use it as a decoration for your spaces or as a gift for someone special.
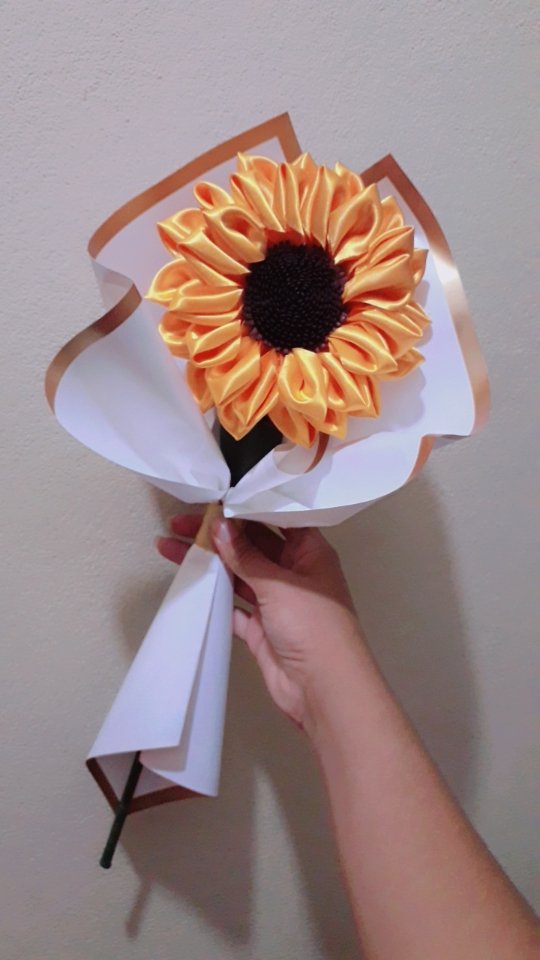

Todas las imágenes son de mi propiedad, sacadas y editadas con mi teléfono Samsung Galaxy j6.
All images are my own, taken and edited with my Samsung Galaxy j6 phone.
Protada y separadores hechos por mí, con Canva.
Cover and dividers have been made by me, with Canva.
Traducción hecha con DeepL traductor.
Translation done by DeepL translator.

Gracias por ver mi post :)
Thanks for vewing my post :)
27/03/24
Te quedaron súper hermosas, a parte explicaste muy claramente cómo hacerlas. Me encantó tu post ✨
!DIY
Me alegra que te haya gustado 😊
Haciendo esta publicación tenía mis dudas de si podrían entender mi explicación, por lo que me satisface saber que haya sido muy clara para ti. Cuando pueda subir contenido de este tipo en video podré explicar con mayor soltura.
Muchas gracias por tu comentario 🥰
This is so beautiful. A sunflower is a symbol of life and flourish, who wouldn't love a gift like this?!
Such great culture you have there. Nicely
Yeah, In addition, making everlasting sunflowers avoids cutting natural sunflowers, prolonging the short life of the flower, and so you will also have one that will not wilt.
Has sido votado por
PROYECTO ENLACE
'Conectando Ideas y Comunidades'
PROYECTO ENLACE es un proyecto de curación de habla hispana enfocado en recompensar contenido de calidad y apoyar autores en su proceso de crecimiento en HIVE.
Creemos y apostamos por el futuro de esta gran plataforma, y estamos muy emocionados de poder hacerla crecer junto a esta comunidad. Así que te invitamos a publicar en nuestra COMUNIDAD y estar atento a todas las actividades que tenemos preparadas y que estaremos publicando en breve.
¿QUIERES AUTOMATIZAR TUS GANANCIAS DE CURACIÓN? SE PARTE DEL PROYECTO ENLACE APOYANDO A NUESTRO TRAIL EN HIVE.VOTE INGRESA AQUÍ PARA CONOCER LOS DETALLES.
¿QUIERES INVERTIR ENLACE? DESCUBRE COMO HACERLO Y GENERAR INGRESOS DE FORMA SEMANAL MEDIANTE TU DELEGACIÓN DE HP AQUÍ TE EXPLICAMOS COMO.
Te invitamos a participar en nuestro servidor de Discord: https://discord.gg/3S9y7BbWfS
Atentamente
EQUIPO ENLACE 2024
Gracias por el apoyo 😊
Congratulations @andygy0423! You have completed the following achievement on the Hive blockchain And have been rewarded with New badge(s)
Your next target is to reach 300 replies.
You can view your badges on your board and compare yourself to others in the Ranking
If you no longer want to receive notifications, reply to this comment with the word
STOPCheck out our last posts:
Me encantan éstas ideas de flores eternas 🥺🥺, nunca he sido fan de asesinar flores, por eso siempre digo que no me gustan, pero definitivamente desde que han salido las ideas de éste tipo me he vuelto fan de apoyarlas 💕, tus girasoles han quedado hermosos y las explicación es super entendible y ordenada 💕.
Excelente post 🌻
Apoyo por completo tu visión, tampoco me gusta cortar flores, las prefiero vivas en un hermoso jardín. Por eso las flores eternas son la mejor alternativa para mí, además, no se van a marchitar.
Muchas gracias por tu apoyo y comentario 🥰
muy bonito trabajo!
very nice job!
Thanks so much! 😊
Wow, quedaron hermosos, eso de hacer flores eternas está muy de tendencia, tengo varias conocidas que los hacen y son preciosas, en un momento realicé muchas flores en tela para los lazos, ahora tienen otra utilidad muy bonita y puede ser un lindo detalle para regalar.
Saludos
Muchas gracias 🥰
En tocados para el cabello también son hermosas, de hecho, le regalé a una amiga una pinza de girasol
Está precioso, claro. Los he visto.
Gracias 😊
https://reddit.com/r/crafts/comments/1bp7gtm/eternal_sunflowers/
The rewards earned on this comment will go directly to the people( @yolimarag ) sharing the post on Reddit as long as they are registered with @poshtoken. Sign up at https://hiveposh.com.
Thanks 🥰
You can query your personal balance by
!DIYSTATSThanks for the support 😊