
[Photo Edited With Photo Grid]
Hola! Hiver Friends! I am back again with another DIY handicraft idea! I am inspired to share these projects because I know how to recycle unused materials, instead of throwing them away.
Today! I will show you how to make a beautiful DIY flower vase using cardboard and raffia rope. Its surprisingly simple and easy!
Why Recycle?
Before we begin, lets talk about the importance of recycling. Cardboard and raffia rope are often discarded, contributing to landfill waste.
By repurposing these materials, we reduce our environmental impact and contribute to a more sustainable lifestyle. Plus, crafting with recycled materials is fun and rewarding experience!
Material You'll Need:
Carboard { corrugated cardboard works best, but any study cardboard will do}
Raffia rope { or any other type of sturdy rope or twine}
Glue { a strong adhesive is recommended, like hot glue or a strong craft glue}
Scissors or a craft knife
Ruler or measuring tape { optional for precision}
Paint or other decorative elements { optional, to customize your vase}
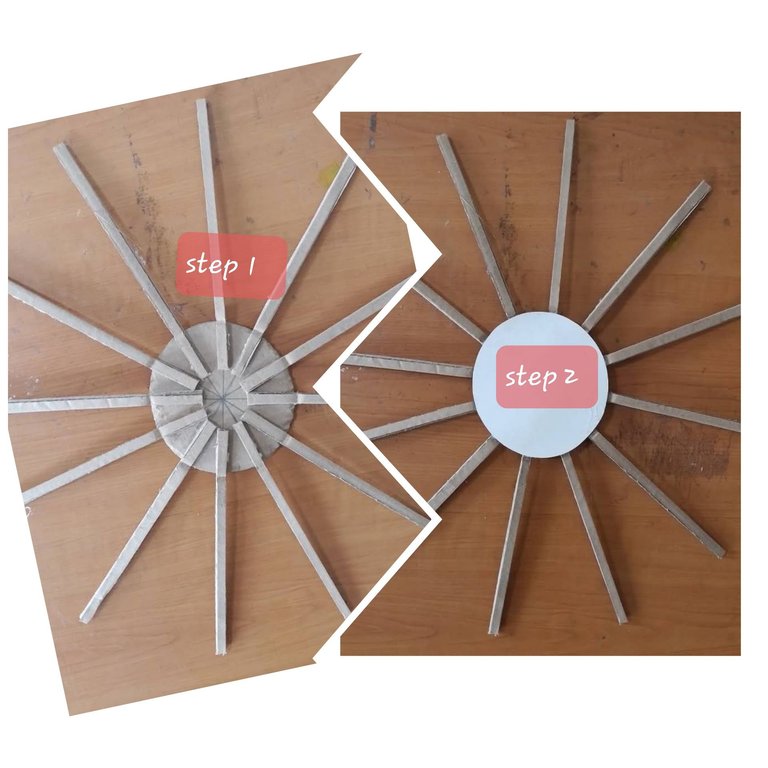
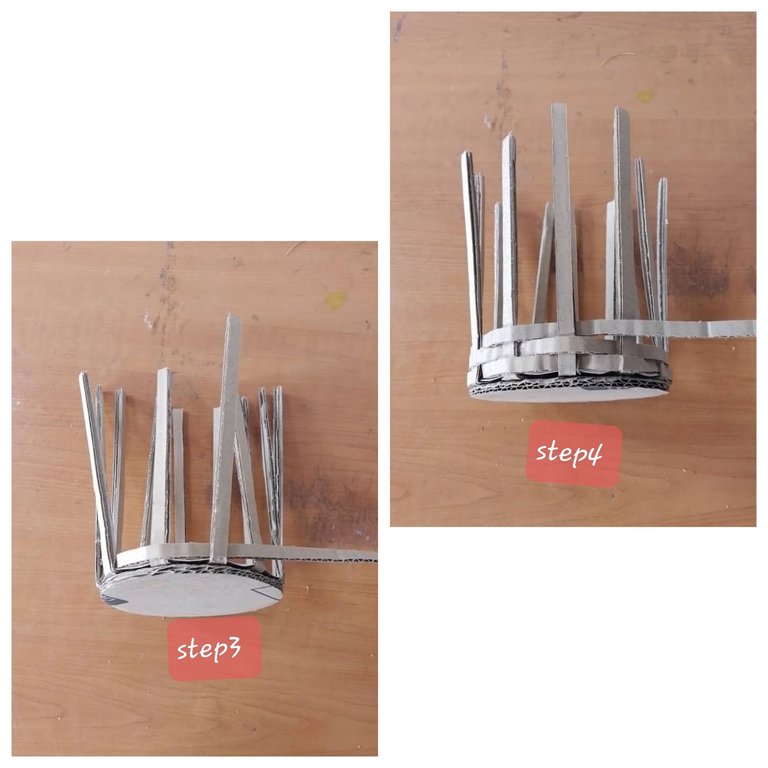
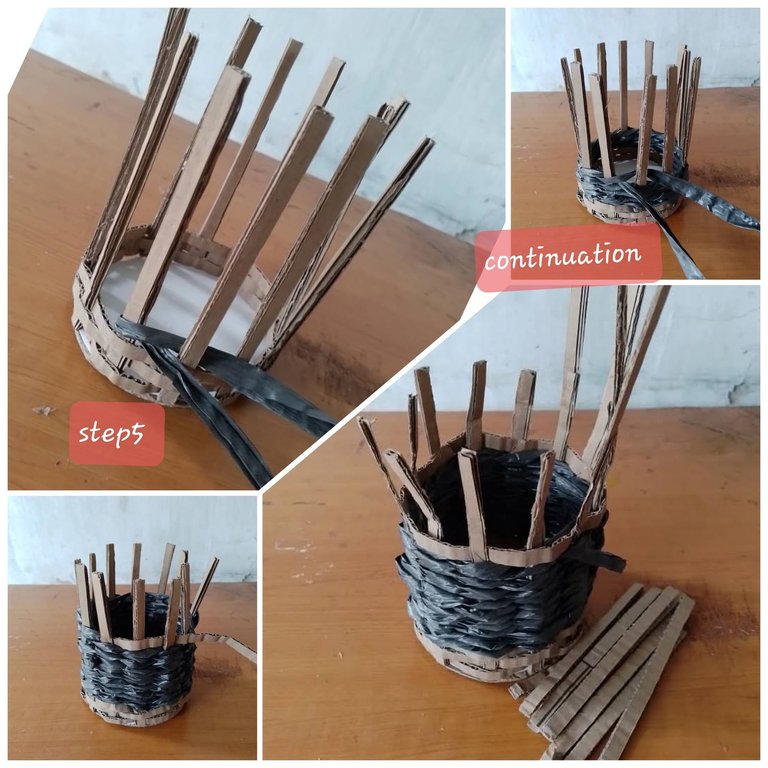
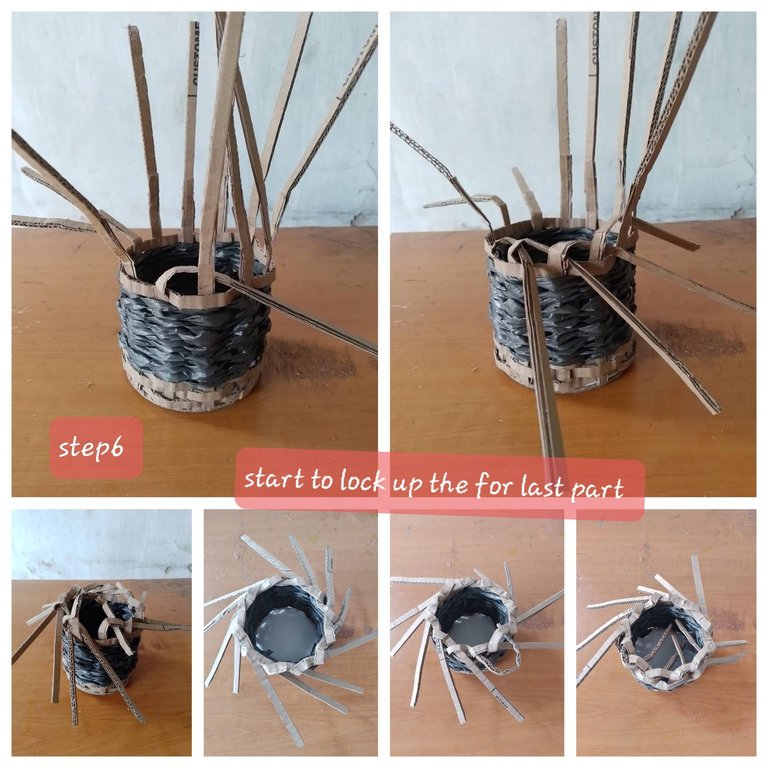
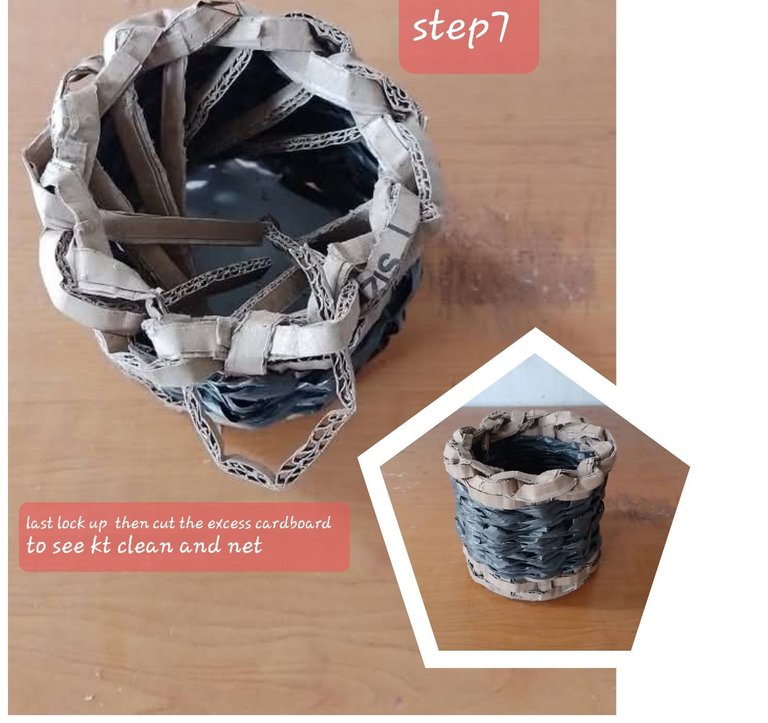
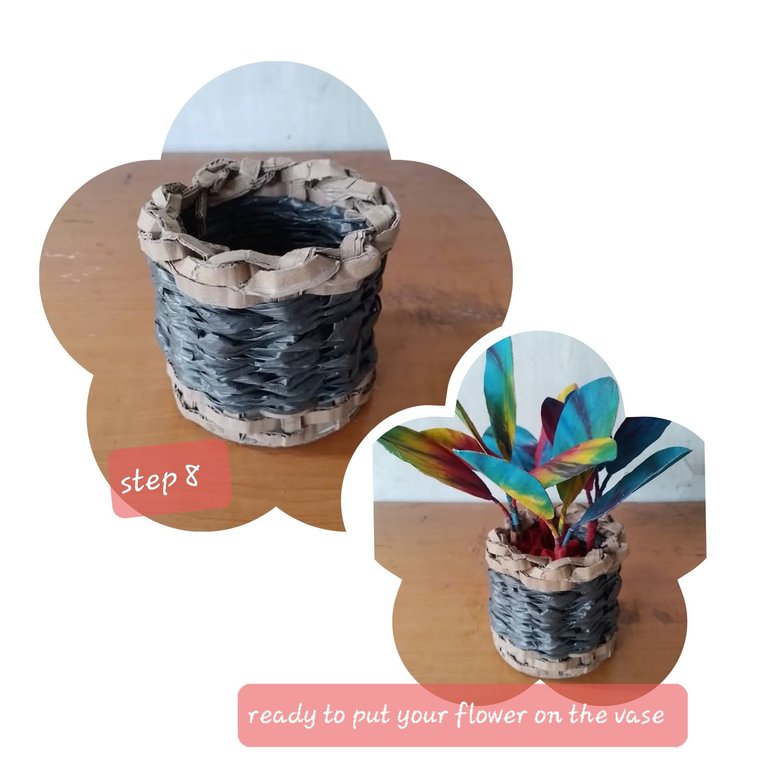
Step -by Step Instructions:
= Prepare the cardboard:
Cut the cardboard into strips. The width and length of the strips will determine the size of your vase.
For small vase, strips around 1-2 inches wide and 6-8 inches long work well. You'll nee a significant number of strips at least 12-15, depending on the desired height and diameter of your vase. experiment to find what works best for you.
= Create the Base:
Arrange the cardboard strips in a circular pattern, overlapping the ends slightly. Secure the strips together using glue.
Make sure the base is sturdy and circular. You can use a small circular object as a template to ensure evenness.
= Building Walls:
This is where the raffia rope comes in. Begin wrapping the raffia rope around the base of the cardboard strips, tightly securing each wrap with glue.
Continue wrapping upwards, creating the walls of your vase.
You can adjust the thickness of the raffia rope layer to control the vases sturdiness and aesthetic appeal.
= Weaving Technique {Optional:}
For a more intricate look, you can try weaving the raffia rope in and out of the cardboard strips, creating a woven effect.
this requires a bit more patience and skill, but the result is a more textured and visually appealing vase.
= Finishing Touches:
Once you've reached your desired height, secure the end of the raffia rope with glue.
you can add additional layers of raffia rope for extra strength and a more polished look.
Allow the glue to dry completely before handling.
= Decorating { Optional}:
Personalize your vase! You can paint it, add decorative elements like beads or ribbons, or leave it in its natural state for a rustic look.
Let you creativity shine!
Addition with that, Let me give you a Tips and Tricks for making this DIY FLOWER VASE.
Cardboard Choice: Thicker cardboard will create sturdier vase. Consider using recycled cardboard boxes.
Glue Section: Hot glue provides a quick and strong bond, but craft glue allows for more time to adjust the placement of the raffia rope.
Raffia Rope Variations: Experiment with different colors and textures of raffia rope to create unique designs.
Size and Shape: Don't be afraid to experiment with different sizes and shapes. You can create tall, slender vases or short, wide ones.
This DIY flower vase project is a fantastic way to recycle cardboards and raffia rope while creating a beautiful and functional item for your home.
Its a simple, affordable, and co-friendly craft that's perfect for beginners and experienced crafters alike.
Share your creations with us! happy crafting everyone!
This is absolutely fantastic and amazing, WOW! Am so impressed about how you came about this beautiful craft and the result is outstanding. Well done and good job 👍
THANK YOU VERY MUCH YOU LIKE MY WORK.
You can check out this post and your own profile on the map. Be part of the Worldmappin Community and join our Discord Channel to get in touch with other travelers, ask questions or just be updated on our latest features.
THANKS A LT WORLDMAPPIN
Beautiful work with recyclable materials, this pencil holder really looks beautiful. You can make very nice things with materials that others throw away.Thank you for leaving us your step by step and creative process, good job
Thank you so much DIY HUB! I'm so glad you like it. Its rewarding to create something beautiful from recycled materials. I'm happy to share the process, its all about seeing the potential in things others might overlook. Thanks again for your kind words!.
Congratulations @analyn21! You have completed the following achievement on the Hive blockchain And have been rewarded with New badge(s)
Your next target is to reach 1250 upvotes.
Your next target is to reach 100 comments.
Your next target is to reach 1750 upvotes.
You can view your badges on your board and compare yourself to others in the Ranking
If you no longer want to receive notifications, reply to this comment with the word
STOPThanks a lot hivebuzz.
THANK YOU THANK YOU SO MUCH HIVEBUZZ. aiming to have more friends here.
wow...very cute, really creative, can be a multi-purpose container
thank you very much you appreciated my work, but yes it can be a multi-purpose container.