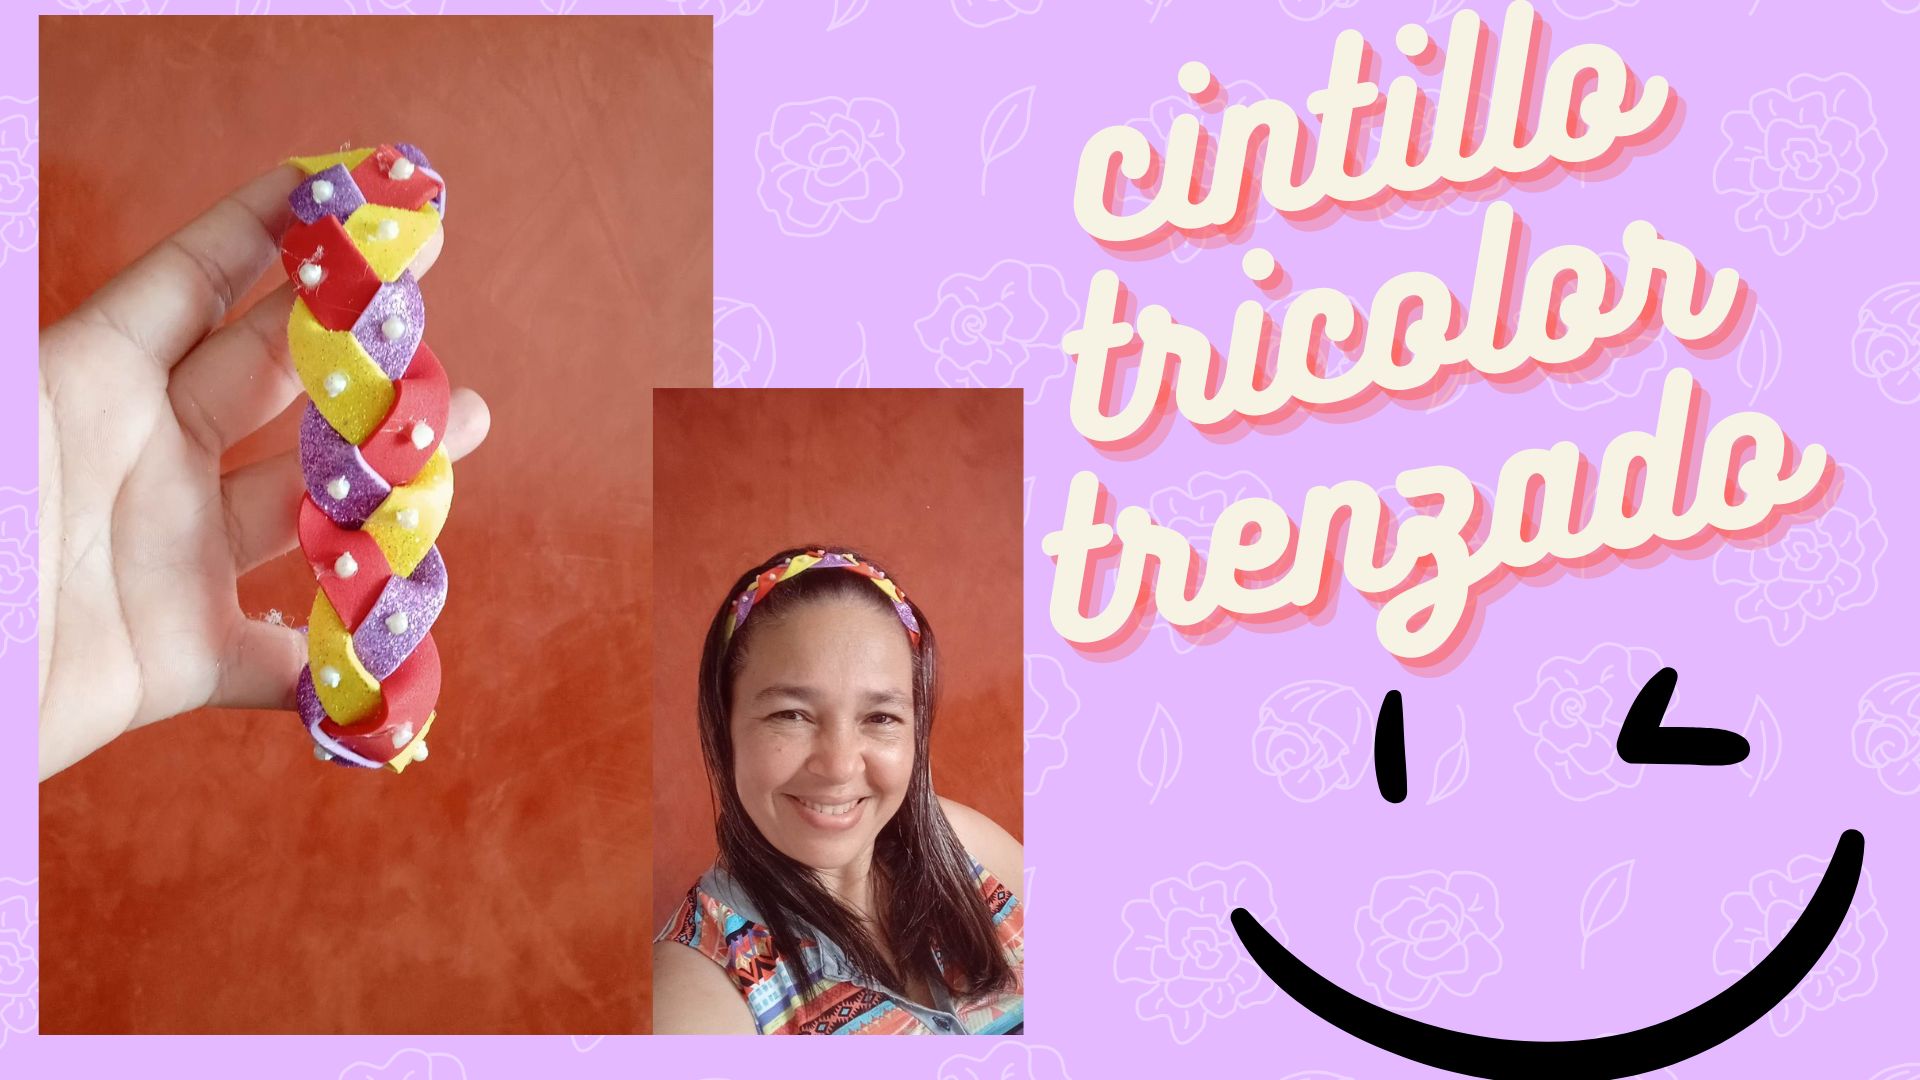
 Que la paz y la bendición de Dios sea para cada uno de los que hacen parte de esta gran familia, me complace estar compartiendo nuevamente con todos en un nuevo tutorial, disfruto mucho de cada una de sus publicaciones y es algo que me llena de mucha alegría y motivación de hacer cosas nuevas y que sean de su agrado, en esta oportunidad les quiero compartir un precioso cintillo trenzado de tres colores que hice para mi sobrina pero me lo medí y me quedó muy bien, es ideal para salir a caminar, hacer ejercicios, o bien para estar en casa, yo en particular uso mucho cintillo para recoger mi cabello de la cara, la verdad que es impresionante lo que podemos hacer con este tipo de material, la idea es ponernos un poco creativos y sacarle provecho a todo esto que tenemos en casa y que en algunas oportunidades las botamos sin darnos cuenta lo que podemos hacer con ellos.
May the peace and blessing of God be for each of you who are part of this great family, I am pleased to be sharing again with everyone in a new tutorial, I really enjoy each of your publications and it is something that fills me with great joy and motivation to do new things and that are to your liking, this time I want to share a beautiful braided headband of three colors that I made for my niece but I measured it and it was very well, It is ideal to go for a walk, do exercises, or to be at home, I particularly use a lot of headband to collect my hair from the face, the truth is that it is impressive what we can do with this type of material, the idea is to get a little creative and take advantage of all this that we have at home and that sometimes we throw them away without realizing what we can do with them.
.jpg)
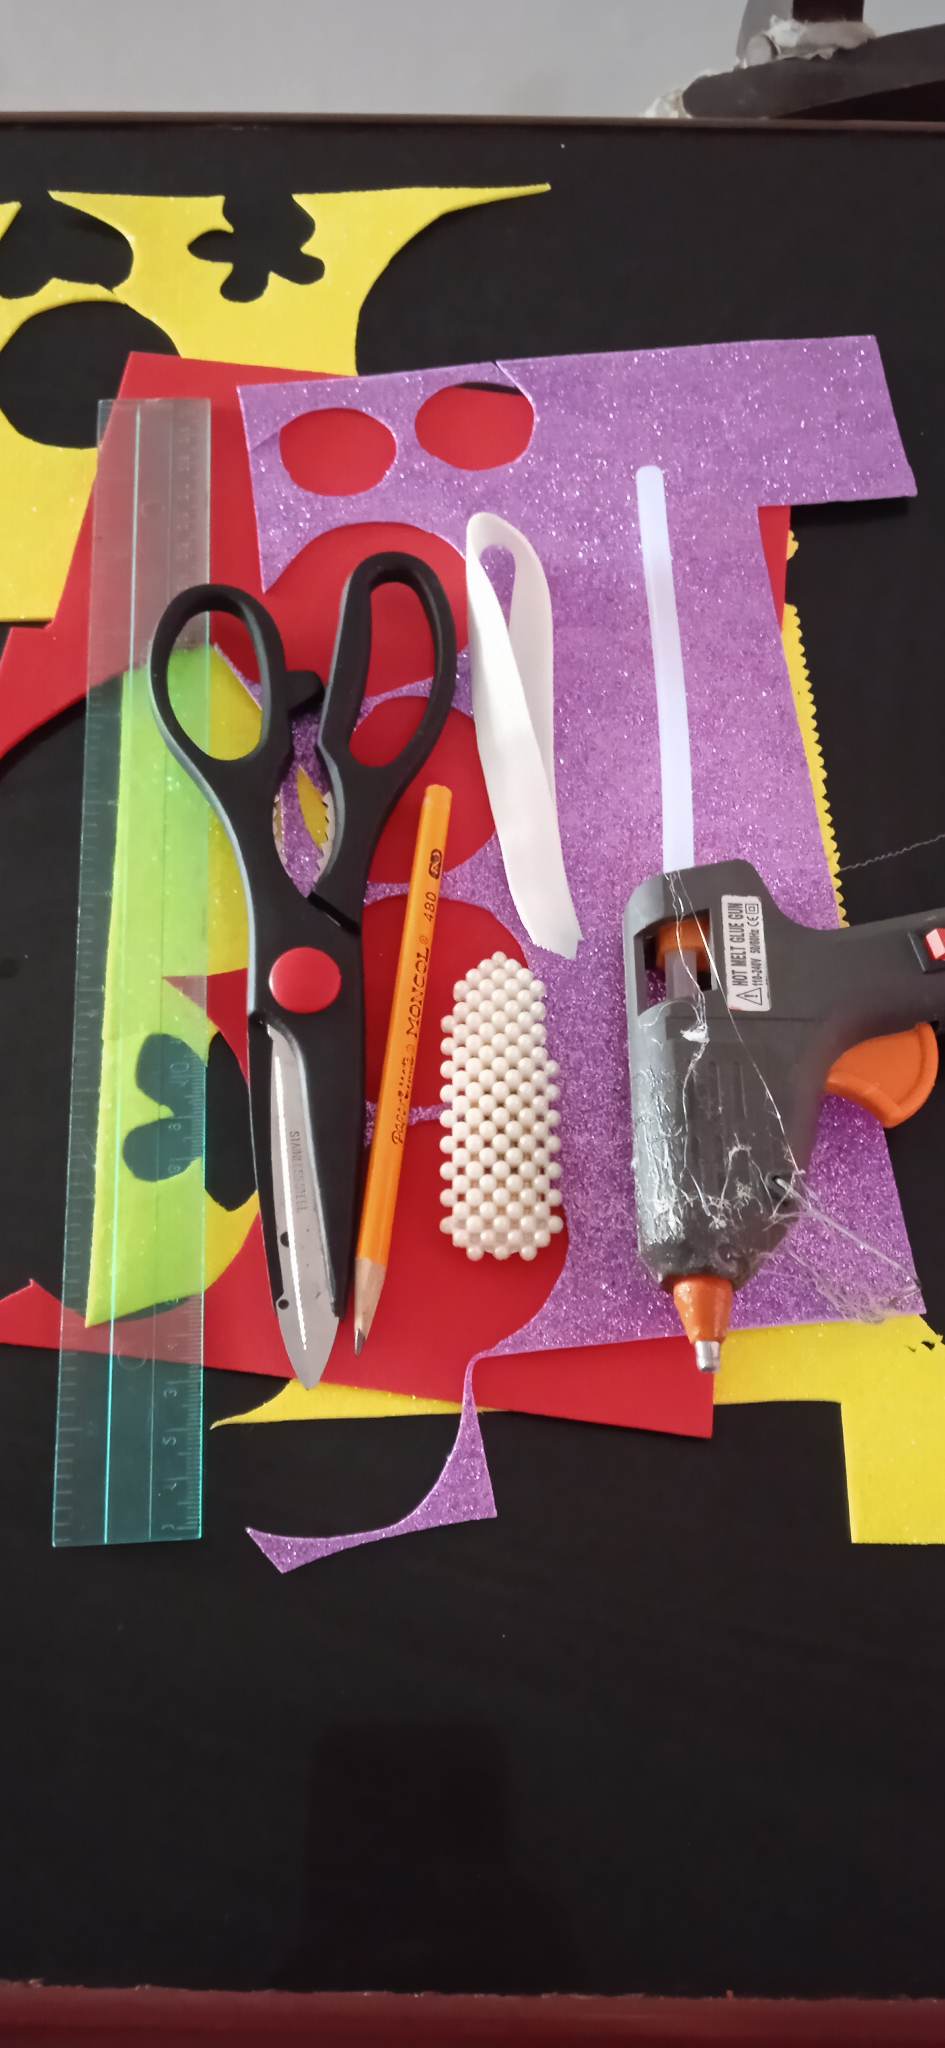
- Los materiales a utilizar son:
- Foami de 3 colores ( amarillo, rojo, y morado).
- Silicón en barra.
- Tijera.
- Regla.
- Lápiz.
- Elástica.
- Piedras decorativas.
- The materials to be used are:
- Foami of 3 colors ( yellow, red, and purple).
- Silicone stick.
- Scissors.
- Ruler.
- Pencil.
- Elastic band.
- Decorative stones.
.jpg)
.jpg)
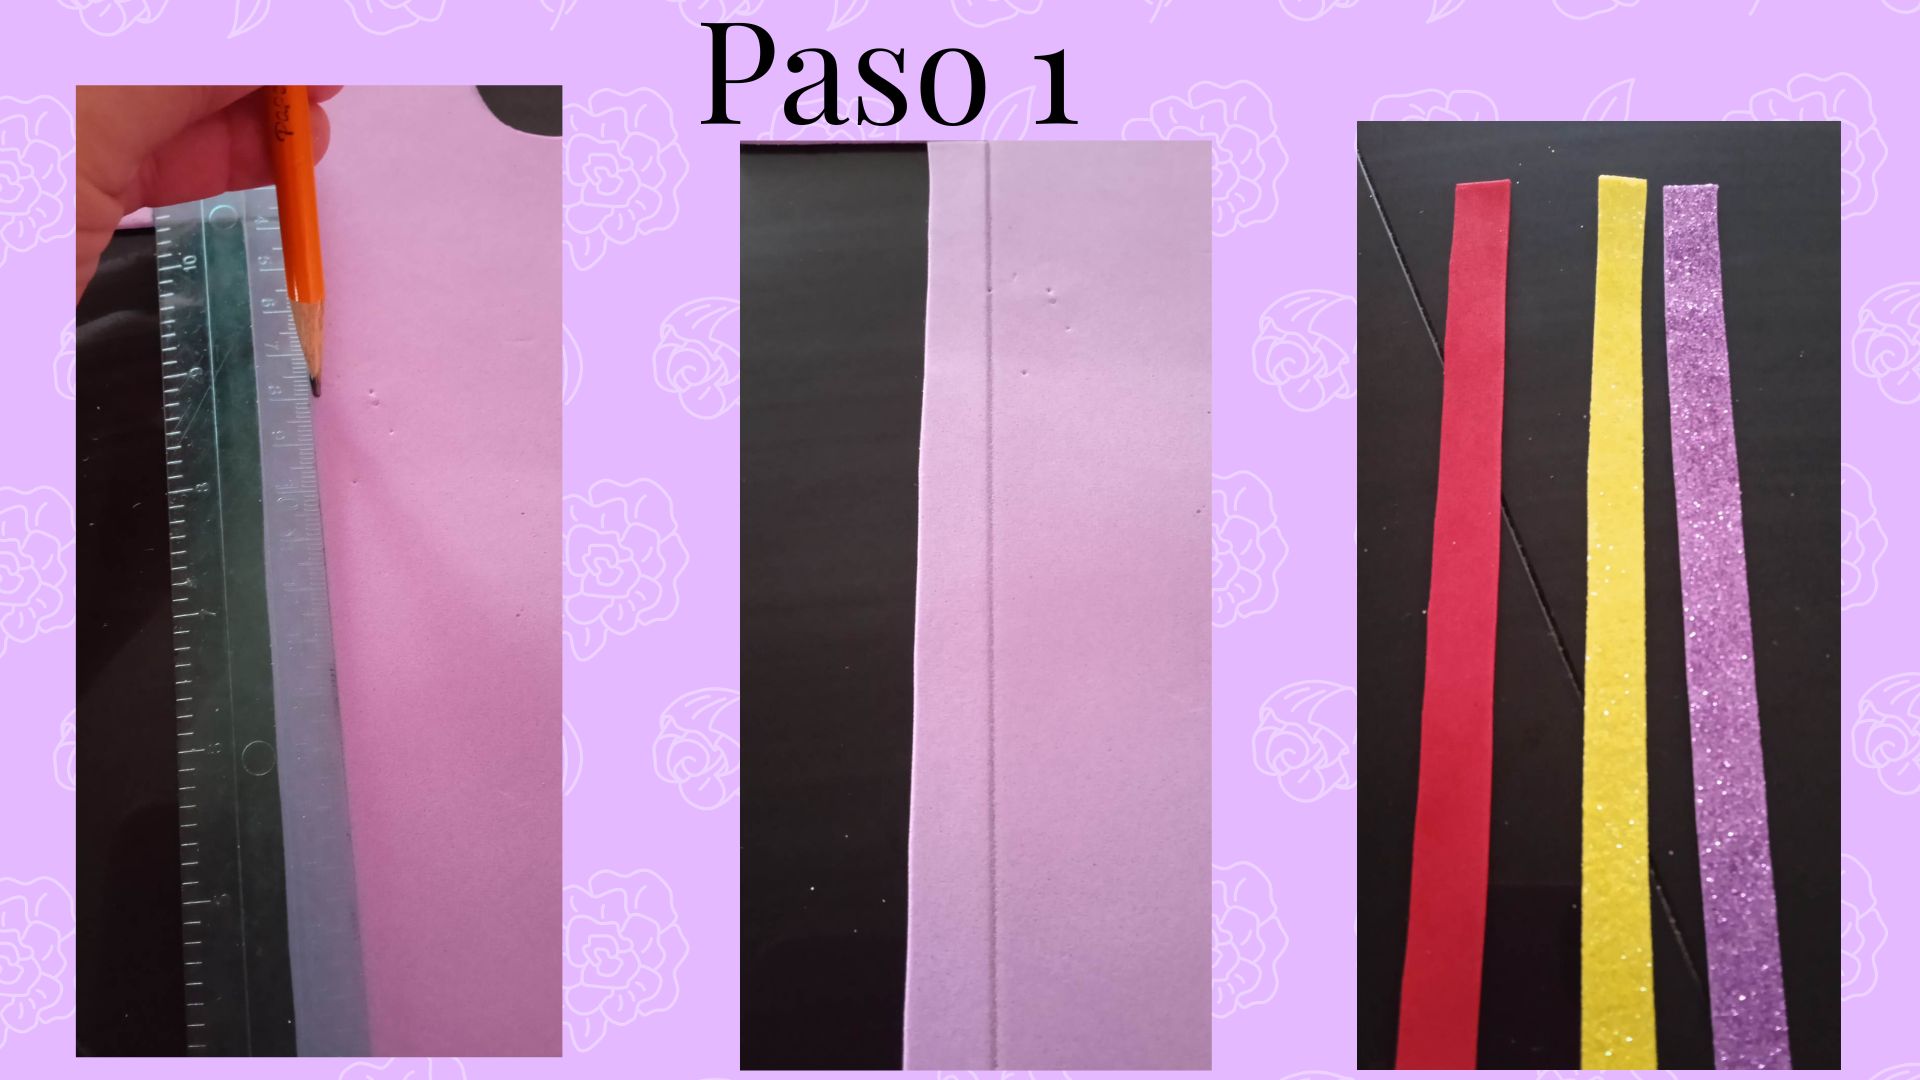
- Paso 1: Lo primero que debemos hacer para la elaboración de este cintillo es marcar en cada uno de los foami las mismas medidas de 1 cm de ancho por 25 cm de largo, una vez marcadas procedemos a recortar las tiras sacando tres piezas iguales.
- Step 1: The first thing we must do to make this headband is to mark on each of the foami the same measures of 1 cm wide by 25 cm long, once marked proceed to cut the strips taking out three equal pieces.
.jpg)
.jpg)
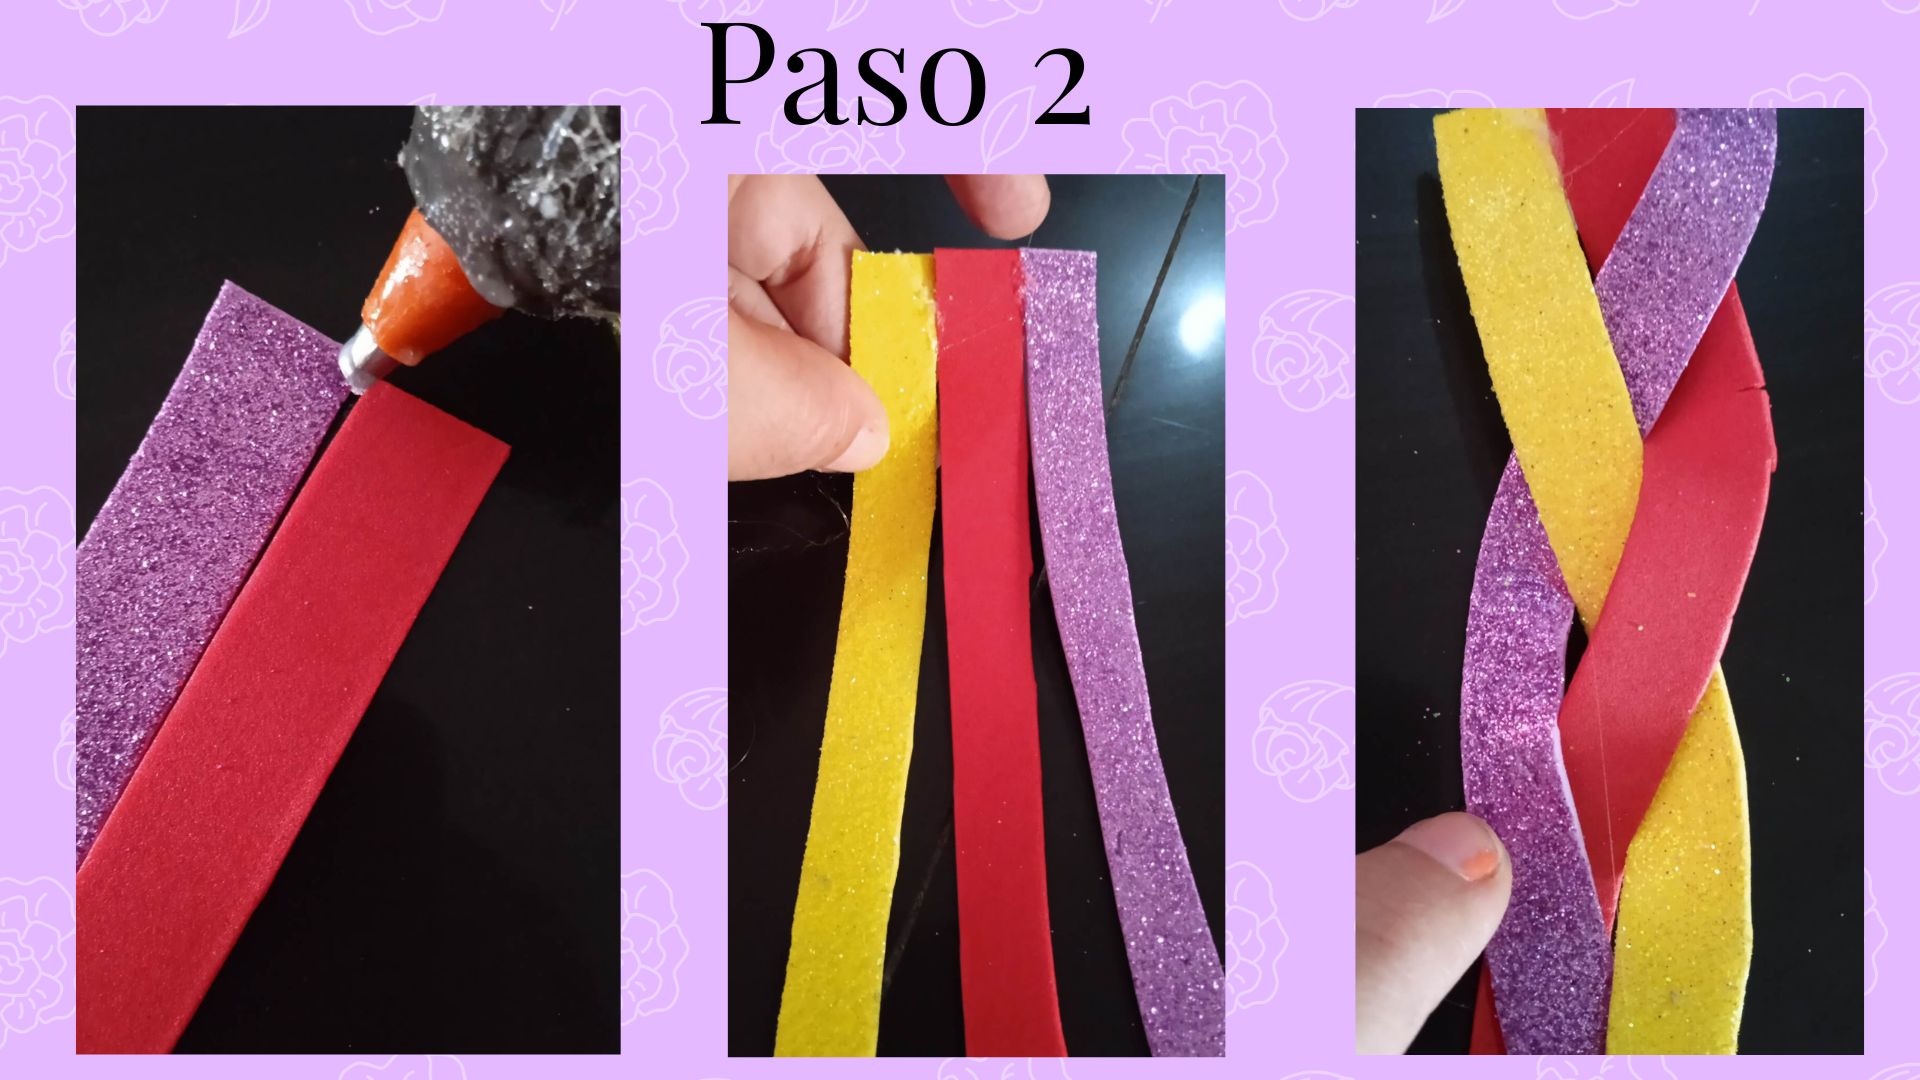
- Paso 2: Luego de tener las 3 piezas las pegamos una a una solo en un extremo, deberá quedar tal cual muestra la segunda imágen, posteriormente procedemos al trenzado del cintilo pasando las tiras una por debajo de la otra hasta terminarlas todas.
- Step 2: After having the 3 pieces we glue them one by one only at one end, it should be as shown in the second image, then proceed to the braiding of the headband passing the strips one below the other until finishing them all.
.jpg)
.jpg)
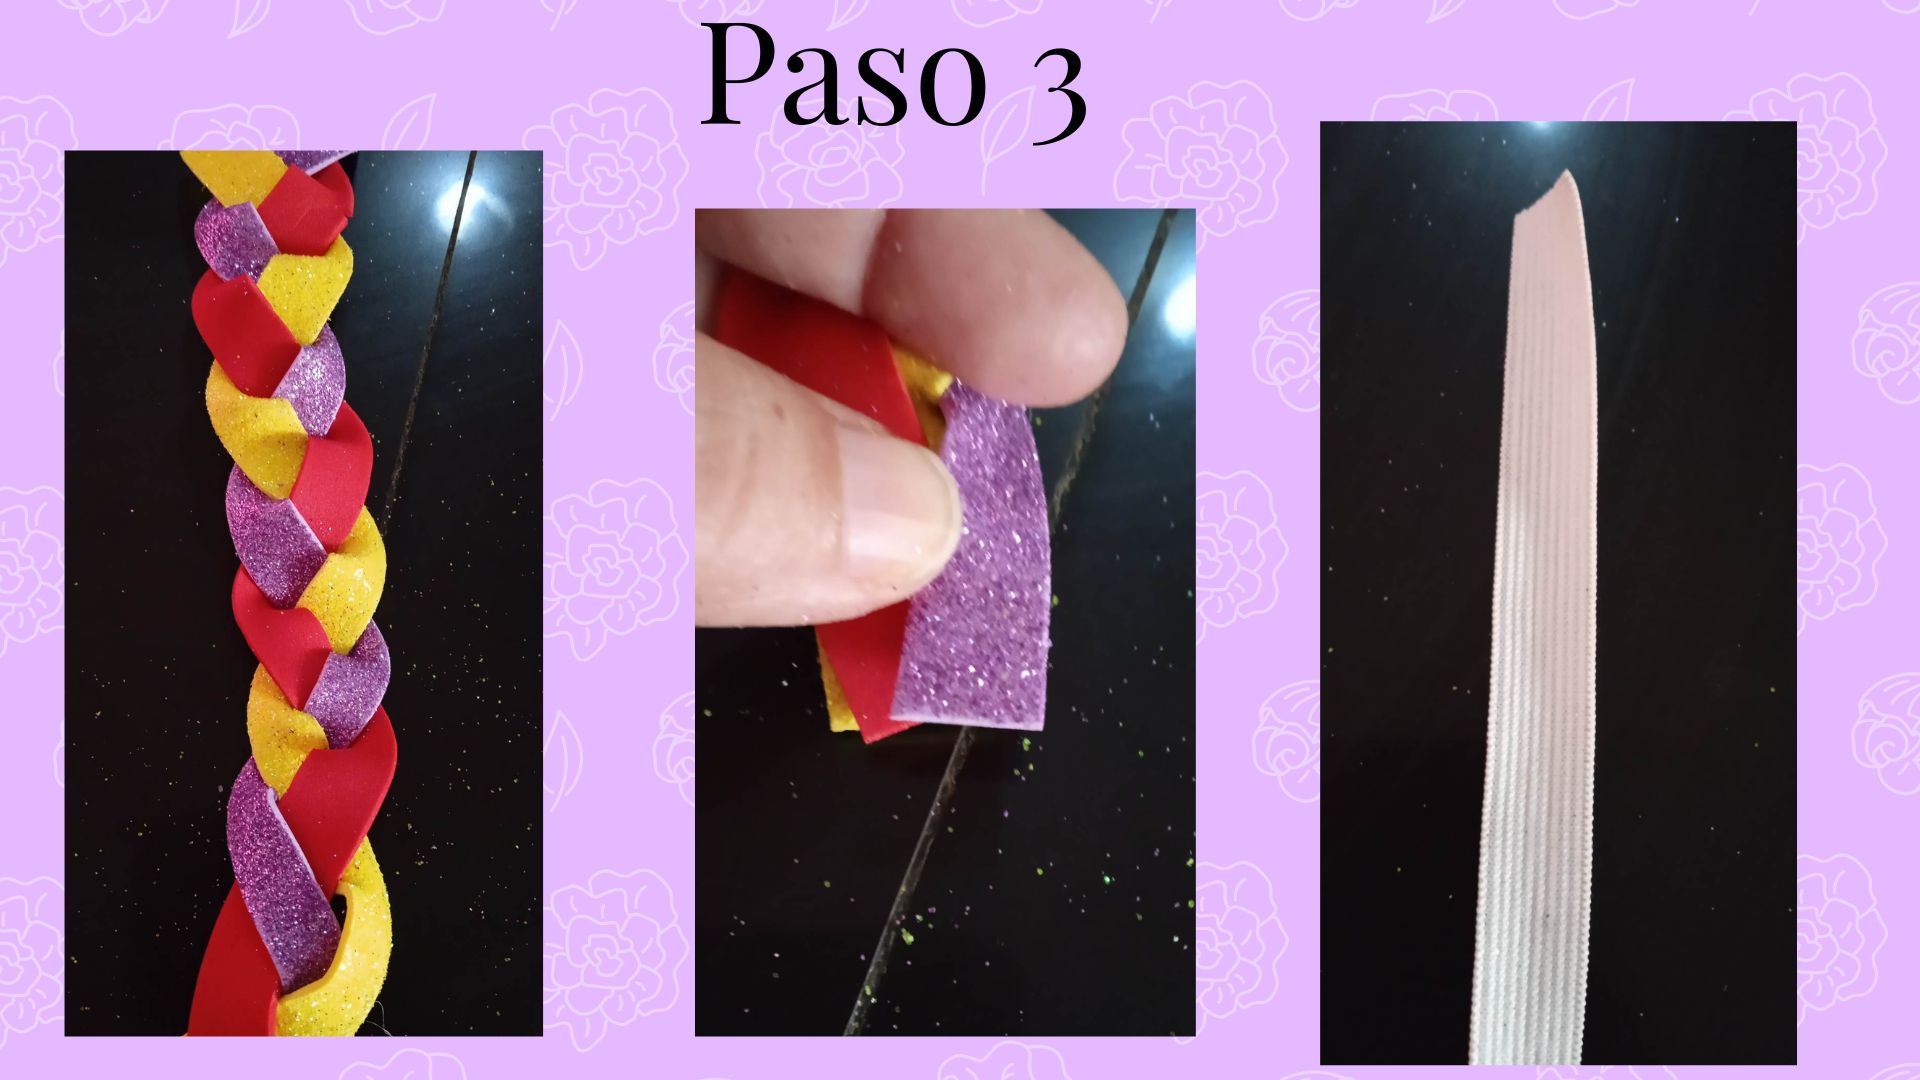
- Paso 3: Al terminar de hacer el trenzado lo estiramos para acomodarlo un poco y el otro extremo lo pegamos con el silicón uno a uno, seguidamente cortamos una pedazo de elástica de apróximadamente 15 cm.
- Step 3: Once the braid is finished we stretch it to accommodate it a little and the other end we glue it with the silicone one by one, then we cut a piece of elastic about 15 cm long.
.jpg)
.jpg)
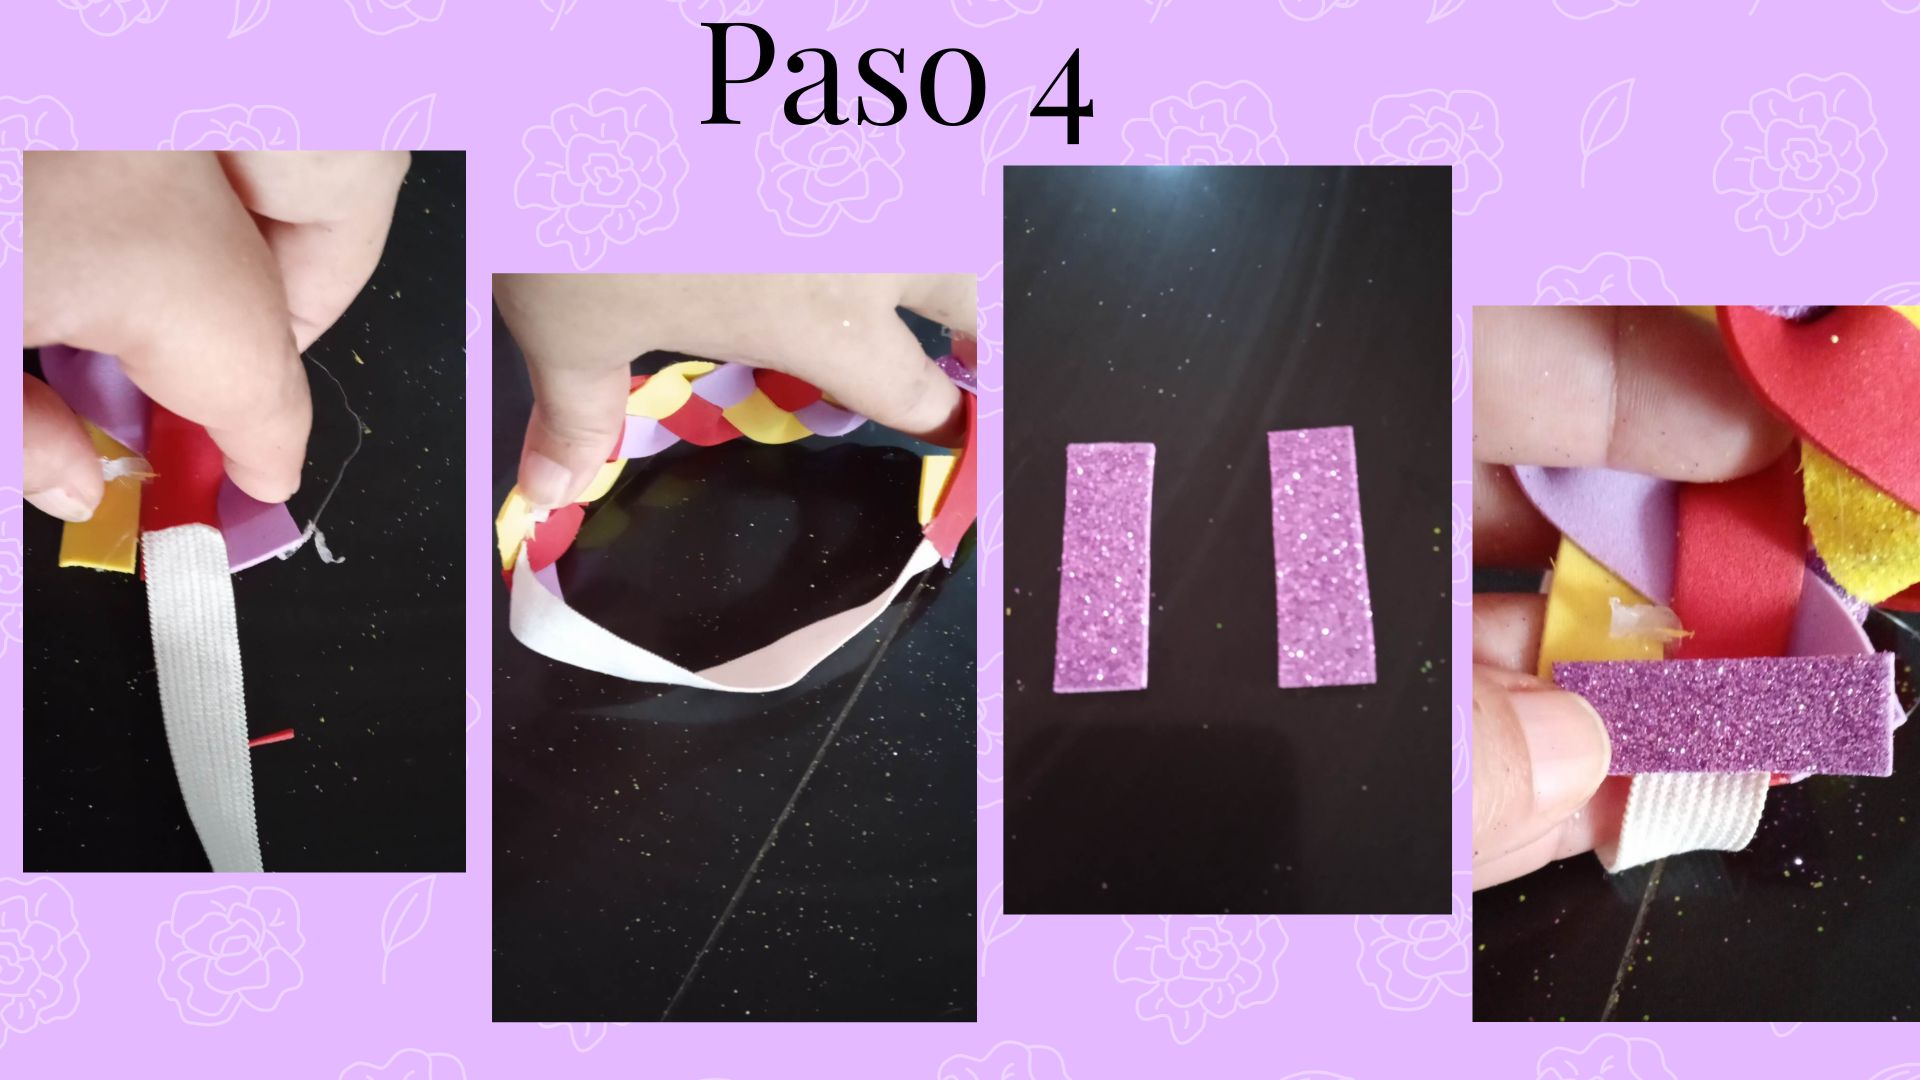
- Paso 4: Al tener la elástica la pegamos en la parte de adentro en cada extremo del cintillo, recortamos 2 pedacitos de foami del color de su preferencia, del mismo largo que el extremo del cintillo y pegamos para cubrir la unión de la elástica y el cintillo.
- Step 4: Once we have the elastic, we glue it on the inside at each end of the headband, cut out 2 pieces of foami of the color of your choice, of the same length as the end of the headband and glue to cover the union of the elastic and the headband.
.jpg)
.jpg)
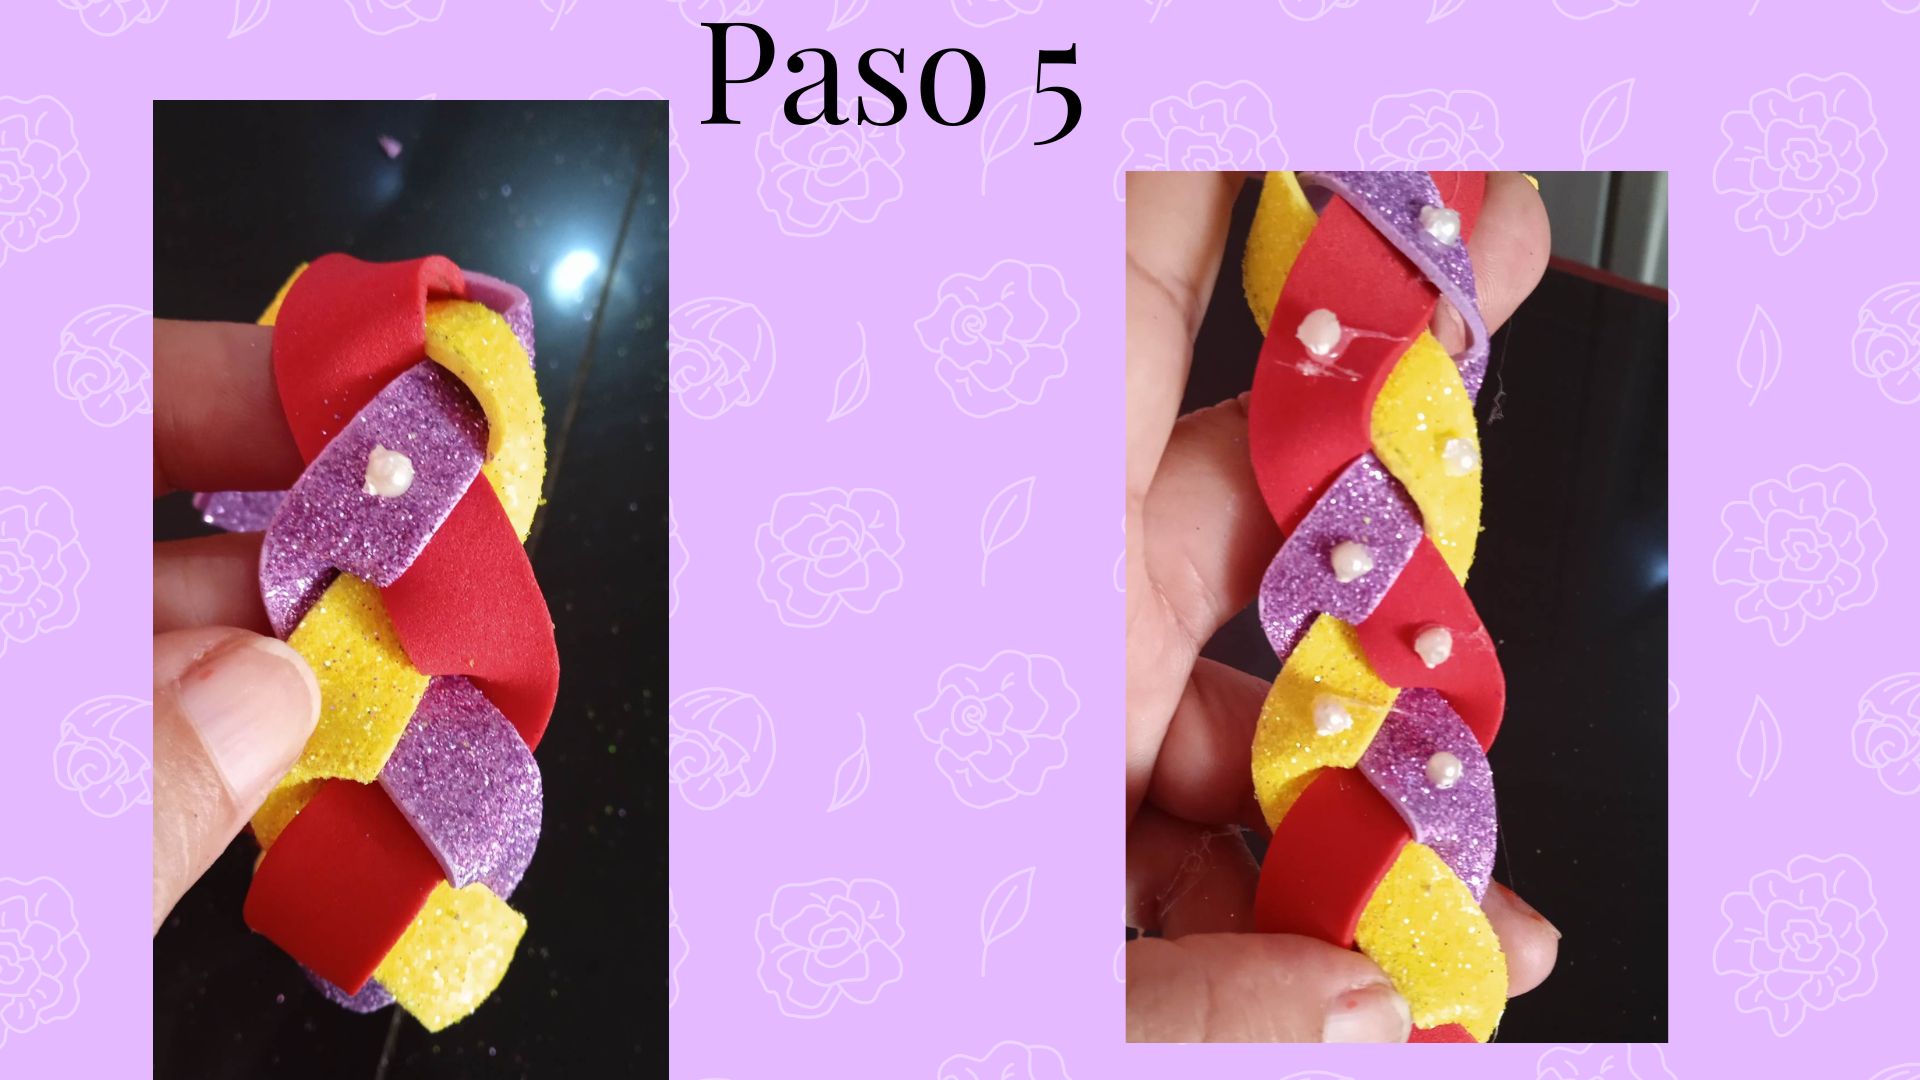
- Paso 5: Para terminar con este precioso cintillo lo que debemos hacer es pegar las piedritas decorativas en cada parte del cintillo, si usted desea utilizar otro adorno de su preferencia también lo puede hacer, yo utilicé estas piedritas porque me gustan mucho y además le da un toque de elegancia a todo tipo de accesorios que vayamos a utilizar.
Espero que este nuevo tutorial sea de su agrado y los invito a realizar este tipo de cintillo, la verdad que quedan muy bonitos además que es muy colorido, sencillo y fácil de realizar y los materiales son de provecho, además lo podemos realizar también para obsequiarlo bien sea a una sobrina, ahijada, vecina, además de esto es muy juvenil.
- Step 5: To finish with this beautiful headband what we must do is paste the decorative pebbles in each part of the headband, if you want to use another ornament of your preference you can also do it, I used these pebbles because I like them very much and also gives a touch of elegance to all kinds of accessories that we are going to use.
I hope this new tutorial is to your liking and I invite you to make this type of headband, the truth is that they are very nice plus it is very colorful, simple and easy to perform and the materials are of benefit, plus we can also make it to give it as a gift either to a niece, goddaughter, neighbor, besides this is very youthful.
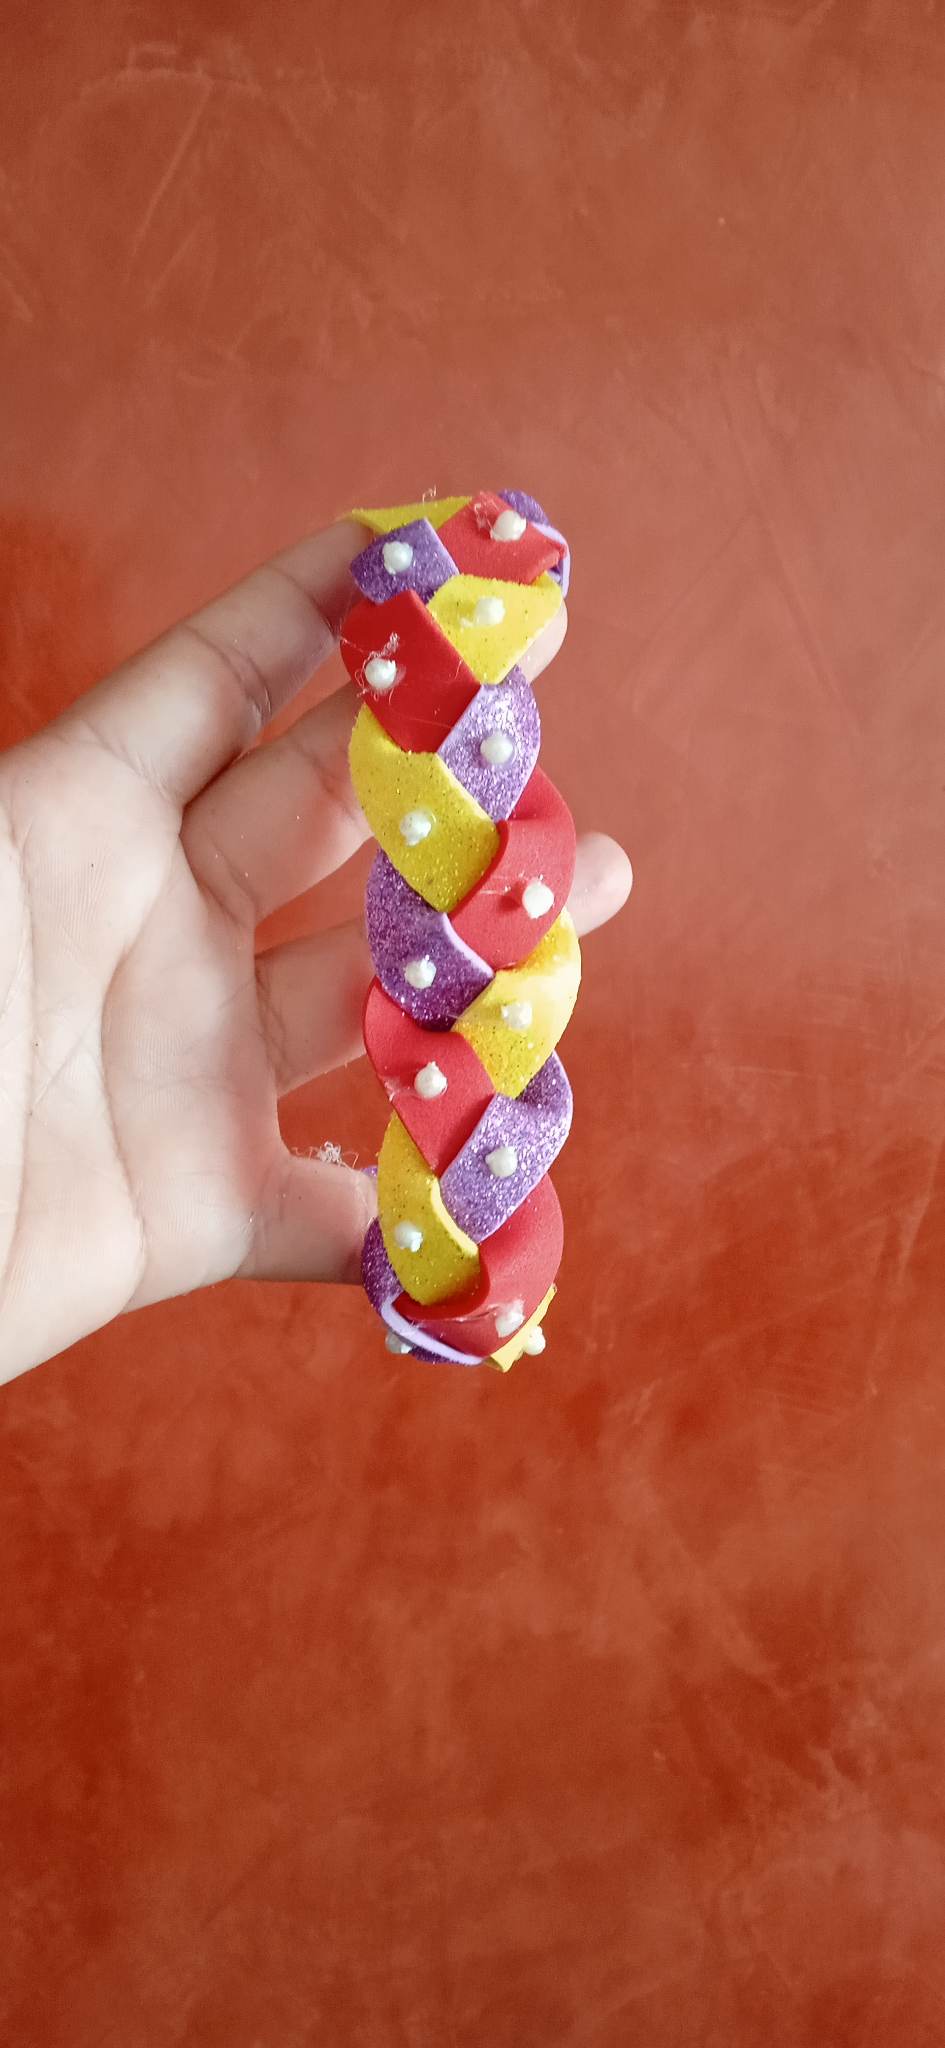
.jpg) Aqui tenemos nuestro resultado final.
Here we have our final result.
Aqui tenemos nuestro resultado final.
Here we have our final result.
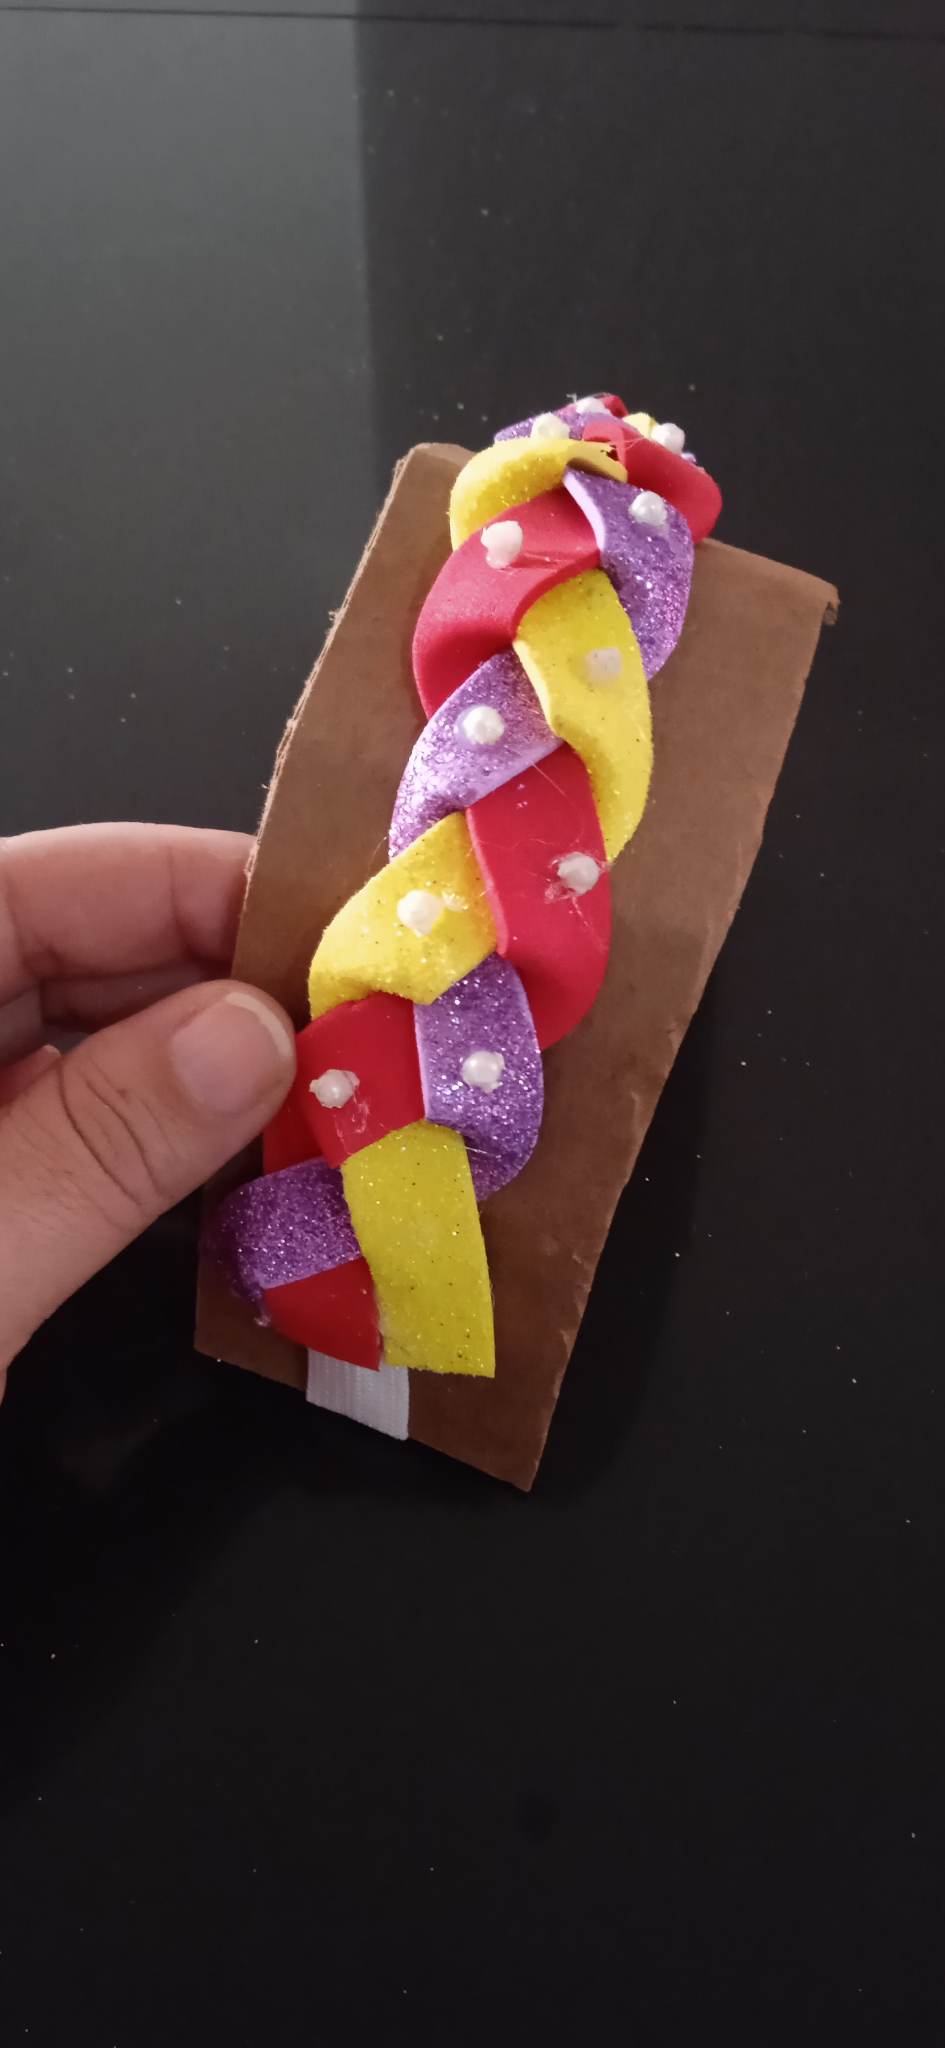
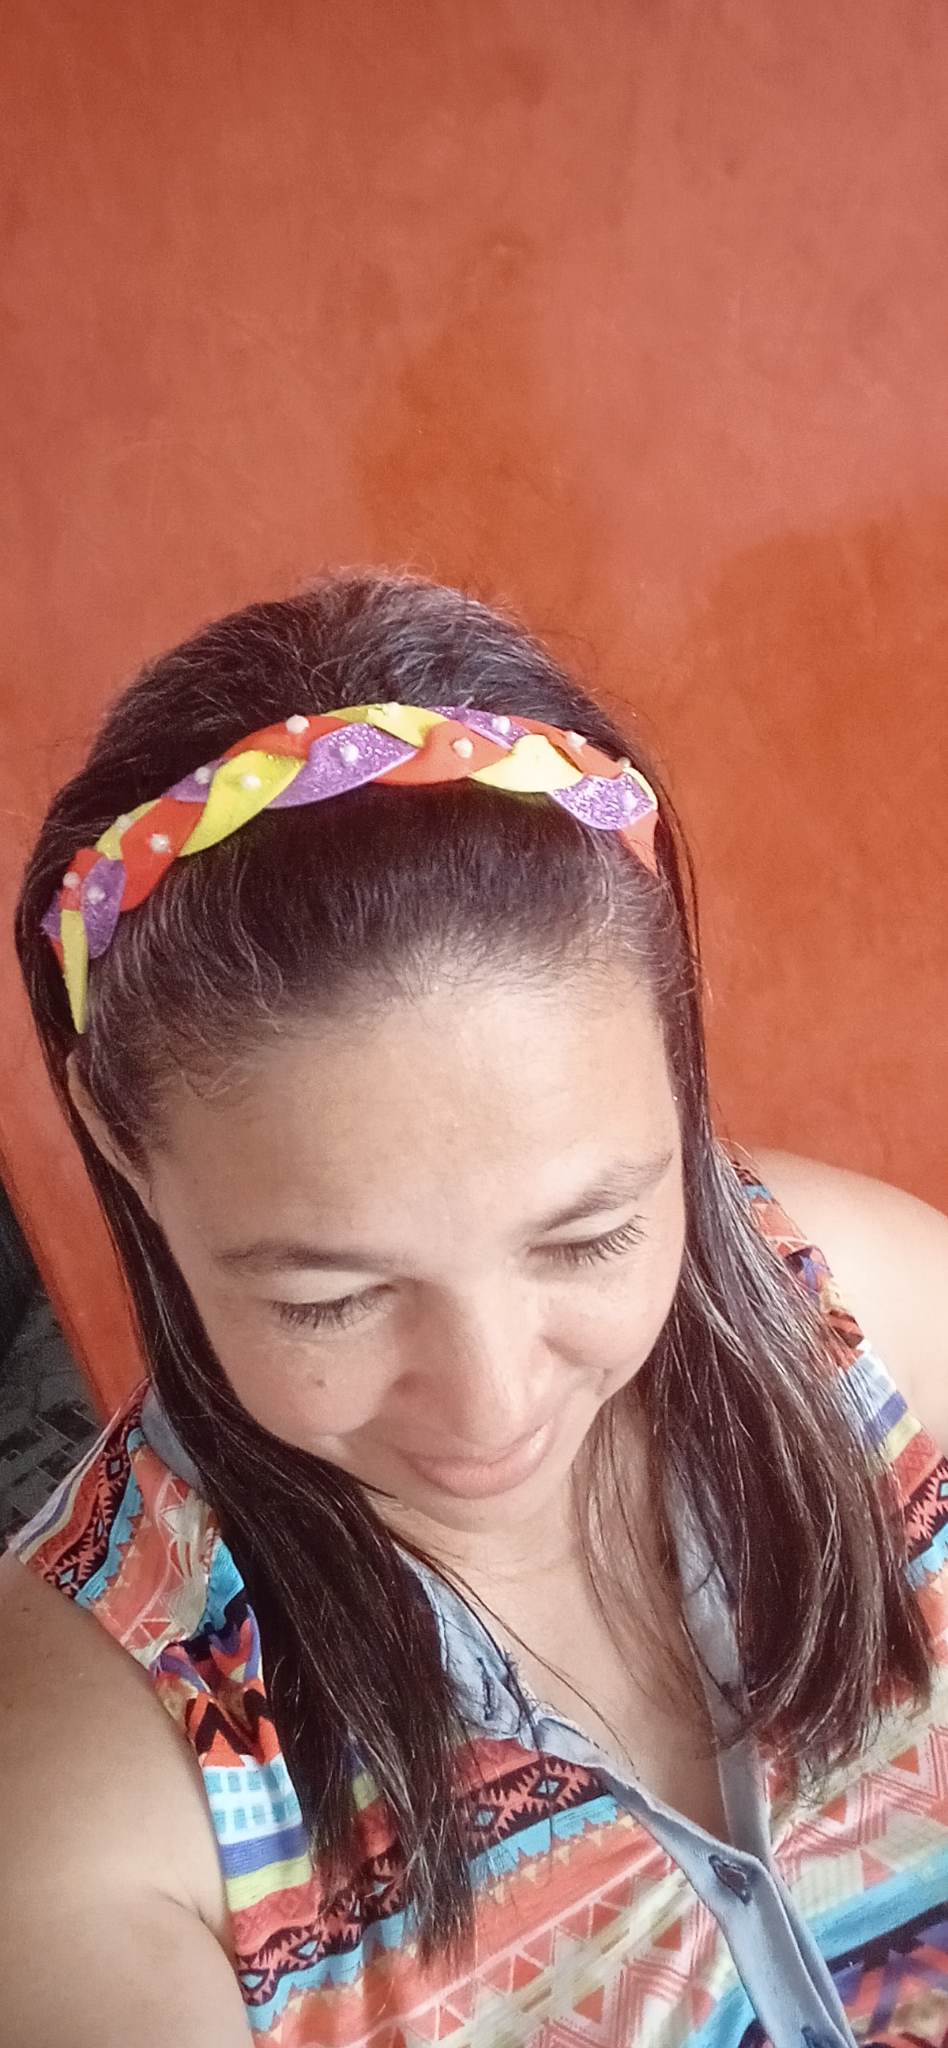

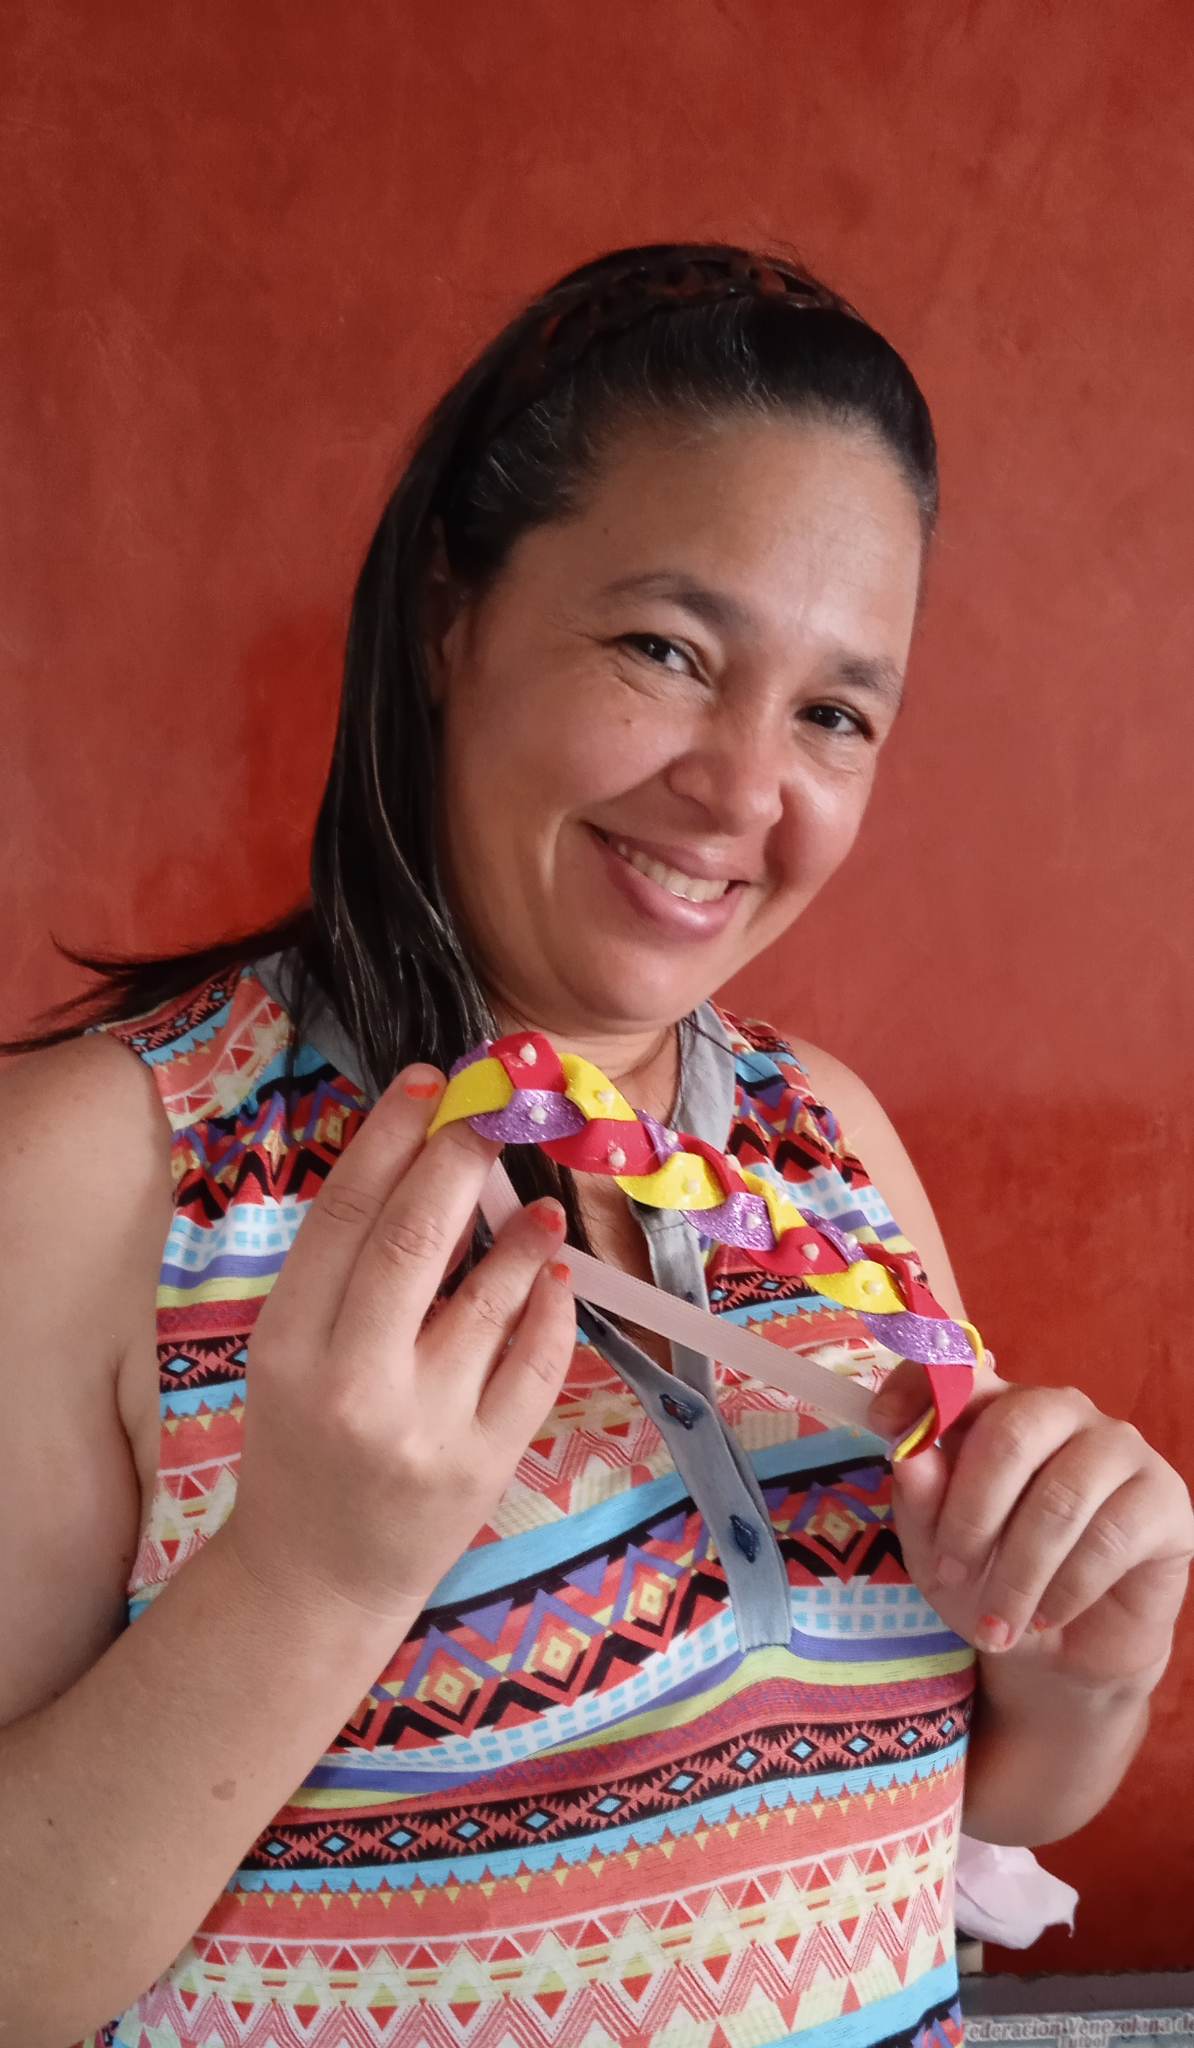
.jpg) Todas las fotos son de mi autoría, y editadas desde canva
All photos are of my authorship, and edited from canva
Todas las fotos son de mi autoría, y editadas desde canva
All photos are of my authorship, and edited from canva
.jpg)
.jpg)

.jpg)

.jpg)
.jpg)
.jpg)
.jpg)
.jpg)
.jpg)
.jpg)
.jpg)
.jpg)
.jpg)
.jpg)


.jpg)
.jpg)
.jpg)
Thank you for your witness vote!
Have a !BEER on me!
To Opt-Out of my witness beer program just comment STOP below
View or trade
BEER.Hey @yannet80, here is a little bit of
BEERfrom @isnochys for you. Enjoy it!Learn how to earn FREE BEER each day by staking your
BEER.Congratulations @yannet80! You have completed the following achievement on the Hive blockchain And have been rewarded with New badge(s)
Your next target is to reach 1000 comments.
You can view your badges on your board and compare yourself to others in the Ranking
If you no longer want to receive notifications, reply to this comment with the word
STOPCheck out our last posts:
Support the HiveBuzz project. Vote for our proposal!