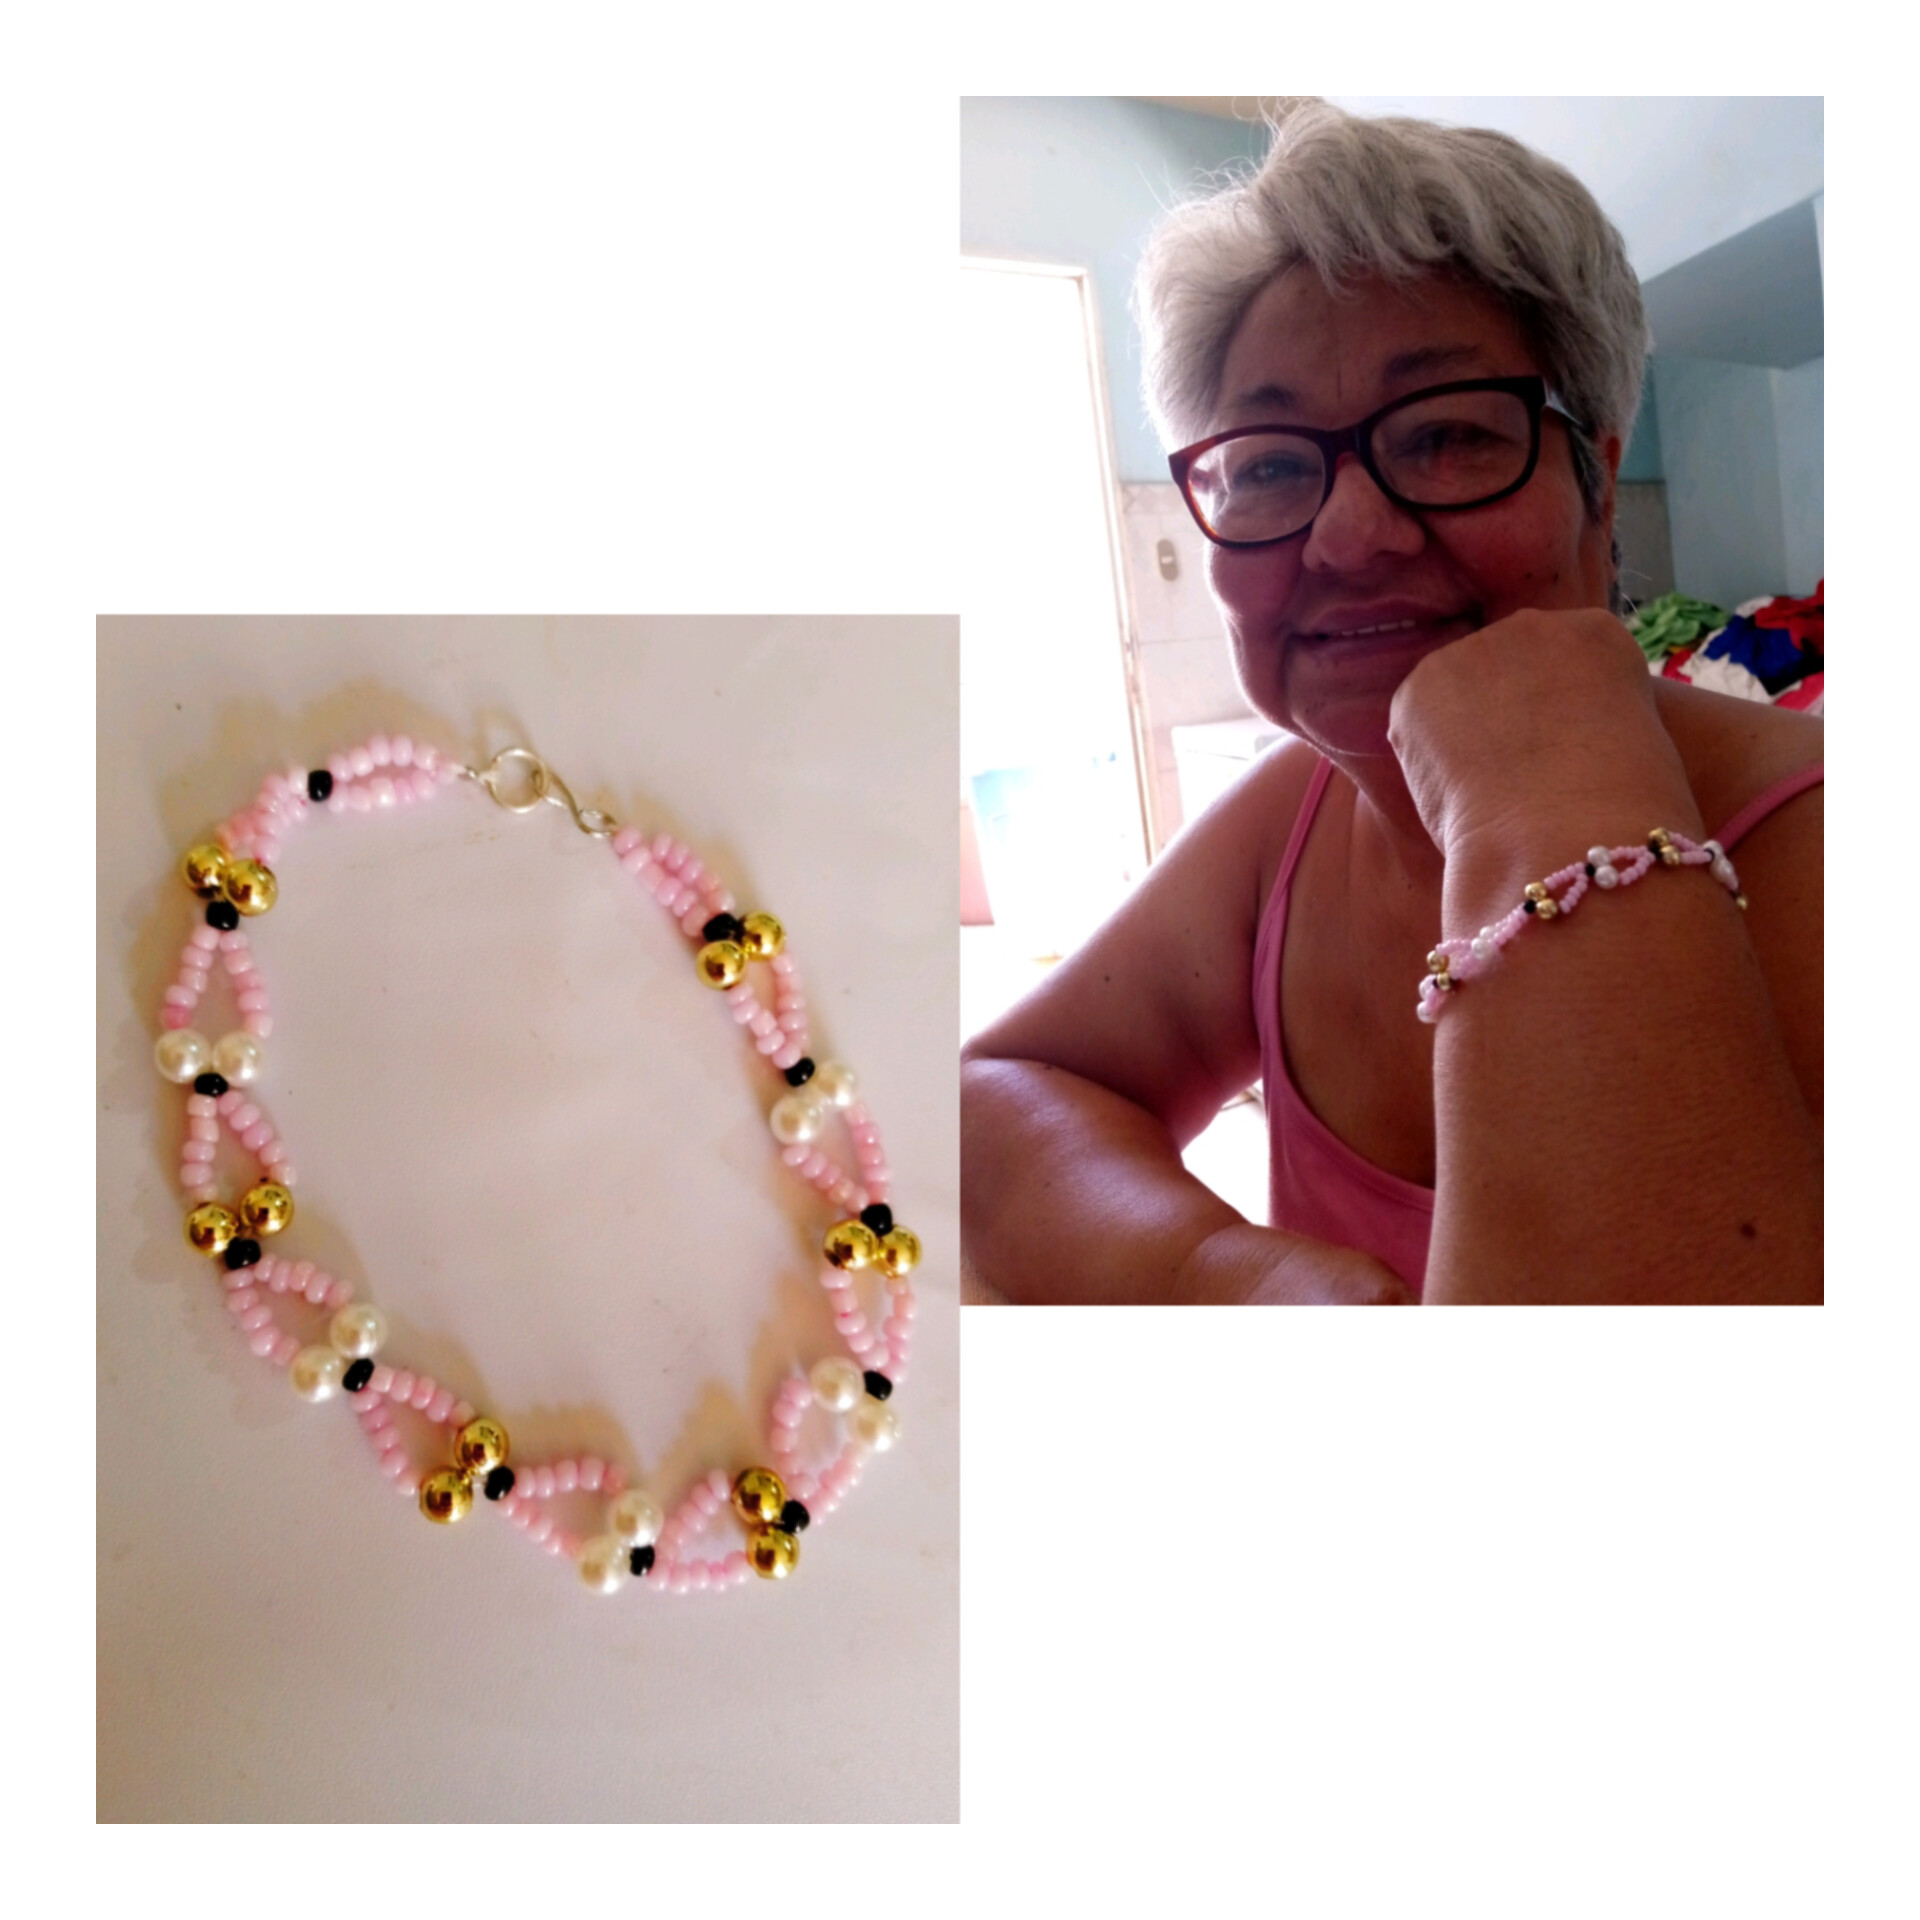
Hello my dear friends artists of this community #jewelry I wish you an excellent start of the week full of many successes, life and health with your loved ones, here I share a beautiful bracelet very youthful that I made for a daughter of a friend who is birthday and loves bracelets and rings, but I made her this bracelet, I saw a tutorial on Instagran of this model I looked much like this young girl and I looked for my materials but adapted to the personality of it.
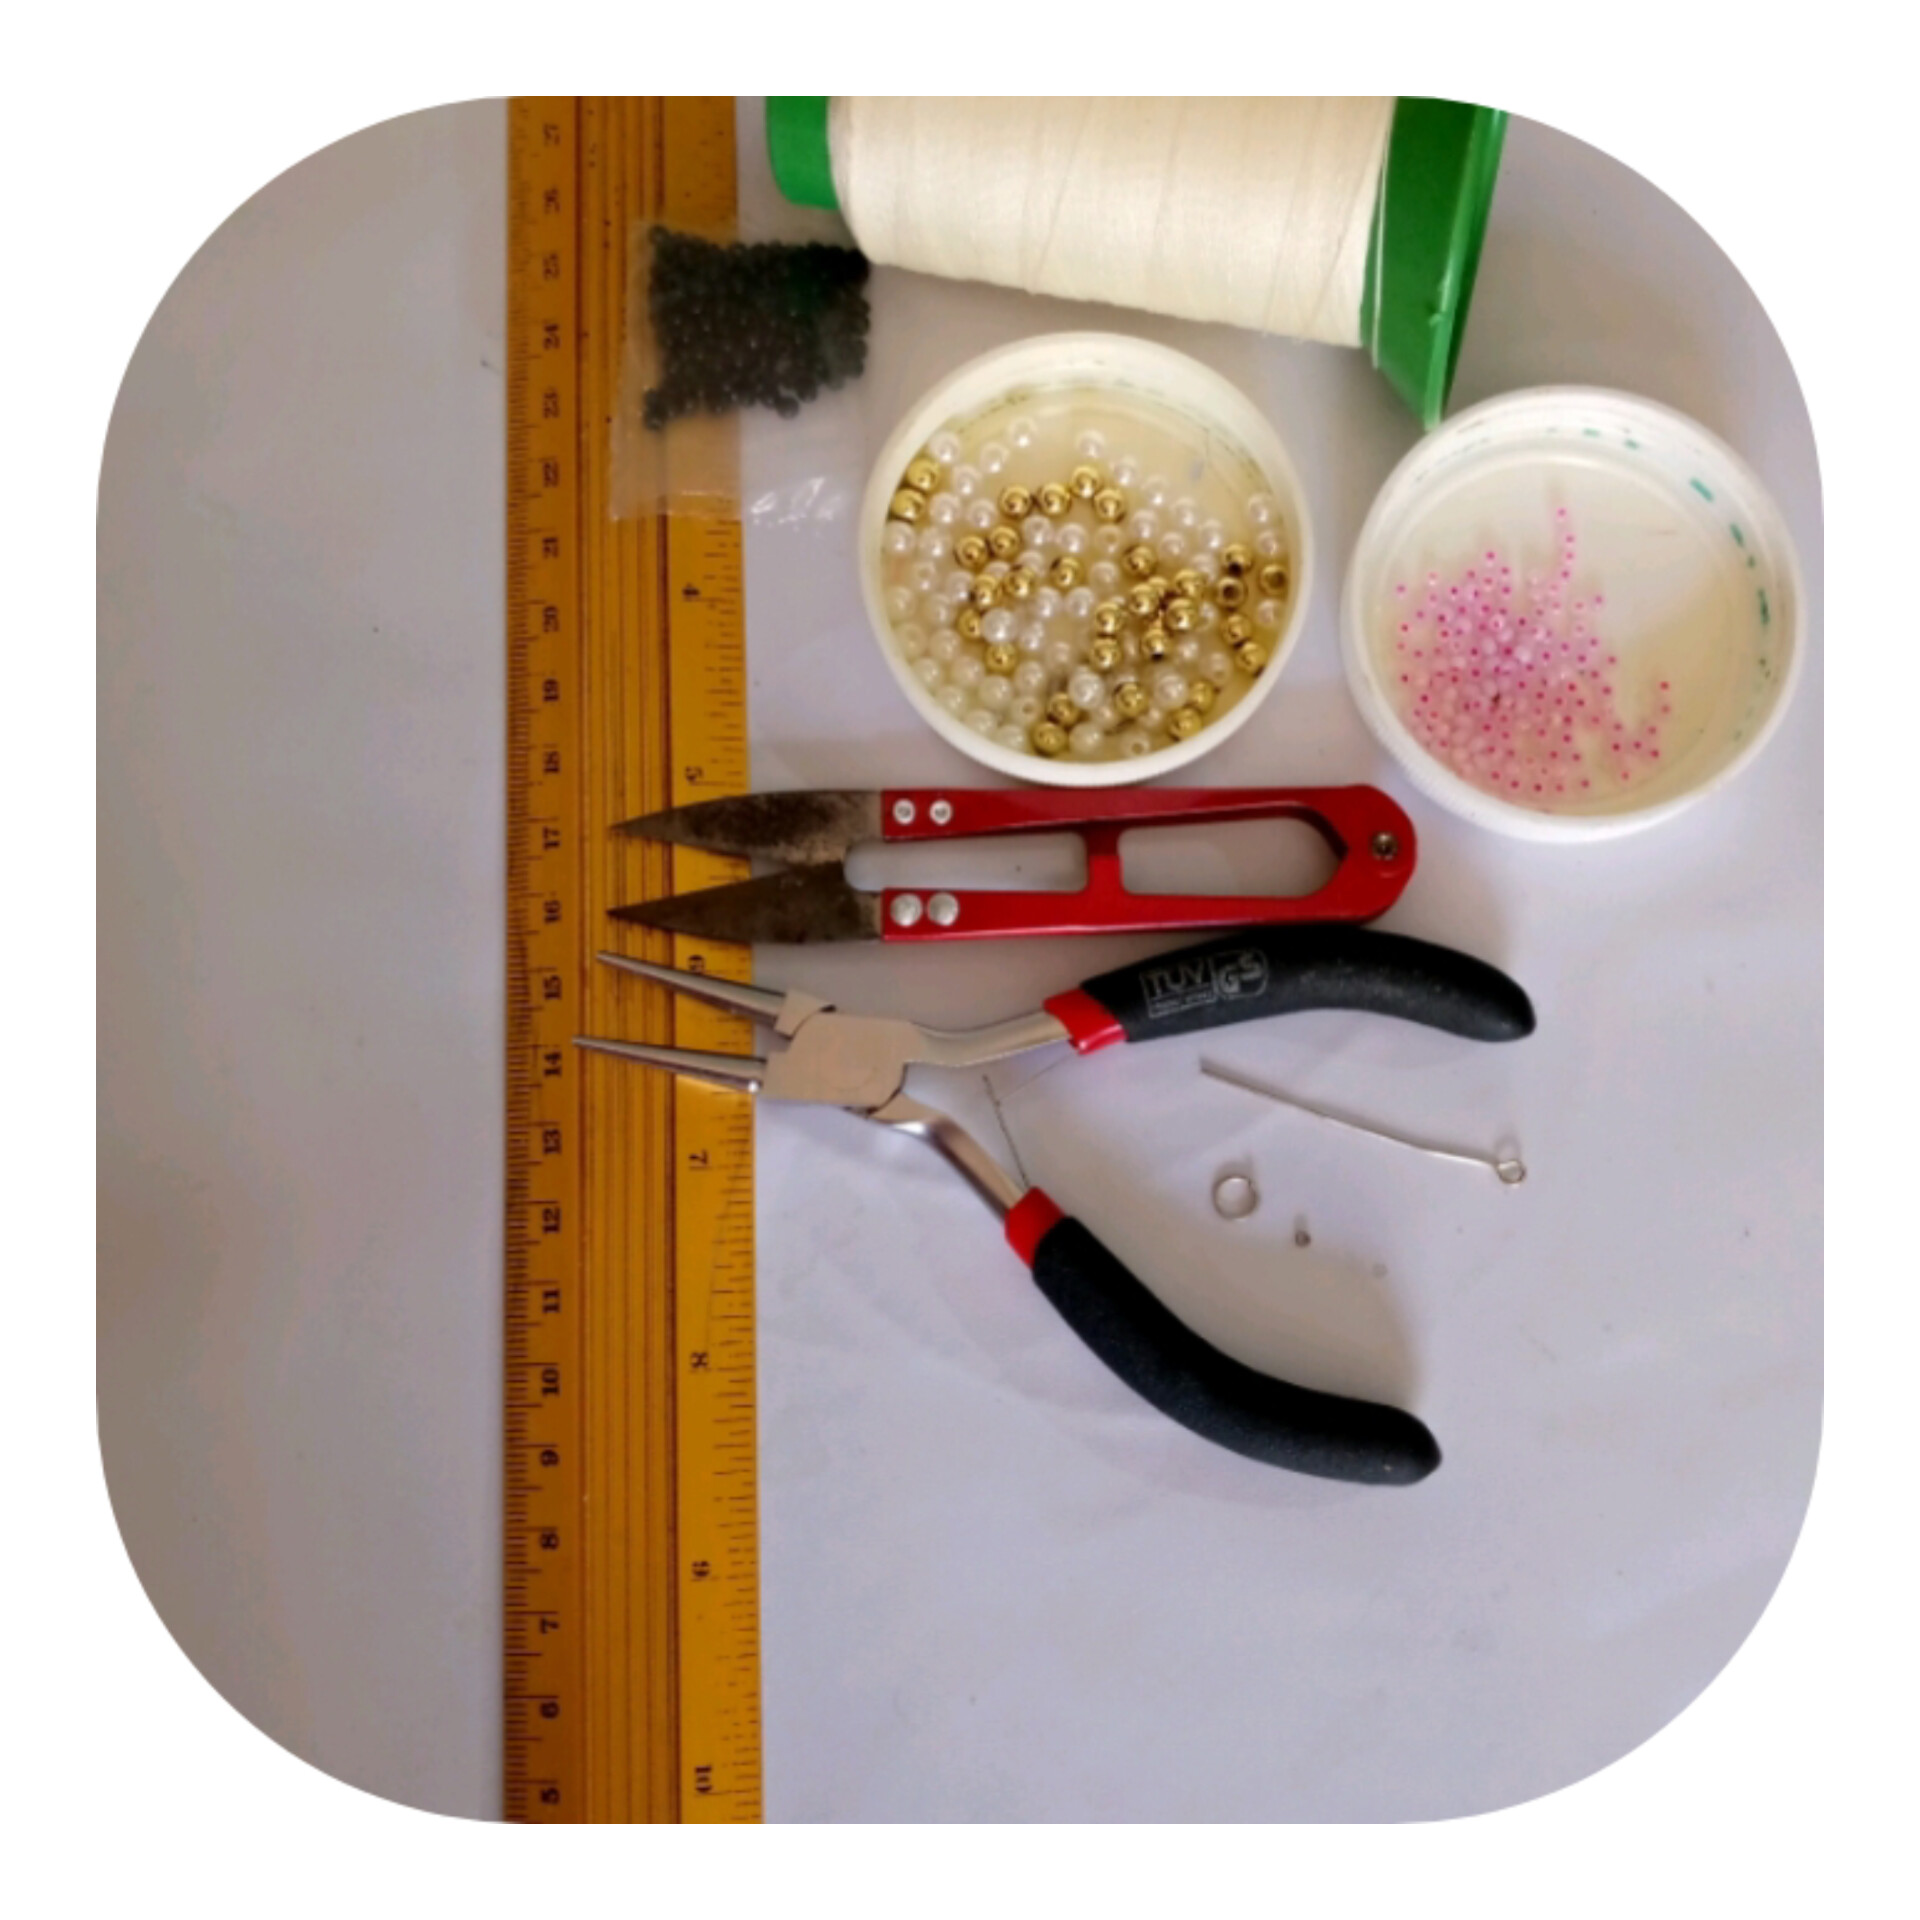
MATERIALES A UTILIZAR
MATERIALS TO BE USED
- Hilo de tapicerìa
- Tijera
- Regla
- Perlas blancas y doradas
- Alambre
- Un arito
- Mostacilla de presiòn
- Mostacillas rosaditas
- Mostacillas negras
- Pinzas de bisuterìa.
- Upholstery thread
- Scissors
- Ruler
- White and gold beads
- Wire
- A hoop
- Pressure beads
- Pink beads
- Black beads
- Jewelry tweezers.
PROCEDIMIENTO
PROCEDURE
PASO 1
STEP 1
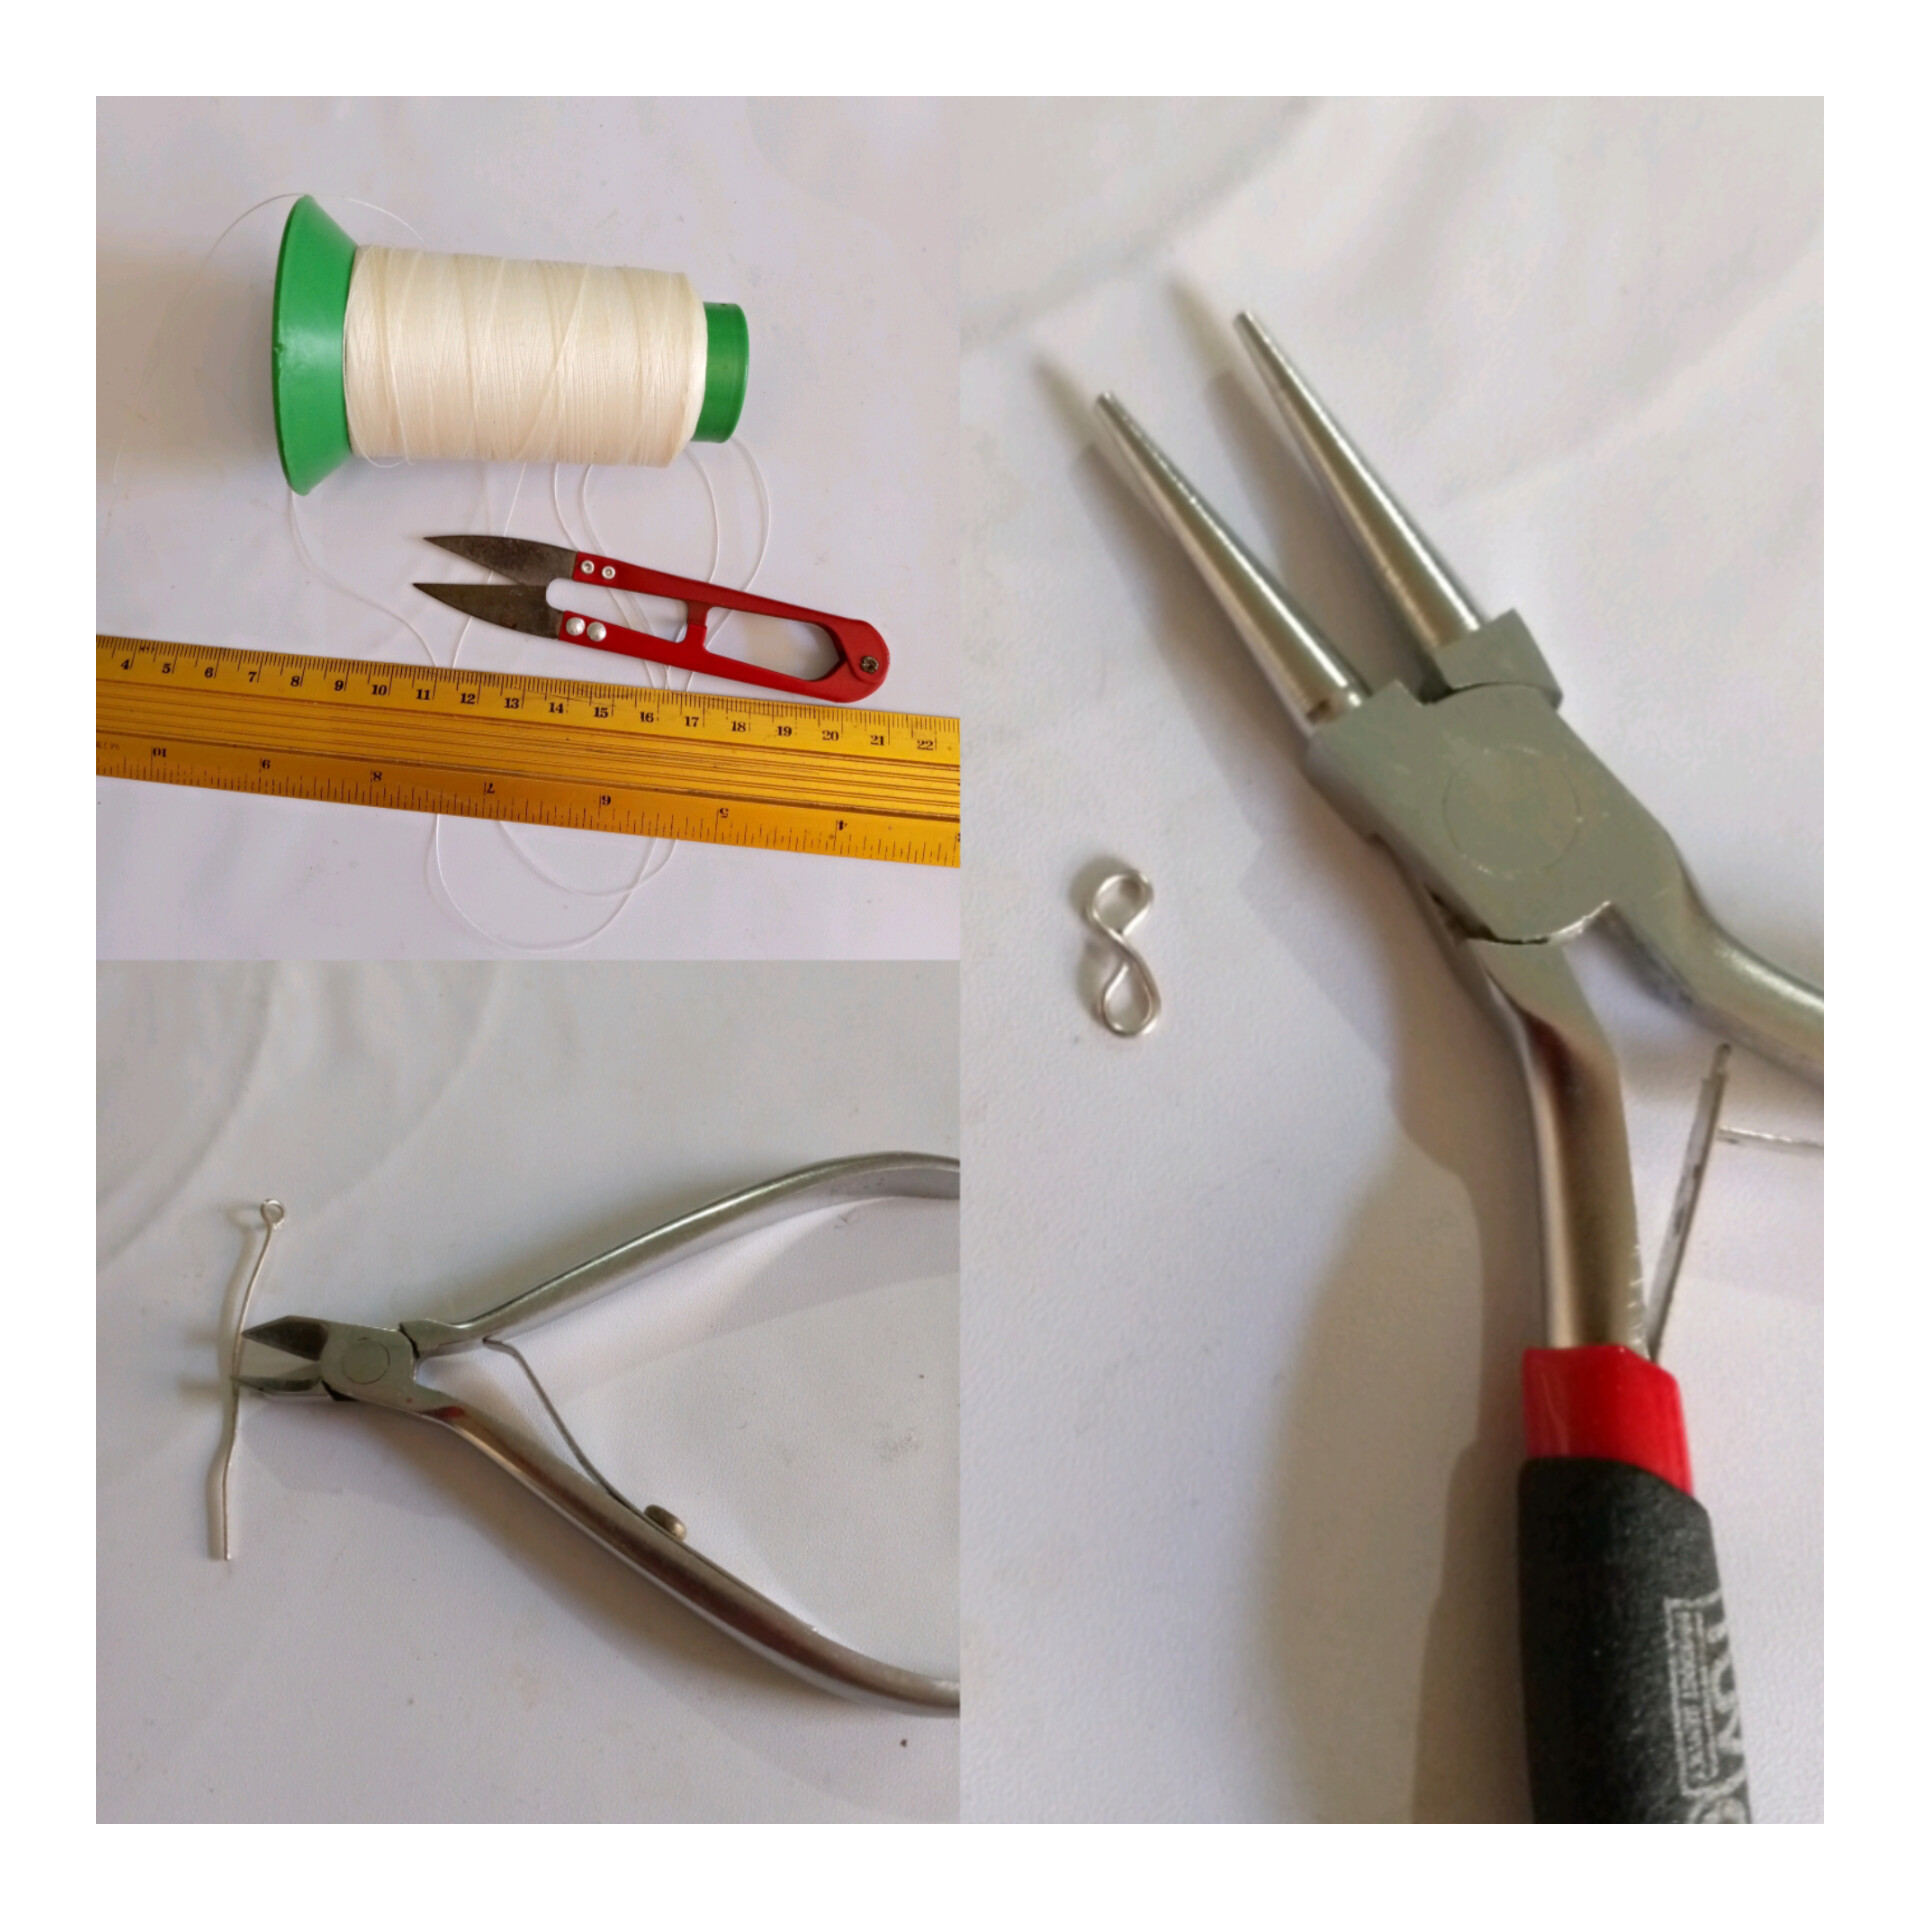
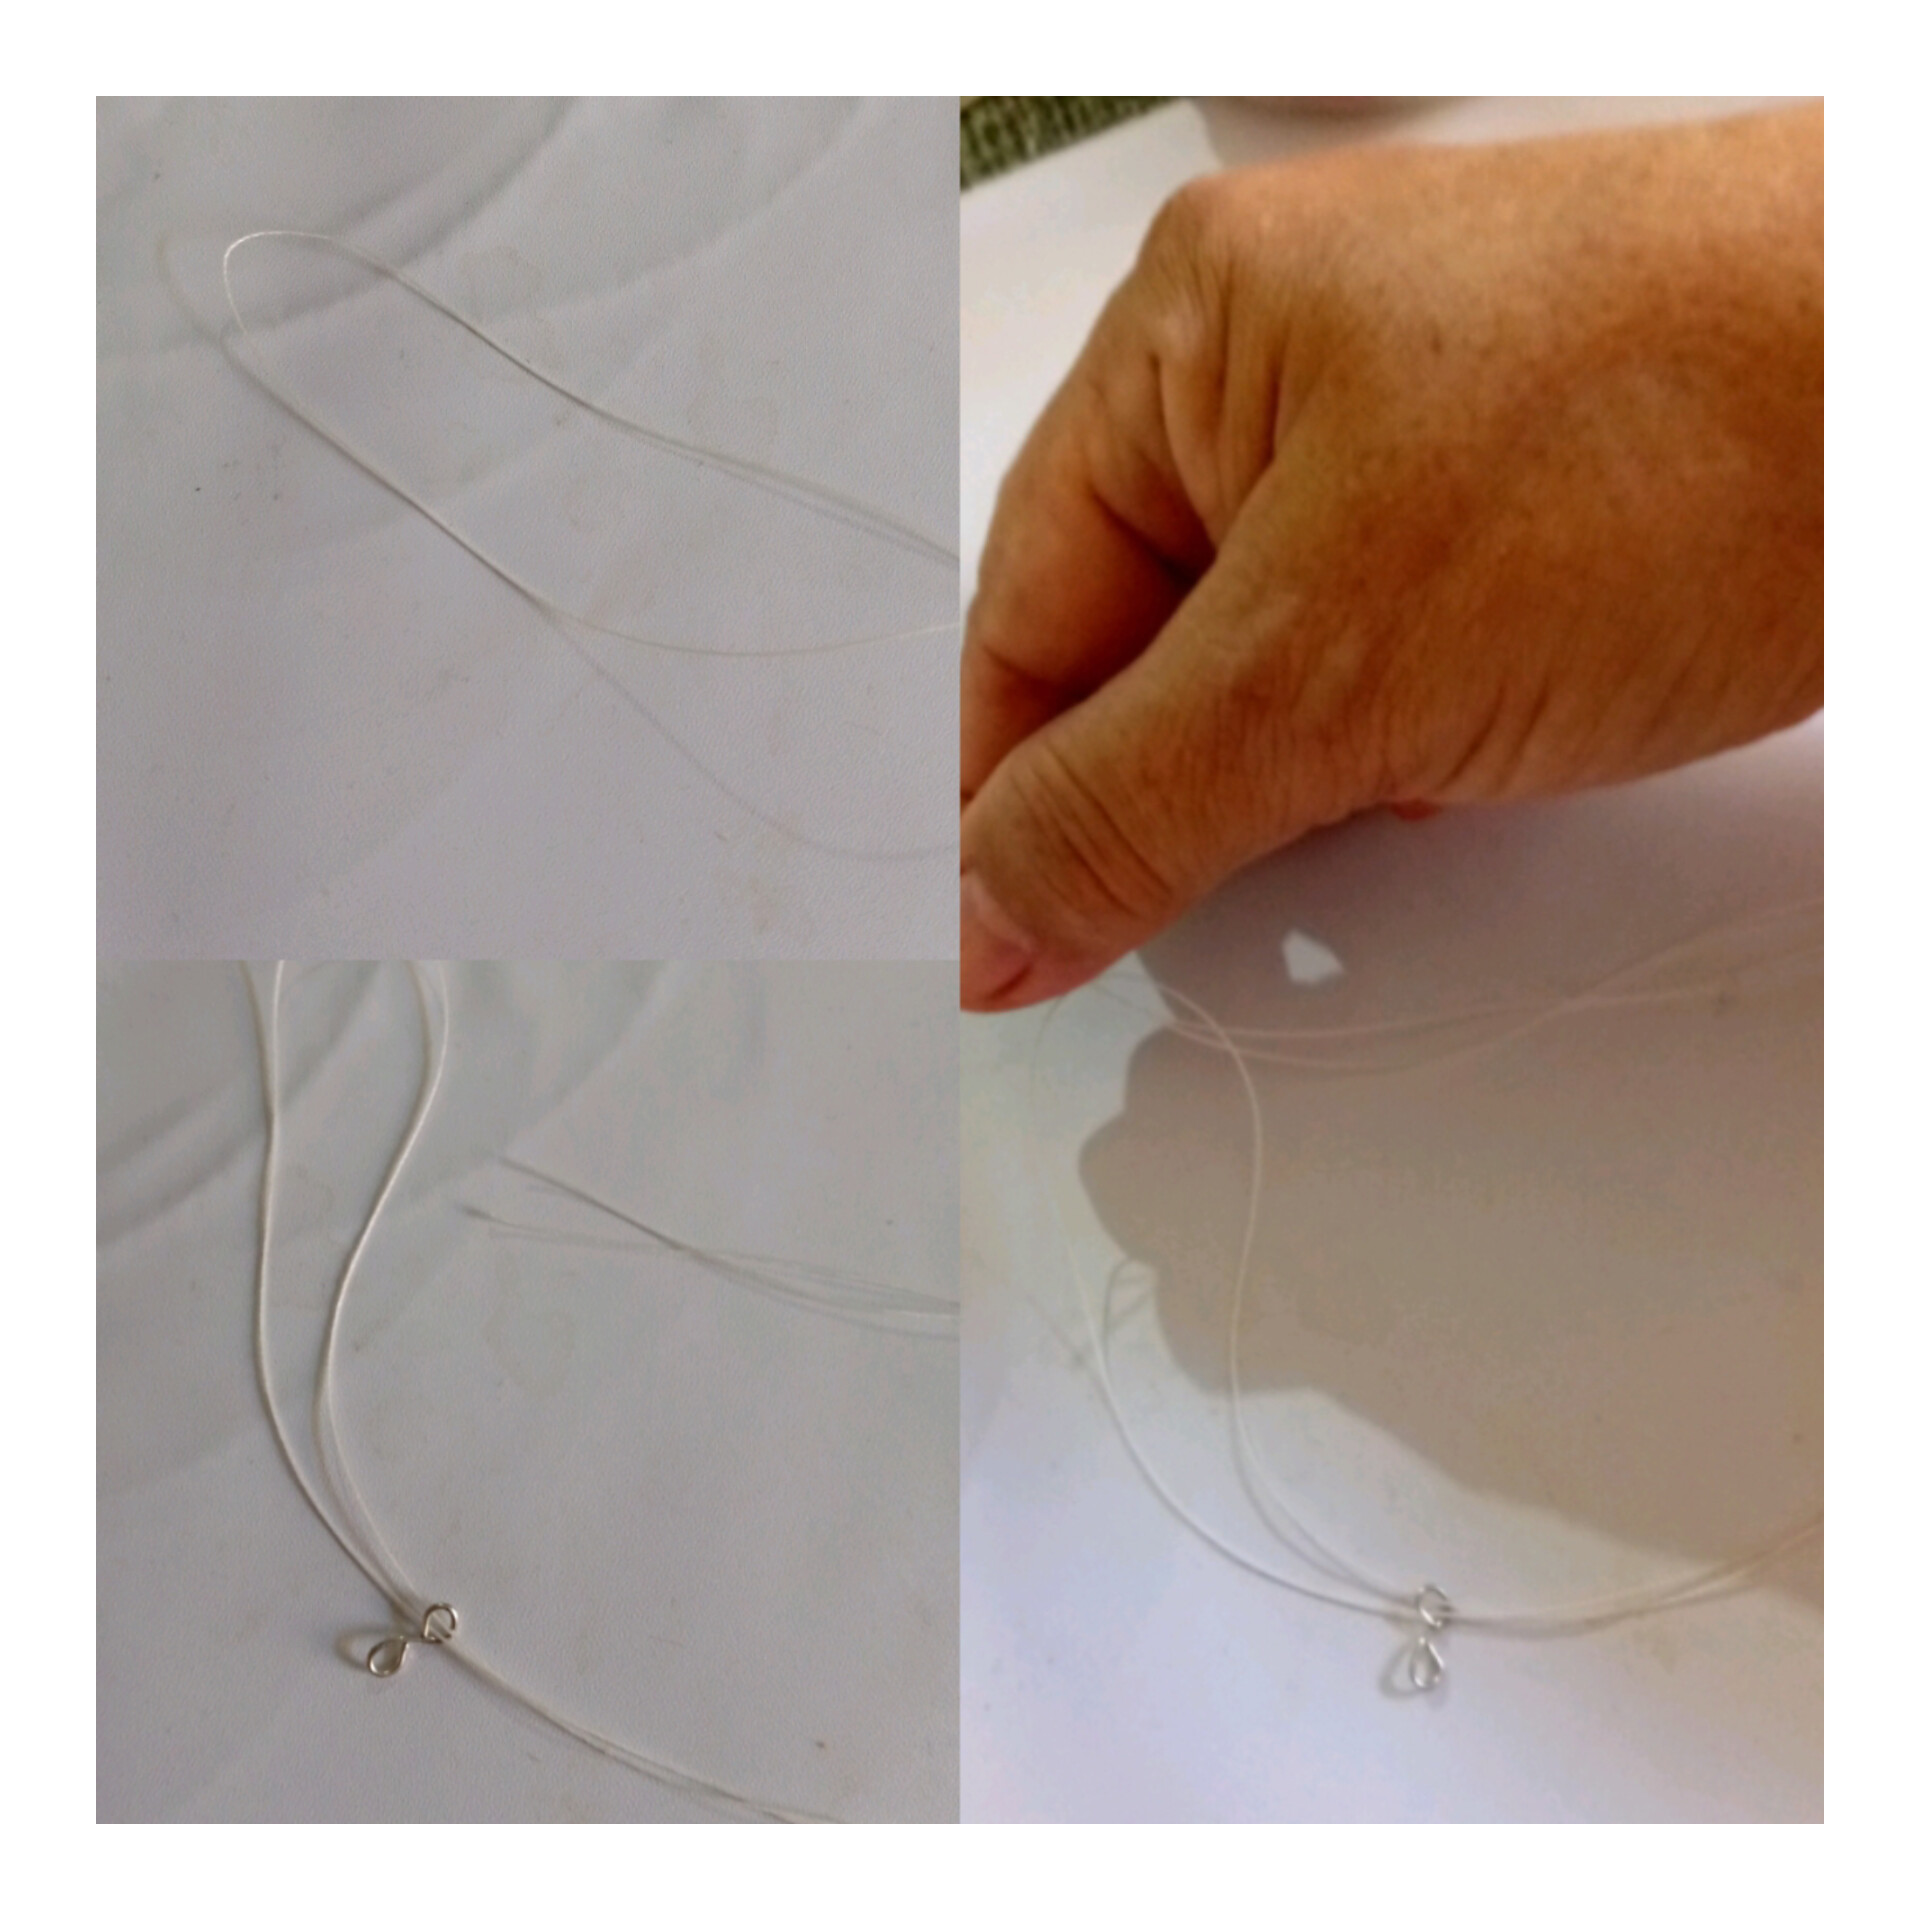
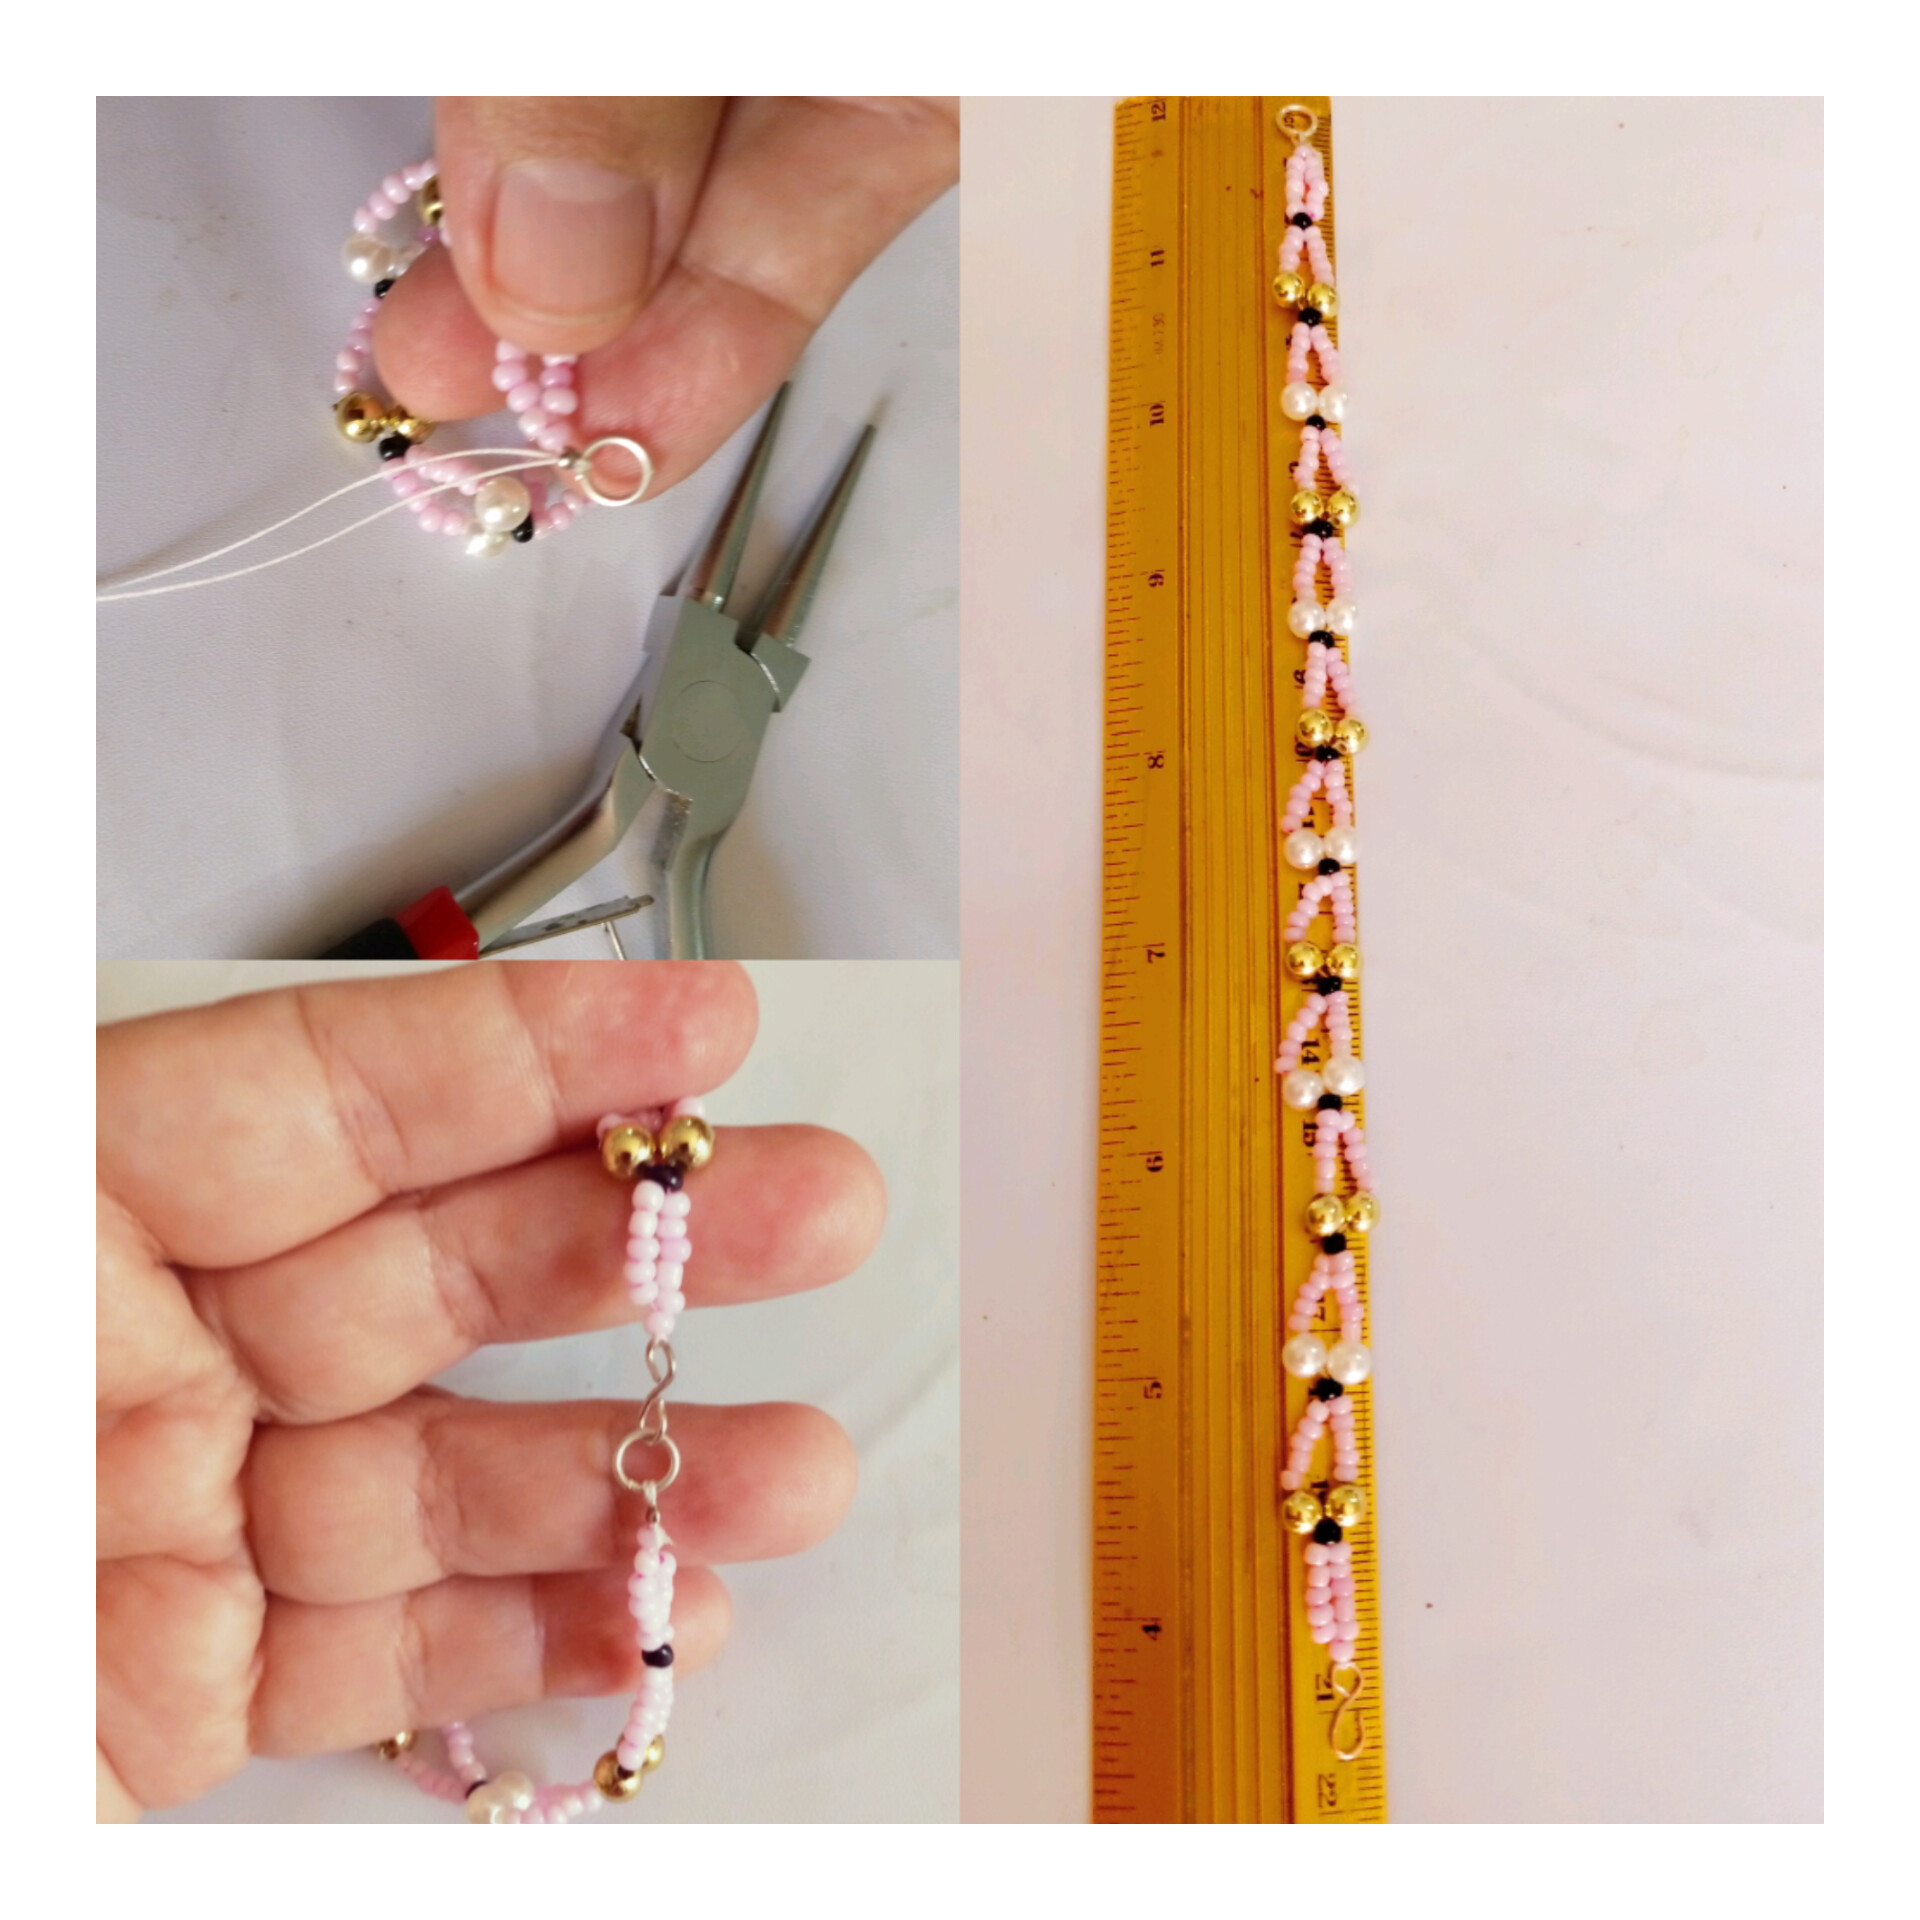
Empezamos en tomar el hilo de tapicerìa y la regla medimos 1,45 cmts de largo y cortamos, luego procedemos a realizar el broche de la pulsera con el alambre y corto unos 2 cmts y con la pinza en cada punta lo doblo uno al contrario en forma del sìmbolo infinito.
We start by taking the upholstery thread and the ruler we measure 1.45 cm long and cut it, then we proceed to make the clasp of the bracelet with the wire and cut about 2 cm and with the pliers on each end I bend it one on the contrary in the form of the infinite symbol.
PASO 2
STEP 2
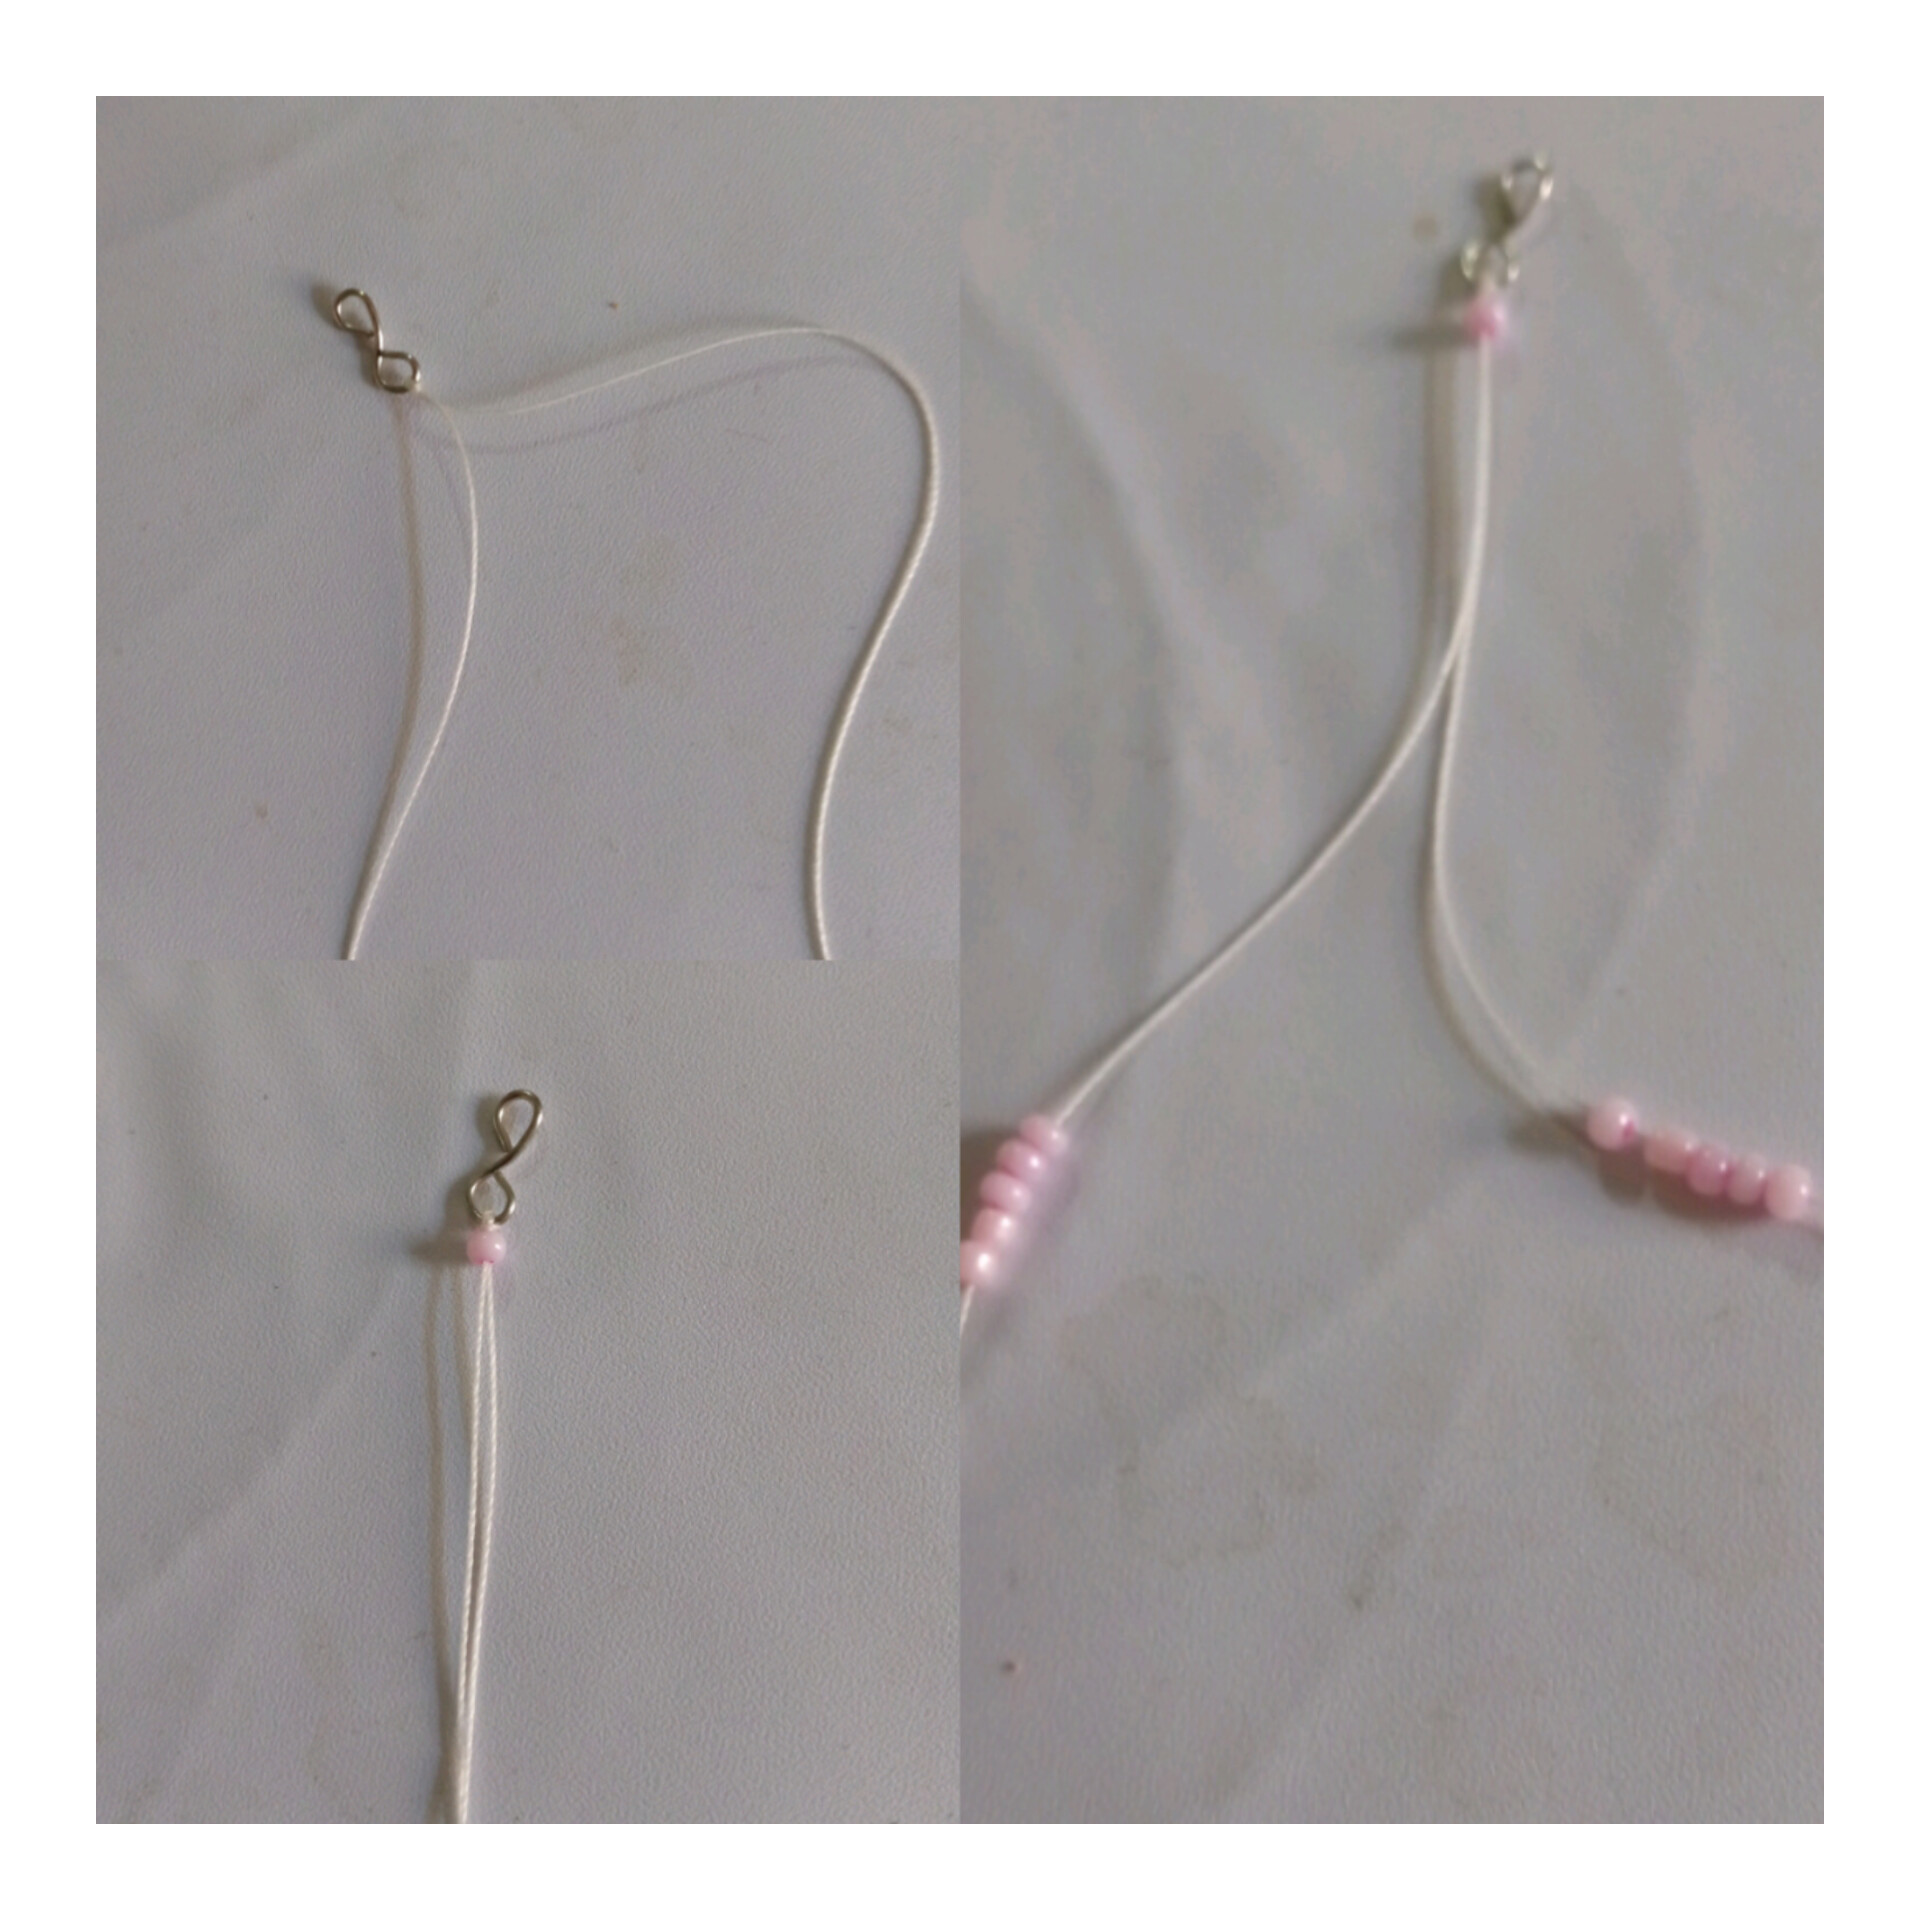
Luego vamos hacer esto doblamos el hilo exactamente a la mitad y lo introducimos por un orificio del trancadero dejamos una punta de cada lado pero una punta te queda el hilo donde queda la mitad por allì vas a meter el hilo del lado contrario y jalas.
Then we fold the thread exactly in half and we introduce it through the hole of the locking device, leaving one end on each side, but one end of the thread is left where the thread is in the middle, then you will insert the thread on the opposite side and pull it through.
PASO 3
STEP 3
Y de esta manera te queda ya segura tu pulsera luego vamos a empezar a introducir una mostacilla rosada la pasamos por los dos hilos y la llevamos hasta arriba, luego abrimos los hilos y por cada hilo vamos a introducir 5 mostacillas rosada.
And in this way your bracelet is already secure, then we will begin to introduce a pink bead, we pass it through the two threads and take it to the top, then we open the threads and through each thread we will introduce 5 pink beads.
PASO 4
STEP 4
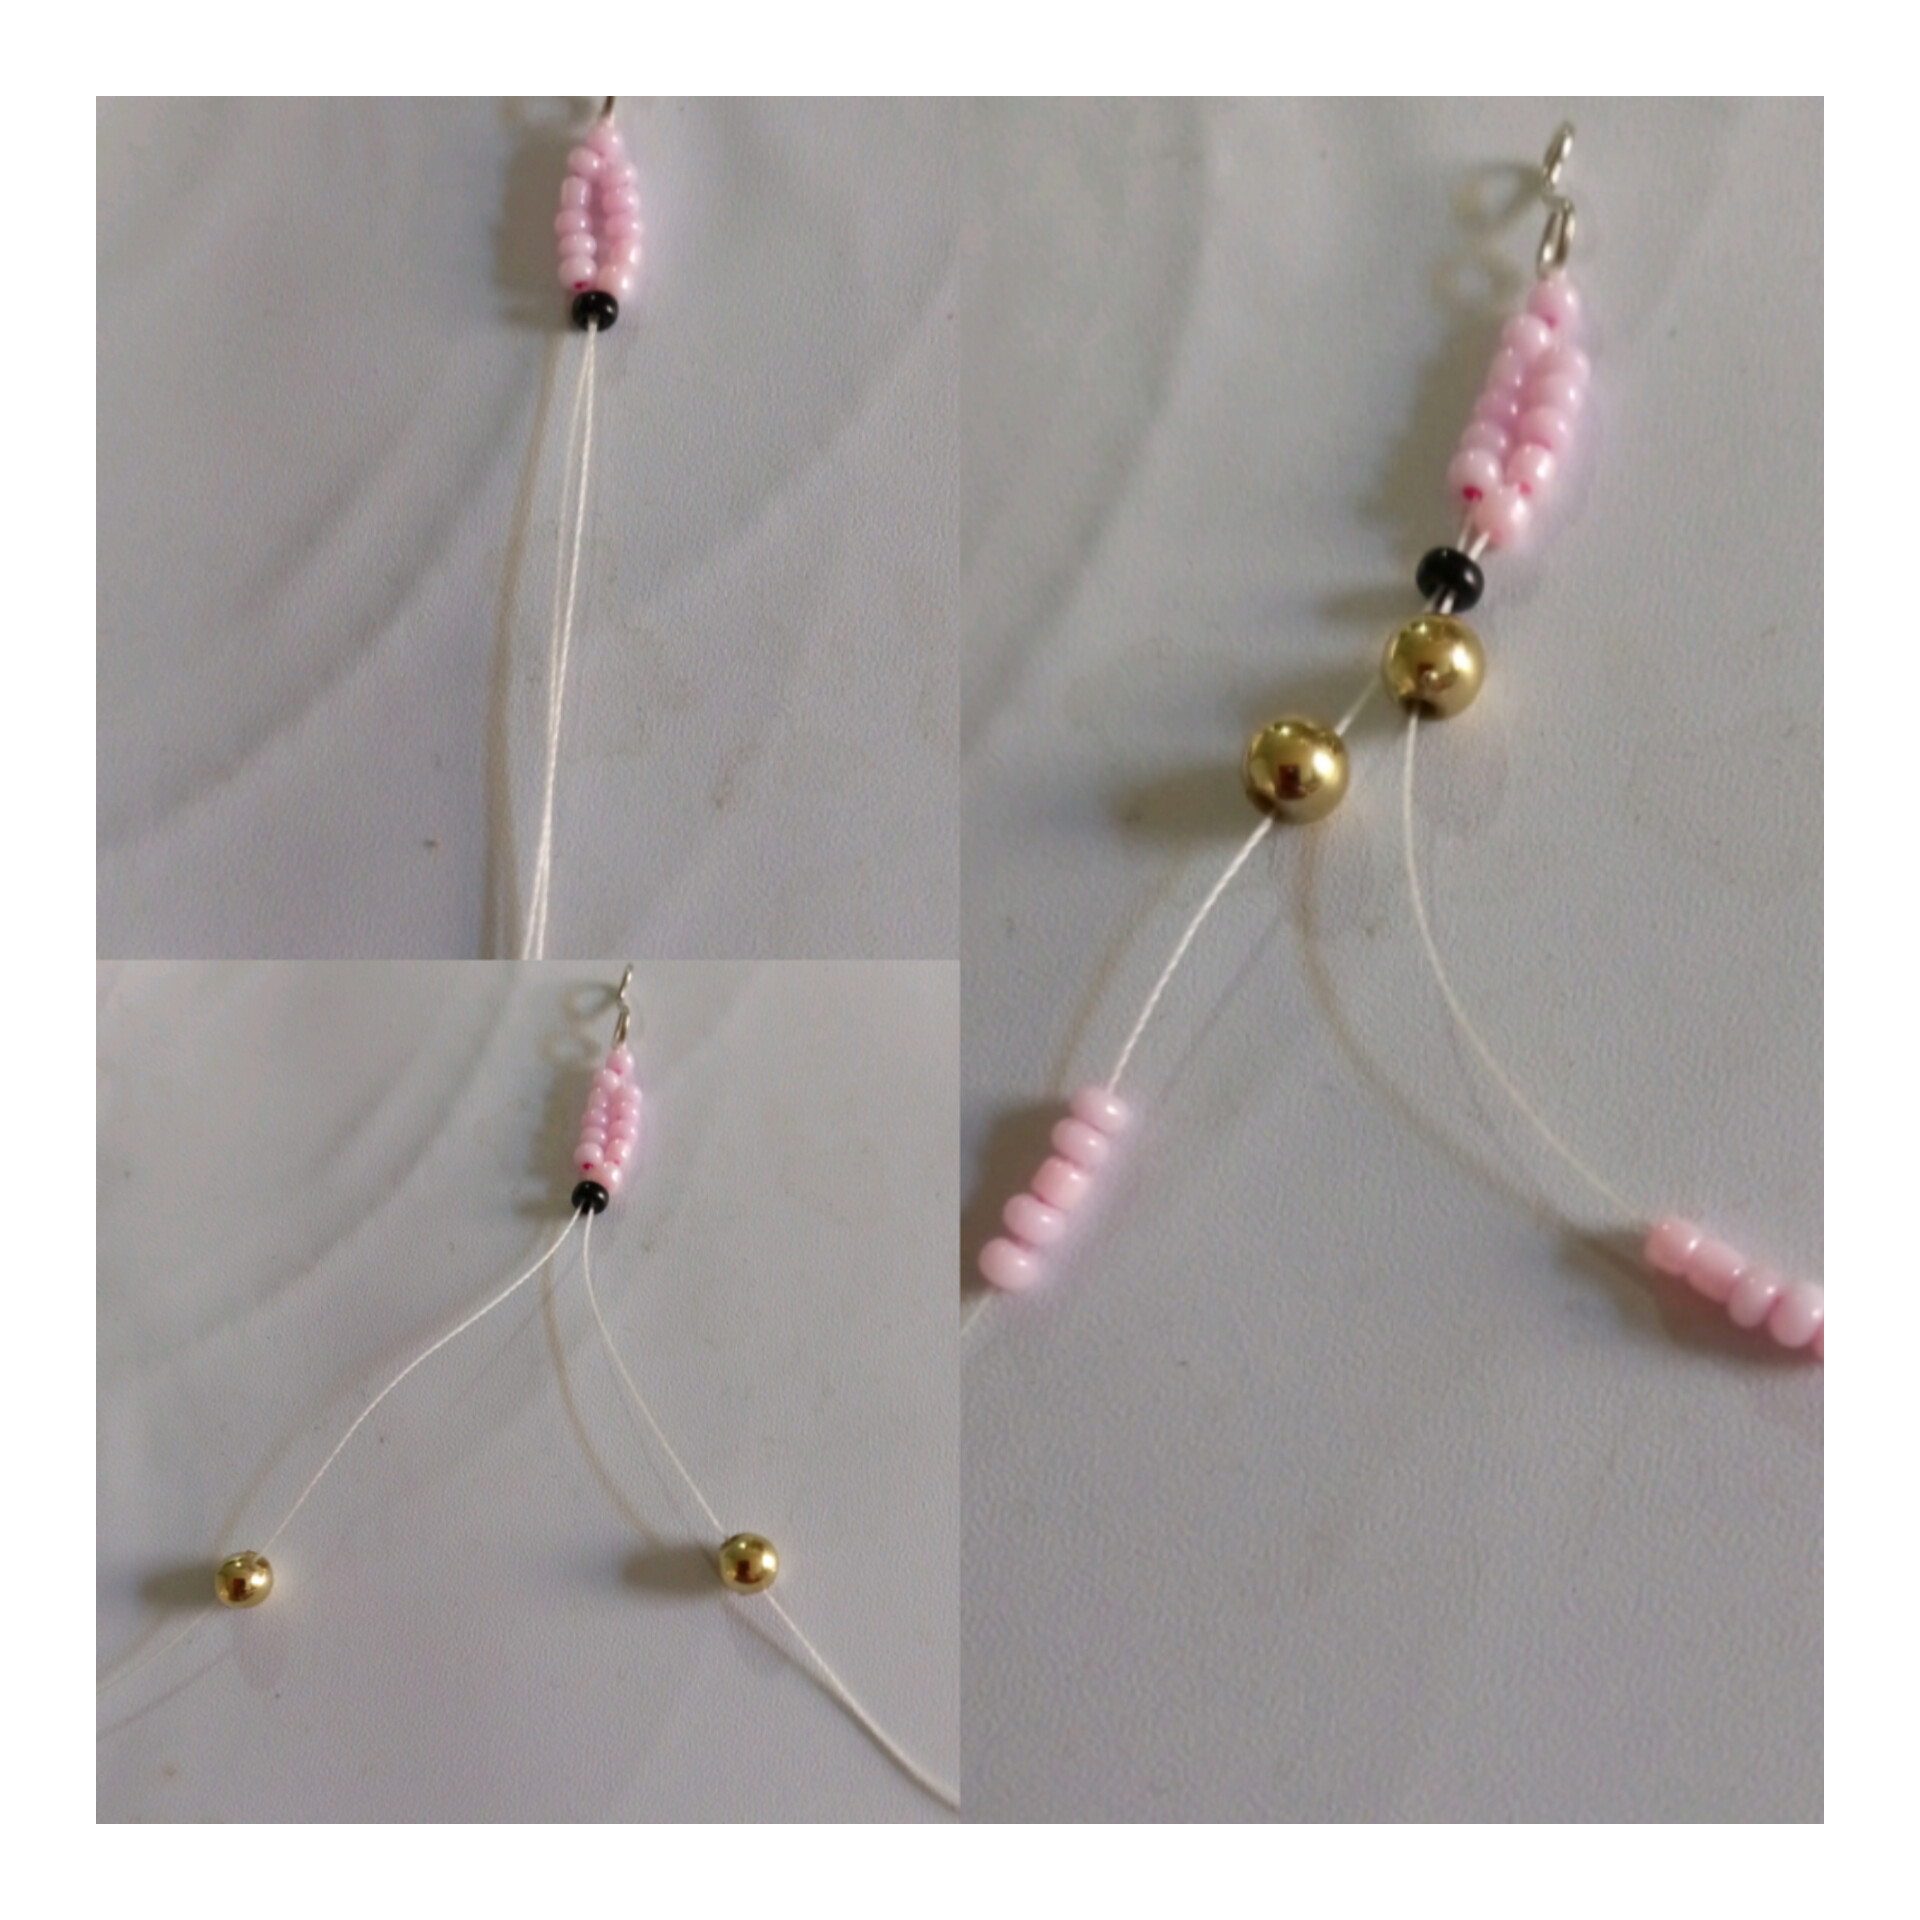
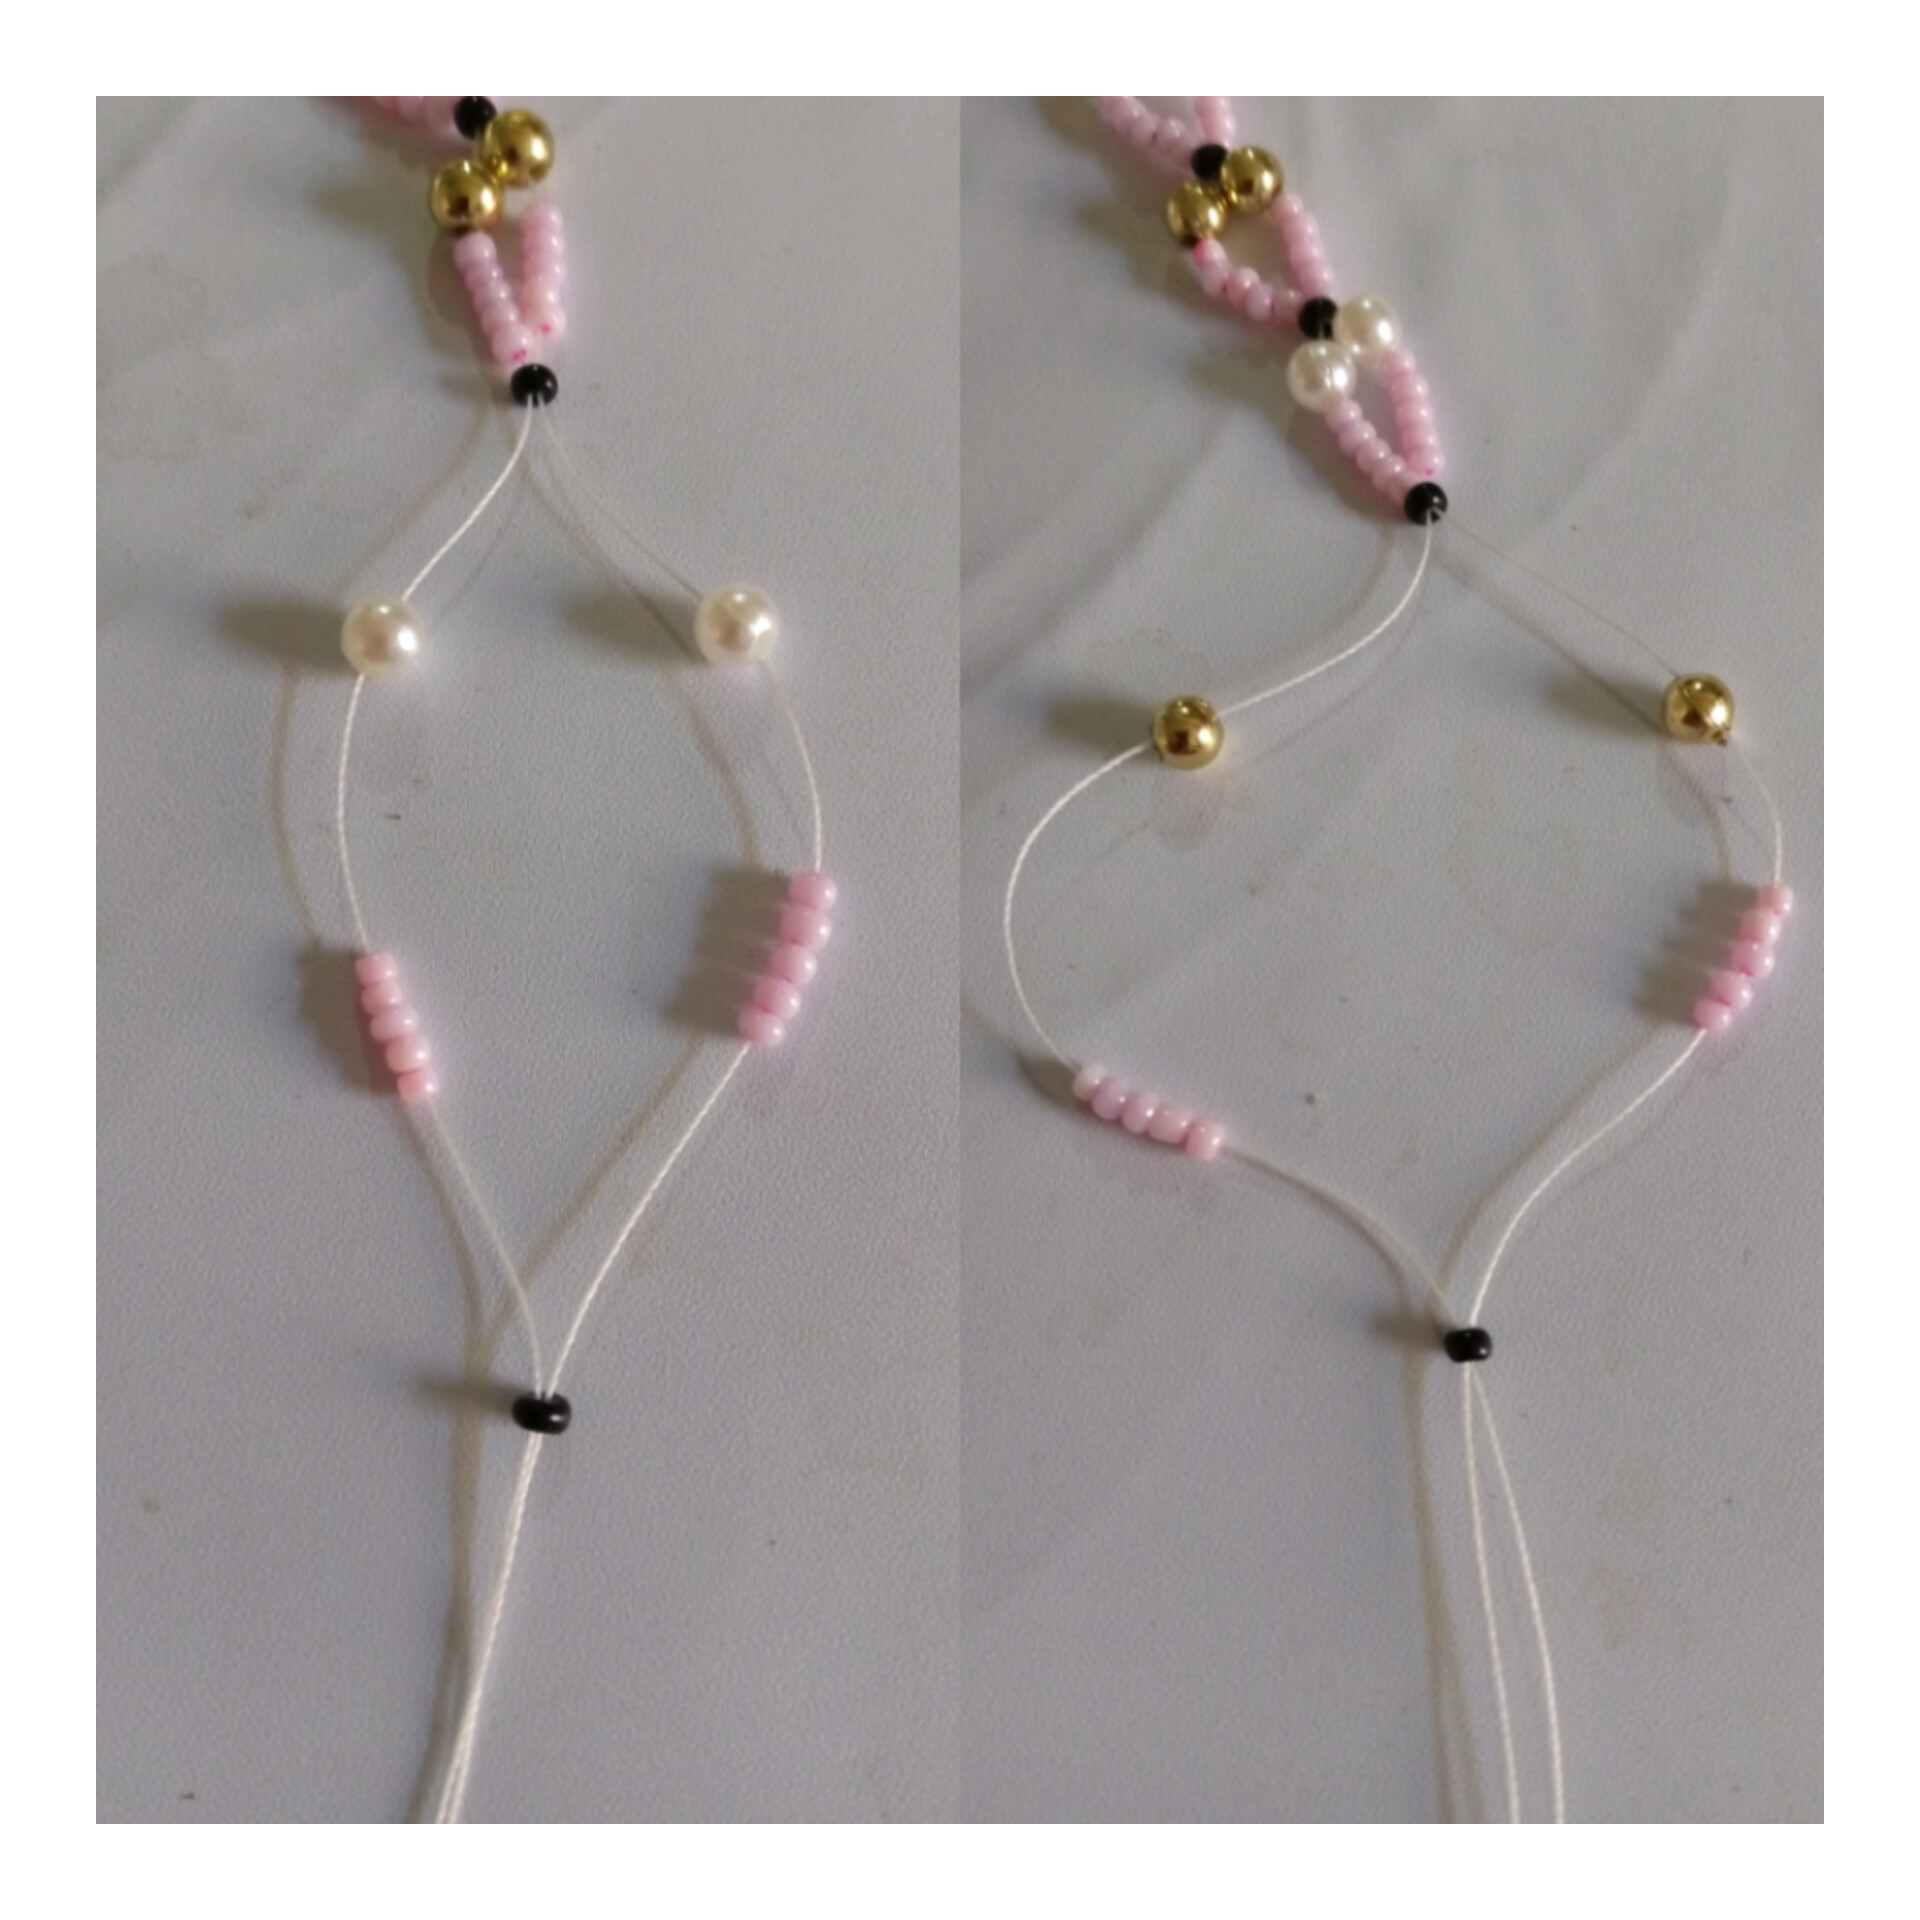
Una vez que hayamos introducido las mostacillas rosada la rodamos hasta arriba y despuès metemos una mostacilla negra por los dos hilos y ahora abrimos los hilos y metemos 1 perla dorada de cada hilo y despuès 5 mostacillas rosadas de cada lado.
Once we have introduced the pink beads we roll it up to the top and then we put a black bead through the two threads and now we open the threads and put 1 golden bead on each thread and then 5 pink beads on each side.
PASO 5
STEP 5
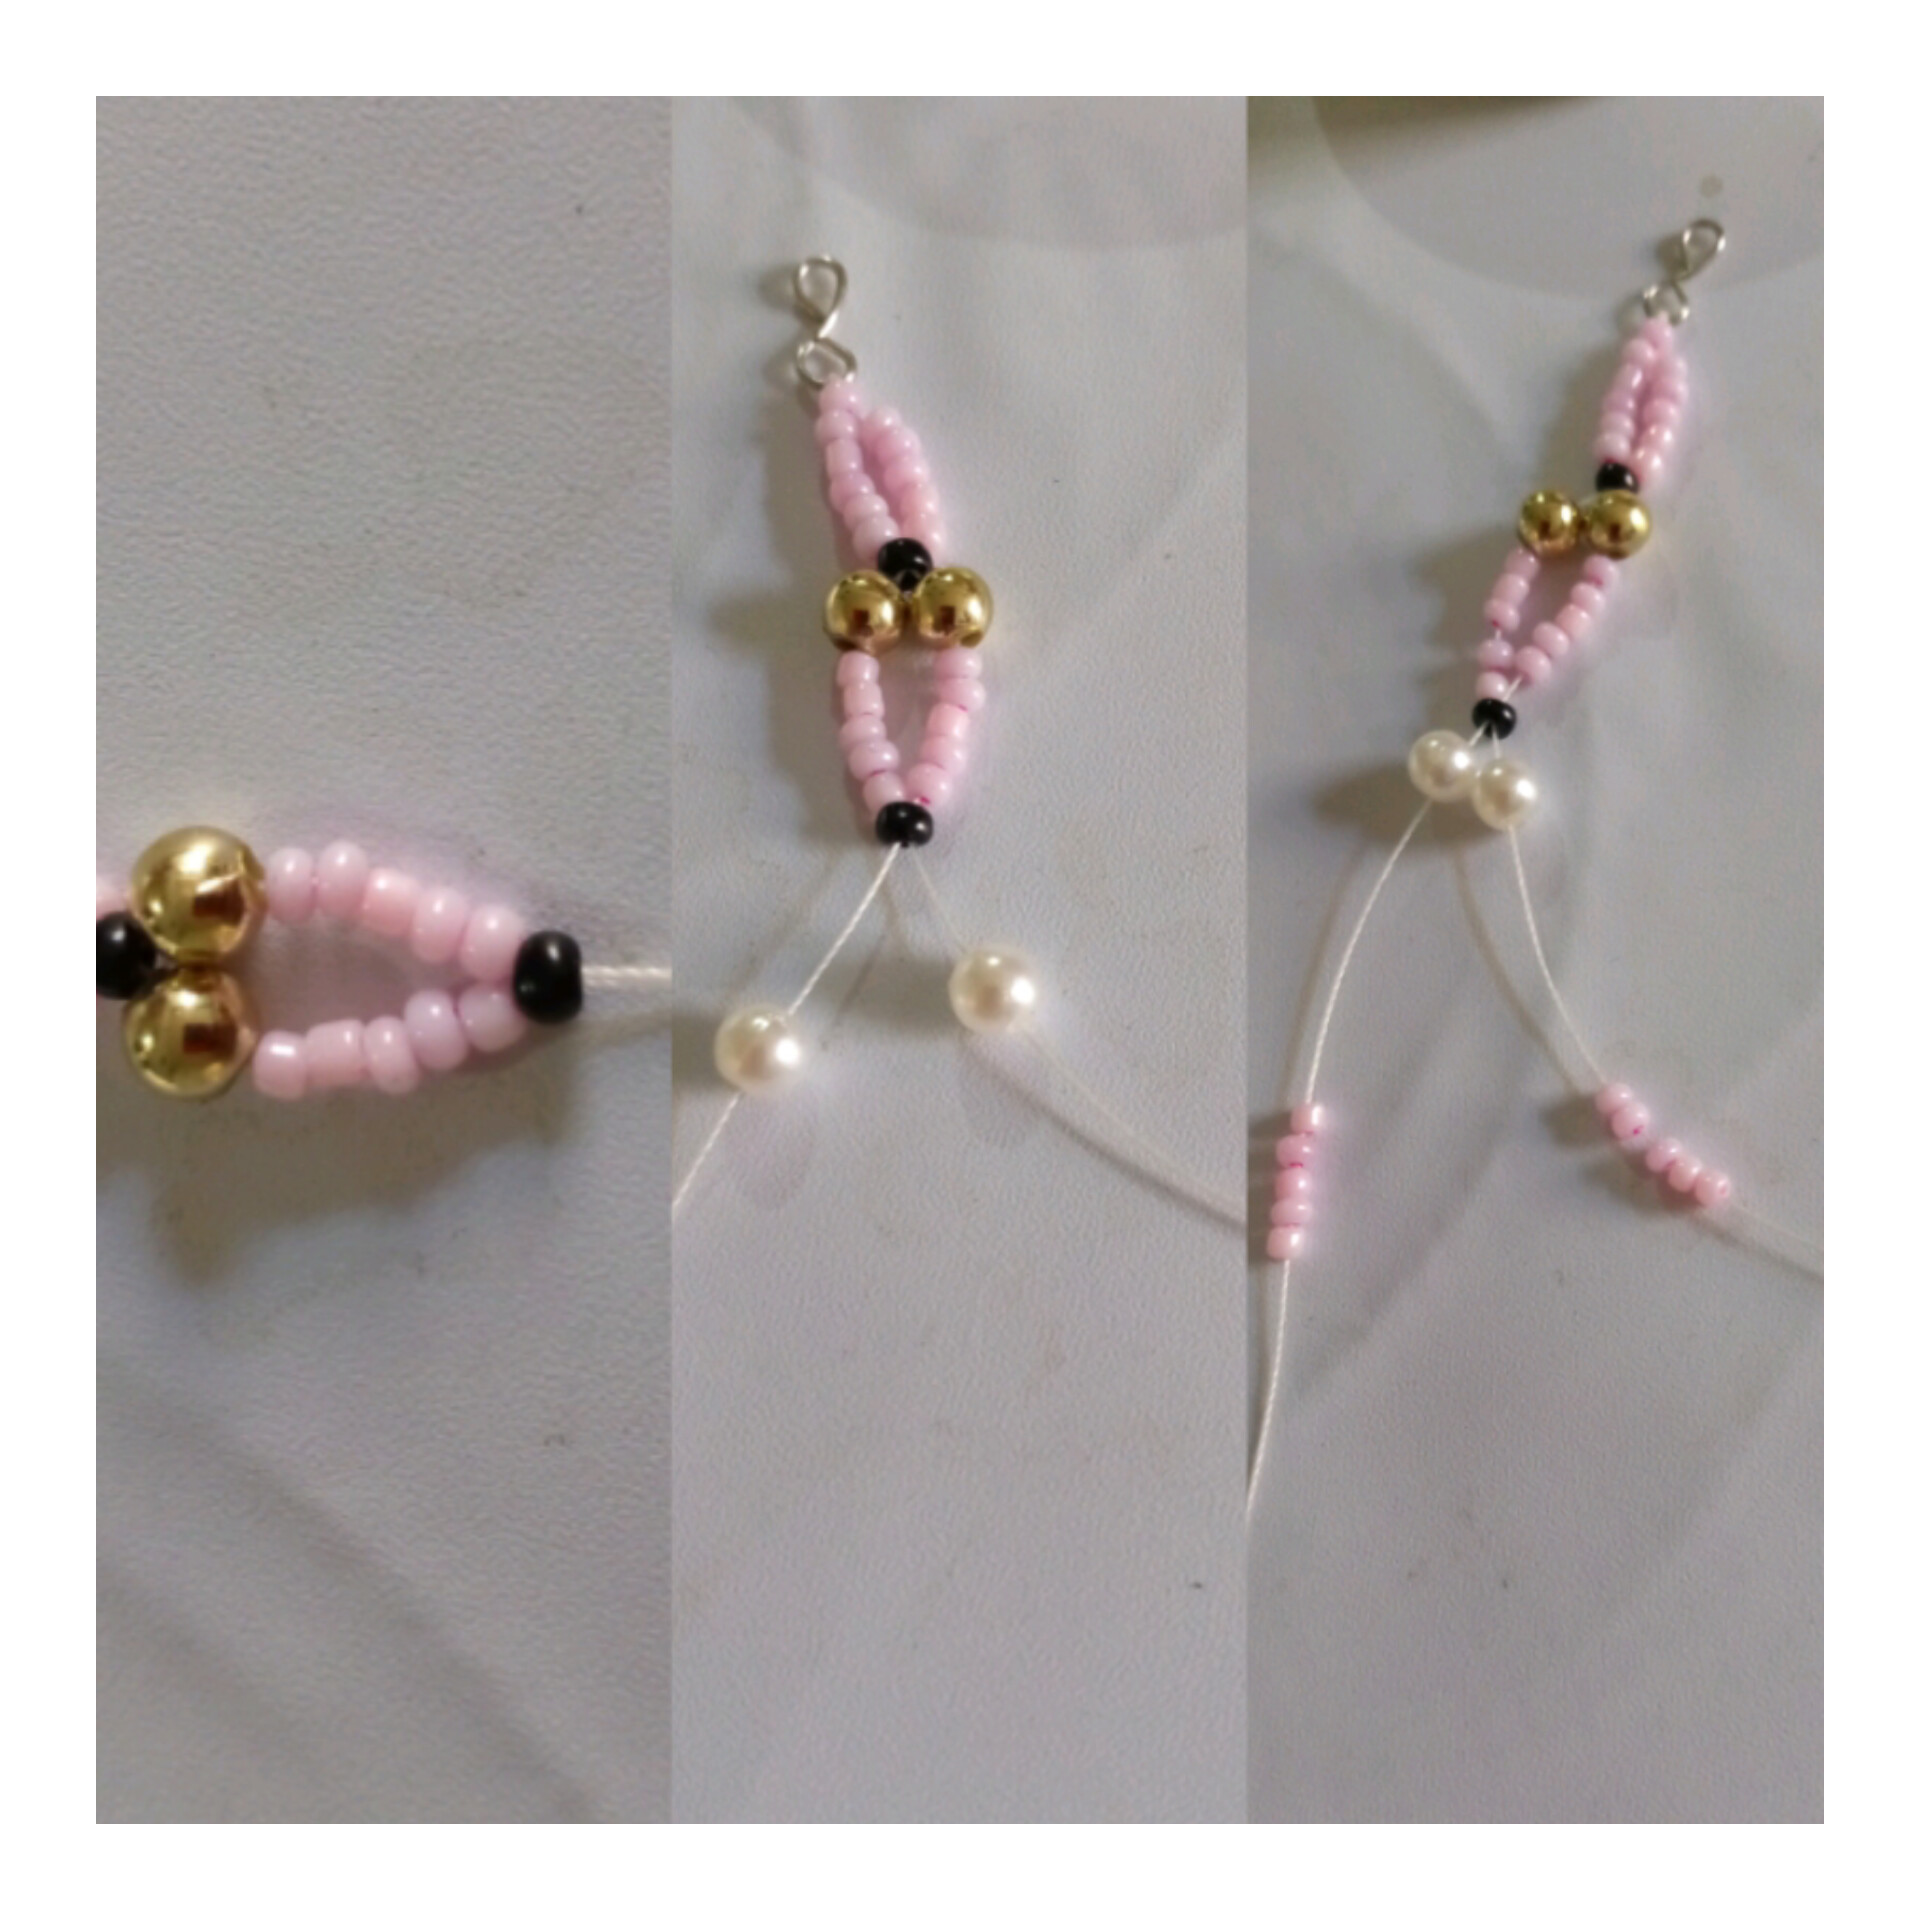
Luego observa acà, te muestro como va quedando y la forma que va tomando vas a cerrar con una mostacilla negra que introduce por los dos hilos, luego vas a meter 1 perla blanca de cada hilo y despuès 5 mostacillas rosadas de ambos lado del hilo ve que se esta elaborando alternado las perlas hay que tener cuidado a la hora de ir introduciendo y ver que sigue, lo bueno que uno pone a trabajar las neuronas y nos ayuda a la concentraciòn.
Then watch here, I show you how it is going to be and the form that it is taking, you are going to close with a black bead that introduces by the two threads, then you are going to introduce 1 white bead of each thread and then 5 pink beads on both sides of the thread, see that it is being elaborated alternating the beads, you have to be careful at the time of introducing them and see what follows, the good thing that one puts to work the neurons and helps us to the concentration.
PASO 6
STEP 6
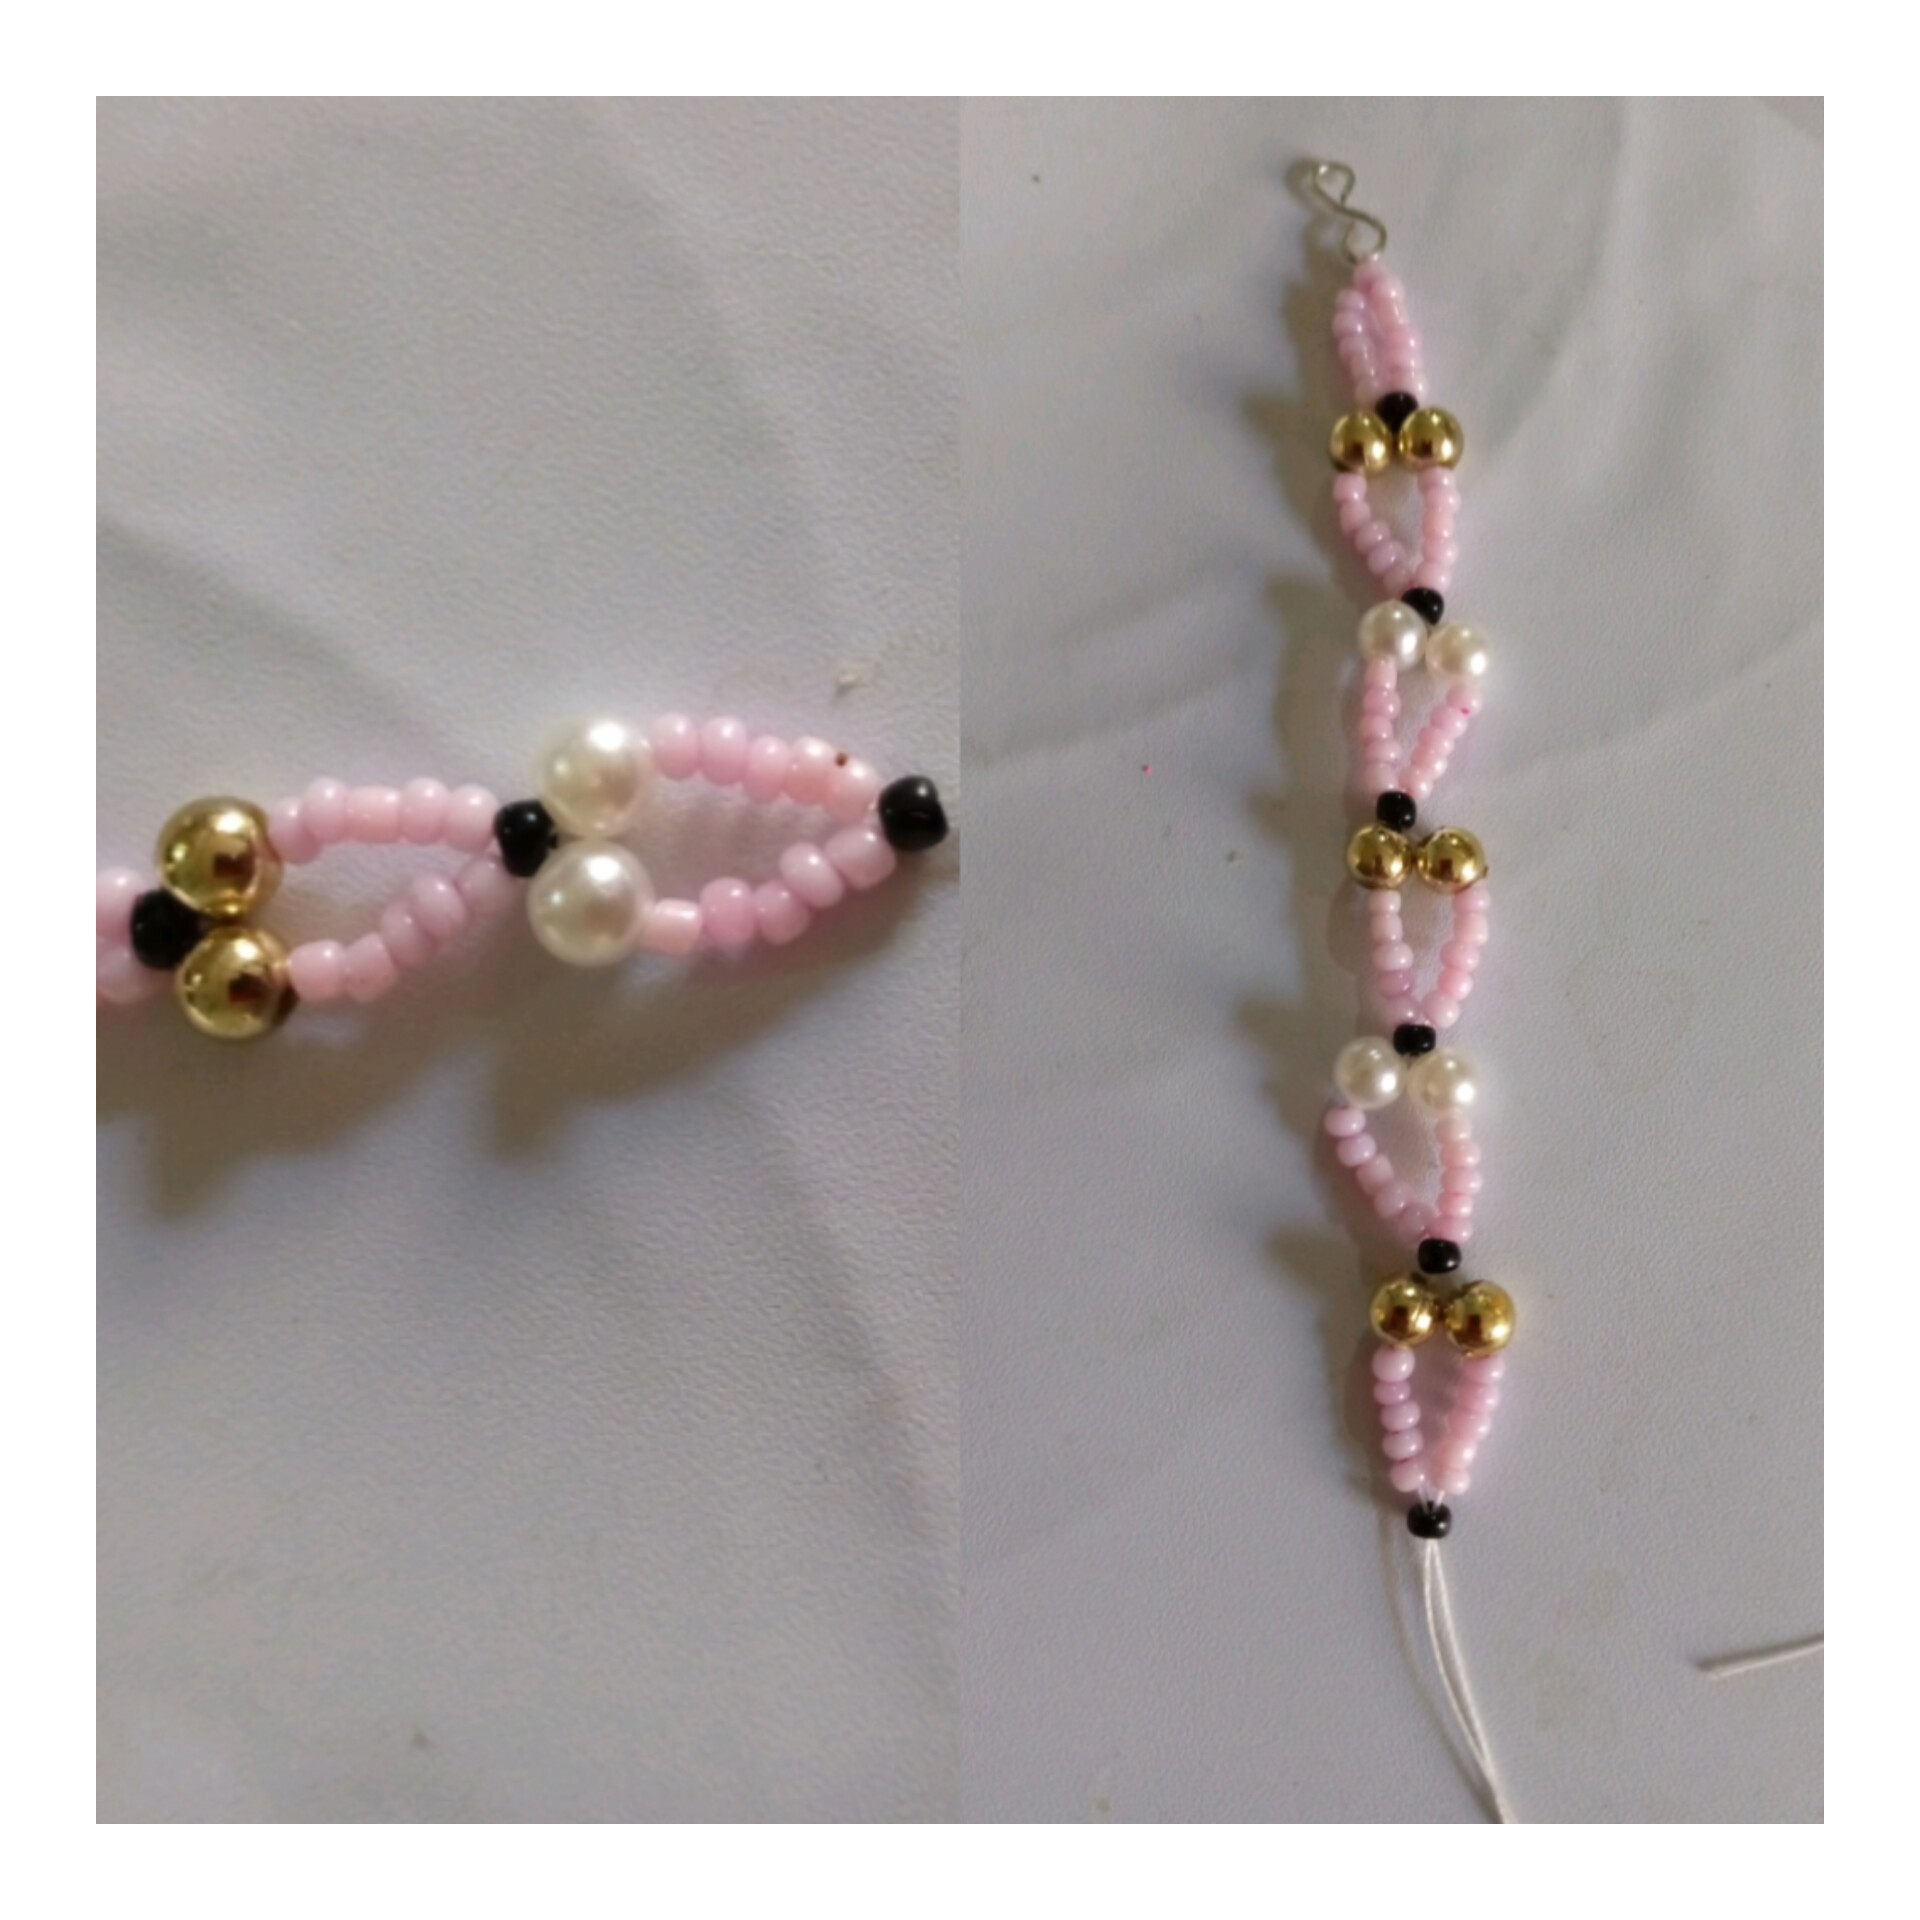
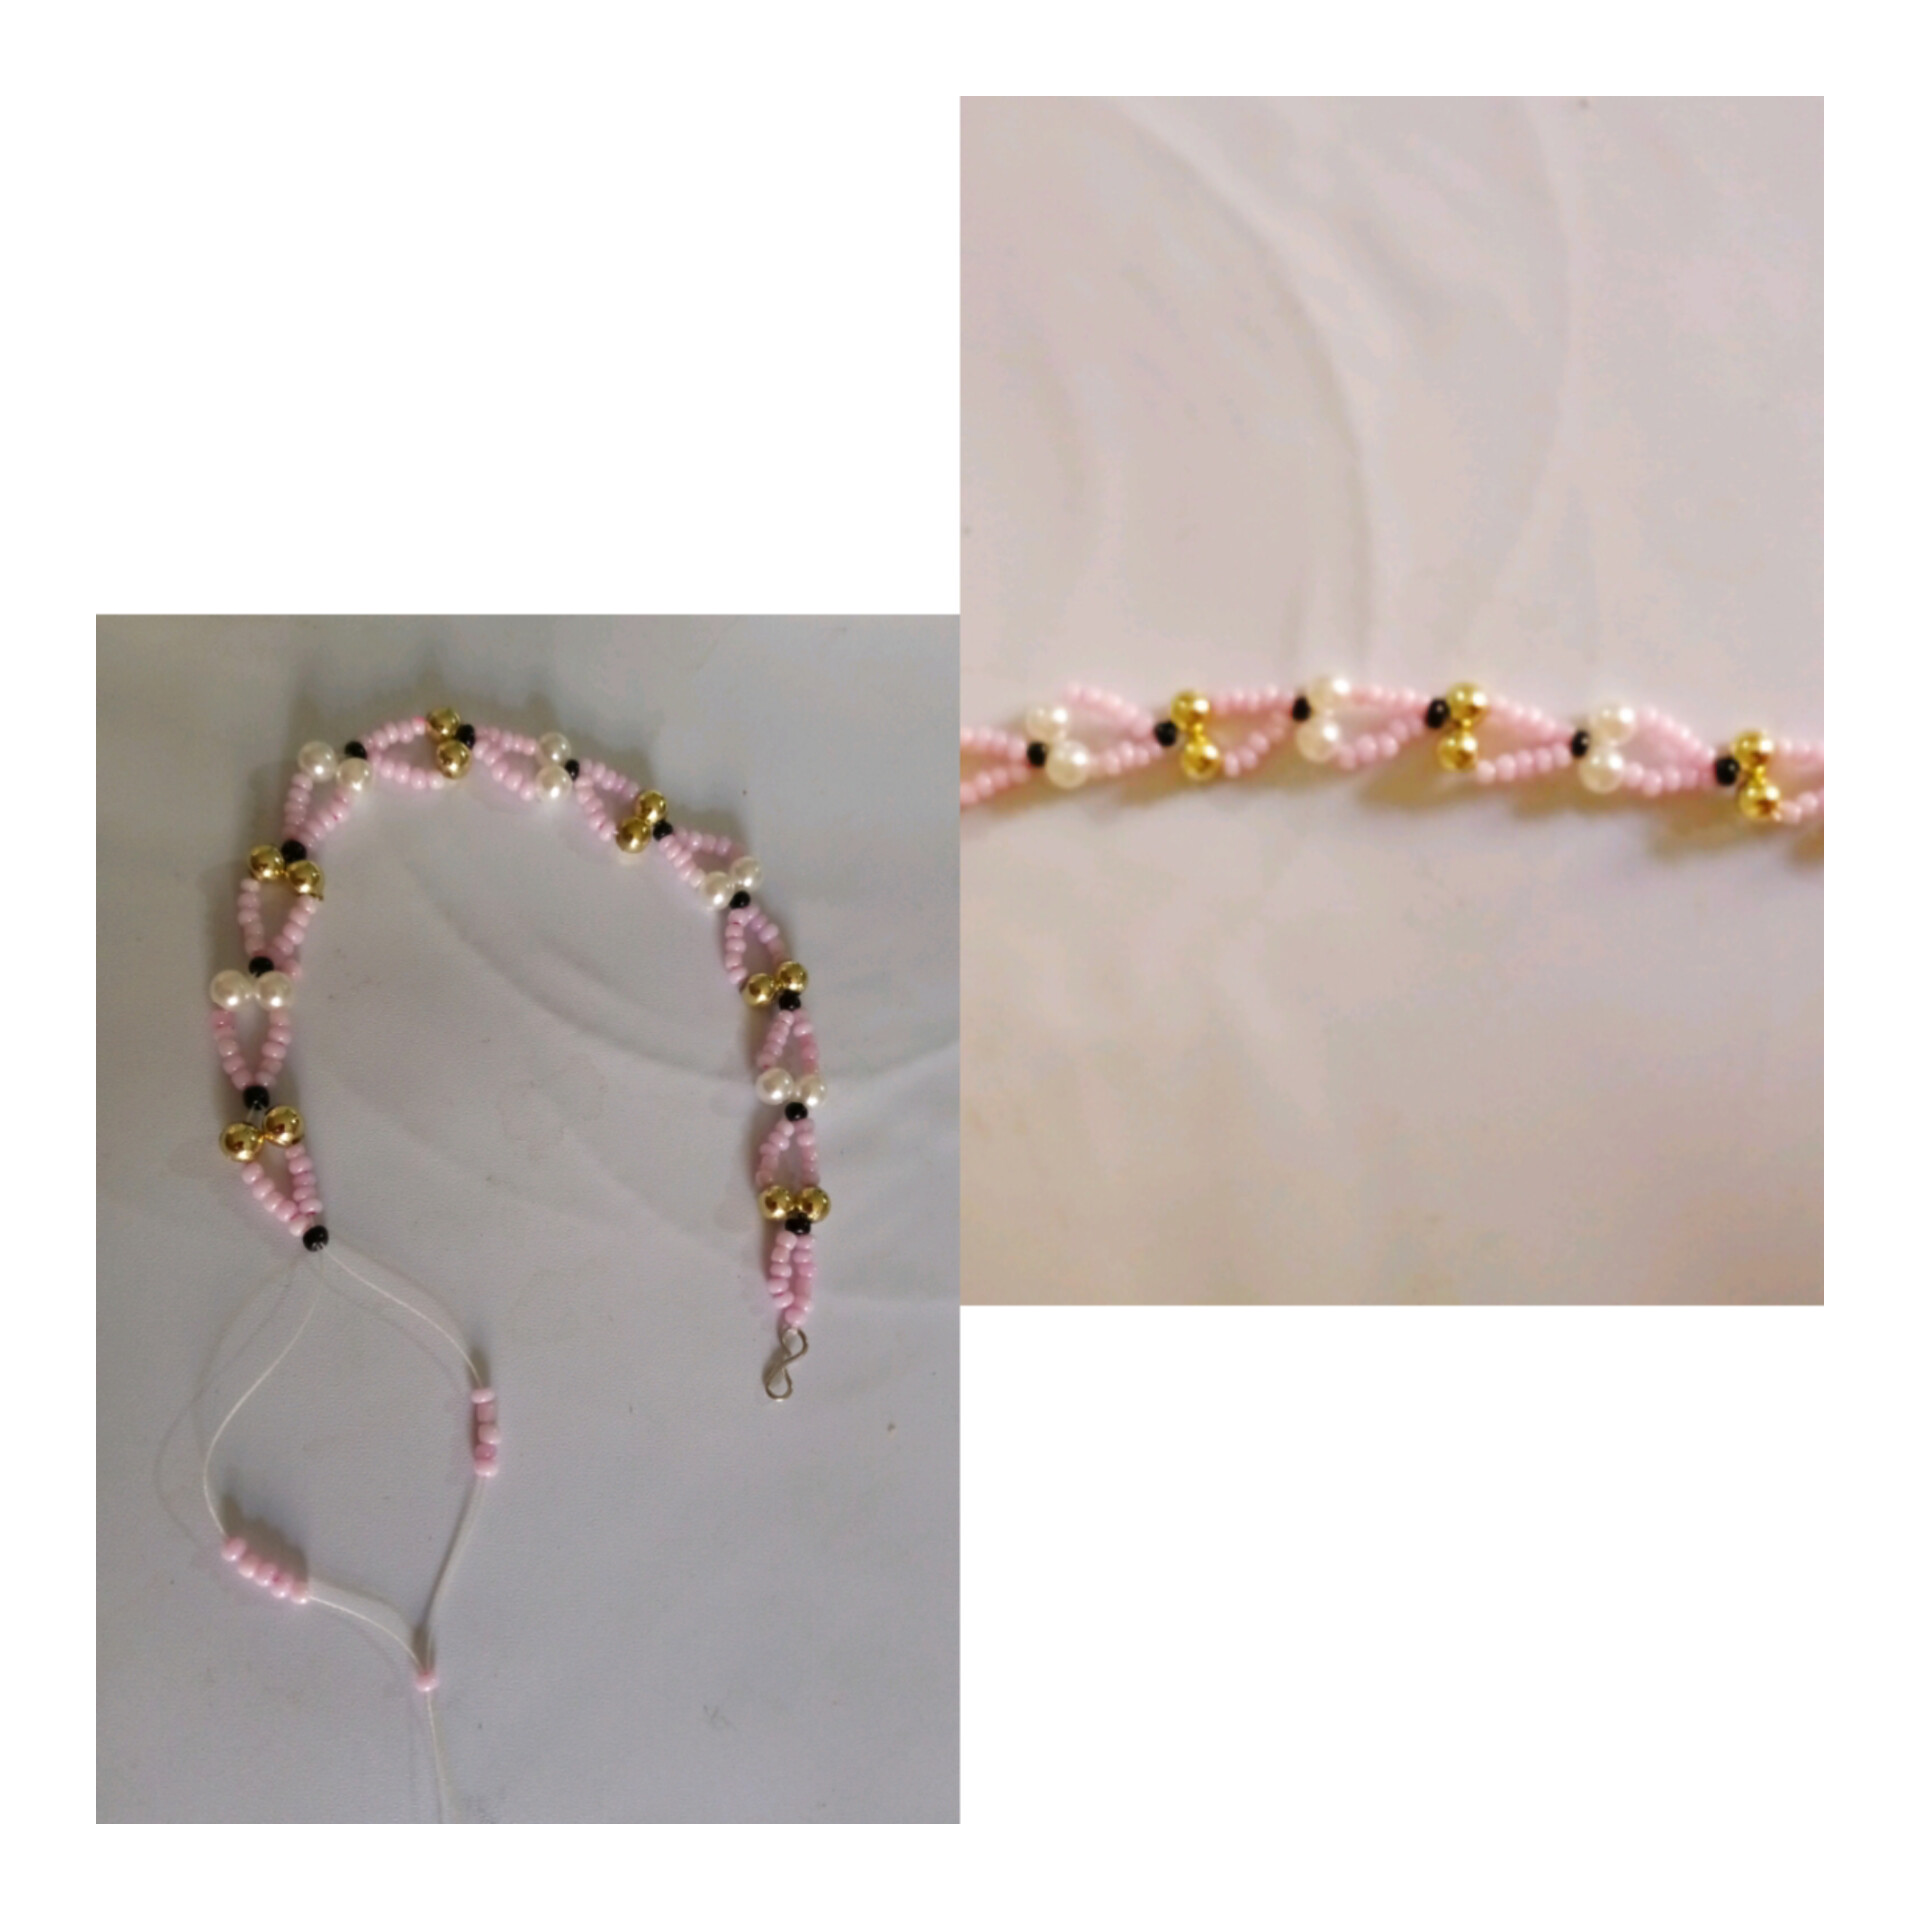
Aquì puedes observar como va alternando las perlas blancas y doradas, la forma que se va obteniendo del tejido de la pulsera, ya acà la tengo màs adelantada y ve que linda se ve con estos colores que escogì variados pero combinan.
Here you can see how the white and gold beads alternate, the shape that is obtained from the weaving of the bracelet, and here I have it more advanced and see how beautiful it looks with these colors that I chose varied but combined.
PASO 7
STEP 7
Observen mi guìa es la mostacilla negra se abren los hilos y en cada hilo mete 1 perla blanca ya la anterior fuè dorada, toca la blanca e igualmente de cada hilo mete 5 mostacillas rosadas y luego vuelves a unir los hilos y pasa la mostacilla negra y rueda hasta arriba y ahora acà repites el mismo procedimiento pero cambiando la perla que aquì serìa la dorada, y asì es todo el tejido de la pulsera.
Observe my guide is the black bead, open the threads and in each thread put 1 white bead and the previous one was golden, touch the white one and also in each thread put 5 pink beads and then join the threads again and pass the black bead and roll up to the top and now here you repeat the same procedure but changing the bead that here would be the golden one, and so is the whole weaving of the bracelet.
PASO 8
STEP 8
Luego ya estamos finalizando debemos de hacerlo terminar como se empezò se une los hilos introduce la mostacilla negra rueda y despuès abre los hilos introduce en cada lado 5 mostacillas rosadas luego unes los hilos e introduce una mostacilla rosada.
Then we are already finishing we must make it finish as we started, join the threads, introduce the black beads and then open the threads, introduce 5 pink beads on each side, then join the threads and introduce a pink bead.
PASO 9
STEP 9
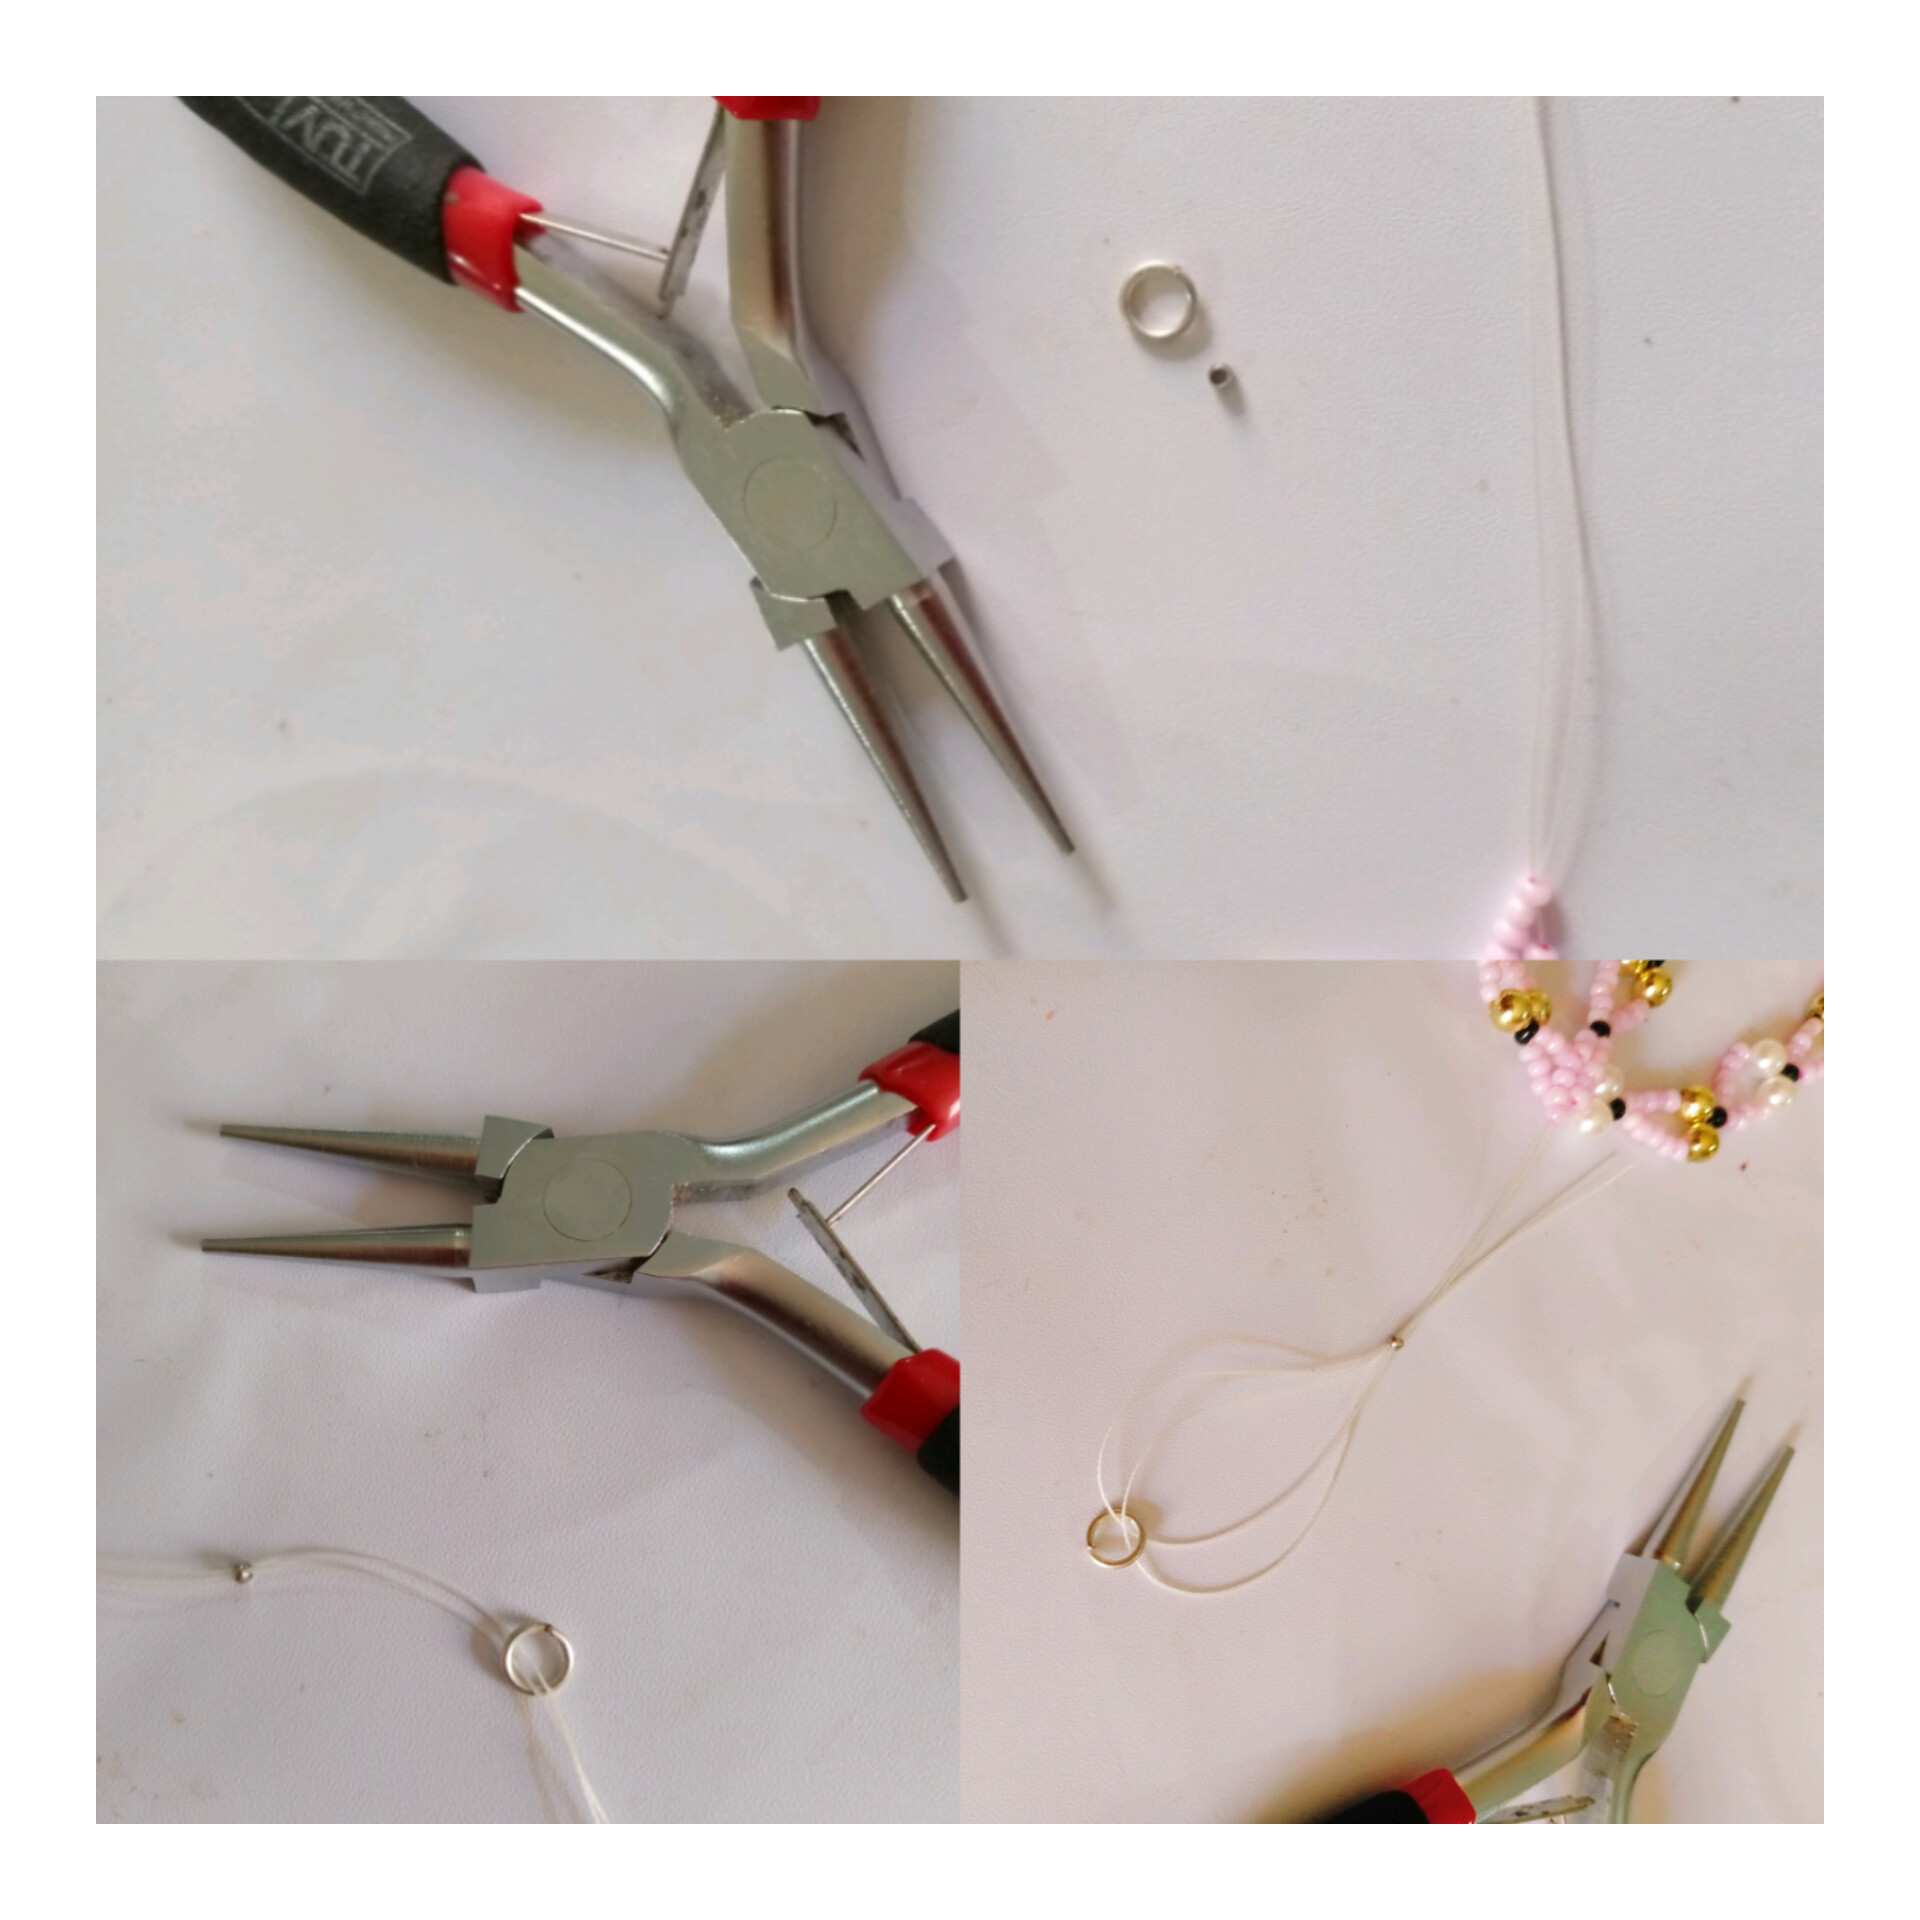
Acà tomamos la pinza, el arito y la mostacilla de presiòn, introducimos la mostacilla de presiòn primero y despuès el arito por el hilo tomamos los dos y por encima del arito pasamos los dos hilos y lo introducimos por la mostacilla de presiòn.
Here we take the clamp, the earring and the pressure bead, we introduce the pressure bead first and then the earring through the thread, we take the two and over the earring we pass the two threads and we introduce it through the pressure bead.
PASO 10
STEP 10
Despuès rodamos la mostacilla de presiòn junto con el arito hasta laq mostacilla rosada bien pegadito lo acomodamos y con la pinza apretamos la mostacilla hasta aplanar y el hilo sobrante lo recorremos un poco por entre las mostacillas y el excedente lo cortamos y asì quedò nuestro broche, y la pulsera tiene un largo de 21 cmts.
Then we roll the pressure bead together with the earring to the pink bead well glued, we place it and with the tweezers we tighten the bead to flatten and the excess thread we run it a little between the beads and the excess we cut it and this is how our brooch is, and the bracelet has a length of 21 cm.
PASO 11
STEP 11
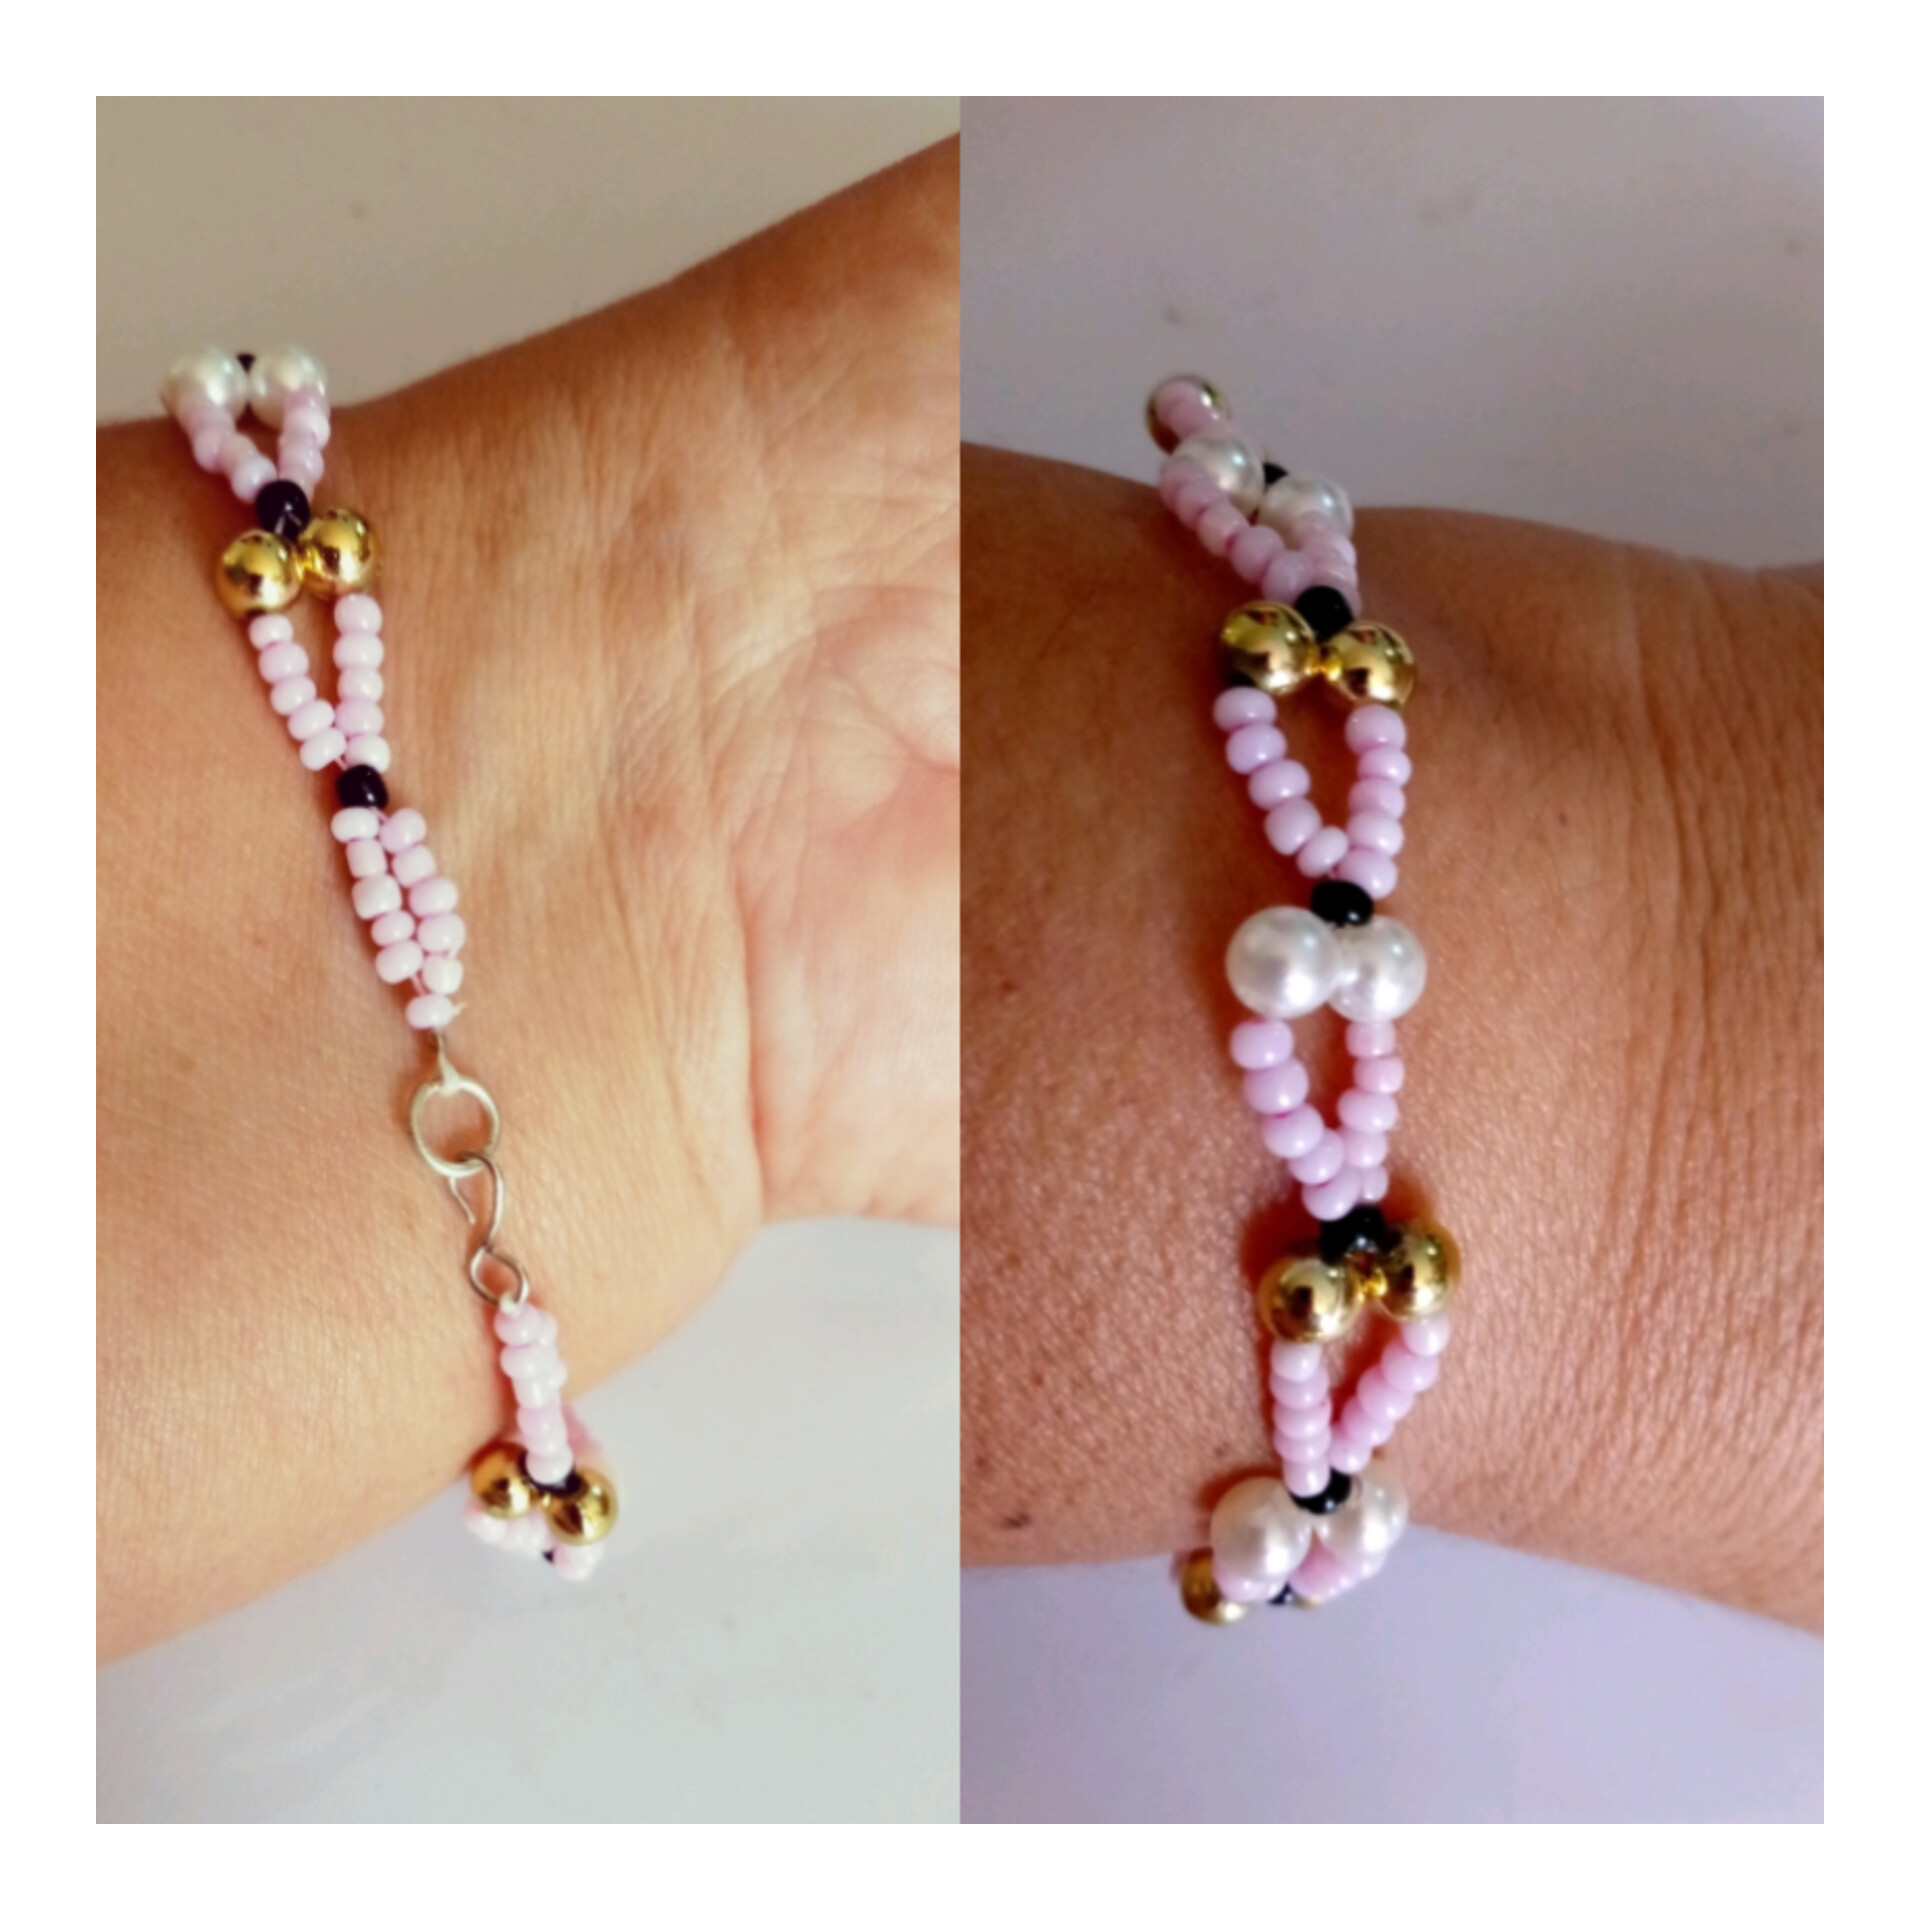
Pues me medì la pulsera para ver si le iba quedar bien a la joven me quedò un poco floja exacto para su medida y muestro por la parte de abajo y el frente de la pulsera.
Well, I measured the bracelet to see if it would fit the young lady and it was a little loose for her exact size and I show the bottom and the front of the bracelet.
Mi selfie mostrando mi trabajo finalizado y muy a gusto como me quedò el resultado.
My selfie showing my finished work and very happy with the result.

Gracias por haberme acompañado hasta el final espero le haya gustado, si lo hacen me comentas como te quedò.
Thank you for joining me until the end, I hope you liked it, if you do, let me know how you like it.
Las fotografìas son tomadas con mi celular Tecno Go Spark editado con la aplicaciòn Inshot Collage.
Traducido con deepl translate.
The pictures are taken with my Tecno Go Spark cell phone edited with the Inshot Collage application.
Translated with deepl translate.
HASTA MUY PRONTO.
SEE YOU VERY SOON.
the bracelet fits so nicely. Beautiful
Gracias 🫂
Bendiciones mi estimada se ve muy delicada y bonita tu pulsera
Gracias amigo un gusto saludarte bendiciones 🙏
Hermosísimo. Es romántico, delicado y fresco. Me gustan los colores que seleccionaste. Has hecho un bello trabajo.
Gracias me alegra que te haya gustado amiga feliz día bendiciones 🙏.
Linda pulsera amiga, buena combinación. Saludos 🤗
Gracias a ti por tu grata visita y comentario agradable feliz tarde.