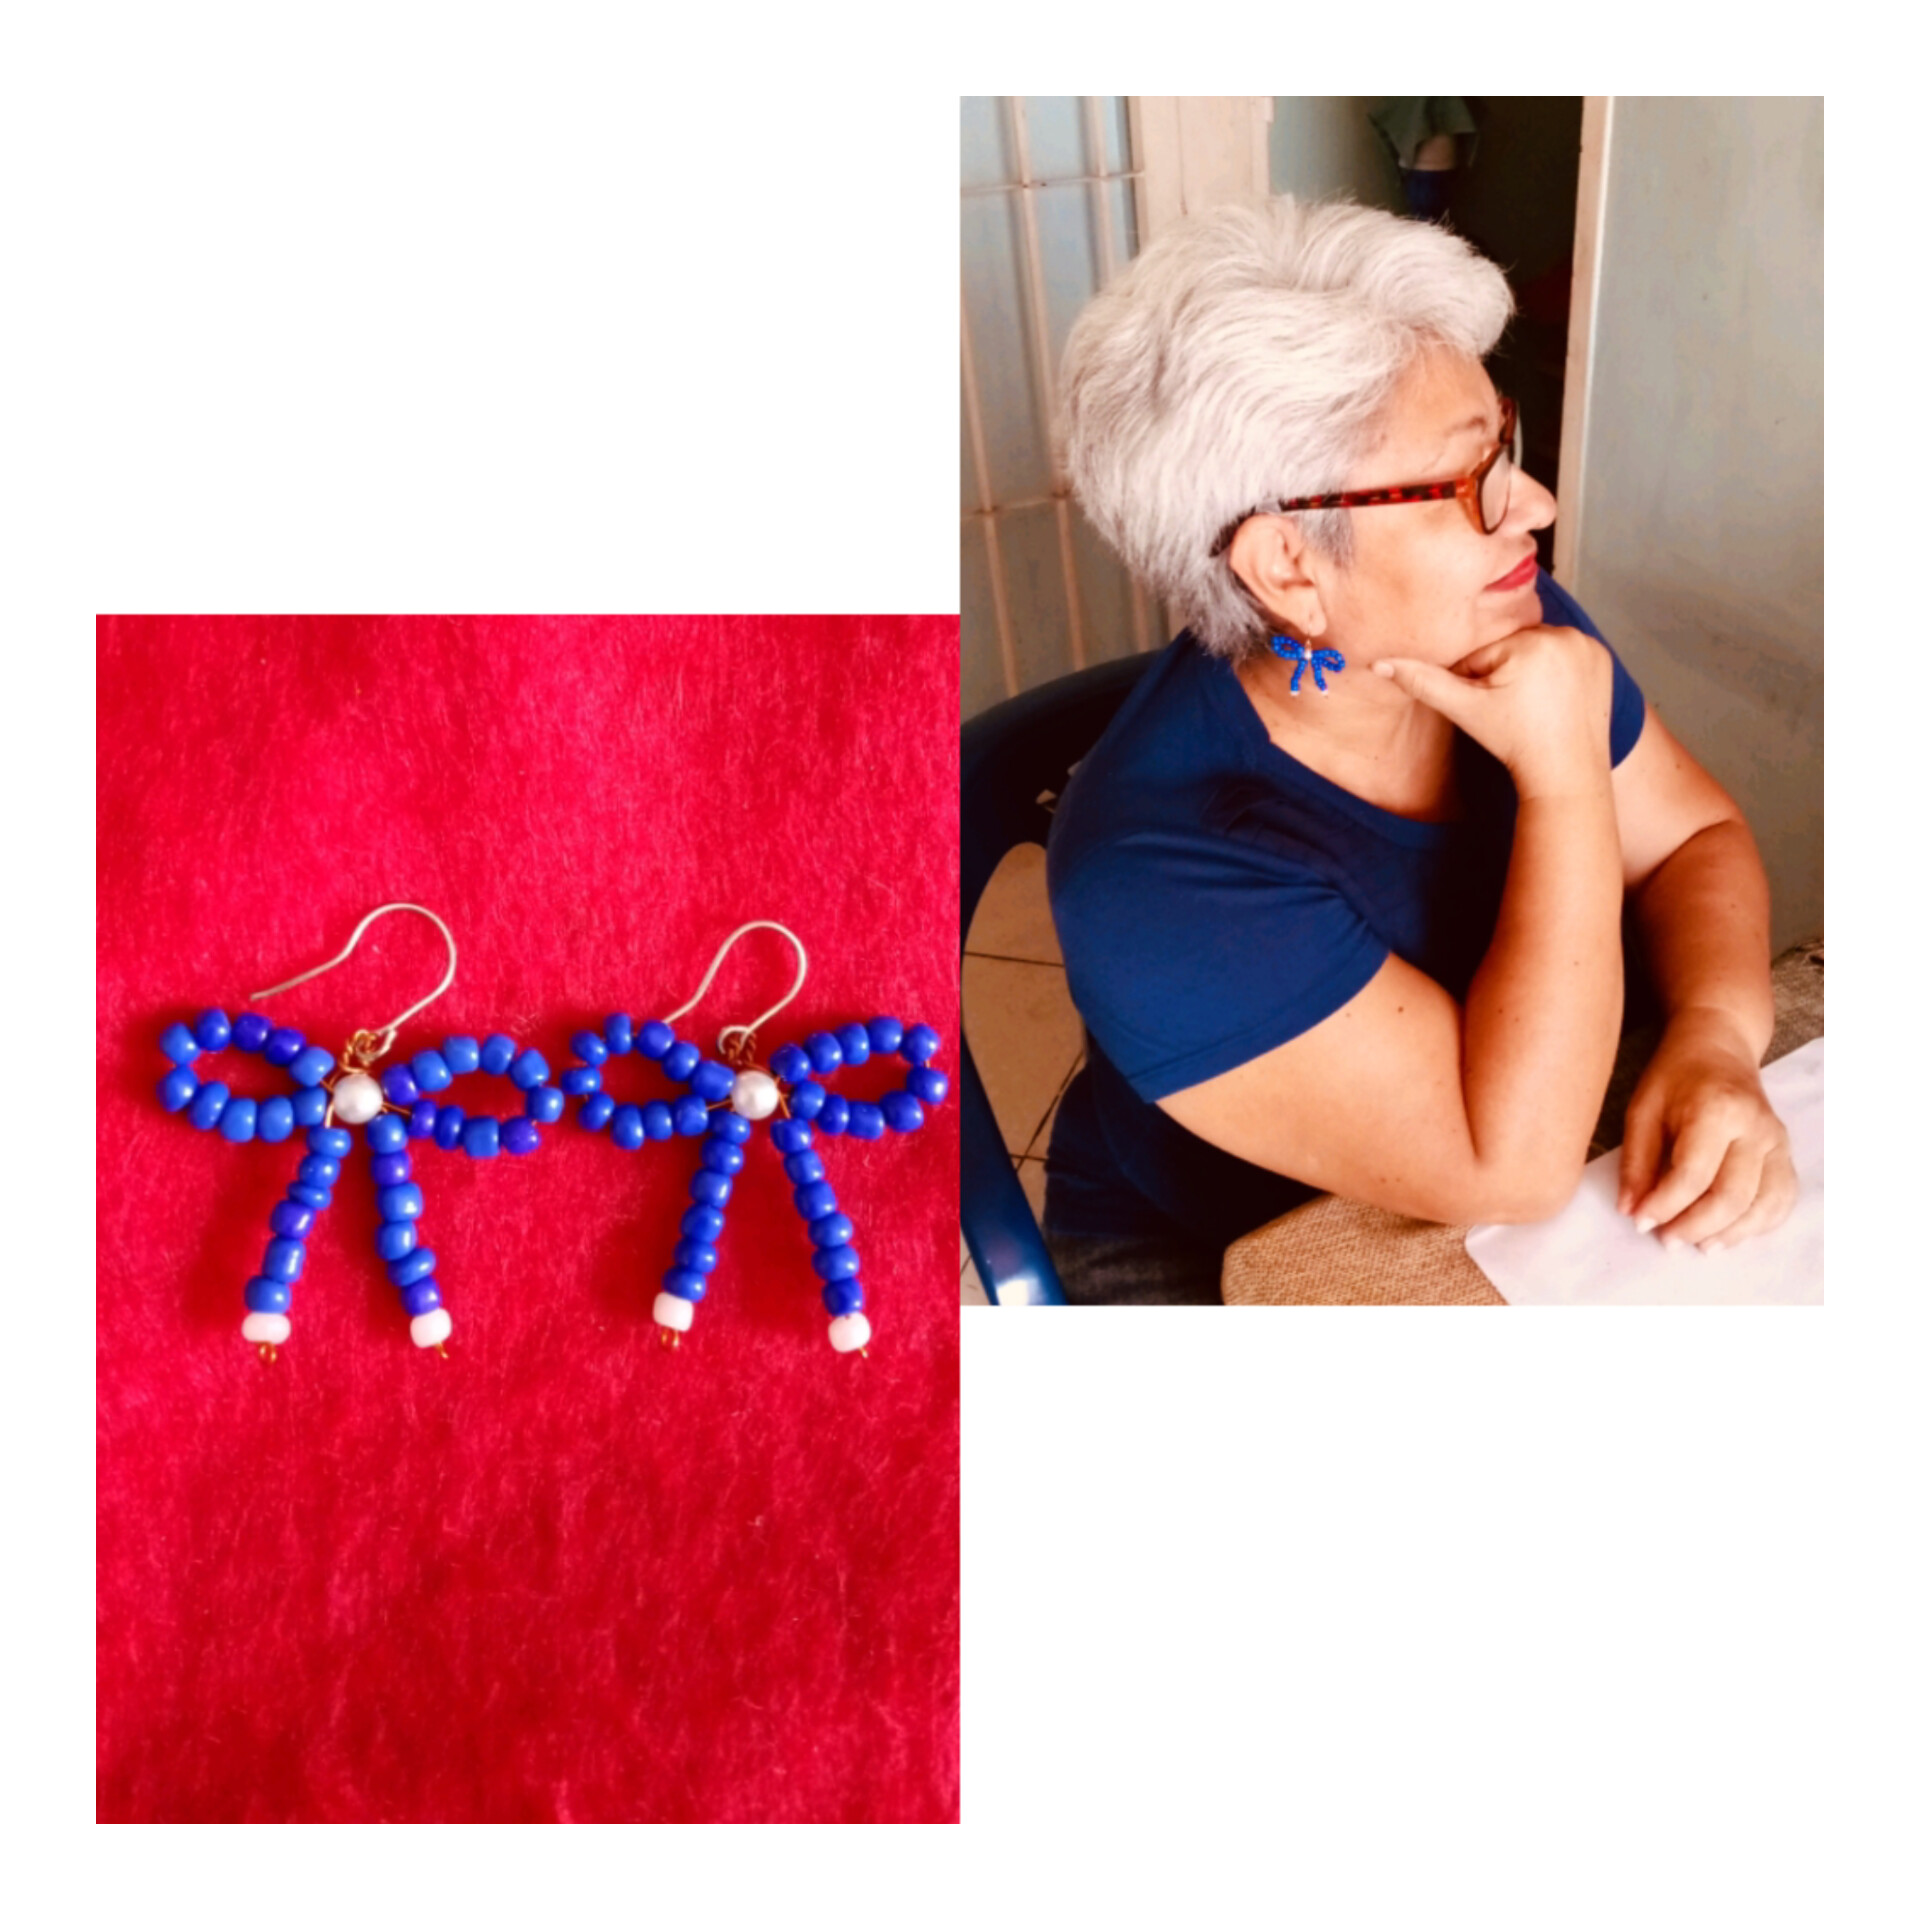
Hello, my appreciated artist friends of this beautiful #jewelry Community where we all learn from our colleagues about these beauties of creations that they give us every day, on this occasion I am going to share some beautiful Coquette Tendrils made with beads, here I have already seen some Tutorials that have been shared with us and also by reels that I see on Facebook are excellent and I said why not make some for the newspaper now that I am going to go out to the pool this Senior Week and as the name says to look flirty. Ok, I'll give you the step by step, it's really simple.
MATERIALES A UTILIZAR:
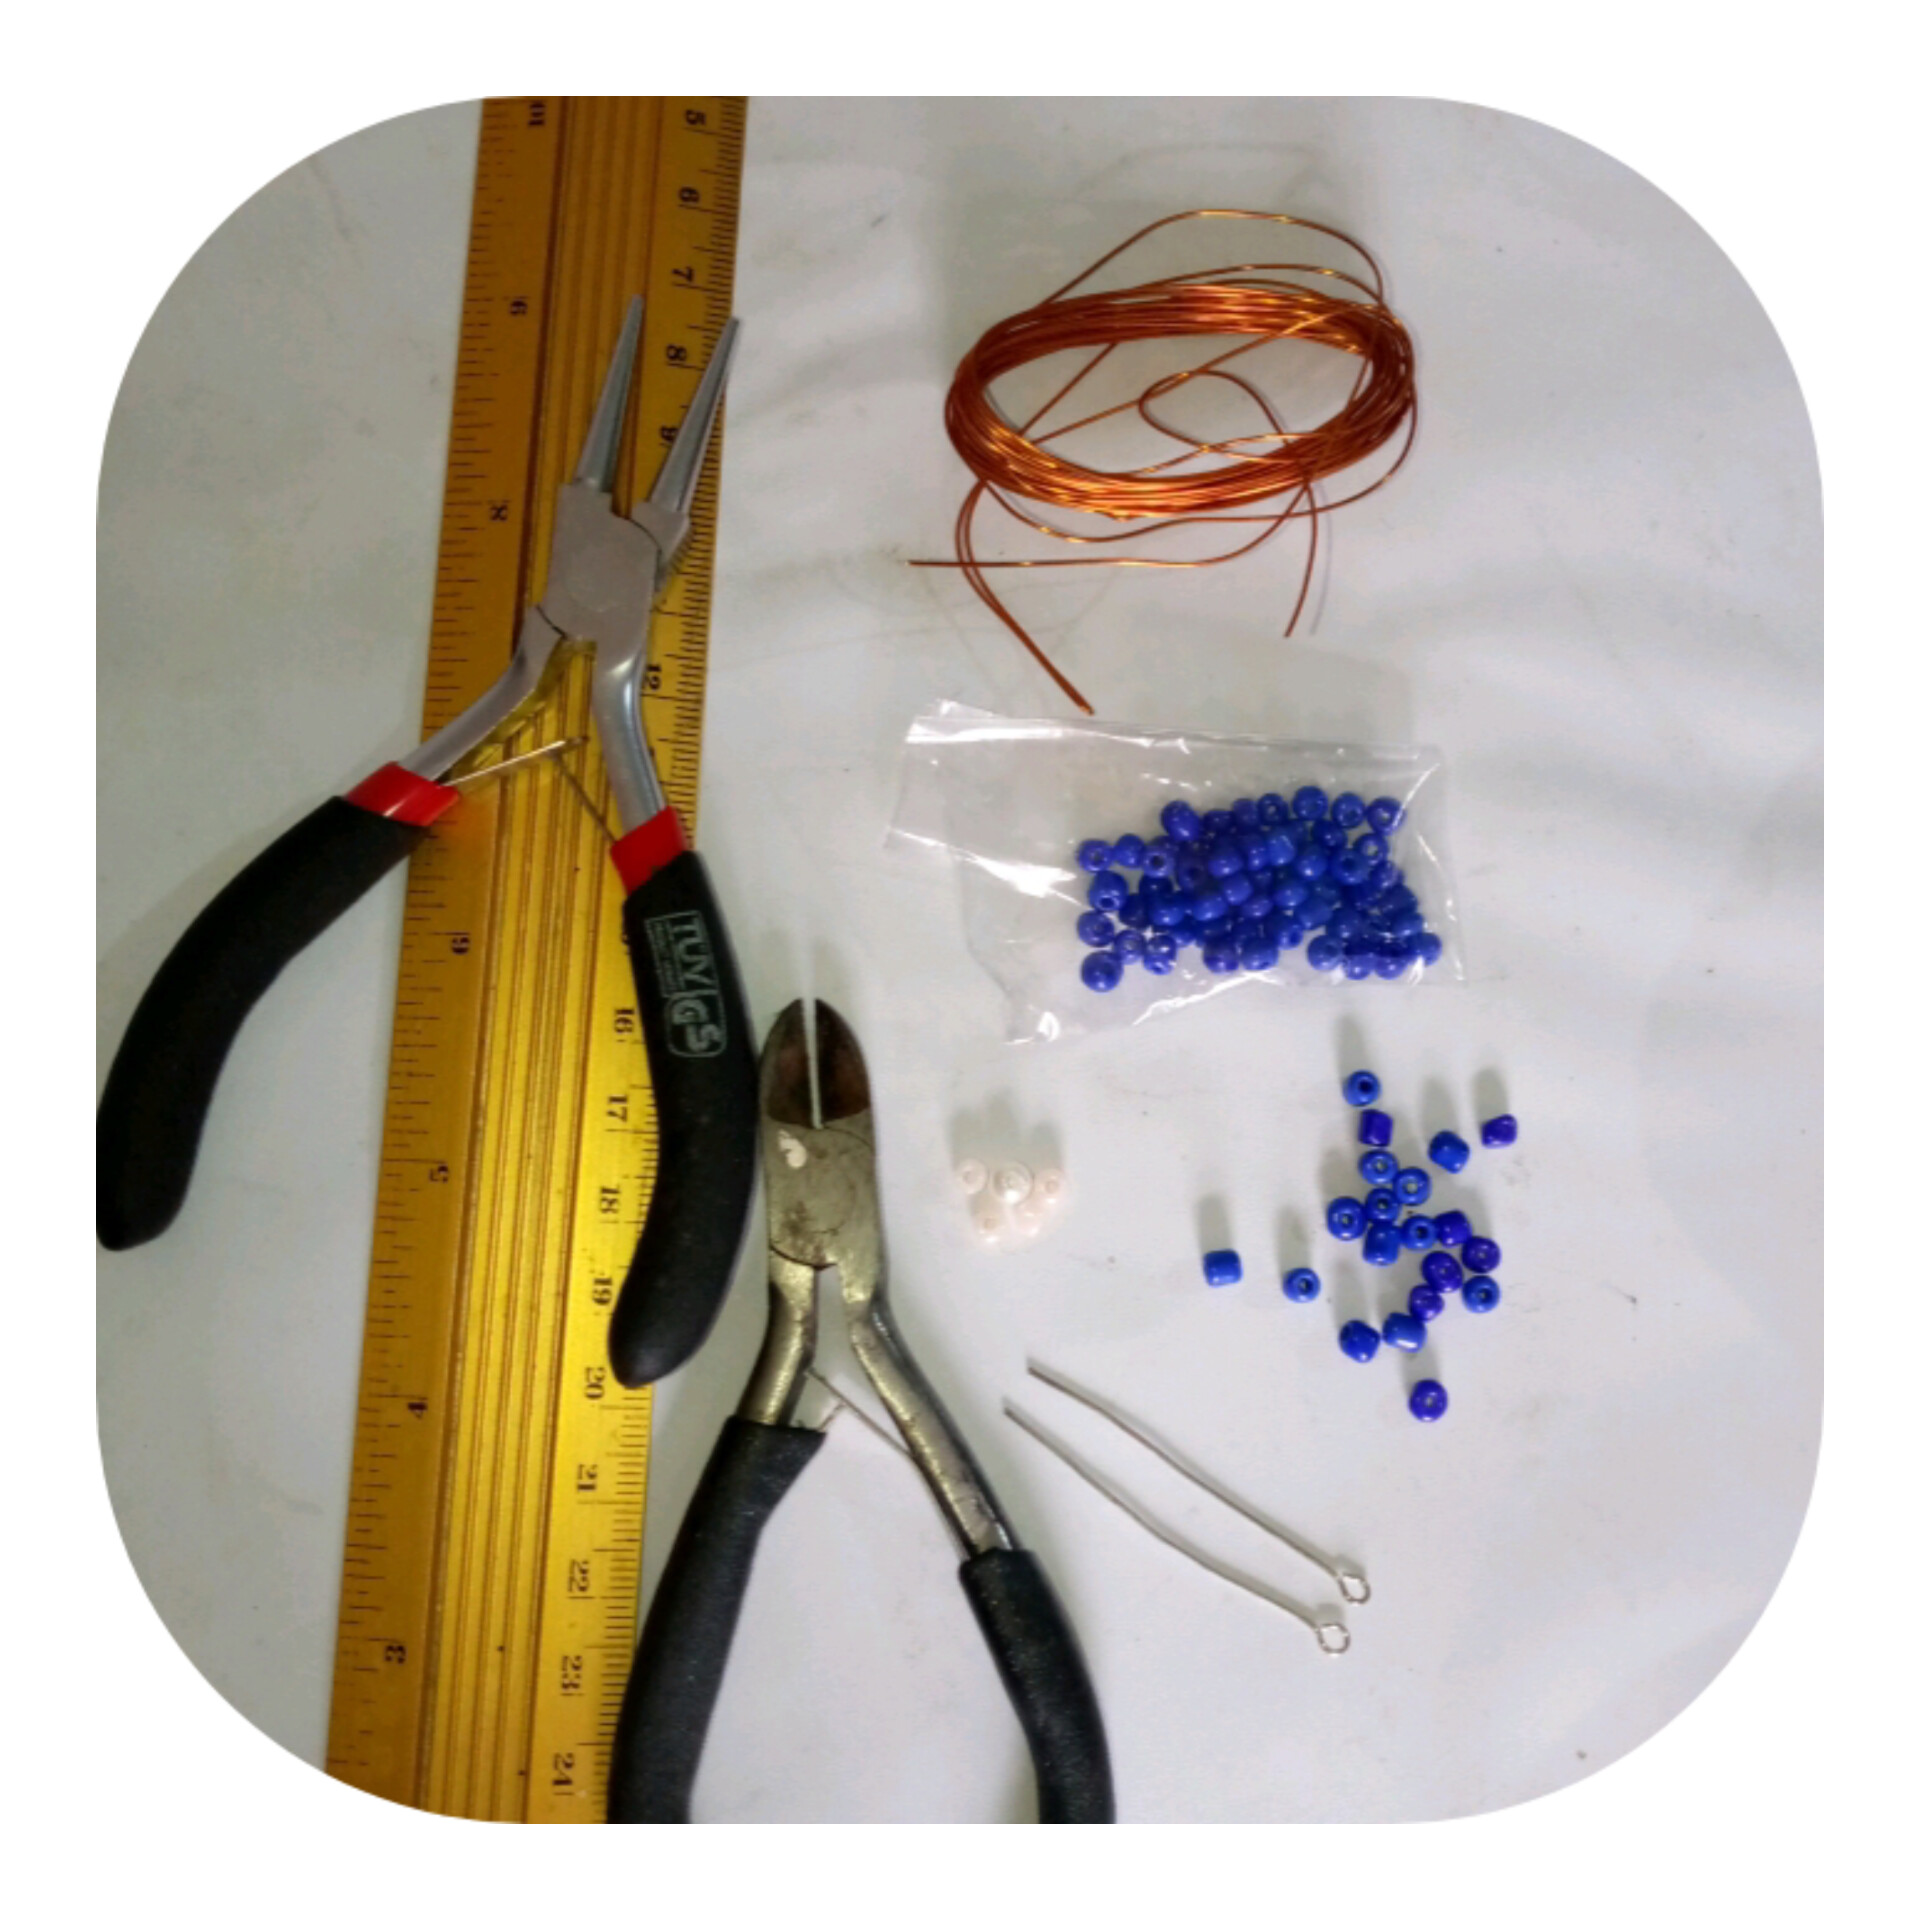
MATERIALS TO USE:
- Una regla
- Pinzas
- Alambre de bisutería
- 64 mostacillas azules
- 4 mostacillas rosadas
- 2 perlas blancas
- Alambre para hacer los ganchos de oreja.
- A rule
- Tweezers
- Jewelry wire
- 64 blue beads
- 4 pink beads
- 2 white pearls
- Wire to make the ear hooks.
PROCEDIMIENTO:
PROCEDURE:
PASO 1:
STEP 1:
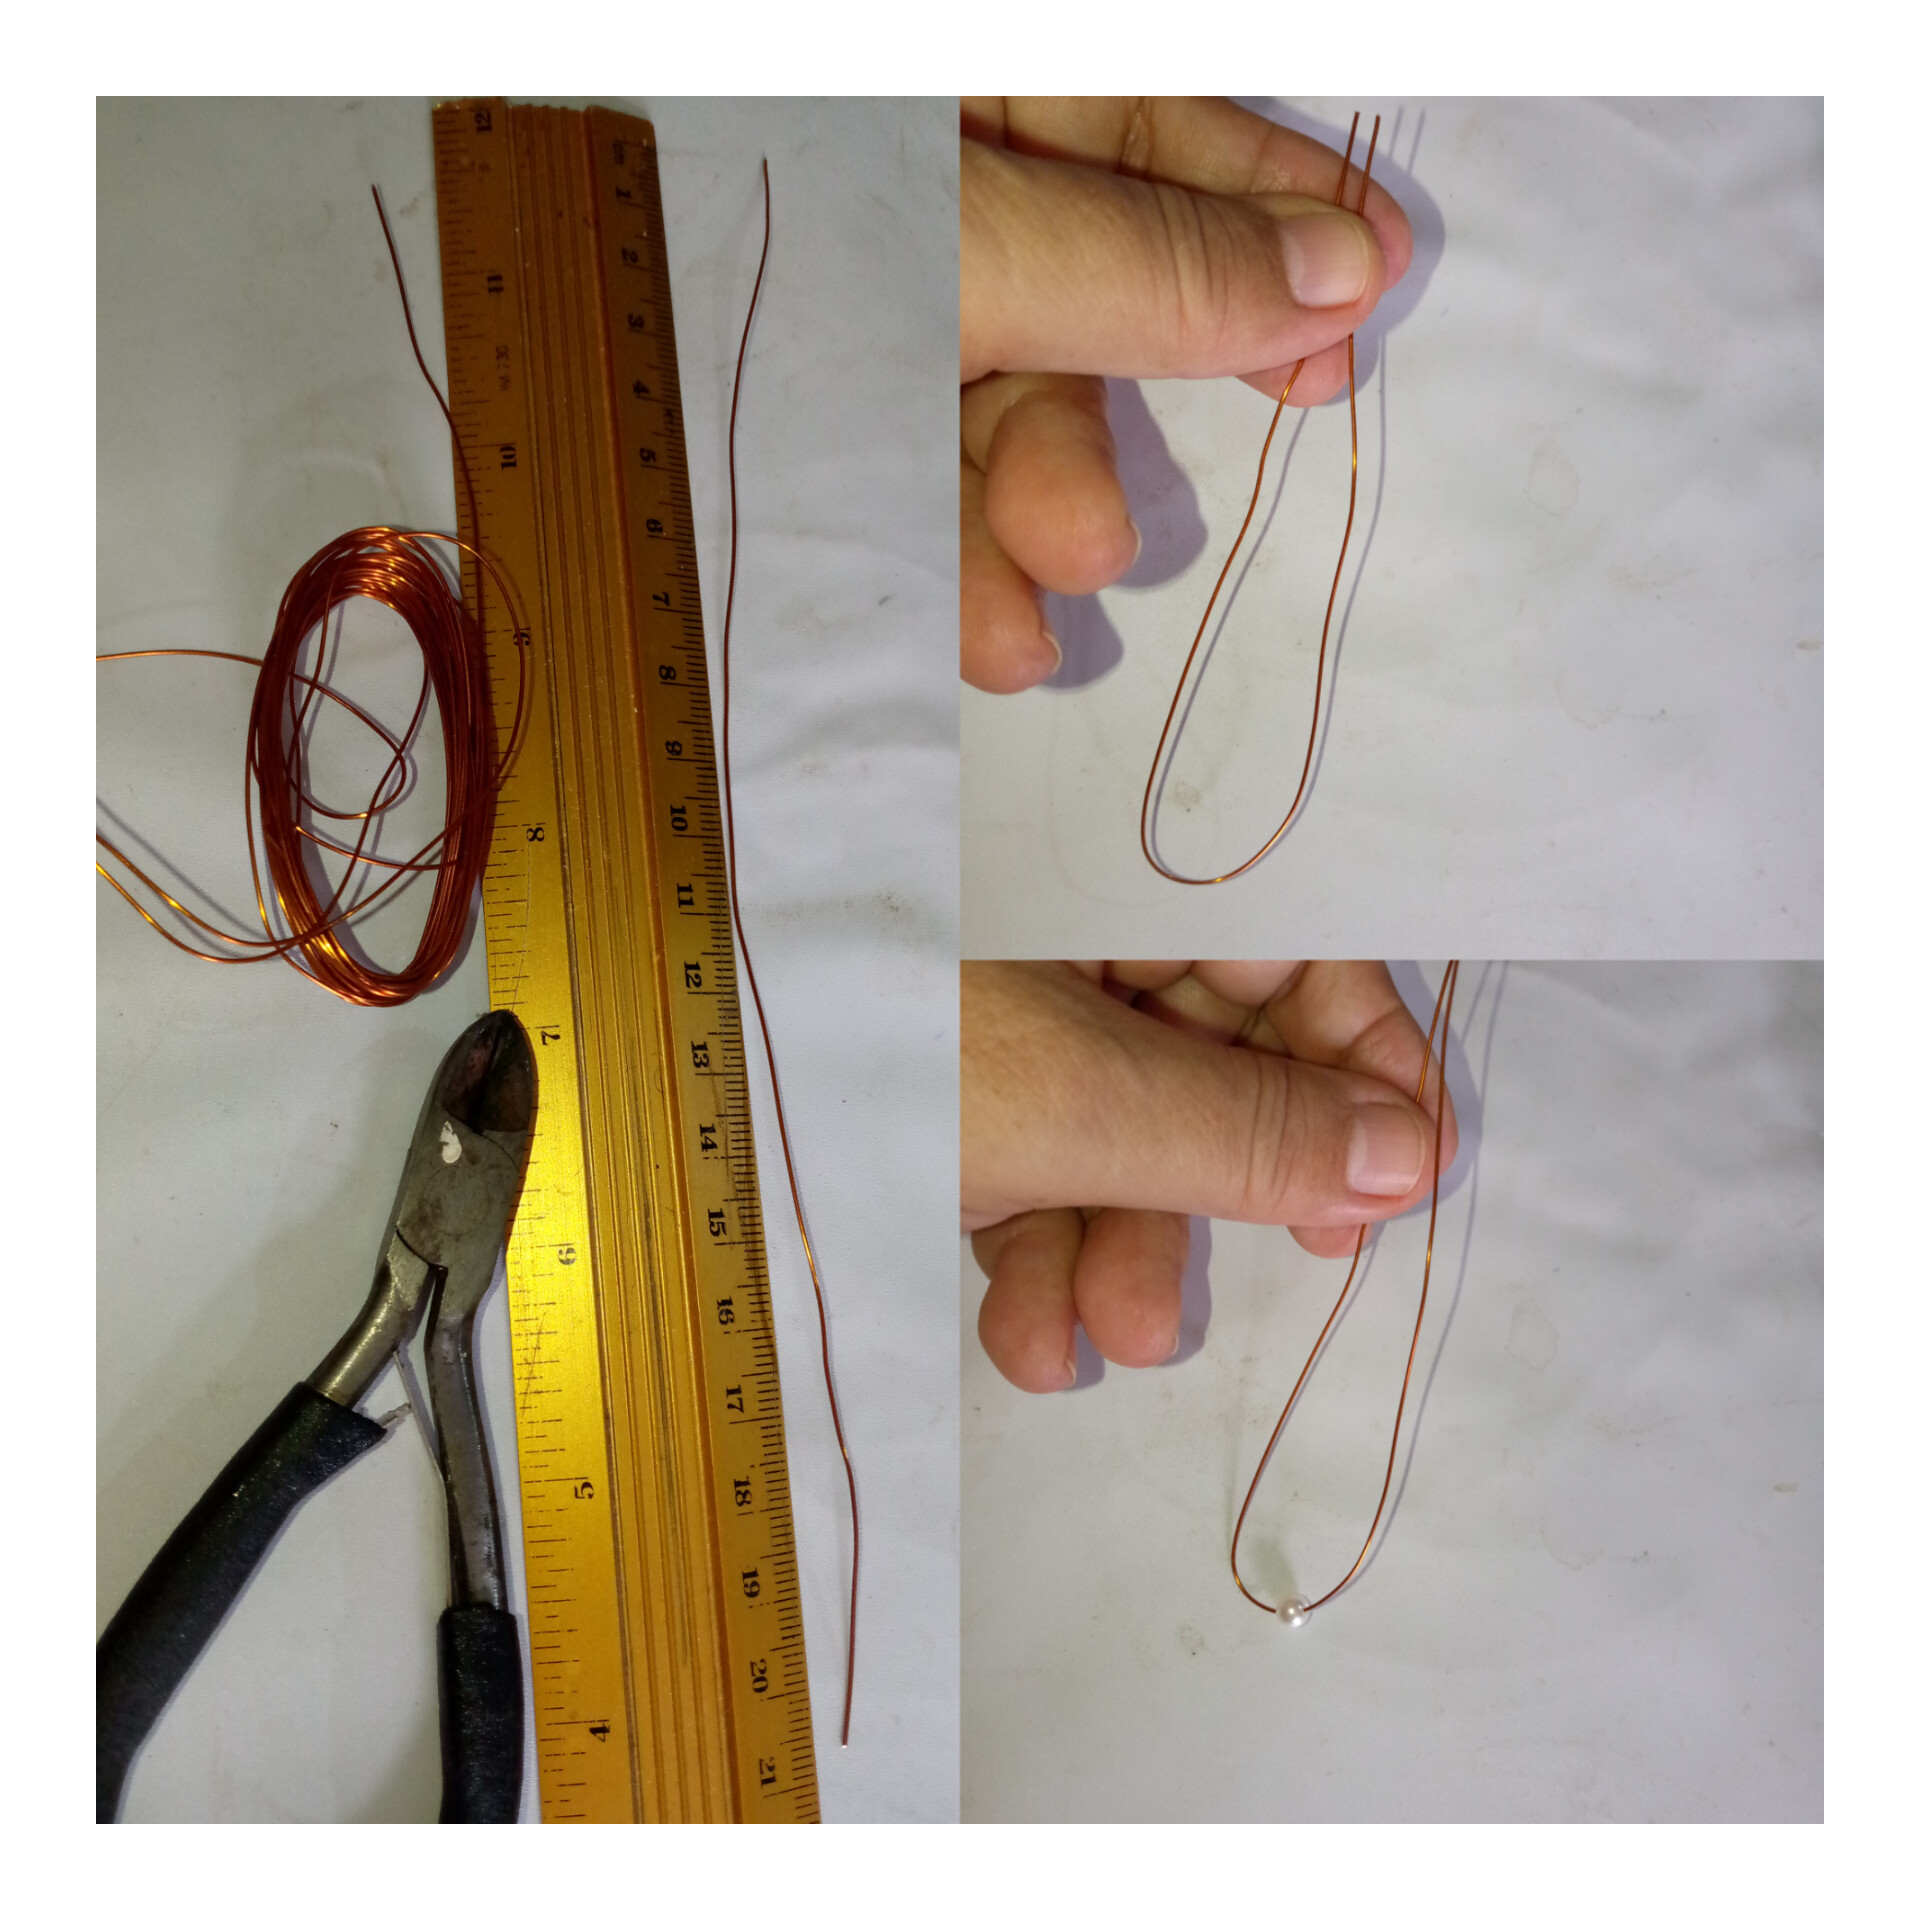
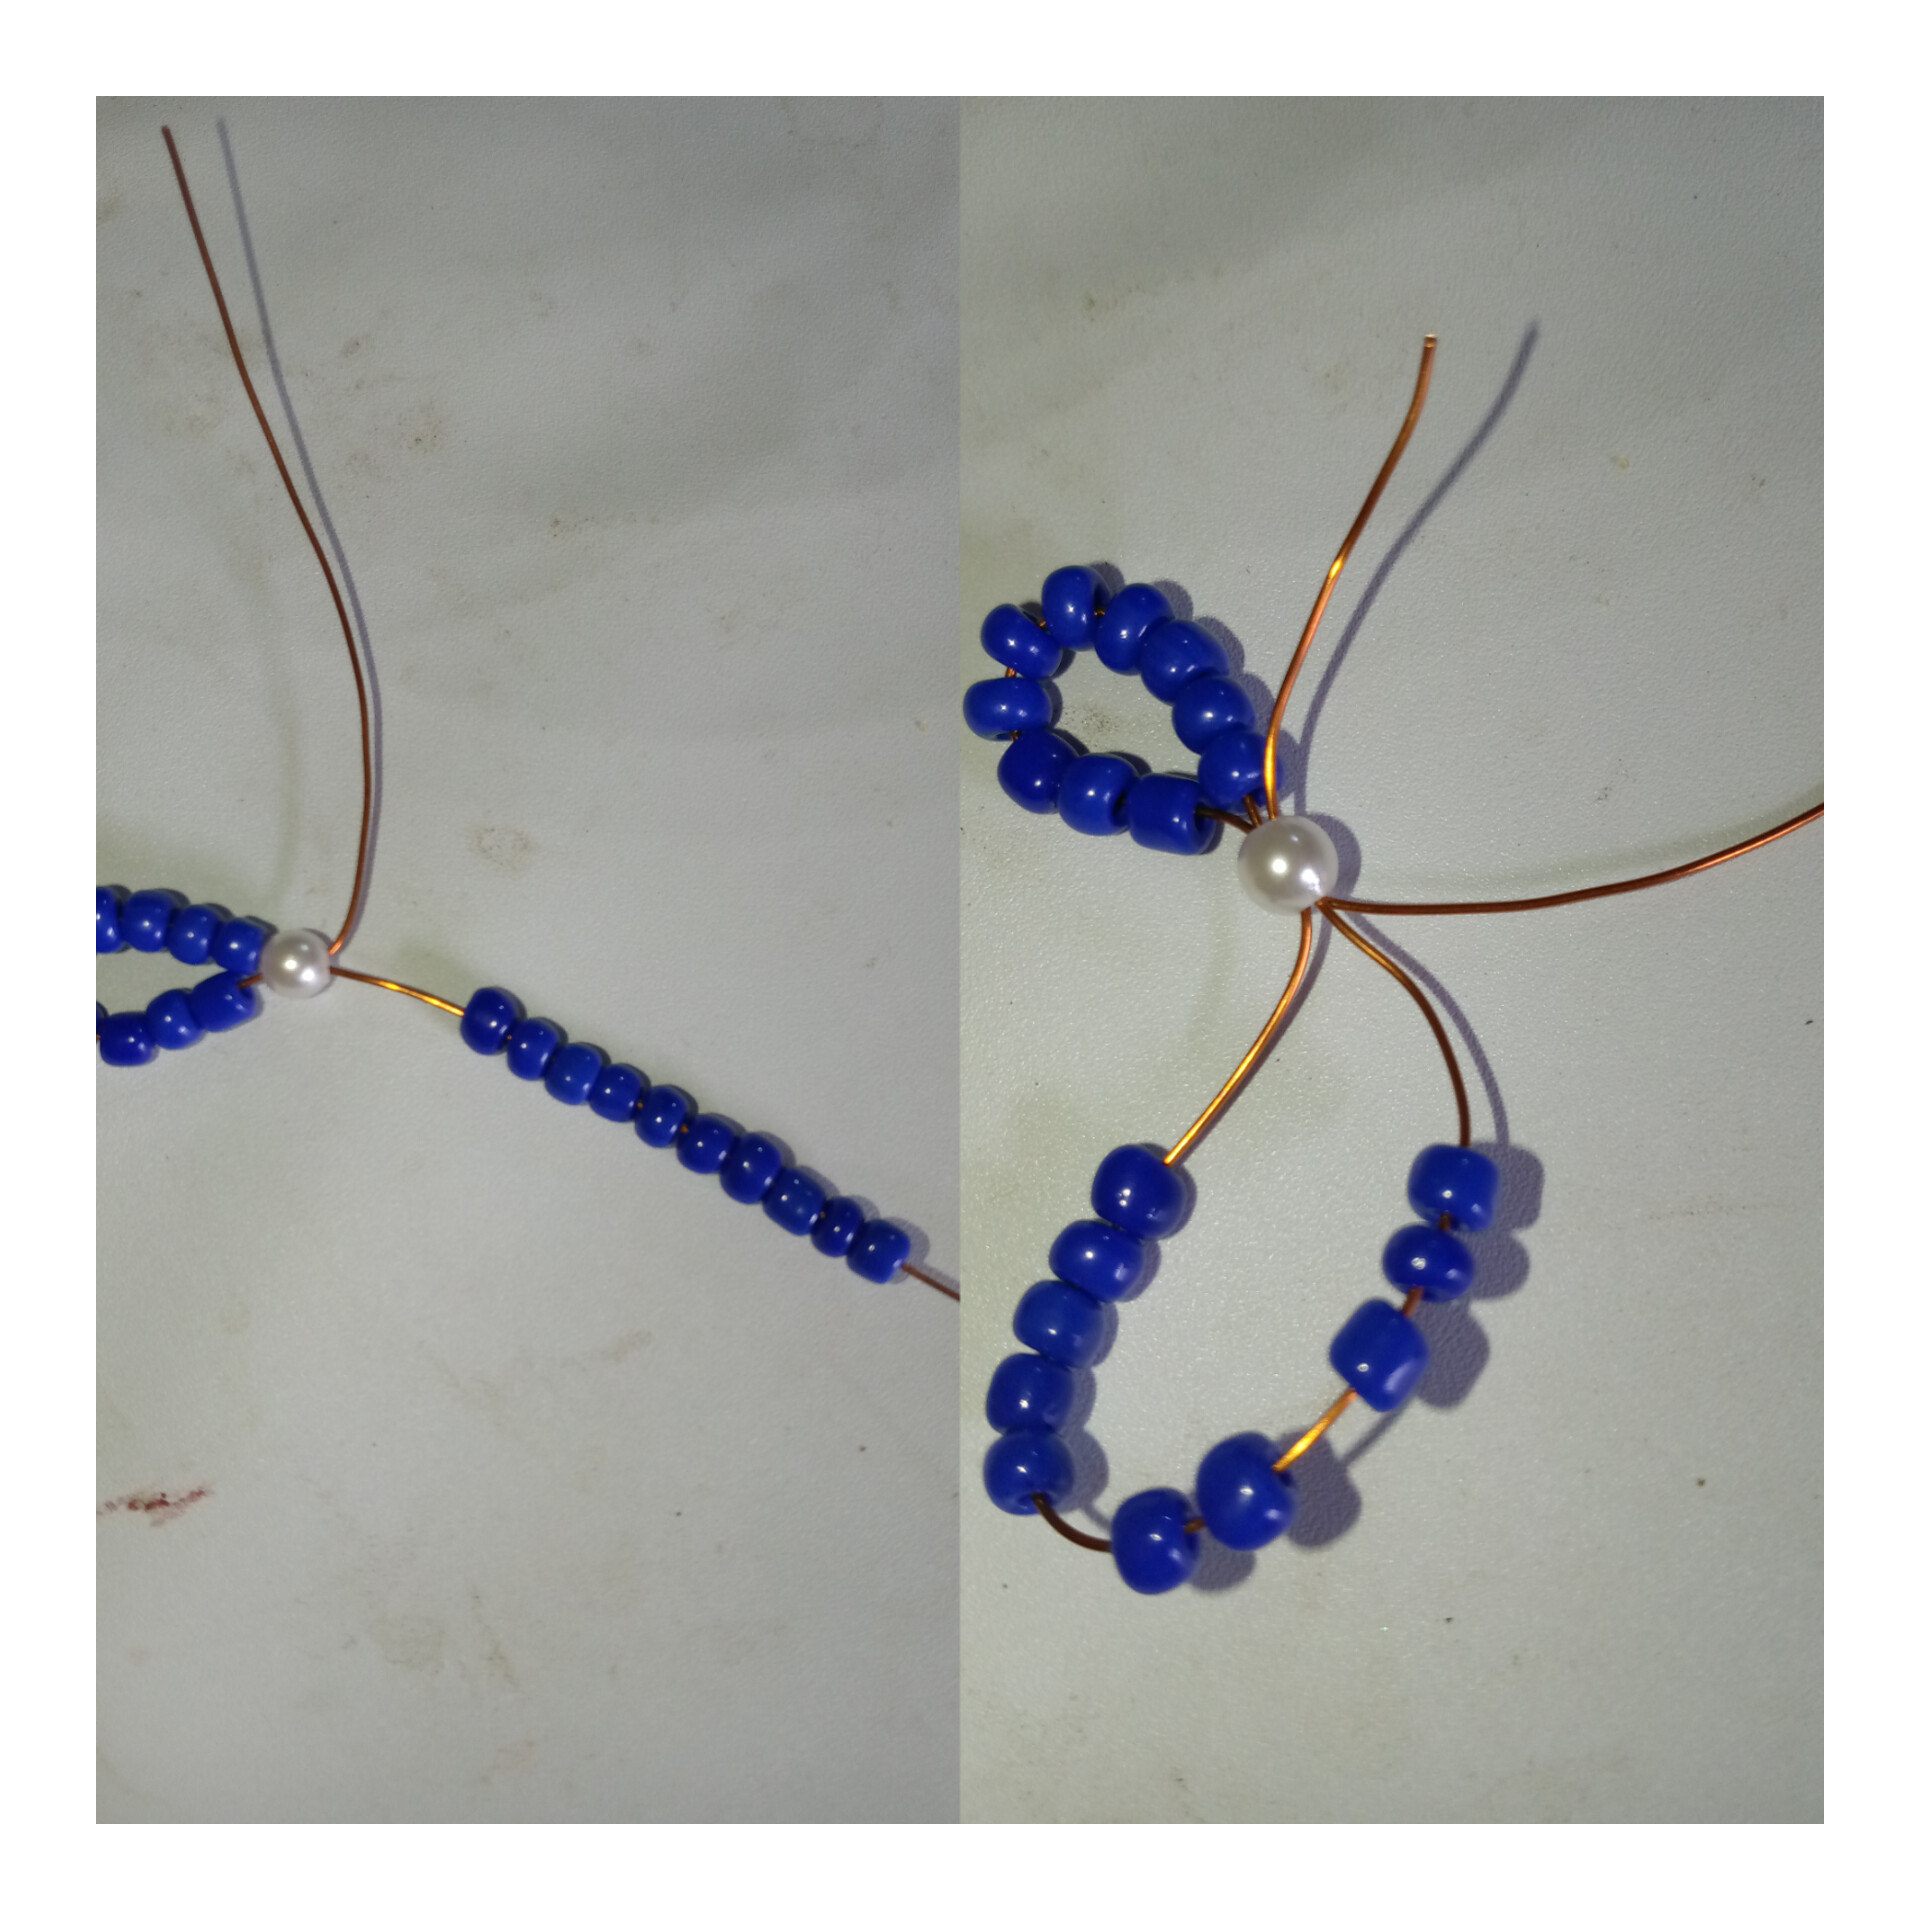
Comenzamos a realizar nuestros zarcillos primero tomamos la regla para medir el alambre y medimos 20 cmts de largo y cortamos, luego unimos las dos puntas del alambre para llevarlo a la mitad e introducimos una perla blanca exactamente centrada.
We begin to make our tendrils, first we take the ruler to measure the wire and we measure 20 cm long and cut, then we join the two ends of the wire to take it to the middle and we introduce a white pearl exactly centered.
PASO 2:
STEP 2:
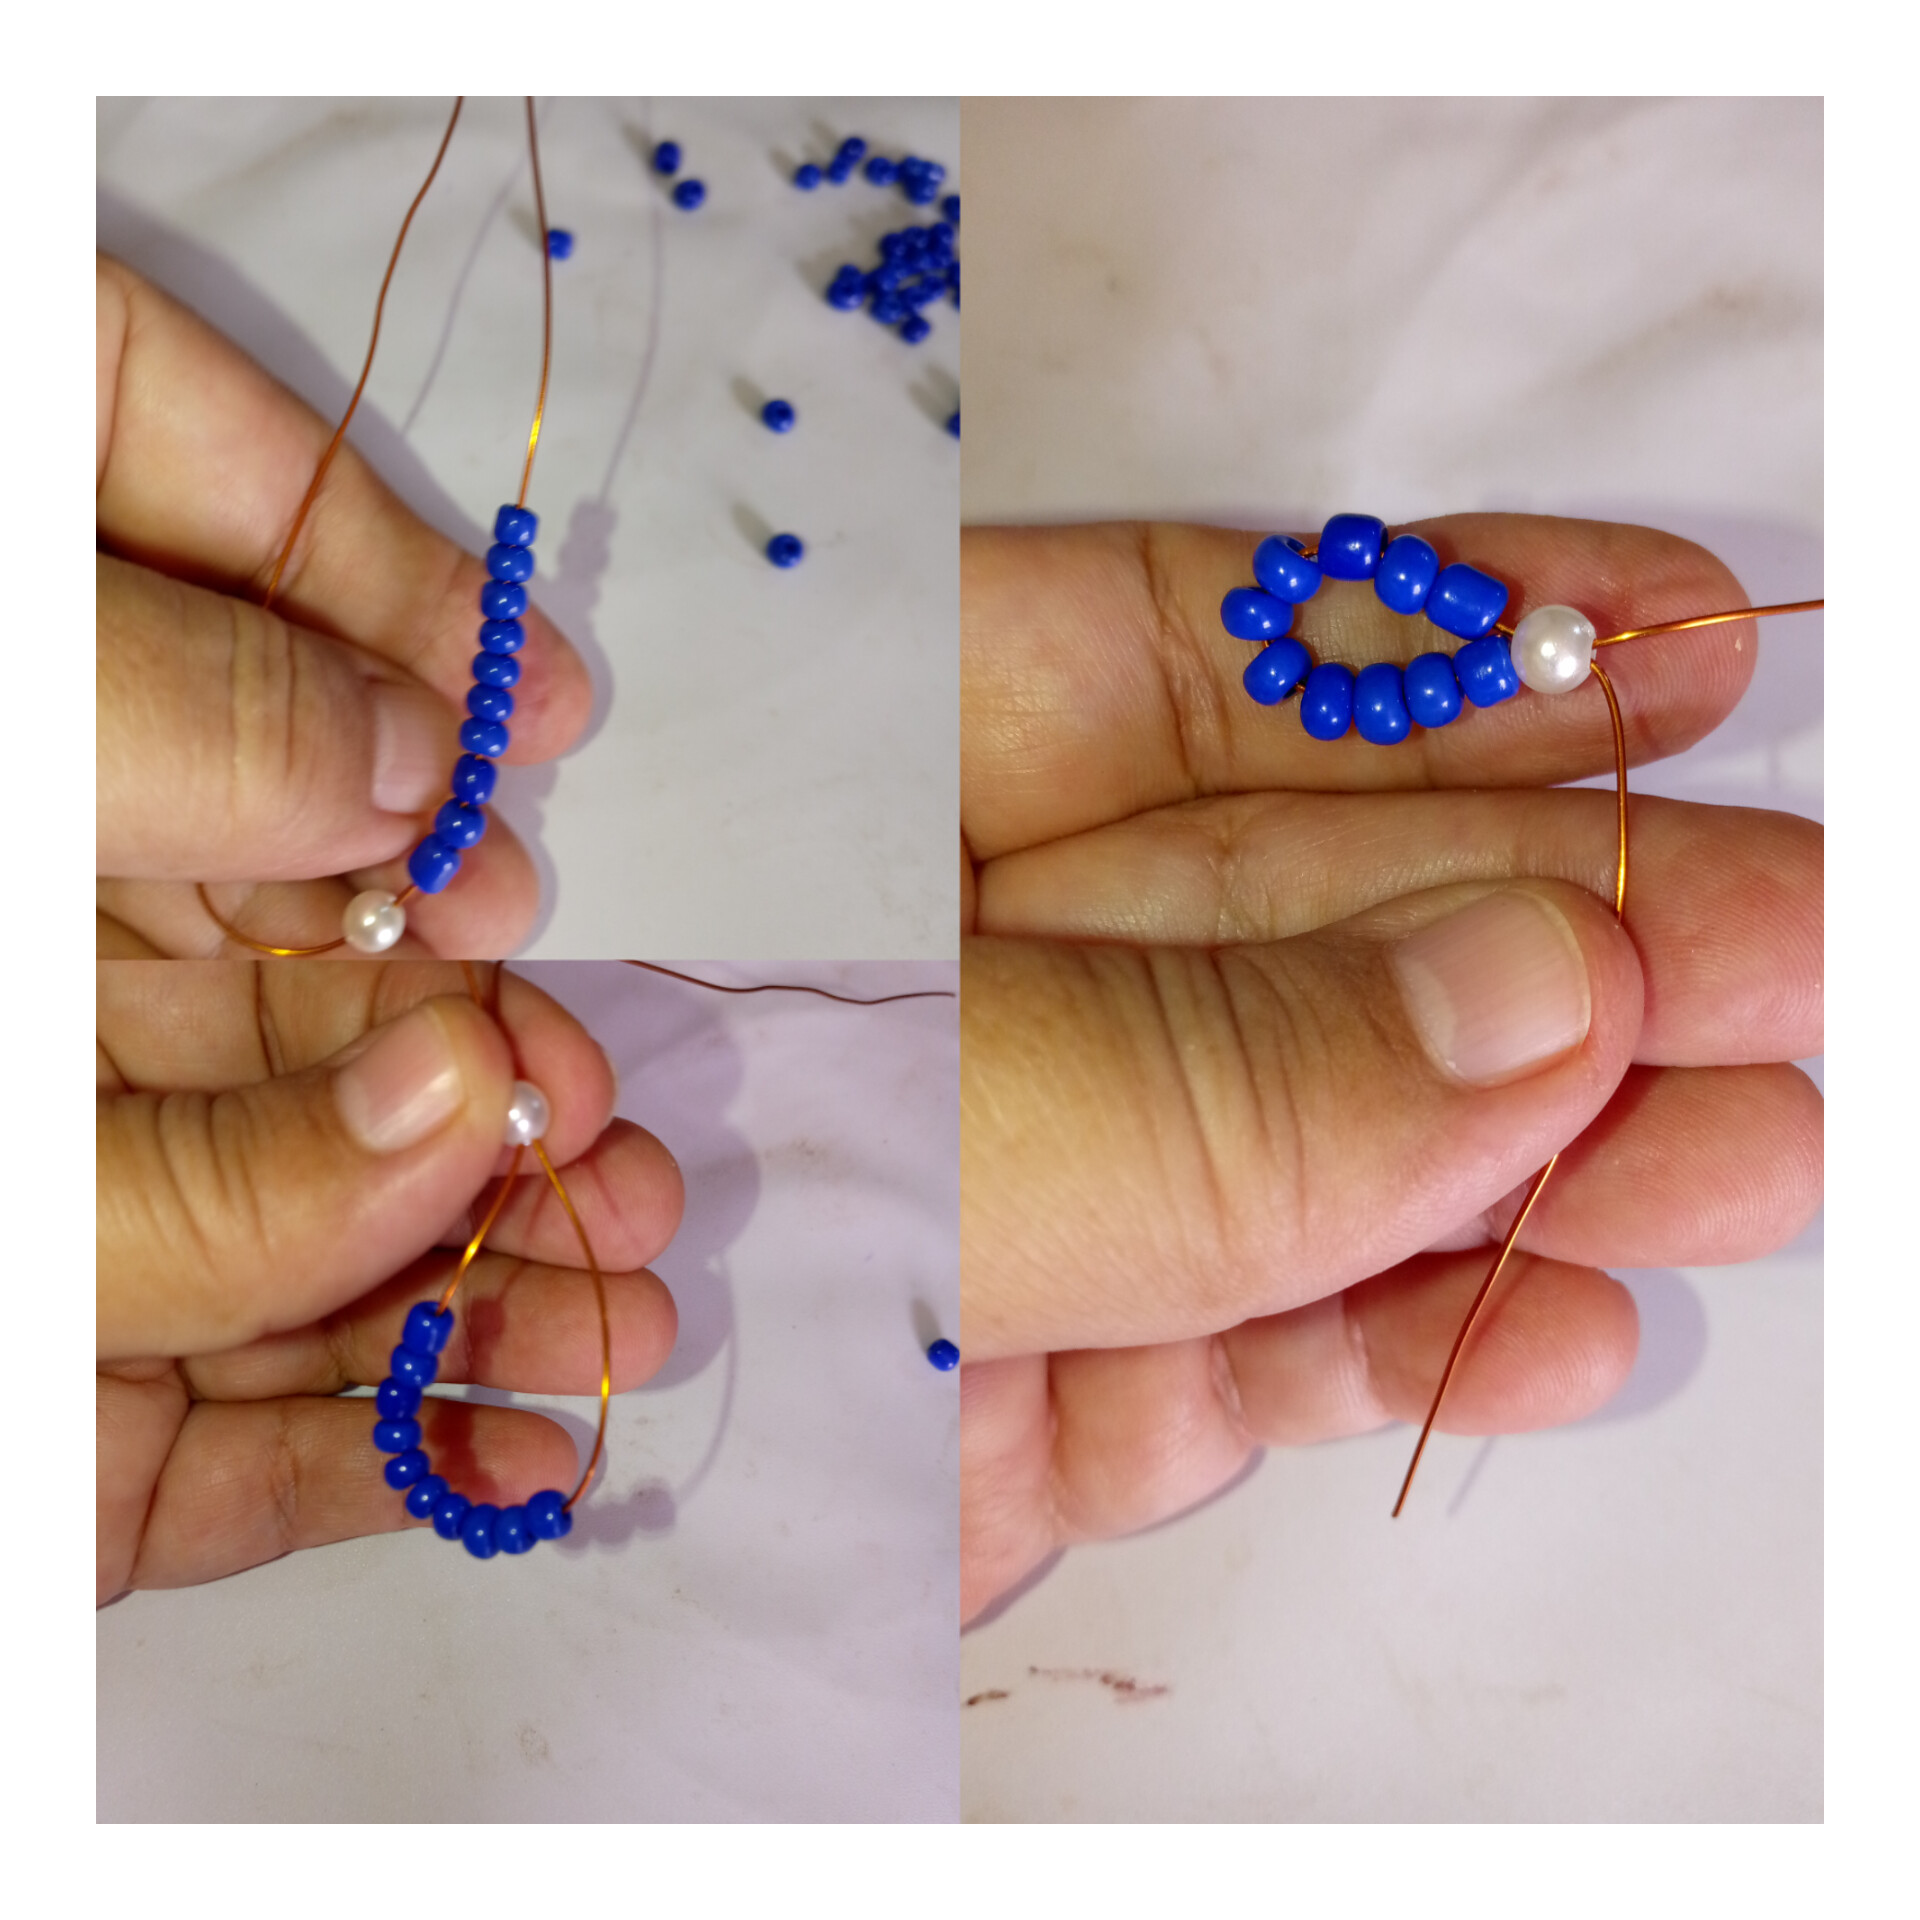
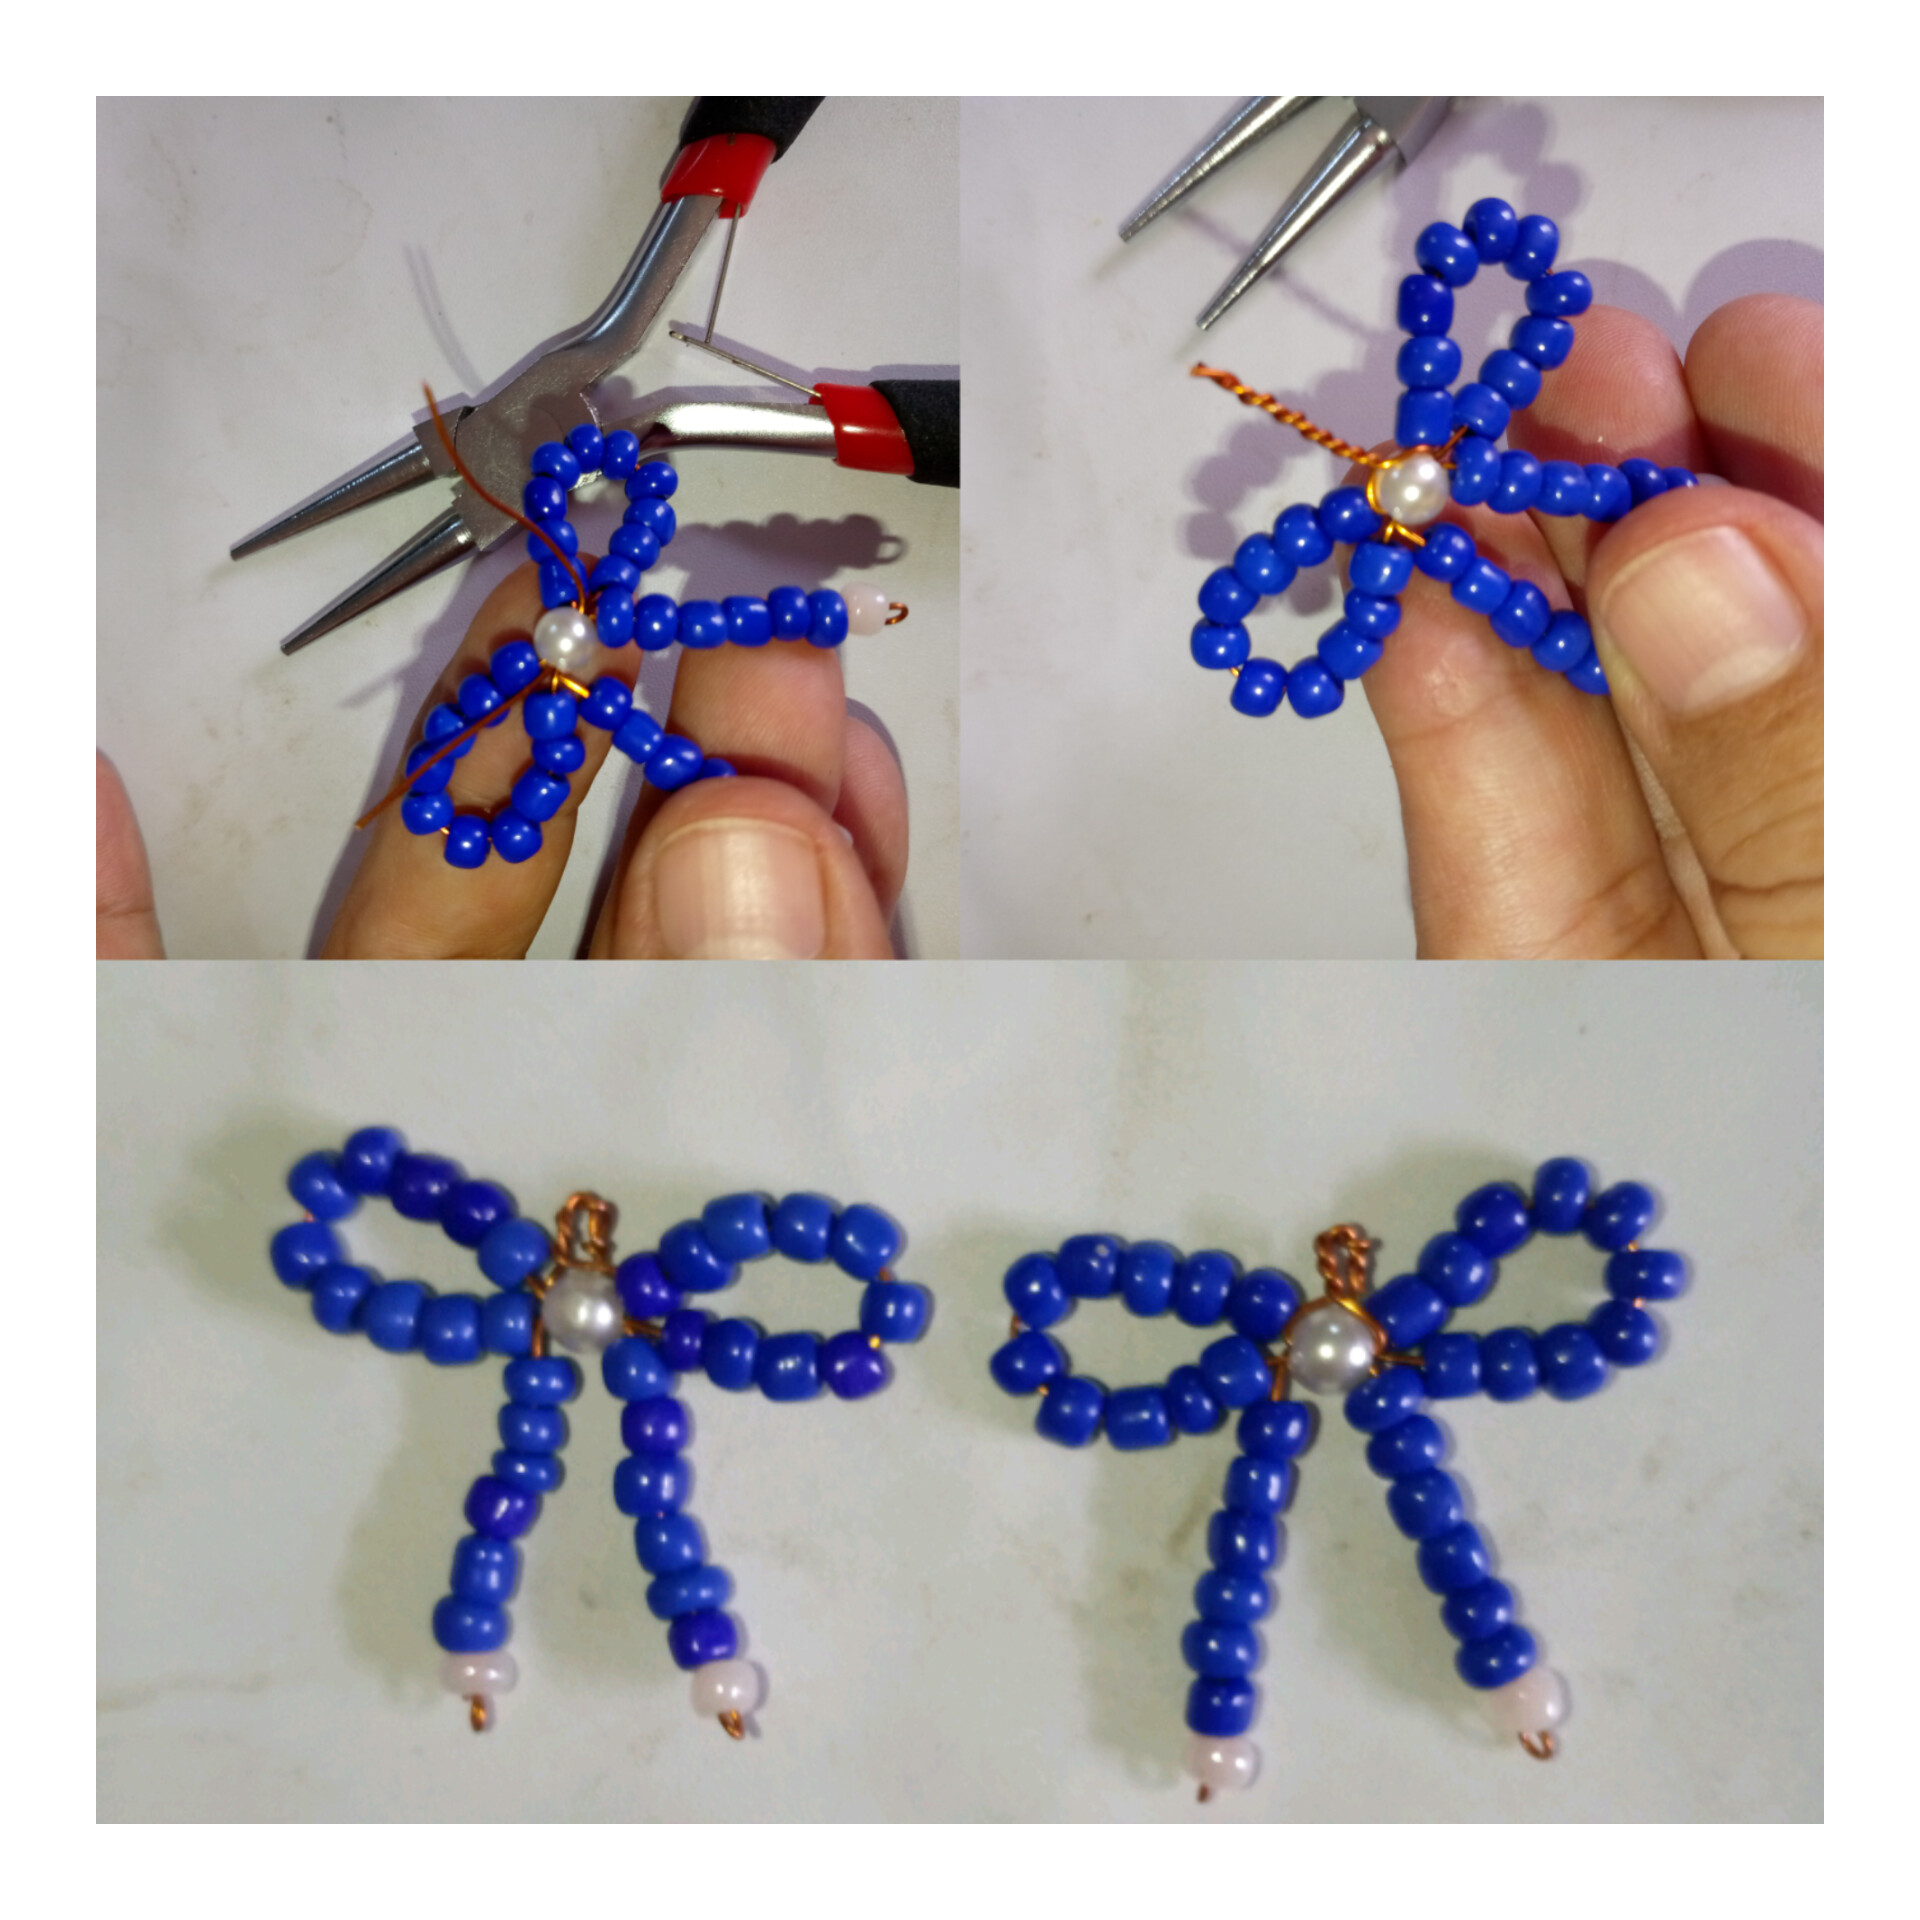
Ok preste atención con los pasos introducimos 10 mostacillas azules por cualquiera de los lados de la punta del alambre y por donde introducimos las mostacillas tomamos esa punta ahora la vamos a meter por la perla blanca y jala, pero asegurate que esté centrada la perla, una vez que haya jalado el alambre y acomode bien las mostacillas lleva el alambre hacia abajo y te da esta forma ya este es el primer moño del lazo.
Ok, pay attention to the steps, we introduce 10 blue beads on either side of the tip of the wire and where we introduce the beads we take that tip, now we are going to put it through the white pearl and pull, but make sure that the pearl is centered, one Once you have pulled the wire and arranged the beads well, take the wire down and give it this shape and this is the first bow of the bow.
PASO 3:
STEP 3:
Luego seguimos vamos ahora introducir otras 10 mostacillas azules del otro lado rodamos y jalamos e introducimos el alambre por la perla blanca y jala.
Then we continue, let's now introduce another 10 blue beads on the other side, roll and pull and insert the wire through the white bead and pull.
PASO 4:
STEP 4:
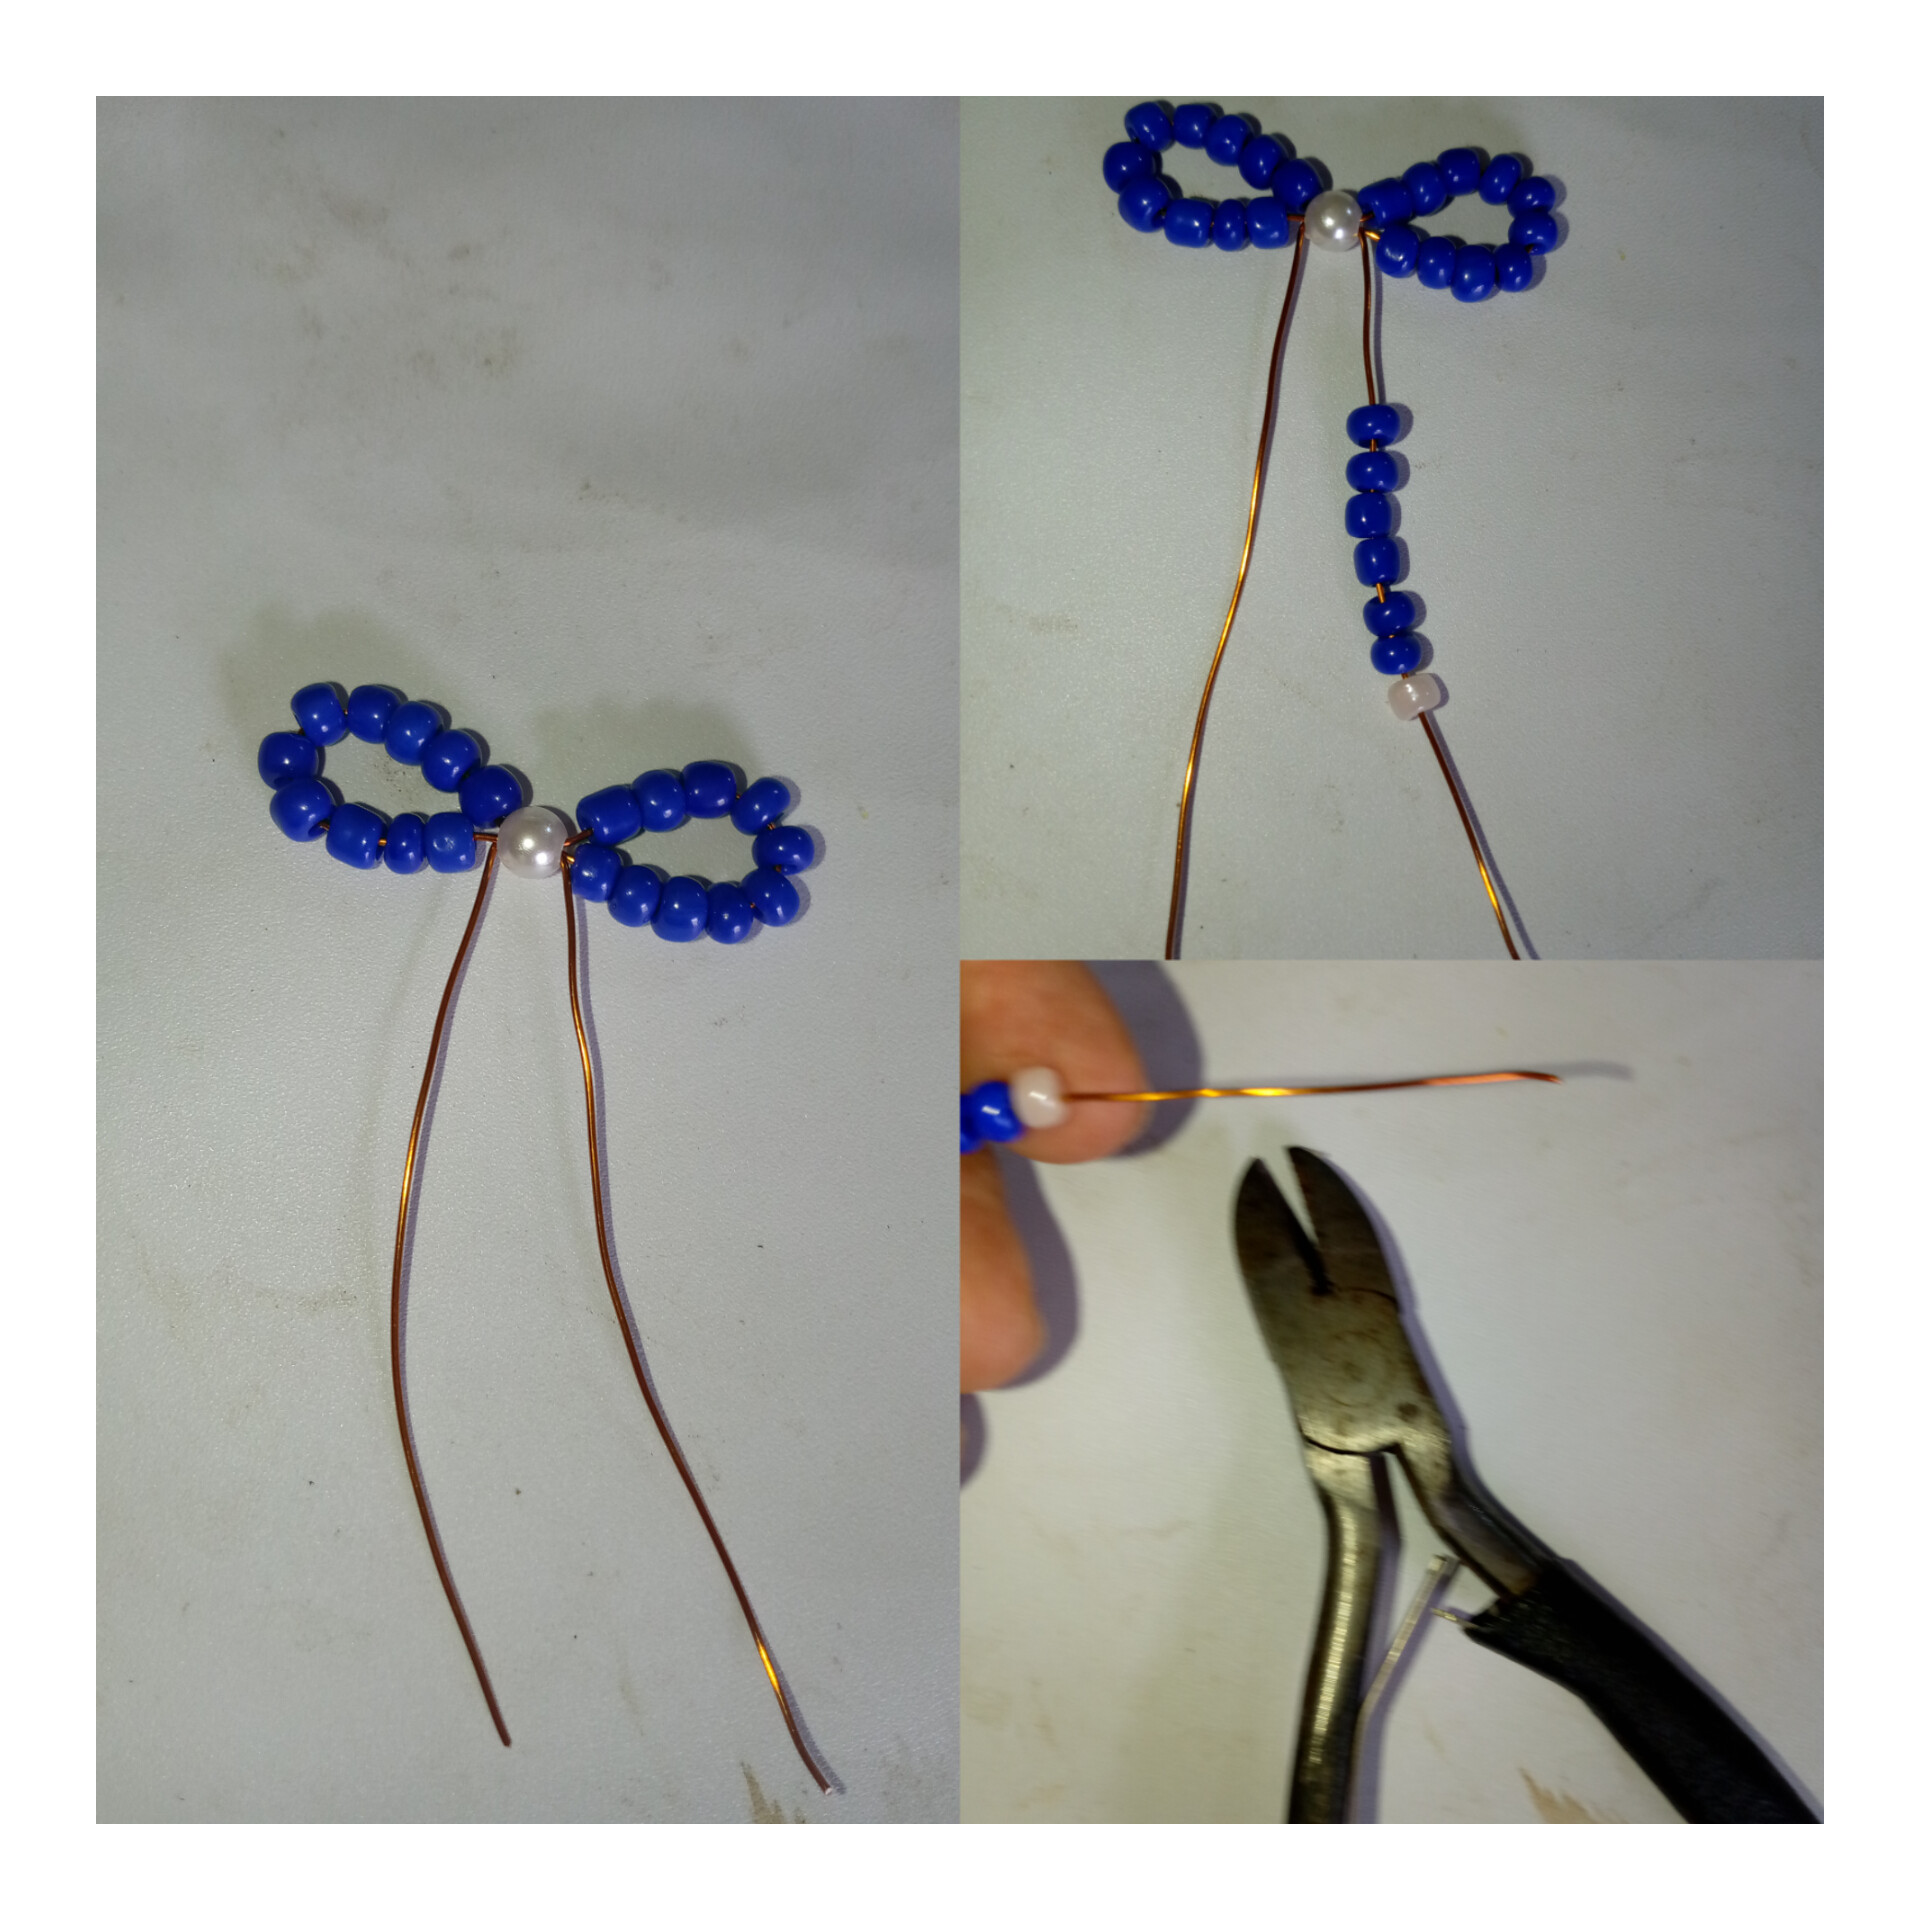
Cuando haya acomodado y jalado el alambre ya tiene los dos moños del lazo y los alambres van hacia abajo de los moños, luego introduce 6 mostacillas azules por uno de los alambres y una mostacilla rosada allí te sobra un pedazo de alambre.
When you have arranged and pulled the wire you already have the two bows of the bow and the wires go down the bows, then insert 6 blue beads through one of the wires and a pink bead there you have a piece of wire left over.
PASO 5:
STEP 5:
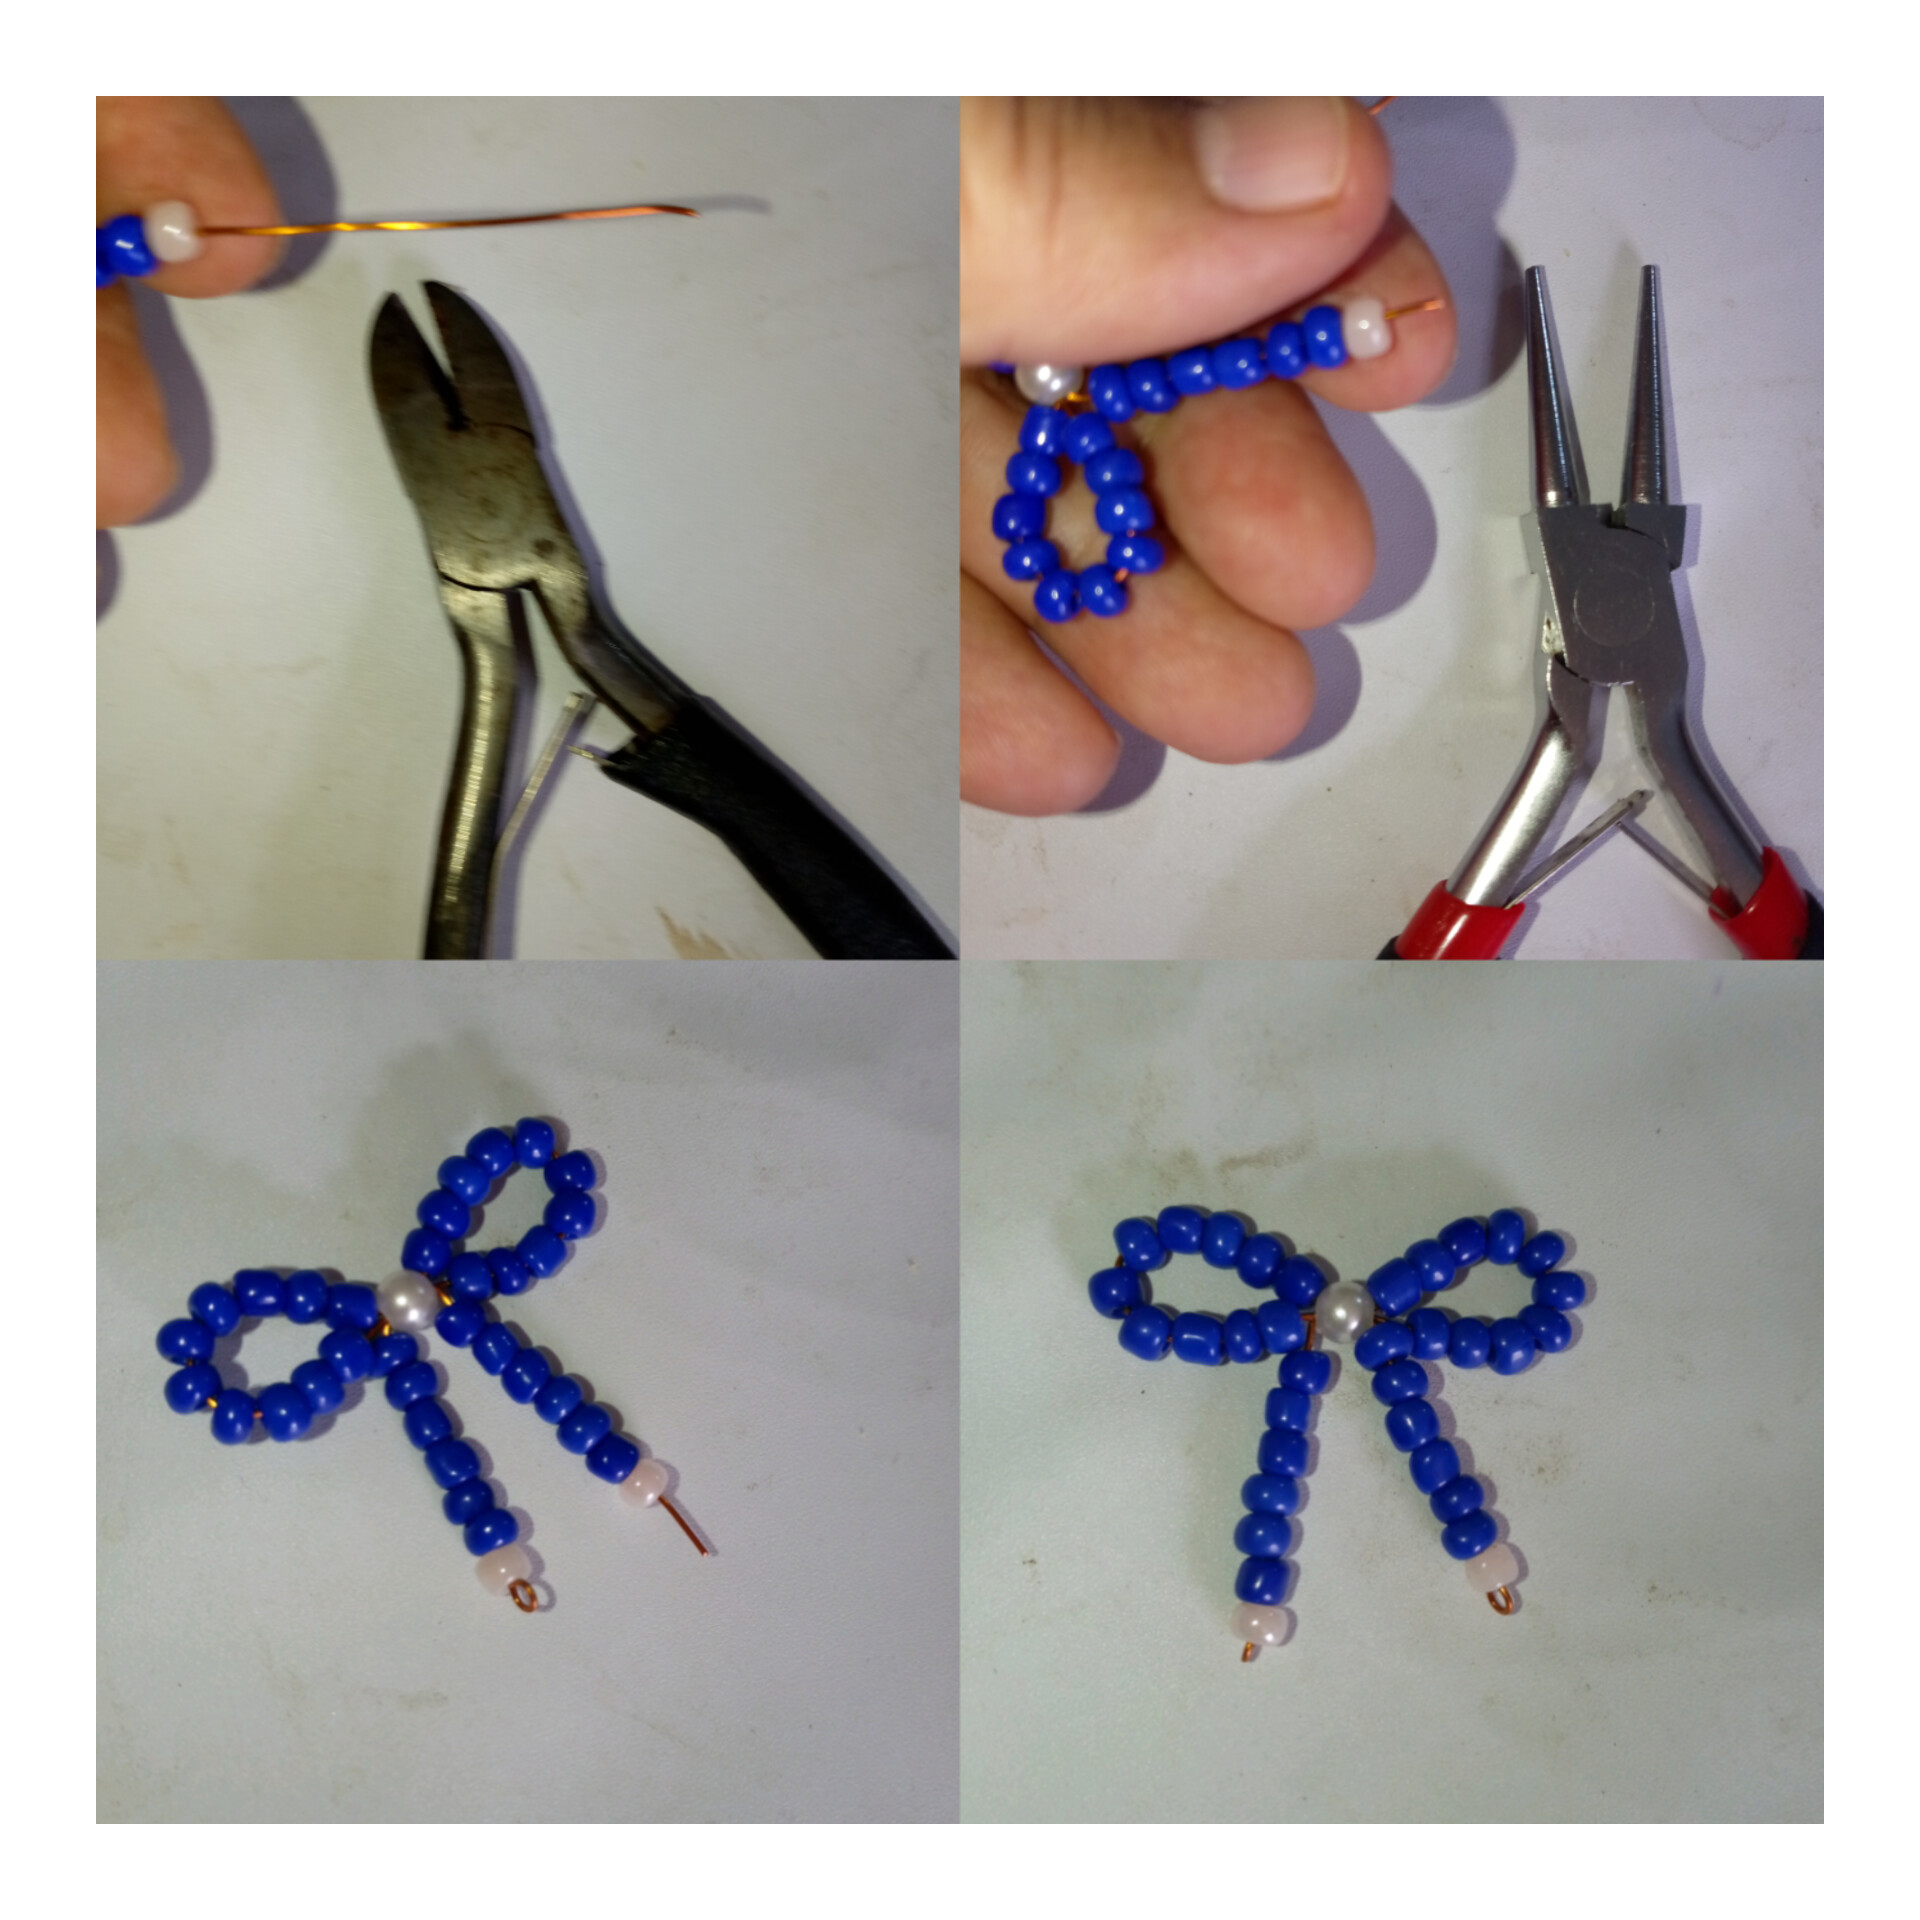
Ahora tienes un sobrante de alambre cortas y deja un cms y con la pinza hazle un arito, después ahora para completar vuelves aintroducir 6 mostacillas azules y una rosada y repite y ya ves como te queda.
Now you have a surplus of wire, cut it and leave a cm and with the tweezers make a ring, then now to complete it, reintroduce 6 blue beads and one pink one and repeat and you will see how it looks.
PASO 6:
STEP 6:
Después repites el procedimiento con el otro zarcillo ya después tiene tus pares, tomamos un pedazo de alambre de 5 cmts.
Then you repeat the procedure with the other tendril and after you have your pairs, we take a 5 cm piece of wire.
PASO 7:
STEP 7:
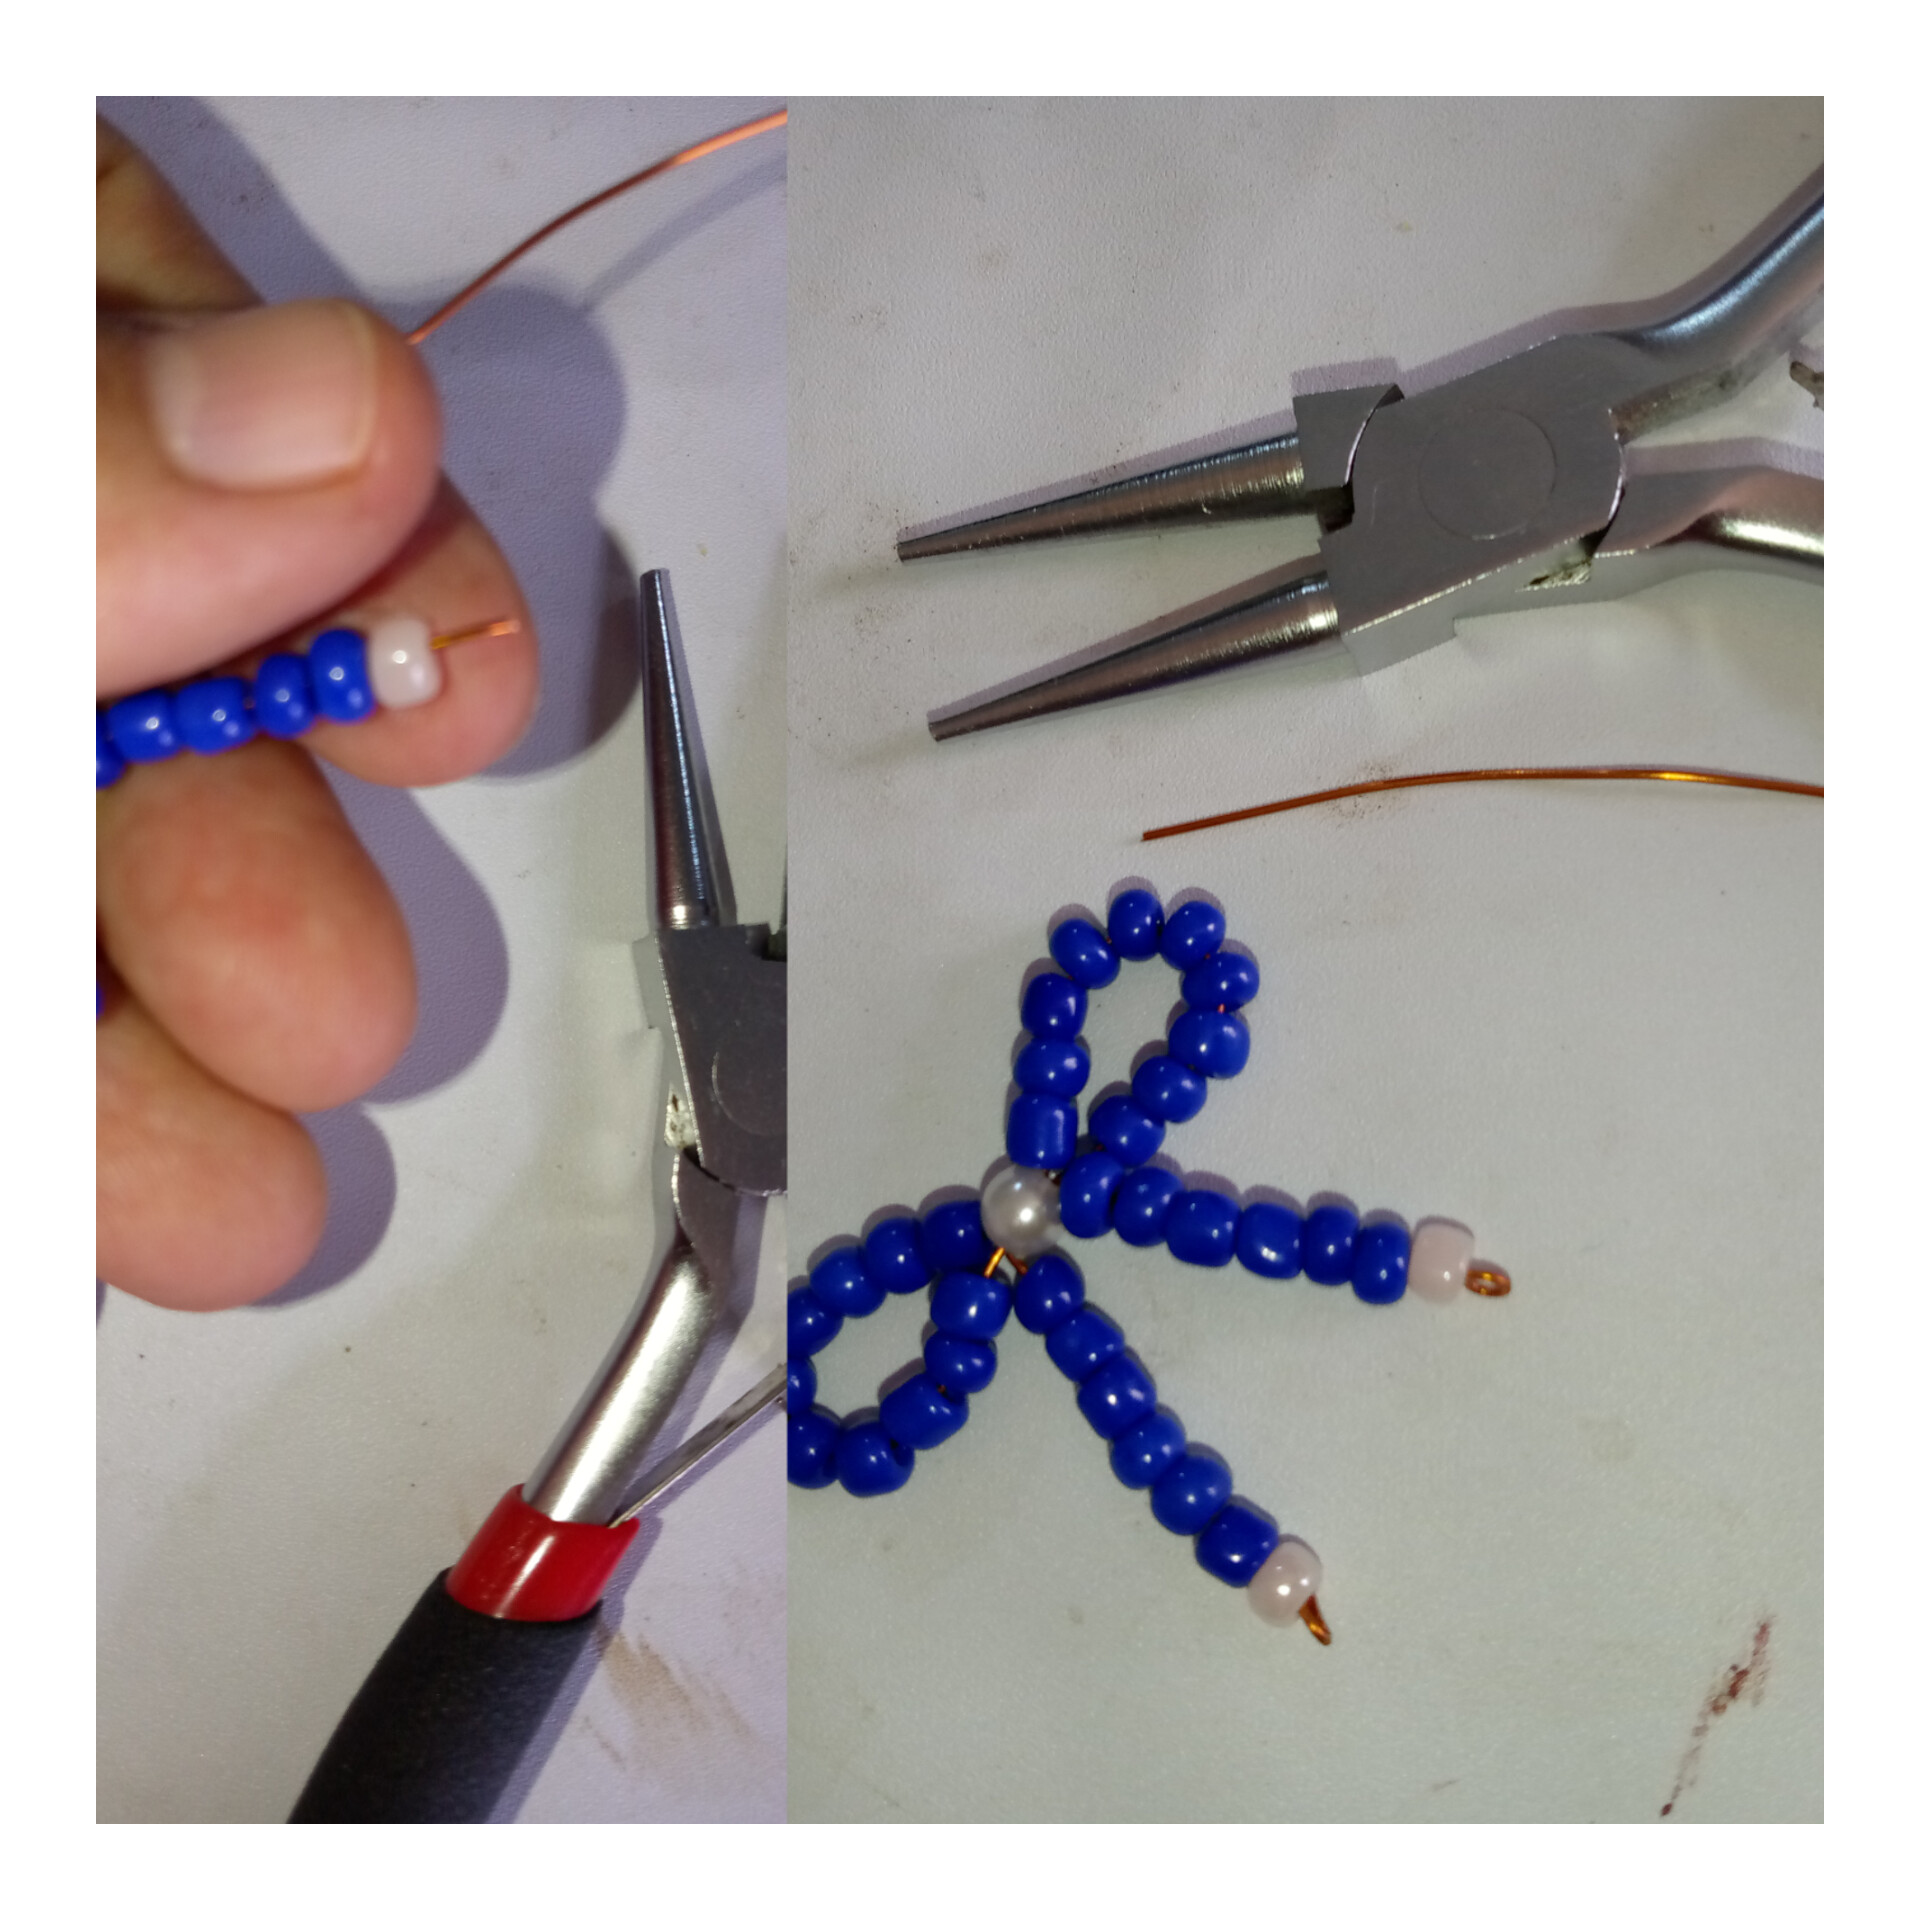
Con el pedazo de alambre de 5 cmts lo vas a entorchar en el centro del zarcillo y después con la ayuda de la pinza lo enrrollas y después corta y deja 2 cmts y con la pinza le das vuelta para hacer los aritos para luego colocar los ganchos y acá tiene tus pares de zarcillos ahora vamos con el otro proceso.
With the 5 cm piece of wire you are going to twist it in the center of the tendril and then with the help of the tweezers you roll it up and then cut it and leave 2 cm and with the tweezers you turn it to make the earrings and then place the hooks and here are your pairs of tendrils now let's go with the other process.
PASO 8:
STEP 8:
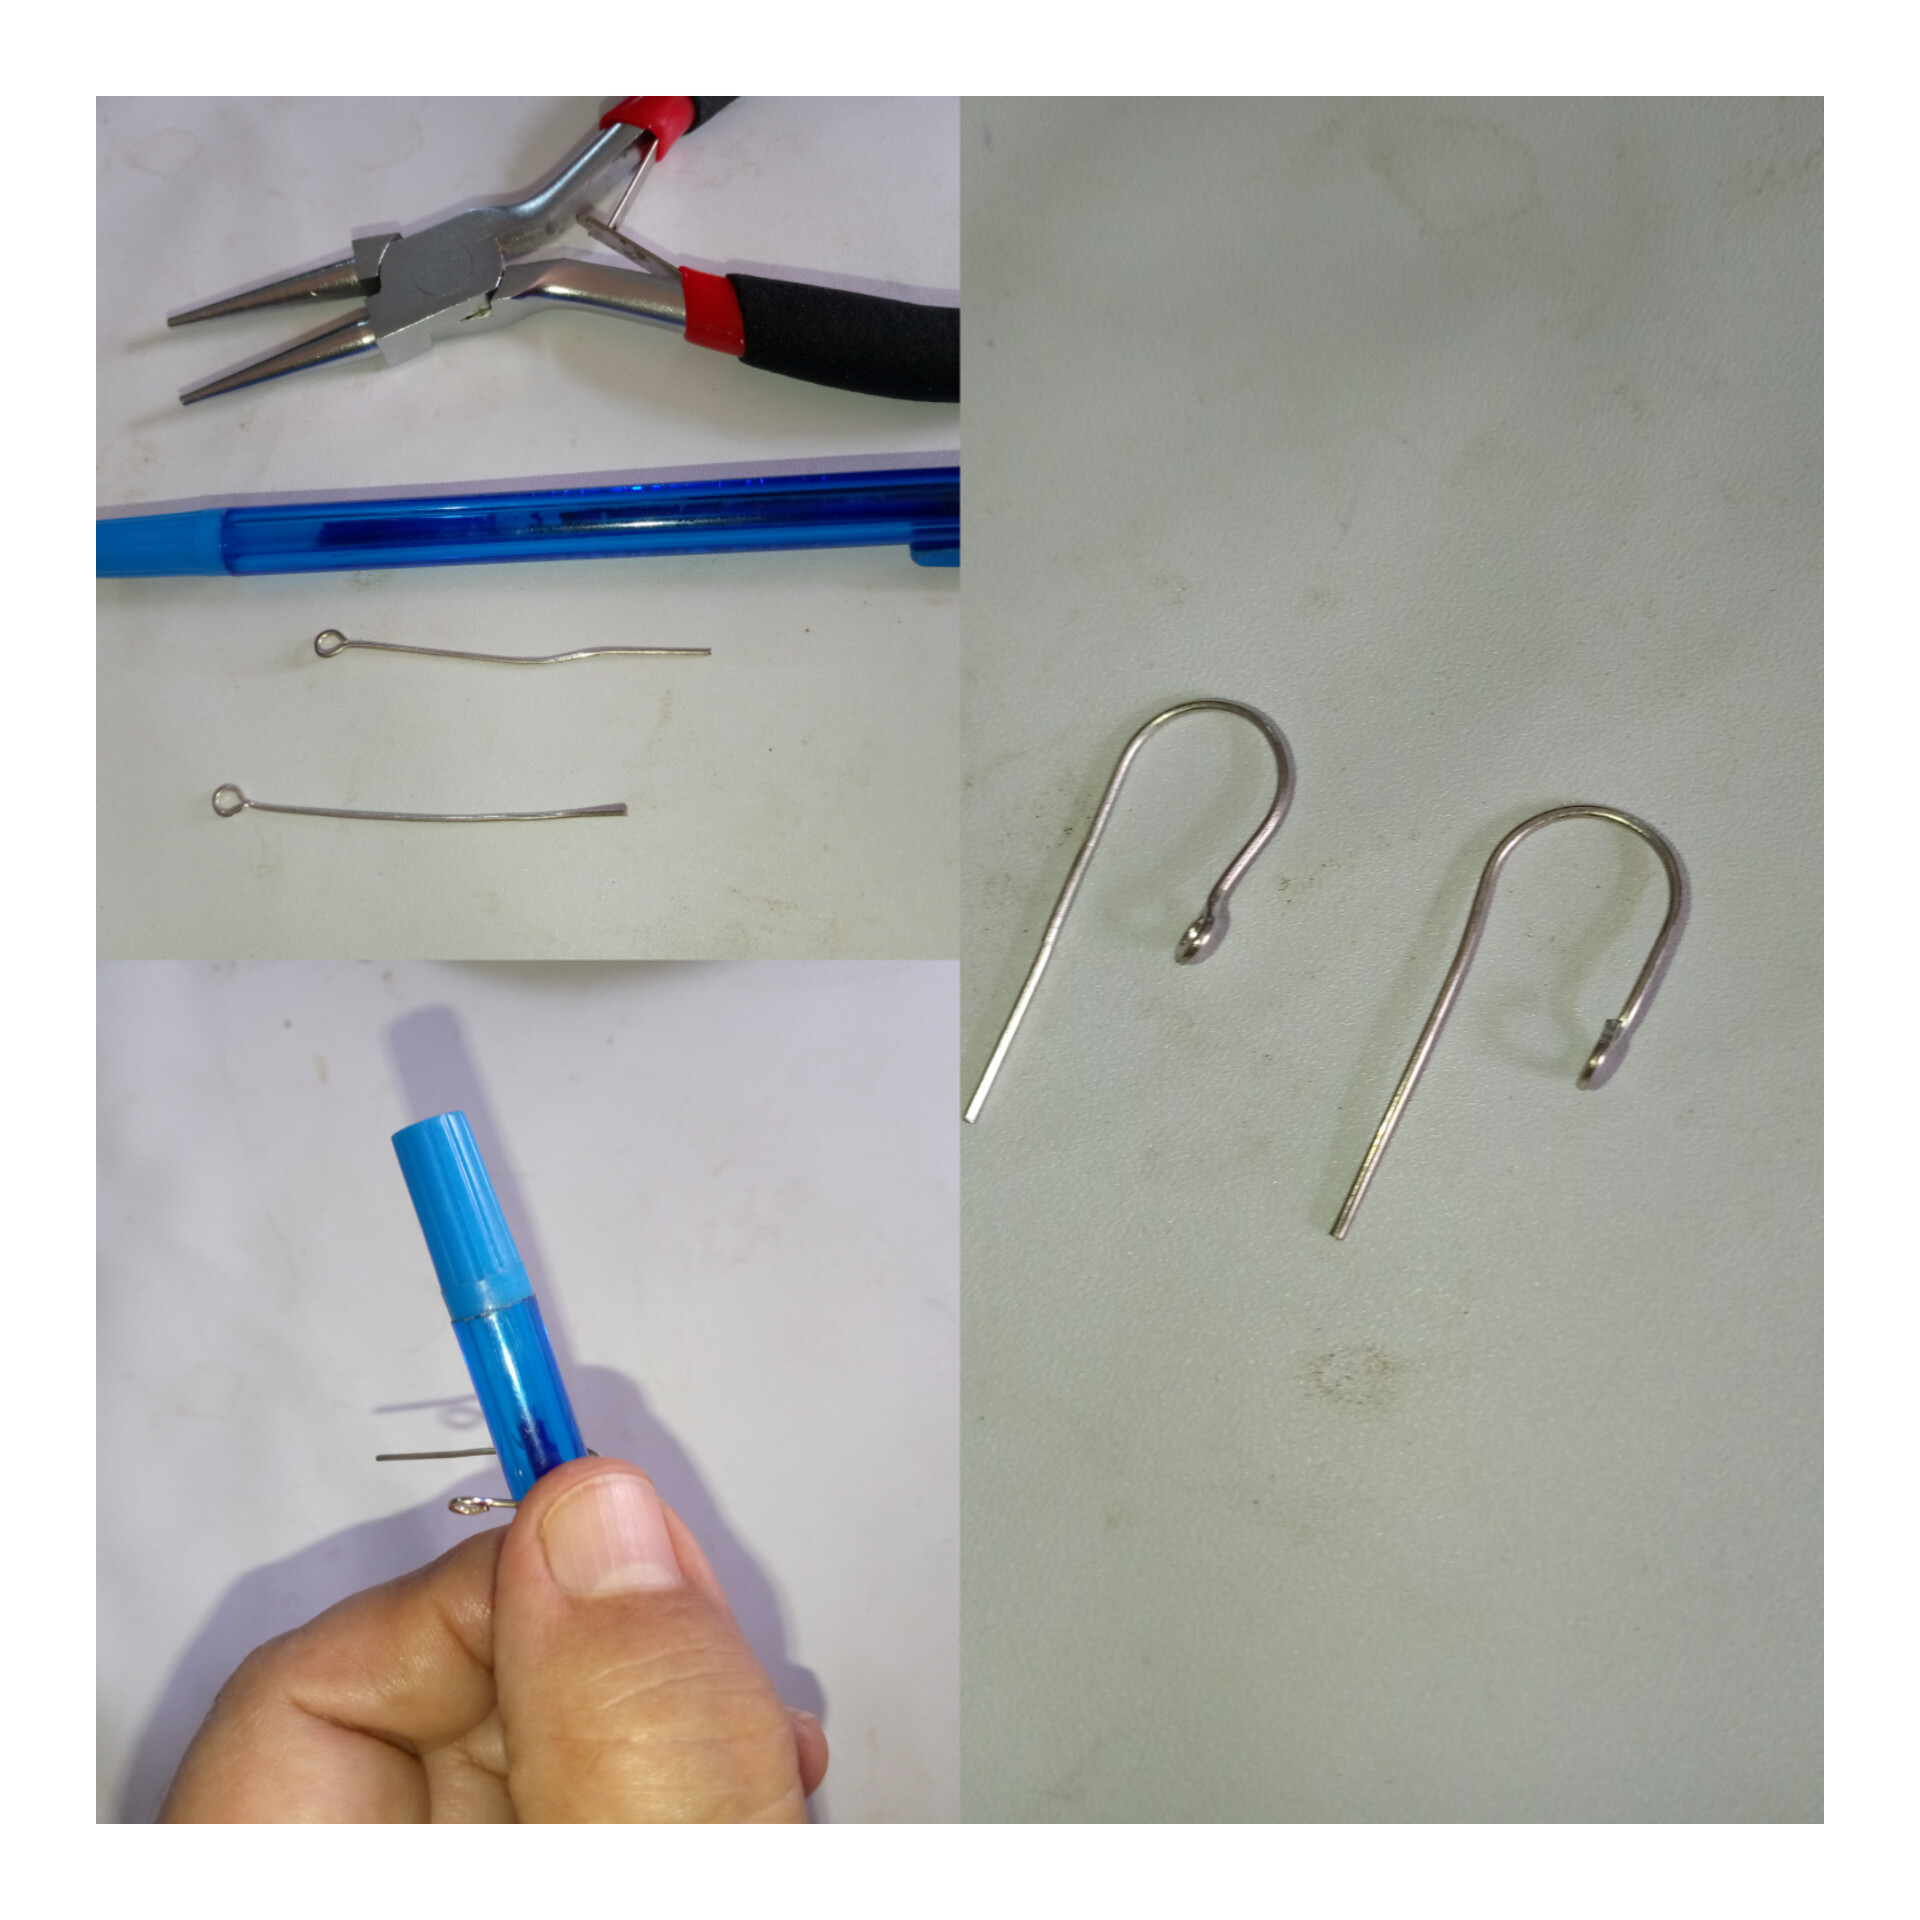
Ahora voy hacer los ganchos con el alambre con la ayuda de un lápiz y la pinza se hacen, se toma el lápiz se coloca el alambre encima y lo doblas a la mitad dándole forma de gancho o anzuelo y te quedan así.
Now I am going to make the hooks with the wire with the help of a pencil and the clamps are made, take the pencil, place the wire on top and bend it in half giving it the shape of a hook or hook and they look like this.
PASO 9:
STEP 9:
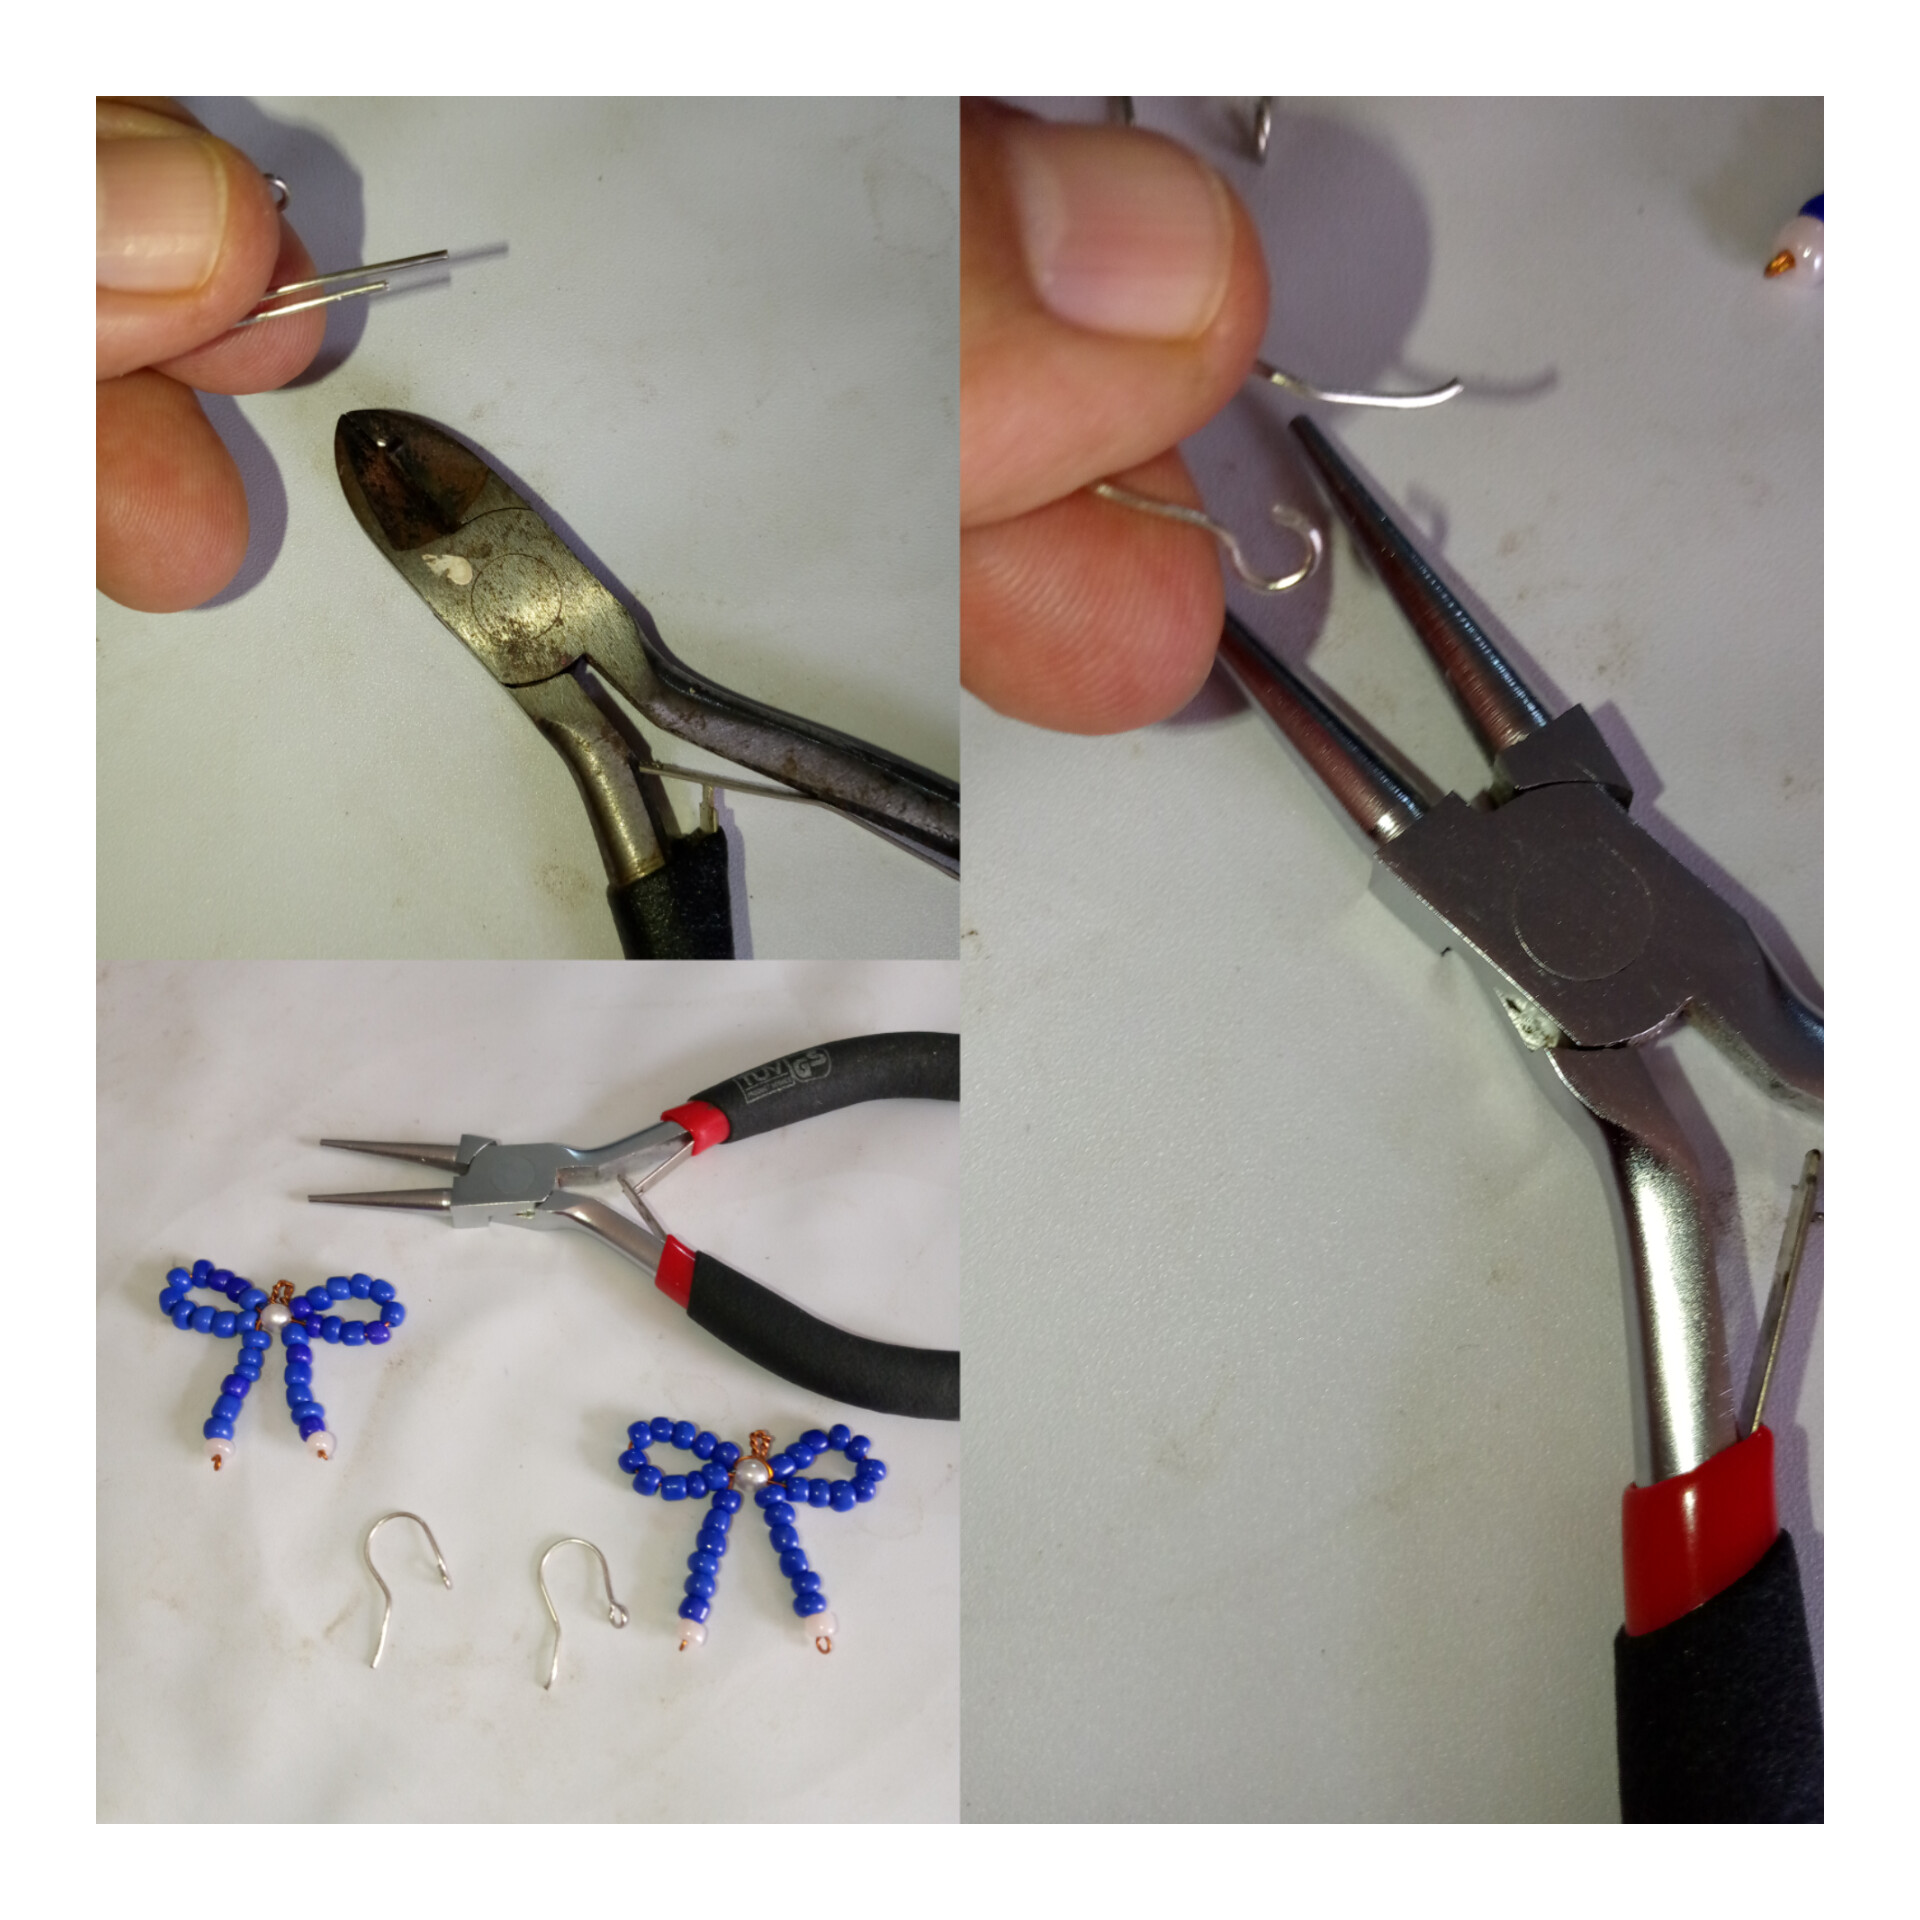
Luego los juntas en partes iguales para cortar la punta e igualar y con la pinza le doy forma, luego abro el gancho.
Then you put them together in equal parts to cut the tip and match it and with the tweezers I shape it, then I open the hook.
PASO 10:
STEP 10:
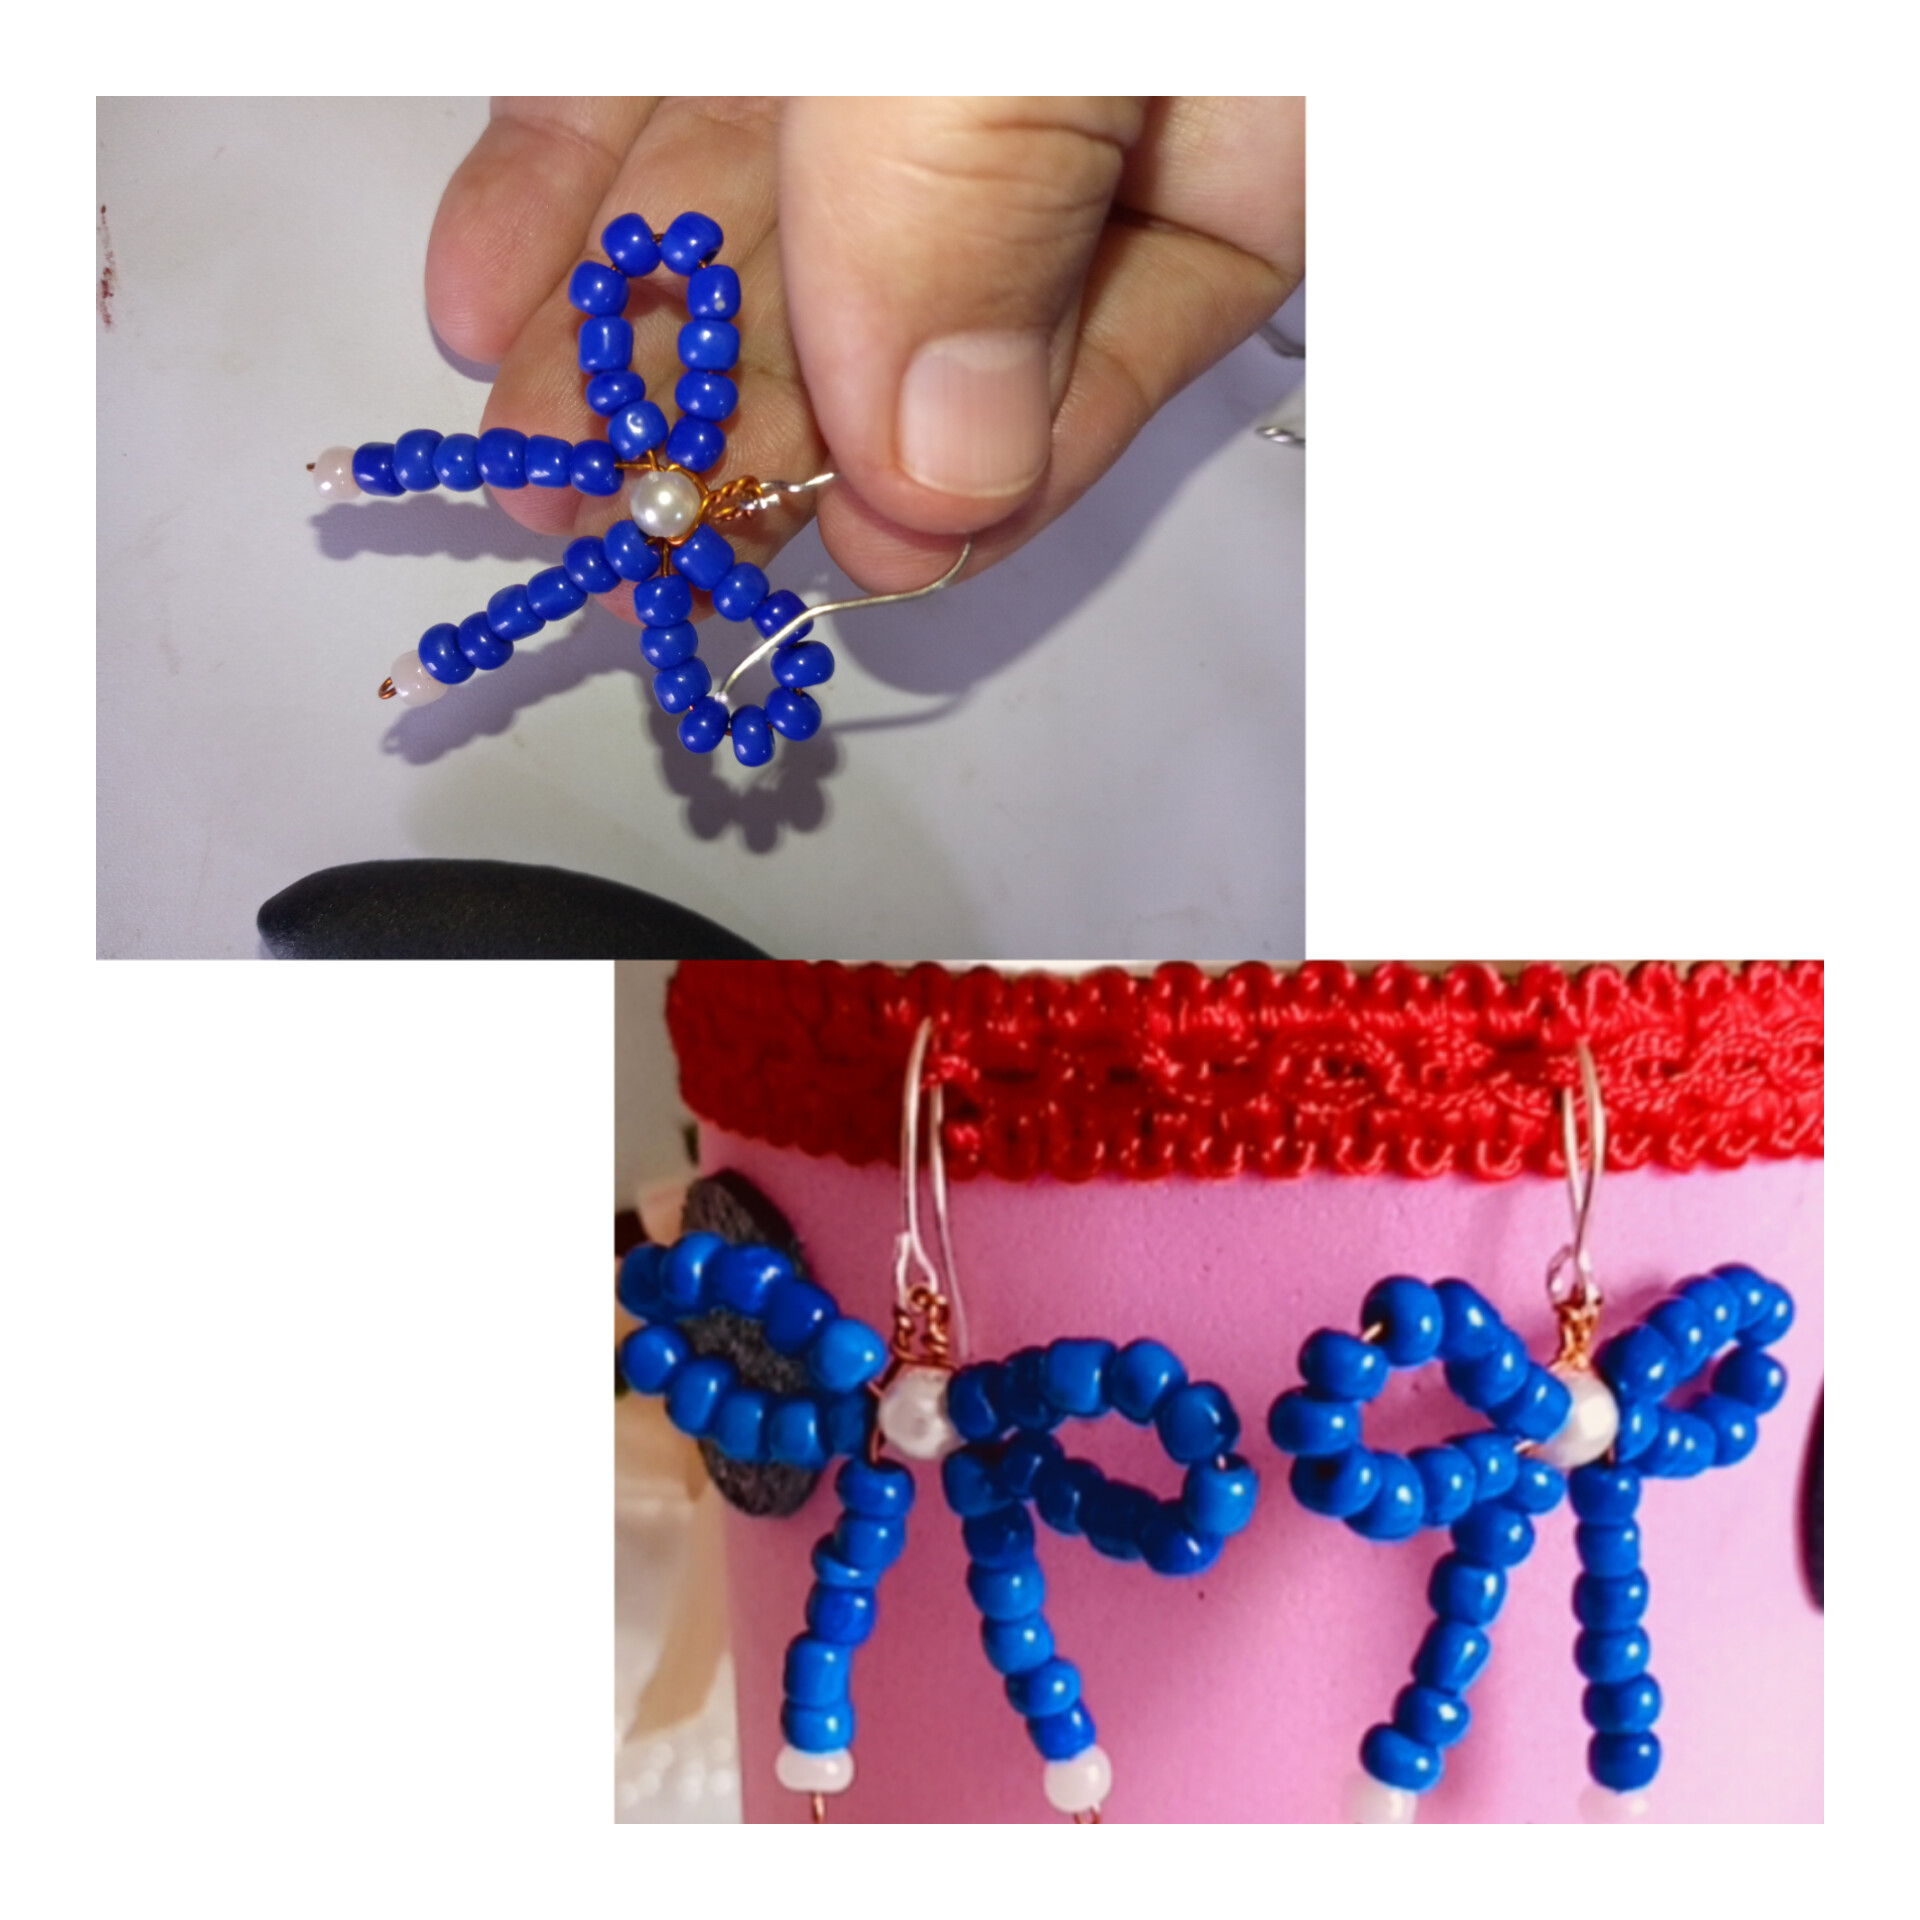
Luego que tengo los ganchos abiertos los aritos lo introduzco y aprieto y de esta manera me han quedado mis Zarcillos Coquette verdad que quedaron hermosos.
After I have the hooks open, I insert the earrings and tighten them and this way I have my Coquette Tendrils, they really turned out beautiful.
Gracias por visitar y por tus comentarios, espero le haya gustado la elaboración de estos zarcillos vieron que es muy fácil y rápido de realizar que puedes hacer para obsequiar a tus familiares y amigas.
Thank you for visiting and for your comments, I hope you liked the making of these tendrils, you saw that it is very easy and quick to make and you can make it as a gift to your family and friends.
Las fotos son tomadas con mi celular Tecno Go Spark 2023 y editada con la aplicación inshot Collage.
Traducida con google.
The photos are taken with my Tecno Go Spark 2023 cell phone and edited with the inshot Collage application.
Translated with Google.
SALUDOS Y BENDICIONES PARA TODOS.
GREETINGS AND BLESSINGS TO ALL.

You are very creative 👍
Thank you, happy afternoon.
Quedaron muy lindos 😉
Gracias amiga feliz tarde.
Saludos amiga, que hermosos te quedaron los zarcillos,una forma diferente de llevar los lazos que están de moda.
Gracias amiga así es bendiciones feliz tarde.
Hola amiga te quedó muy bonito tu zarcillo ese color es muy llamativo. Éxitos