It is a pleasure to greet you friends of HIVE and especially my #jewelry artists, here I share with you a beautiful creation that I came to see by Reel and I loved it and while I was watching it I was getting inspired and in my mind I was designing it in another shape, color and size.
Se trata de una hermosa Flor tejida alrededor de un Botón y luego adornadas con perlas blancas y perlitas doradas le hice un aro con alambre, ya les comparto el paso a paso.
It is a beautiful flower woven around a button and then adorned with white pearls and golden beads I made a ring with wire, I will share the step by step.
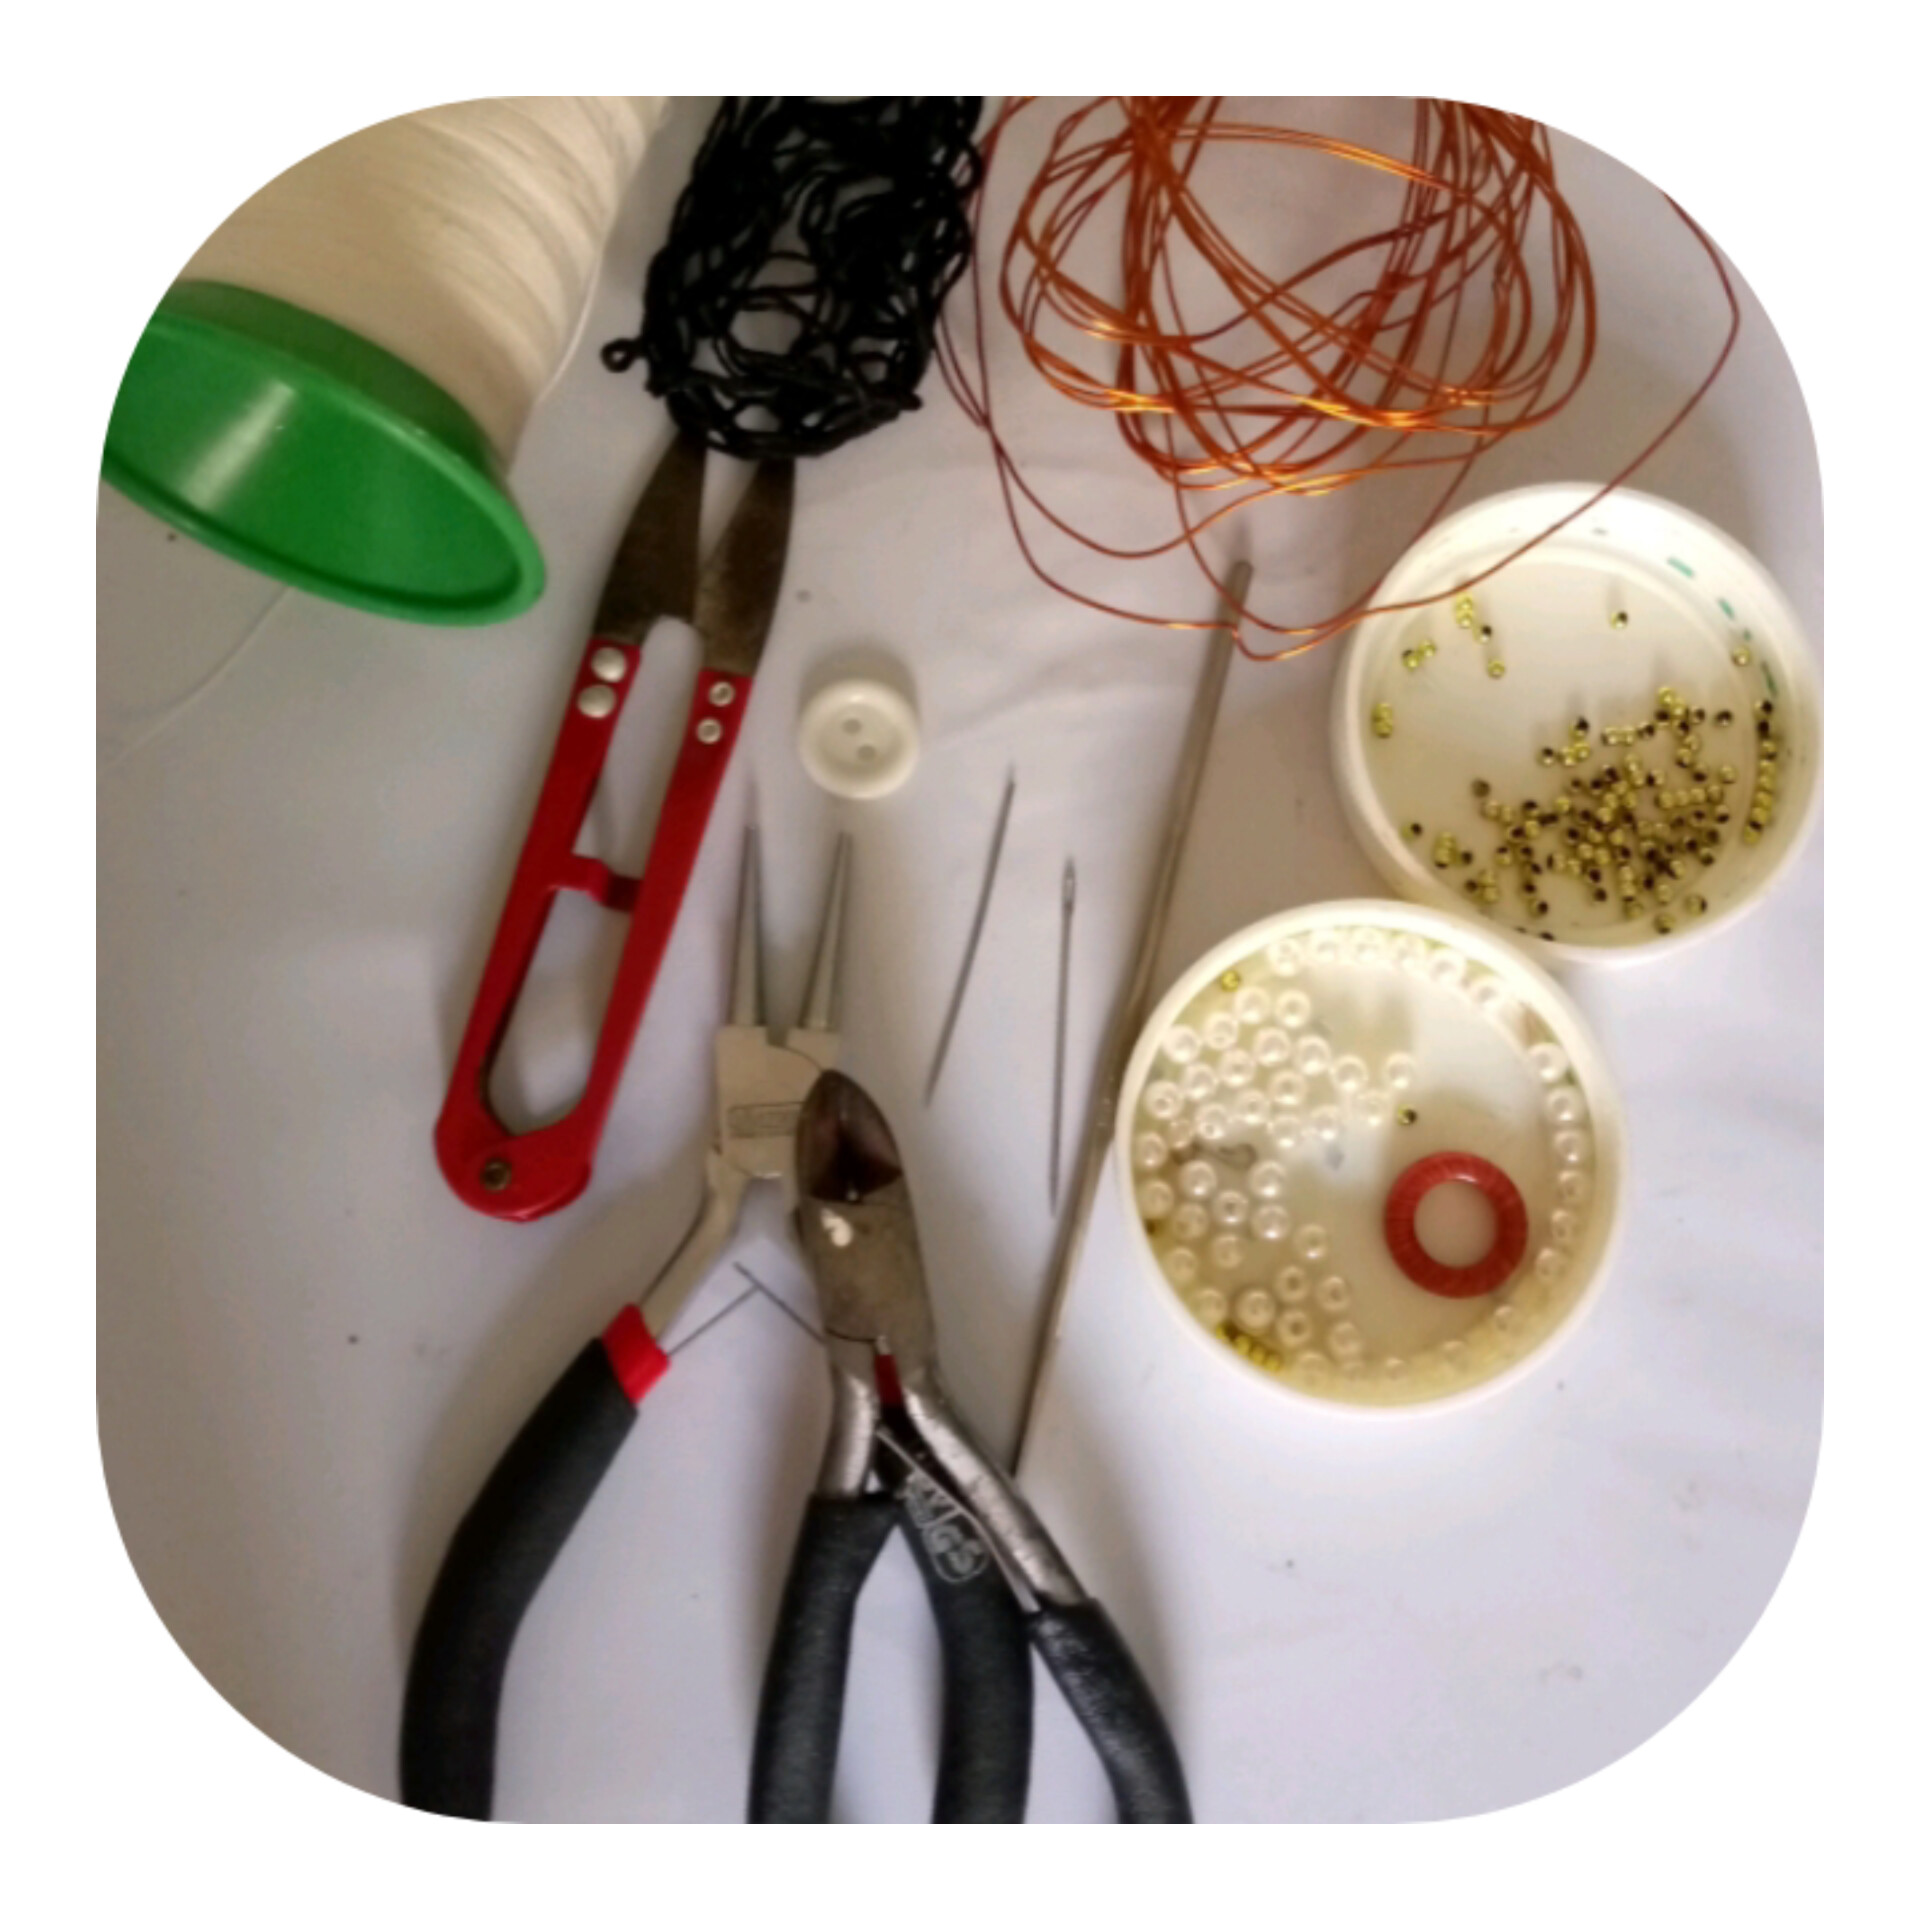
MATERIALES QUE UTILICE:
MATERIALS I USE:
- Hilo de tapicería
- Tijera
- Pinzas
- Alambre color bronce
- Hilo de bordar negro
- Un botón blanco
- Aguja de coser
- Aguja de tejer
- Un arito material sintético
- Perlas blancas
- Perlitas doradas.
- Upholstery thread
- Scissors
- Tweezers
- Bronze colored wire
- Black embroidery thread
- White button
- Sewing needle
- Knitting needle
- A synthetic earring
- White beads
- Golden beads.
PROCEDIMIENTO:
PROCEDURE:
PASO 1:
STEP 1:
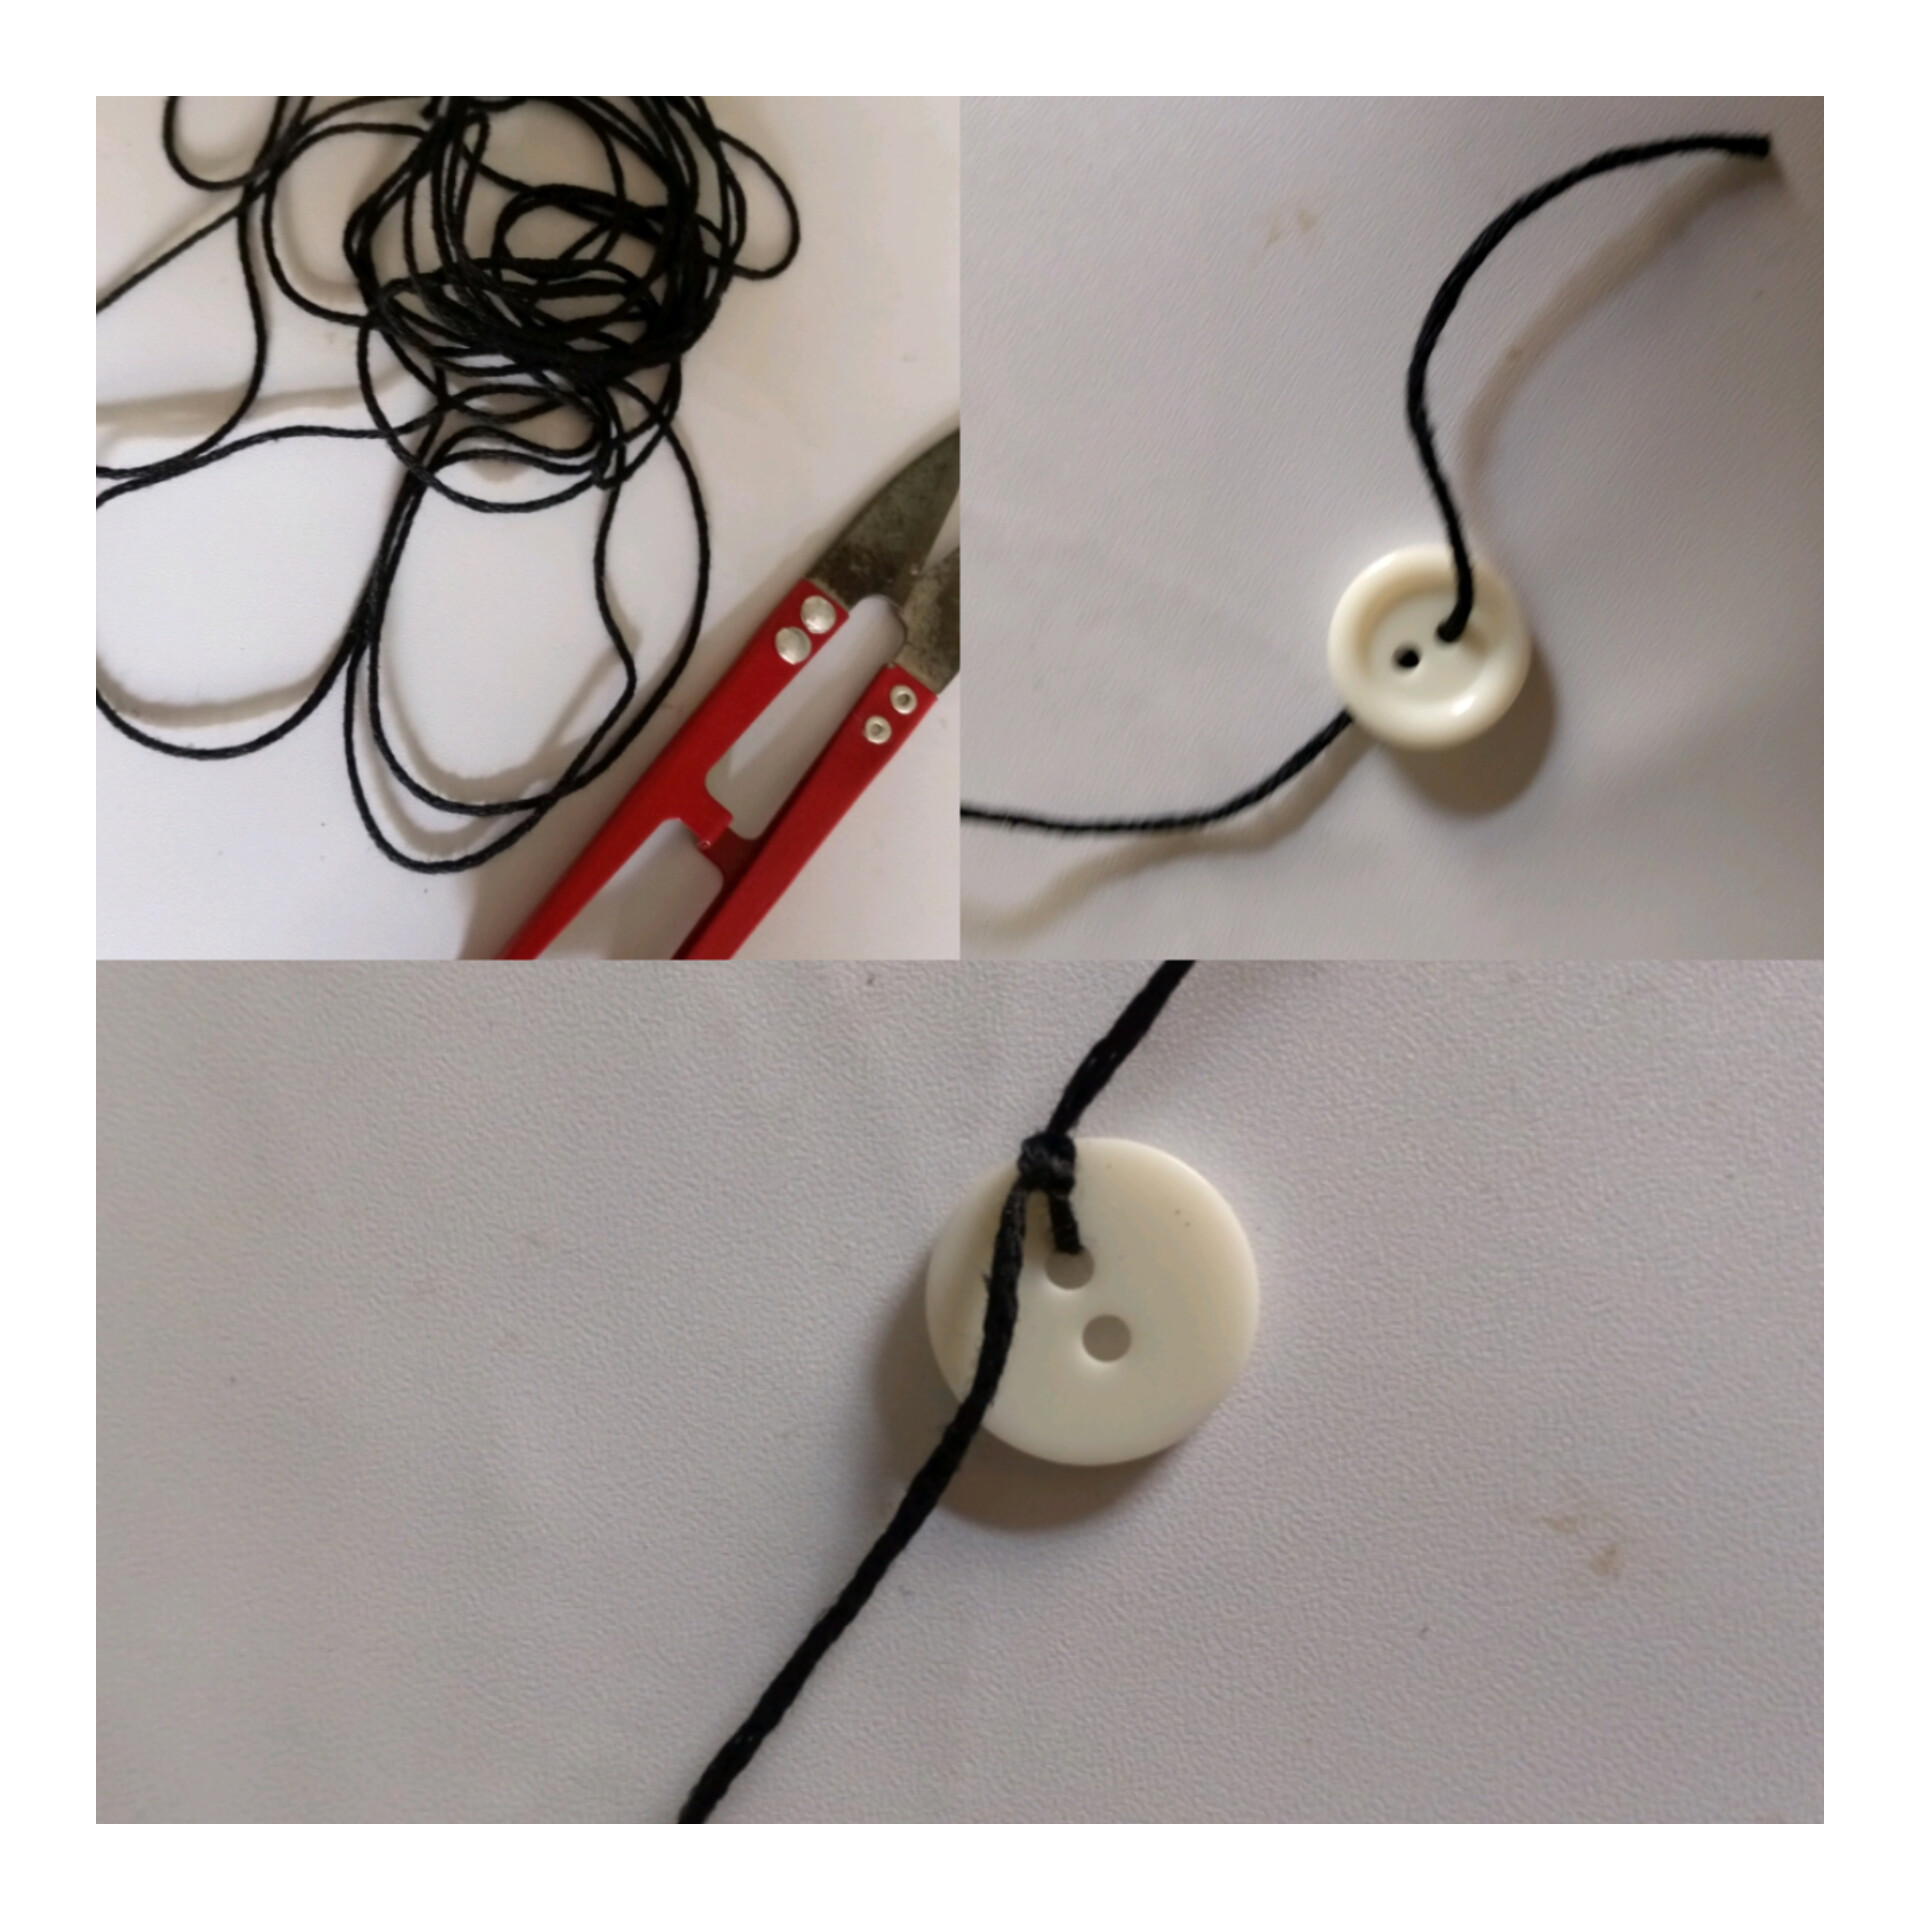
Tomo la madeja del hilo negro y corto aproximadamente 2,70 ctms de largo, luego tomo el botón introduzco una punta del hilo por el orificio y le hago dos nudos fuertes y corto el excedente.
I take the skein of black thread and cut approximately 2.70 ctms long, then I take the button, introduce one end of the thread through the hole and make two strong knots and cut the excess.
PASO 2:
STEP 2:
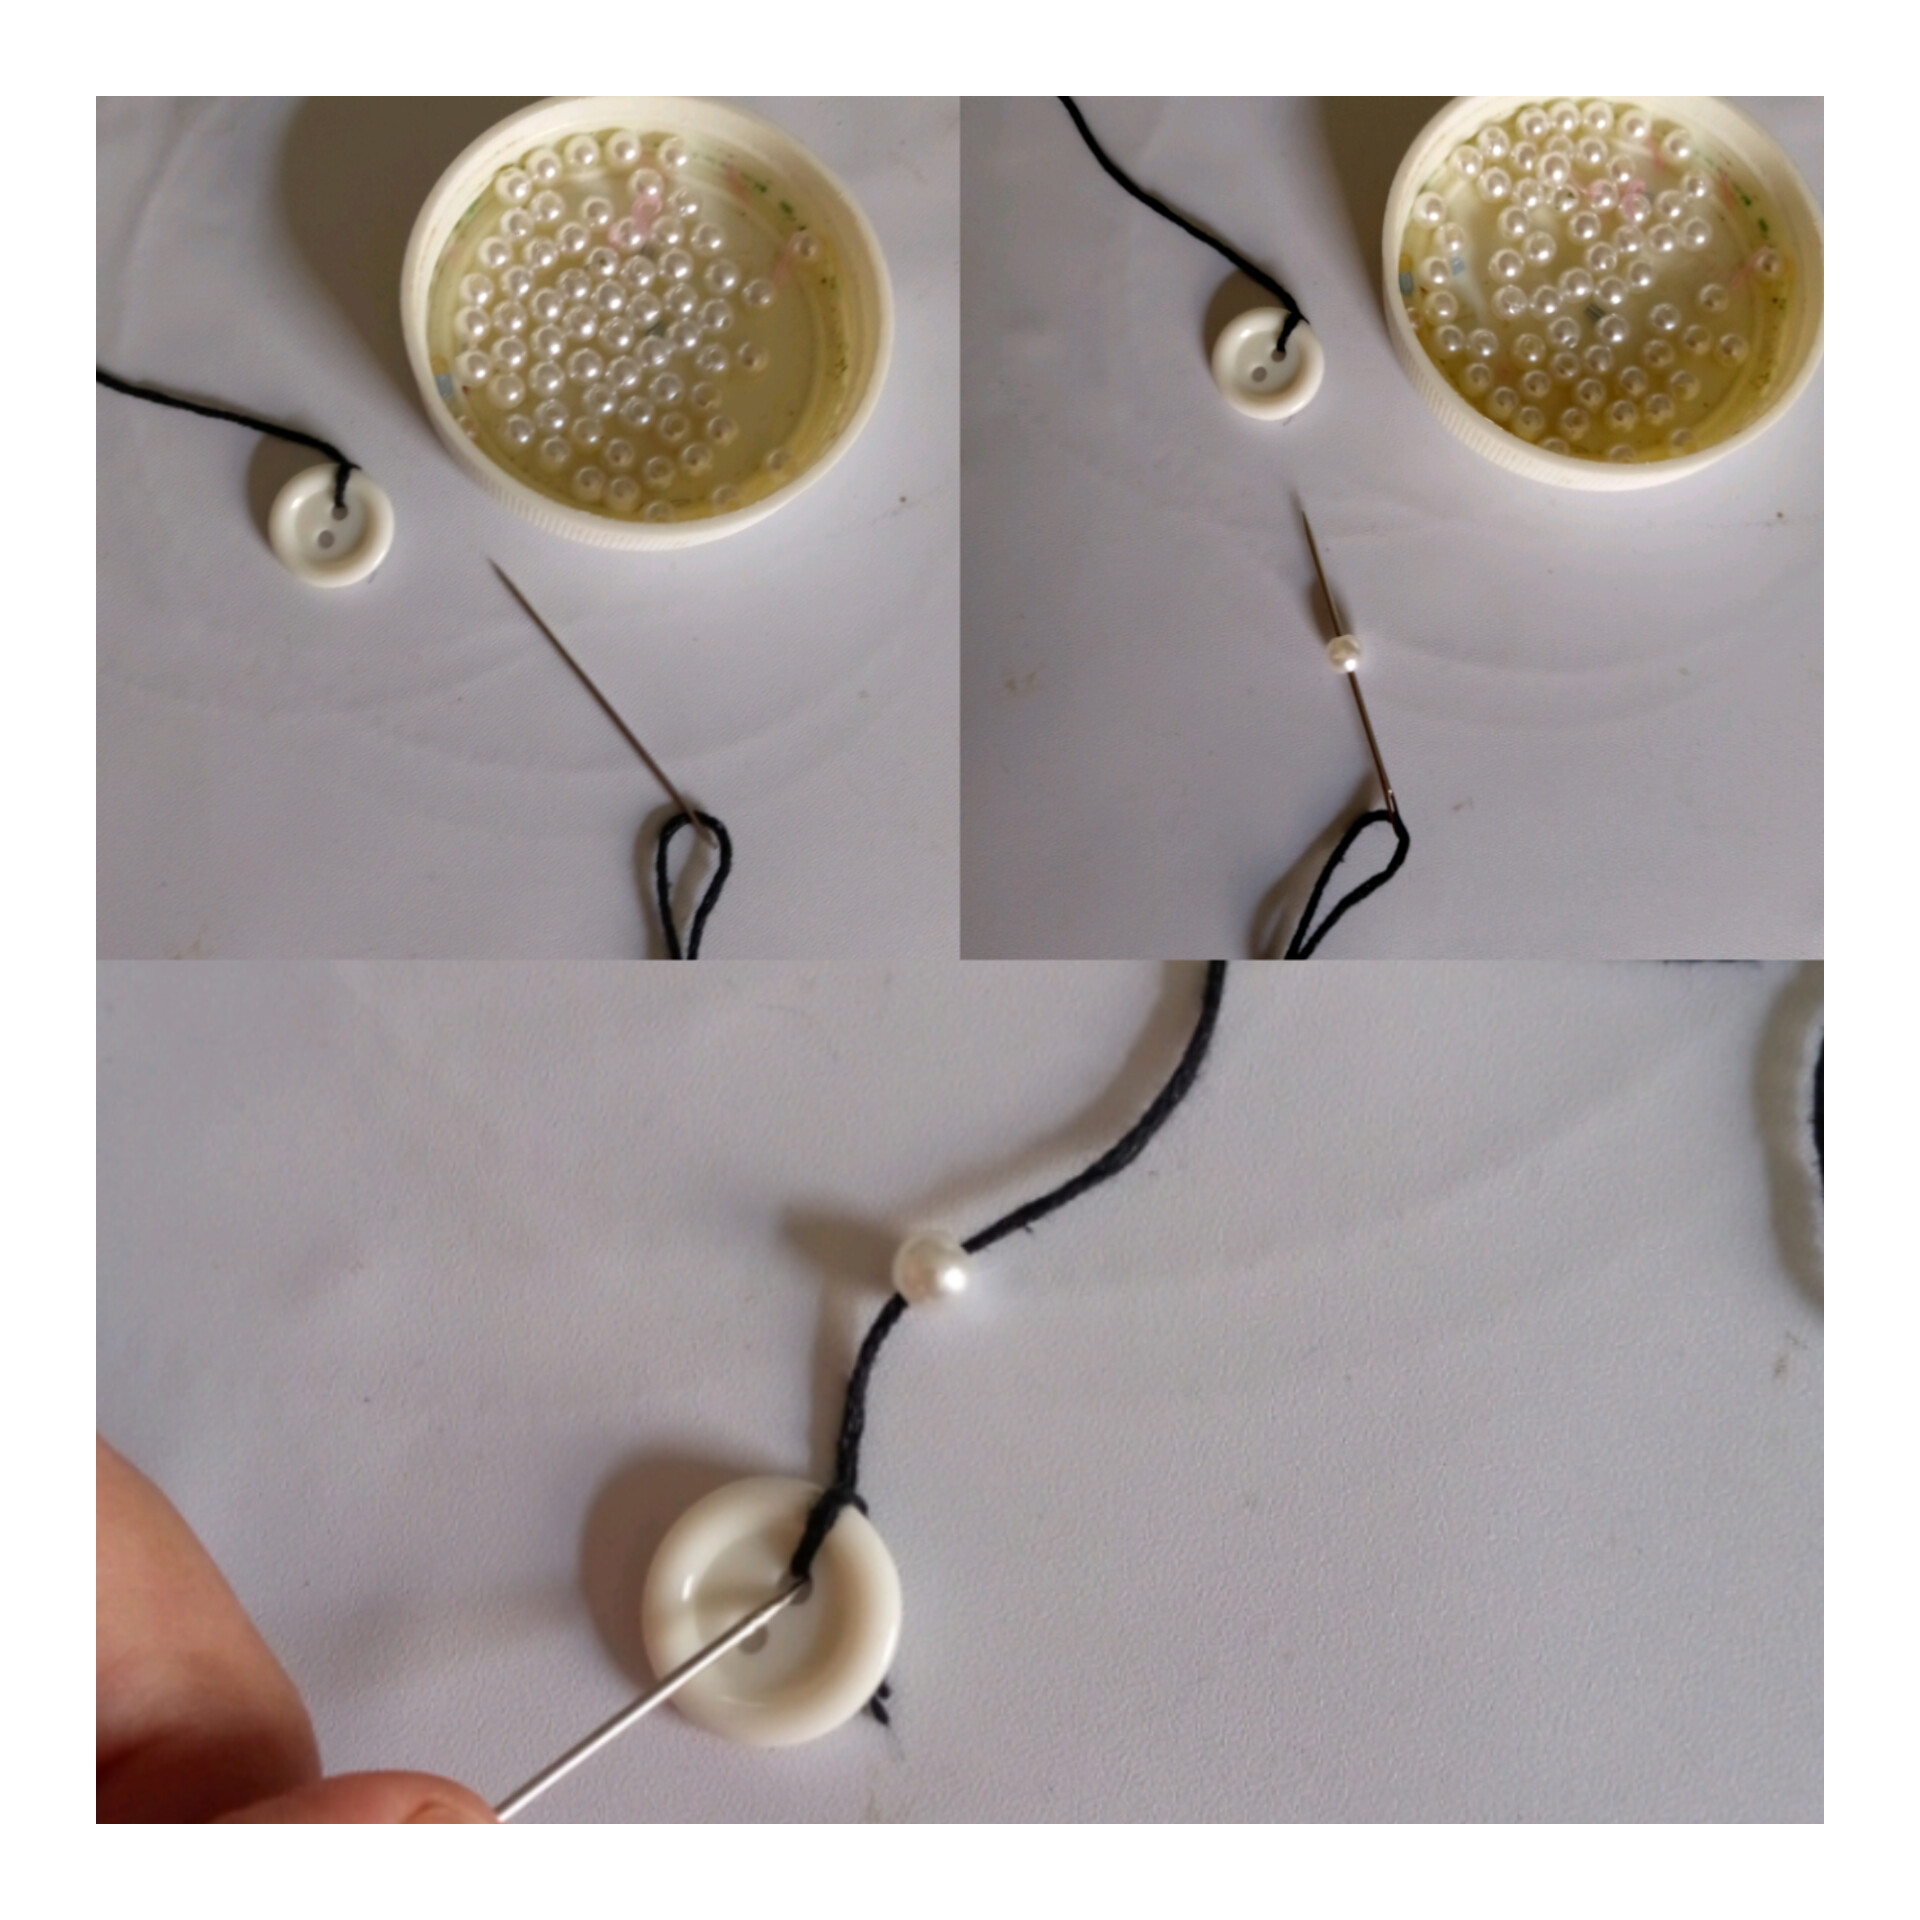
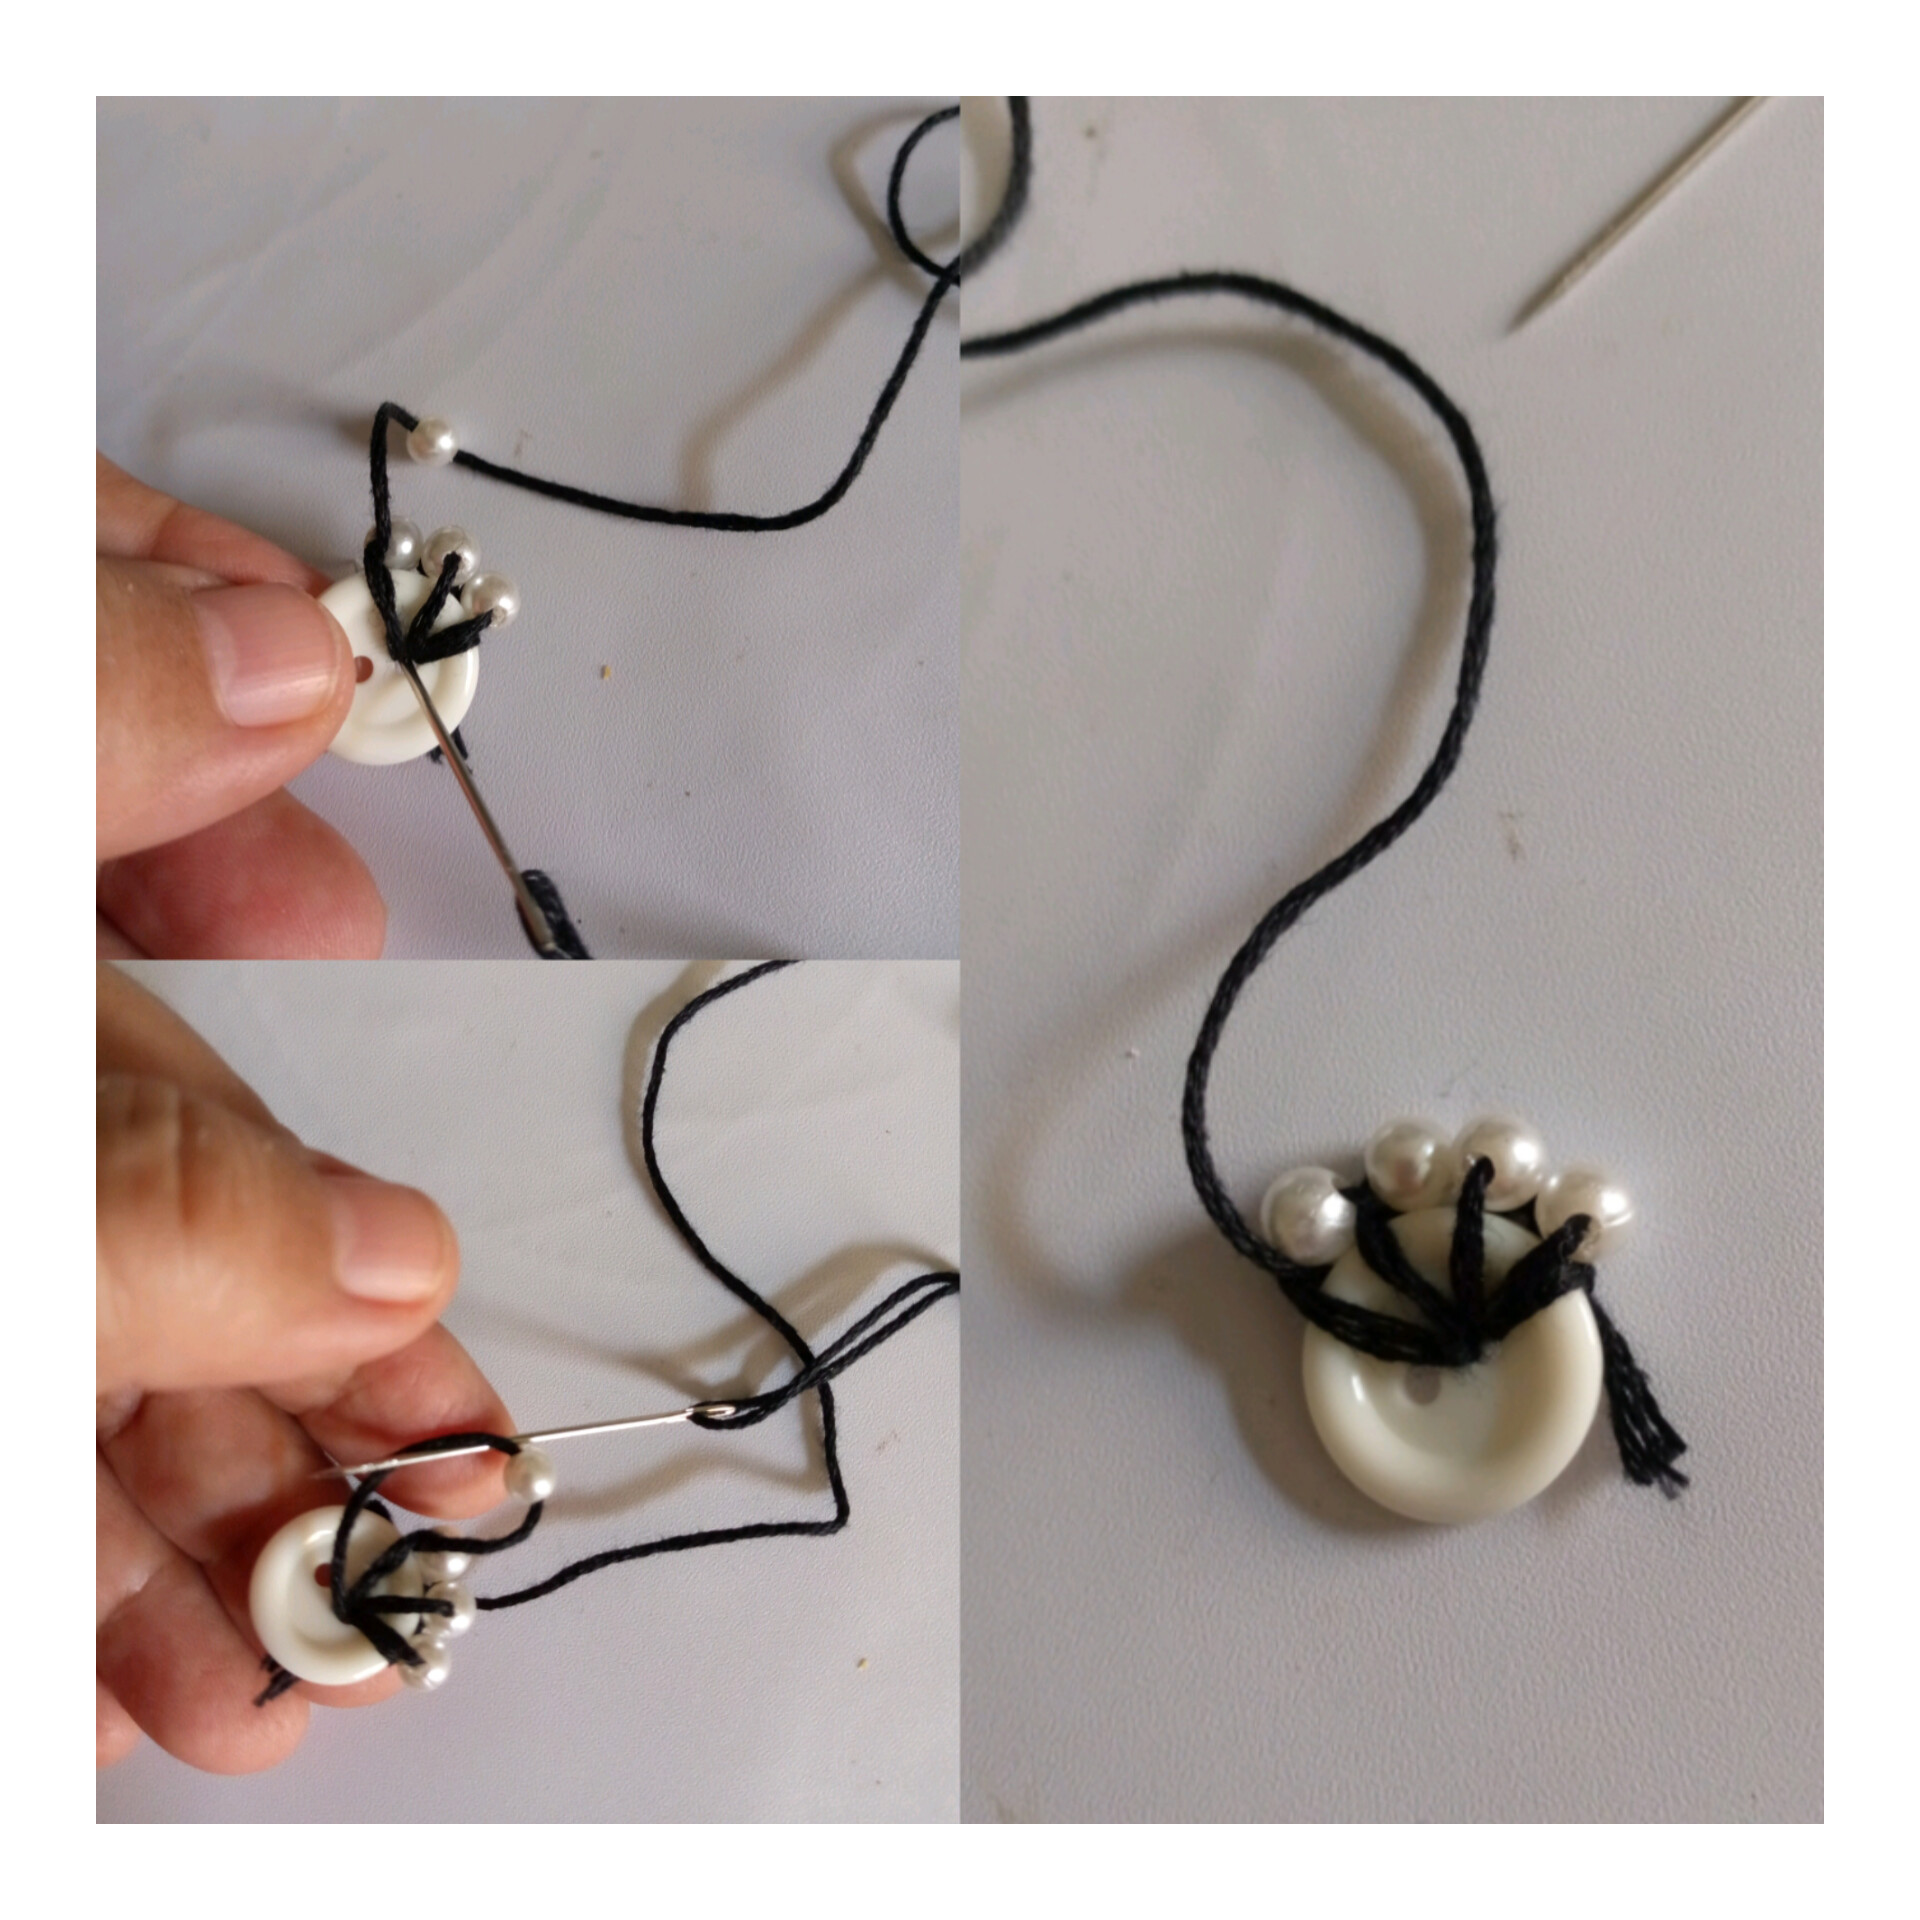
Después tomo la aguja y la enhebro con la otra punta del hilo y luego introduzco una perla blanca y la ruedo hasta abajo.
I then take the needle and thread it with the other end of the thread and then insert a white bead and roll it all the way down.
PASO 3:
STEP 3:
Luego introduzco la aguja por el orificio del botón y jalo acá meto la aguja por detrás de la perla y jala te va quedando así la perla alrededor del botón.
Then I insert the needle through the hole of the button and pull here I insert the needle behind the bead and pull it, leaving the bead around the button.
PASO 4:
STEP 4:
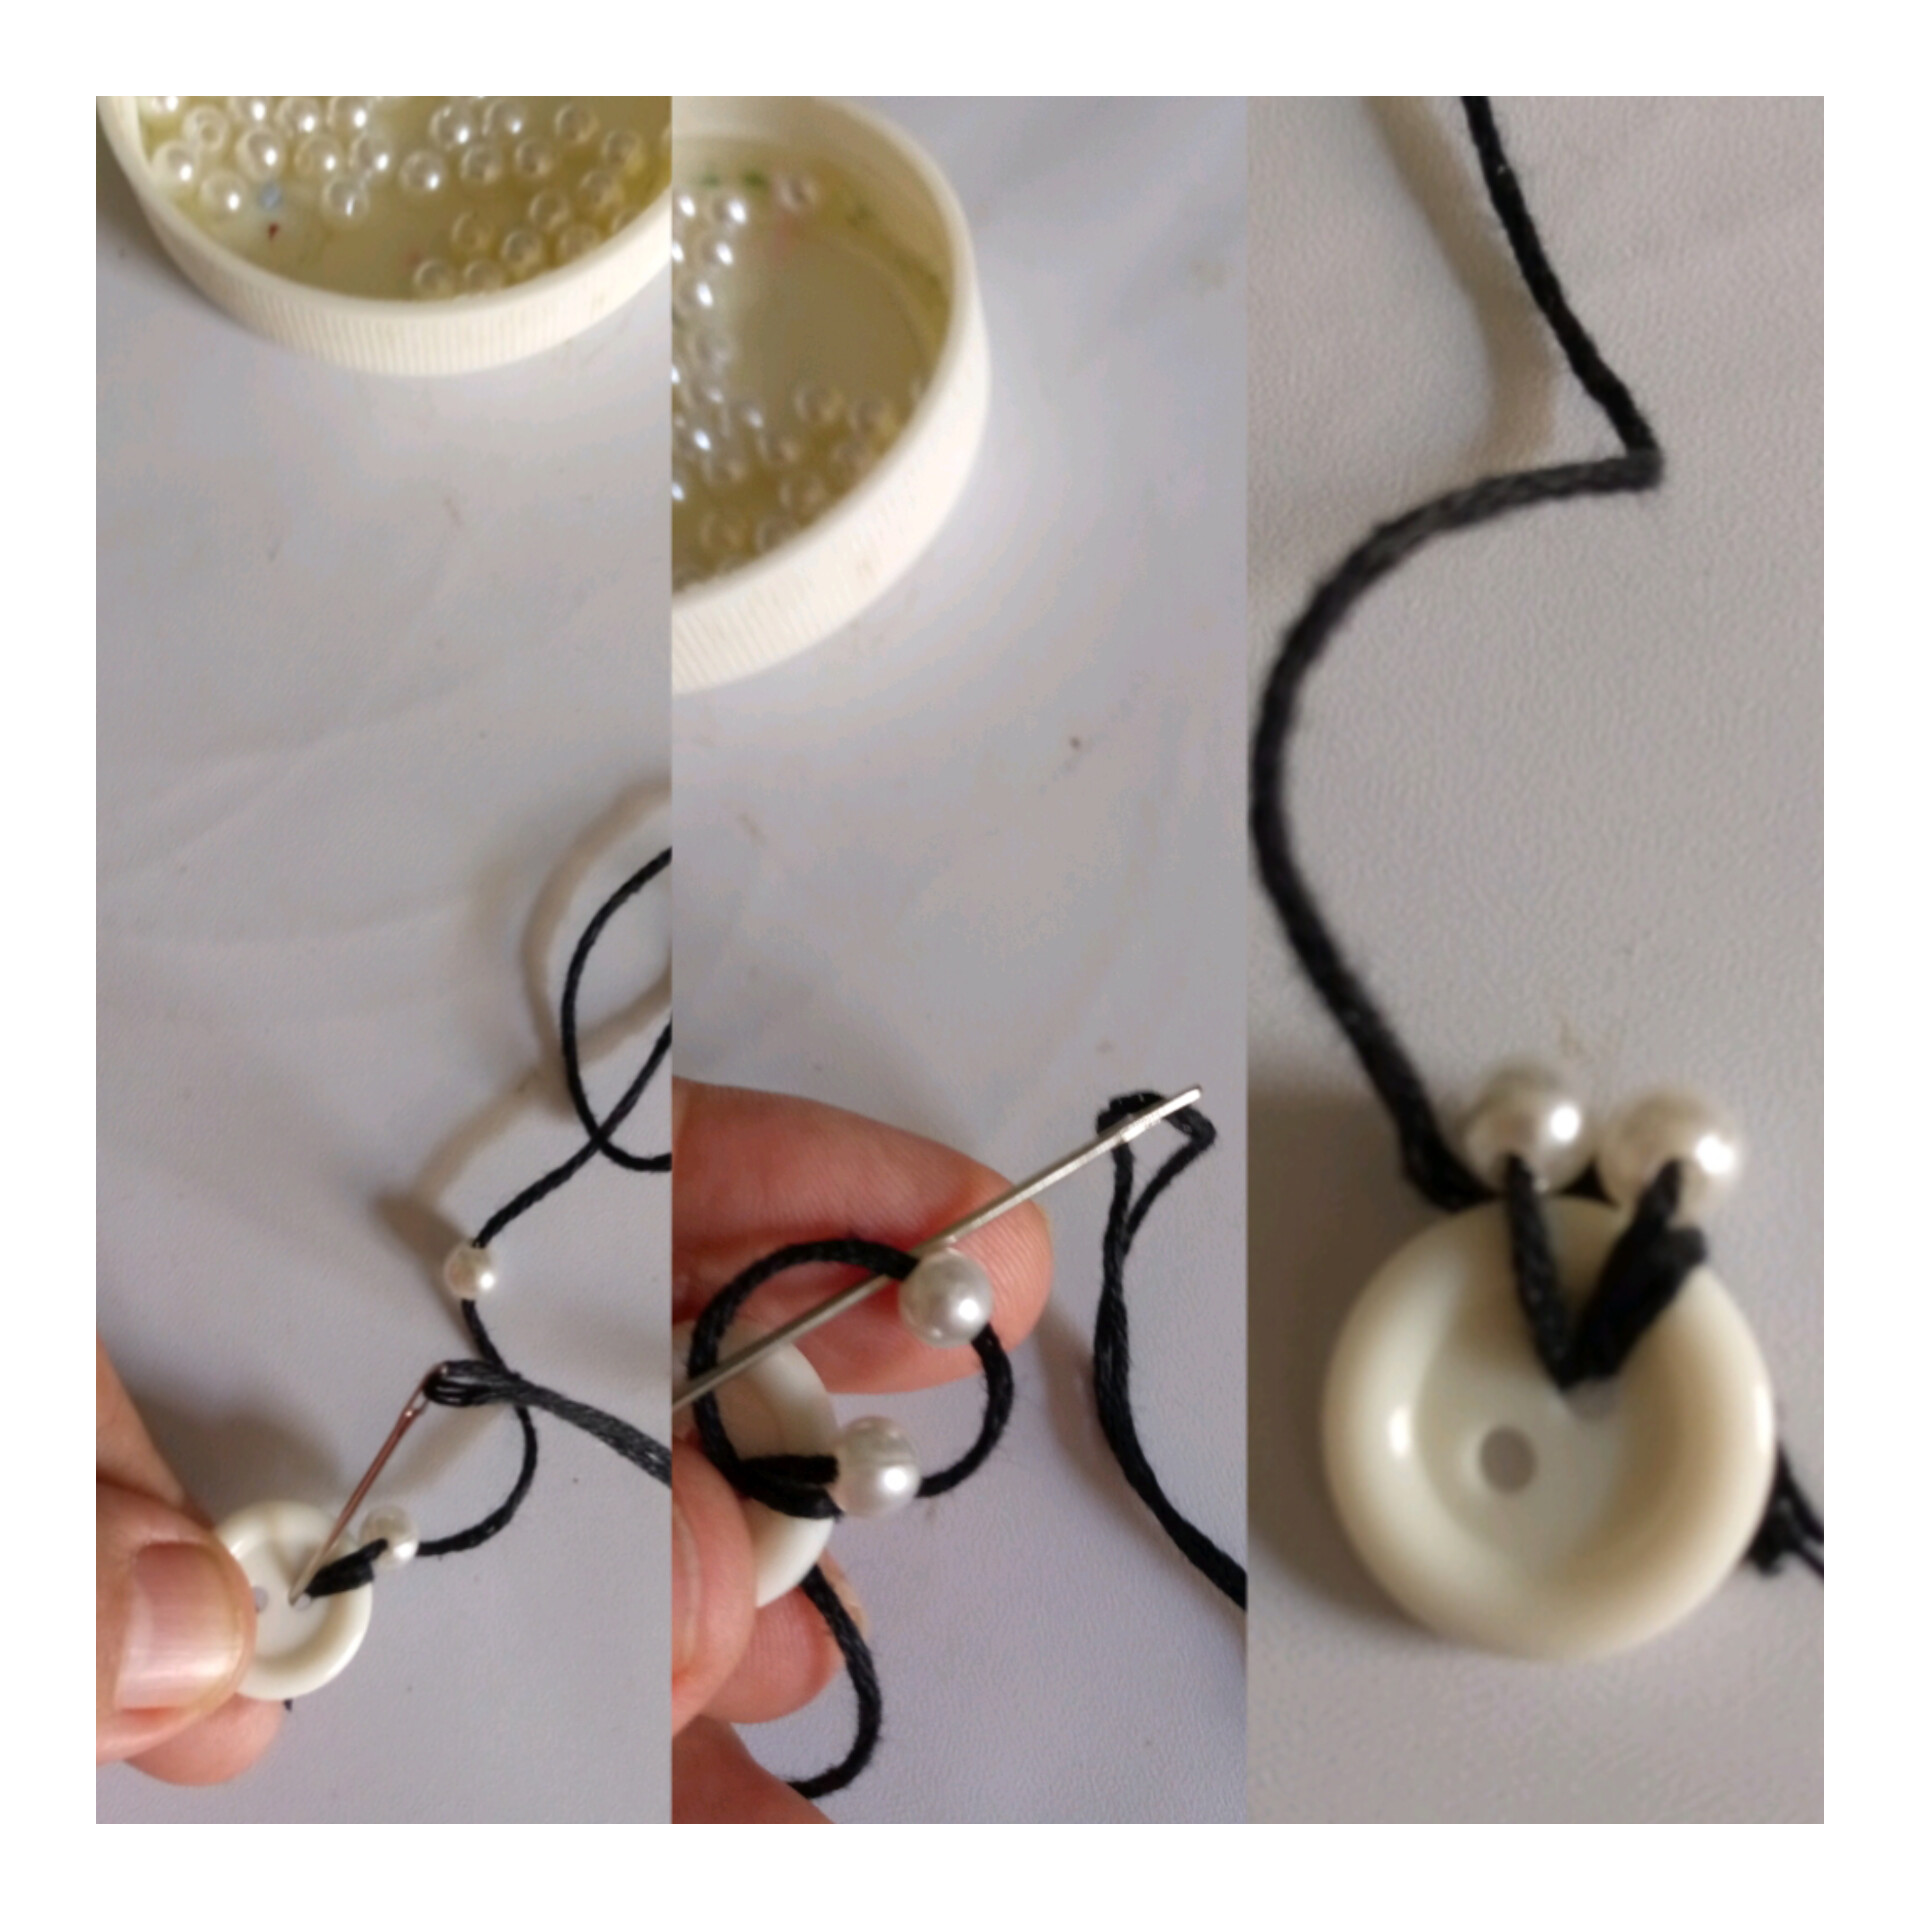
Luego tomamos otra perla blanca la introducimos por el mismo orificio y jala pasa la aguja por detrás y jala y de esta forma te van quedando las perlas una al lado de la otra.
Then we take another white pearl and we introduce it through the same hole and pull, pass the needle through the back and pull and in this way the pearls will be next to each other.
PASO 5:
STEP 5:
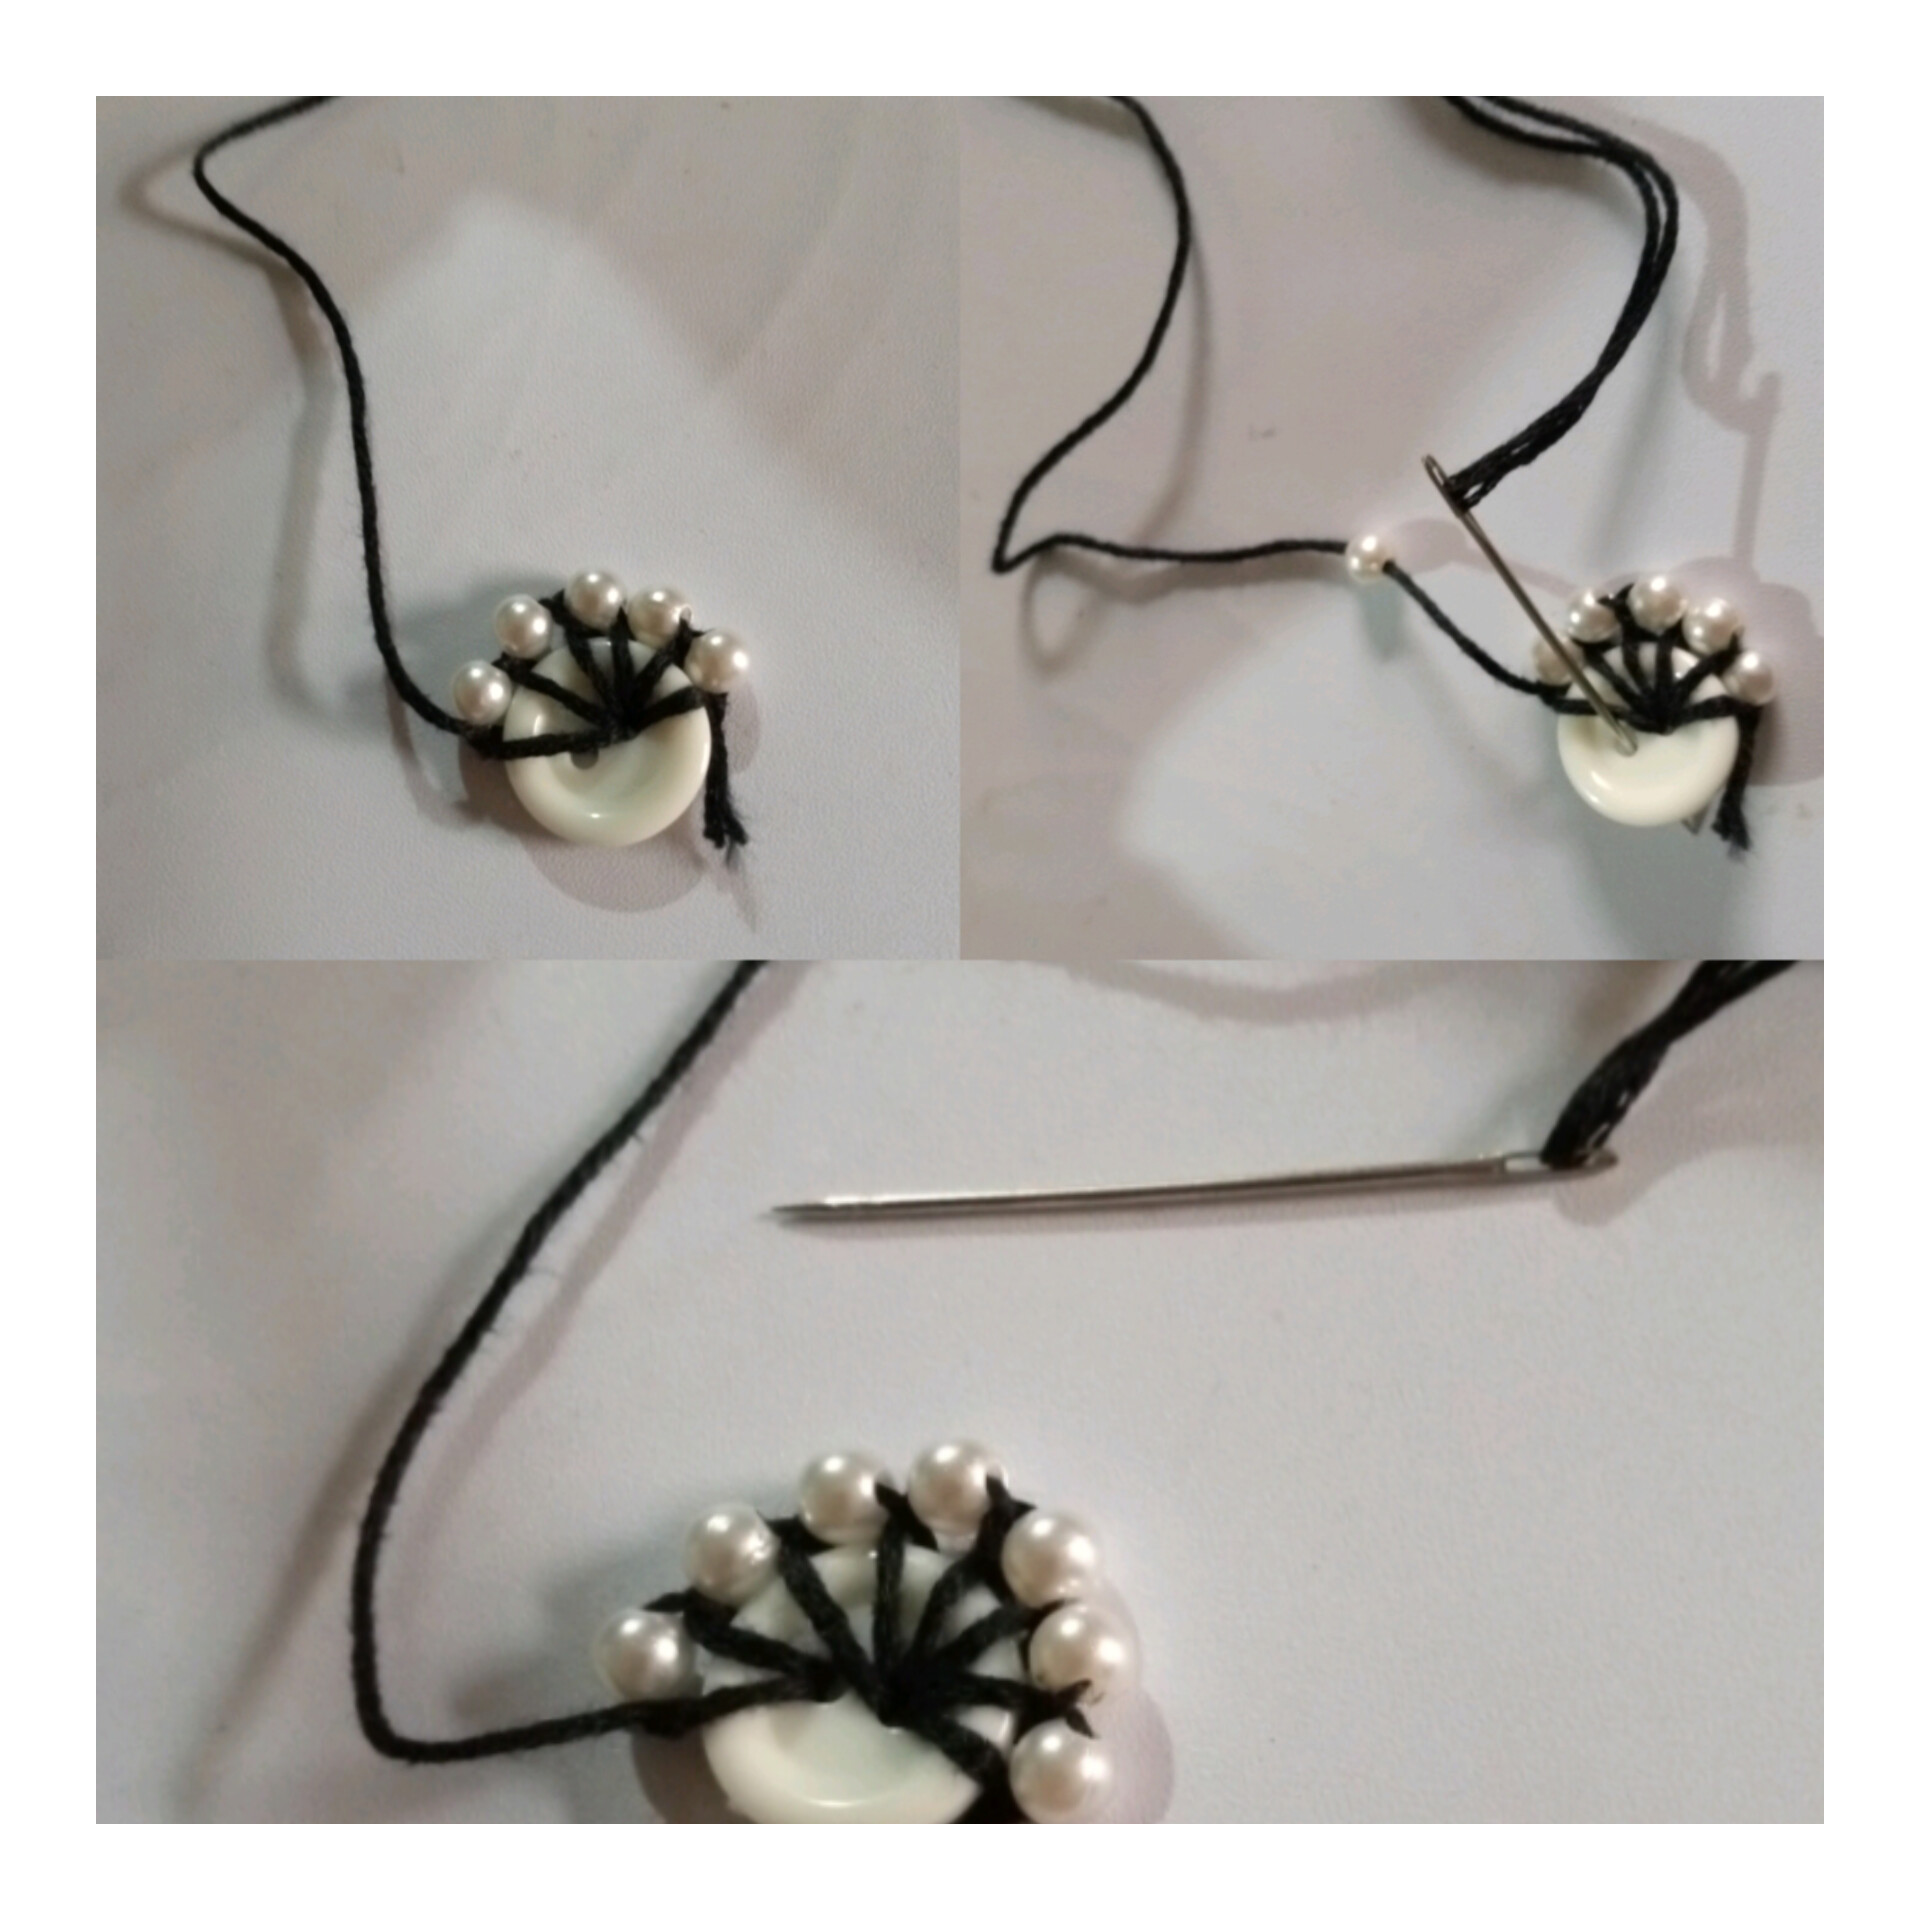
Acá se va repitiendo introducimos una perla jalamos y luego pasamos la aguja por detrás y jalamos para ir uniendo las perlas alrededor del botón.
Here it is repeated, we introduce a bead, pull and then pass the needle through the back and pull to join the beads around the button.
PASO 6:
STEP 6:
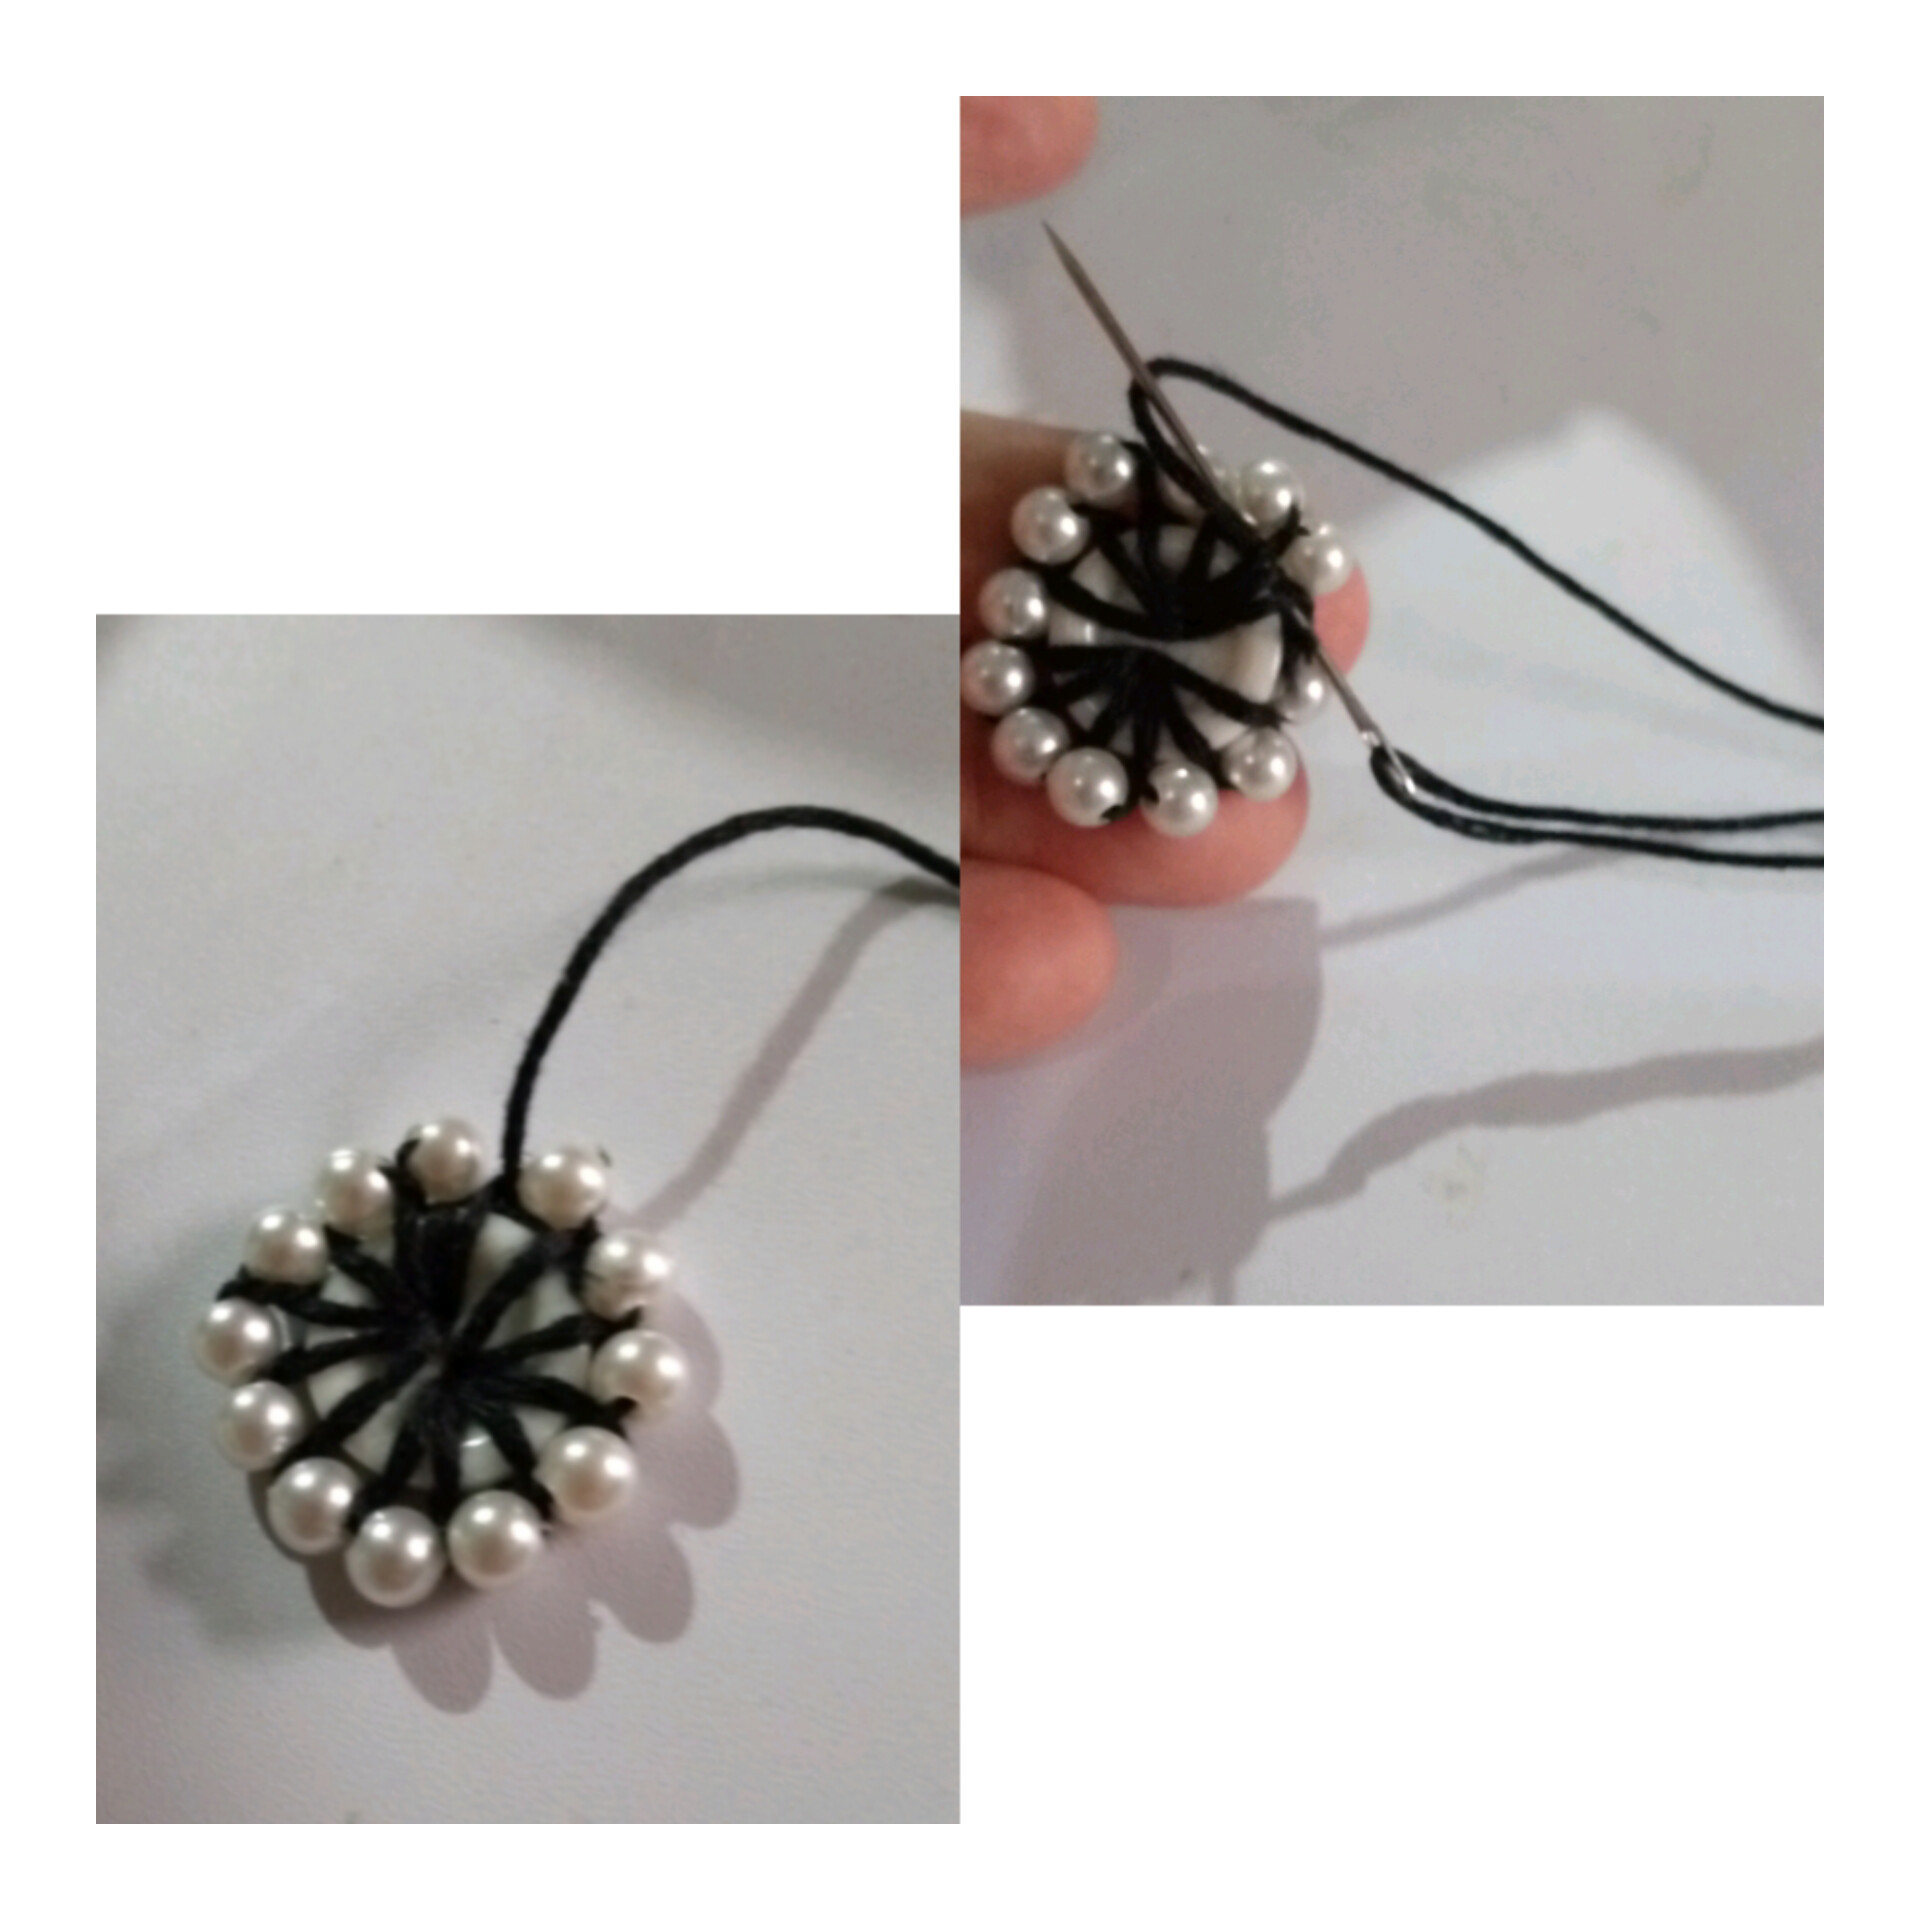
Seguimos haciendo el mismo procedimiento cuando ya hemos introducido 5 veces por el orificio del botón, procedemos ahora a introducirlo por el otro orificio del botón y seguimos el mismo procedimiento y ve como nos va quedando.
We continue doing the same procedure when we have already introduced 5 times through the hole of the button, we now proceed to introduce it through the other hole of the button and follow the same procedure and see how we are getting.
PASO 7:
STEP 7:
Acá se ve como quedó ahora con la aguja la pasamos de atrás hacia adelante y levantamos el hilo y lo pasamos por dentro del hilo y jalamos allí se hace un nudo.
Here is how it looks now with the needle we pass it from the back to the front and lift the thread and pass it through the thread and pull it through the thread and there we make a knot.
PASO 8:
STEP 8:
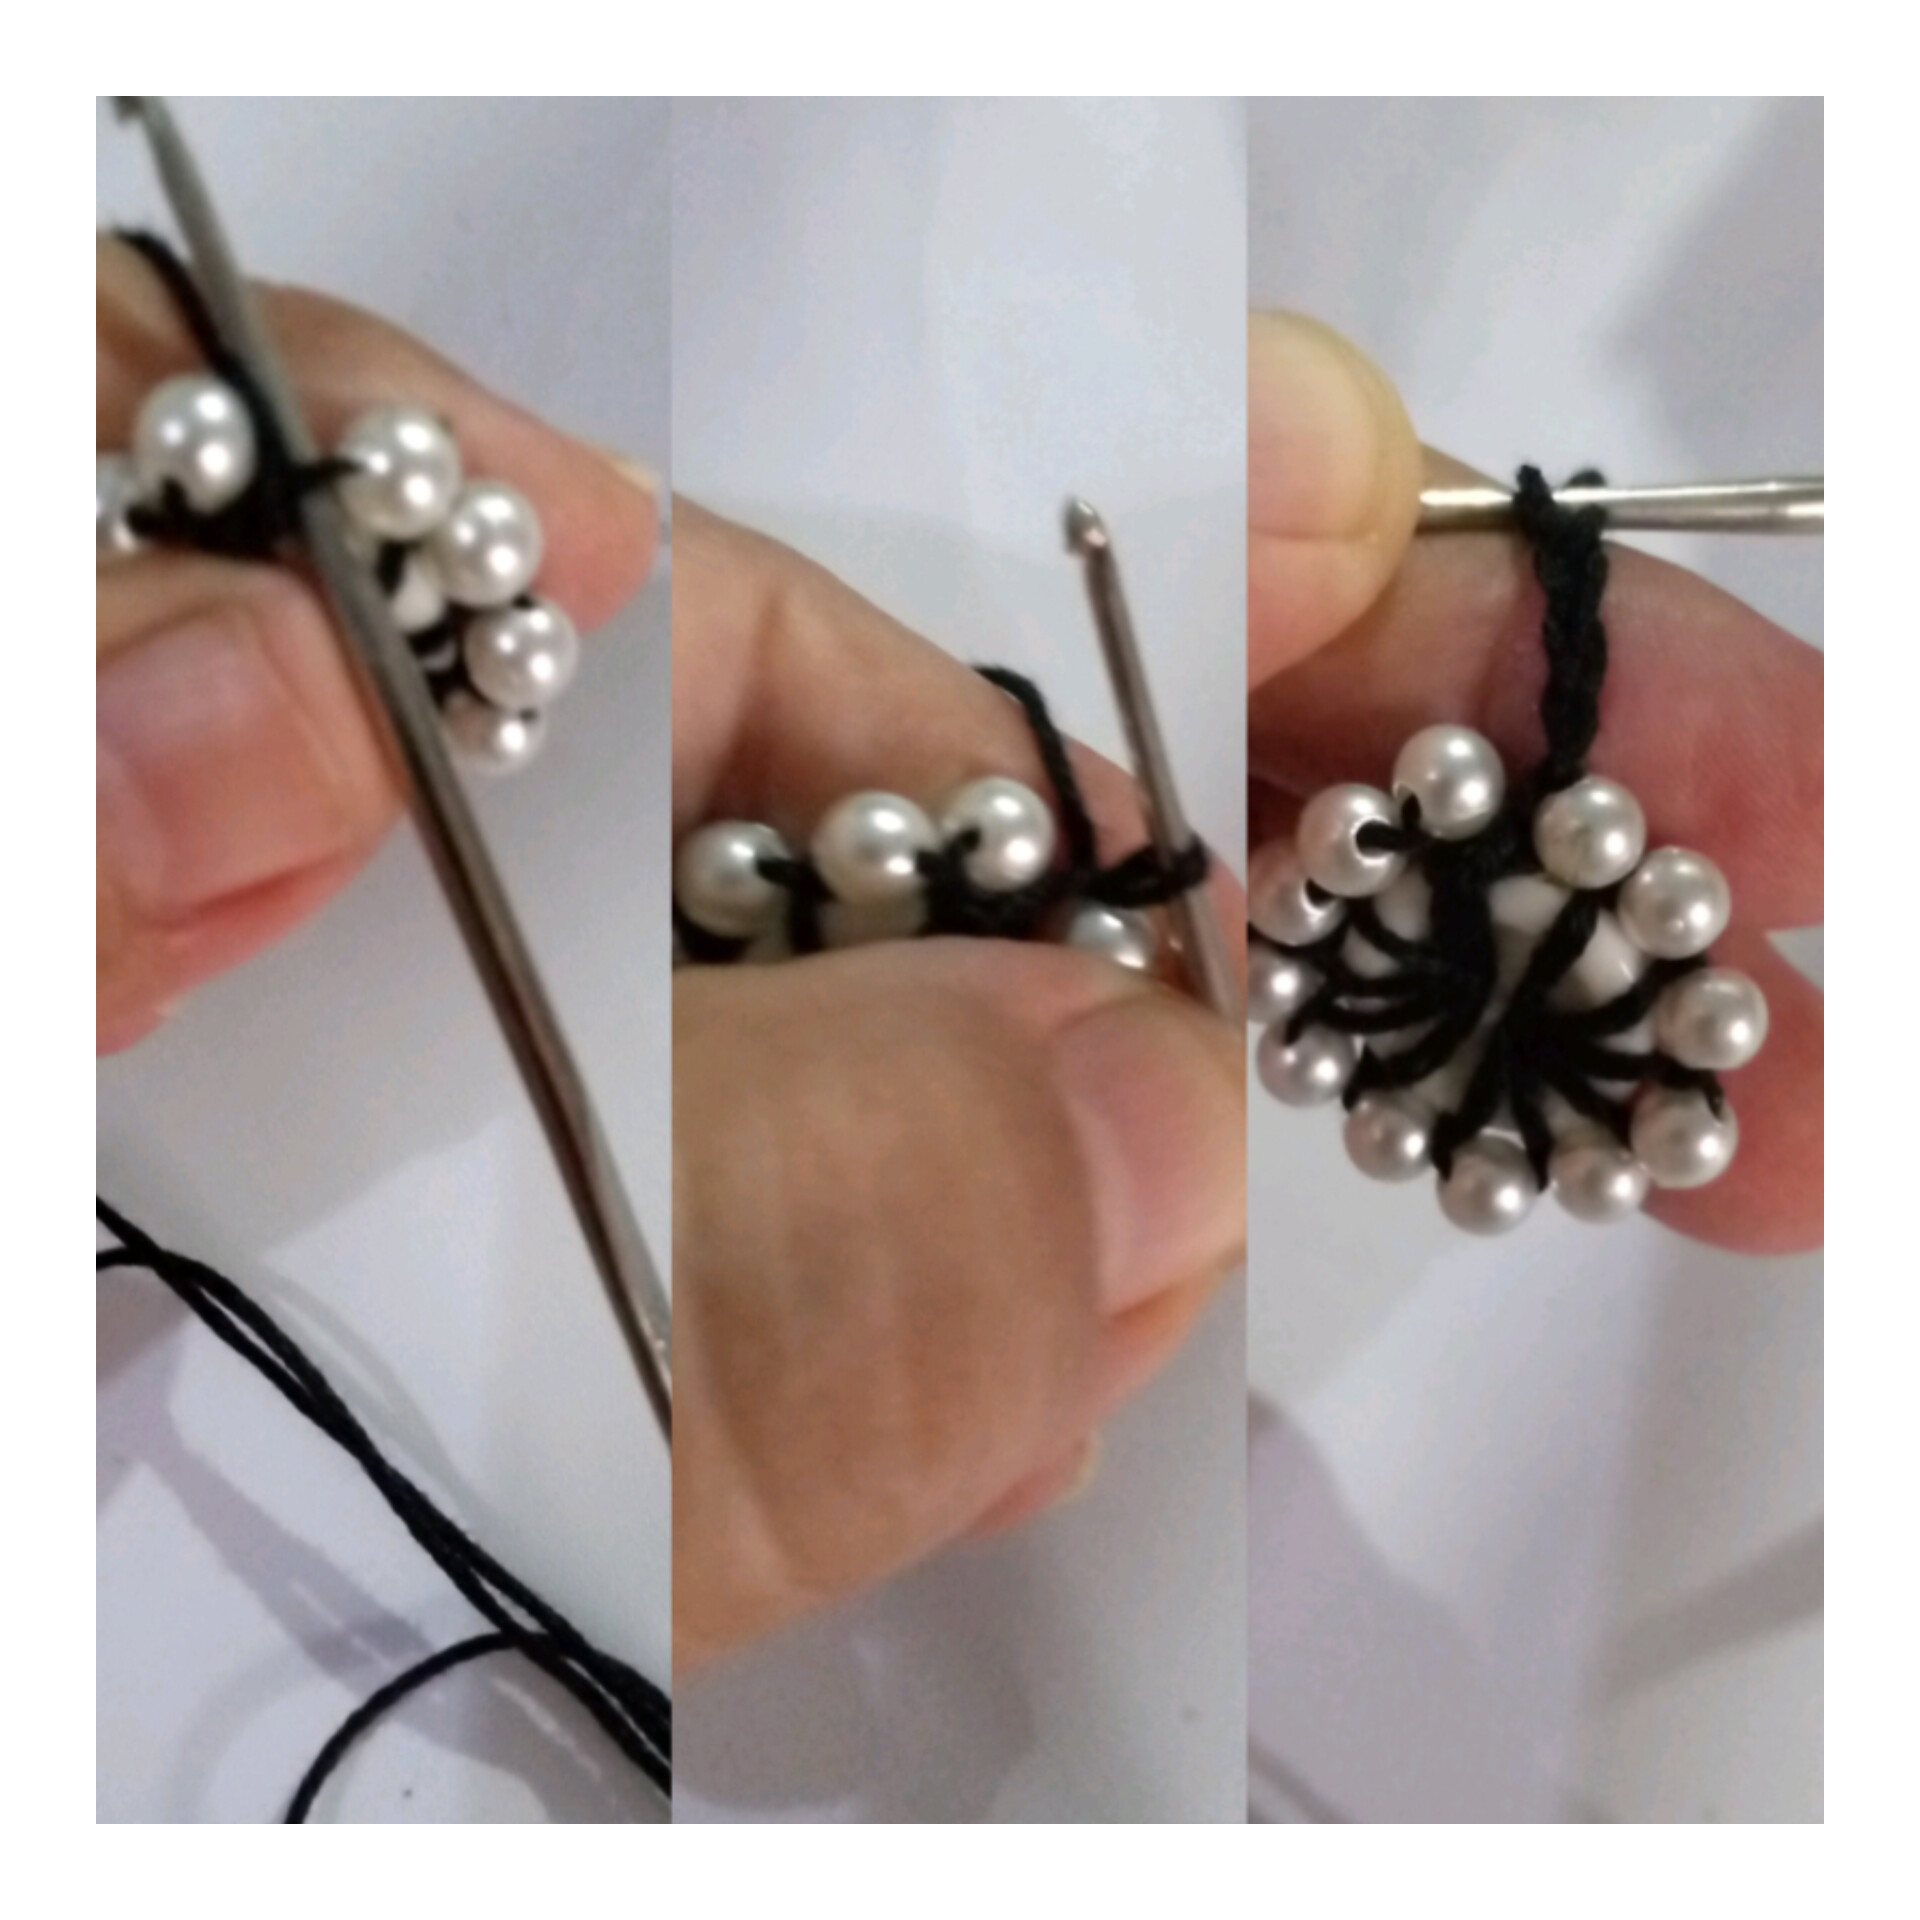
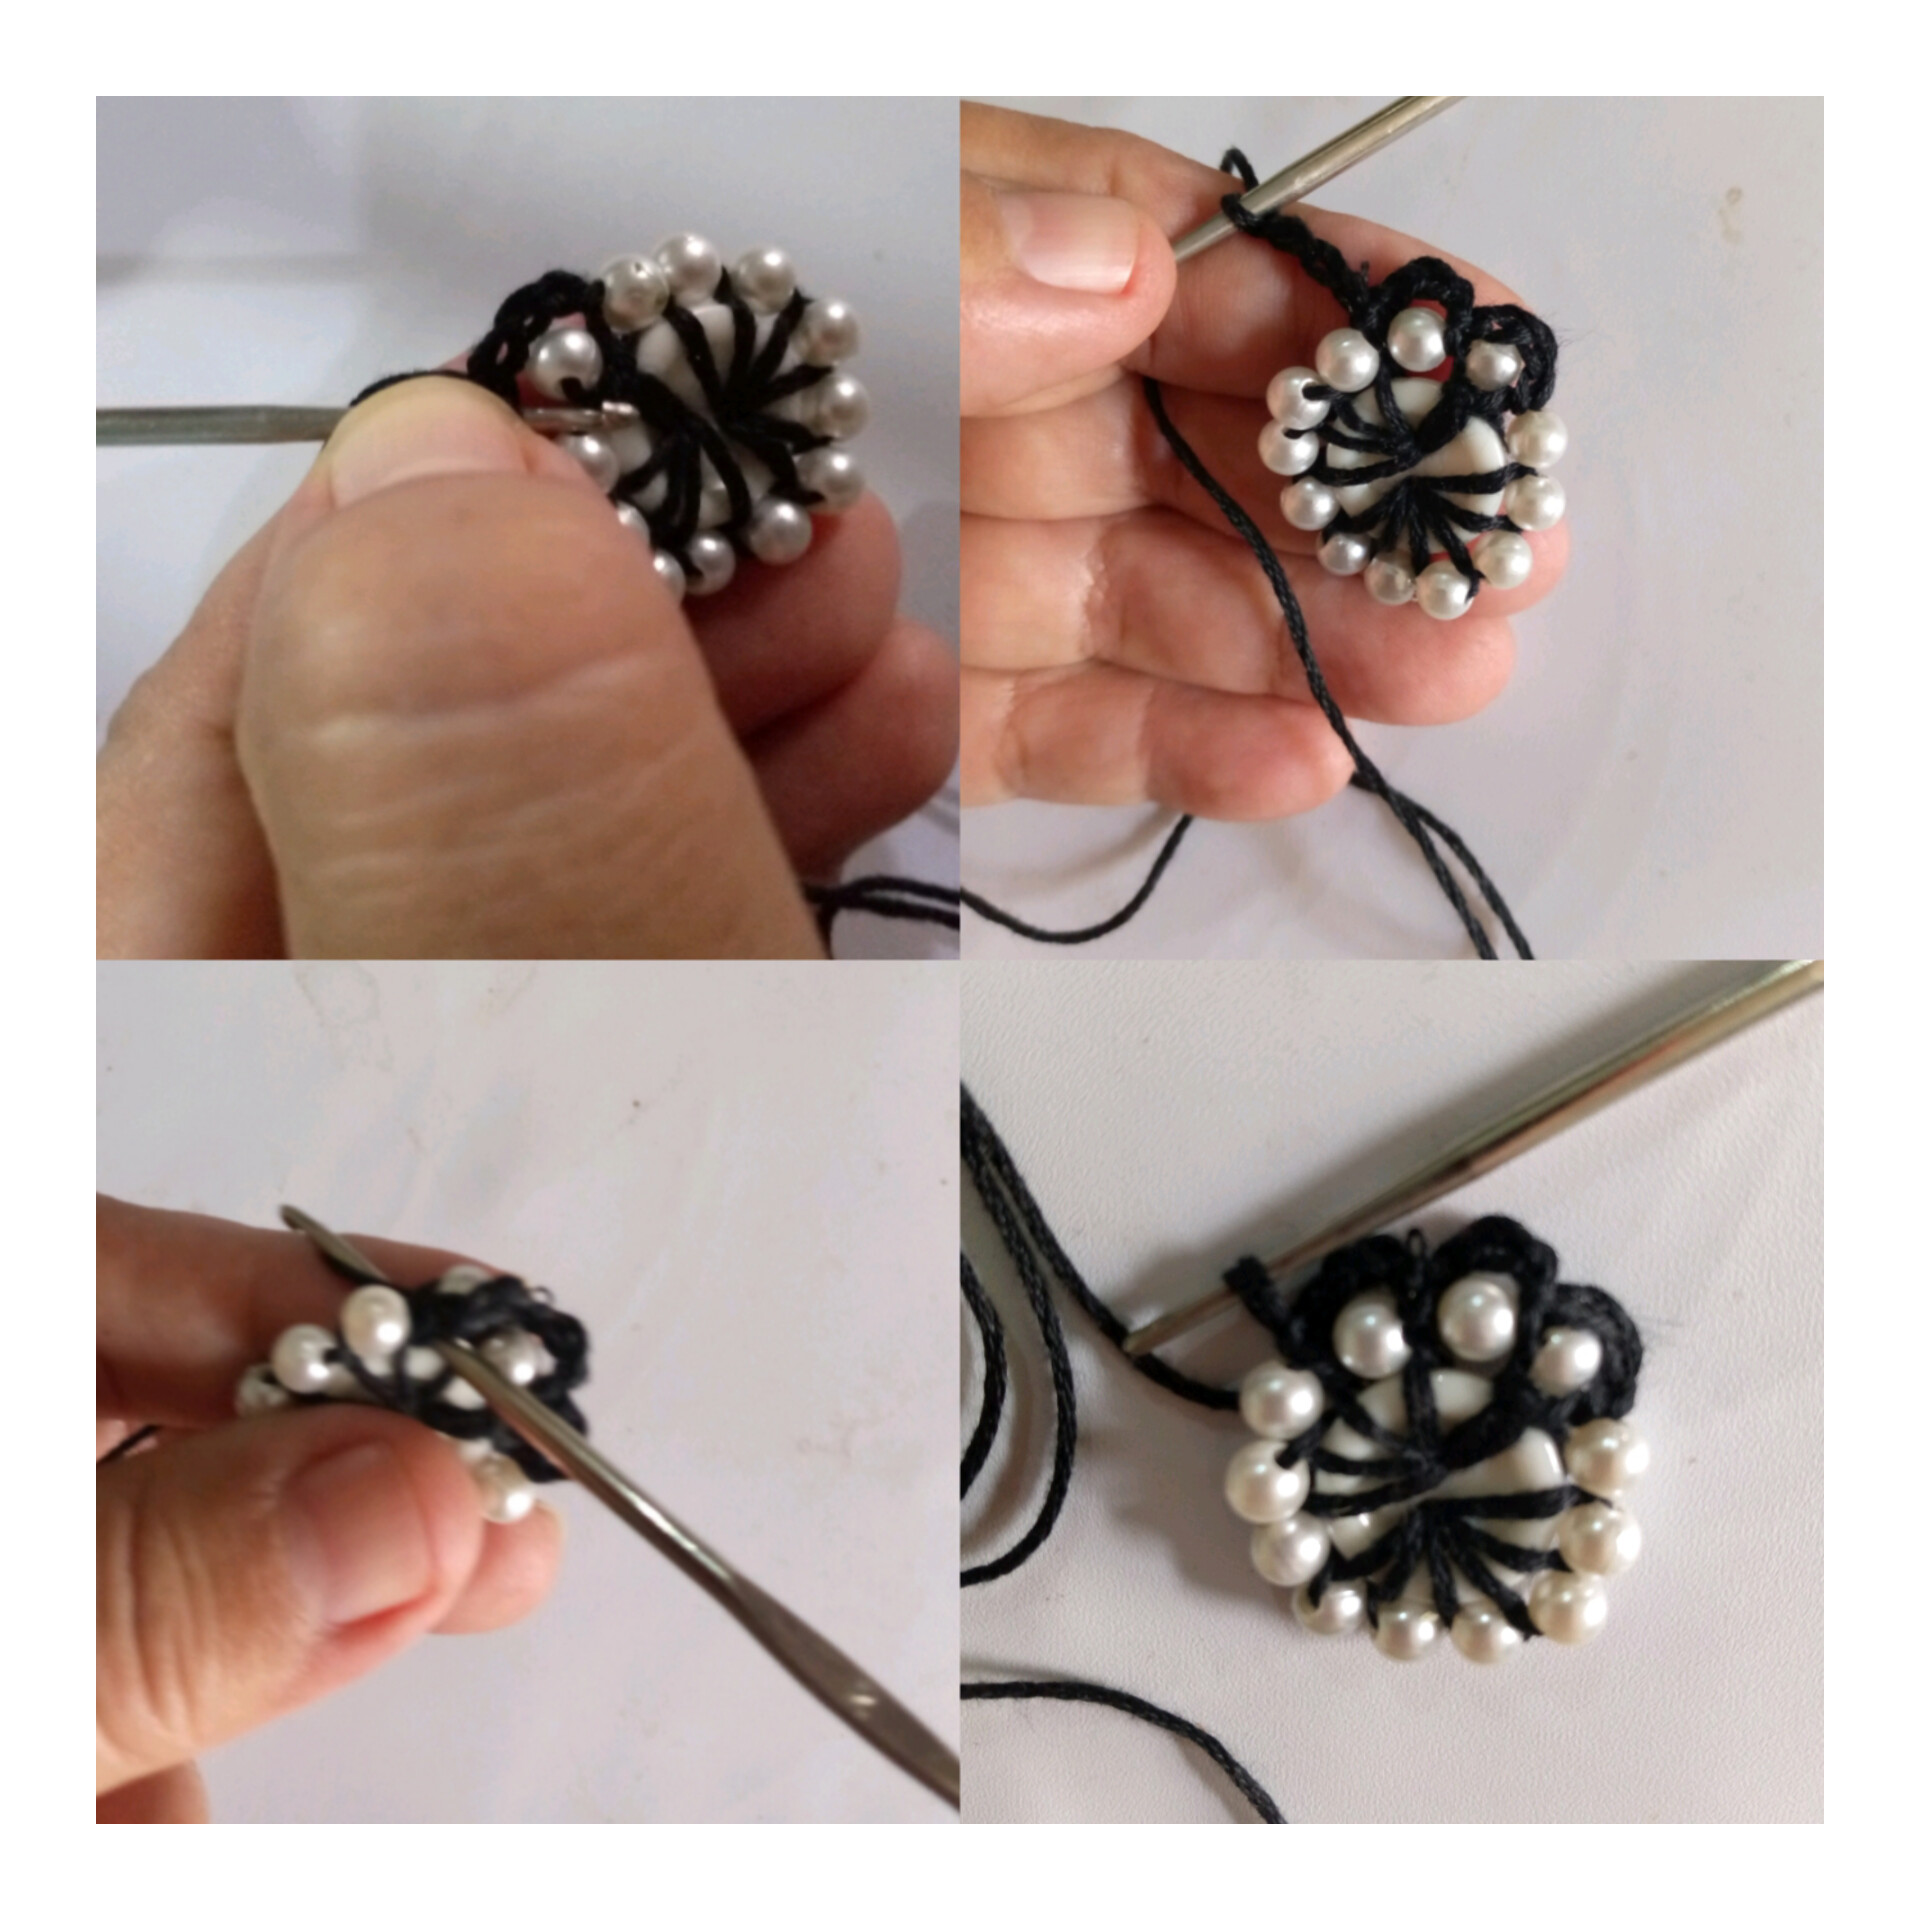
Después quitamo la aguja de coser y cambiamos ahora a la aguja de tejer la pasamos por debajo de la primera perla donde nos iniciamos y tomamos el hilo y lo jalamos y se hace el nudo para seguir acá tejemos una cadeneta de 4 puntos.
Then we remove the sewing needle and switch now to the knitting needle and pass it under the first bead where we started and take the yarn and pull it and make the knot to continue here we knit a chain of 4 stitches.
PASO 9:
STEP 9:
Acá la cadeneta la vamos a pasar por encima de la perla y en el mismo sitio metemos la aguja y tomamos el hilo jalamos y asi de esta manera te van quedando cada una de las perlas.
Here we are going to pass the chain chain over the pearl and in the same place we put the needle and take the thread, pull and in this way you will have each one of the pearls.
PASO 10:
STEP 10:
Ya acá está más adelantada se tejen una cadeneta de 4 puntos pasa por debajo de la perla y jala el hilo hasta terminar.
Once it is more advanced, knit a chain of 4 stitches, pass under the pearl and pull the yarn through to the end.
PASO 11:
STEP 11:
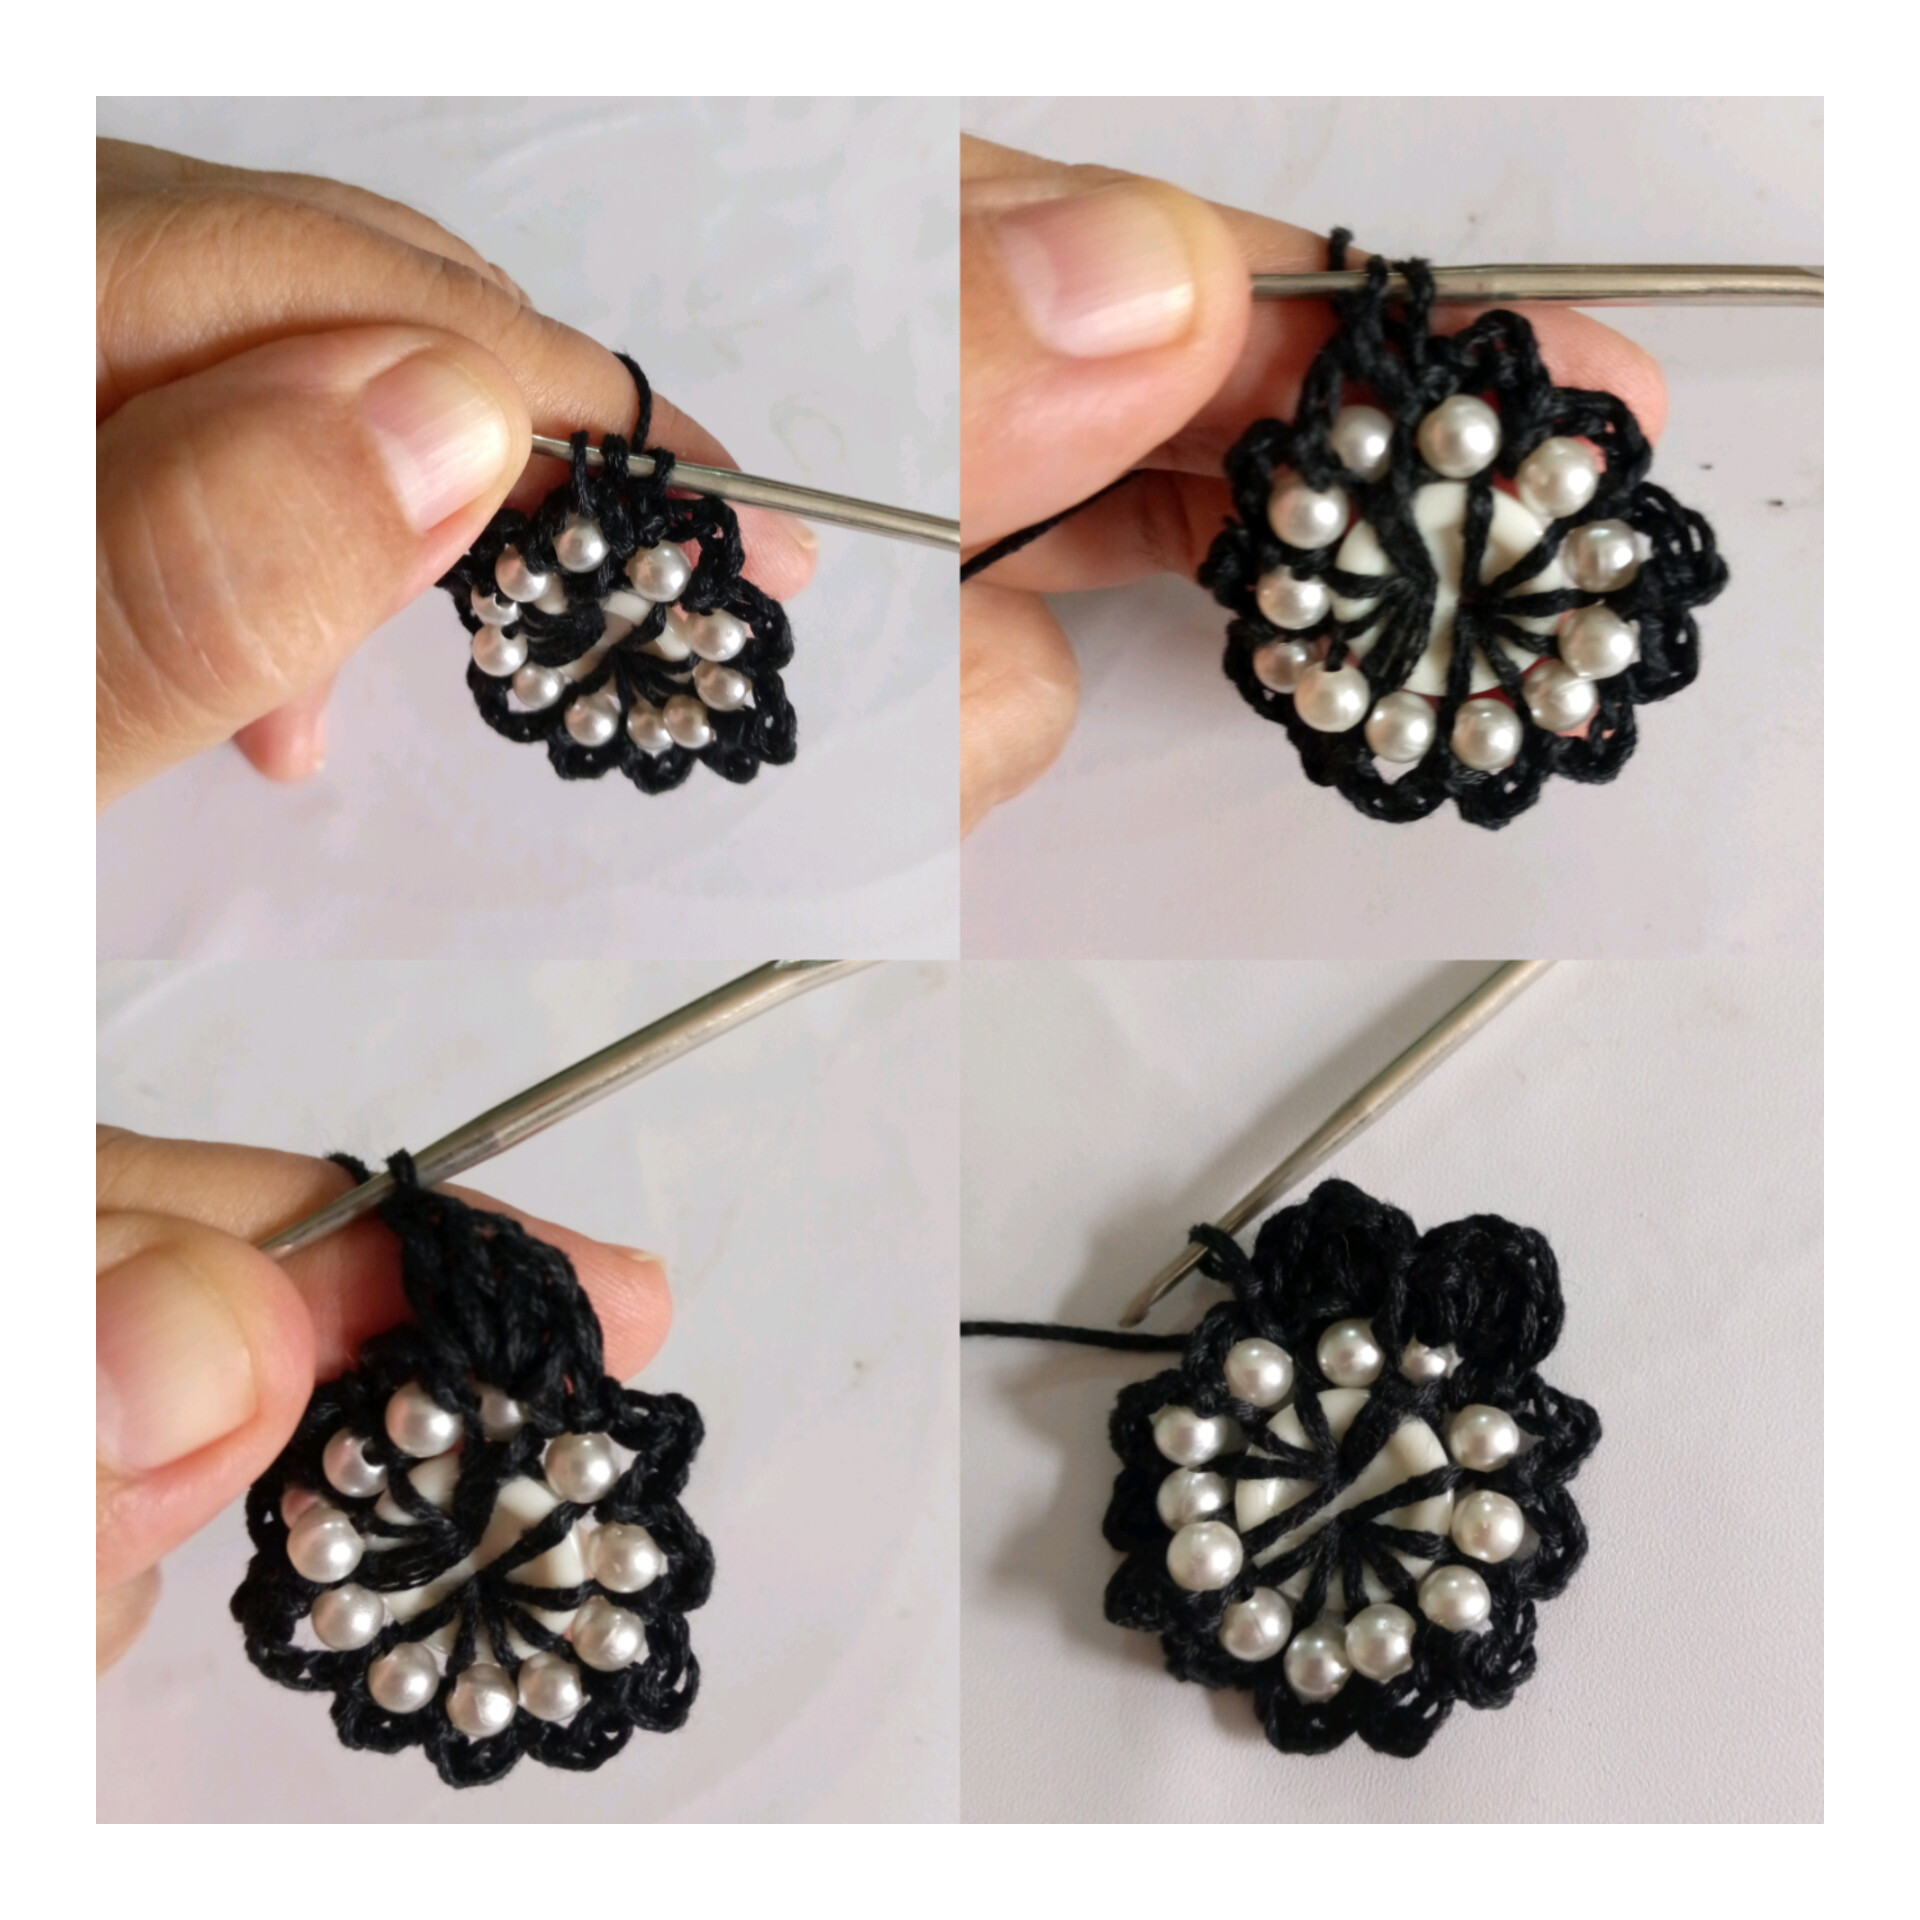
Luego seguimos con el siguiente proceso al terminar la primera vuelta procedemos tejemos un medio punto tomo una lazada e introduzco la aguja por debajo del arco que le hicimos con la cadeneta a cada perla luego la saca y jala hacia arriba este es el punto alto toma una lazada y jala hacia atras metiendo dos puntos y te quedan dos y después vuelve a tomar una lazada al aire y jala los otros dos puntos y vuelves a repetir en total vas hacer 4 baretas en cada arco de la perla y así te va quedando el tejido esto sería los pétalos de la flor.
Then we continue with the following process at the end of the first round we proceed, we knit a half stitch I take a loop and introduce the needle under the arch that we made with the chain stitch to each pearl then take it out and pull it upwards this is the high stitch take a loop and pull it backwards putting two stitches and you have two left and then take a loop in the air again and pull the other two stitches and repeat again in total you will make 4 barrettes in each arch of the pearl and this is how the fabric will be knitted this would be the petals of the flower.
PASO 12:
STEP 12:
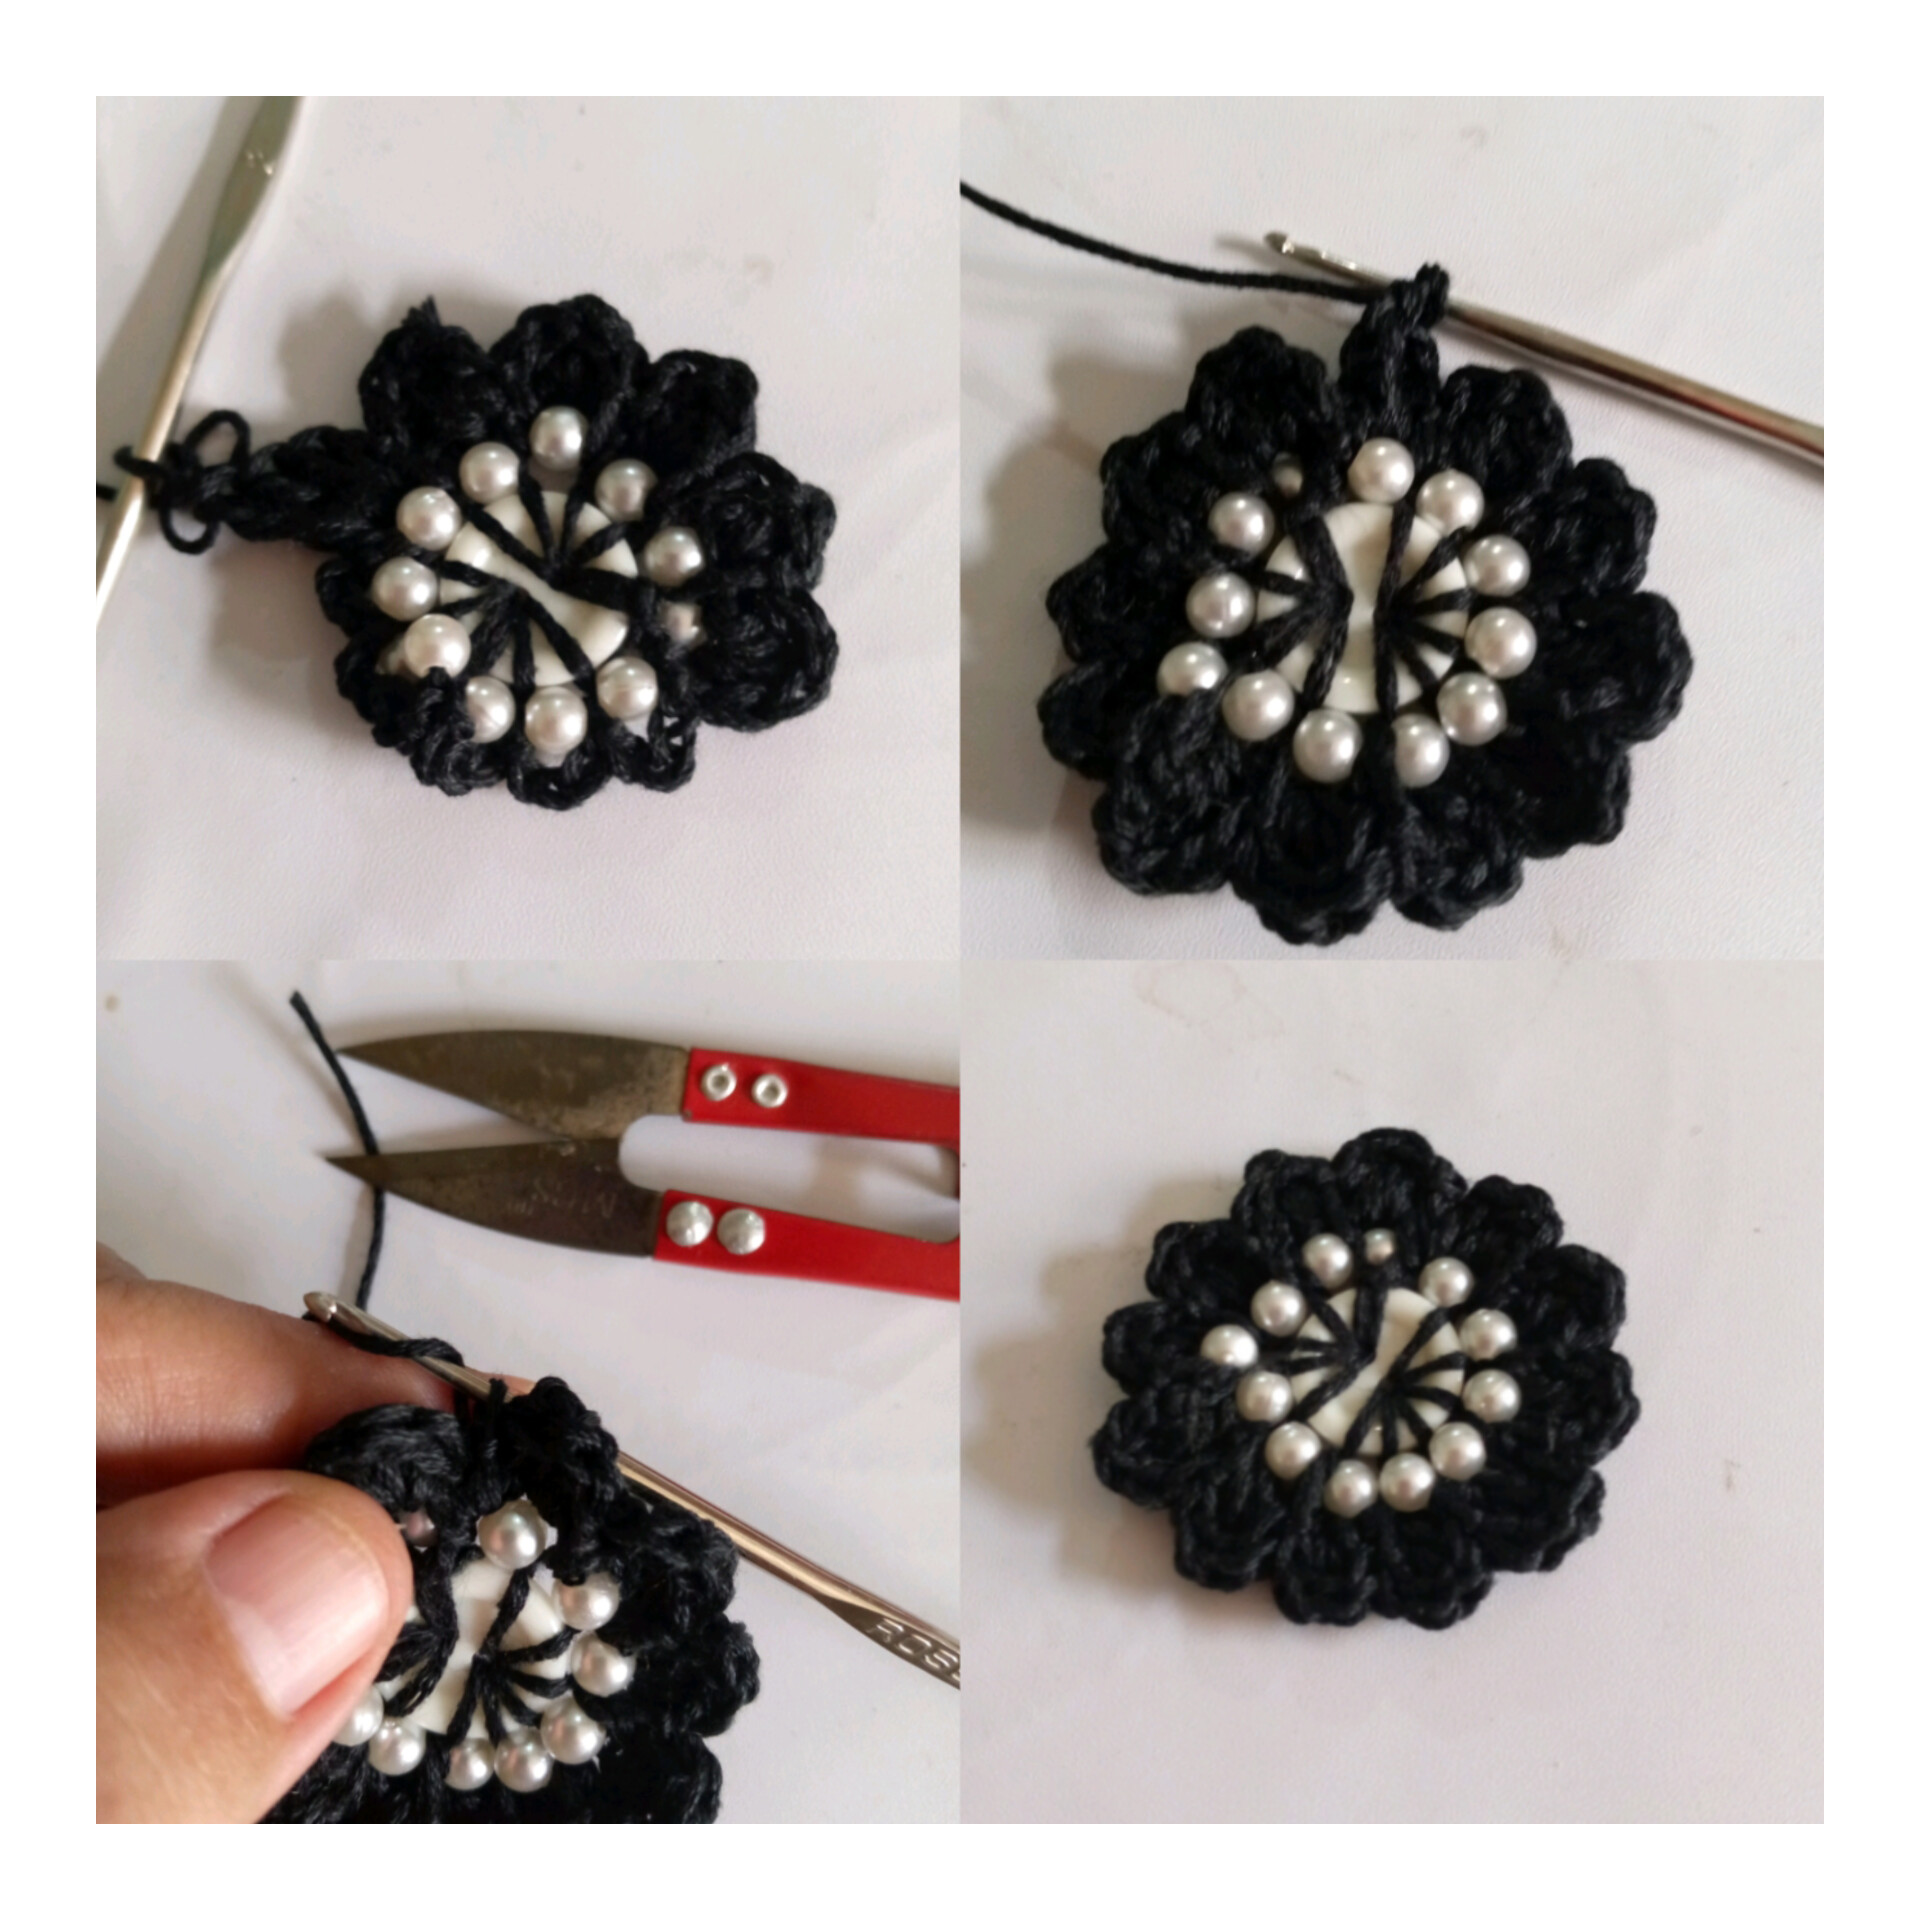
Aquí ya lo muestro adelantada como ha sido el proceso en cada arco de la perla hice los pétalos de la flor y una vez terminada lo que hago es introducir la aguja por todo el centro de ambos pétalos y tomo el hilo y jalo tomo una lazada y saco allí hago el nudo y corto el excedente, de esta manera quedó nuestra flor.
Here I show it in advance as has been the process in each arc of the pearl I made the petals of the flower and once finished what I do is to introduce the needle throughout the center of both petals and take the thread and pull I take a loop and take out there I make the knot and cut the excess, in this way was our flower.
PASO 13:
STEP 13:
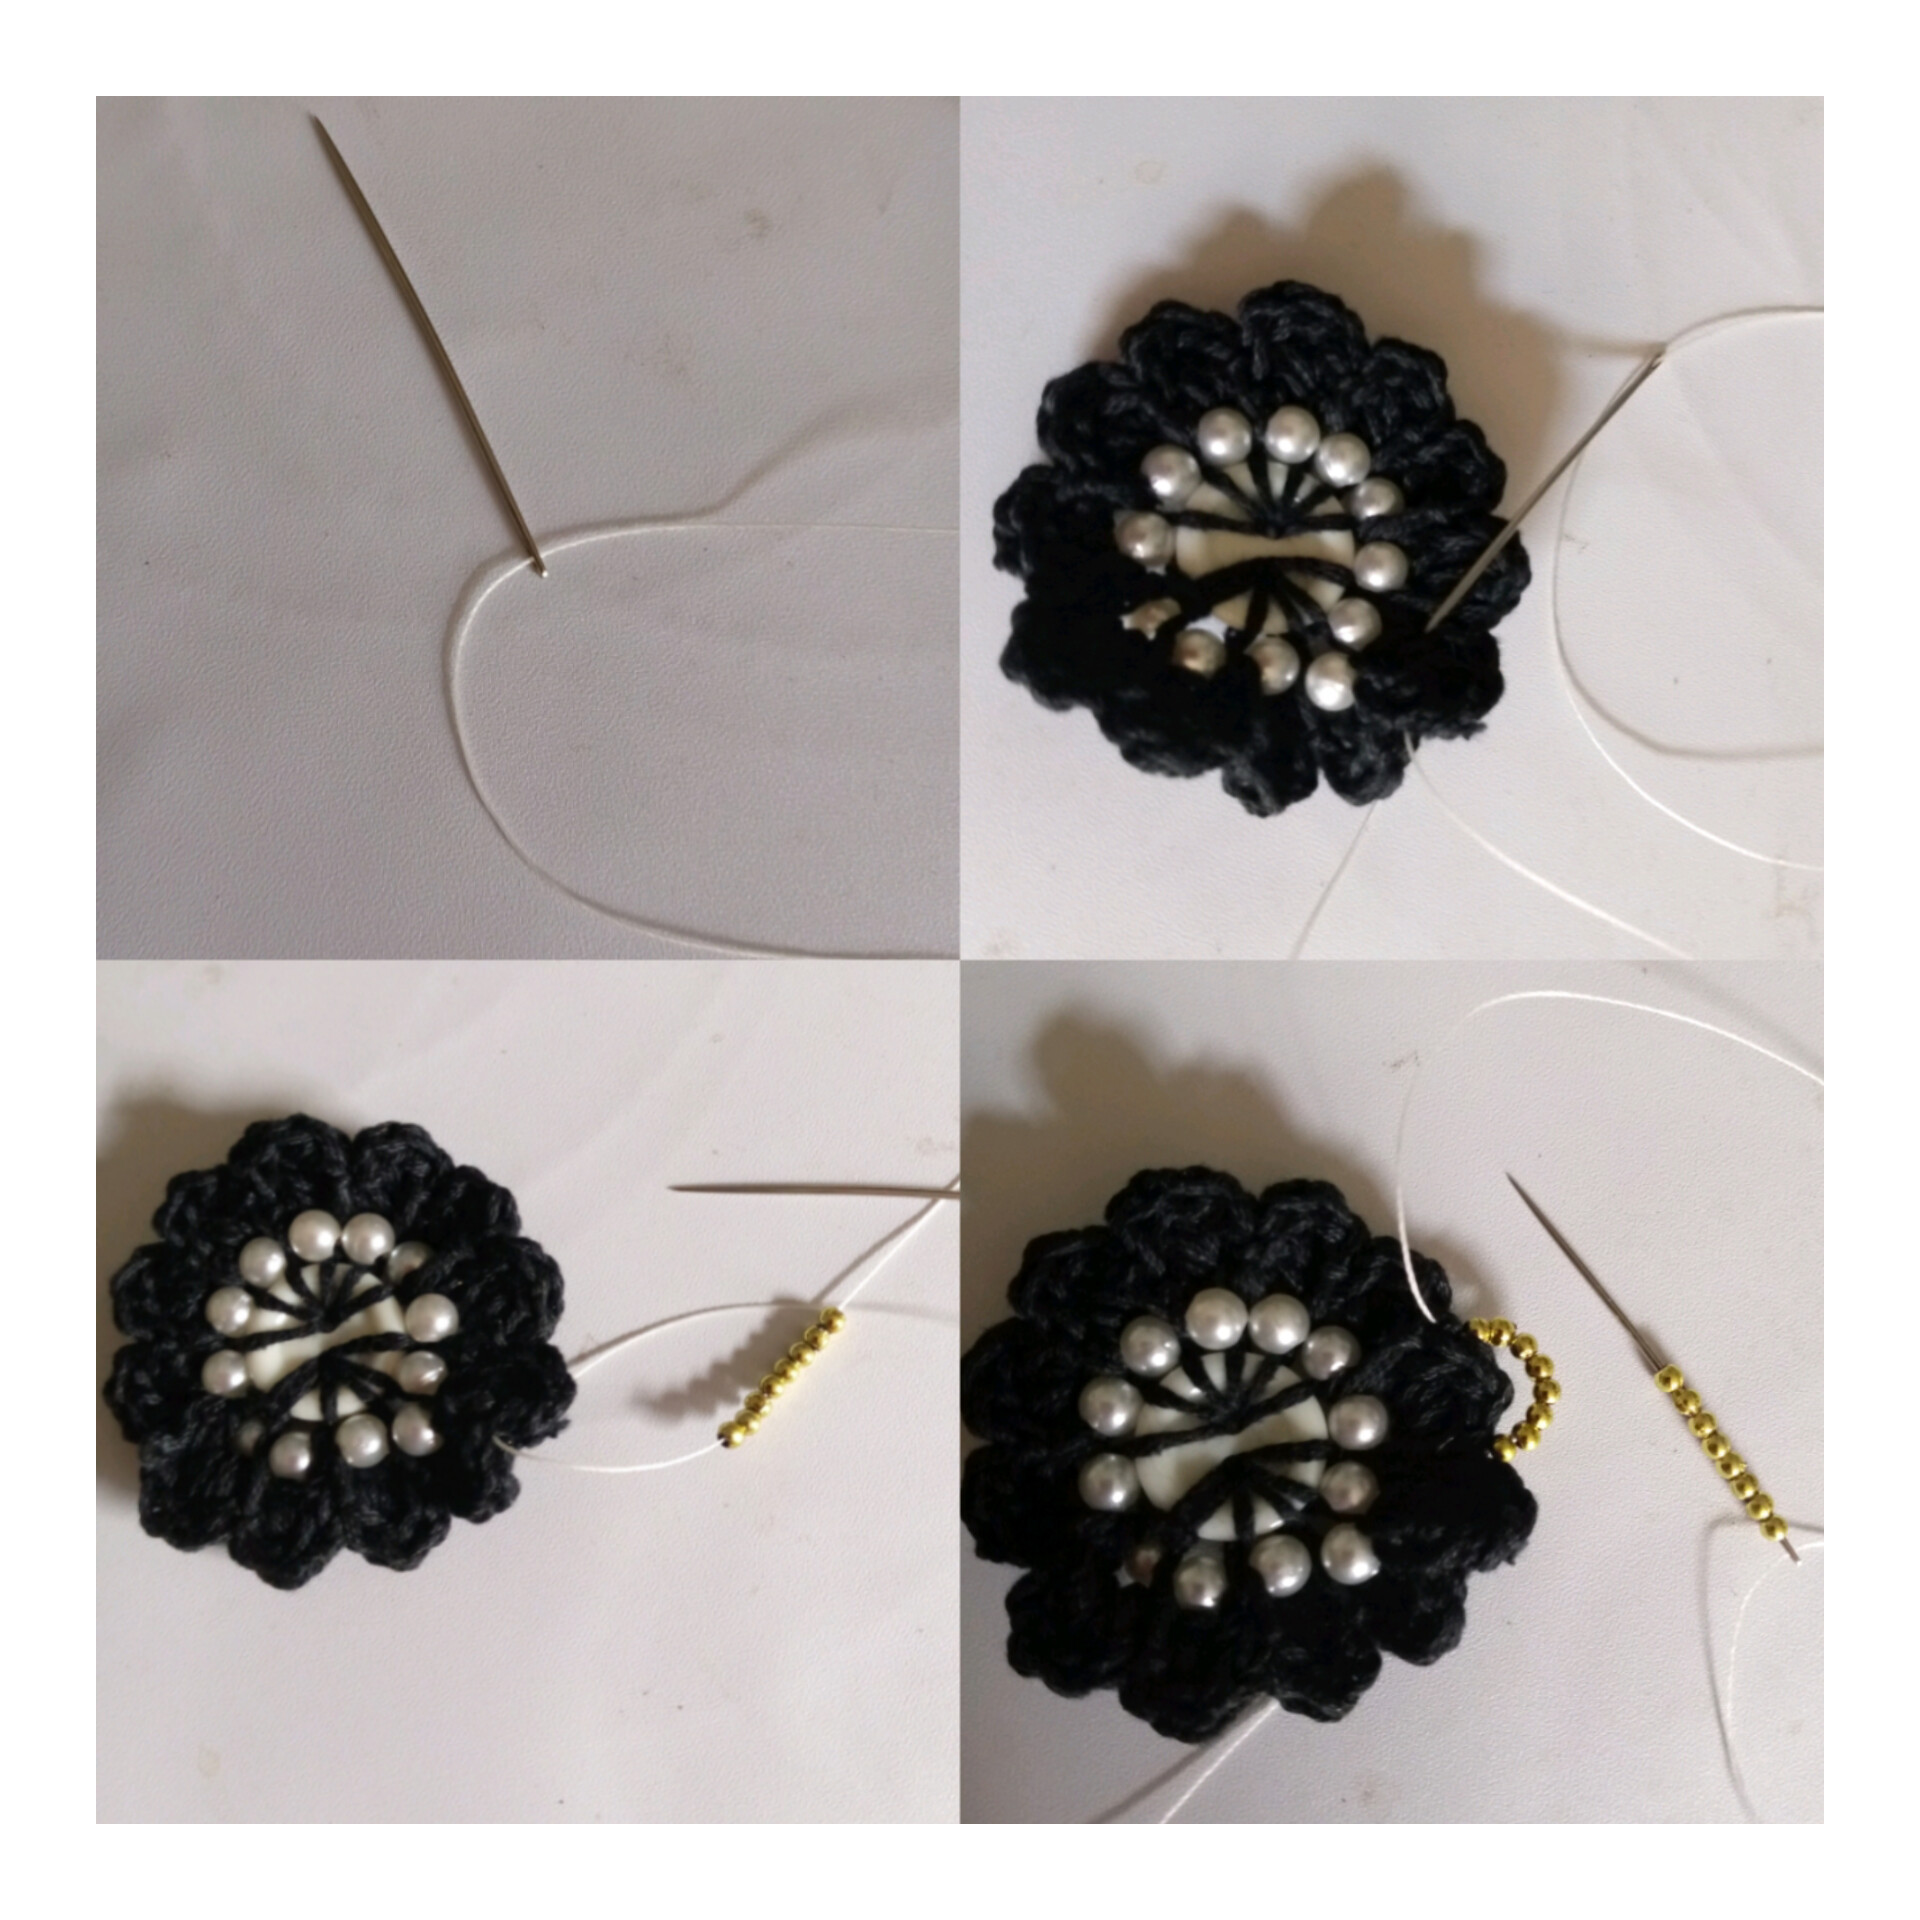
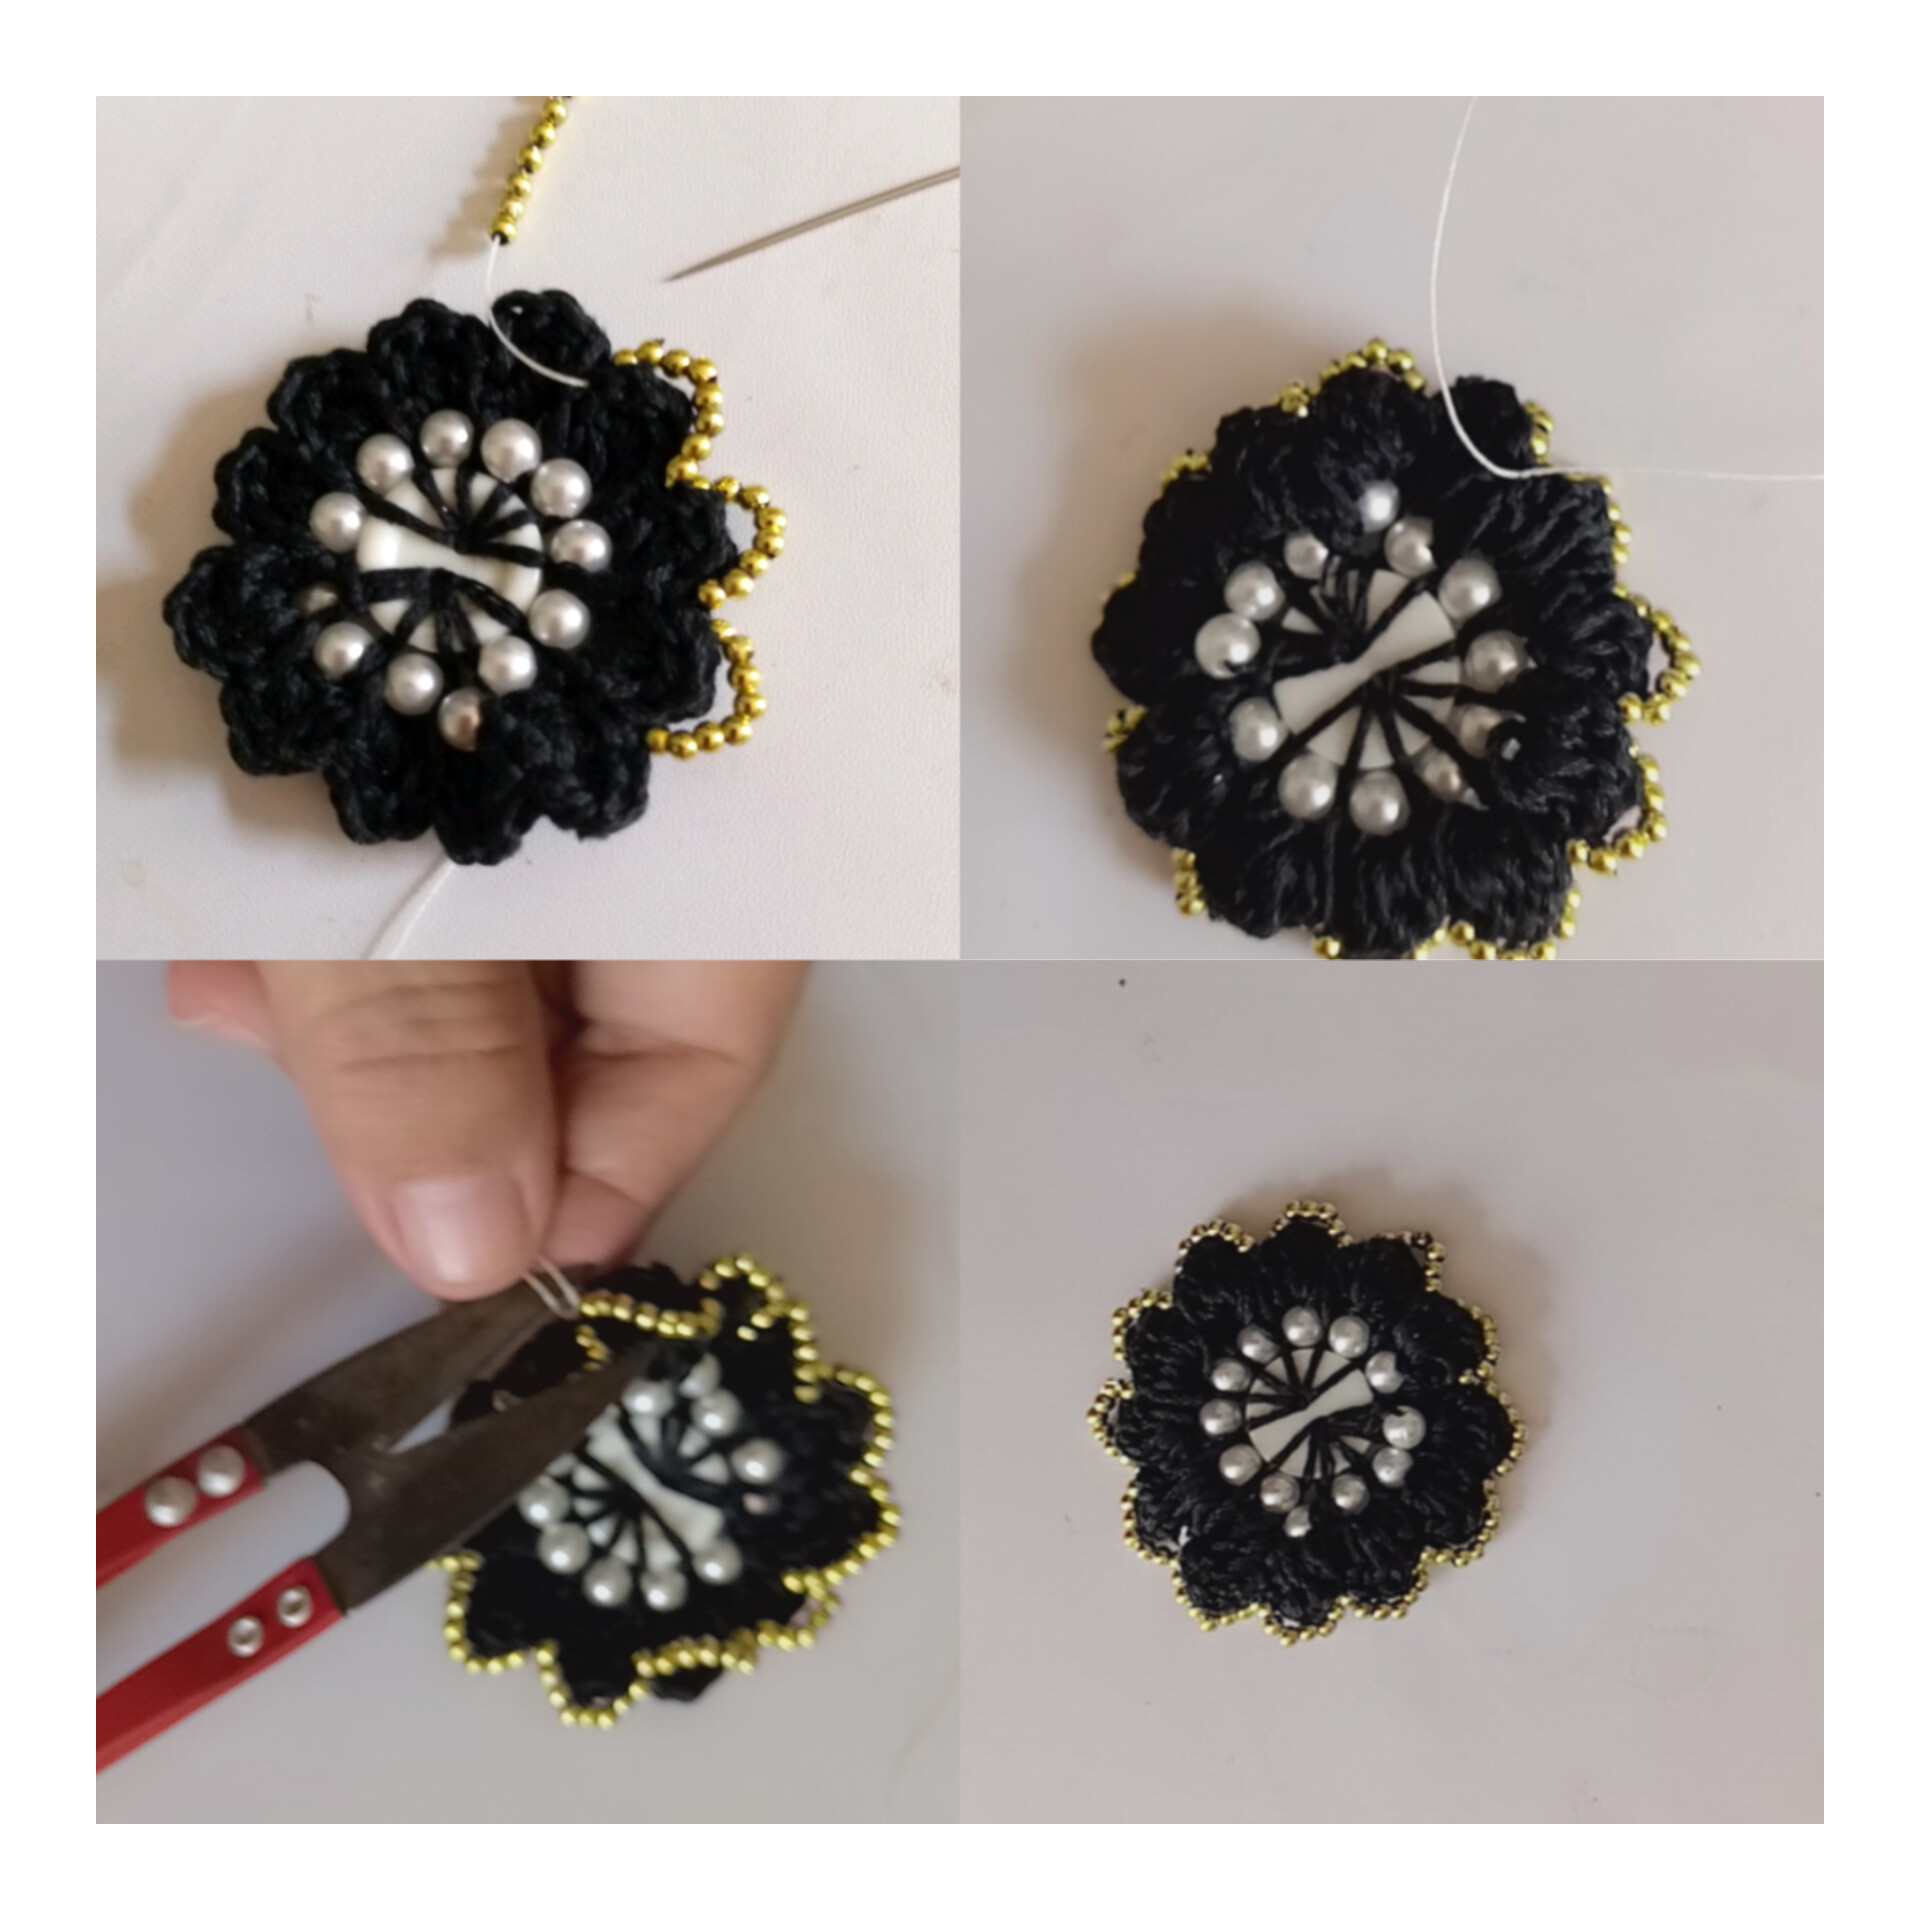
Aquí tomamos la aguja y el hilo de tapicería cortamos 1,40 cmts de largo enhebramos y hacemos dos nudos y la vamos a pasar por una de las puntas del pétalo con la aguja tomamos 8 perlitas doradas y rodeamos el pétalo introducimos la aguja de abajo hacia arriba del mismo pétalo y volvemos a tomar 8 perlitas.
Here we take the needle and the tapestry thread, cut 1.40 cm long, thread it and make two knots and we are going to pass it through one of the tips of the petal with the needle we take 8 golden beads and go around the petal we introduce the needle from the bottom to the top of the same petal and we take 8 beads again.
PASO 14:
STEP 14:
Y así sucesivamente lo vamos repitiendo el proceso hasta finalizar y una vez finalizado pasamos dos veces la aguja de abajo hacia arriba y le hacemos un nudo fuerte y cortamos el excedente y hermosa quedó.
And so on we repeat the process until the end and once finished we pass the needle twice from bottom to top and we make a strong knot and cut the excess and beautiful was left.
PASO 15:
STEP 15:
Luego tomamos nuevamente el hilo negro y la aguja de tejer y un arito, así que introduzco la aguja por todo el medio de los pétalos jalo el hilo y lo paso por dentro del aro y abro el hilo tomo la punta y la paso por dentro jalo para asegurar y luego le voy dando vueltas con el hilo alrededor del aro siempre con la ayuda de la aguja le hice 6 vueltas y al final un nudo de amarre.
Then we take again the black thread and the knitting needle and a hoop, so I introduce the needle through the middle of the petals I pull the thread and pass it inside the hoop and open the thread I take the tip and pass it inside I pull it to secure and then I go around the hoop with the thread always with the help of the needle I made 6 turns and at the end a tie knot.
PASO 16:
STEP 16:
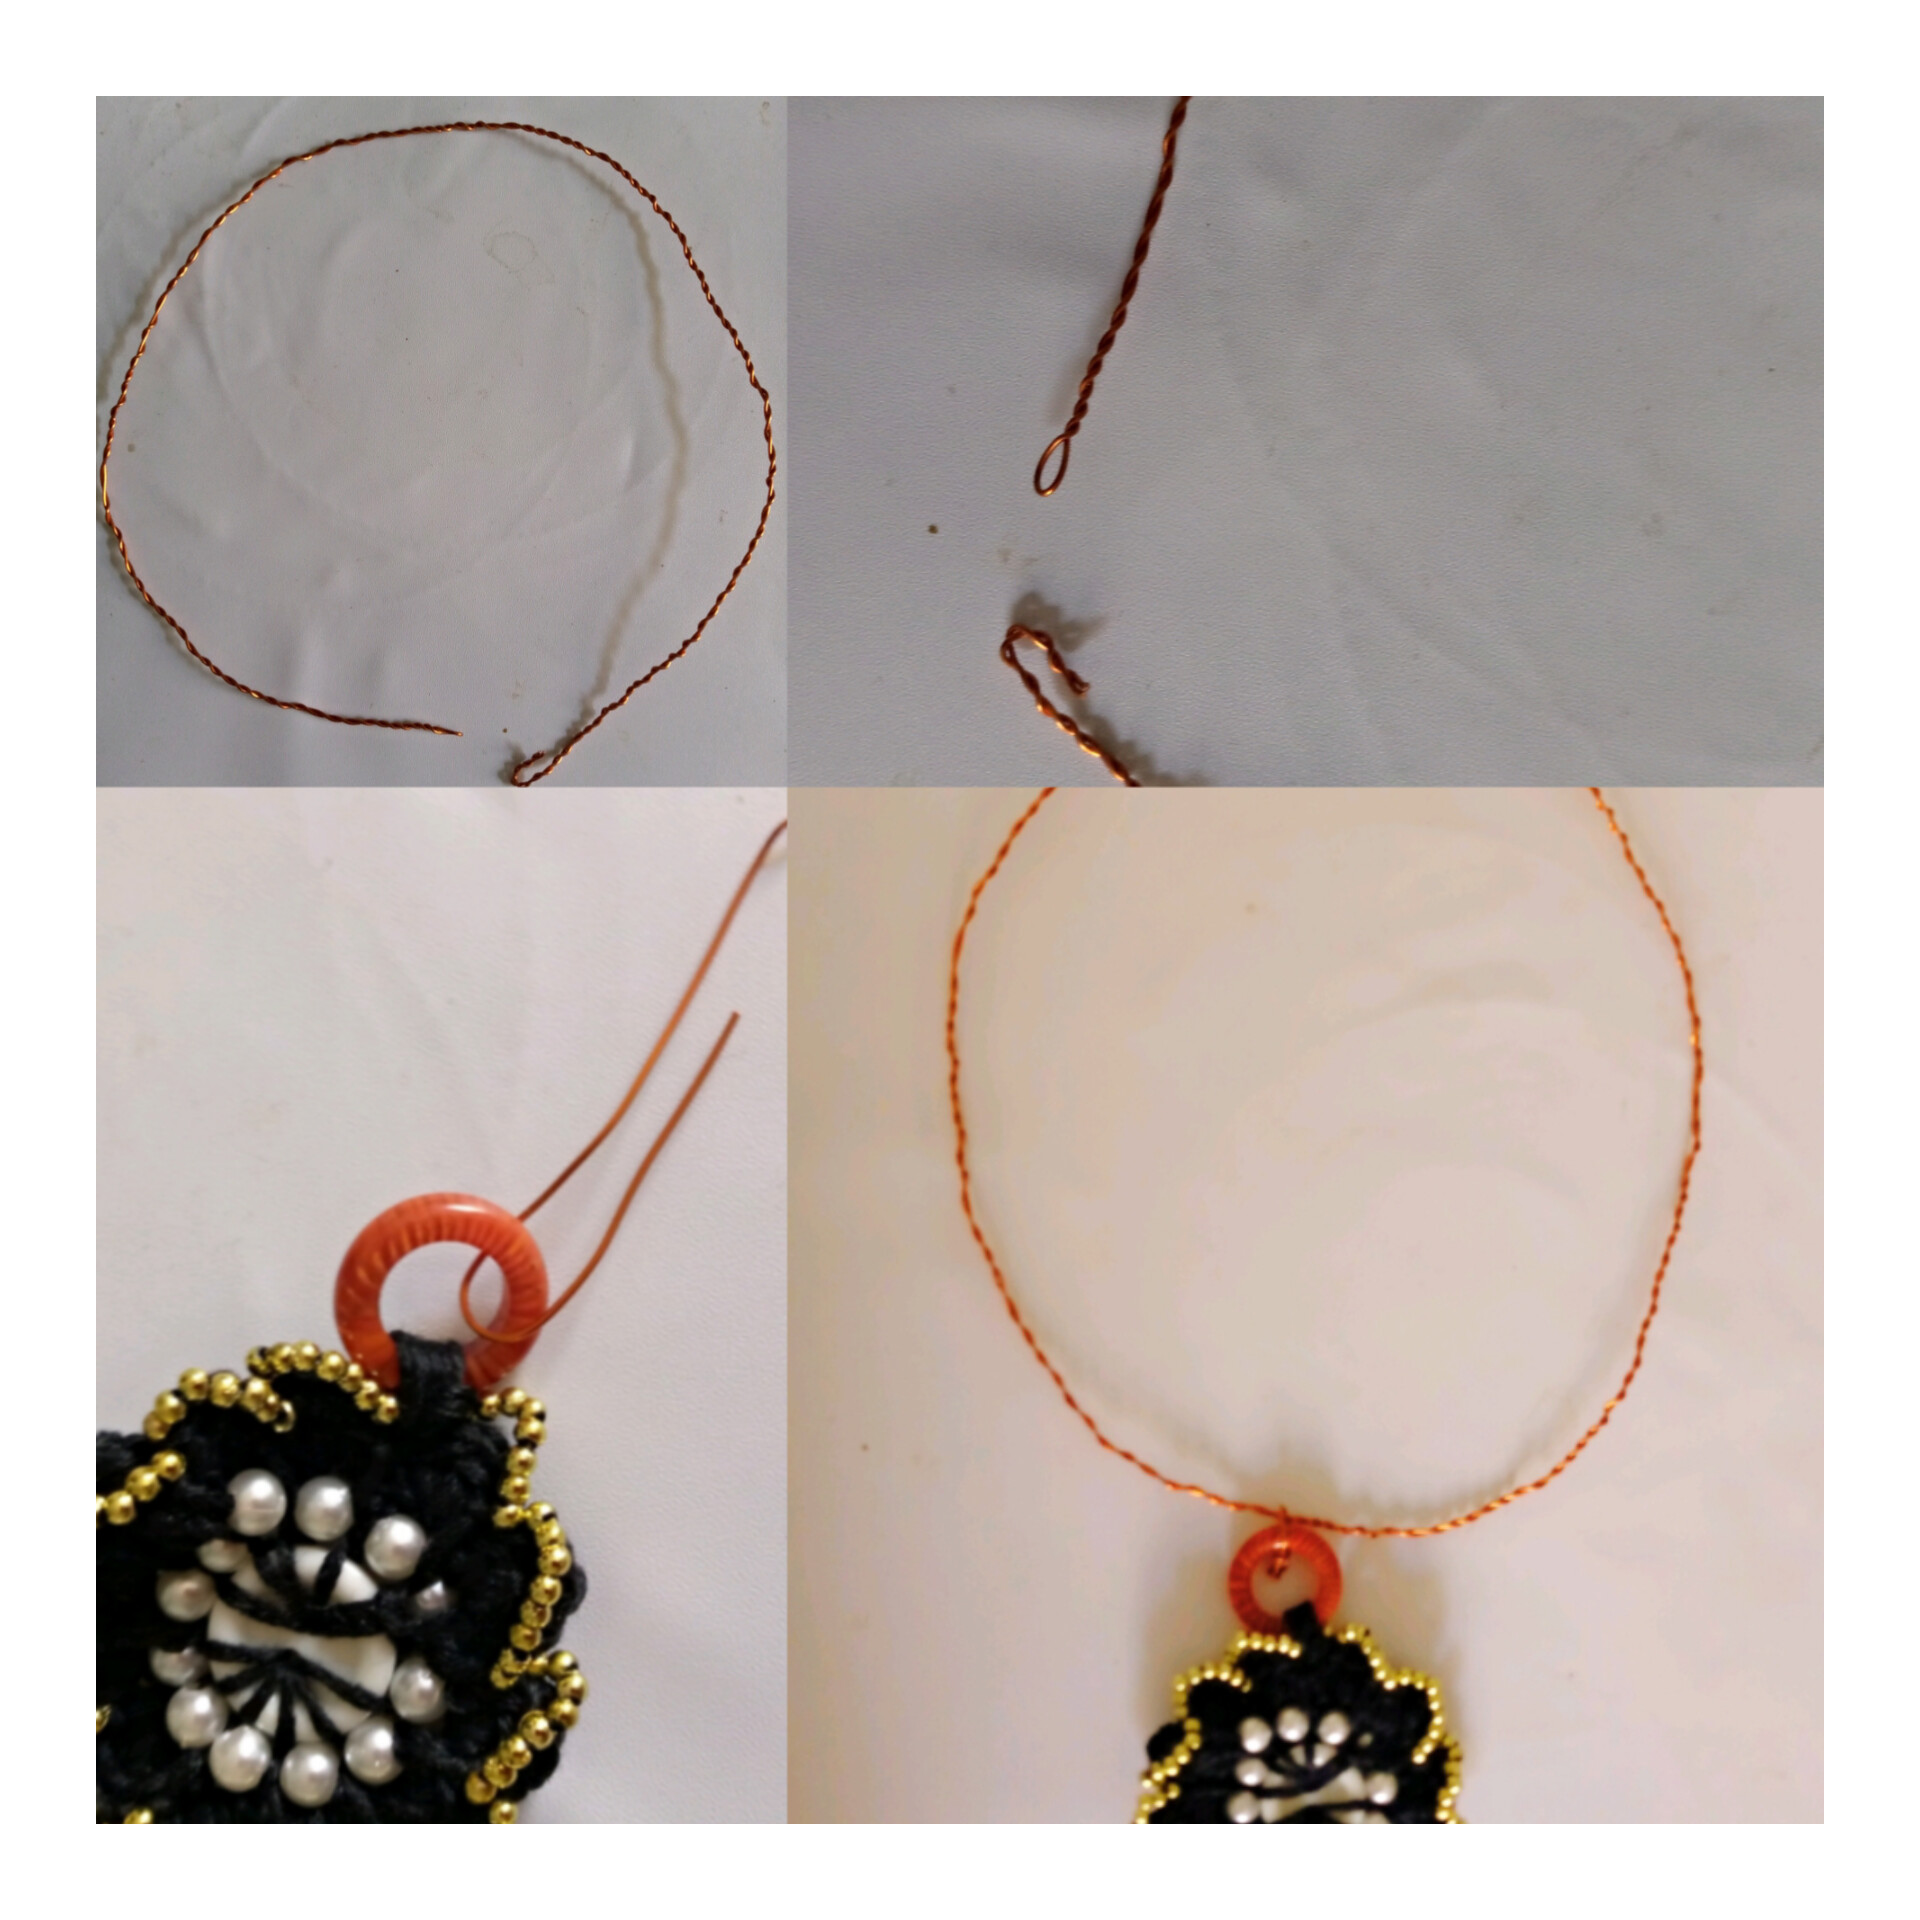
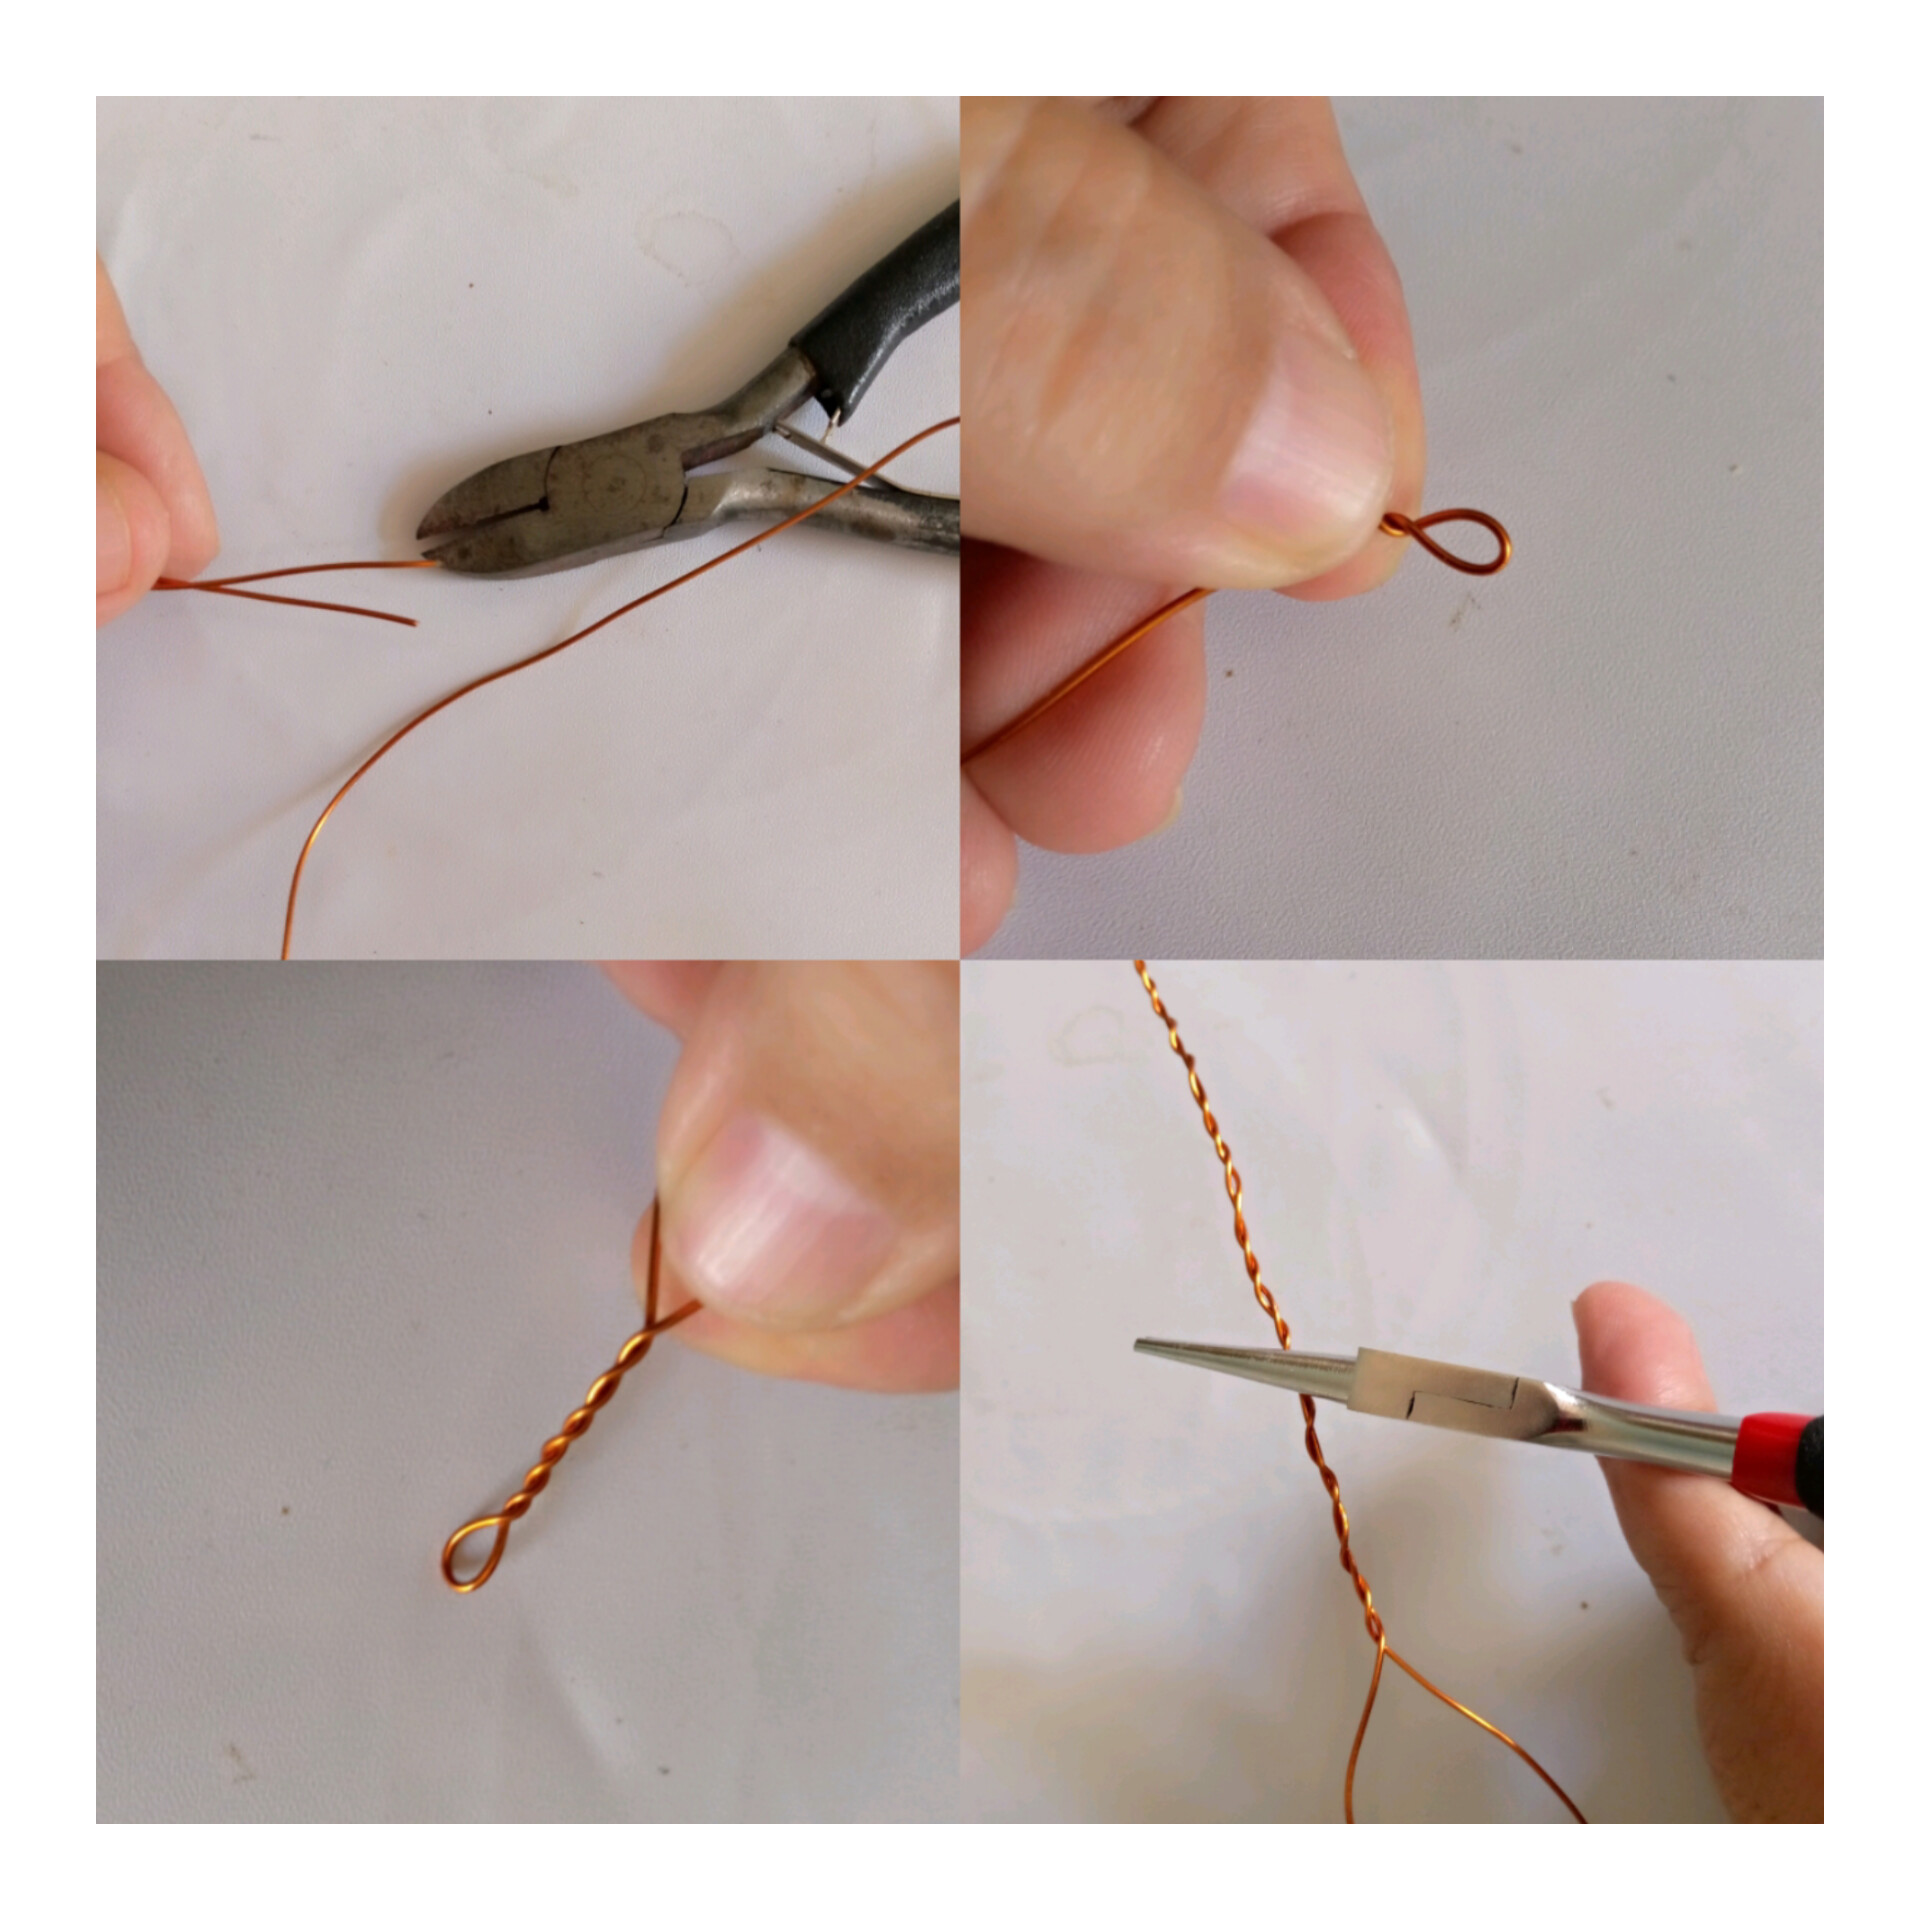
Aquí tomamos el alambre y luego corto 1,40 ctms de largo y lo doblo a la mitad exactamente que quedaría 70 ctms en todo el centro lo voy a enrrollar haciendo un orificio para el trancadero y luego sigo enrrollando y con la pinza me voy ayudando hasta obtener mi enrrollado del alambre.
Here we take the wire and then I cut 1,40 ctms long and I fold it to the half exactly that would be 70 ctms in all the center I am going to coil it making a hole for the lock and then I continue coiling and with the clamp I am helping myself until obtaining my coiling of the wire.
PASO 17:
STEP 17:
Así me quedó mi aro ya me lo medí alrededor de mi cuello que me quede ni muy ajustado y ni muy flojo y lo largo para que quede bien la flor, luego le hago en la punta un doblez para que enganche con la otra punta.
This is how I got my hoop, I measured it around my neck so that it was neither too tight nor too loose and I made it long so that the flower would fit well, then I made a fold at the tip so that it would hook with the other tip.
Acá en el aro introducimos un pedazo de alambre para hacer un arito para pasar el alambre y de esta manera quedó nuestra Gargantilla con un Dije de Flor tejida.
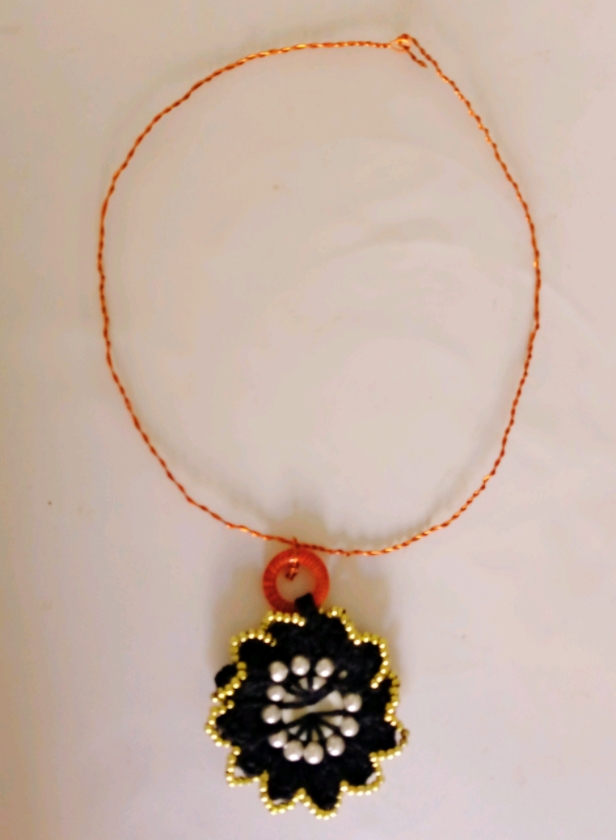
Here in the hoop we introduce a piece of wire to make a ring to pass the wire through and this is how our Choker with a woven Flower Charm turned out.
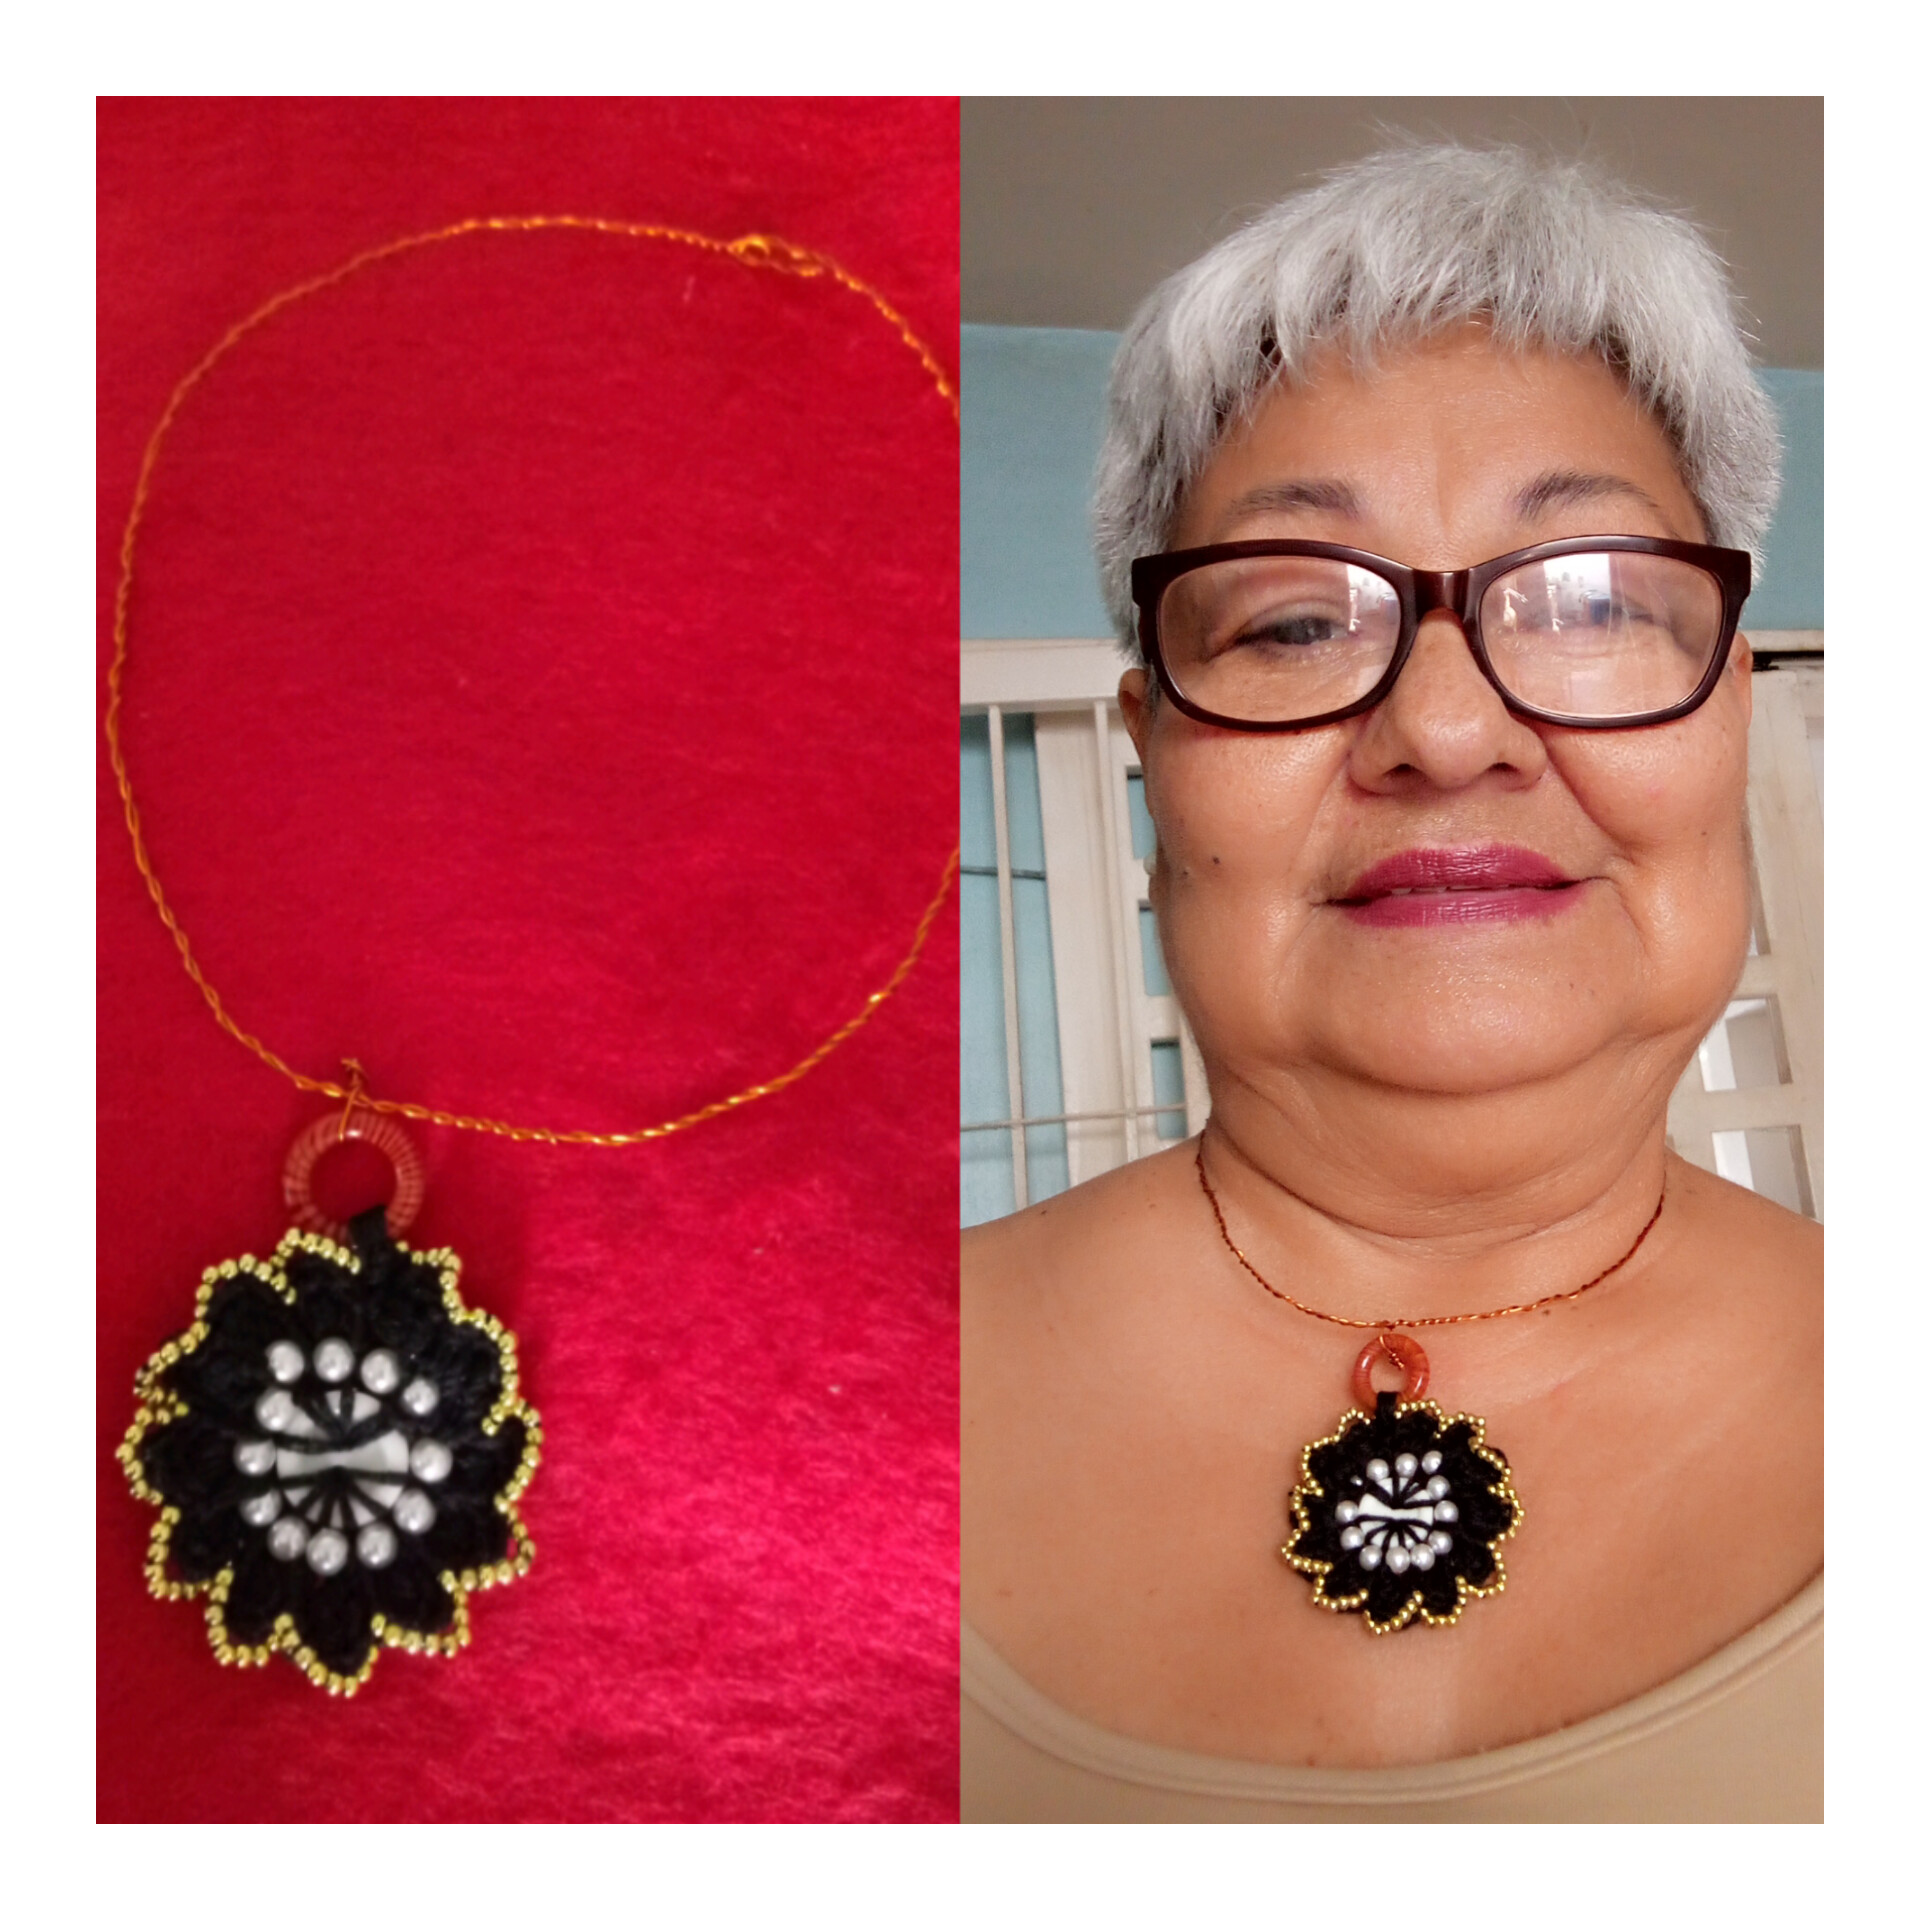
Y de esta manera queda por terminada mi Gargantilla me gustó el resultado muy hermosa lista para lucirla.
And this way my choker is finished, I liked the result, very beautiful and ready to wear it.
He finalizado mi creación resultó un poco largo la explicación traté de resumirlo lo más que pude pero es realmente fácil de realizar, espero le guste como ha quedado, le agradezco su visita y comentario.
I have finished my creation was a little long explanation I tried to summarize it as much as I could but it is really easy to do, I hope you like how it turned out, thank you for your visit and comment.
Todas las imágenes son tomadas con mi celular Tecno go spark editada con la aplicación inshot collage.
Traducida con deepl translate.
All images are taken with my Tecno go spark cell phone edited with the inshot collage application.
Translated with deepl translate.
BENDICIONES PARA TODOS.
BLESSINGS TO ALL.



Wow en el resultado casi no se nota que tiene un botón, se ve muy bonito
Gracias amiga por tu visita y comentario, me alegro que te haya gustado, siii la verdad que no se nota, saludos y bendiciones.
Wow this is so beautiful my dear friend. You did an amazing job. Weldone
Thanks I'm glad you liked it happy evening.