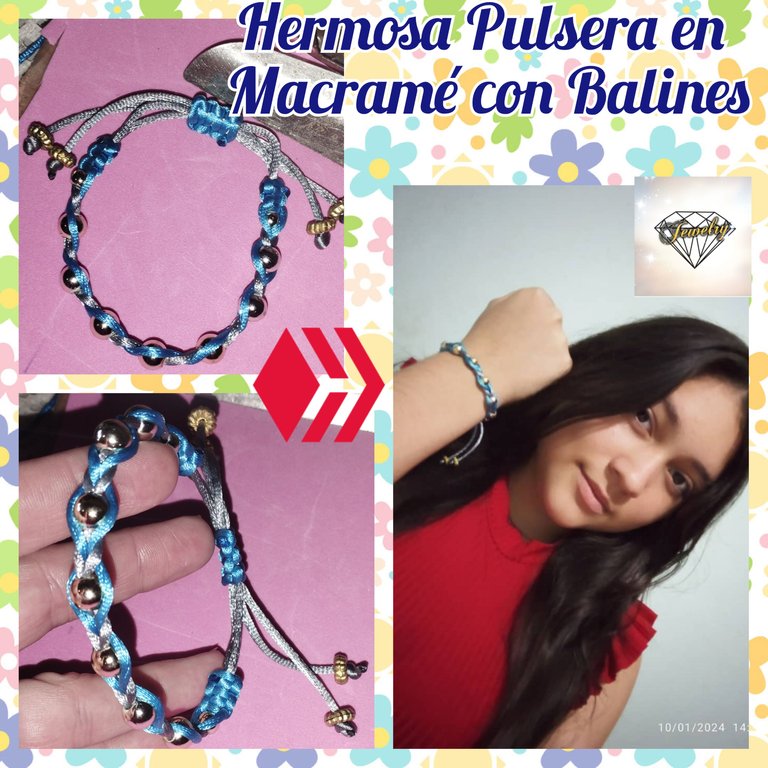
Saludos amigos de @jewelry y de @hive. Estoy de vuelta este año vengo con muchas ideas para esta hermosa comunidad de creación de joyas. En esta oportunidad hice una pulsera con trenzado Y el tejido en macramé que me.gusta mucho.
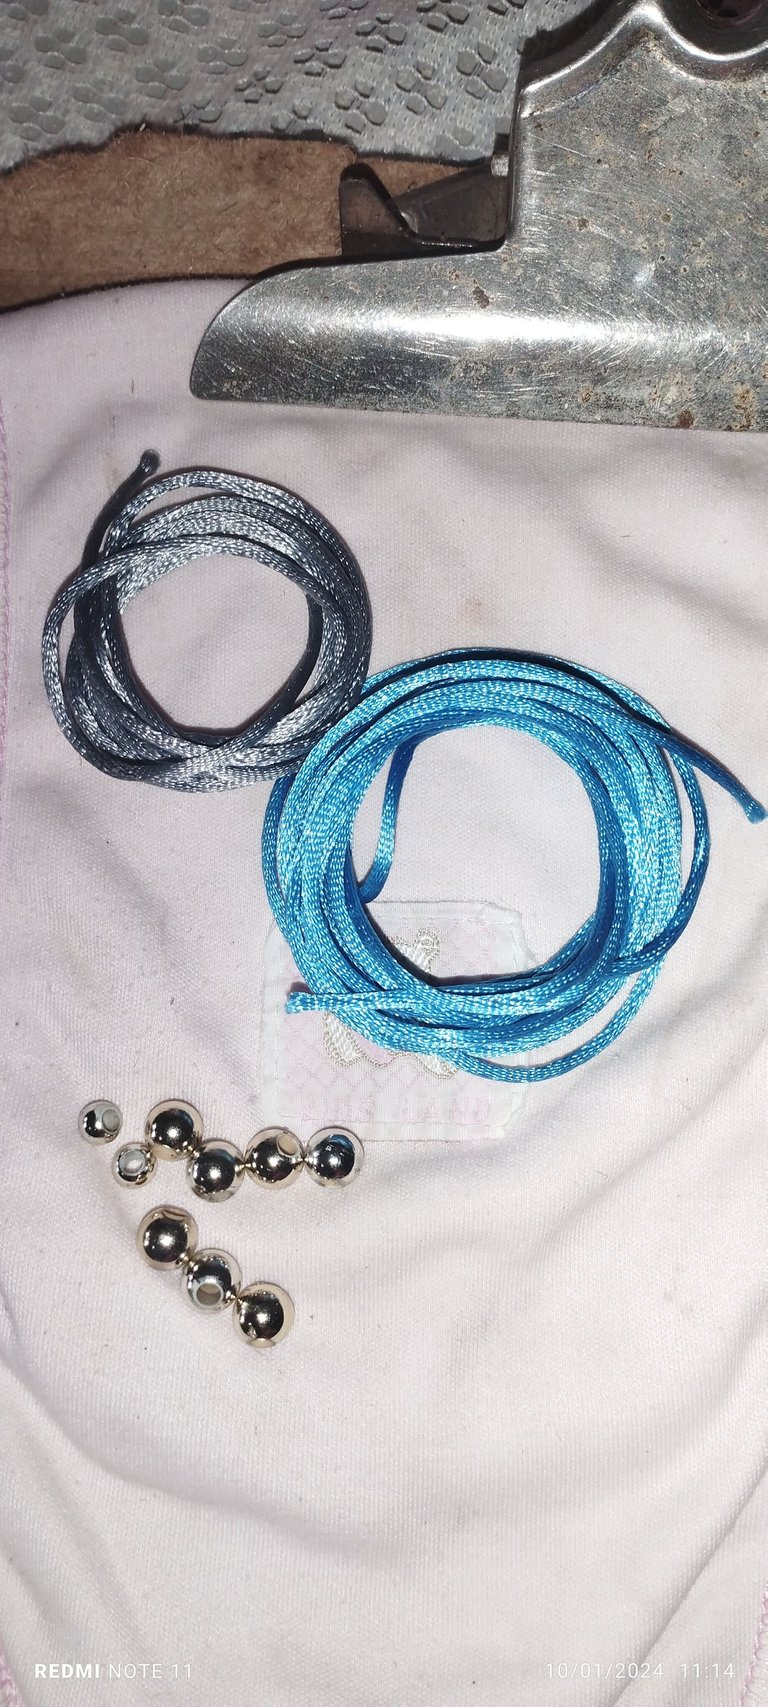
Para mí pulsera utilice:
- Hilo azul (2 metros).
- Hilo gris. ( 1 metro).
- 7 balines dorados número 8.
- 2 balines dorados número 2.
- 4 separadores dorados.
- Tijera.
- Encendedor o yesquero.
Paso a paso:
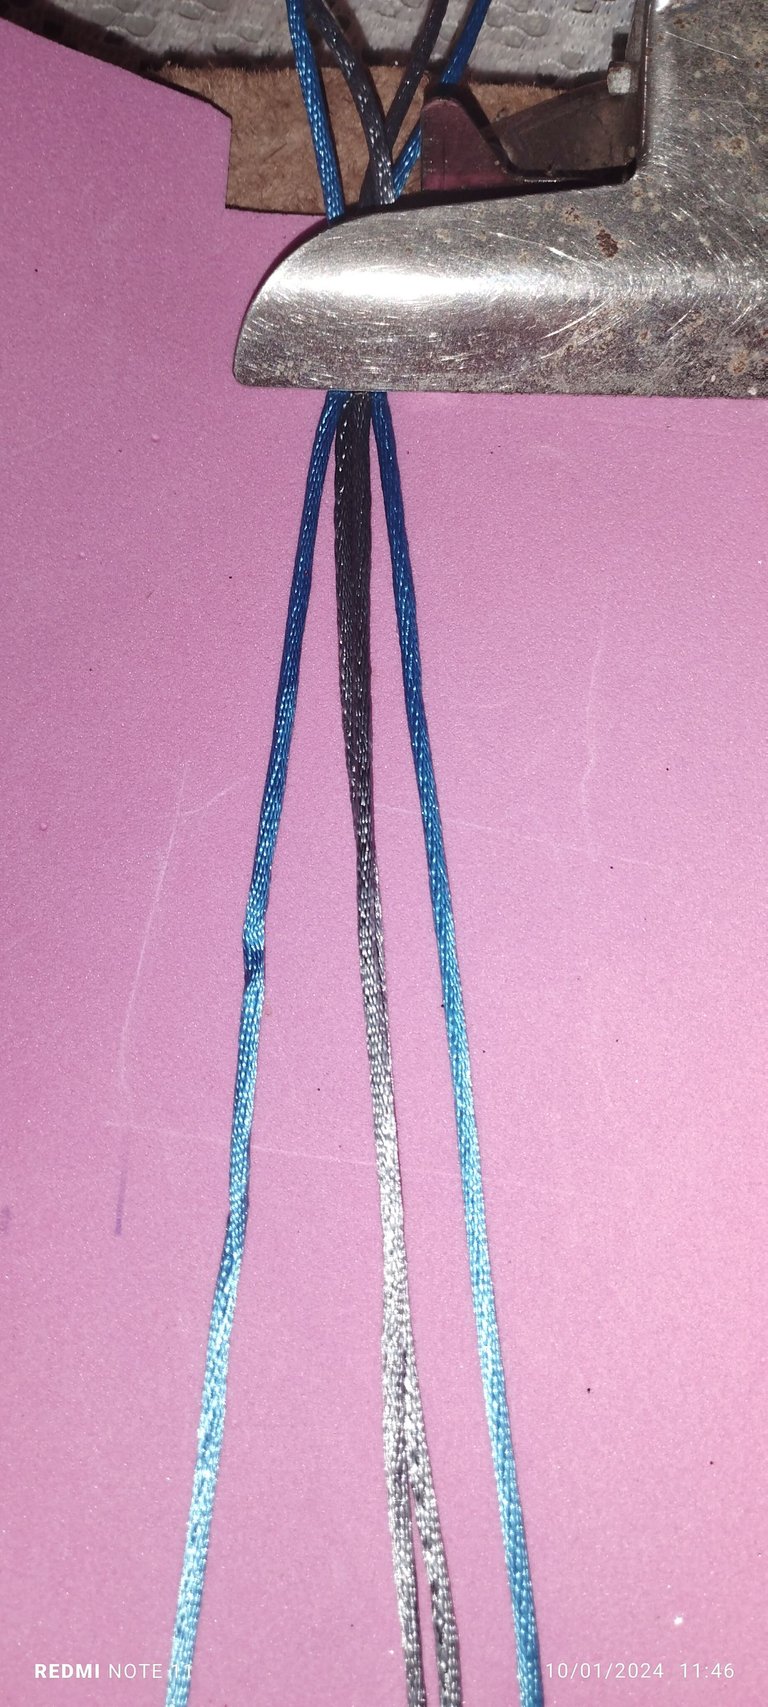
Primer paso:
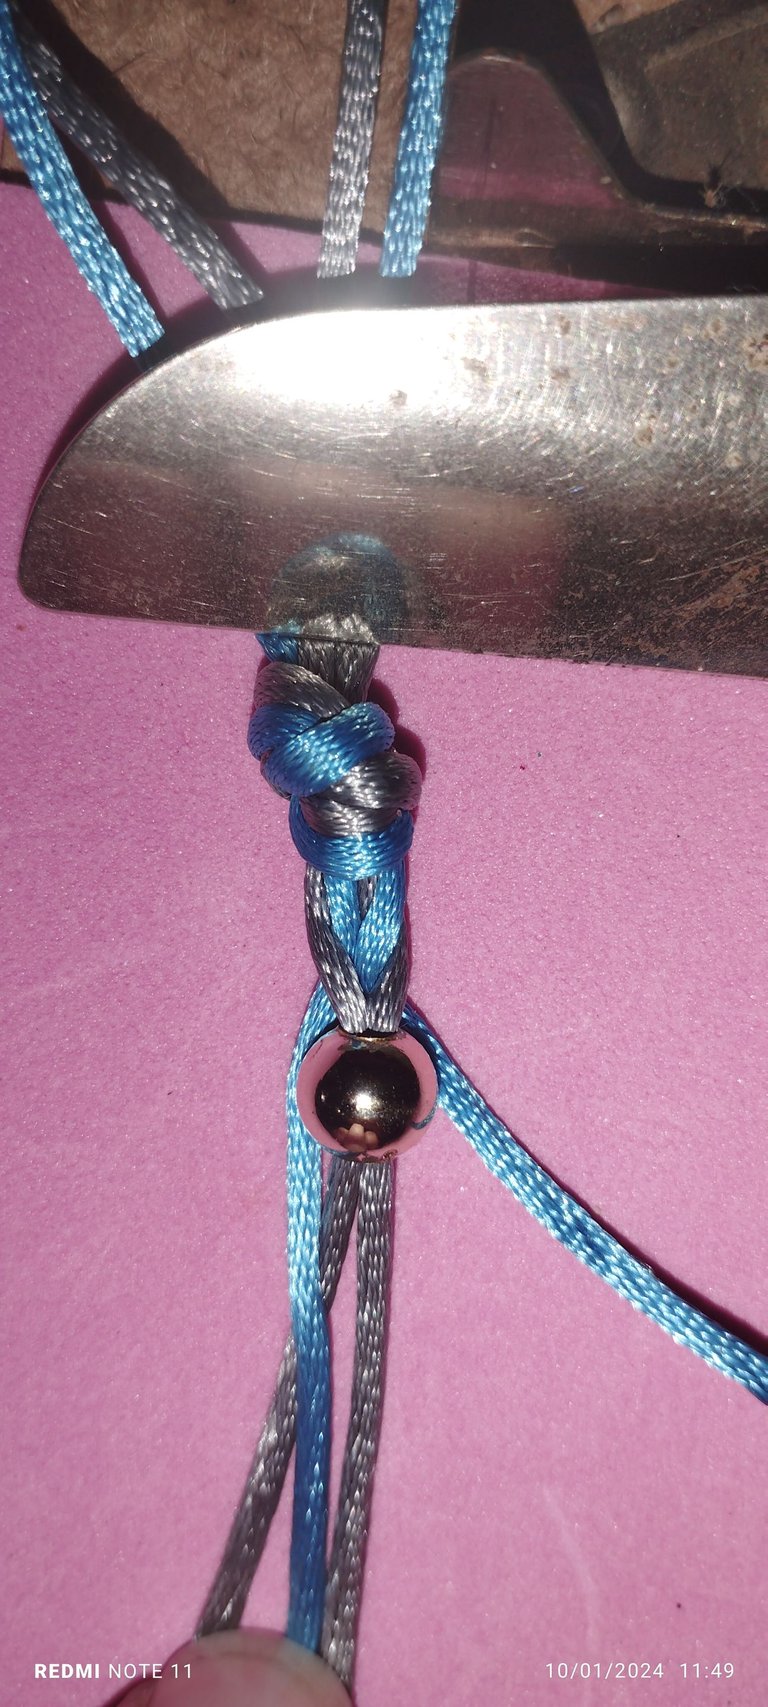
Vamos a dejar 15 centimetro de largo de un lado y andaremos nuestros hilos, para que no se muevan y lo ponemos fijamos donde vallamos a ensamblar la pulsera, en este caso yo utilice una carpeta con gancho. Va a quedar el hilo gris en la parte de adentro y el azul es el que se utilizara para hacer el tejido.
Segundo paso:
Vamos a colocar los balines en el hilo gris en los dos. Si quiere las puede ir colocando una a uno o todas de una vez y luego solo vamos subiendo los balines.

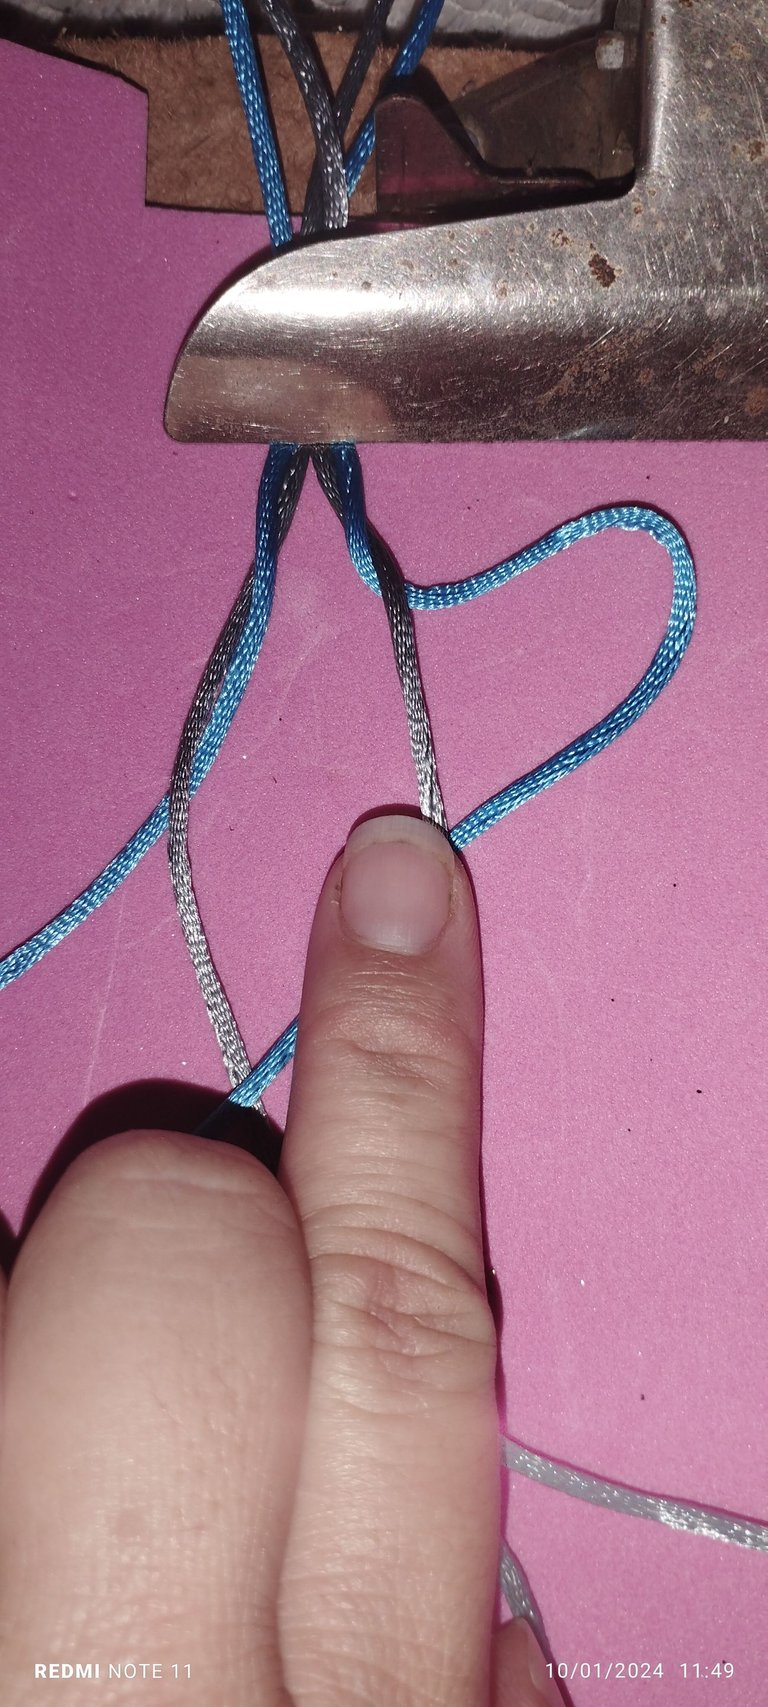
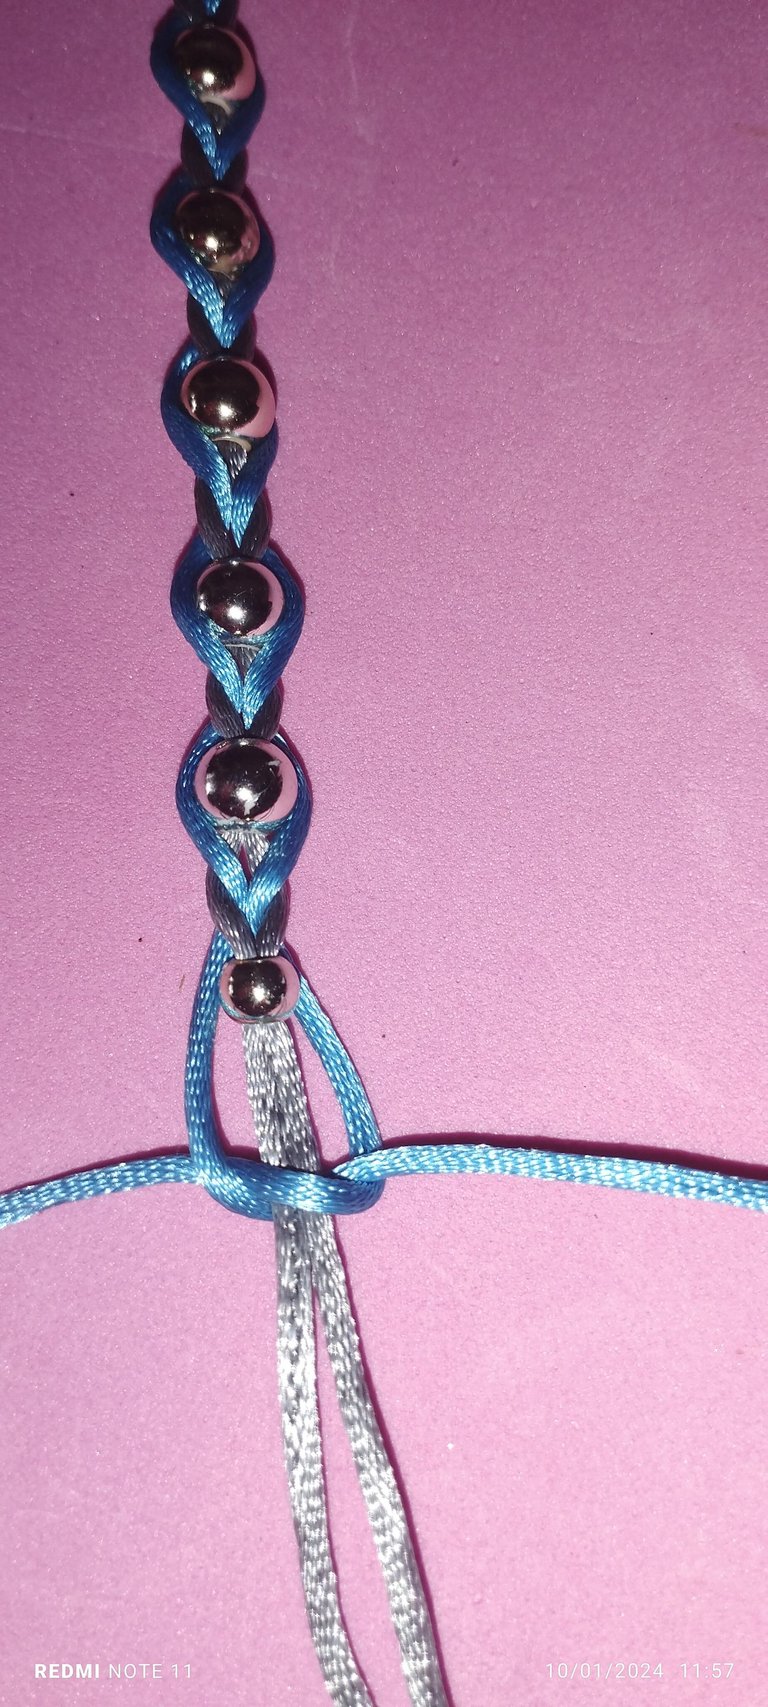
Tercer Paso:
Aquí vamos a pasar un extremo del hilo por debajo del hilo gris. Y así lo haremos del otro lado vamos a obtener la idea como que si abrazaramos el otro hilo azul y luego que lo hagamos de los dos lado introducimos el primer balín. Vamos a ir repitiendo este procedimiento hasta que tengamos los 7 balines integrados en su totalidad.
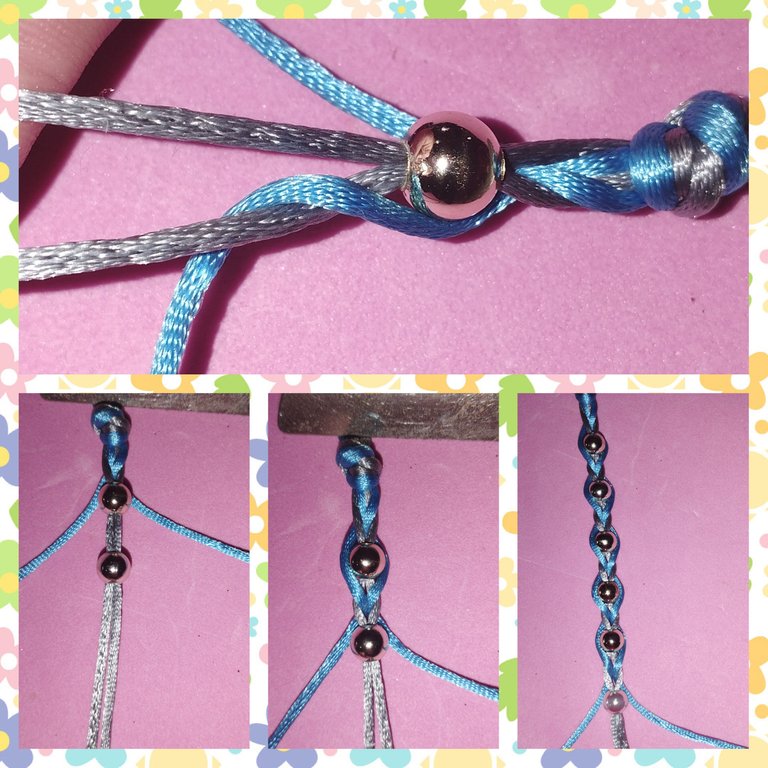
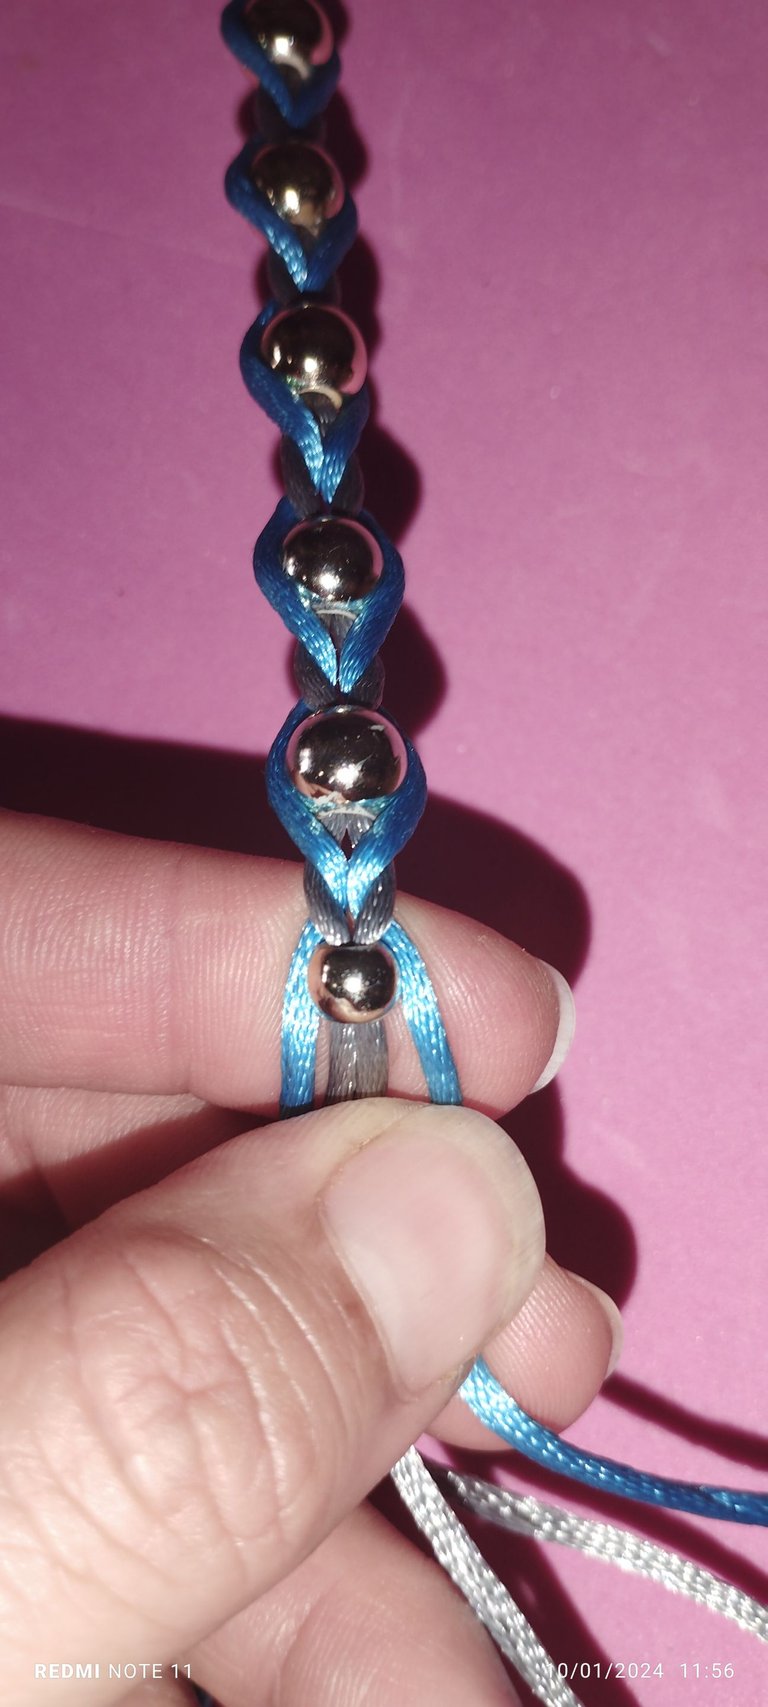
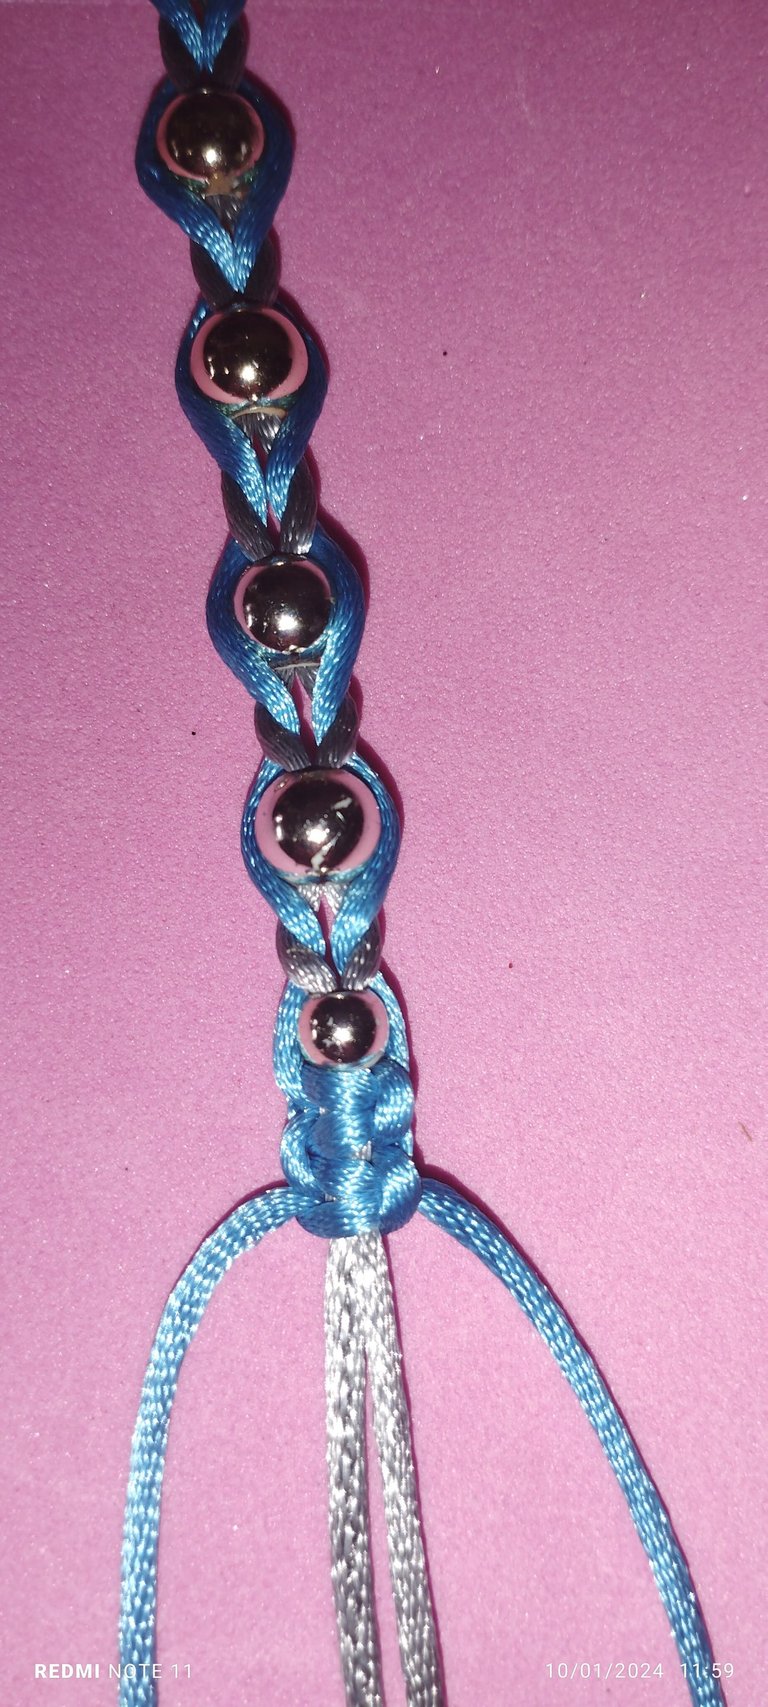
Cuarto paso:
Una vez culminado el procedimiento. Colocamos el balin más pequeño esto para finalizar el tejido y se nos vea más Delicado el acabado esto sería una nuestra de que termina el tejido ahí.
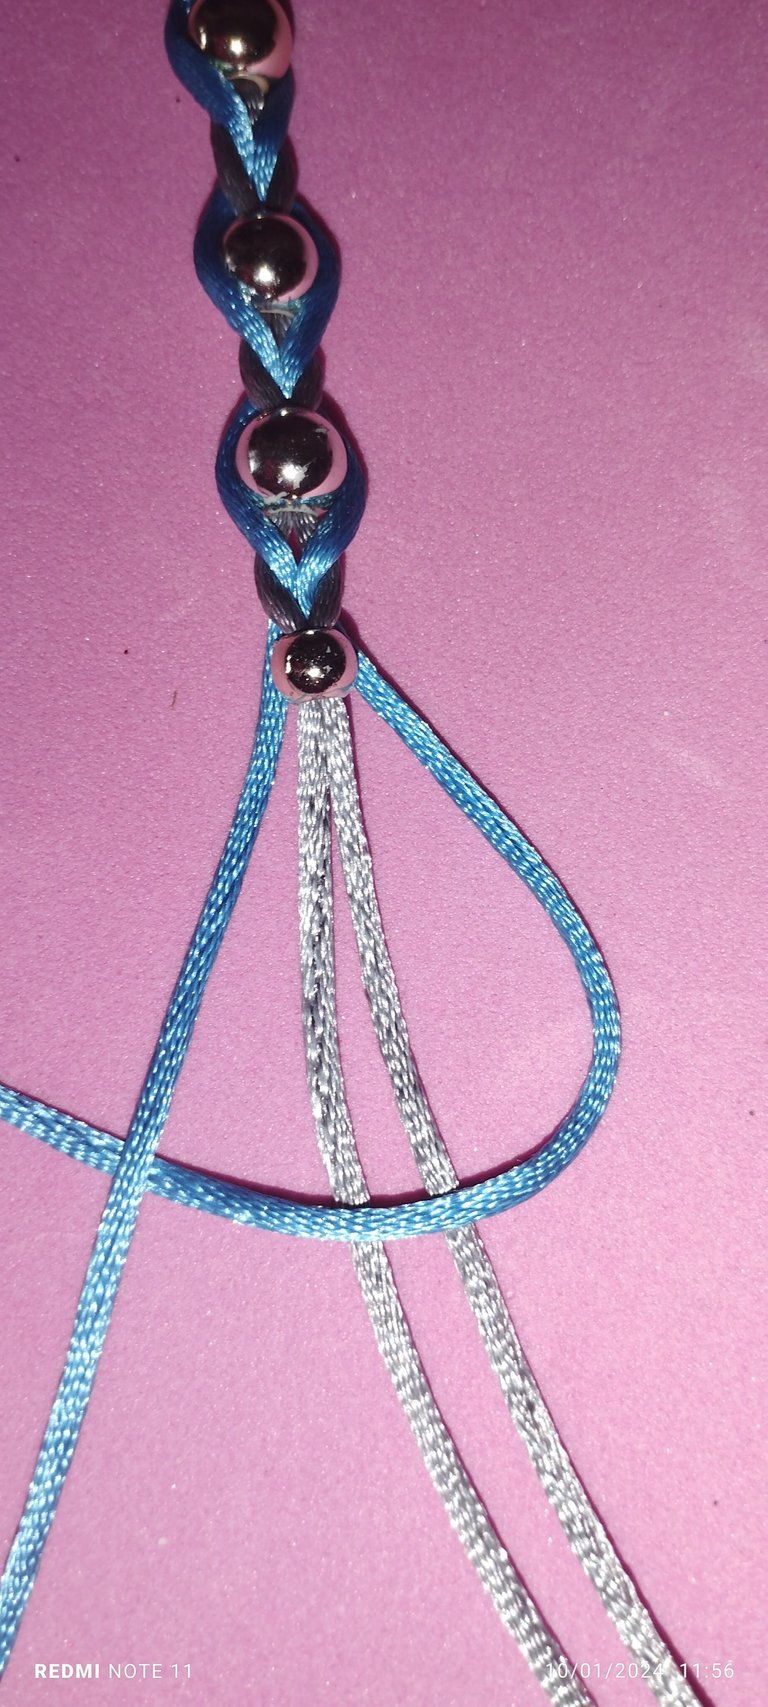
Quinto Paso:
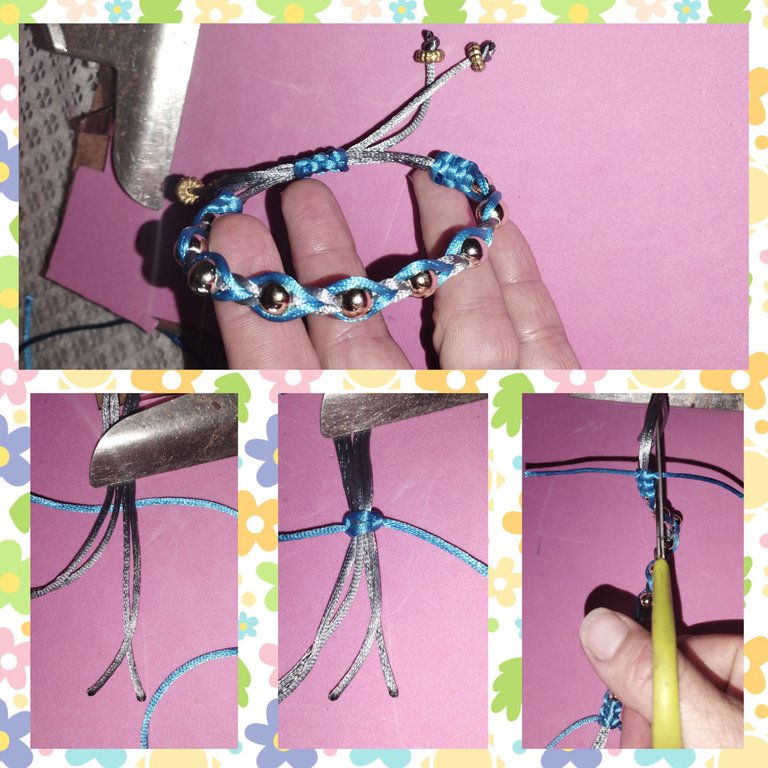
Aquí vamos a cerrar con el tejido de macramé. Agarramos un extremo y los ponemos en forma de una P. Y los cruzamos hacia adentro por debajo de los hilos así del otro lado haremos el mísmo procedimiento. Esto lo haremos de los dos extremos de la pulsera. Del otro lado soltaremos el nudo y realizamos el mismo procedimiento de introducir el balin número 2 y hacer el tejido macramé.
Sexto Paso:
Vamos a cortar los extremos los quemamos cn el yesquero para evitar que se suelten y unimos los dos extremos para hacer un tejido macramé para abrir y cerrar la pulsera en las.puntas colocamos los separadores dorados y así culminar la pulsera.
Desde que conocí está plataforma me ha gustado mucho hacer mis pulseras y así me sirven para lucirlas en mis clases y mis amigas quedan maravilladas con mis creaciones. Doy gracias a la comunidad de jewelry y a los hivers que comparten sus contenidos que de ellos he obtenido muchos tips.
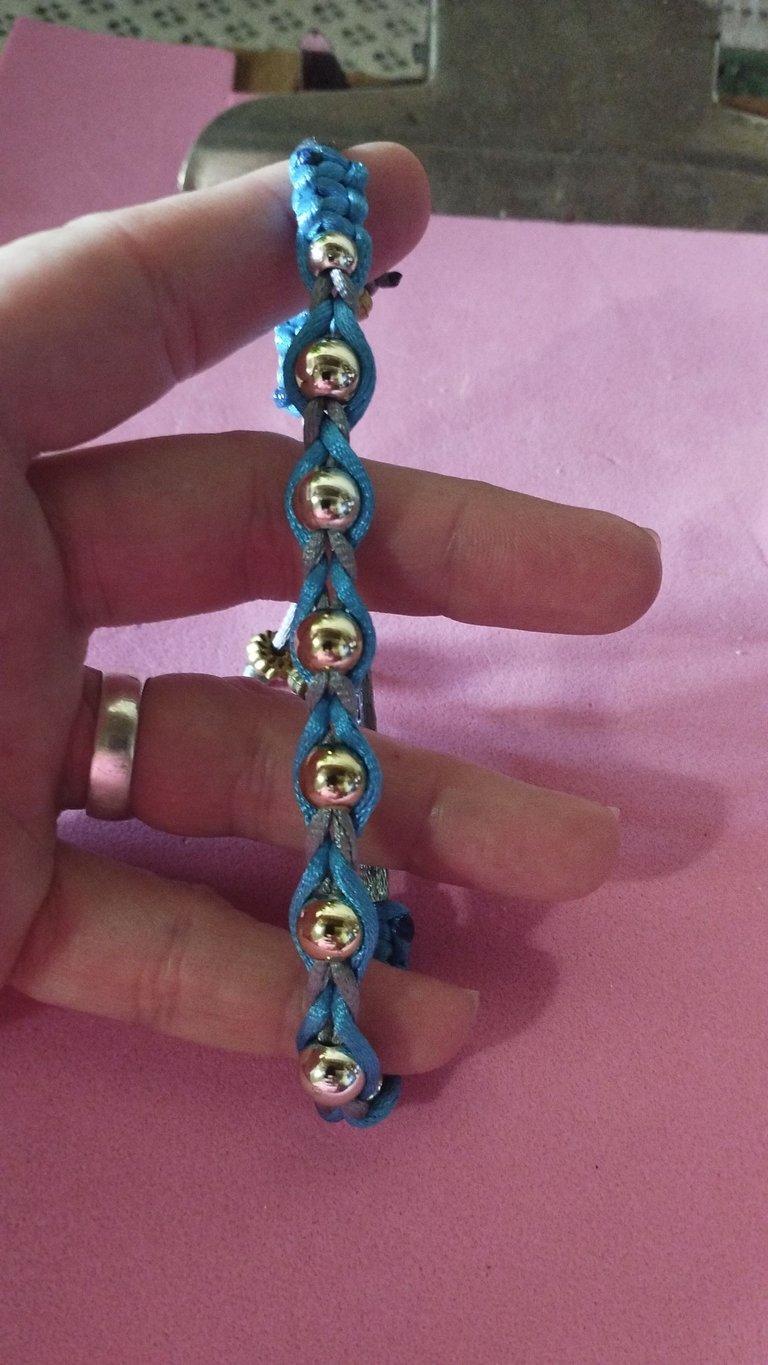
Espero les guste lo pulsera en Macramé. Saludos, hasta una nueva oportunidad. Nos vemos pronto en una nueva creación y deseando que estén llenos de bendiciones.
Las imagenes me pertenecen, fueron tomadas de mi teléfono Redmi note 11.
Las imágenes fueron editadas por programa de editor de fotos Polish.
traductor: Deepl Traslator.
English
Greetings friends of @jewelry and @hive. I'm back this year I come with many ideas for this beautiful jewelry making community. This time I made a bracelet with braiding AND weaving in macramé that I really like.
For my bracelet I used:
- Blue thread (2 meters)
- Blue thread (2 meters).
- Gray thread (1 meter).
- 7 golden balls number 8.
- 2 golden balls number 2.
- 4 golden separators.
- Scissors.
- Lighter or tinder.
Step by step:
First step:
Let's leave 15 centimeters long on one side and walk our threads, so they do not move and put it fix where vallamos to assemble the bracelet, in this case I used a folder with hook. It will be the gray thread on the inside and the blue is the one that will be used to make the weaving.
Second step:
We are going to place the balls in the gray thread in both of them. If you want you can place them one by one or all at once and then we just go up the balls.
Third Step:
Here we are going to pass one end of the thread under the gray thread. And so we will do it on the other side we are going to get the idea as if we embrace the other blue thread and after we do it on both sides we introduce the first pellet. We are going to go repeating this procedure until we have the 7 pellets integrated in its totality.
Fourth step:
Once the procedure is finished. We place the smallest ball in order to finish the weaving and we can see a more delicate finish, this would be a sign that the weaving is finished there.
Fifth Step:
Here we are going to close with the macramé weave. We take one end and we put them in the form of a P. And we cross them inward under the threads so on the other side we will do the same procedure. We will do this on both ends of the bracelet. On the other side we will loosen the knot and perform the same procedure to introduce the ball number 2 and make the macramé weave.
Step Six:
We are going to cut the ends, burn them with the tinder box to prevent them from coming loose and join the two ends to make a macramé fabric to open and close the bracelet. At the ends we place the gold separators and thus complete the bracelet.
Since I found out about this platform I have really liked making my bracelets and they help me show them off in my classes and my friends are amazed by my creations. I thank the jewelry community and the hivers who share their content that I have obtained many tips from them.
I hope you like the Macramé bracelet. Greetings, until a new opportunity. See you soon in a new creation and wishing you are full of blessings.
The images belong to me, they were taken from my Redmi note 11 phone.
Images were edited by Polish photo editor program.
translator: Deepl Traslator.
Hermosa tu pulsera. Que vengan más bendiciones y creatividad, saludos
Congratulations @rouseeve26! You have completed the following achievement on the Hive blockchain And have been rewarded with New badge(s)
Your next target is to reach 1750 upvotes.
You can view your badges on your board and compare yourself to others in the Ranking
If you no longer want to receive notifications, reply to this comment with the word
STOPLinda pulsera, me gusta mucho el tejido, con la cola de rata se hacen lindas pulseras, sencillas y bonitas 😉
Que bueno que te gustó amiga
. Saludos y gracias por tu apoyo.
Una hermosa creación. La pulsera está muy bonita y los colores espectaculares, me gustó mucho el resultado. Excelente técnica.
Gracias.. que bueno que te gustó. Saludos
Hola que bueno que te gustó, gracias por comentar y apoyar mi trabajo, Saludos
Súper linda. El hilo de cola de ratón fue un completo acierto pues permite ver claramente la forma del nudo. Los balines realzan todo el diseño y se ve todo muy armónico. Un lindo diseño.
Gracias amiga. Si al principio me enredaba jajaja. Porque los doblez son delicados y hay que tener mucha paciencia.. graciass por tu apoyo amiga
This your woven style for the bracelet is something i have awlaway wanted to try making one day. I love the aluminum beads combined with the thread
Glad you liked it... hope to see your work soon, greetings.
Muy hermosa amiga gran trabajo 🥳💝
Muy bonita tu pulsera saludos!