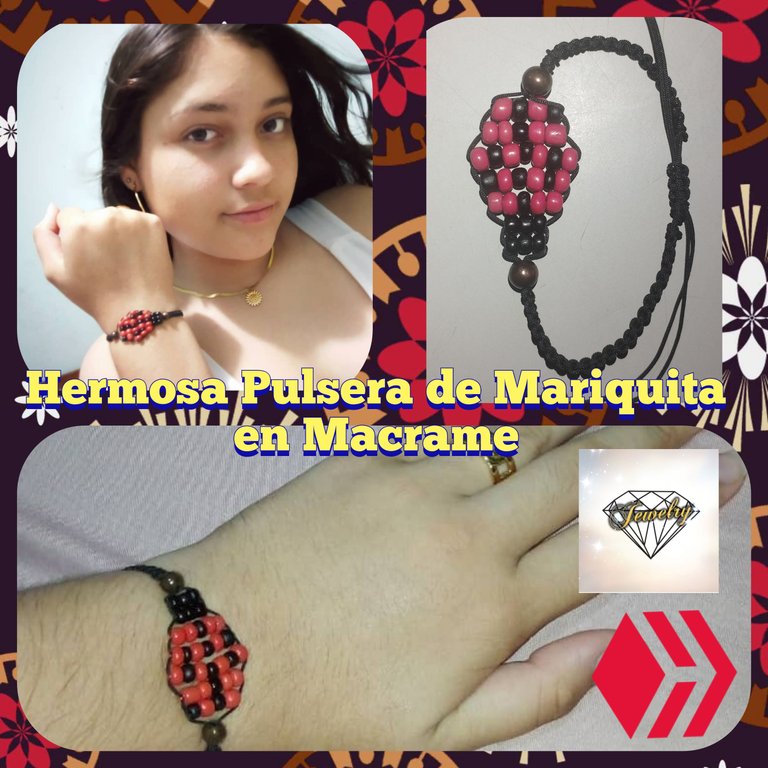
Saludos amigos de @jewelry hoy para ustedes les traigo esta hermosa pulsera que elabore en el tejido macramé con un hilo chino de color negro y de dije una hermosa mariquita en mostacillas, no tengo tantas técnicas en la alineación de las piedras pero voy aprendiendo cada día.
Para mí elaboración útilice los siguientes materiales:
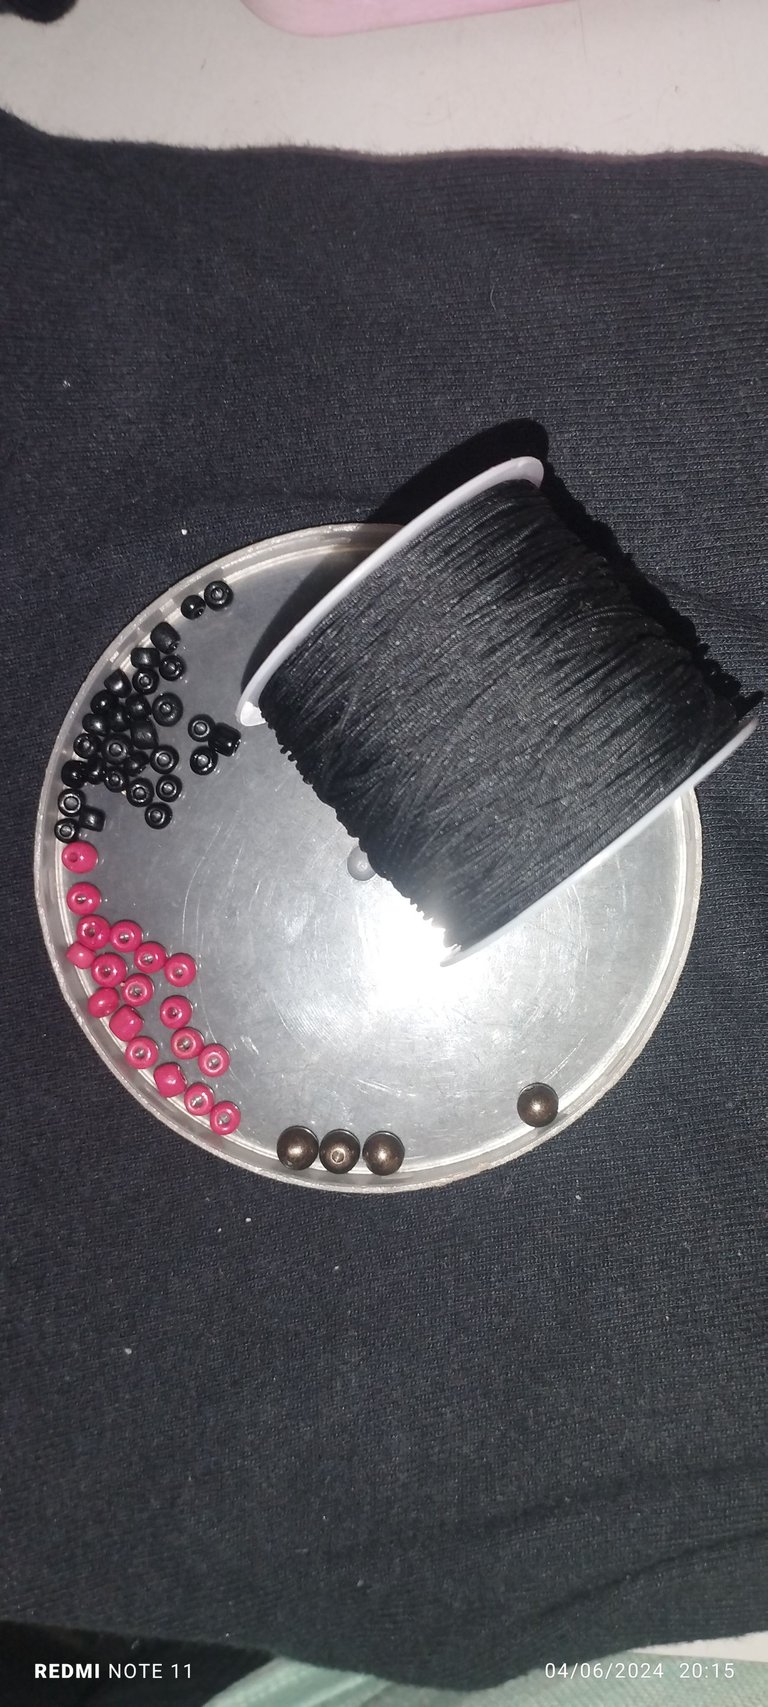
MATERIALES:
✓ 1 metro de Hilo chino color negro.
✓ Mostacillas color negro y rojo.
✓ Balines color Cobre.
✓ Yesquero.
Paso a paso:
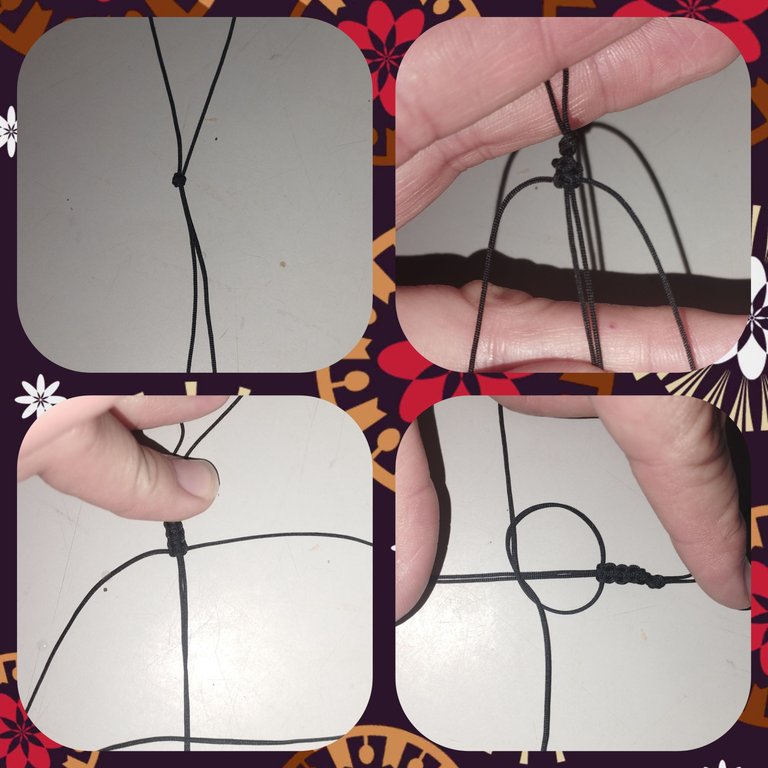
Paso 1:
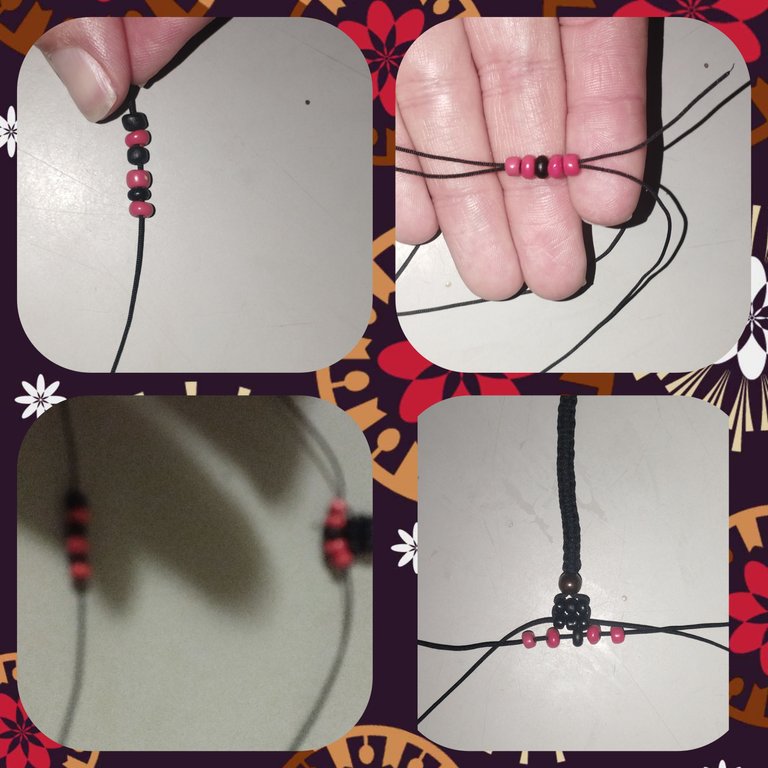
Lo primero que hice fue cortar el hilo chino hacer un nudo y buscar un aguante para poder ajustar el hilo le hice un nudo y empecé a tejer en el tejido de macrame.
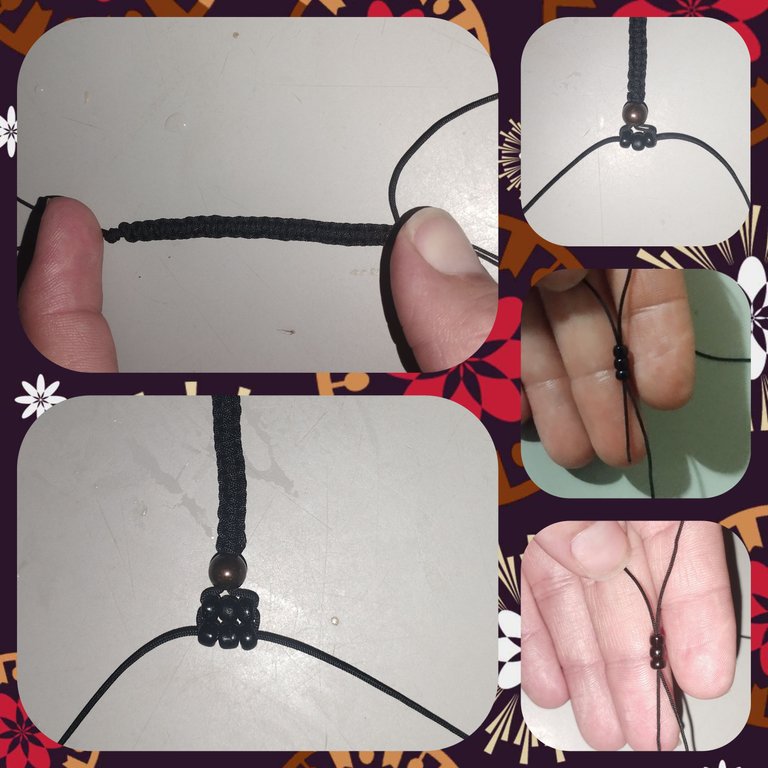
Paso 2:
Cuando ya tenía como 10 centímetros de tejido macramé coloque un balin color dorado para que fuera una base entre las mostacillas. Luego coloque tres mostacillas de color negro entrelace el hilo entre las mostacillas y luego volví a colocar tres mostacillas más de color negro,está será la parte súper de la mariquita.
Paso 3:
Seguí colocando las mostacillas en este punto introduje dos mostacillas de color rojo y una mostacilla color negra y finalice con dos de color rojo.Entrelace el hilo por las mostacillas y ajuste. Luego coloque 6 mostacillas más pero en este procedimiento coloque una mostacilla roja, una negra, una roja, una negra hasta completar el ciclo de 6 las entrelace y ajuste.
Paso 4:
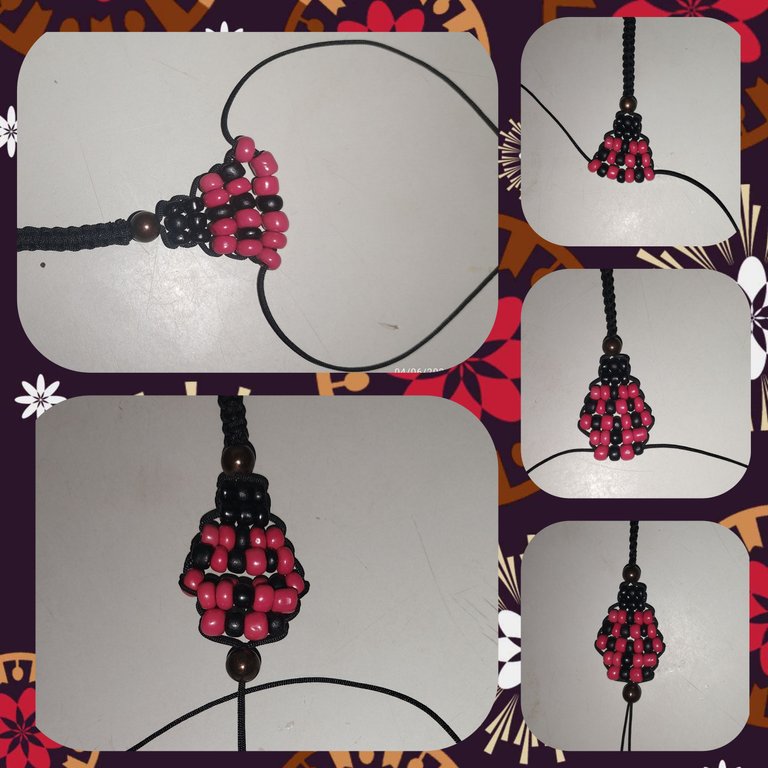
Seguimos provisionando las mostacillas en este paso para mí fue muy complicado colocar la secuencia de las mostacillas y que quedará la línea de mostacillas Negras en el medio y que se viera la alineación de las mostacillas Pero no me di por vencida seguí y logre lo que que quería hacer y aunque se movió un poco estoy feliz con el resultado.clmo pueden notar en esta tercera fila coloque primero tres mostacillas de color rojo una negra y juego tres rojas más, Pero se distorciona el diseño asi que opte por sacar una mostacilla roja de cada lado y se vio mucho mejor. Finalice con una mostacilla roja, una negra,roja, negra en la última fila Para que así pudiera ser uniforme.
Paso 5:
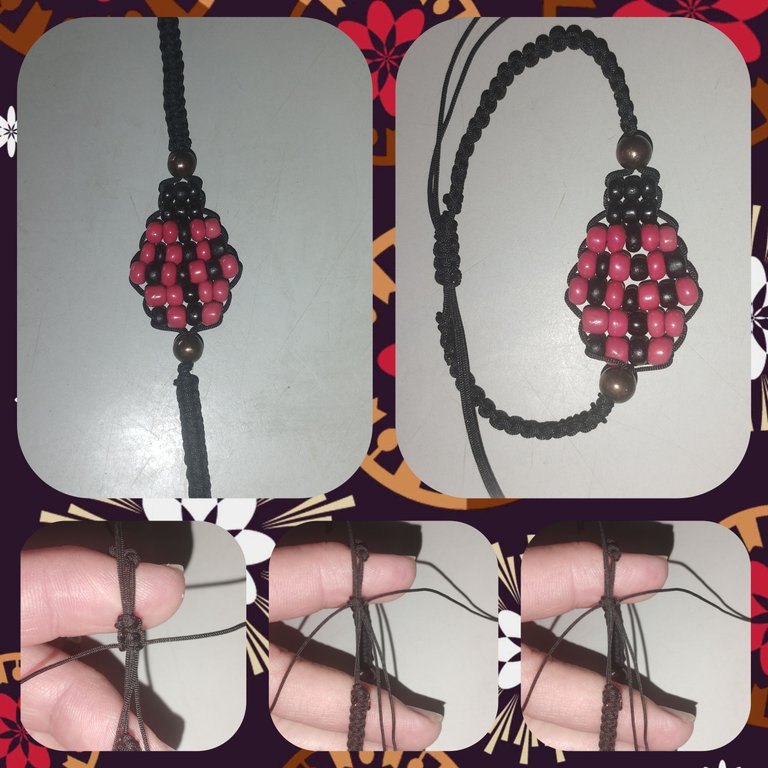
Me gustó mucho el resultado final aunque hubiera querido que los colores fueran más resaltantes ya que las mariquitas tienen esos hermosos colores que enamoran. Ya para terminar mi hermosa pulsera coloque un balin color Cobre y terminé de tejer la parte que faltaba para completar la pulsera. Le hice un broche de tejido macramé para que abriera y cerrará sin ningún problema. Uni las puntas le coloque un balin en cada una y queme con el yesquero. Y así ya culminamos está hermosa pulsera.
Espero les guste está hermosa pulsera y se les haga más fácil para su elaboración, que puedan hacerlas del color sy pretendientes y sea agradable para ustedes amigos creativos de esta plataforma de @hive Espero sus comentarios y gracias de ante mano por el apoyo.
¡Saludos!
Las imagenes me pertenecen, fueron tomadas de mi teléfono Redmi Note 11.
Las imágenes fueron editadas por programa de editor de fotos Polish.
traductor: Deepl Traslator.
Greetings friends of @jewelry today I bring you this beautiful bracelet that I made in macramé weaving with a black Chinese thread and a beautiful ladybug in beads, I do not have so many techniques in the alignment of the stones but I'm learning every day.
For my elaboration I used the following materials:
MATERIALS:
✓ 1 meter of Chinese thread black color.
✓ Black and red beads.
Copper colored pellets.
Tinder.
Step by step:
Step 1:
The first thing I did was to cut the Chinese yarn make a knot and look for a needle to be able to adjust the yarn I tied a knot and started weaving in the macrame fabric.
Step 2:
When I had about 10 centimeters of macramé weave I placed a gold colored ball to be a base between the beads. Then I placed three black beads between the thread between the beads and then I placed three more black beads, this will be the super part of the ladybug.
Step 3:
I continued placing the beads at this point I introduced two red beads and a black bead and ended with two red beads, interlace the thread through the beads and adjust. Then place 6 more beads but in this procedure place one red bead, one black bead, one red bead, one black bead to complete the cycle of 6, interlace and adjust.
Step 4:
We continued providing the beads in this step. For me it was very complicated to place the sequence of the beads and that the line of Black beads would remain in the middle and the alignment of the beads would be seen. But I did not give up and I continued and achieved what I wanted. I wanted to do and although it moved a little I am happy with the result. As you can see in this third row I first placed three red beads, one black and I add three more red ones, but the design is distorted so I chose to take out a red bead of each side and looked much better. Finish with a red bead, a black bead, a red bead, a black bead in the last row so that it could be uniform.
Step 5:
I really liked the final result although I would have liked the colors to be more prominent since ladybugs have those beautiful colors that make you fall in love. To finish my beautiful bracelet, I placed a Copper-colored ball and finished weaving the missing part to complete the bracelet. I made a macramé fabric brooch so that it would open and close without any problem. Join the ends, place a pellet in each one and burn with the tinderbox. And so we finish this beautiful bracelet.
I hope you like this beautiful bracelet and it becomes easier for you to make it, that you can make it the color of your suitors and it is pleasant for you creative friends of this @hive platform. I look forward to your comments and thank you in advance for your support.
Greetings!
The images belong to me, they were taken from my Redmi Note 11 phone.
Images were edited by Polish photo editor program.
translator: Deepl Traslator.
It is stylish, elegant, and beautiful. Love the bracelet's design. Great job! keep it up!
Thank you for your support, I love that you liked it... I work every day to improve. Thank you!
Está muy bonita la pulserita, lograste la forma deseada de materializar una mariquita.
Gracias por compartir tu proceso creativo en la comunidad ✨
!discovery 35
Muchas gracias por el apoyo amiga, que bueno que te ha gustado. Gracias 🫂❤️
This post was shared and voted inside the discord by the curators team of discovery-it
Join our Community and follow our Curation Trail
Discovery-it is also a Witness, vote for us here
Delegate to us for passive income. Check our 80% fee-back Program
Thanks You
Congratulations @rouseeve26! You have completed the following achievement on the Hive blockchain And have been rewarded with New badge(s)
Your next target is to reach 2250 upvotes.
You can view your badges on your board and compare yourself to others in the Ranking
If you no longer want to receive notifications, reply to this comment with the word
STOPa community encouraging first-hand content, and each individual living their best life.
Looks beautiful✨😍
Es una linda mariquita. Te quedo preciosa.