Hola, holaaa! Saluditos mis Artistas Creativos de la Joyería, como se encuentran todos, gozando de perfecta salud ? y ahora sí, ya en la recta final para entrar al mes más alegre y entusiasta del año, Yo, rellena de actividades ; no tengo paranza como decimos acá pero feliz, feliz, porque que maravilla cada vez qué nos toca integrarnos para conformar equipo y llevar a cabo las múltiples tareas con las que amenizamos y divertimos a nuestra querida comunidad.
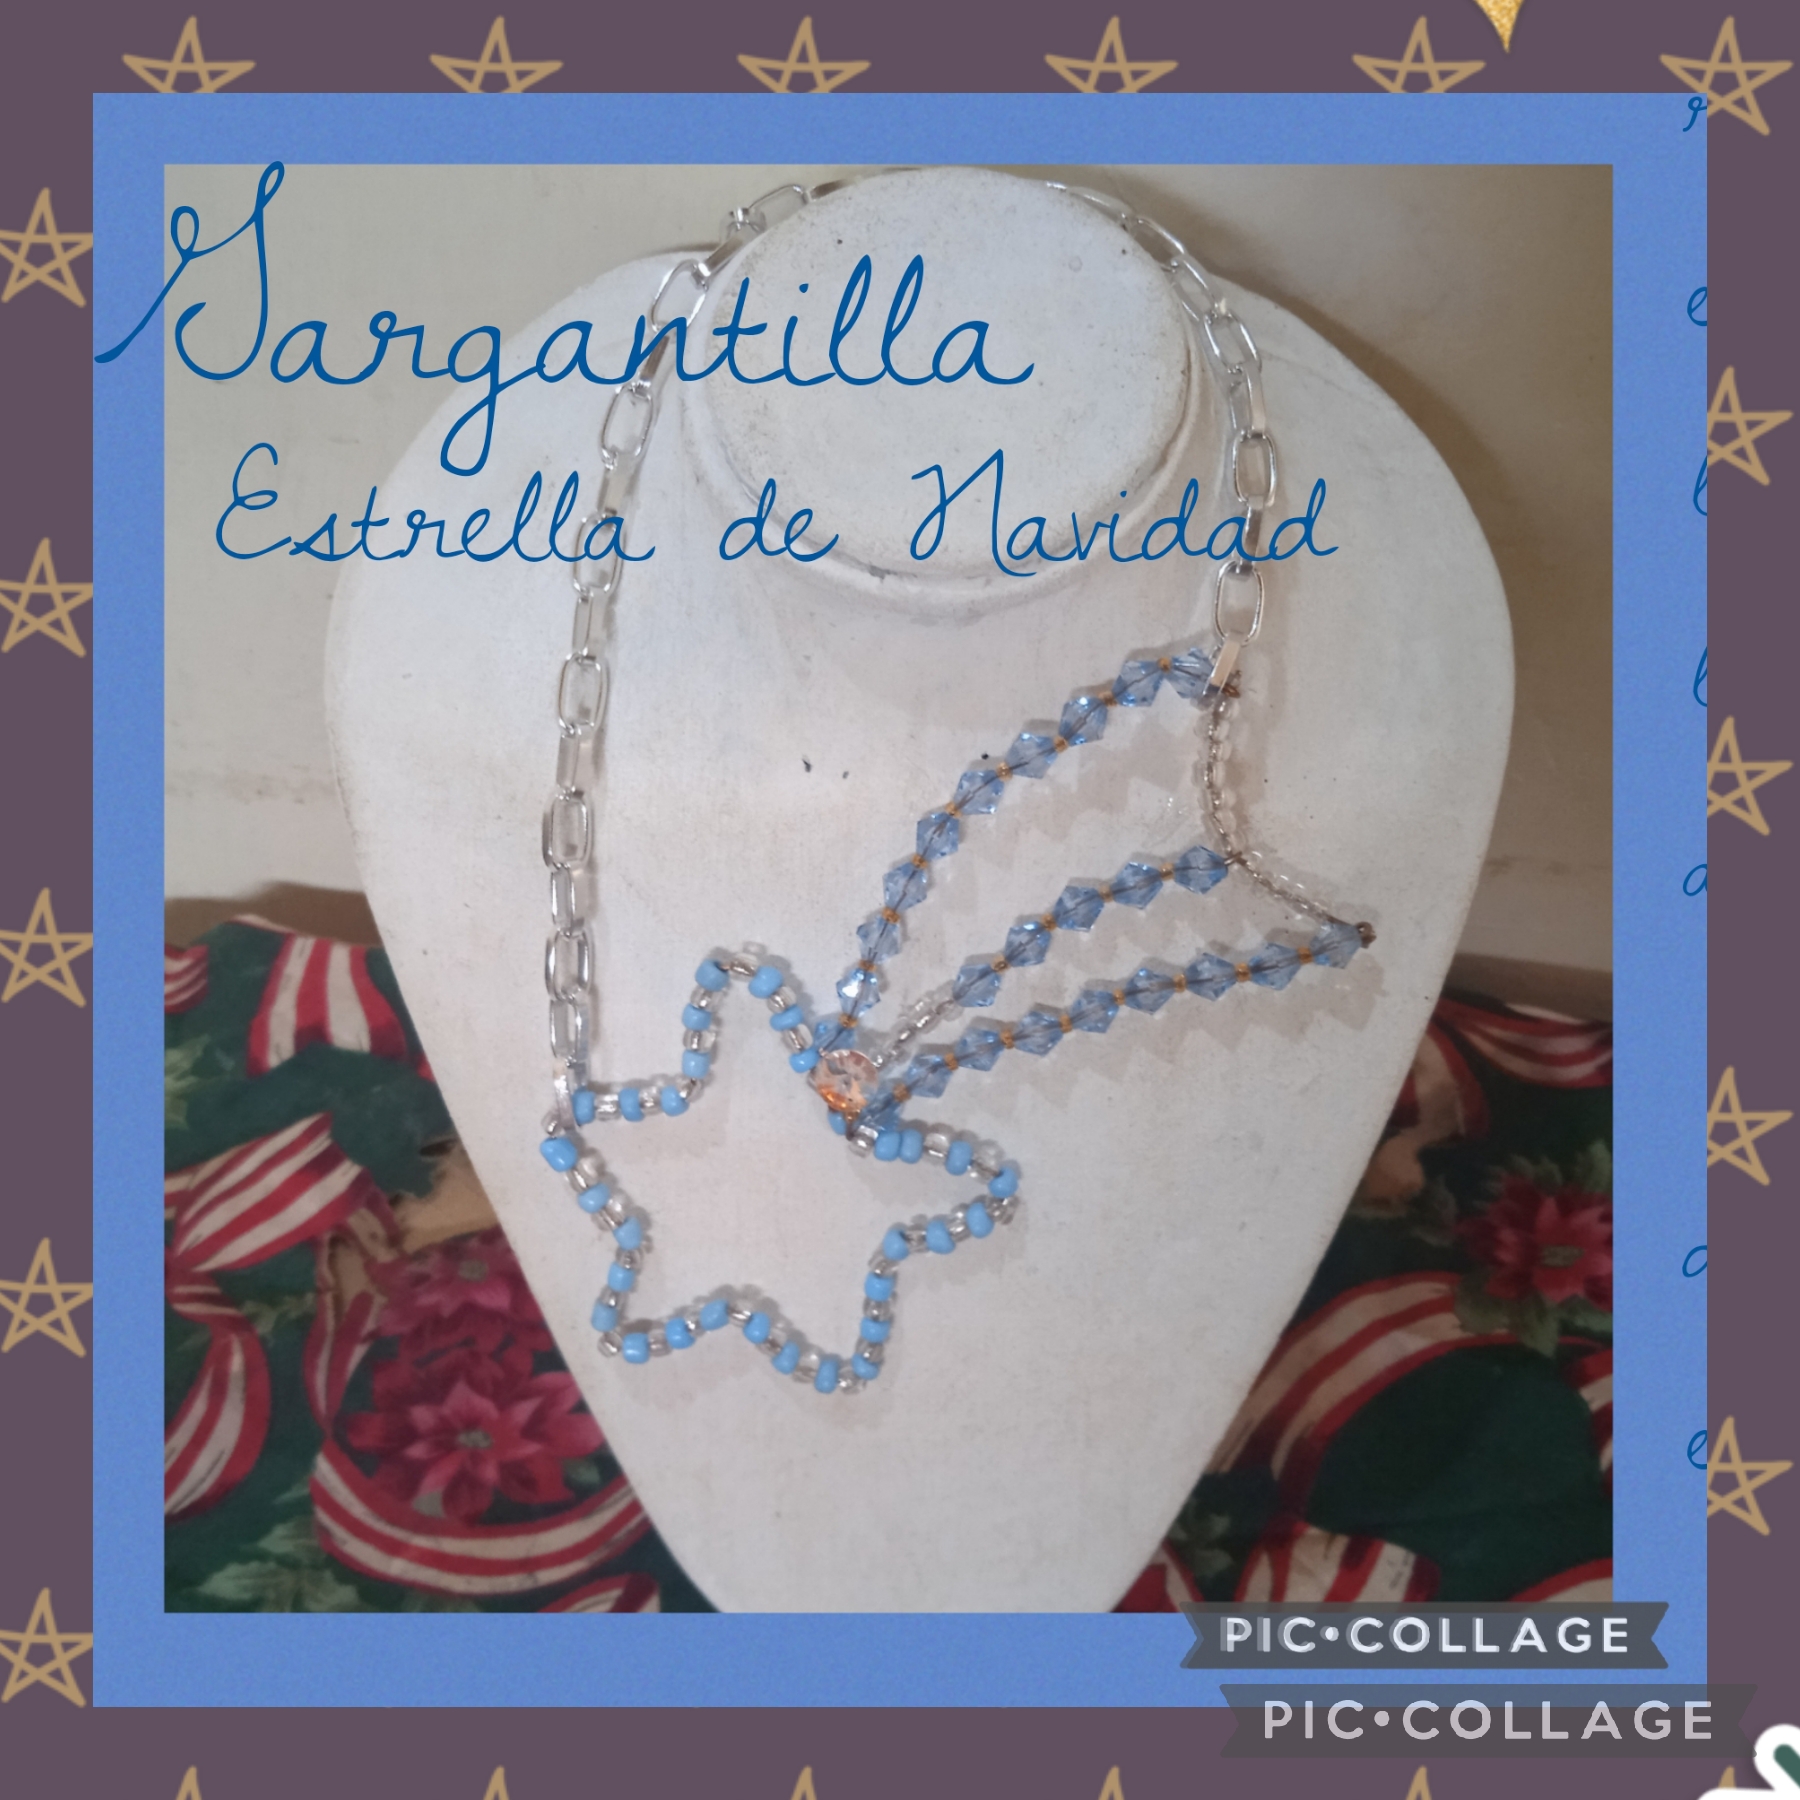
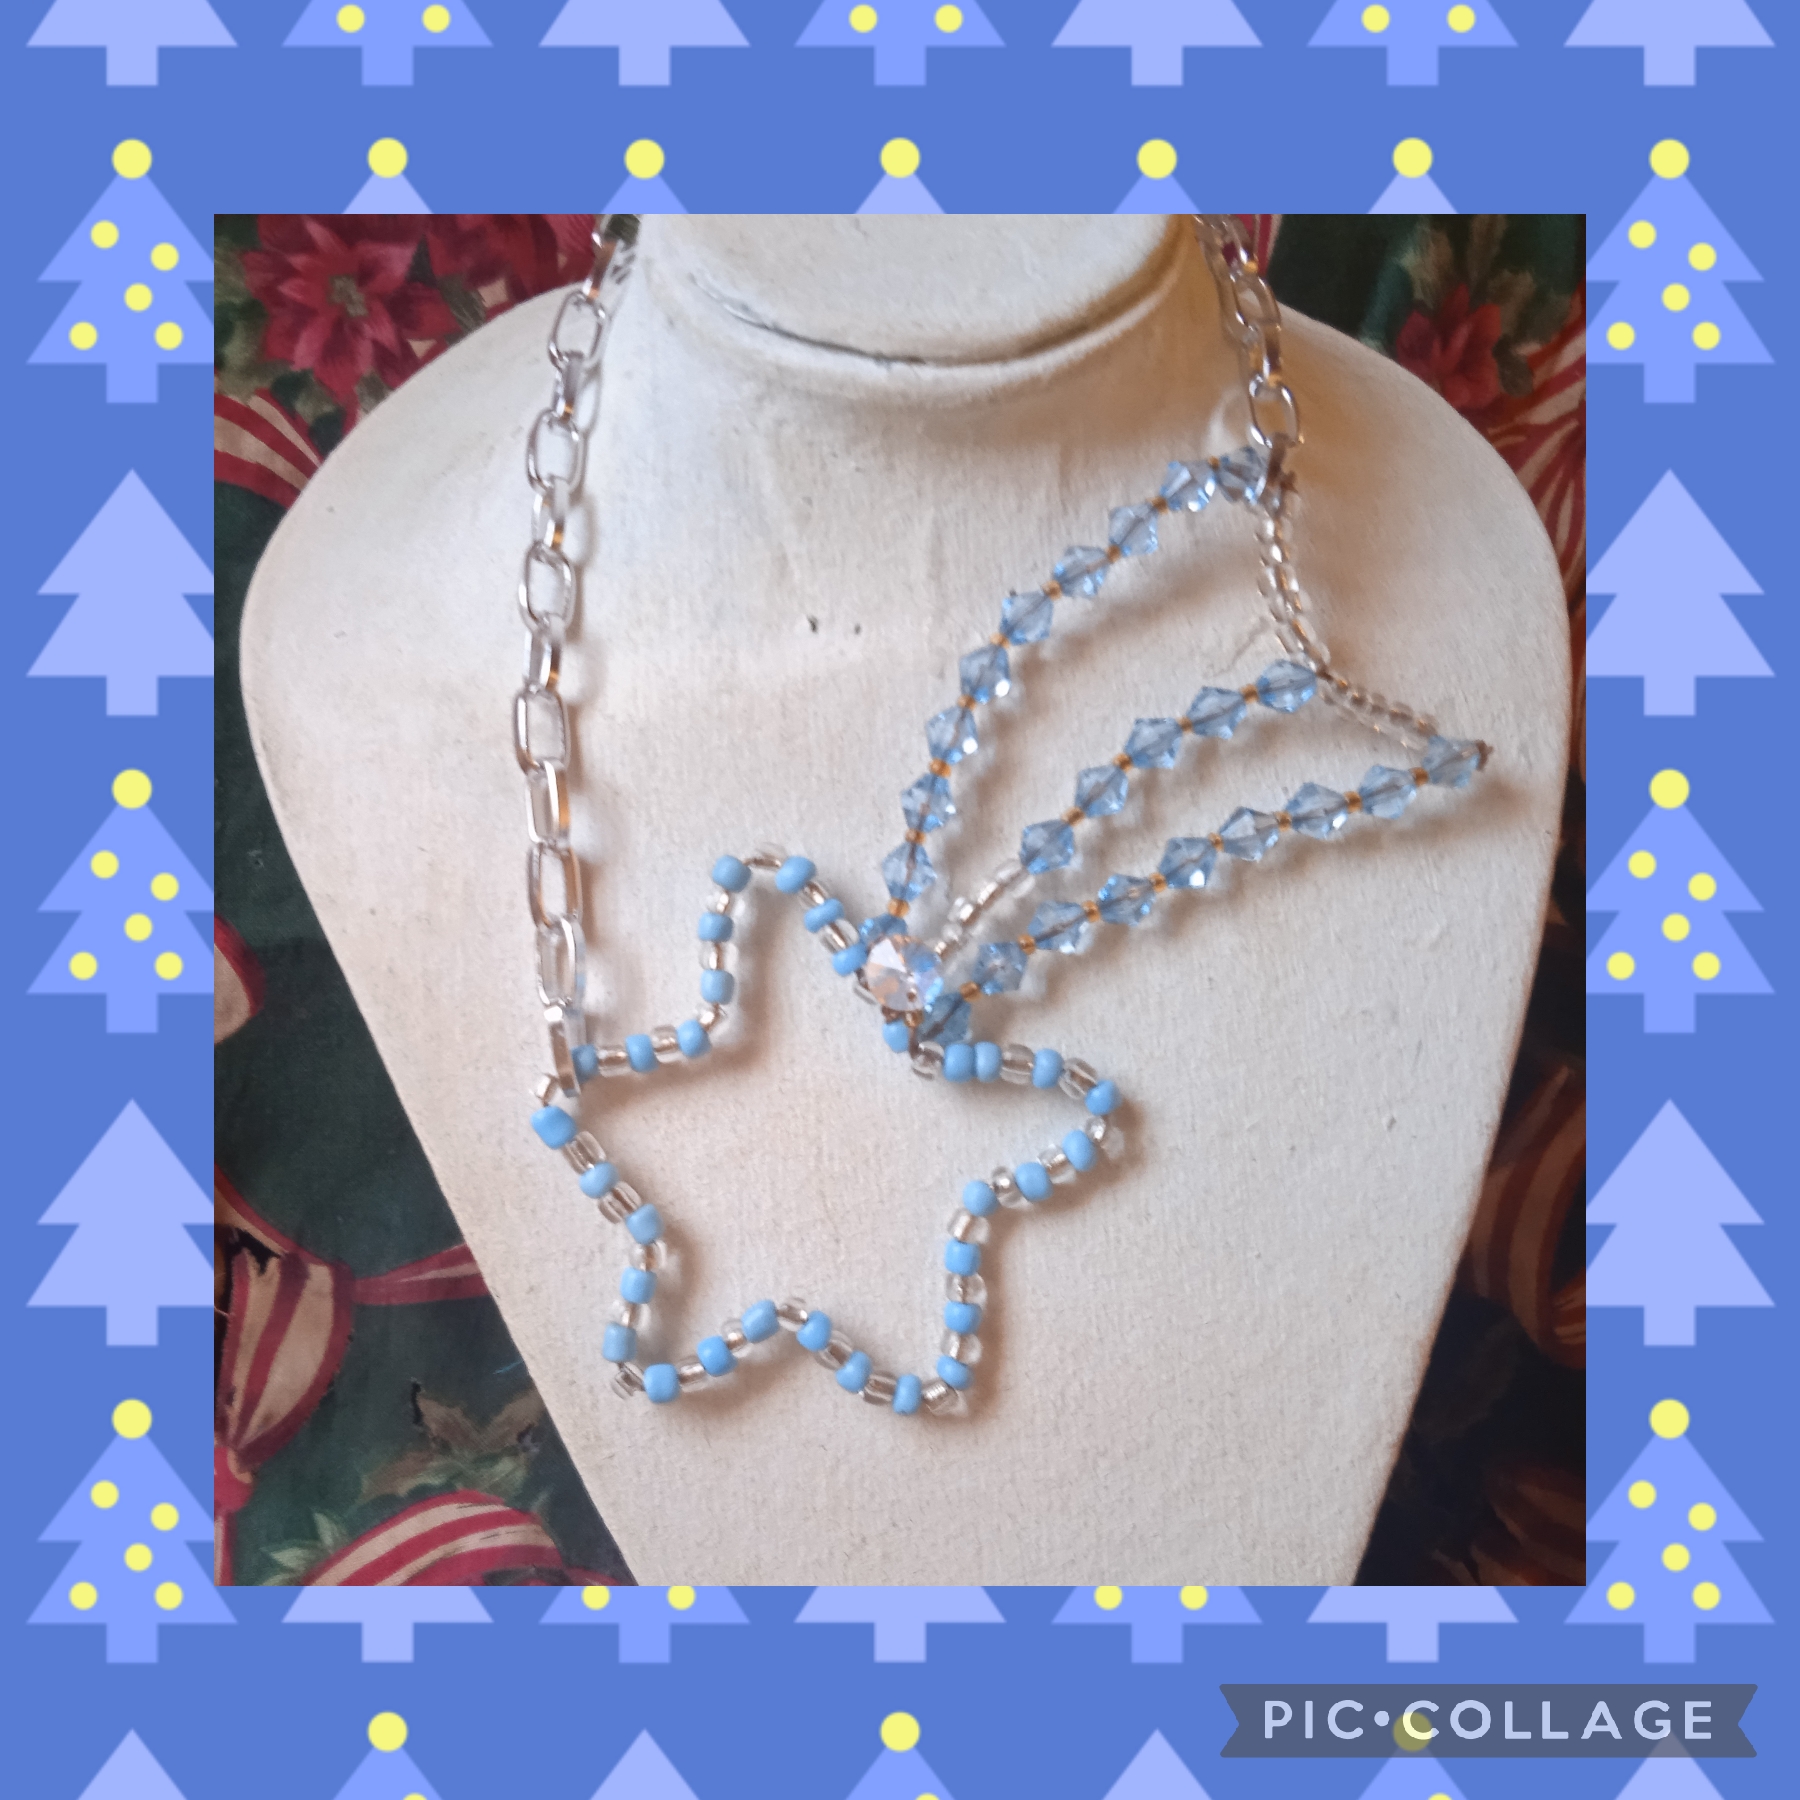
Después de adornar las calles, las plazas, poner en casa los arbolitos y esos tradicionales pesebres, vamos el próximo viernes Primero de Diciembre a encender la Estrella ⭐ Navideña en este sector, todo una algarabía cada quien ha elaborado su estrella para apoyar el momento del encendido, pero como cada quien quiere brillar cuál estrella, he realizado para una amiga muy querida una Preciosa Gargantilla con Temática de ⭐ Navideña, que ella lucirá ese día.
Sigan leyendo y vean el paso a paso de como la hice:
Hello, hello! Greetings my Creative Jewelry Artists, how are you all, enjoying perfect health? and now, already in the final stretch to enter the most joyful and enthusiastic month of the year, I, full of activities; I have no hope as we say here but happy, happy, because it is wonderful every time we have to join together to form a team and carry out the multiple tasks with which we liven up and entertain our beloved community.
After decorating the streets, the squares, putting the trees and those traditional nativity scenes at home, we are going next Friday, December 1st, to light the ⭐ Christmas Star in this sector, a real hubbub, everyone has made their own star to support the moment of Christmas. on, but since everyone wants to shine which star, I have made for a very dear friend a Beautiful ⭐ Christmas Themed Choker, which she will wear that day.
Keep reading and see the step by step of how I made it:
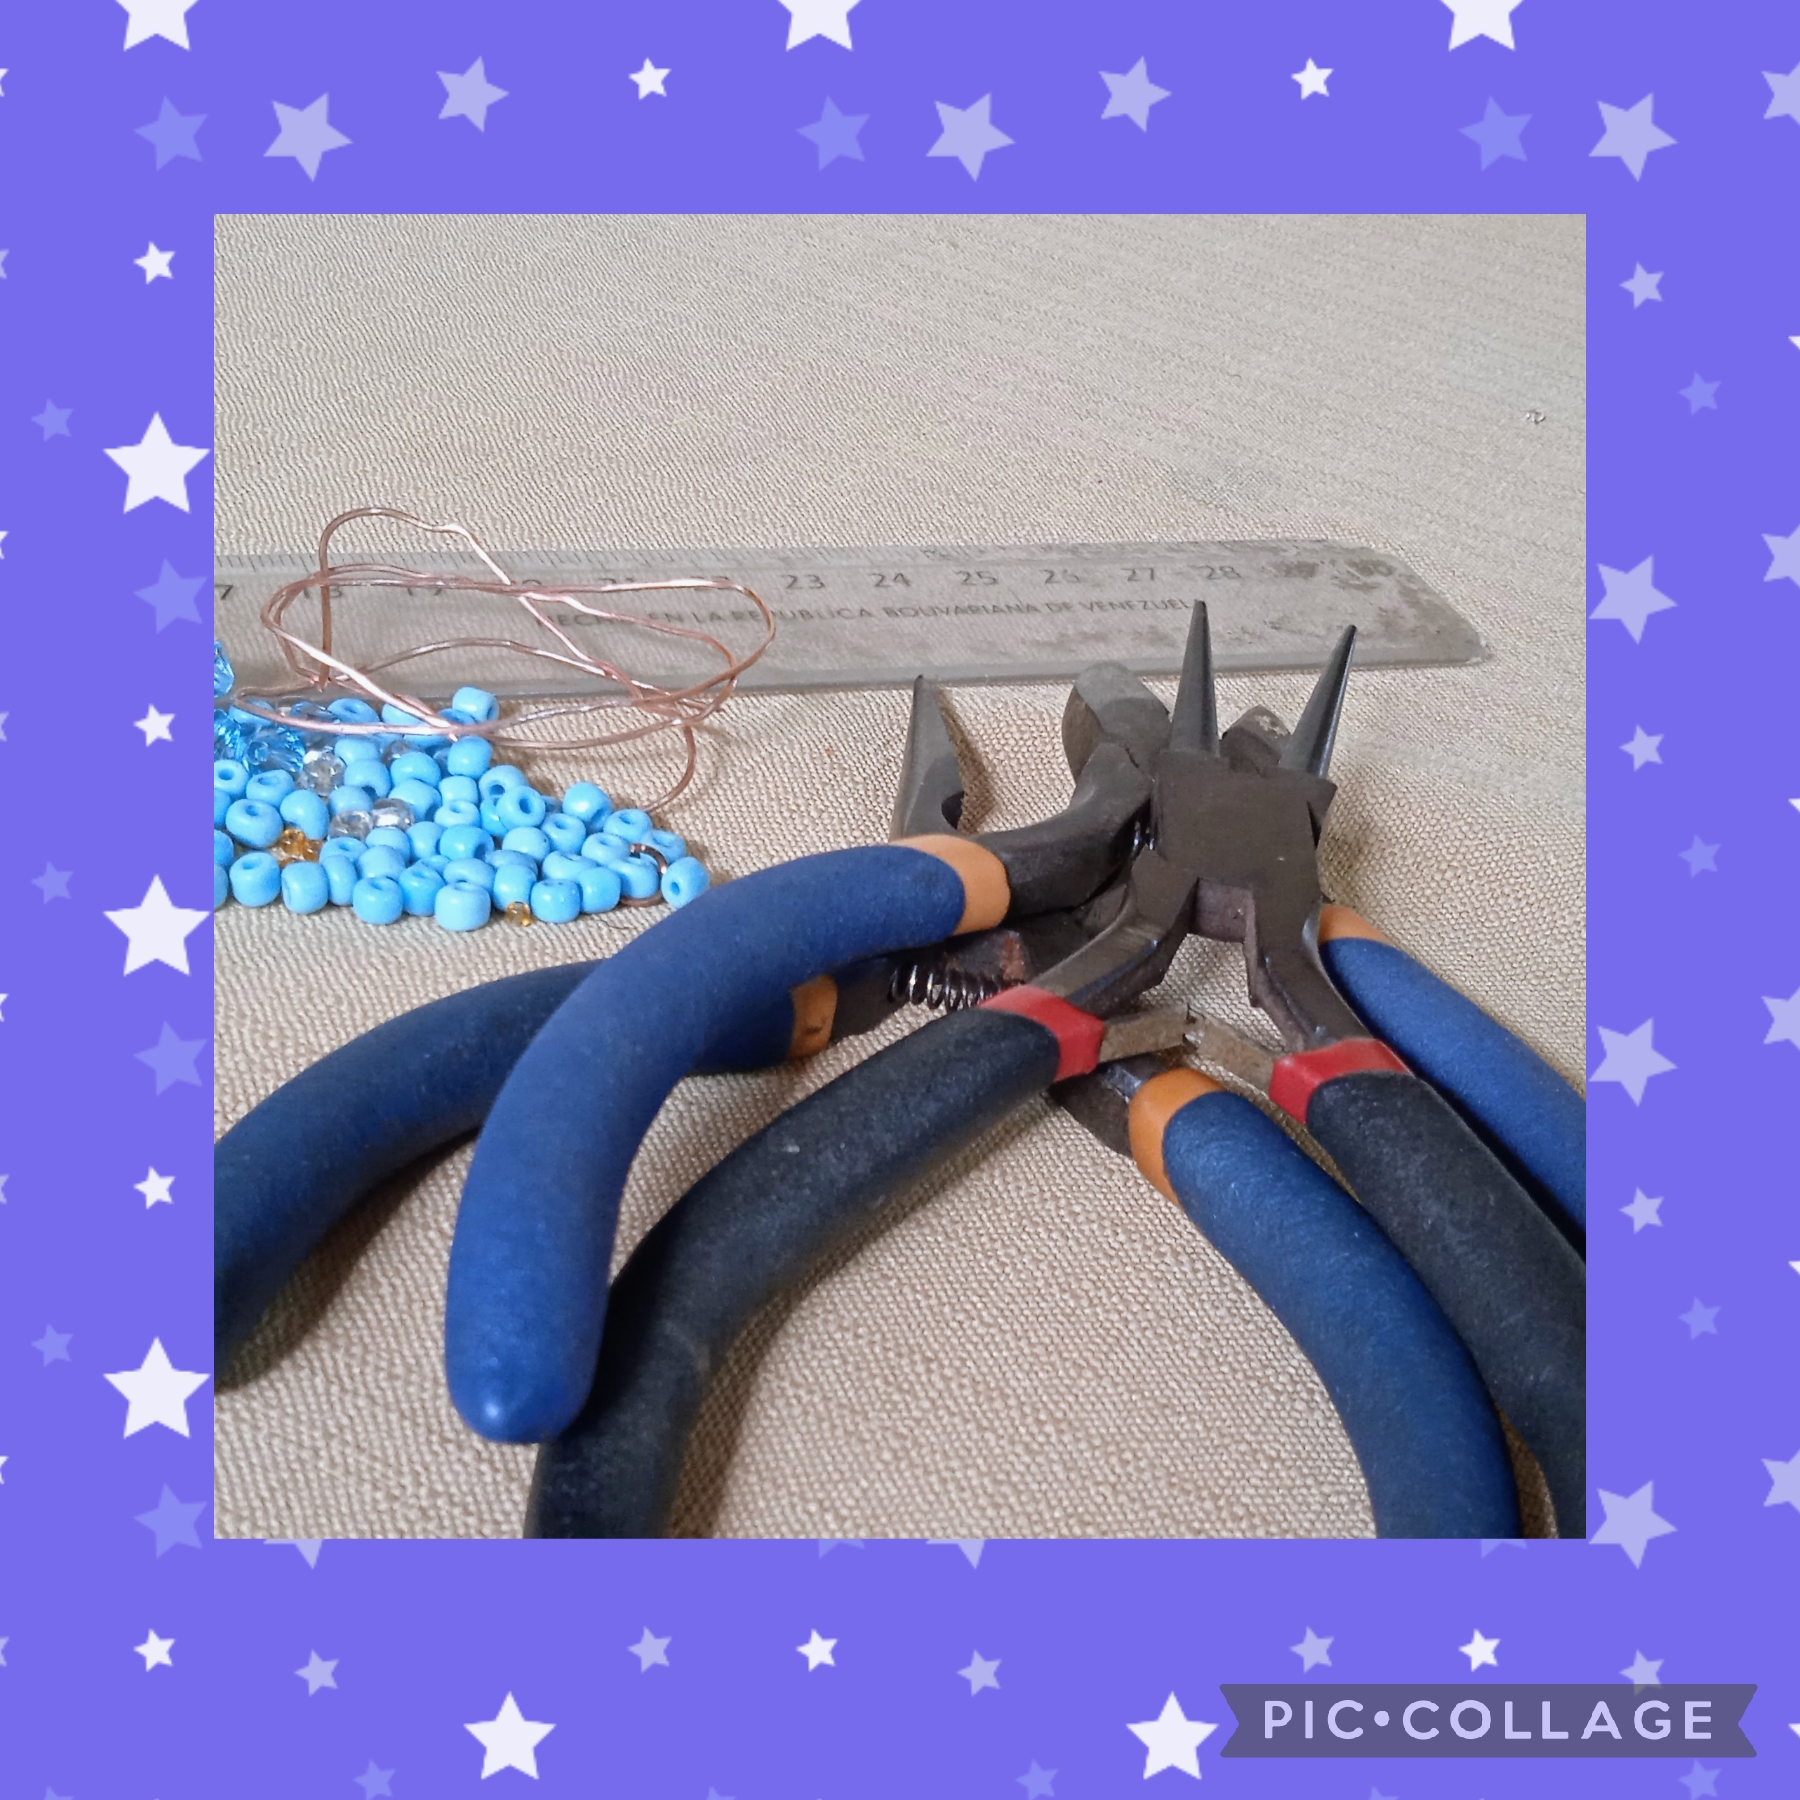
MATERIALES QUE USE PARA REALIZAR ESTÁ GARGANTILLA ESTRELLA ⭐ NAVIDEÑA:
✓ Mostacillones Azules.
✓ Mostacillones.
transparentes.
✓ Veinticinco cristales tipo
rombo azules.
✓ Un metro de alambre de
cobre calibre veinticuatro" ✓ Treinta centímetros de
cadena plateada.
✓ Dos terminales para el
cierre.
✓ Grapas o escalachines.
✓ Pinza plana.
✓ Pinza punta redonda.
✓ Pinza de corte.
✓ Regla.
✓ Mostacillas doradas.
✓ Un cristal transparente.
número seis.
MATERIALS USED TO MAKE THIS ⭐ CHRISTMAS STAR CHOKER:
✓ Blue Mostacillons.
✓ Mostacillons.
transparent.
✓ Twenty-five type crystals
blue rhombus.
✓ One meter of wire
twenty-four" gauge copper ✓ Thirty centimeters
silver chain
✓ Two terminals for the
closing.
✓ Staples or ladders.
✓ Flat clamp.
✓ Round tip tweezers.
✓ Cutting clamp.
✓ Rule.
✓ Golden beads.
✓ A transparent glass.
number six.
PASOS QUÉ USÉ EN SU ELABORACIÓN:
PRIMER PASO:
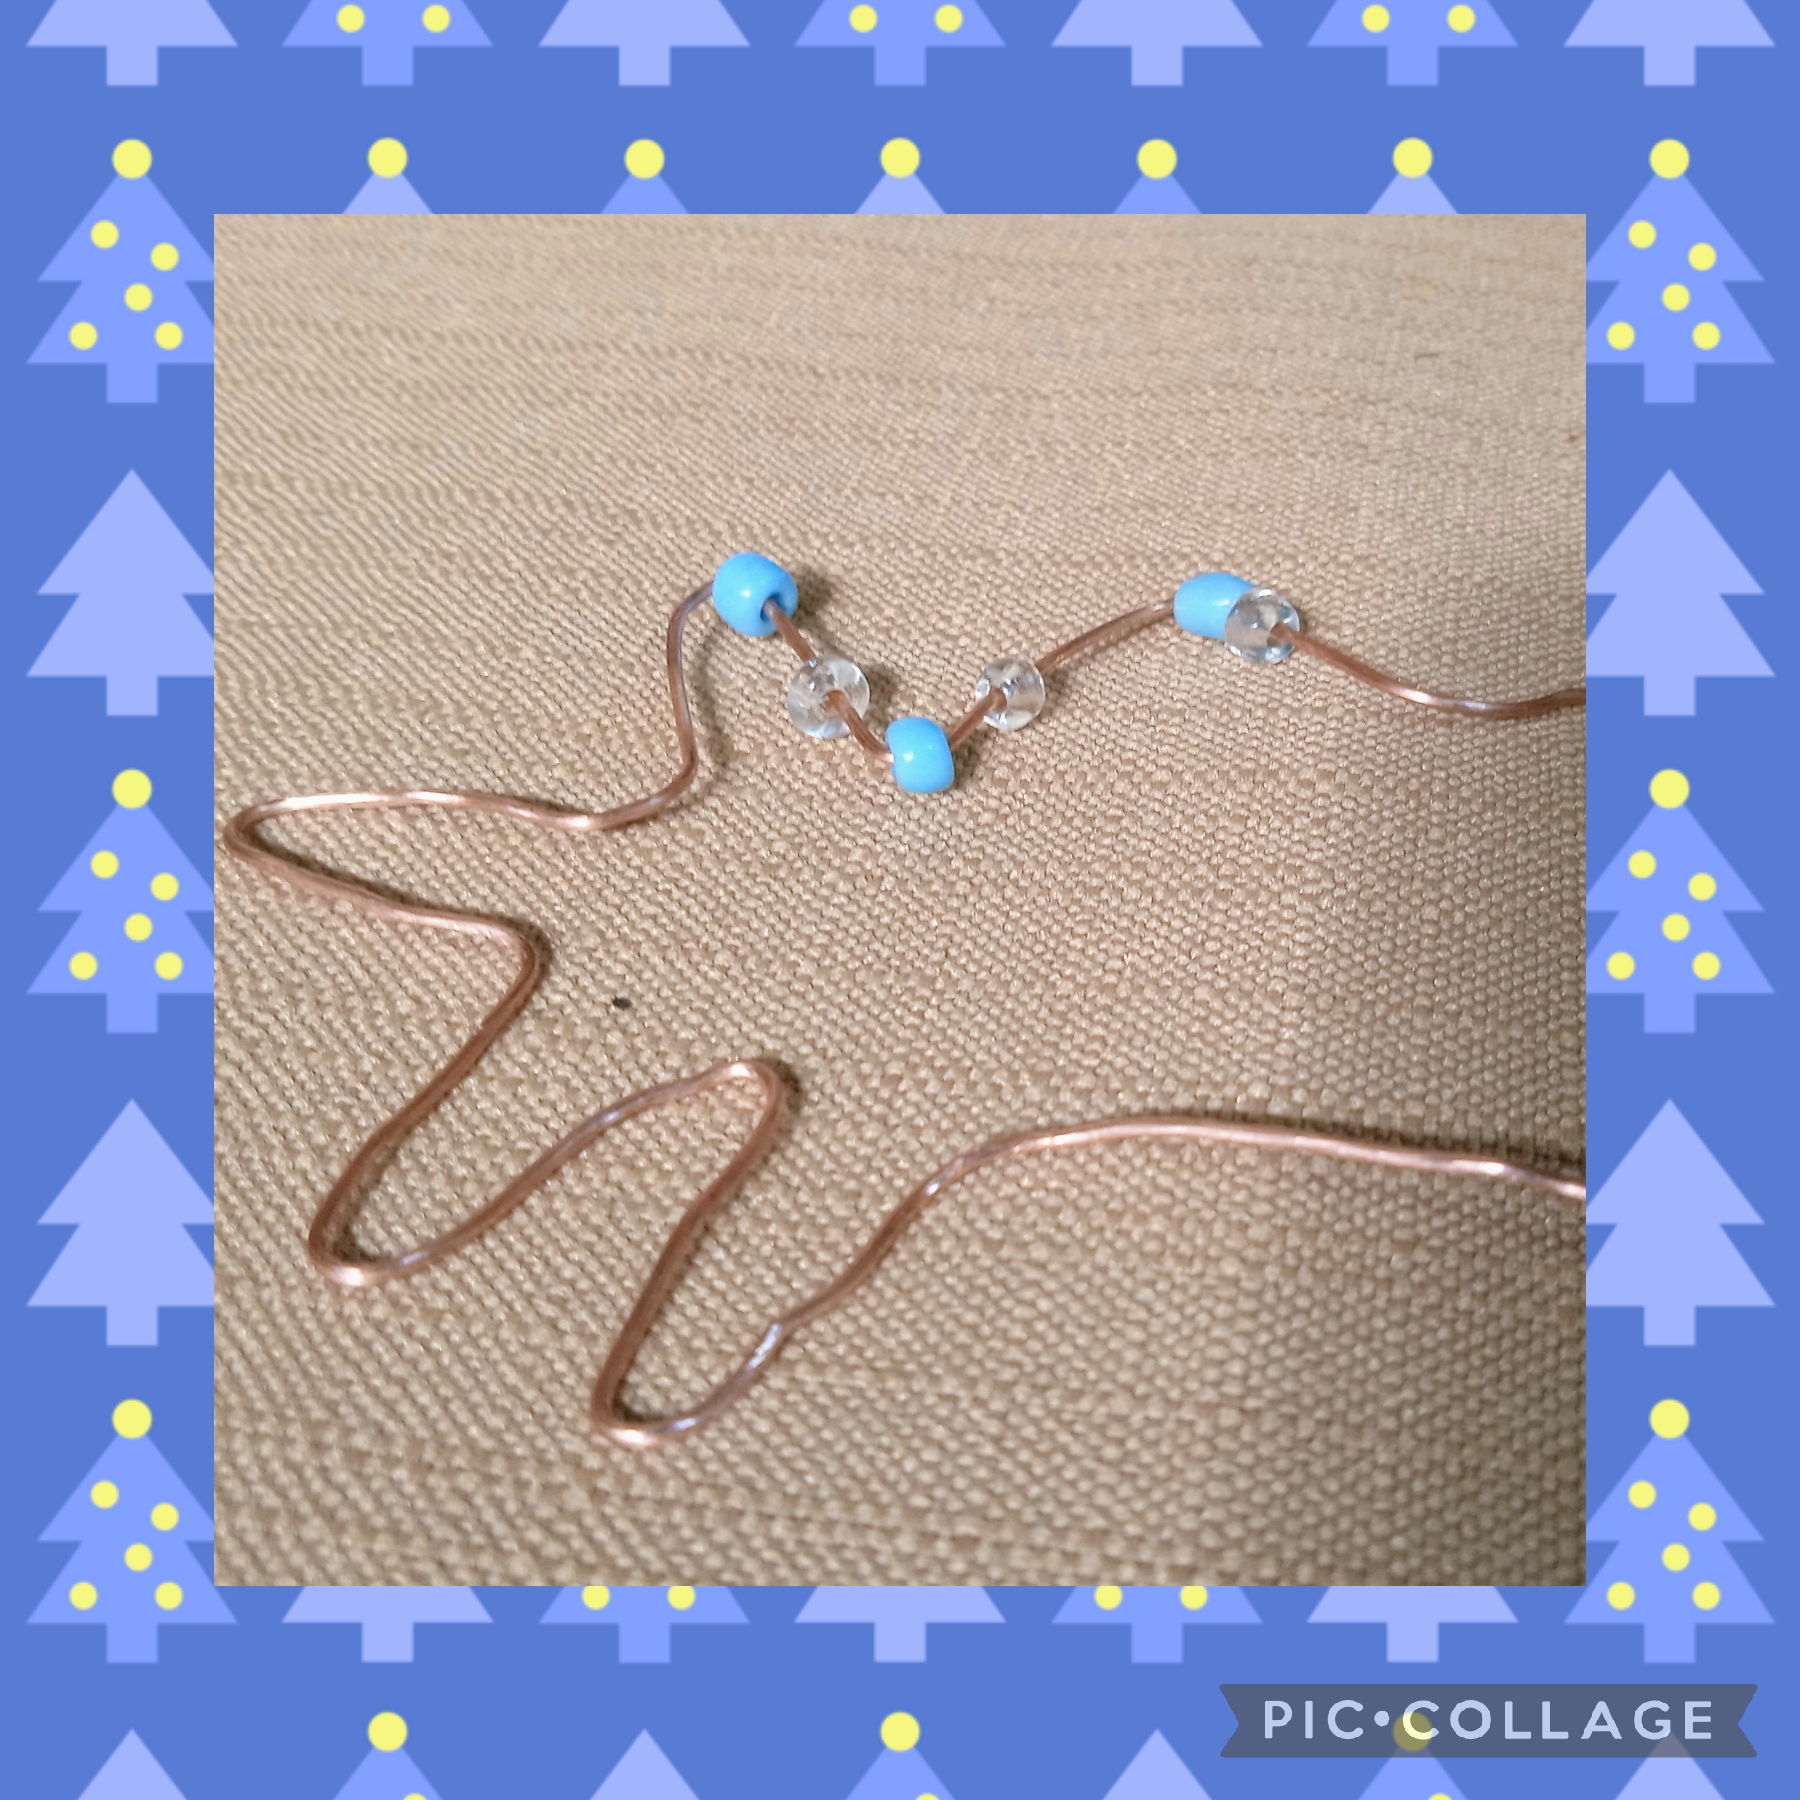
Voy a comenzar a realizar este primer paso, ocupando sesenta centímetros de alambre calibre 24", que verifico con la regla, para comprobar con exactitud las medidas, voy a dejar siete centímetros sin trabajar, y después hago una medida de centímetro y medio que marco haciendo un doblez ayudada con la pinza plana, marco de nuevo centímetro y medio en el alambre y hago un nuevo doblez, este paso lo realizó diez veces y así voy a formar las cinco puntas que tendrá mi estrella ⭐ como muestra mis imágenes
STEPS WHAT I USED IN ITS PREPARATION:
FIRST STEP:
I am going to begin to carry out this first step, using sixty centimeters of 24" gauge wire, which I verify with the ruler, to check the measurements exactly, I am going to leave seven centimeters without working, and then I make a measurement of one and a half centimeters that I mark making a bend with the help of the flat clamp, I again mark a centimeter and a half on the wire and make a new bend, I did this step ten times and thus I will form the five points that my star will have ⭐ as shown in my images

PASO DOS:
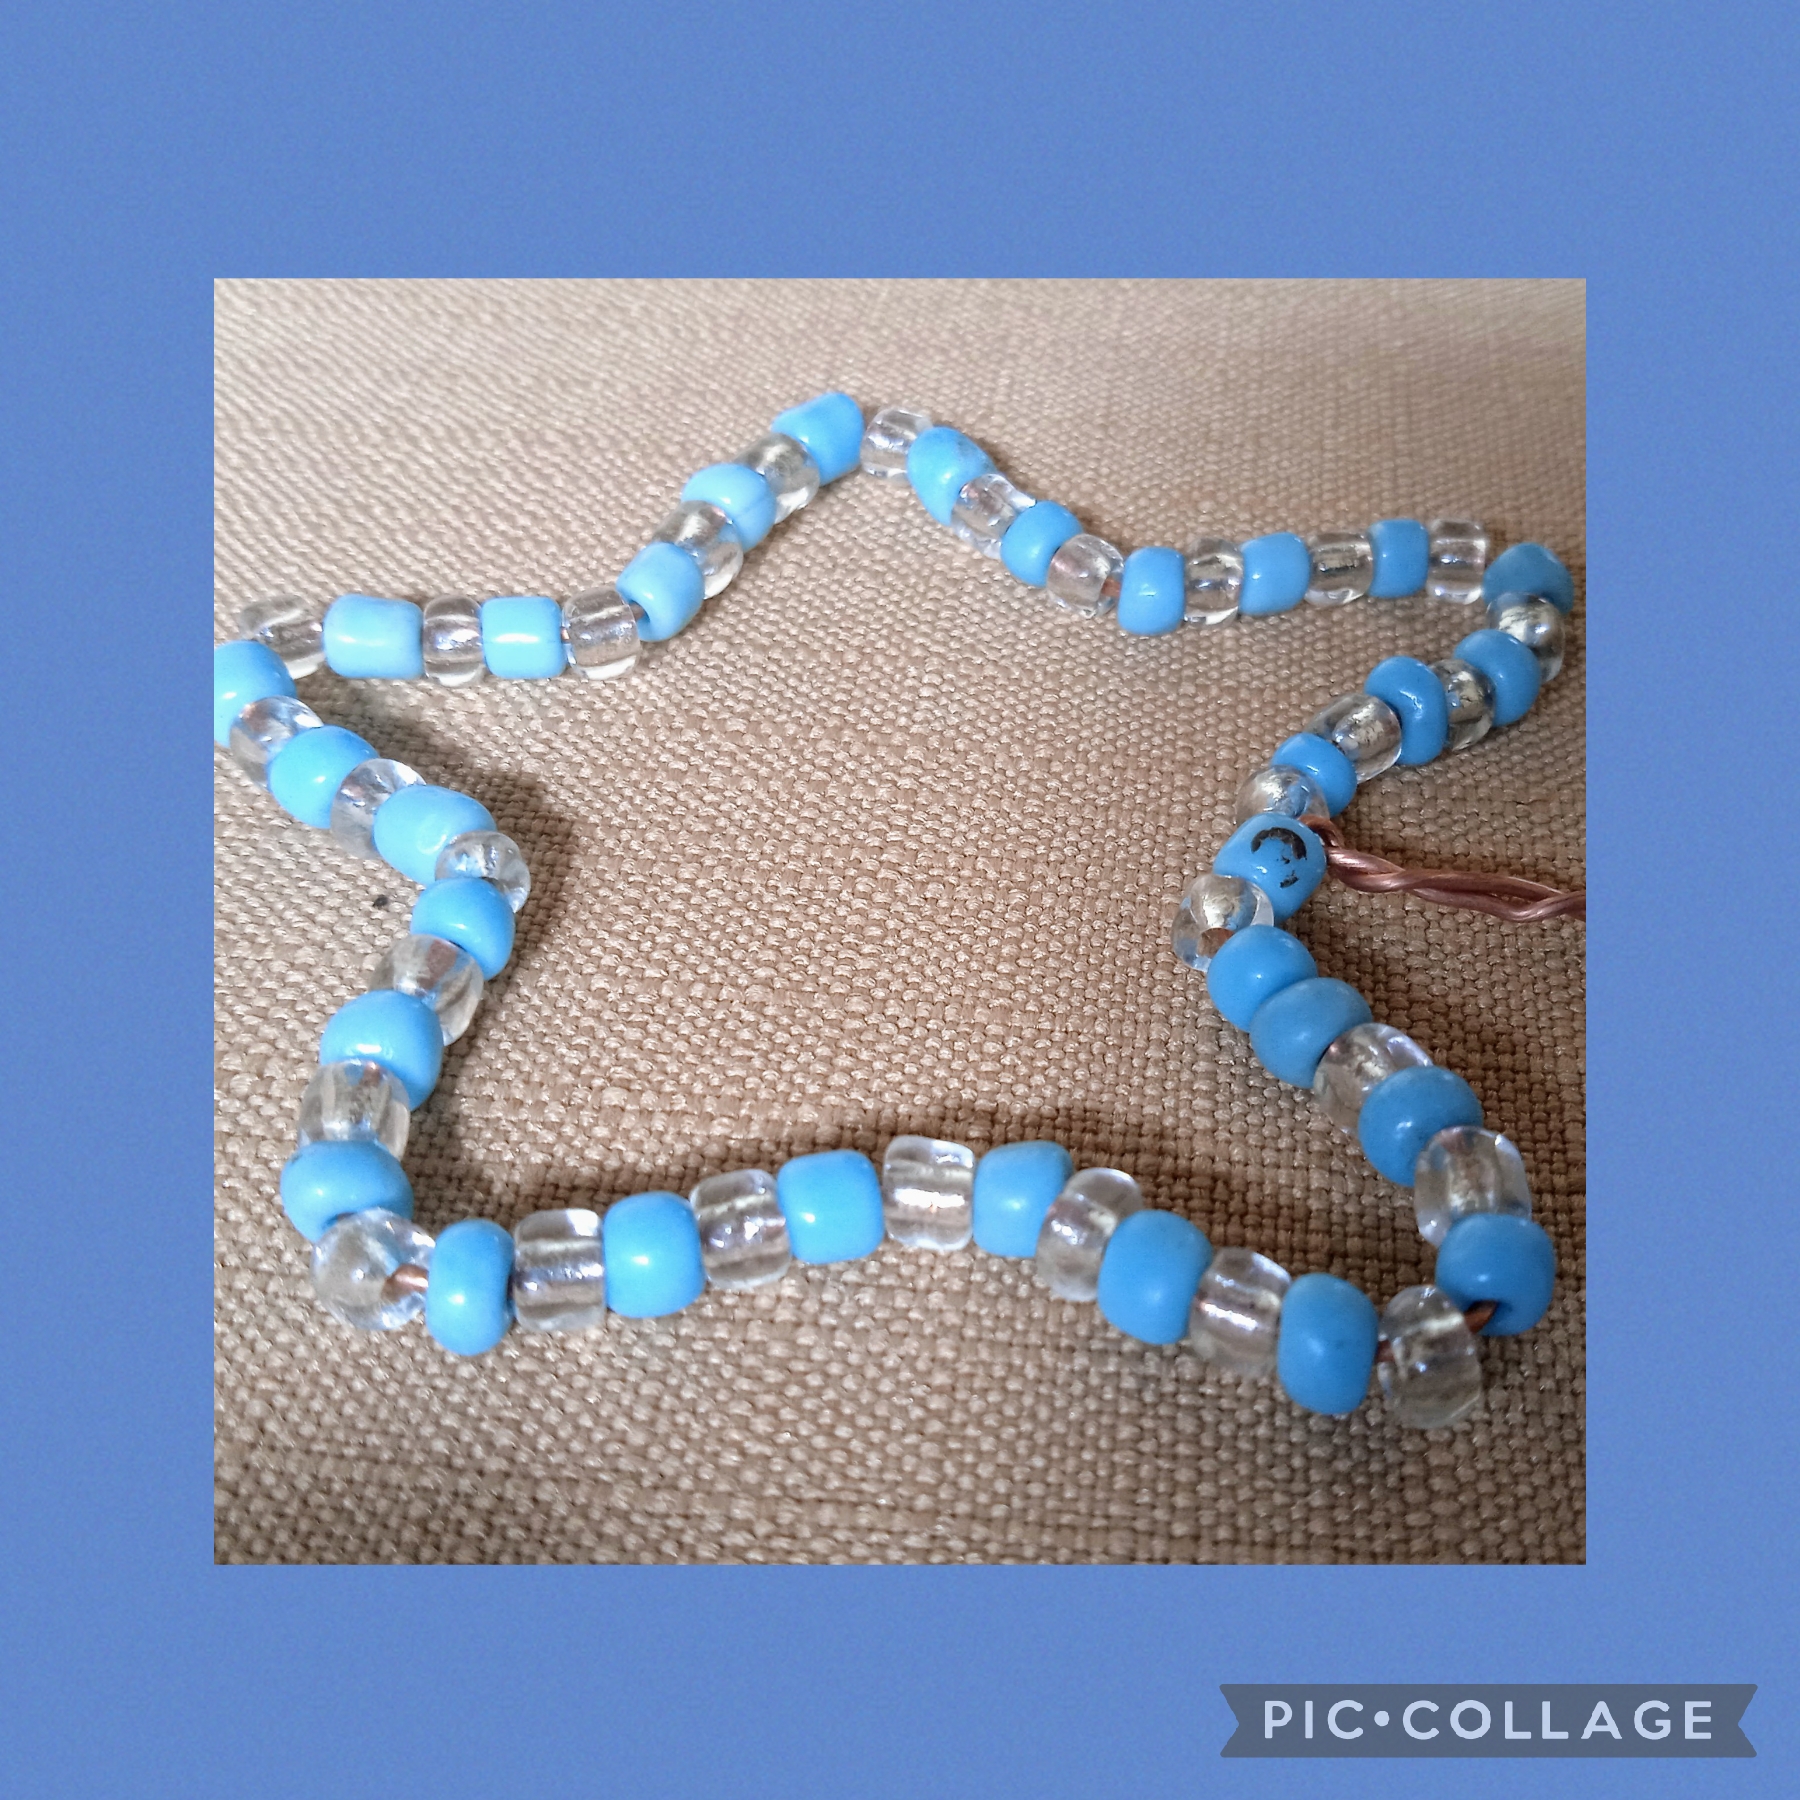
Ahora en este paso voy a insertar mostacillones azules y transparentes para rellenar la forma de la estrella ⭐ que realicé con el alambre; lo hago en ésta forma: inserto un mostacillón transparente, un mostacillón azul, un mostacillón transparente un mostacillón azul y así sucesivamente hasta rellenar todo el esqueleto de la estrella, una vez listo este procedimiento uno y moldeo las cinco puntas, ajusto bien para que me quede muy prolija y uso la pinza para asegurar y así va quedando.
STEP TWO:
Now in this step I am going to insert blue and transparent beads to fill the star shape ⭐ that I made with the wire; I do it in this way: I insert a transparent bead, a blue bead, a transparent bead, a blue bead and so on until the entire skeleton of the star is filled. Once this procedure is ready, I mold the five points, I adjust well so that I It is very neat and I use the clamp to secure it and that's how it looks.
TERCER PASO:
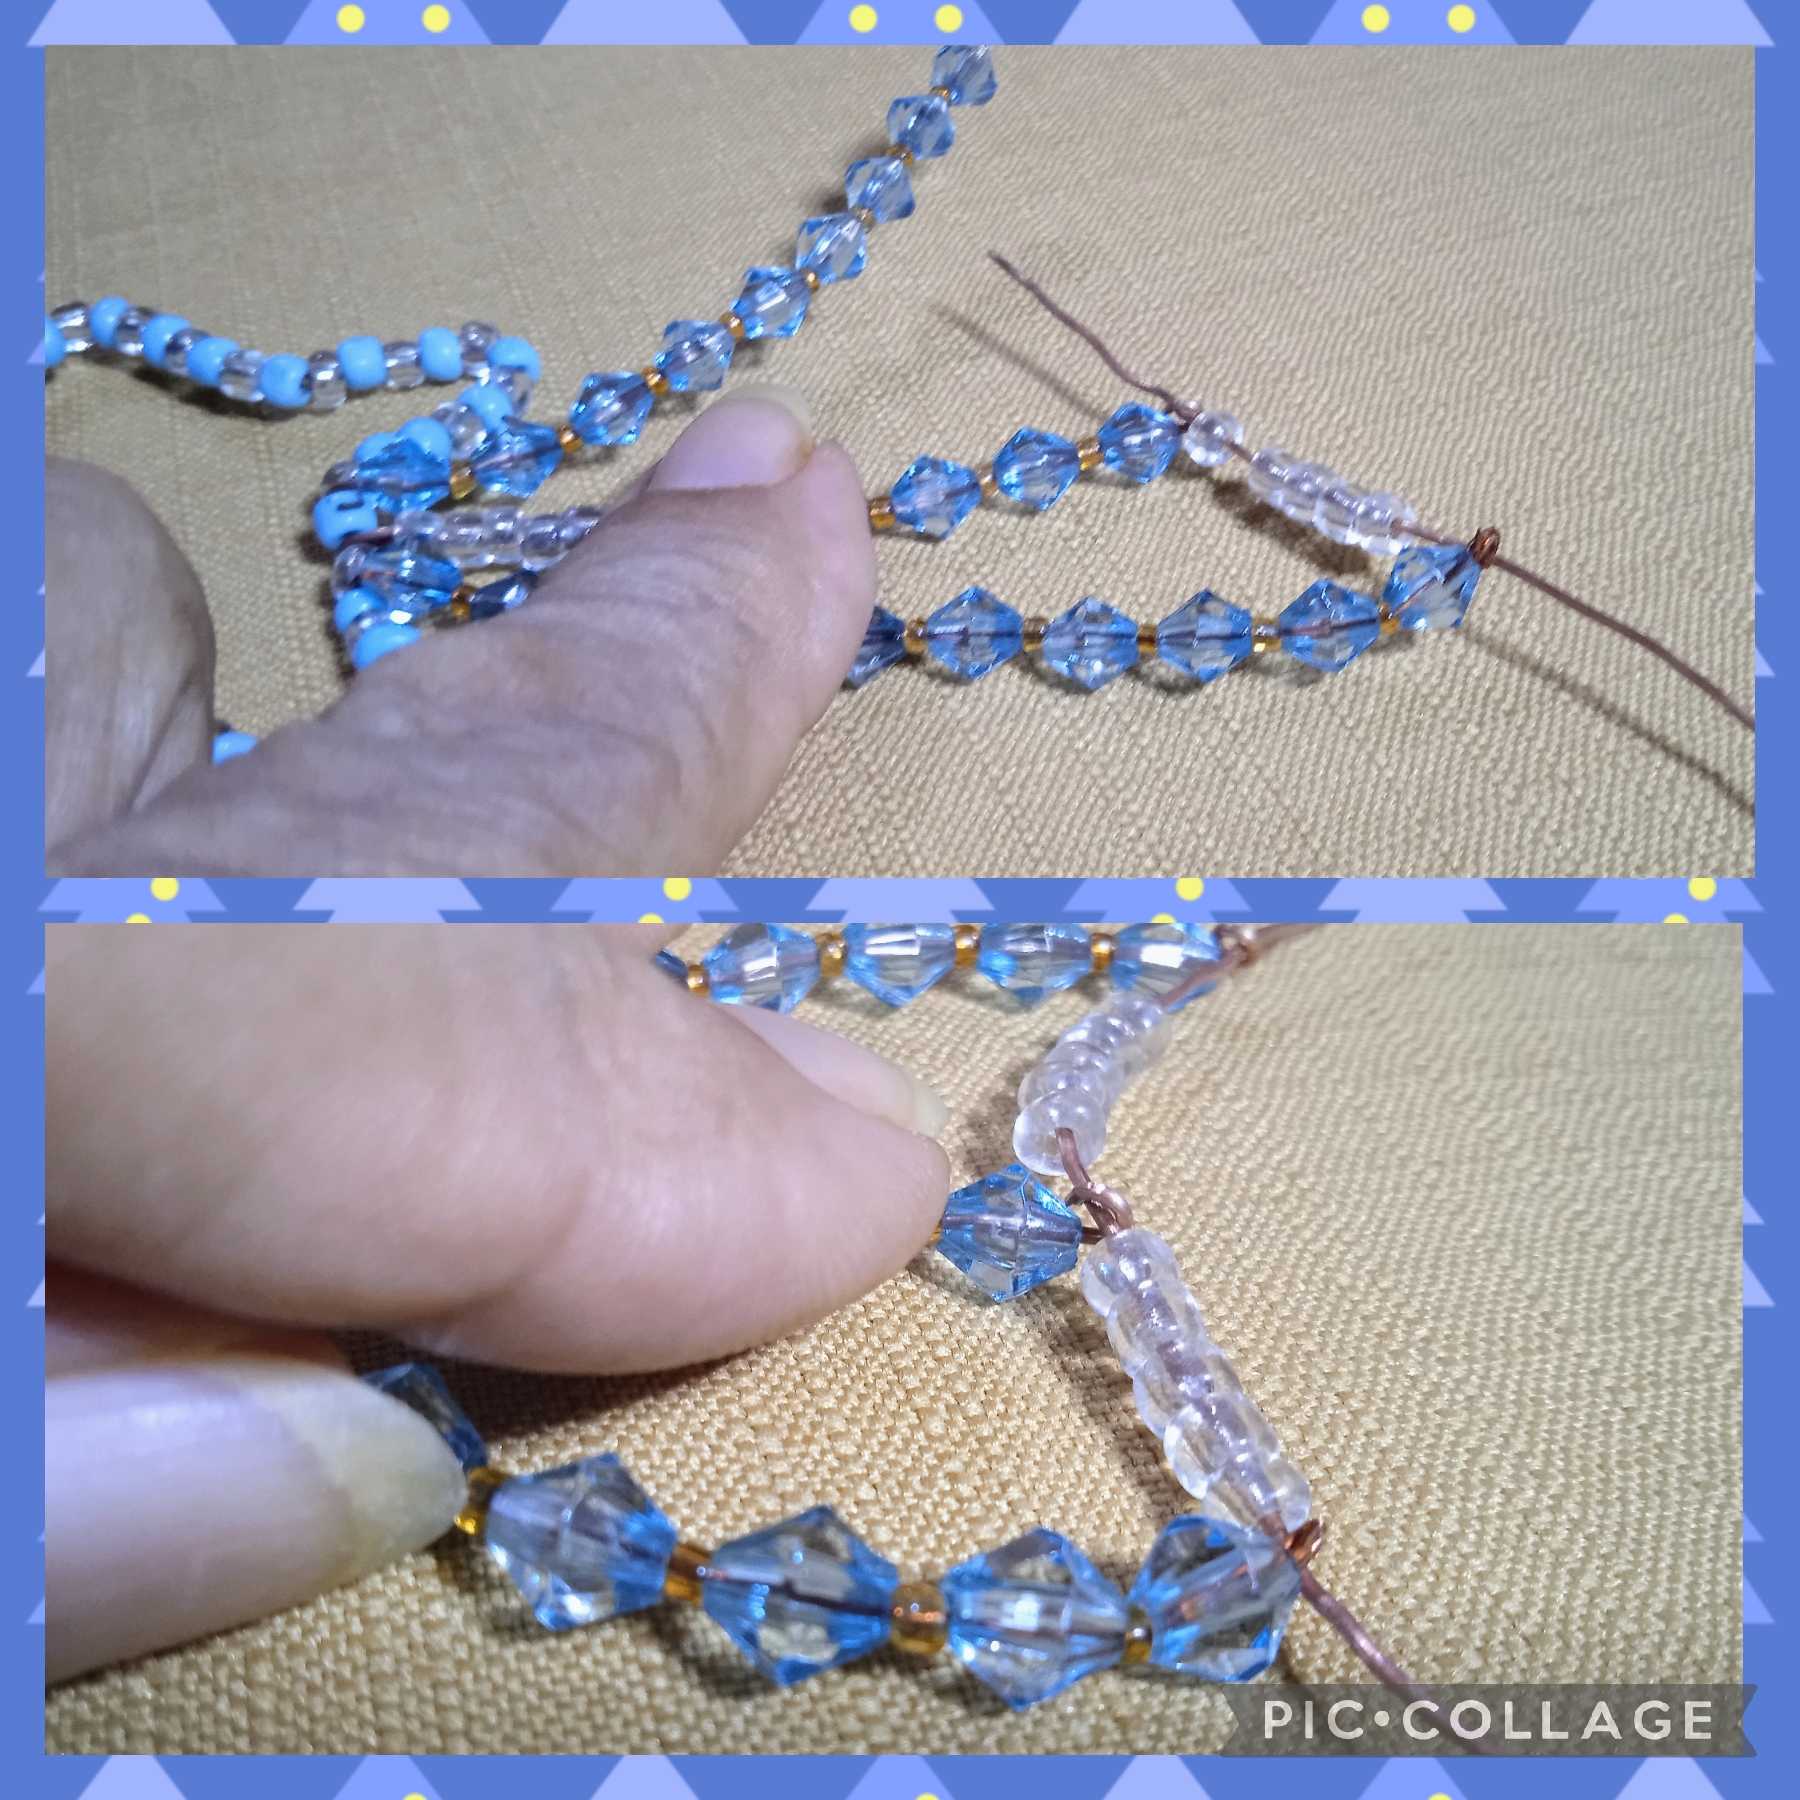
En este tercer paso, después de fijar las dos puntas, corto un trozo del alambre de seis centímetros y lo coloco en el centro al lado de los dos alambres dejando un mostacillón de separación; los mido en esta forma el superior tiene una medida de siete centímetros, el del medio mide cinco centímetros y el de abajo seis centímetros.
Ahora formaré la cola o estela de la estrella ⭐ de esta forma: en el alambre de siete centímetros inserté una mostacilla dorada, un cristal azul tipo rombo, una mostacilla dorada, un cristal azul tipo rombo y así voy hasta lograr insertar diez cristales y nueve mostacillas.
En el alambre del medio inserto seis mostacillones transparentes, y sigo con una mostacilla dorada, un cristal azul, una mostacilla dorada, un cristal azul hasta tener cinco cristales azules y cuatro Mostacillas doradas; sigo insertando en el último alambre ocho cristales azules tipo rombo y siete mostacillas doradas, como se ve en las imágenes.
THIRD STEP:
In this third step, after fixing the two ends, I cut a six-centimeter piece of wire and place it in the center next to the two wires, leaving a bead of separation; I measure them this way: the top one measures seven centimeters, the middle one measures five centimeters and the bottom one six centimeters.
Now I will form the tail or trail of the star ⭐ in this way: on the seven-centimeter wire I inserted a golden bead, a blue rhombus-type crystal, a golden bead, a blue rhombus-type crystal and so on I go until I manage to insert ten crystals and nine beads.
In the middle wire I insert six transparent beads, and continue with a gold bead, a blue crystal, a gold bead, a blue crystal until I have five blue crystals and four gold Beads; I continue inserting eight rhombus-type blue crystals and seven golden beads into the last wire, as seen in the images.
CUARTO PASO:
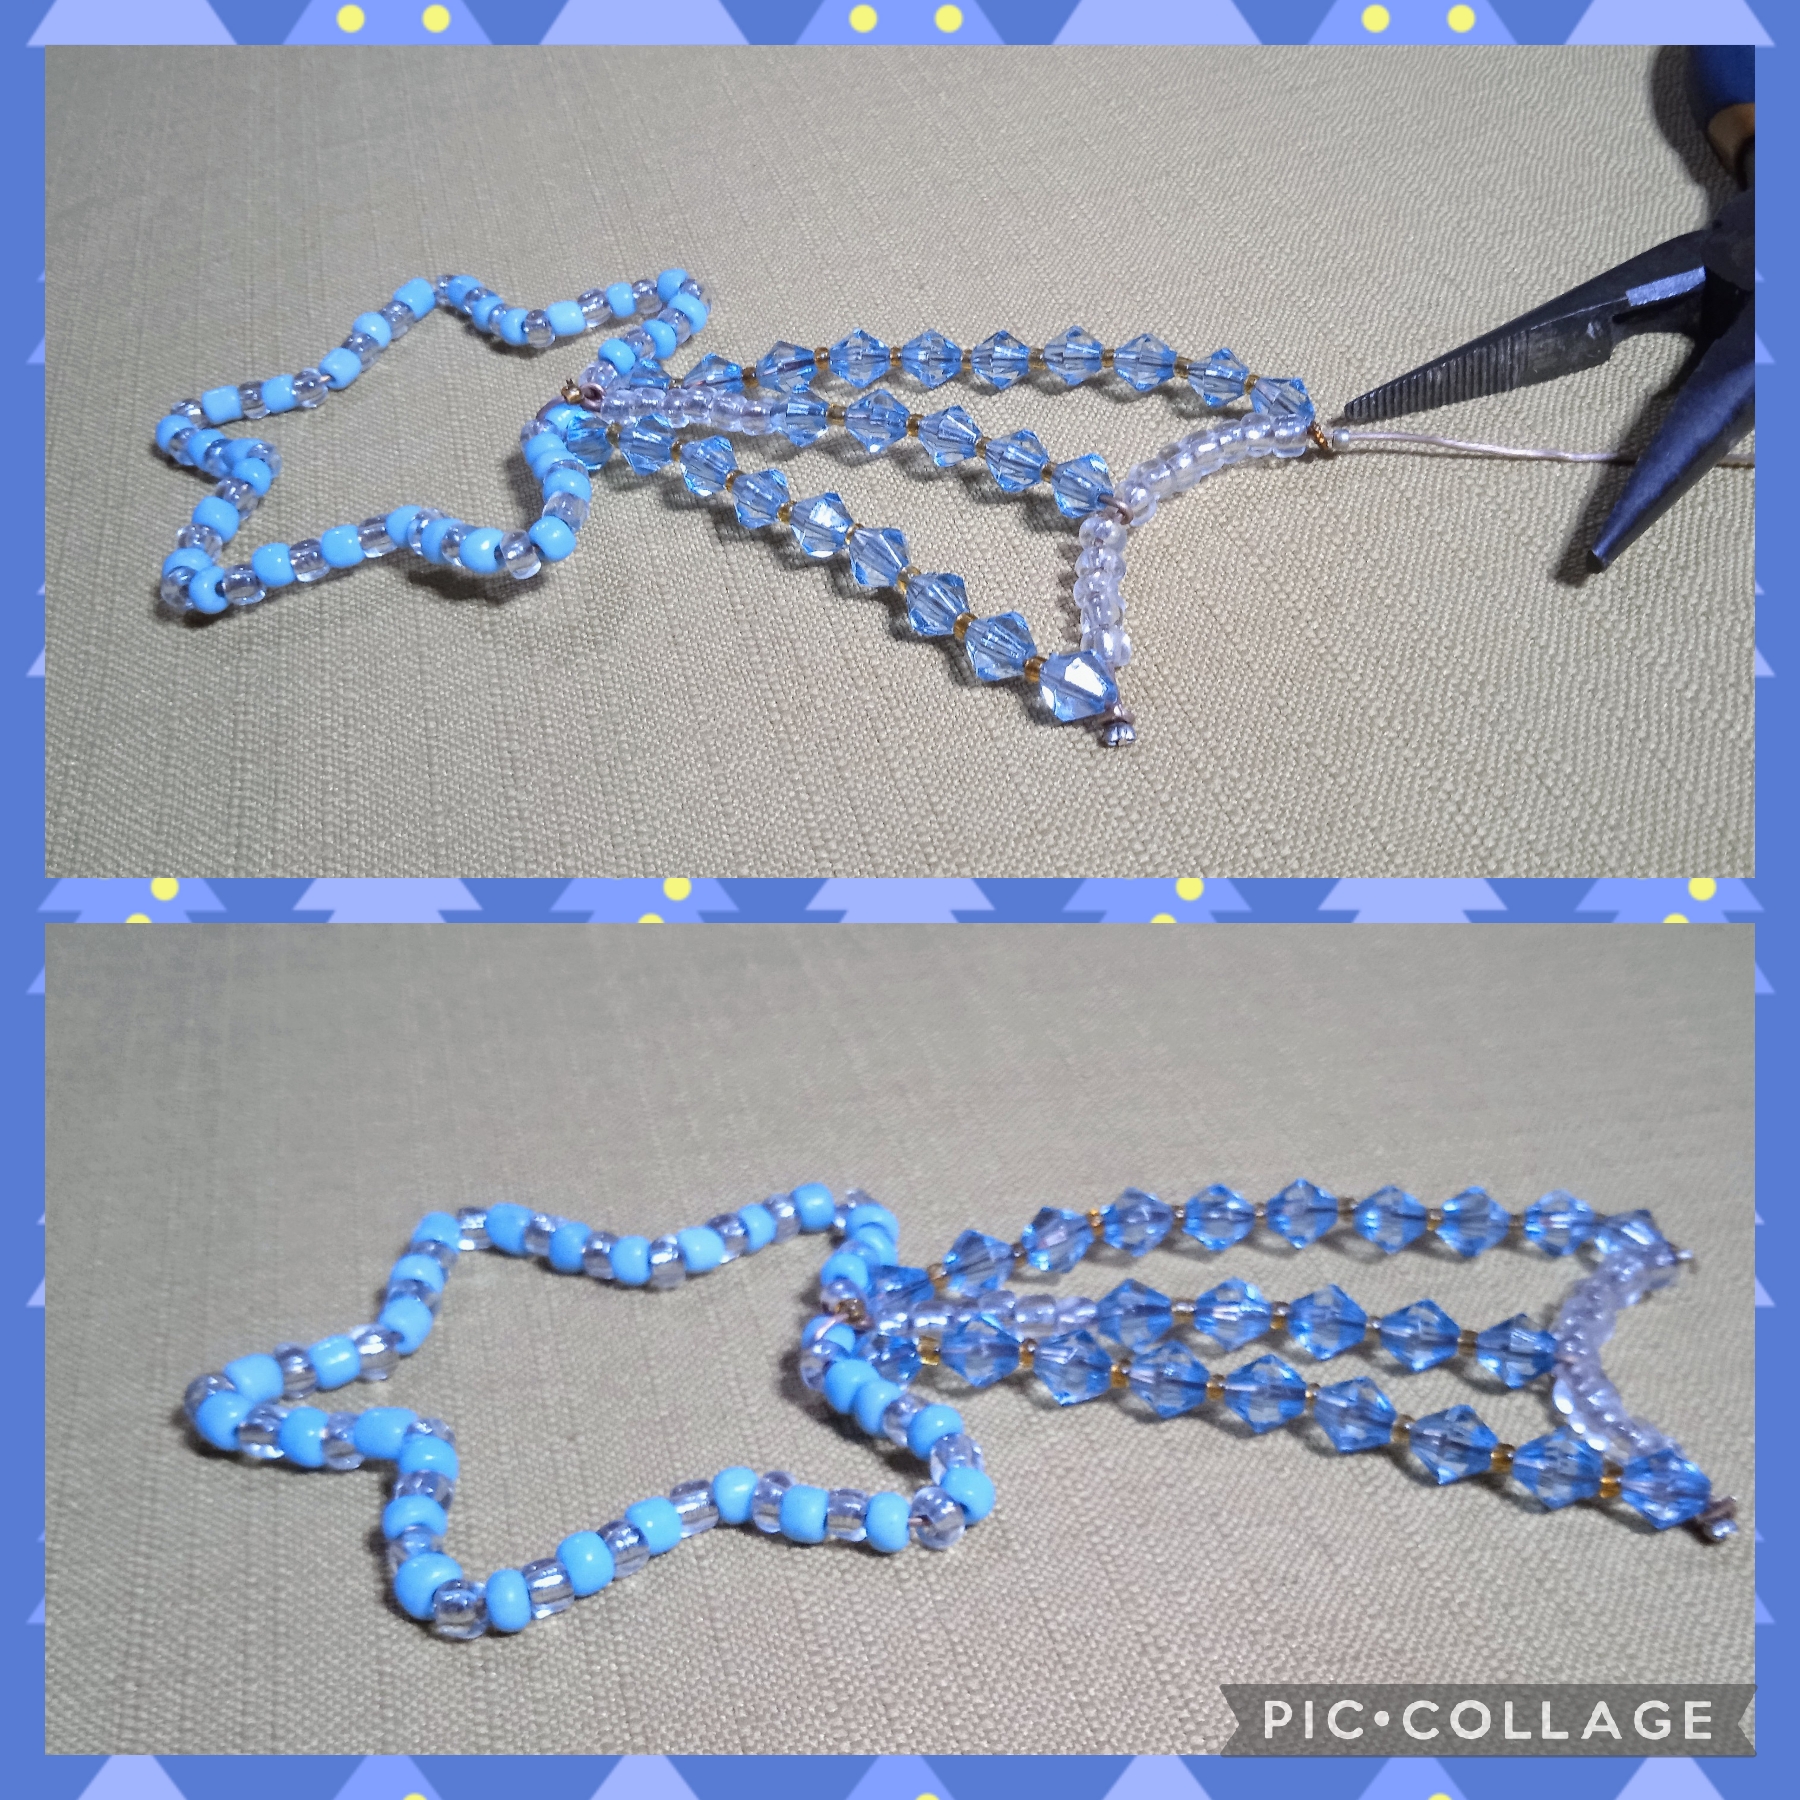
Ya tengo listos los tres alambres que formarán la cola, uso la pinza punta redonda y realizó una pequeña argollita en cada uno; luego corto un trozo de alambre de tres centímetros, que lo voy a pasar por las argollitas de esta manera: lo paso por la primera argolla, inserto cinco mostacillones transparentes, lo paso por la segunda argolla e inserto siete mostacillones transparentes, ahora saco la punta del alambre por la última argolla; inserto una grapa y uso la pinza plana para fijar, halo el alambre para dar forma a la cola y moldeo como muestra la imagen, ajusto insertando una grapa y fijo de esta manera queda lista mi estrella.
FOURTH STEP:
I already have the three wires that will form the tail ready, I use the round tip pliers and made a small ring in each one; Then I cut a three-centimeter piece of wire, which I am going to pass through the rings in this way: I pass it through the first ring, insert five transparent beads, I pass it through the second ring and insert seven transparent beads, now I take out the tip of the wire through the last ring; I insert a staple and use the flat clamp to fix, I pull the wire to shape the tail and mold it as shown in the image, I adjust by inserting a staple and fix in this way my star is ready.
QUINTO PASO:
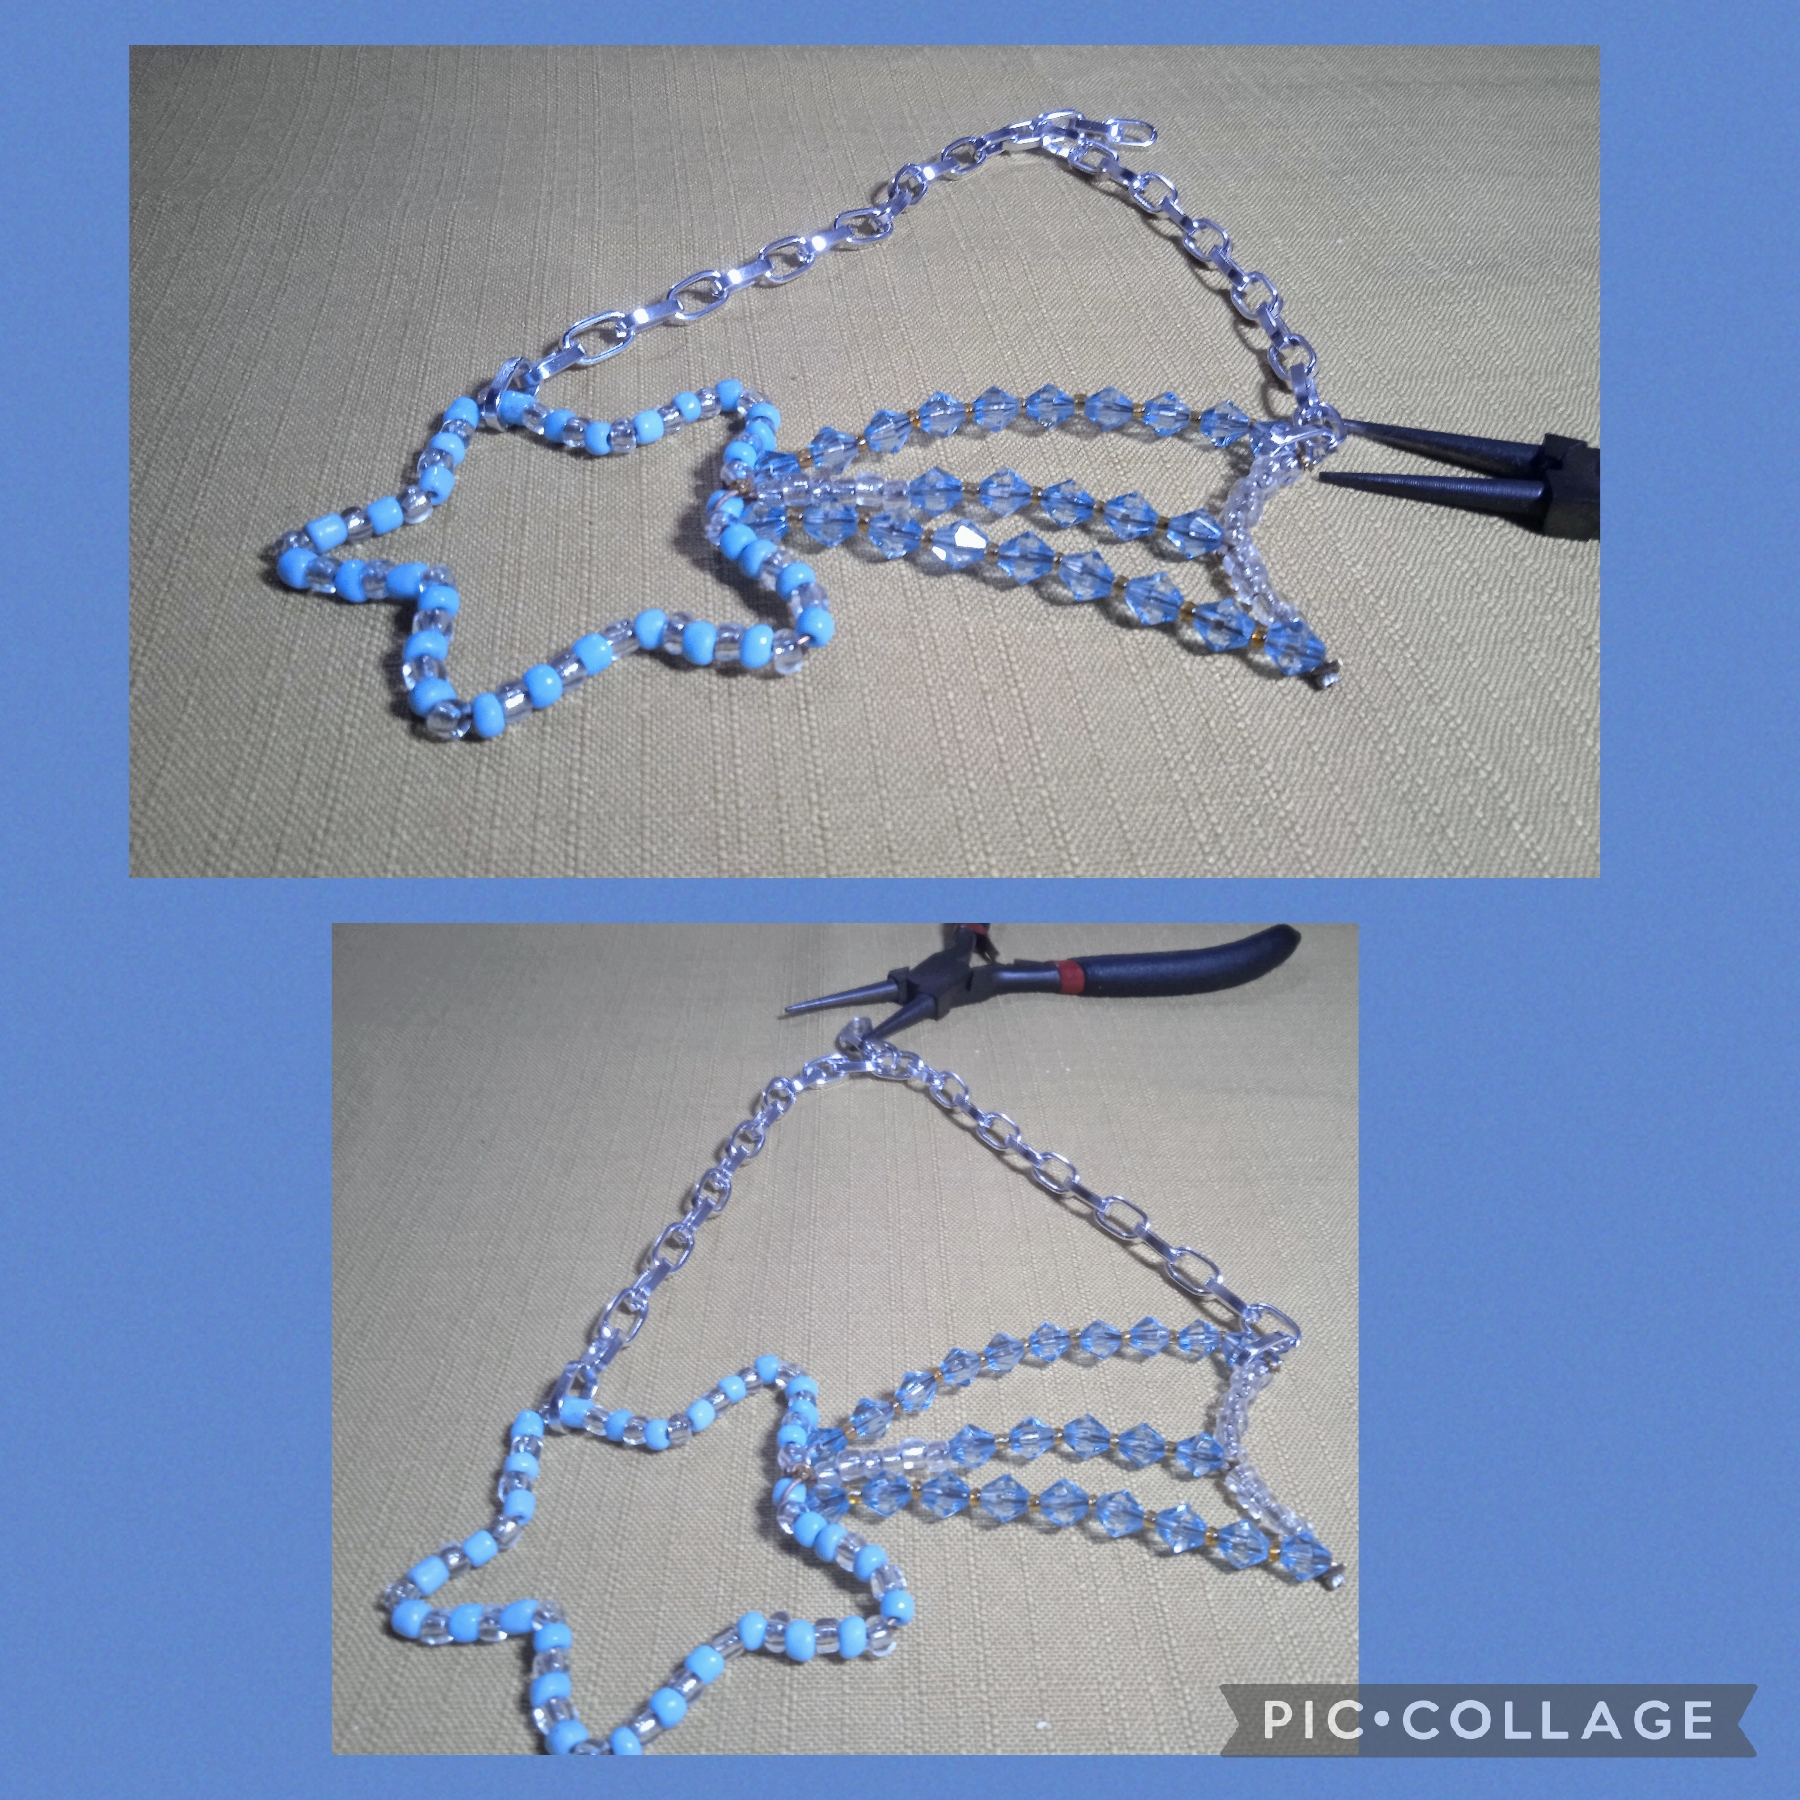
Una vez que tengo lista la estrella uso la cadena plateada y con la pinza punta plana la coloco en un extremo de la cola de la estrella ⭐ abriendo un eslabón de la misma cadena, luego pongo en la segunda punta de la estrella después de la cola la otra parte de la cadena; sigo ayudada con la pinza plana a fijar los terminales.
FIFTH STEP:
Once I have the star ready, I use the silver chain and with the flat tip pliers I place it on one end of the tail of the star ⭐ opening a link of the same chain, then I put it on the second tip of the star after the tail the other part of the chain; I continue to help with the flat clamp to fix the terminals.
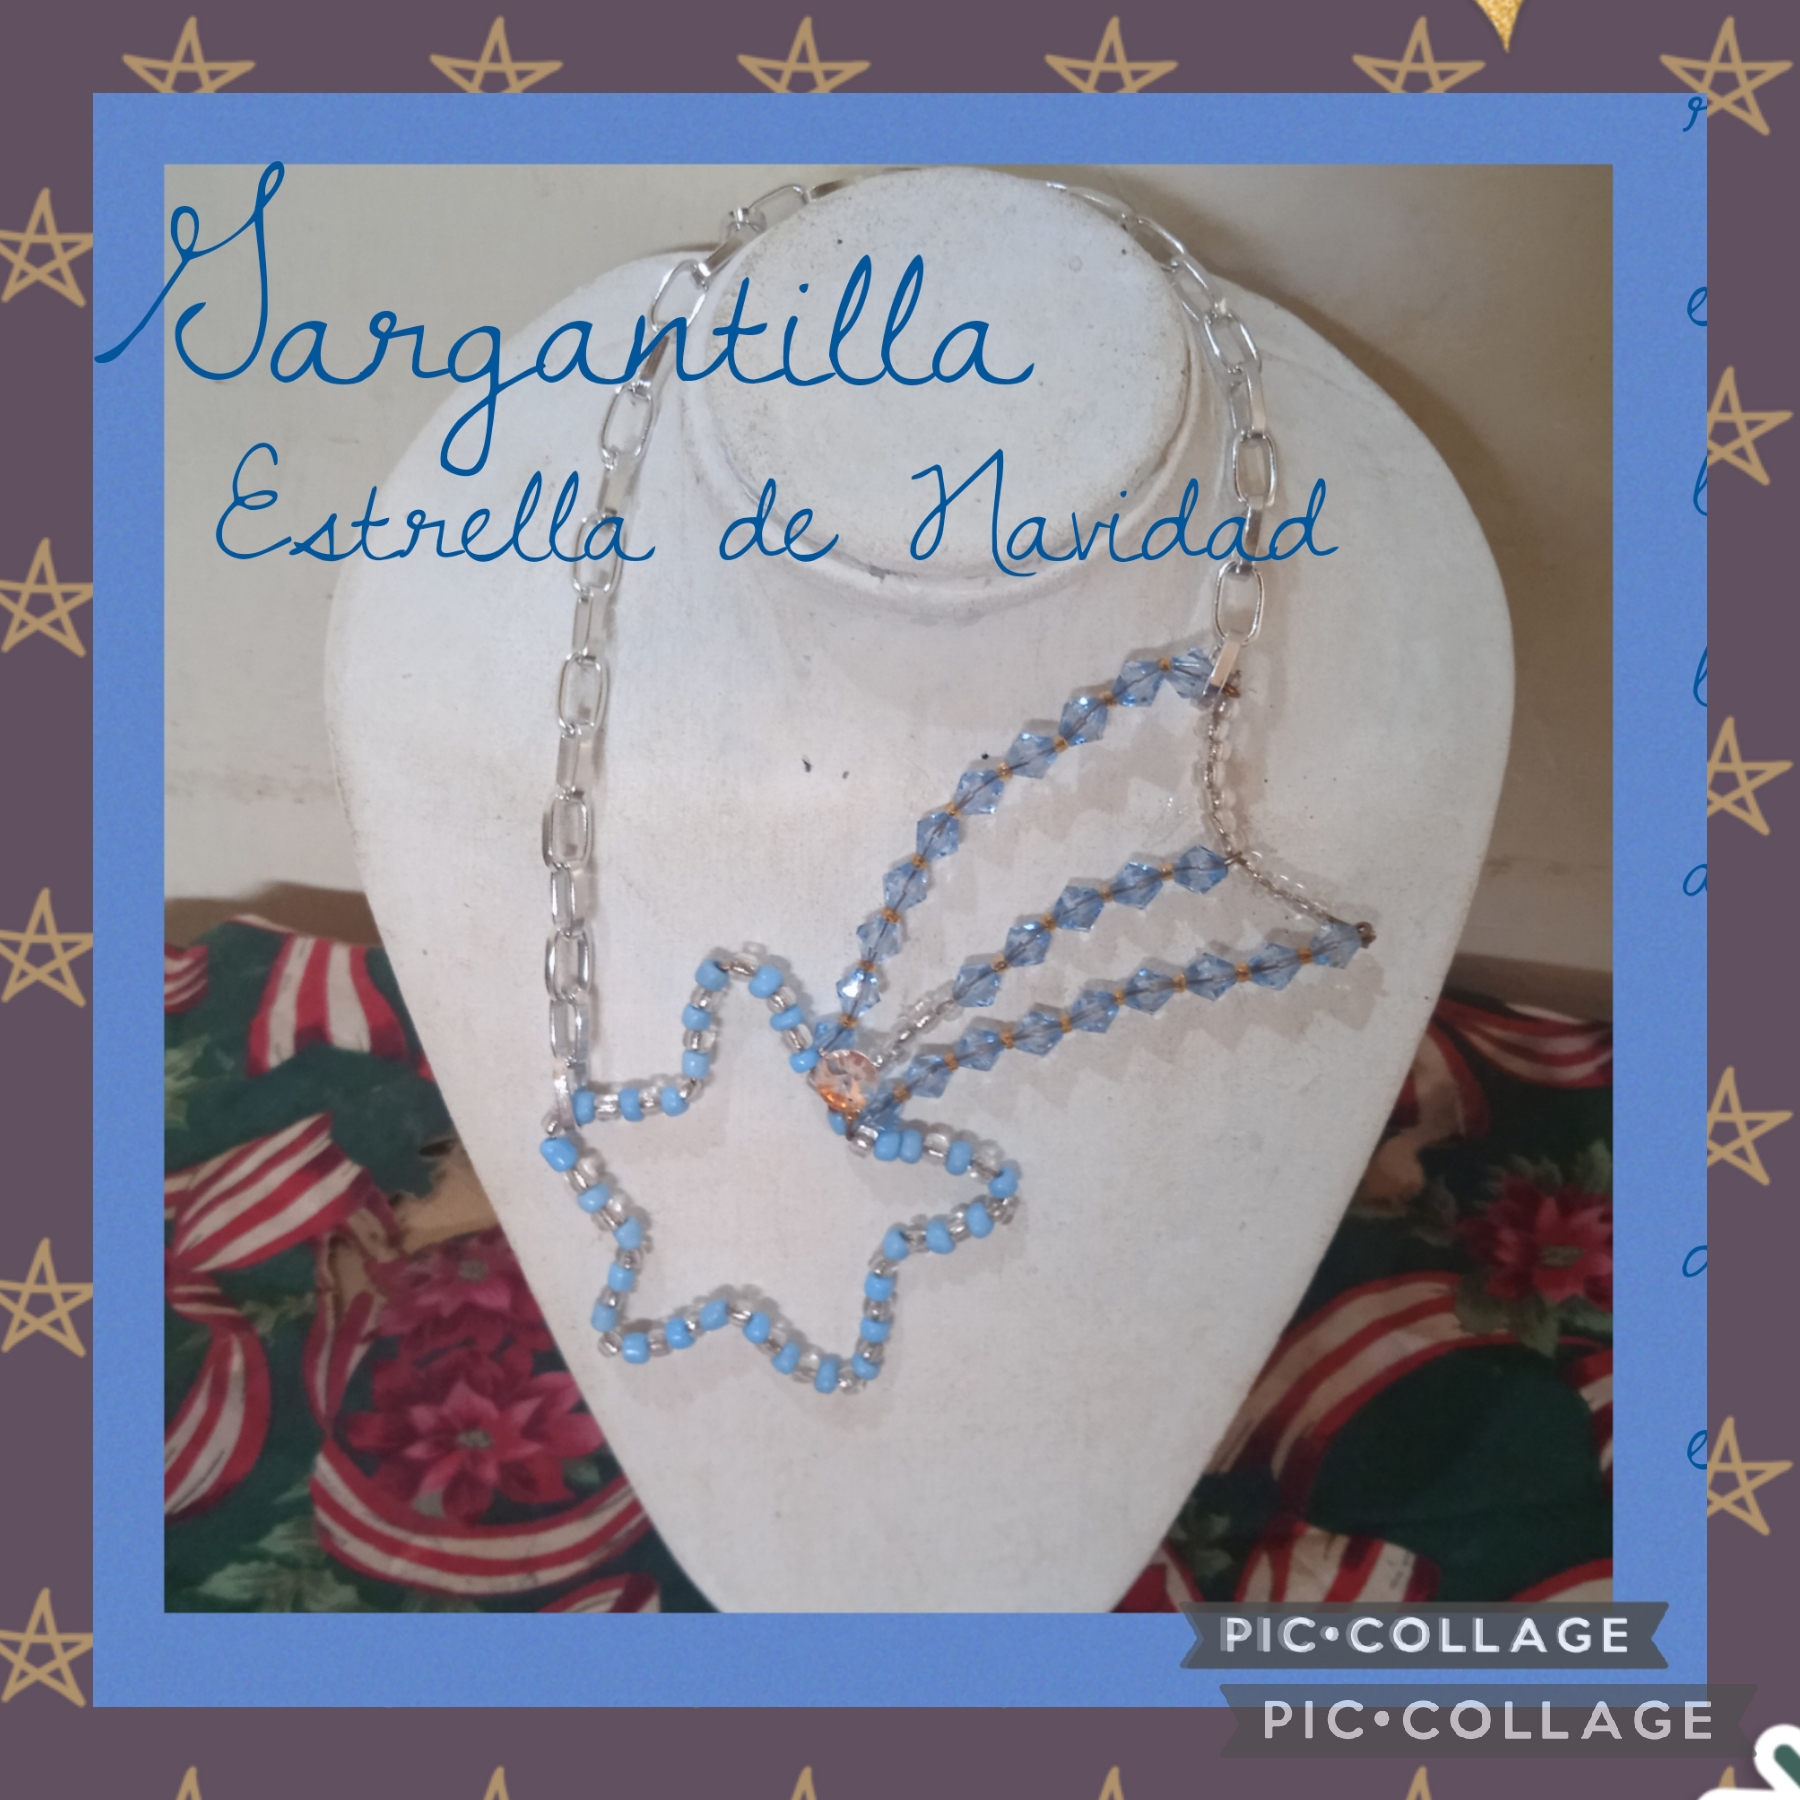
Artistas Creativos de la Joyería este es el resultado final de mi proyecto navideño de este día, como siempre agradezco mucho a todos los que visitan mi blog y me apoyan con sus valiosos comentarios, que tengan feliz noche y nos vemos en la próxima manualidad bye, bye
Creative Jewelry Artists this is the final result of my Christmas project today, as always I am very grateful to everyone who visits my blog and supports me with their valuable comments, have a happy night and see you in the next craft bye, bye
Las imágenes y redacción de este tutorial son de mi propiedad las fotos fueron tomadas con mi teléfono celular redmi 9 y las edité con una aplicación gratis del mismo.
Para traducir texto use Google traductor.
The images and writing in this tutorial are my property. The photos were taken with my Redmi 9 cell phone and I edited them with a free application.
To translate text use Google translator.

Muy bonito este accesorio, además es único en su estilo. Me encanta como se ve esa estrella adornando la gargantilla. ¡Excelente trabajo!
Un gran abrazo, querida @creacioneslelys, me gustó mucho tu comentario agradecida contigo por visitarme, que tengas una feliz noche, saluditos 🌹
Quedó hermoso espectacular
Gracias amiga, saluditos 🌹
aha that looks beautiful, thanks for sharing.keep sharing such great content.
Thanks for the support and good comment Diyhub.
Hola @nhaydu que bello le ha quedado amiga...una idea genial felicidades. Gracias por compartir
Cómo estás @katiuskamata, que linda me encantó verte por acá y saber que te gustó mi Estrella de Navidad ☺️ saluditos feliz día 🌹
Esta muy bonita amiga ese collar, esos cristales de rombo estan muy bonitos
Gracias @lismarcarolina, que linda, te mando un abrazo 🤗
Quedo lindo! Buena creatividad, amiga 👏
Gracias, @argemos me gustó tu comentario saluditos 😊
Es una belleza. Felicidades. Tu amiga brillará cuál estrella con este llamativo accesorio.
Bueno @artsugar según ella esa es su idea brillar mañana cuando enciendan la Estrella, 😂, gracias amiga por tu amable comentario, feliz noche.🌹