made with a piece of fabric to wear at Christmas.
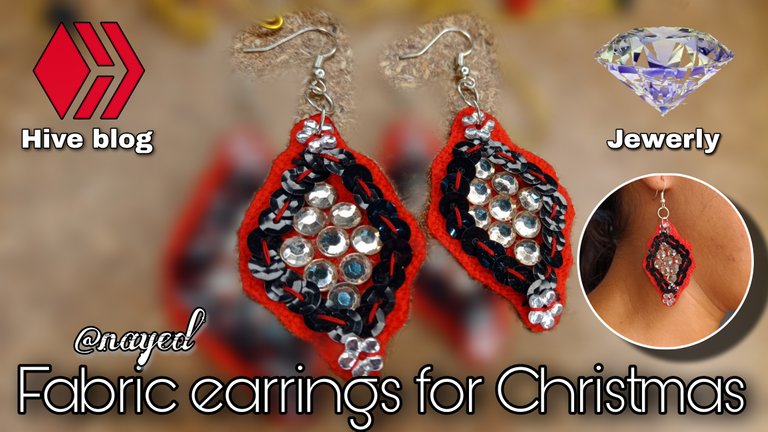
Hello dear friends of Jewerly is a pleasure to be sharing again here the elaboration of a nice design of earrings in this opportunity allusive to Christmas, I like to create from scratch that's why I wanted to do something different this time and at the same time take advantage of material that I have at home many times left over from other crafts, this material well used profit will let us make some nice and useful garments at the same time.
Hola queridos amigos de Jewerly es un gusto estar compartiendo nuevamente por acá la elaboración de un lindo diseño de pendientes en esta oportunidad alusivos a la navidad, me gusta crear apartir de cero es por eso que quise hacer algo diferente en esta oportunidad y al mismo aprovechar material que tengo en casa muchas veces que quedan de otras manualidades, este material de provecho bien utilizado nos dejara hacer algunas prendas lindas y a la vez útiles.

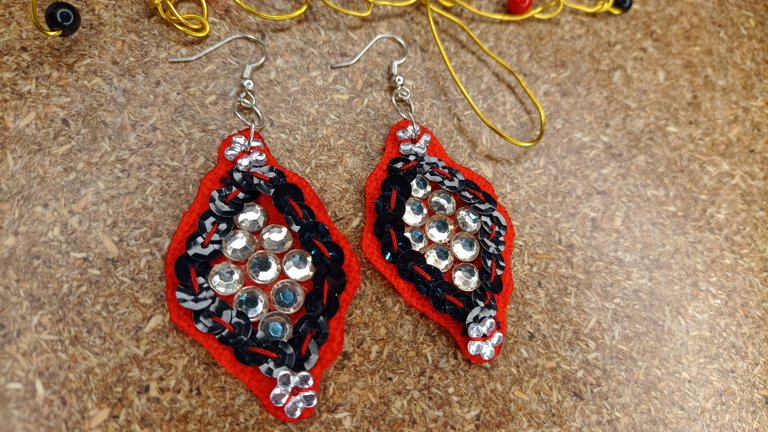
As I mentioned before, I used some materials to make the following earrings, as I wanted to make them allusive to Christmas I used a piece of red fabric, some adhesive stones and shiny sequins that I had left from a craft, it was a big challenge because I didn't know if they would look like I imagined, I made them baked, for more details I will list materials, tools and continue with the procedure.
Cómo les mencioné use material de provecho para realizar los siguientes pendientes, cómo quise hacerlos alusivos a la navidad utilice un retazo de tela roja, algunas piedras adhesivas y Lentejuelas brillantes que me quedaron de un manualidad, era un gran reto ya que no sabía si quedarían como lo imaginé, los hice cocidos, para más detalles en listare materiales, herramientas y continuaré con el procedimiento.

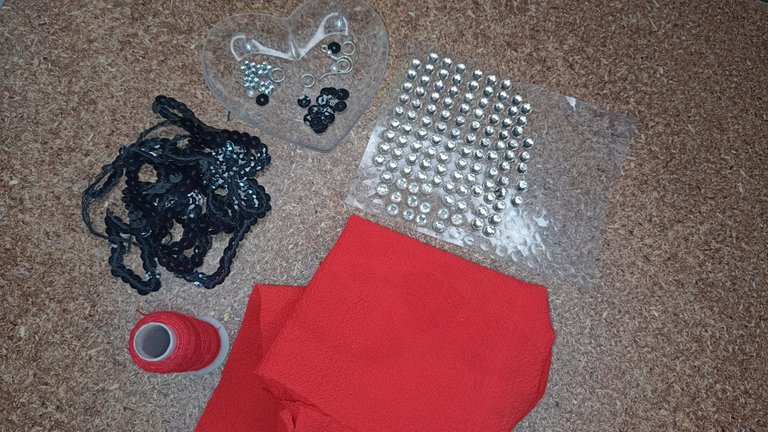
Materials:
- Piece of red fabric.
- Adhesive appliqués in the form of rhinestones.
- Flower appliqués.
- Black sequin strip.
- Costume jewelry ring.
- Hook of costume jewelry.
- Red sewing thread.
Materiales:
- Retazo de tela roja.
- Aplicaciones adhesivas en forma de perderias.
- Aplicaciones de flores.
- Tira de lentejuelas negra.
- Argolla de bisutería.
- Anzuelo de bisutería.
- Hilo Rojo de coser.

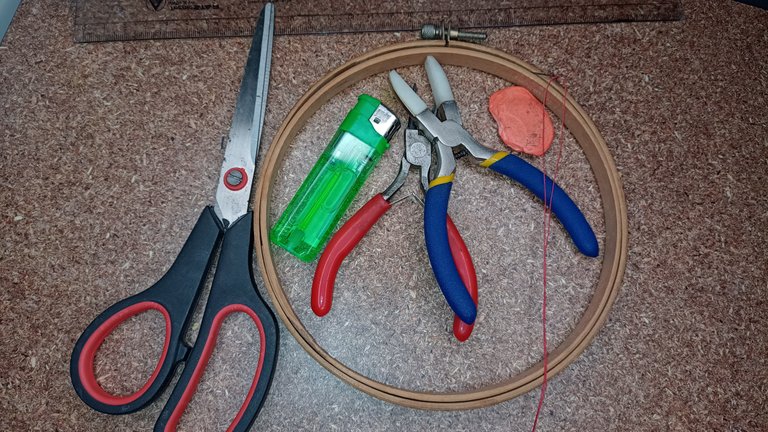
Tools:
- Fabric scissors.
- Measuring ruler.
- Sewing needle.
- Wooden base for sewing the fabric.
- Tinder.
- Jewelry tweezers.
Herramientas:
- Tijera para tela.
- Regla de medición.
- Aguja de coser.
- Base de madera para coser la tela.
- Yesquero.
- Pinzas de bisutería.

Procedure Step to Step:
Procedimiento paso a paso:
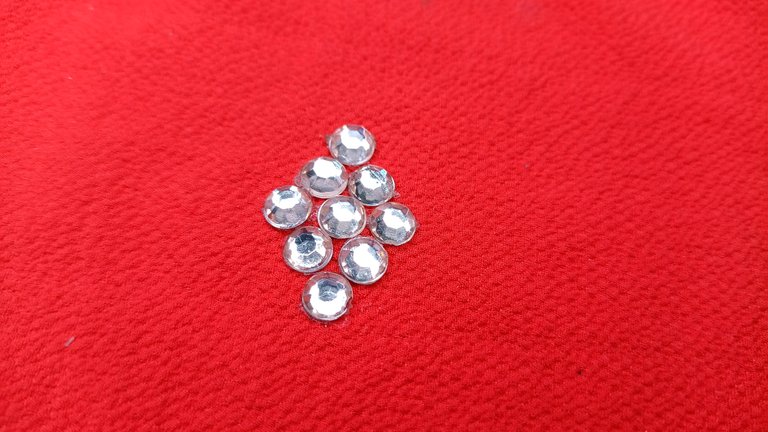
We start with step number 1 we must fix the fabric to the wooden base, this will help us to extend the fabric and thus be able to glue and sew the stones in an easier way, in this first step I glued the shiny adhesive applications giving shape to my design I was placing one by one to form a figure of 4 equal sides.
Empezamos con el paso número 1 debemos fijar la tela a la base de madera, esto nos ayudará a que la tela se extienda y así poder pegar y coser las piedras de una manera más fácil, en este primer paso pegué las aplicaciones brillantes de adhesivo dandole forma a mi diseño fui colocando una por una hasta formar una figura de 4 lados iguales.
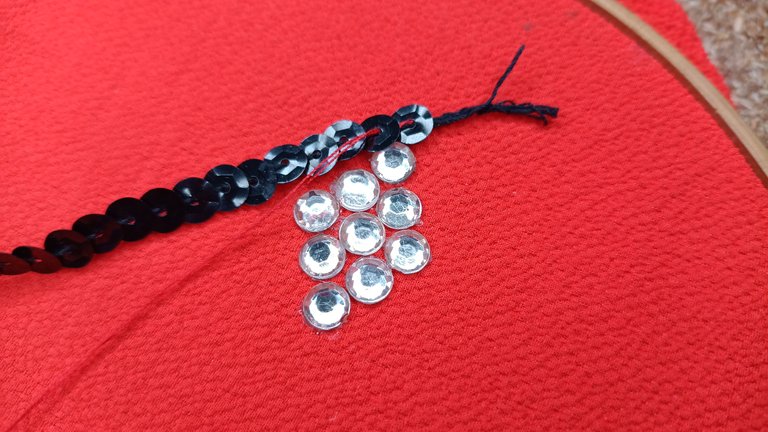
In step number two I prepared the needle with the thread to fix the sequin strip to the fabric, I had the idea of bordering the design I made with the adhesive applications, so once I had the needle with the thread ready I started to sew taking care of the stitches so that they were decorative, so I did it until I finished bordering the design.
En el paso número dos pase a preparar la aguja con el hilo para fijar la tira de lentejuelas a la tela, tuve la idea de bordear el diseño que realice con las aplicaciones de adhesivo, así que una vez que tuve lista la aguja con el hilo empecé a coser cuidando las puntadas para que quedaran de forma decorativa, así lo hice hasta terminar de bordear el diseño.
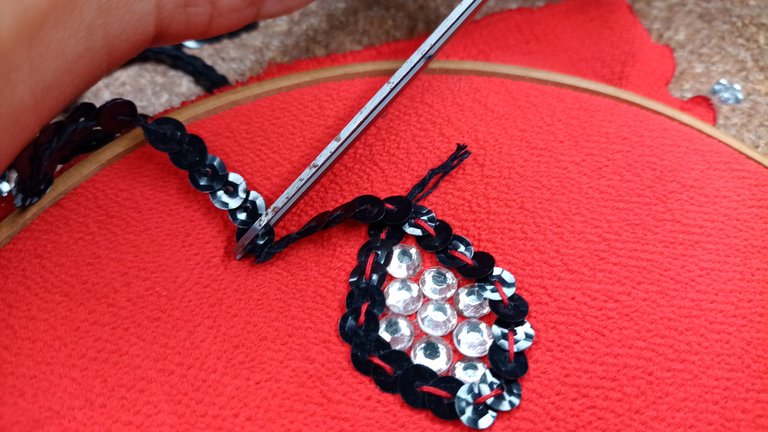
In step number 3 cut the leftover sequins and attach the flower applications with the thread at each end of the figure, I did this to add a Christmas detail as the bright flowers go very well, when finished fixing the thread finish with the back, it is important to give a good finish to each seam so that the piece does not lose its good look.
En el paso número 3 corte el sobrante de las lentejuelas y sujete las aplicaciones de flor cociendolas con el hilo en cada extremo de la figura, esto lo hice para agregar un detalle navideño ya que las florecitas brillantes le van muy bien, al terminar de fijar remate con el hilo por la parte de atrás, es importante dar un buen acabado a cada costura para que la pieza no pierda su buen lucir.
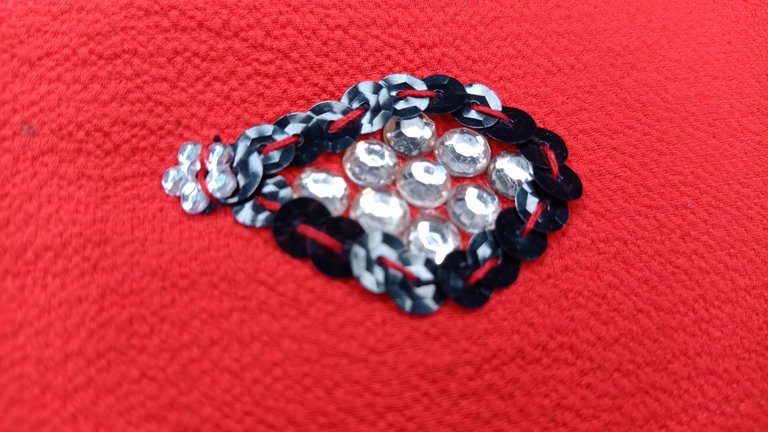
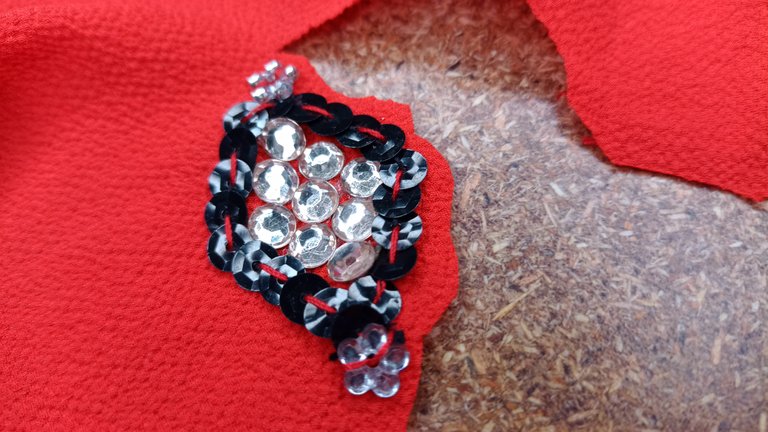
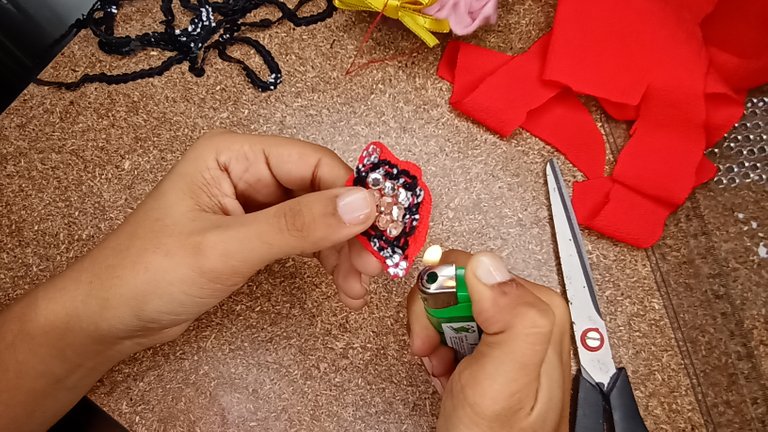
I continued with step number 4 where I cut the fabric giving a cloud shape around it, it is important that here we leave a little bit of fabric because in my case this fabric is sealed with fire to prevent it from falling apart, cut it completely and continue with step number 5 where with the tinder pass fire around the edge of the fabric to seal it and prevent it from falling apart.
Seguí con el paso número 4 dónde recorte la tela dando una forma de nube alrededor, es importante que aquí dejemos un poquito de tela porque en mi caso está tela se sella con fuego para evitar que se desbarate, recorte completamente y continúe con el paso número 5 dónde con el Yesquero pase fuego por todo el borde de la tela para así sellar y evitar que se deshile.
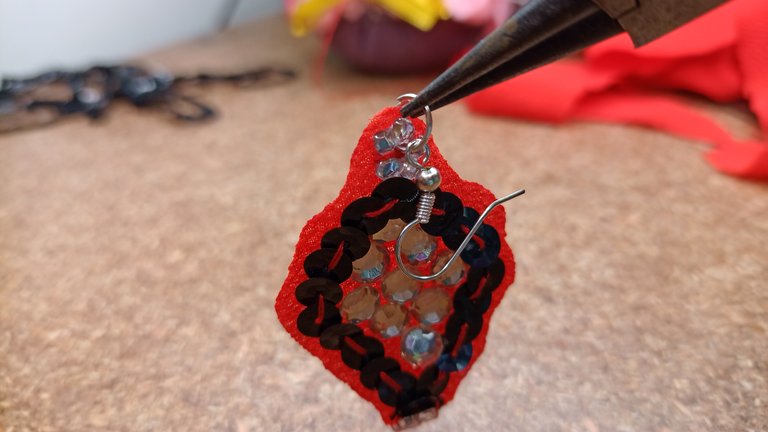
I proceeded with step number 6 to place the ring at one end of the design, pierce the fabric with the ring right in the middle of the flower application, and also place another ring with the hook to attach them to the base of the earring and thus be able to hang our design.
Procedí con el paso número 6 para ubicar la argolla a uno de los extremos del diseño, perfore con la argolla la tela justo en medio de la aplicación de flor, así mismo coloque otra argolla con el Anzuelo para sujetarlos a la base del pendiente y así poder colgar nuestro diseño.
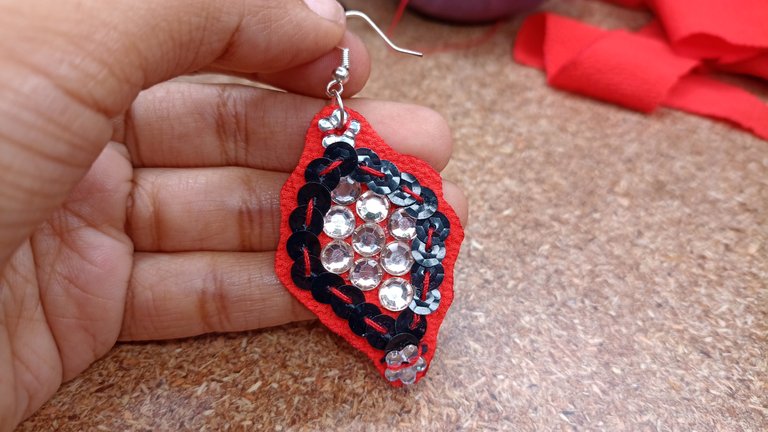

Ready our first earring, we repeat the same steps to make the pair of earring and thus complete our set of elegant earrings to wear at Christmas, they were very nice, as you can see they are easy to make we can make them at home with the fabric we have and some applications, it's all about imagination and practice, I hope you liked it very much and try to do it at home, once again I want to thank you for this beautiful space that allows us to create, learn and contribute our knowledge, Thank you for always ❤️.
Listo nuestro primer pendiente, repetimos los mismos pasos para realizar el par del pendiente y así completar nuestro juego de pendientes elegantes para usar en navidad, me quedaron muy lindos, cómo pueden ver son fáciles de realizar podemos hacerlos en casa con la tela que tengamos y algunas aplicaciones, todo es cuestión de imaginación y práctica, espero les haya gustado mucho e intentén hacerlo en casa, una vez más quiero agradecer por este hermoso espacio que nos permite crear, aprender y aportar nuestro conocimiento, Gracias por siempre ❤️.


▶️ 3Speak
Que bello te quedó. Me gusta mucho tu técnica de trabajo. Y como lo has dicho empezaste de cero y el resultado fue precioso.
Muchas bendiciones para tu post.
Hola amiga aprecio muchos tus palabras y valorar de mi trabajo, Gracias por leer y apoyar mi contenido. Éxito y bendiciones 🙏
Thank you for sharing this post on HIVE!
Your content got selected by our fellow curator hafizullah & you just received a little thank you upvote from us for your great work! Your post will be featured in one of our recurring compilations which are aiming to offer you a stage to widen your audience within the DIY scene of Hive. Next time make sure to post / cross-post your creation within the DIYHub community on HIVE and you will receive a higher upvote ;) Stay creative & HIVE ON!
Please vote for our hive witness <3
Hola muchas gracias agradezco el apoyo y la promoción, cómo hago para publicar de forma cruzada? Agradecería la información. Gracias 😊
Through ecency ☝️
Through peakd ☝️
Then select the community in the community part and tell something about the post or add the tile in the conversation part.
Thank you.
Thank you for the information I will keep it in mind 🙂
Congratulations @nayed! You have completed the following achievement on the Hive blockchain And have been rewarded with New badge(s)
Your next target is to reach 1000 upvotes.
You can view your badges on your board and compare yourself to others in the Ranking
If you no longer want to receive notifications, reply to this comment with the word
STOPTo support your work, I also upvoted your post!
Check out the last post from @hivebuzz:
Support the HiveBuzz project. Vote for our proposal!
Thanks ✨ I'm so Happy! ❣️
You're welcome @nayed! Have a nice day 😊👍
Nos encantó estos aretes con lentejuelas, se ven muy artesanales y muy hermosos pues resaltan bastante el contraste que le has dado, excelente video 😉
Me alegra que les haya gustado, gracias por su apreciación me motivan a seguir adelante... saludos muchas gracias por el apoyo!
Te han quedado muy lindo los aretes @nayed mucha suerte cariño.
Gracias linda por tu apreciación, Saludos