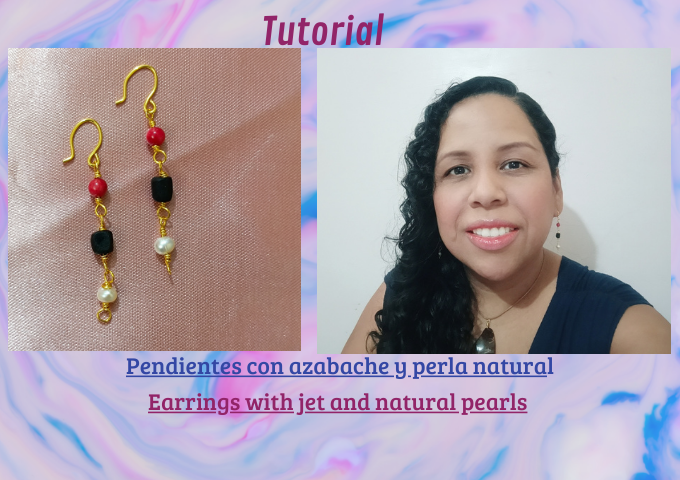
Hello friends of #hive happy and blessed weekend, wishing you well! today again this #jewelry community, in my previous post I talked about jet and its uses, and made reference to it is one of the main materials I use for making handmade jewelry, in pleasure to share this tutorial with you, and as the title says them I design some jet earrings with natural pearls, this model I had not done, I hope you like it.

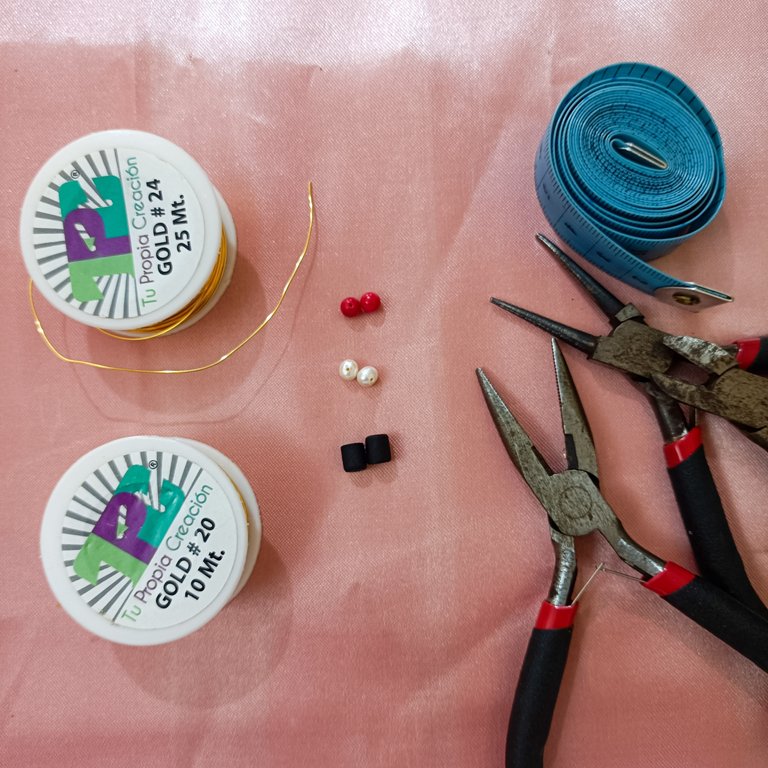
Materials
- Wire #20 #24 gauge
- Azabache beads and red imitation coral beads
- Natural pearl
- Tweezers tape measure
- If you don't have a cutting pliers, you can use a nail clipper to cut the wire, which is perfect for cutting this type of wire.
Step by Step
First
The first thing we will do is measure 18cm of #24 gauge wire and cut 3 parts of 6cm each.


Second
We take the red bead and make a rosary knot with 3 turns, we do the same procedure on the other side of the bead, the result is like the one shown in the picture N°5.


Third
Once the knot is made on both sides of the coral bead, we take the jet bead and make a rosary knot at one end, when we make the second knot, before completing it, we hook the red bead and proceed to close the knot, so the coral bead and the jet bead are united at once.


Fourth
We proceed to perform the same technique as above, but this time with the natural pearl bead.


Fifth
For the base of the earrings, we are going to use two wires #20 of 3cm each, (I always follow the measure of my index and middle fingers, for me that is the perfect measure, having so much time making jewelry you will have your own measures).
We bend the tip of the wire and shape it like an eye as shown in the image N°16.


With the help of a plier magician place the wire in the middle of the magician proceed to bend both sides (image N°17 and 18), straighten the eye of the wire so that it is in front of it as shown in the image N°21 and then make a small bend at the other end of the wire.


In the eye of the wire we hook the red beads, the jet and the pearls, close well and do the same with the other earring and ready we have our earrings as shown in the picture.


I hope you are encouraged to make these beautiful earrings, if you do not have the beads that I have used in this tutorial, remember that you can use any combination of beads or material that you like, there are no limitations just use your imagination.

I will be more active in this community showing you what I am passionate about handmade jewelry I say goodbye with a hug.

Hola amigos de #hive feliz y bendecido fin de semana, deseando que se encuentre bien! hoy nuevamente en esta comunidad de #jewelry, en mi publicación anterior hablaba sobre el azabache y sus usos, y hacía referencia a que es uno de los principales materiales que utilizo para la elaboración de joyería artesanal, en gusto compartir este tutorial con ustedes, y como el titulo los dice diseñe unos pendientes de azabache con perlas naturales, este modelo no lo había realizado, espero les guste.

Materiales
- Alambre calibre #20 #24
- Cuentas de azabache y cuentas rojas imitación de coral
- Perla natural
- Pinzas cinta métrica
- De no tener una pinza de corte pueden utilizar para cortar el alambre un cortaúñas les sirve perfectamente para cortar este tipo de alambre.
Paso a Paso
Primero
Lo primero que haremos es medir 18cm de alambre calibre #24 y cortaremos 3 partes de 6cm cada uno.


Segundo
Tomamos la cuenta roja y hacemos un nudo rosario con 3 vueltas, hacemos el mismo procedimiento al otro lado de la cuenta, el resultado es como el que se aprecia en la imagen N°5


Tercero
Una vez realizado el nudo en ambos lados de la cuenta de coral, tomamos la cuenta de azabache y realizamos un nudo rosario en un extremo, al hacer el segundo nudo, antes de completar el mismo enganchamos la cuenta roja y procedemos a cerrar el nudo, así queda unido de una vez la cuenta de coral con la de azabache.


Cuarto
Procedemos a realizar la misma técnica anterior, pero esta vez con la cuenta de la perla natural


Quinto
Pará la base de los zarcillos o pendientes, vamos a utilizar dos alambres #20 de 3cm cada uno, (yo siempre me guio por lo que mide mis dedos índice y medio, para mi esa es la medida perfecta, al tener tanto tiempo realizando joyería vas teniendo tus propias medidas).
Doblamos la punta del alambre y le damos forma parecido a un ojo tal como se muestra en la imagen N°16

Con la ayuda de un mago de una pinza colócalos el alambre a mitad del mago procedemos a doblar ambos lados (imagen N°17 y 18), enderezamos el ojo del alambre de modo que quede al frente del mismo como se puede apreciar en la imagen N°21 seguidamente se realiza un pequeño dobles en el otro extremo del alambre


En ojo del alambre enganchamos las cuentas rojas el azabache y las Perlas cerramos bien y realizamos lo mismo con el otro pendiente y listo tenemos nuestros pendientes tal como se muestra en la imagen.


Espero se animen a realizar estos bellos pendientes, sino tienes las cuentas que en este tutorial he utilizado, recuerda que puedes utilizar cualquier combinación de cuentas o material que te guste, no hay limitaciones solo debes usar tu imaginación.

Estaré más activa en esta comunidad mostrándoles lo que me apasiona la joyería artesanal Me despido con un abrazo.

Photos / Fotos: My authorship
Designs / Diseño: @monicamm
Photo Editing / Edición de Fotos: Canva


Saludos querida @monicamm que hermosos zarcillos con azabache, se ven hermosos, nos gusta mucho tu tutorial lo has explicado muy bien y te quedan preciosos, felicidades 👏
! Gracias! espero estar más activa en la comunidad☺️
Hola amiga, quedaron hermosos los zarcillos, me encantaron los colores. Saludos y buenos deseos.
Hola, gracias por los buenos deseos☺️ y por el apoyo
This looks so beautiful and it looks good on you too 🤗thank you so much for the guide!
Thank you for your comment!😊
Están muy hermosos y lo mejor es el contraste de color de la pieza preciosa que tienes cómo collar de juego, me gusta mucho, también me encanta el arte de la bisutería, ¿Vendes tus piezas aquí? ¡Si no lo haces deberías hacerlo! hay una comunidad de emprendimiento nuevecita en Holos&Lotus.
Hola, gracias😊 no sabia que había una comunidad acá de emprendimiento, voy a buscarla.... Gracias por la información🤗
Amiga son hermosos, @monicamm una explicación excelente! Gracias, me encanta el azabache son protectores y le dan un toque especial a la pieza!
Thank you for sharing this amazing post on HIVE!
Your content got selected by our fellow curator @hafizullah & you just received a little thank you via an upvote from our non-profit curation initiative!
You will be featured in one of our recurring curation compilations and on our pinterest boards! Both are aiming to offer you a stage to widen your audience within and outside of the DIY scene of hive.
Join the official DIYHub community on HIVE and show us more of your amazing work and feel free to connect with us and other DIYers via our discord server: https://discord.gg/mY5uCfQ !
If you want to support our goal to motivate other DIY/art/music/homesteading/... creators just delegate to us and earn 100% of your curation rewards!
Stay creative & hive on!