Saludos a todas las hermosas e increíbles abejitas que día a día llenan a este maravilloso ecosistema llamado #hive y sobretodo a esta comunidad con sus diferentes creaciones, el día de hoy quise formar parte de ellas y por eso el motivo de este post, dónde les estaré dejando los materiales utilizados, así como también el proceso de creación paso a paso, espero que les guste.
🍬 MATERIALES 🍬
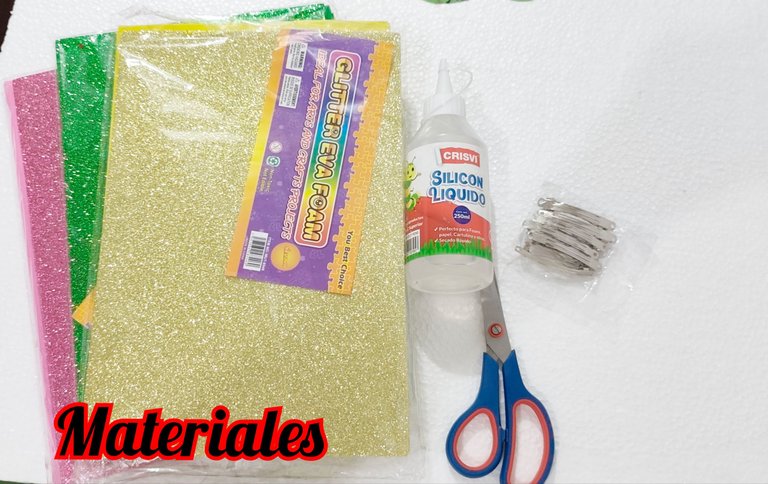
🍬 Foami escarchado verde.
🍬 Foami escarchado amarillo.
🍬 Foami escarchado fucsia.
🍬 Silicón caliente.
🍬 Pinza.
🍬 Tijera.
🍬 Lápiz.
🍬 Regla.
🍬 Pistola de silicón caliente.
🍬 PASO A PASO 🍬
🍬 PASO 1:
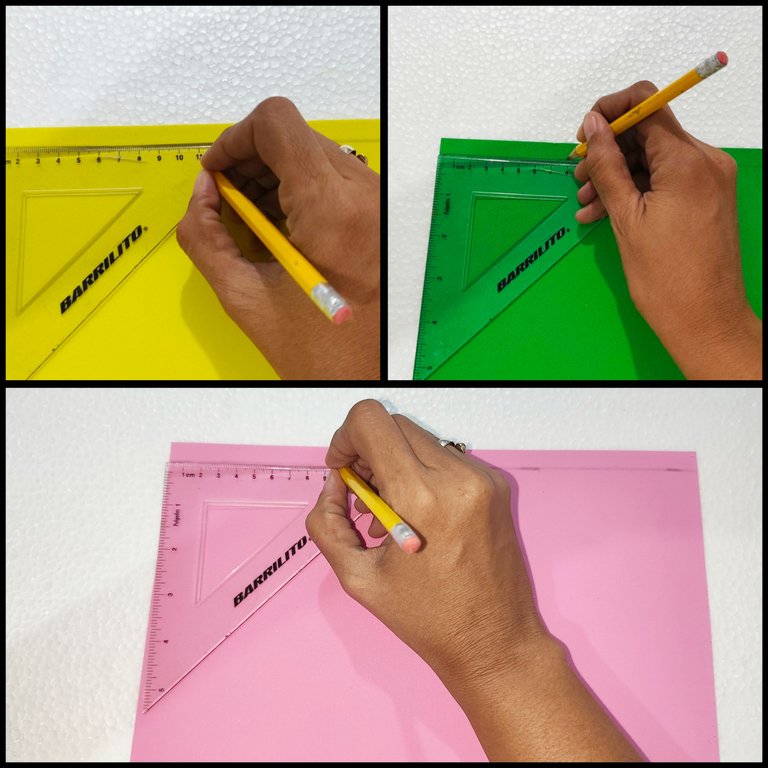
Tome una regla y el lápiz y marco encima de el foami de color verde una linea de 1 cm de ancho y a todo lo largo de la pieza del foami, luego repito el el proceso en el foami escarchado amarillo y en el foami escarchado color fucsia.
🍬 PASO 2:
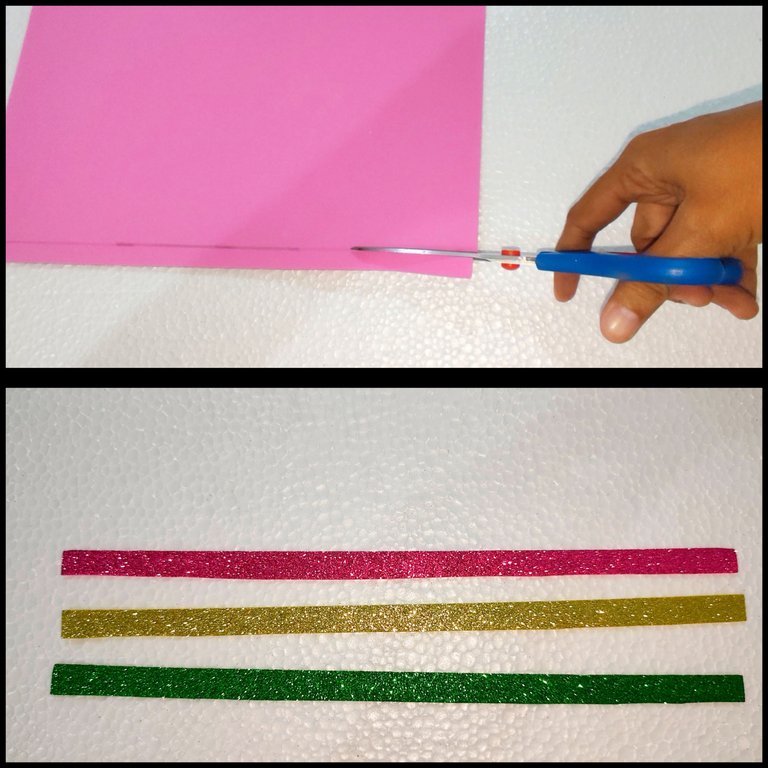
Con la tijera recortamos las tres piezas que marqué en los diferentes foamis escarchado estás deben quedar del mismo ancho.
🍬 PASO 3:
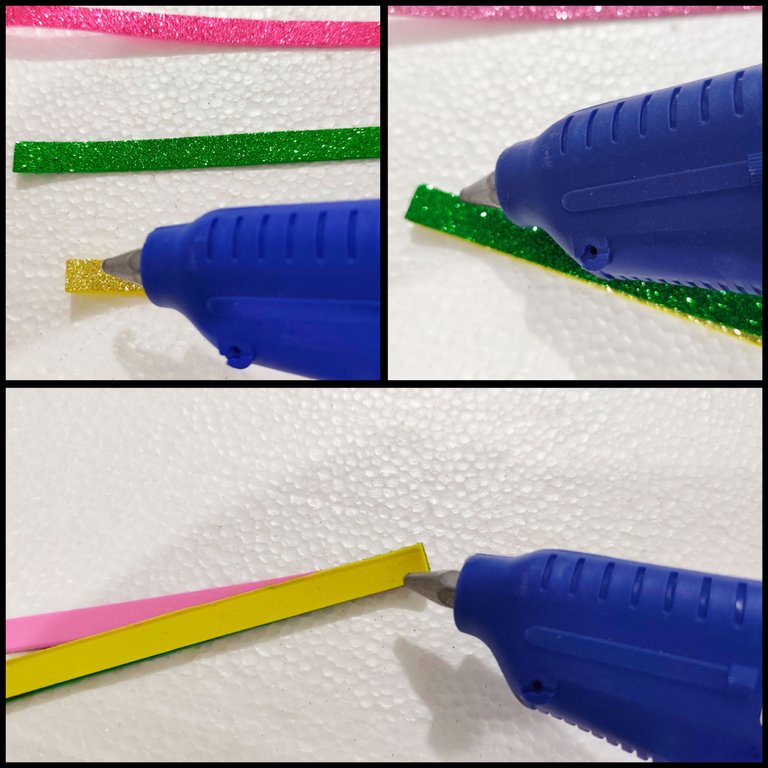
Colocó las tres piezas de foami escarchado que recortamos una encima de la otra, previamente encendimos la pistola de silicón caliente y aplicamos el silicón con uno de los extremos, y así hasta pegar los tres extremos.
🍬 PASO 4:
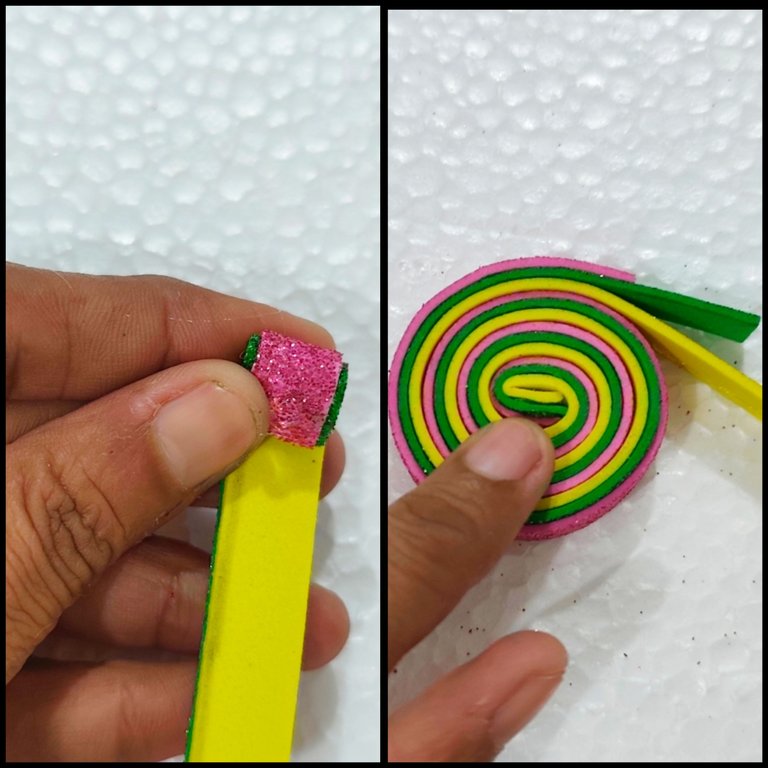
Cuando las puntas ya están pegadas procedí a enrollar, cuidando que todas queden juntas y para evitar que se muevan les voy aplicando silicón caliente.
🍬 PASO 5:
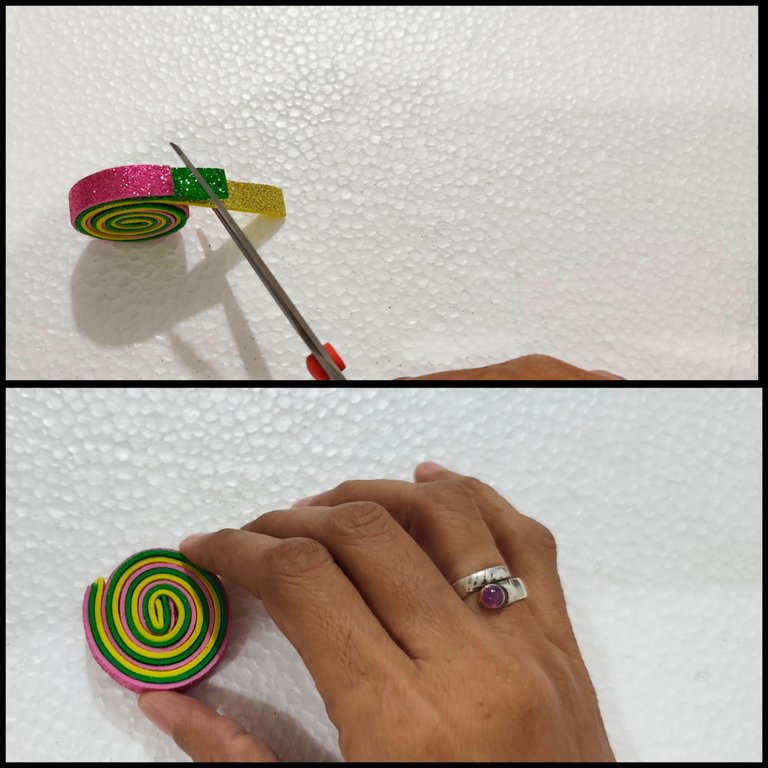
Cuando enrollé las tiras de Foami quedaron las puntas disparejas, así que tome la tijera y recorté de manera que quedarán pareja.
🍬 PASO 6:
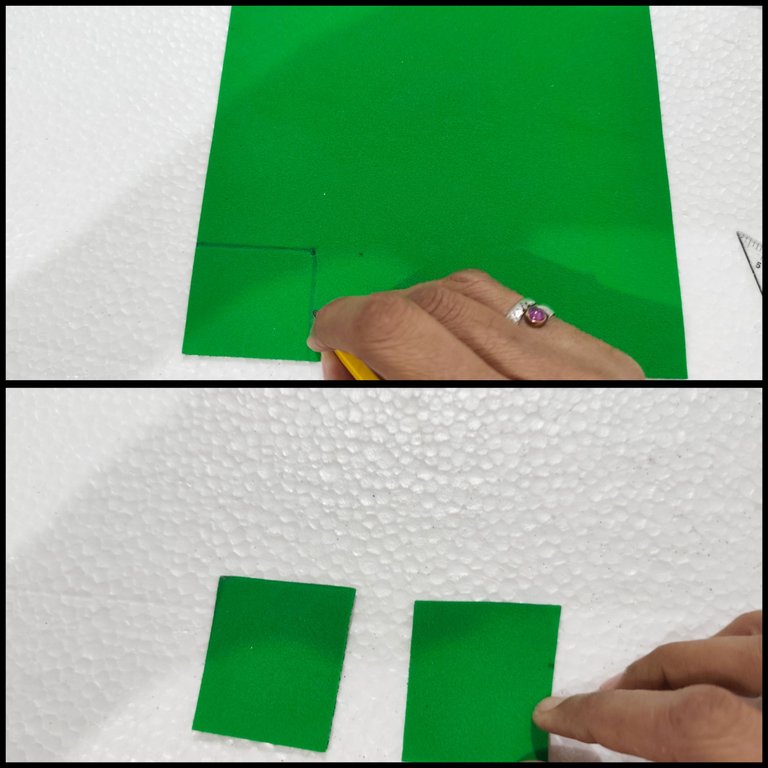
Ahora tomo el foami verde escarchado y ayudándome con la regla y el lápiz dibujo dos cuadrados de unos 5 cm de largo y de ancho, y recortamos.
🍬 PASO 7:
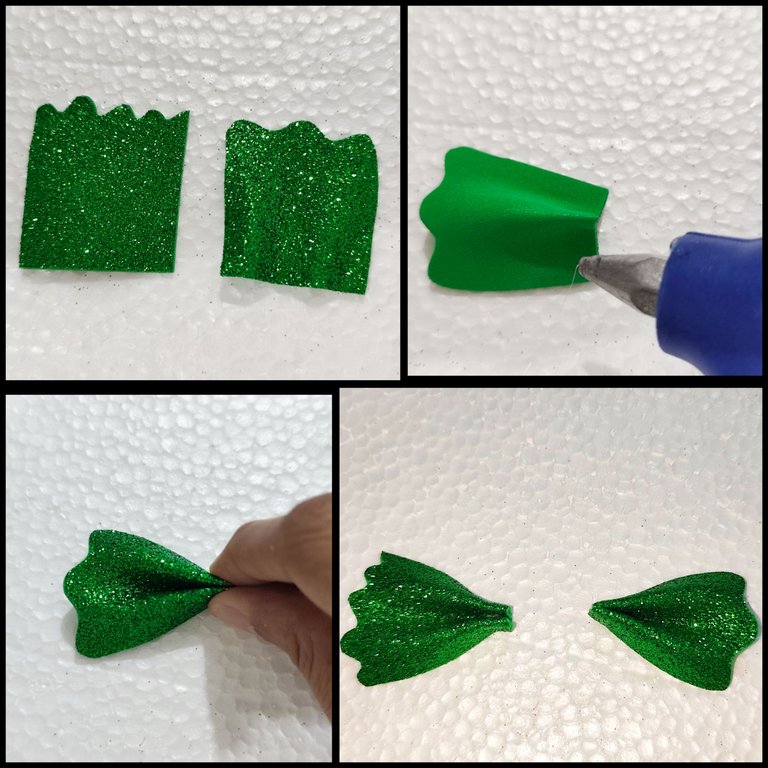
A las dos piezas que recorté les vuelvo a recortar la orilla, luego del otro lado aplicó silicón caliente y unimos.
🍬 PASO 8:
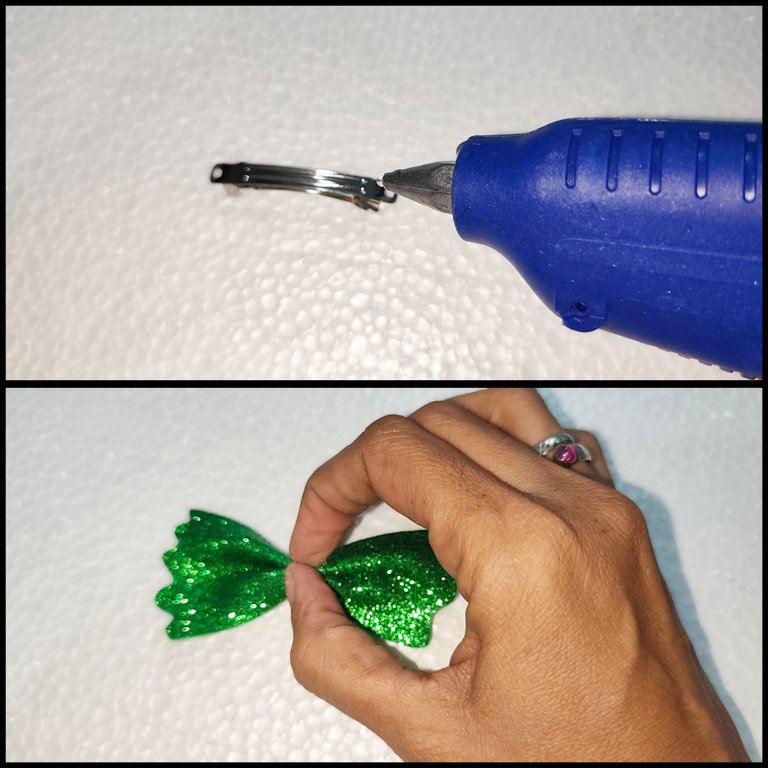
Tomamos la pinza y le aplicamos silicón caliente y pegamos las dos piezas verdes que hice anteriormente a la pinza.
🍬 PASO 9:
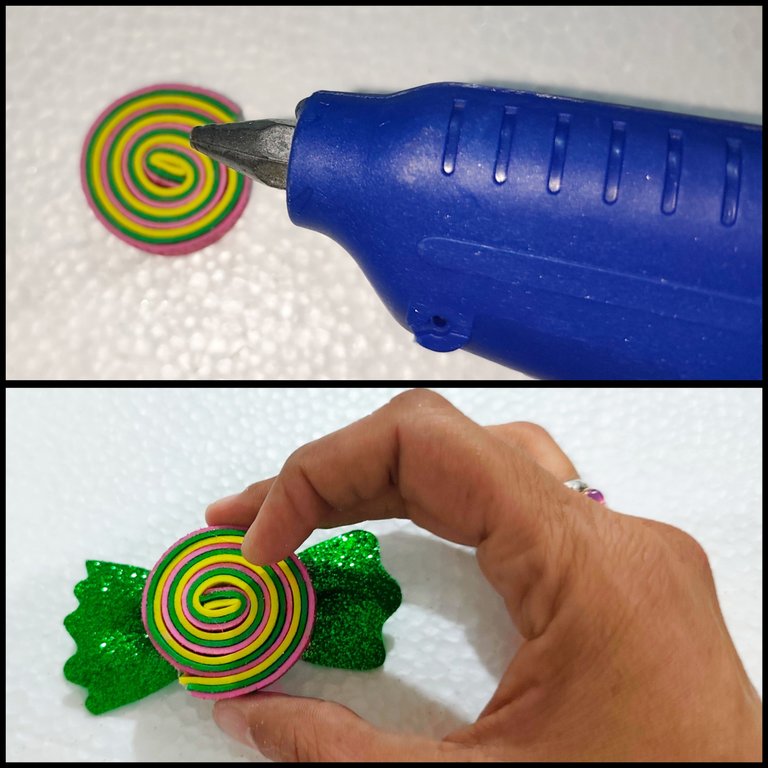
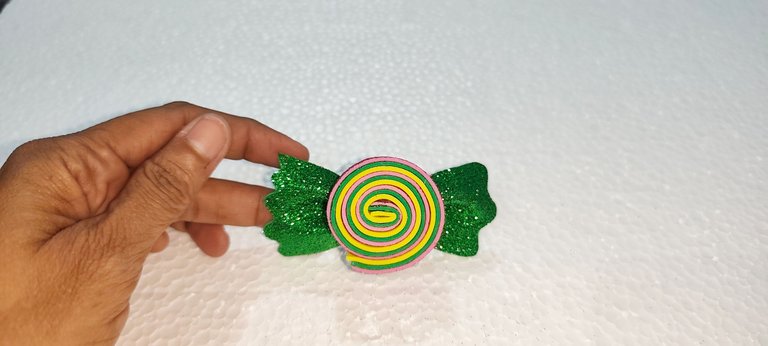
Tomé la piezas grande en dónde enrollé los foamis y le aplicó silicón caliente y pegamos encima de las piezas verdes pegadas a la pinza y listo terminamos.
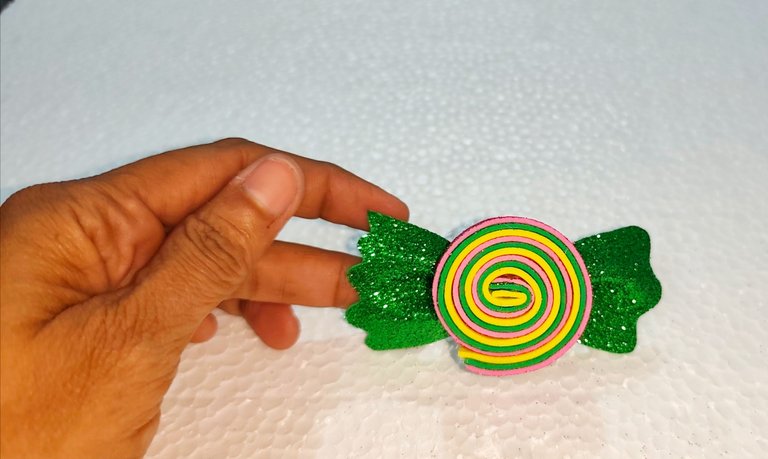
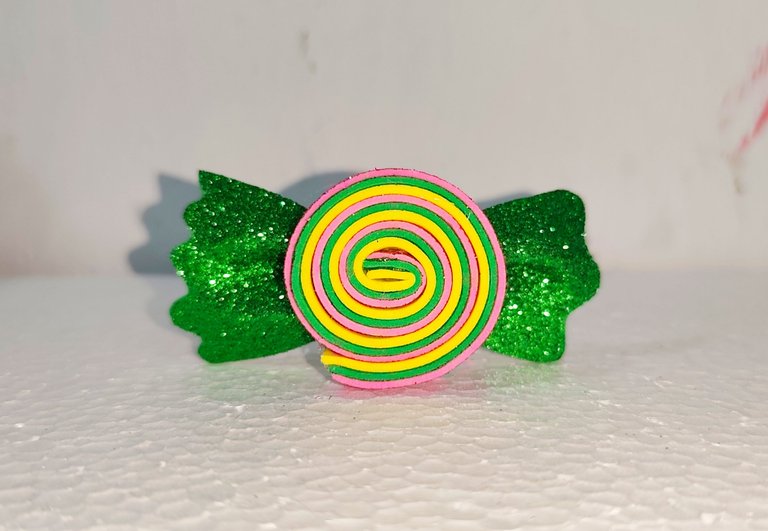
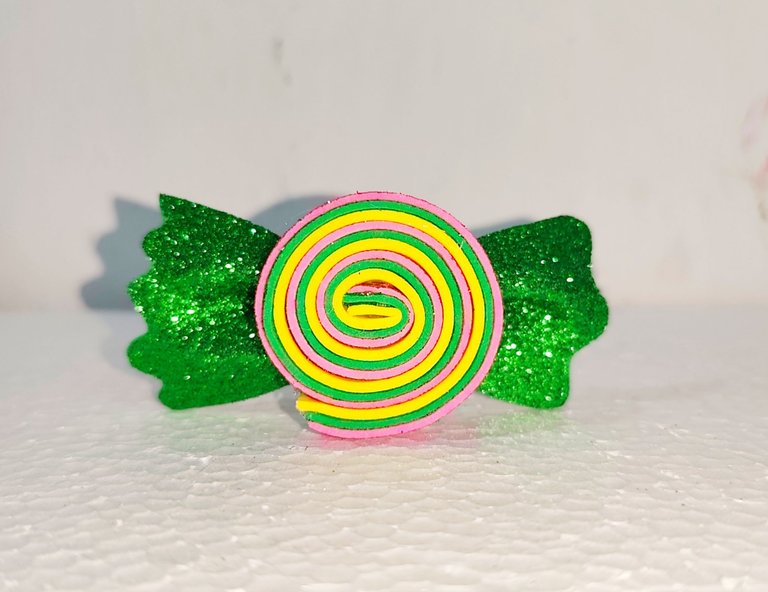
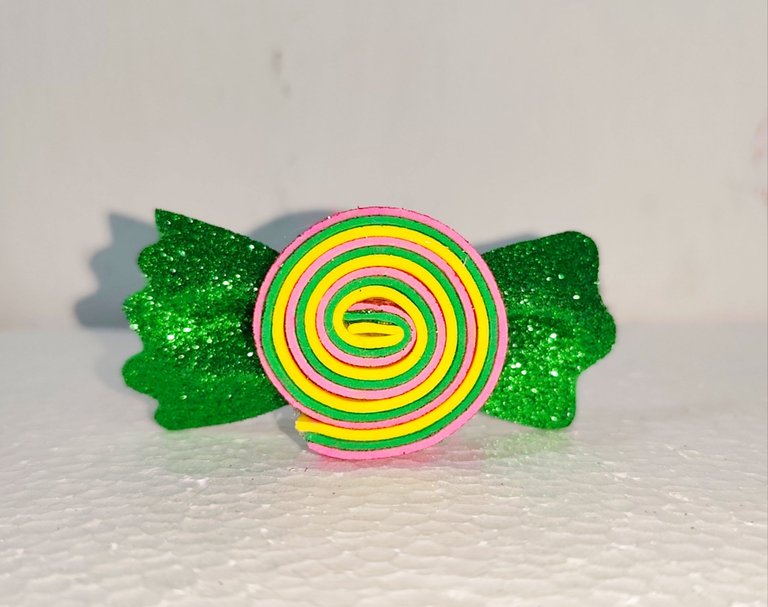
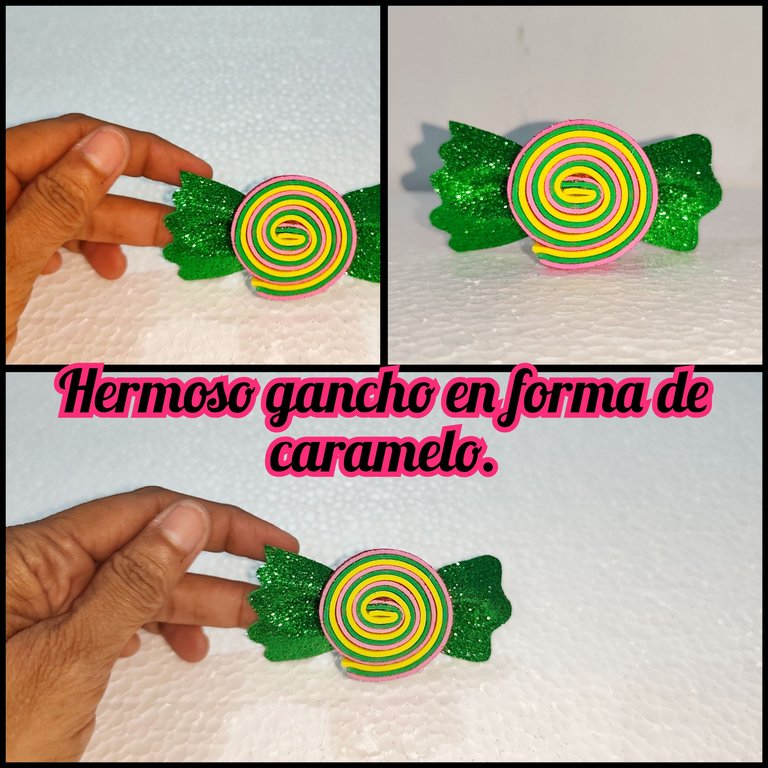
Díganme que les gustó está hermosa pinza de foami en forma de caramelo que he creado para todos ustedes, estás pueden ser elaborada con diferentes colores y de diferentes tamaños, yo disfrute muchísimo al realizarla así que espero les guste y de antemano muchísimas gracias por el apoyo.
🍬 CRÉDITOS 🍬
Todas las fotografías fueron tomadas con mi teléfono Xiaomi redmi y son de mi propiedad, utilice el programa polish y el traductor.


Greetings to all the beautiful and incredible little bees that day by day fill this wonderful ecosystem called #hive and above all to this community with their different creations, today I wanted to be part of them and that is the reason for this post, where I will be leaving the materials used, as well as the creation process step by step, I hope you like it.
🍬 MATERIALS 🍬
🍬 Green frosted foami.
🍬 Yellow frosted foami.
🍬 Fuchsia frosted foami.
🍬 Hot glue.
🍬 Tweezers.
🍬 Scissors.
🍬 Pencil.
🍬 Ruler.
🍬 Silicone hot melt gun.
🍬 STEP BY STEP 🍬
🍬 STEP 1:
Take a ruler and pencil and mark on the green foami a line 1 cm wide and along the whole length of the foami piece, then repeat the process on the yellow frosted foami and on the fuchsia frosted foami.
🍬 STEP 2:
With the scissors we cut out the three pieces that I marked on the different frosted foamis, these should be of the same width.
🍬 STEP 3:
He placed the three pieces of frosted foami that we cut out one on top of the other, previously we turned on the hot silicone gun and applied the silicone with one of the ends, and so on until the three ends were glued.
🍬 STEP 4:
When the ends are already glued, I proceeded to roll them up, making sure that they all stay together and to prevent them from moving I applied hot silicone.
🍬 STEP 5:
When I rolled the Foami strips, the ends were uneven, so I took the scissors and trimmed them so that they would be even.
🍬 STEP 6:
Now I take the frosted green foami and helping me with the ruler and pencil I draw two squares about 5 cm long and wide, and cut them out.
🍬 STEP 7:
To the two pieces that I cut out I cut the edge again, then on the other side I apply hot silicone and we join them together.
🍬 STEP 8:
We take the clamp and apply hot silicone and glue the two green pieces I made earlier to the clamp.
🍬 STEP 9:
I took the big piece where I rolled the foamis and applied hot silicone and glued it on top of the green pieces glued to the clamp and we were done.
Let me know how you like this beautiful candy shaped foami pin that I have created for all of you, these can be made with different colors and different sizes, I really enjoyed making it so I hope you like it and thank you very much in advance for your support.
🍬 CRÉDITS 🍬
All pictures were taken with my Xiaomi redmi phone and are my property, I used polish and translator.
~~~ embed:1907278016641638821?t=MkzKKLRFccdph0Kfh4t10Q&s=19 twitter metadata:TWF5ZWxpbjIwMjF8fGh0dHBzOi8vdHdpdHRlci5jb20vTWF5ZWxpbjIwMjEvc3RhdHVzLzE5MDcyNzgwMTY2NDE2Mzg4MjF8 ~~~
The hair clip is beautiful and simple, the color combination is unique.
Thank you for your comment, if I did something that was fast but it will look nice, thank you. 🌹
Bastante ingenioso quedó muy bien ese gancho
Gracias mi corazón.🌹🌹🌹
Congratulations @mayifiestas! You have completed the following achievement on the Hive blockchain And have been rewarded with New badge(s)
Your next target is to reach 140000 upvotes.
You can view your badges on your board and compare yourself to others in the Ranking
If you no longer want to receive notifications, reply to this comment with the word
STOPCheck out our last posts:
Muchísimas gracias
¡Eso es genial @mayifiestas! ¡Estás haciendo un gran trabajo en Hive! ¡Seguimos animándote para tu próxima meta!
That hair clip is really cute and elegant. The color is really good. Thanks for sharing this with us.