*** BIENVENIDOS A MI BLOG***
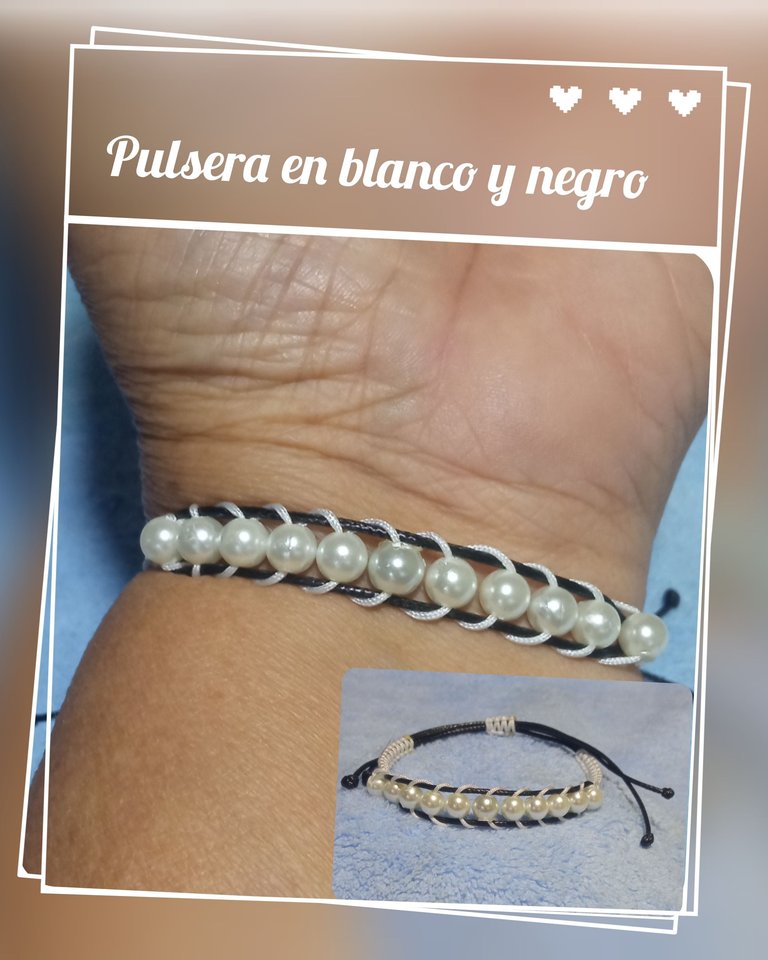
Hola, hola comunidad de #Hive y comunidad de #Jewelry deseo estén todos bien y que hayan teniendo una buena semana la cual espero haya Sido muy productiva para todos en la comunidad y ya prestos para disfrutar de un buen fin de semana y recargar energías, Nuevamente por acá con ustedes sigo elaborando pulseras al igual que collares , gargantillas, aretes o zarcillos , en esta oportunidad les traigo una linda pulsera en blanco y negro en la cual utilicé hilo piel de serpiente No 1 , hilo chino y perlas se ve muy bonita , la elaboración fácil , solo hay que estar pendiente que los hilos queden bien al momento de cruzar la perla, espero les guste el proyecto ,asi que sin mas aqui les dejo el paso a paso o tutorial.
*** WELCOME TO MY BLOG ***
Hello, hello #Hive community and #Jewelry community I wish you are all well and have had a good week which I hope has been very productive for everyone in the community and ready to enjoy a good weekend and recharge energies, Again here with you I continue making bracelets as well as necklaces, chokers, earrings or earrings, this time I bring you a nice bracelet in black and white in which I used snakeskin thread No. 1, Chinese thread and pearls, earrings or earrings, this time I bring you a nice bracelet in black and white in which I used snakeskin thread No 1, Chinese thread and pearls looks very nice, easy development, just be aware that the threads are well at the time of crossing the pearl, I hope you like the project, so without further ado here I leave the step by step or tutorial.
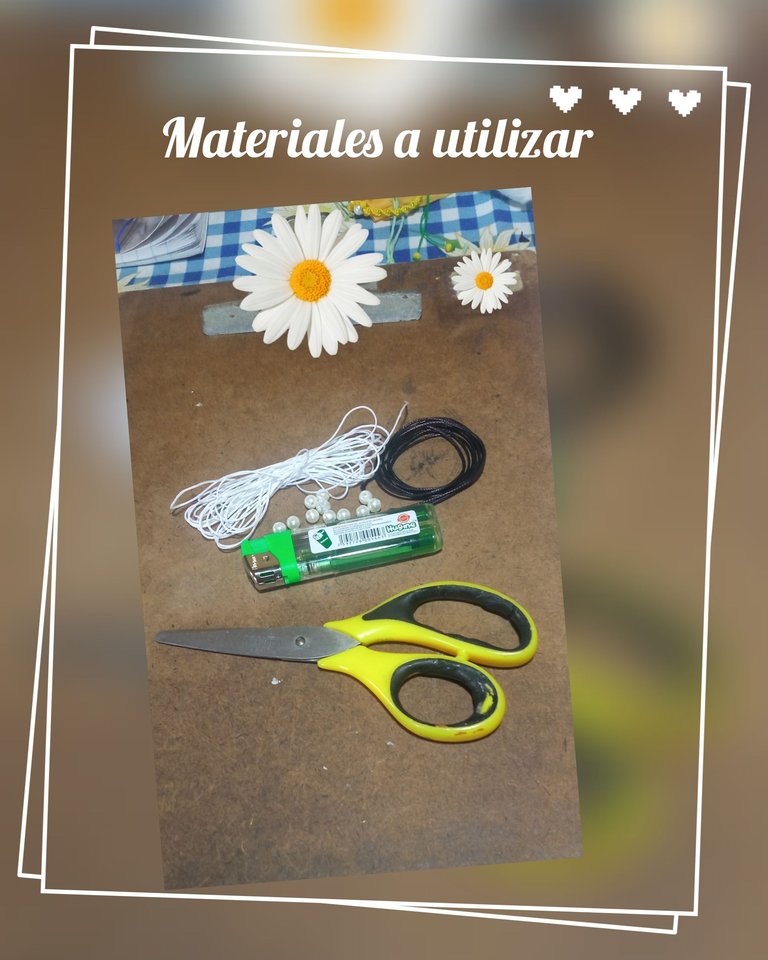
Materiales a utilizar
☑️ Hilo piel de serpiente de 1 mm.
☑️ Hilo chino.
☑️ 11 Perlas acrílicas No 6.
☑️ Yesquero o encendedor.
☑️ Tijeras.
☑️ Tabla con gancho.
☑️ Cinta métrica.
Materials to be used
☑️ 1 mm snakeskin thread.
☑️ Chinese thread.
☑️ 11 No 6 acrylic beads.
☑️ Tinder or lighter.
☑️ Scissors.
☑️ Hook and loop board.
☑️ Tape measure.
Tutorial o paso a paso
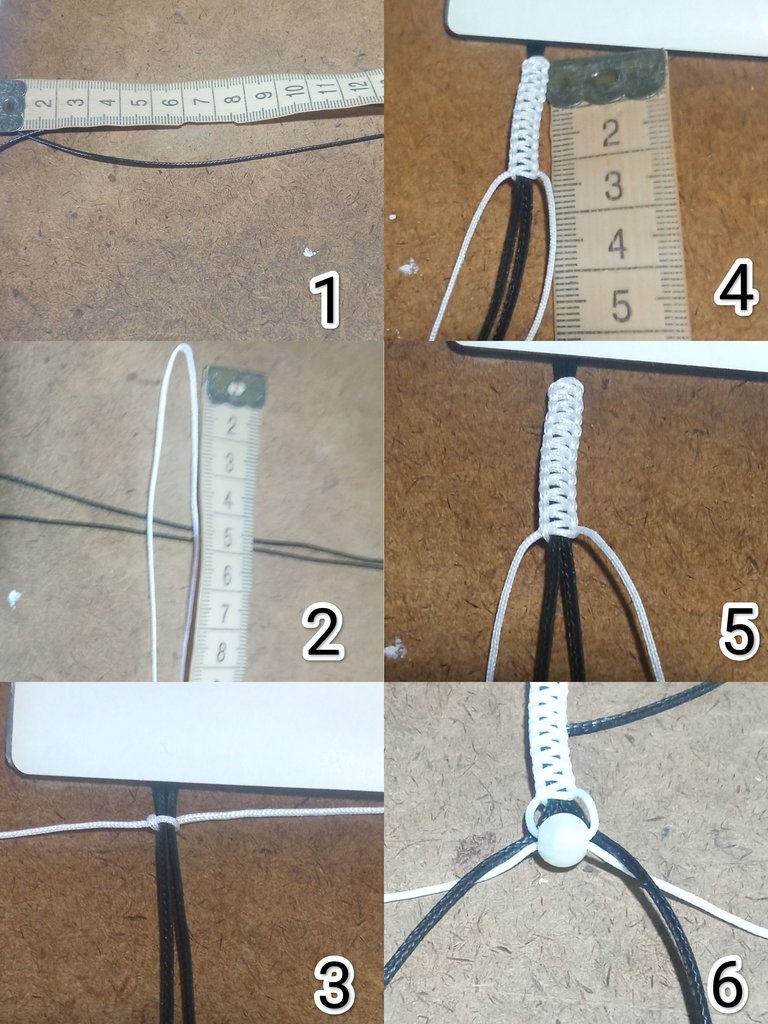
Comienzo midiendo y cortando 2 hilos piel de serpiente No 1 de 40 cm cada uno , estos van a ser la base de la pulsera , igualmente mido y corto 1 metro 20 cm de hilo chino, luego coloco por la parte de abajo de los hilos base el hilo chino y comienzo a realizar nudo plano macramé hasta completar 3 cm de tejido , luego introduzco una perla en uno de los extremos del hilo con el cual estoy haciendo el nudo macramé y cruzo con el otro extremo del hilo chino y subo la perla hasta donde quedó el tejido y paso el hilo chino por debajo del hilo piel de serpiente el cual es la base de la pulsera (1 al 6 )
Tutorial or step by step
I start measuring and cutting 2 snakeskin thread No 1 of 40 cm each, these will be the base of the bracelet, also measure and cut 1 meter 20 cm of Chinese thread, then I place the Chinese thread at the bottom of the base threads and begin to make flat macramé knot to complete 3 cm of weaving, then I introduce a pearl in one of the ends of the thread with which I am making the macramé knot and I cross with the other end of the Chinese thread and I raise the pearl up to where the weave was and I pass the Chinese thread under the snakeskin thread which is the base of the bracelet (1 to 6).
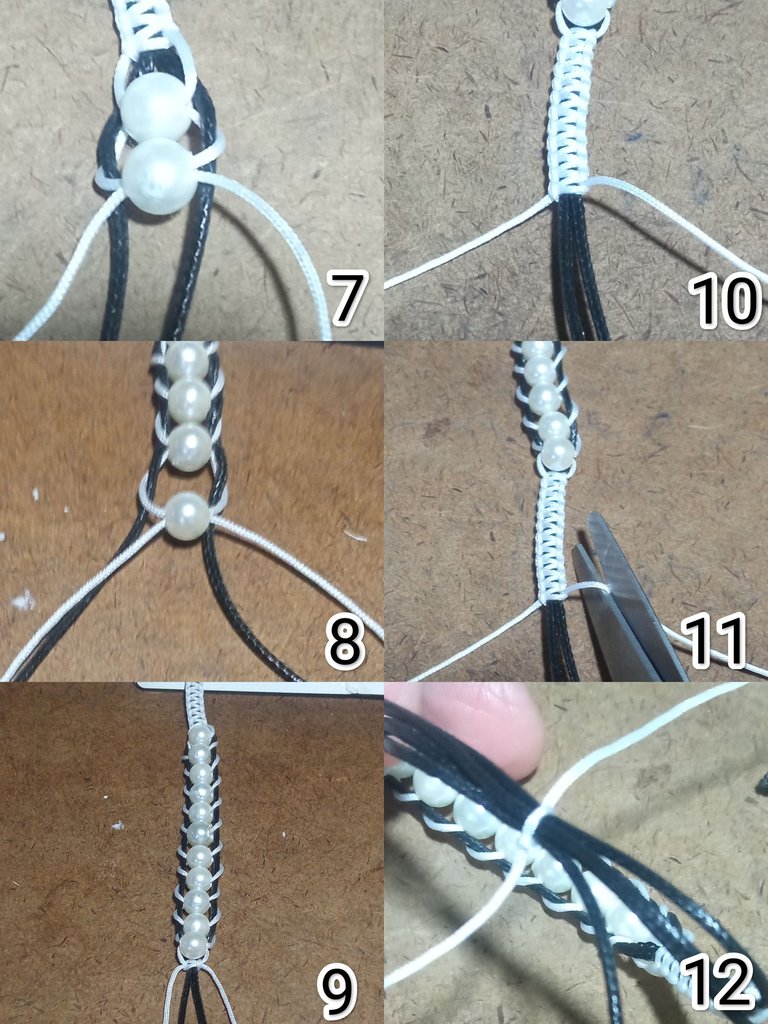
Luego de pasar el hilo por debajo de la base lo llevo nuevamente hacia arriba e introduzco otra perla y la cruzo, ese procedimiento lo repito hasta completar las 11 perlas, debo estar pendiente que los hilos vayan primero por debajo y llevarlos siempre hacia adelante, en si el tejido con las perlas e hilo chino va quedando como una espiga, al completar las 11 perlas realizo en el otro extremo el tejido nudo plano macramé, igual 3 cm como al inicio, corto los excedentes y quemo las puntas para asegurar el tejido, luego corto 20 cm de hilo chino cruzo los hilos base y realizo el cierre de la pulsera con nudo plano corredizo, realizo de 4 a 5 nudos planos, corto el excedente y quemo, reviso que este todo bien y doy por terminado este hermoso proyecto (7 al 12).
After passing the thread under the base I take it up again and introduce another bead and cross it, I repeat this procedure until completing the 11 beads, I must be aware that the threads go first below and always take them forward, if the fabric with the beads and Chinese thread will be like a herringbone, when completing the 11 beads I make at the other end the flat macramé knot weaving, I cut the excess and burn the ends to secure the weave, then I cut 20 cm of Chinese thread, cross the base threads and make the closure of the bracelet with a flat slip knot, I make 4 to 5 flat knots, cut the excess and burn, I check that everything is ok and I finish this beautiful project (7 to 12).
Espero les haya gustado el trabajo realizado, y estar nuevamente con ustedes compartiendo un nuevo proyecto, gracias a todos por visitar mi blog y por el apoyo siempre brindado.
I hope you liked the work done, and be with you again sharing a new project, thank you all for visiting my blog and for the support always provided.
Todas las fotos son de mi autoría @Lupaabra21 fueron tomadas con mi teléfono inteligente Redmi 9, utilicé la aplicación polish para la edición de fotos y usé el traductor Deepl translate.
All photos are my authorship @Lupaabra21 were taken with my Redmi 9 smartphone, I used the polish app for photo editing and used the translator Deepl translate.
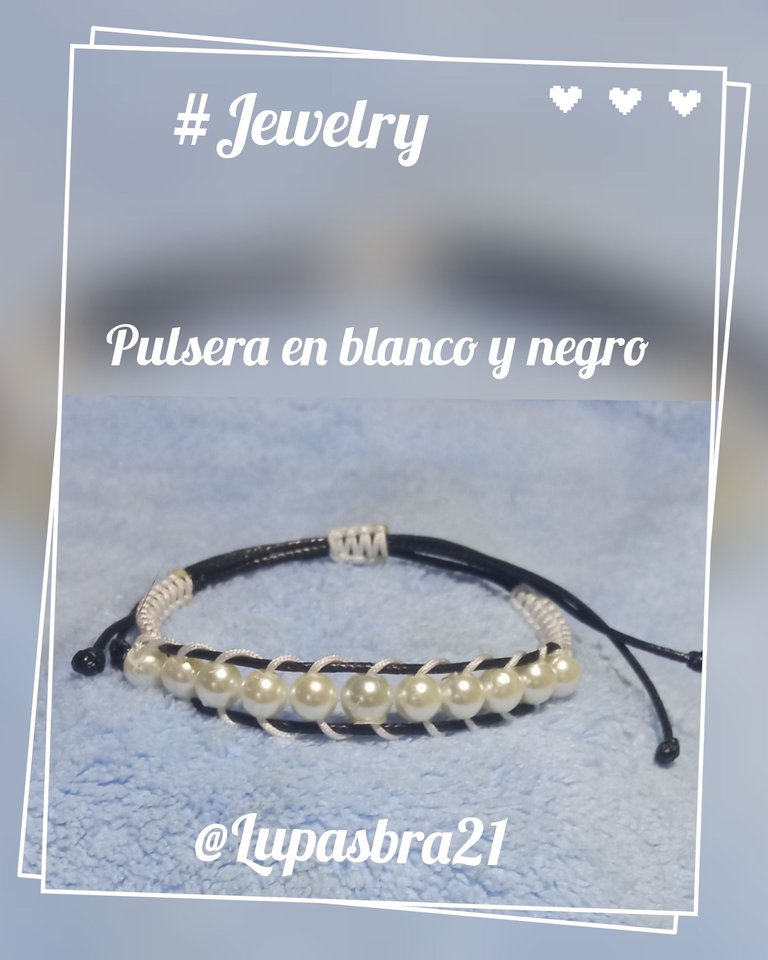
Ideal para cualquier ocasión y además es unisex.
Muy bonita te quedó. Saludos 👋🏽
Gracias amiga ,me alegro que te haya gustado . saludos
WOW! This bracelet is so shining, beautiful, and elegant. Love its design. It shows your skills and creativity. Great work! Keep it up!
Gracias por tan bonito comentario, gracias por el apoyo.
You did a great job,is so lovely
@lupasbra21 Me encantó tu diseño y los colores son de mis favoritos, porque los puedes combinar con cualquier otro y queda perfecto, Saludos 🤗