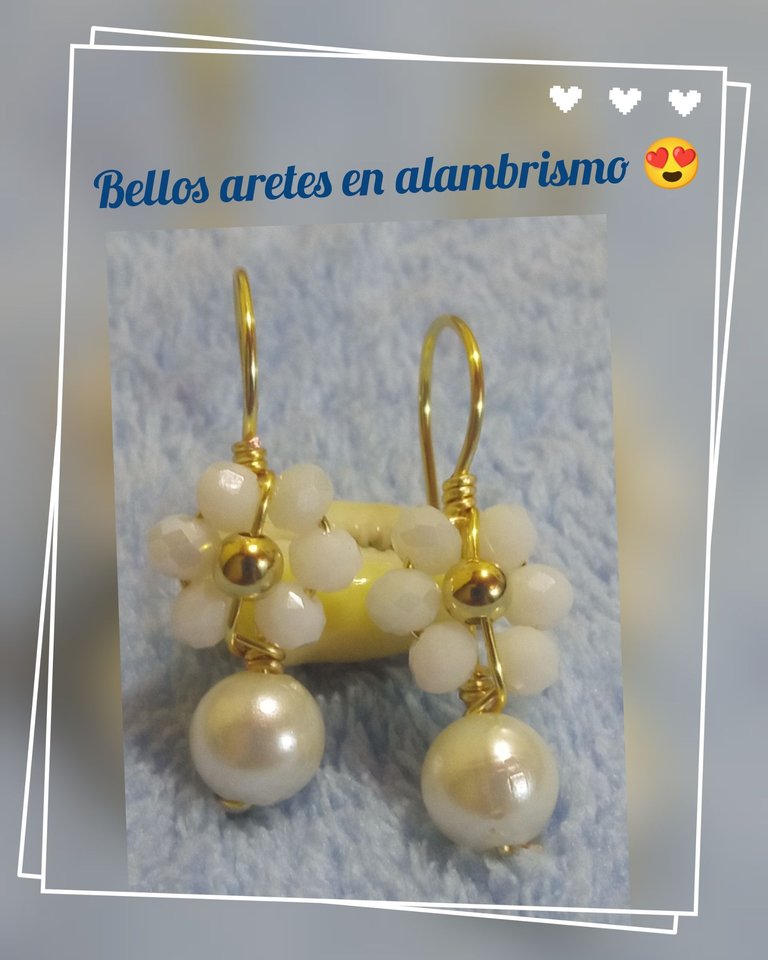
Hola , hola amigos de la comunidad #Hive y comunidad #Jewelry deseo se encuentren todos bien y disfrutando de un buen fin de semana , por acá de nuevo dispuesta a seguir compartiendo con ustedes mis trabajos, los aretes o zarcillos son un complemento esencial en cuanto accesorios para resaltar nuestra belleza , pueden ser combinados muy bien con los oufith que vallamos a usar para determinadas ocasiones, es por ello que en esta oportunidad les traigo el paso a paso o tutorial para realizar unos bellos aretes o zarcillos en alambre tpc, cristales y balín ... Podemos realizarlos con el color que más nos guste , quedan muy bonitos, espero que sea de su agrado y gracias a todos por visitar mi blog, sin más acá les dejo el paso a paso.
Hello, hello friends of the #Hive community and #Jewelry community I wish you are all well and enjoying a good weekend, here again ready to continue sharing with you my work, earrings or earrings are an essential complement as accessories to highlight our beauty, they can be combined very well with the oufith that we are going to use for certain occasions, which is why this time I bring you the step by step or tutorial to make beautiful earrings or earrings in tpc wire, crystals and balin . .. We can make them with the color that we like, they are very nice, I hope you like it and thank you all for visiting my blog, without further ado here I leave the step by step.
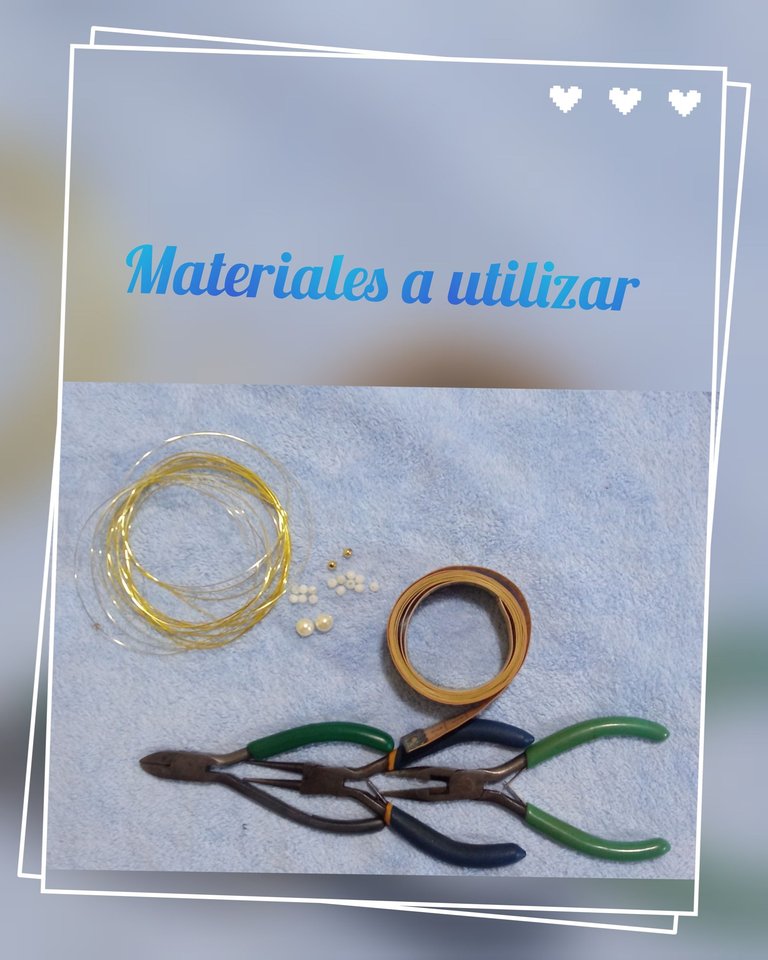
Materiales a utilizar
☑️ 12 cristales blancos No 4.
☑️ 2 perlas acrílicas No 5.
☑️ Alambre tpc No 20.
☑️ Alambre tpc No 24.
☑️ 2 balines en acero No 3.
☑️ Pinza punta plana.
☑️ Pinza punta redonda.
☑️ Pinza piqueta.
☑️ Lima de uñas.
☑️ Cinta métrica.
Materials to be used
☑️ 12 white crystals No 4.
☑️ 2 acrylic beads No 5.
☑️ tpc wire No 20.
☑️ tpc wire No 24.
☑️ 2 No 3 steel pellets.
☑️ Flat tip tweezers.
☑️ Round nose pliers.
☑️ Pick-nosed pliers.
☑️ Nail file.
☑️ Tape measure.
Tutorial o paso a paso
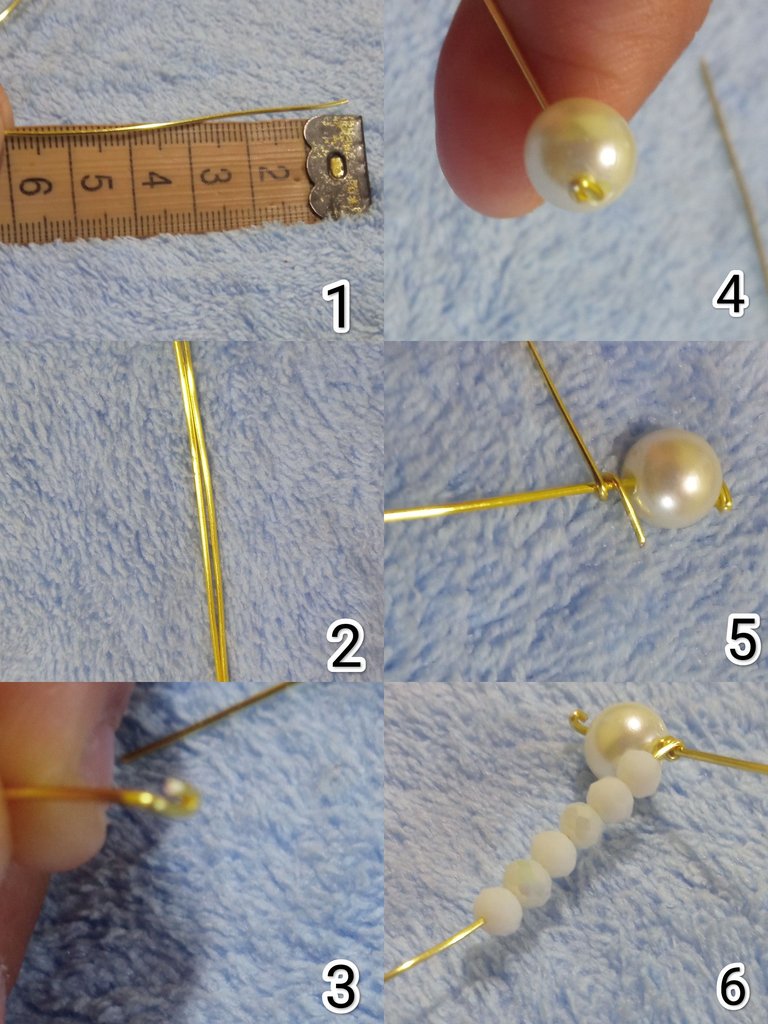
Comienzo midiendo y cortando 2 piezas de 7 cm de alambre tpc No 20, podemos también usar alambre tpc No 18 , luego en uno de los extremos realizo un arito con la pinza punta redonda y luego doblo con ello evito que la perla a usar se salga ya que el orificio es un poco grande , luego con el alambre 24 podemos usar tambien alambre tpc No 22 , doy unas tres vueltas corto el excedente del extremo que queda hacia la perla y aplano con la pinza punta plana, aseguro bien el alambre para que no se ruede luego introduzco 6 cristales blancos
( 1 al 6).
Tutorial or step by step
I start by measuring and cutting 2 pieces of 7 cm of tpc wire No 20, we can also use tpc wire No 18, then at one end I make a ring with the round nose pliers and then bend it to avoid that the pearl to use comes out because the hole is a little big, then with the wire 24 we can also use wire tpc No 22, I make about three turns I cut the excess of the end that remains towards the pearl and flatten it with the flat tip pliers, I secure the wire well so that it does not roll then I introduce 6 white crystals
(1 to 6).
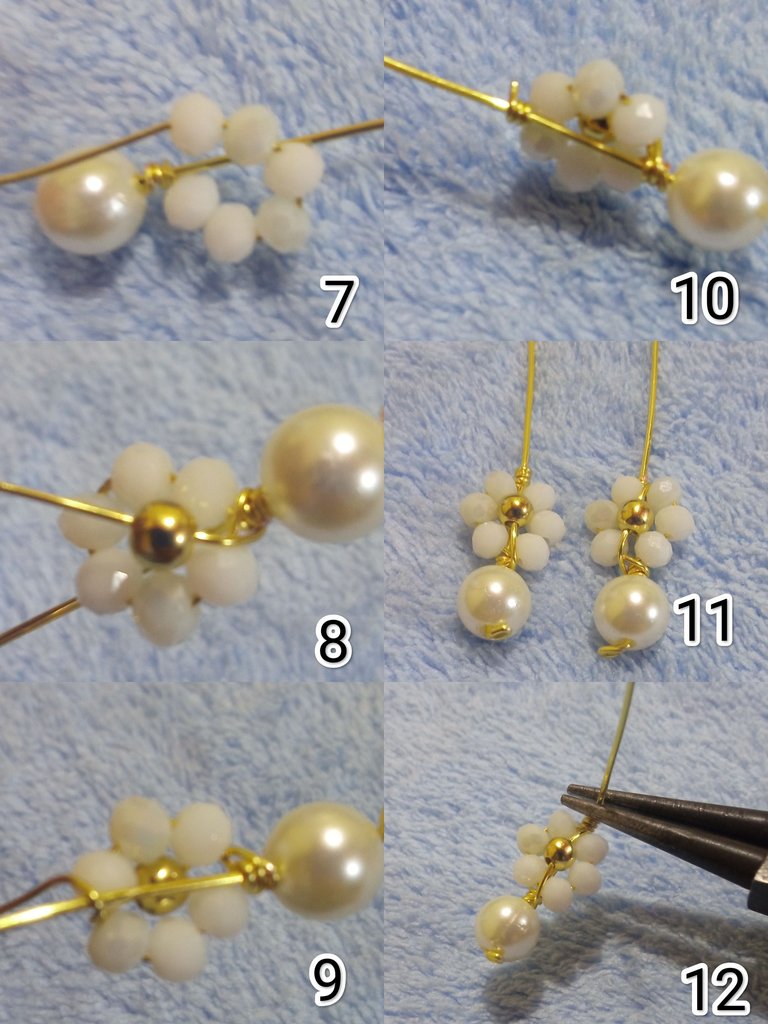
Luego ayudada con los dedos doblo el alambre y los cristales para formar una flor , doy una vuelta con el alambre en la parte de abajo y lo paso al frente de los cristales e introduzco el balín que quede en todo el centro de los 6 cristales y con el mismo alambre doy tres vueltas en la parte de arriba, corto el excente aplano bien y repito el procedimiento con el otro arete, luego justo en dónde finaliza las tres vueltas que aguantan la flor, con la pinza punta redonda doy un pequeño doblez hacia el frente del arete (7 al 12).
Then with the help of my fingers I bend the wire and the crystals to form a flower, I make a turn with the wire in the lower part and I pass it to the front of the crystals and I introduce the ball that remains in the center of the 6 crystals and with the same wire I make three turns in the upper part, I cut the excess, flatten it well and repeat the procedure with the other earring, then just where the three turns that hold the flower end, with the round tip tweezers I make a small bend towards the front of the earring (7 to 12).
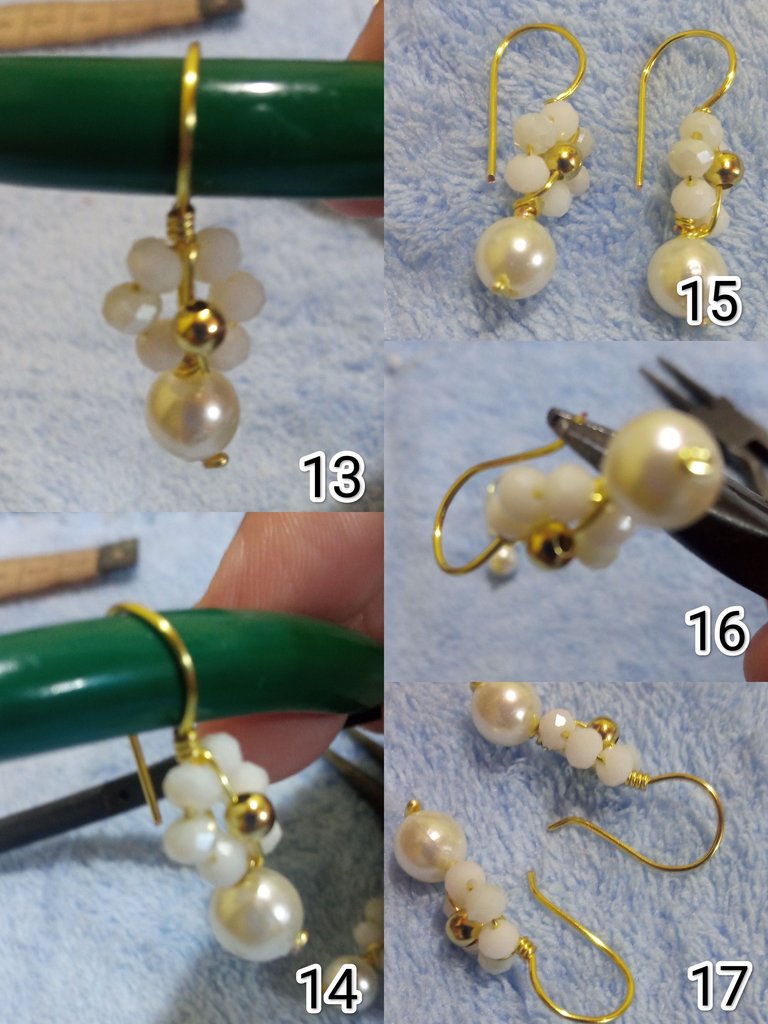
Luego por falta de mandril , con el mango de una de las pinzas doy el doblez a los aretes para formar el anzuelo, luego con la pinza punta plana hago un pequeño doblez hacia afuera , para finalizar con una lima de uñas limo las puntas de los alambres para evitar que molesten al usarlos y asi doy por terminado este hermoso proyecto
(13 al 17).
Then for lack of a mandrel, with the handle of one of the pliers I bend the earrings to form the hook, then with the flat tip pliers I make a small bend outward, and finally with a nail file I file the tips of the wires to prevent them from bothering when using them and so I finish this beautiful project
(13 to 17).
Espero haya Sido de su agrado este trabajo, espero estar pronto con ustedes nuevamente, gracias a todos por ver y leer siempre mis post 🫂 , todas las fotos son de mi autoría @lupasbra21 fueron tomadas con mi teléfono inteligente Redmi 9, usé la aplicación polish para la edición de fotos y usé el traductor Deepl translate.
I hope you liked this work, I hope to be with you again soon, thank you all for always seeing and reading my posts 🫂 , all photos are of my authorship @lupasbra21 were taken with my Redmi 9 smartphone, I used the polish application for photo editing and I used the translator Deepl translate.
Gracias por el apoyo
What you did, that's amazing. These earrings are so beautiful and attractive. You did a wonderful job! Thanks!