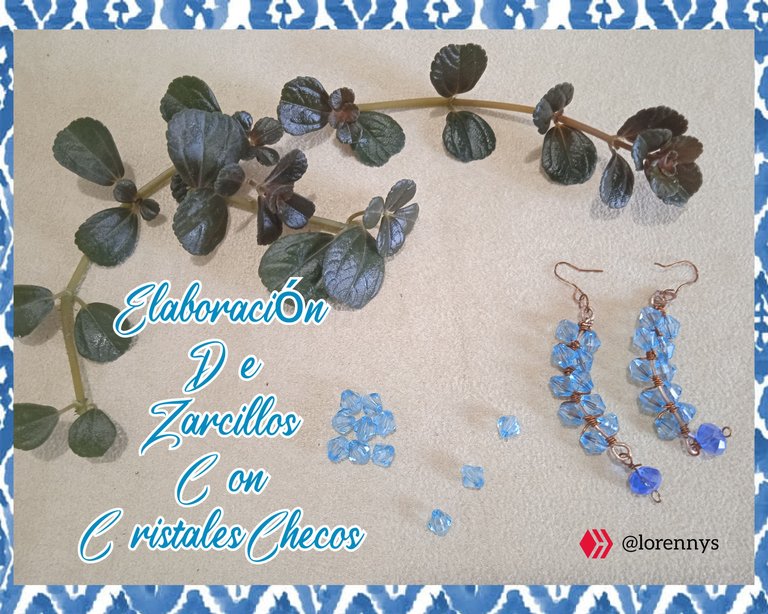
Saludos especiales querida comunidad @jewelry, espero que se encuentre súper bien, hoy me siento feliz de poder compartir con ustedes una vez más. Elaboré unos zarcillos de cristales Checos y alambre de manera muy fácil, no cabe duda que las bisuteria es un hermoso arte, ideal para resaltar cualquier outfit. Estos zarcillos tienen un toque minimalista para de manera sencilla acentuar la elegancia.
English Version
Special greetings dear community @jewelry, I hope you are feeling great, today I am happy to share with you once again. I made some Czech crystals and wire earrings in a very easy way, there is no doubt that jewelry is a beautiful art, ideal to highlight any outfit. These earrings have a minimalist touch to accentuate elegance in a simple way.
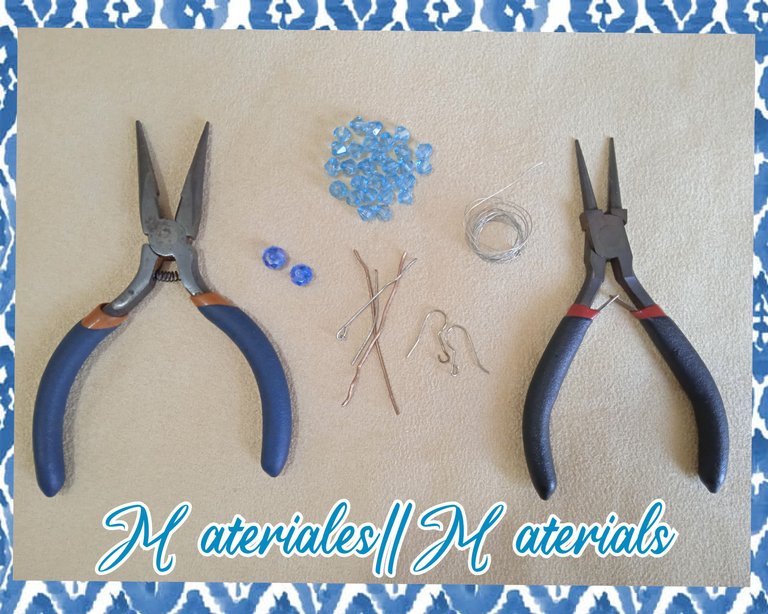
Materiales que use para realizar estos zarcillos
✓Veinte cristales checos azules tipo rombo.
✓Dos cristales tafetados azul cobalto.
✓Dos argollas pequeñas.
✓Dos anzuelos pico de loro 🦜
✓Dos trozos de alambre de cobre calibre 24 ".
✓Veintiséis centímetros de hilo de cobre.
✓Pinza plana.
✓Pinza punta redonda.
English Version
Materials I used to make these earrings.
✓Twenty blue Czech rhombus type crystals.
✓Two cobalt blue taffeta crystals.
✓Two small hoops.
✓Two parrot beak hooks 🦜.
✓Two pieces of 24 " gauge copper wire.
✓Veintiséis centimeters of copper wire.
✓Flat clamp.
✓Round-nose pliers.
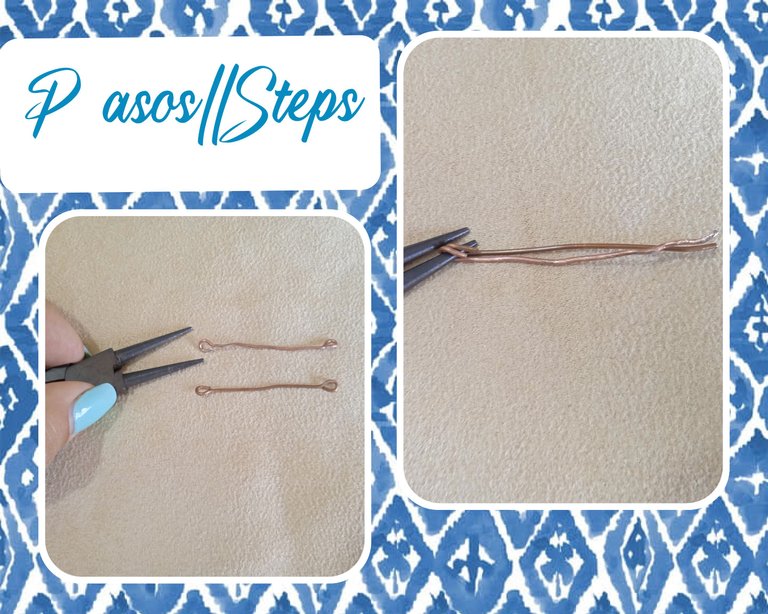
Vamos a iniciar con estos sencillos pasos la elaboración de los zarcillos
Primer Paso:
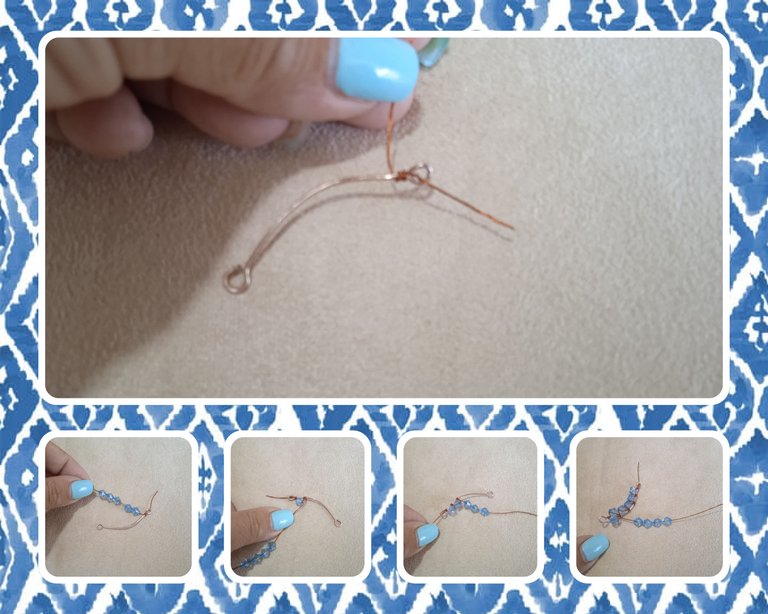
Corto dos alambres del calibre 24 en una medida de seis centímetros. Luego uso la pinza punta redonda y elaboro una argollita en cada extremo de los alambres hacia la parte de afuera en esta manera.
English Version
Let's start with these simple steps to make the tendrils.
Step 1:
I cut two 24 gauge wires to a length of six centimeters. Then I use the round nose pliers and make a small ring at each end of the wires towards the outside in this way.
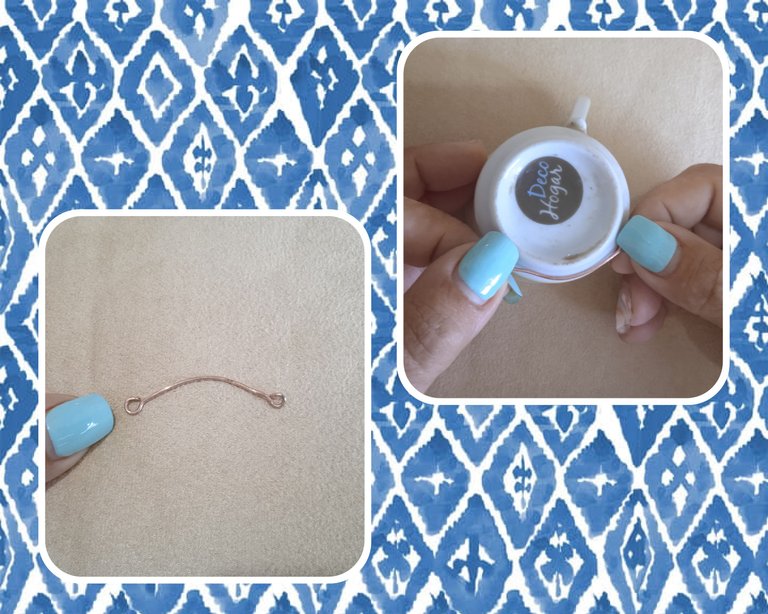
Segundo Paso:
Buscamos en casa algo de lo que tenemos de forma circular, yo use una taza y apoye el alambre para moldearlo en semicírculo así queda.
English Version
Second step:
We look for something at home of what we have in a circular shape, I used a cup and support the wire to mold it in a semicircle so it is.
Paso Tres:
Ahora tomo el hilo de alambre de cobre, doy tres vueltas para fijar al semicírculo que había formado antes, dejando un tramito de un centímetro y medio .
Ahora inserto en el hilo de cobre cinco cristales checos azules tipo rombo, y los voy colocando de esta manera, en la parte de adentro del semicírculo pongo el primer cristal y lo fijo con tres vueltas del hilo de cobre, después de ajustar bien, inserto otro cristal y realizo la misma operación; hasta lograr insertar cinco cristales, ver la imagen.
English Version
Step Three:
Now I take the copper wire thread, I give three turns to fix to the semicircle that I had formed before, leaving a stretch of a centimeter and a half .
Now I insert in the copper wire five blue Czech rhombus crystals, and I place them in this way, in the inside of the semicircle I put the first crystal and fix it with three turns of the copper wire, after adjusting well, I insert another crystal and perform the same operation; until inserting five crystals, see the image.
Paso Cuatro:
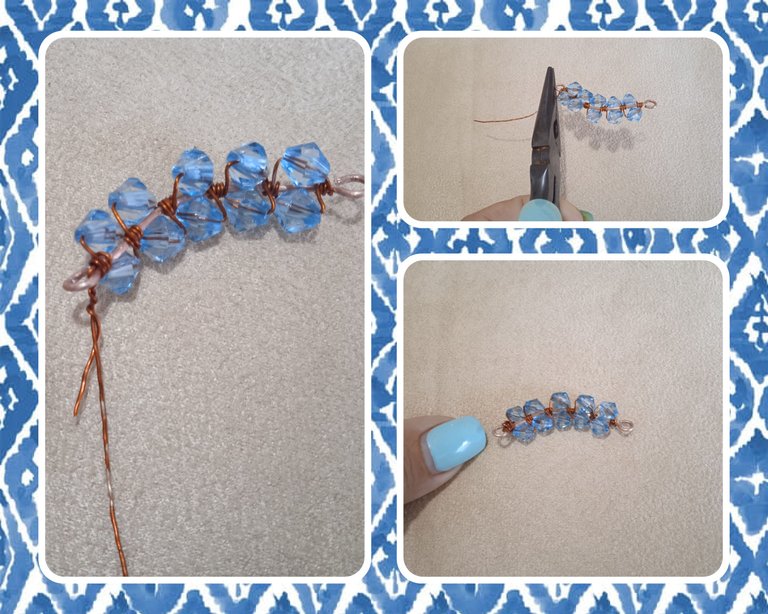
Una vez que inserto los cinco cristales y ajusto bien con las tres vueltas; inserto de nuevo cinco cristales azules tipo rombo y voy a colocarlos en la parte de arriba del semicírculo al lado de los que coloque antes así: paso el primer cristal y lo fijo pasando el hilo por encima del otro hilo con que fije el cristal anterior, hasta lograr con el mismo procedimiento insertar los cinco cristales, aquí se juntan los dos hilos de alambre , los uno con un suave entorchado y doy dos vueltas alrededor de la argollita, ajusto bien y con la pinza corto el excedente para rematar.
English Version
Step Four:
Once I insert the five crystals and adjust well with the three turns; I insert again five blue rhombus type crystals and I will place them at the top of the semicircle next to the ones I placed before like this: I pass the first crystal and fix it passing the thread over the other thread with which I fixed the previous crystal, until I insert the five crystals with the same procedure, here I join the two strands of wire, I join them with a soft twist and I make two turns around the ring, I adjust well and with the pliers I cut the excess to finish.
Paso Cinco:
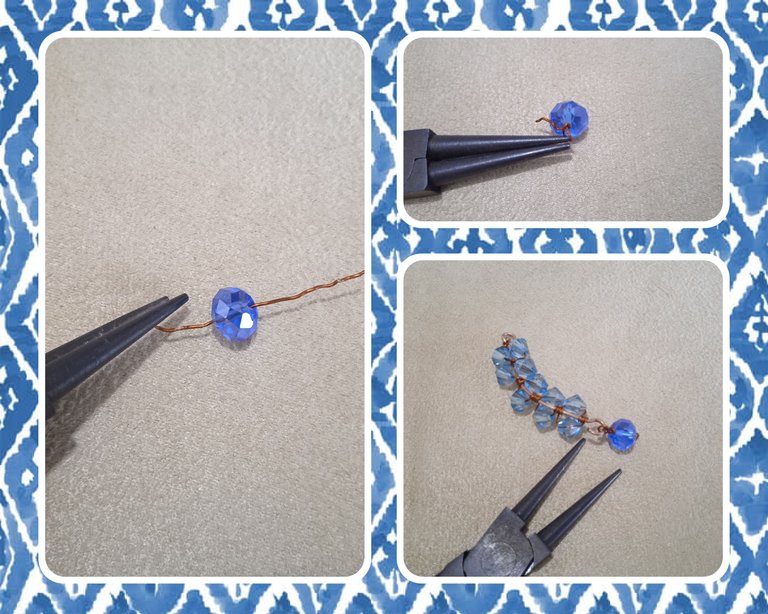
Aquí voy a elaborar un colgante con el cristal azul cobalto así: con centímetro y medio de alambre de cobre, uso la pinza punta redonda y hago una argolla.
Inserto el cristal azul cobalto y de nuevo con la pinza punta redonda realizo otra argolla y así queda.
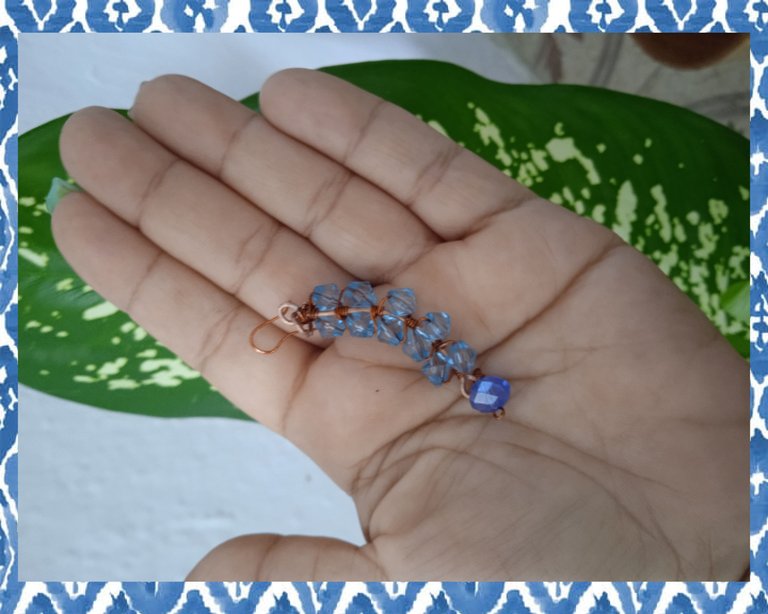
Realizado el colgante, uso la pinza de nuevo abro la argollita y lo coloco, como se en la imagen.
English Version
Step Five:
Here I am going to make a pendant with the cobalt blue crystal like this: with a centimeter and a half of copper wire, I use the round nose pliers and make a ring.
I insert the cobalt blue crystal and again with the round nose pliers I make another ring.
Once the pendant is made, I use the tweezers again, open the ring and place it, as shown in the picture.
Paso Seis:
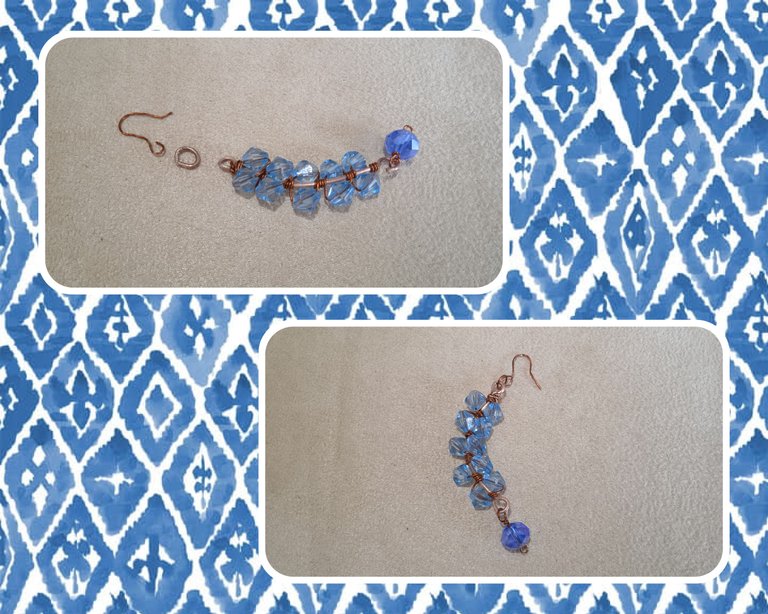
En este paso para finalizar el zarcillo coloco el anzuelo pico de loro que había realizado con anterioridad .
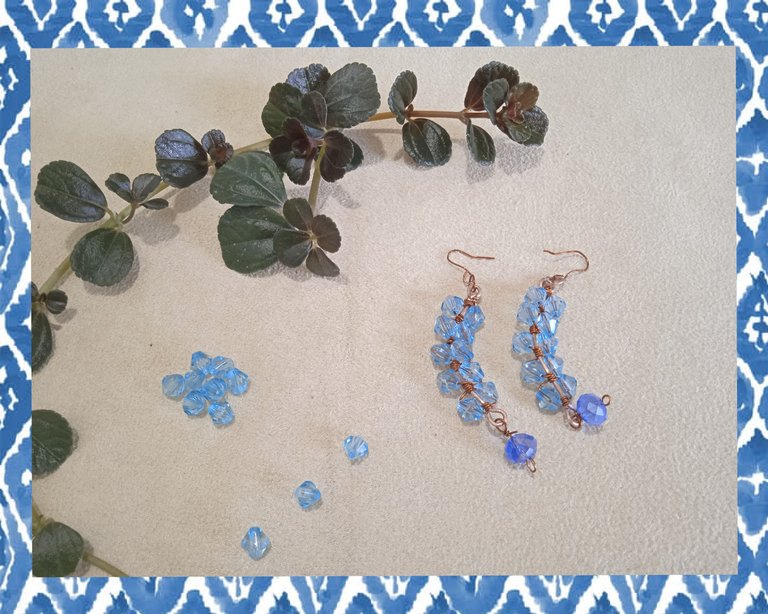
Ahora usando los mismos pasos realizo el otro Zarcillo y este es el resultado.
English Version
Step Six:
In this step to finish the tendril I place the parrot beak hook that I had previously made.
Now using the same steps I make the other tendril and this is the result.
Espero que les haya gusta este diseño y se animen a realizarlos en casa .
English Version
I hope you like this design and that you are encouraged to make them at home.
Todas las fotografías son de mi propiedad ,capturadas con mi Redmi A9. Canva versión gratuita banner final imágenes editado con GridArt .
Deelptraductor fue utilizado para esta publicación.
Éxitos y bendiciones para todos 🙏🏻 hasta las próxima publicación.
¡Tengan una feliz Noche!
¡Gracias por detenerte a leer!
English Version
All photos are my property ,captured with my Redmi A9. Canva free version final banner images edited with GridArt .
Deelptraductor was used for this publication.
Success and blessings to all 🙏🏻 until the next post.
Have a happy evening!
Thanks for stopping by to read!

Hola. Esta muy bonito este diseño de aretes. El color azul de los cristales los hacen ver mucho más bonitos.
Me gustó mucho por su sencillez precisamente y bueno el toque azul es mi preferido. Gracias por la visita 😃
Que bonitos! La sutileza y brillo del azul en los cristales los hacen únicos, también explicastes muy fácil el paso a paso, me gustaron, un abrazo 🤗.
Gracias querida @nhaydu siempre tan consecuente si los cristales azules son preciosos.
Muy bonita la imagen de presentación, interesante asi que estos sonlos cristales checos.
Saludos amiga gracias, si estos son
Están demasiado lindo y creativo, ㊗️
Gracias amiga ☺️ que bueno que visitarás mi publicación y te hayan gustado
Coquetos 🤗
😉
Amiga hasta las uñas las combinaste con la creación, todo muy bien pensado es una publicación hermosa.
Gracias amiga me alegra que te haya gustado 😊 gracias por pasar y comentar ☺️
Están hermosos esos zarcillos amiga
Gracias amiga me alegra te gustarán .