(ENG)
Hello everyone at @jewelry, I am pleased to start this week with you, hoping you are always well, and with a great desire to create. Today I will show you a very nice and easy, step by step, how to make a beautiful headband, for girls, where I use amigurumi technique, for its creation, breathing into a delicate and striking frog. I invite you to walk through the steps and I will show you how to do it.
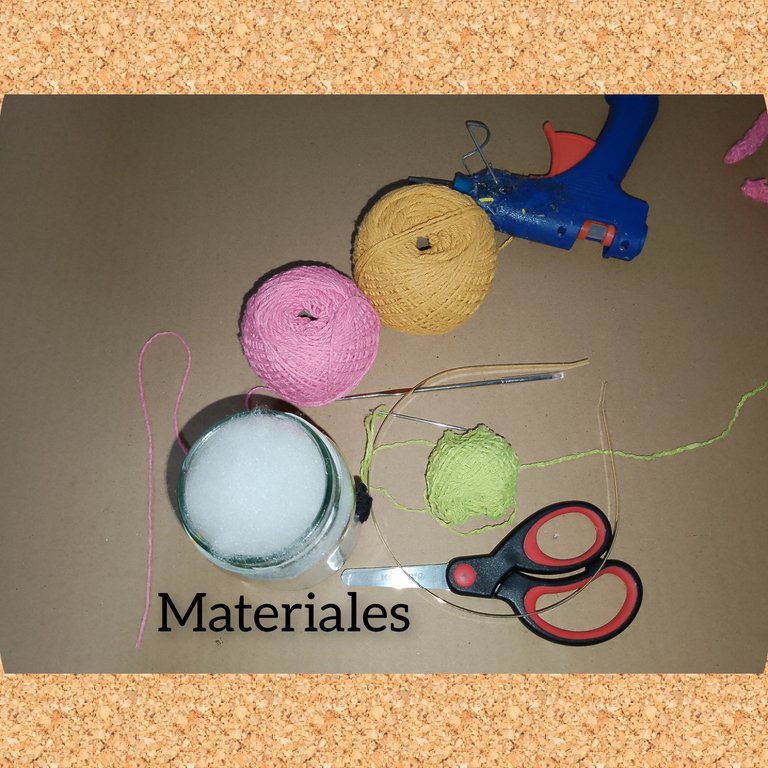
Materials used:
. Threads for knitting, colors (yellow, pink, green).
. Wool needle.
. Knitting needle.
. Hot silicone.
. Scissors
. Little bulging eyes.
. Stuffed.
. Thin metal headband.
Steps:
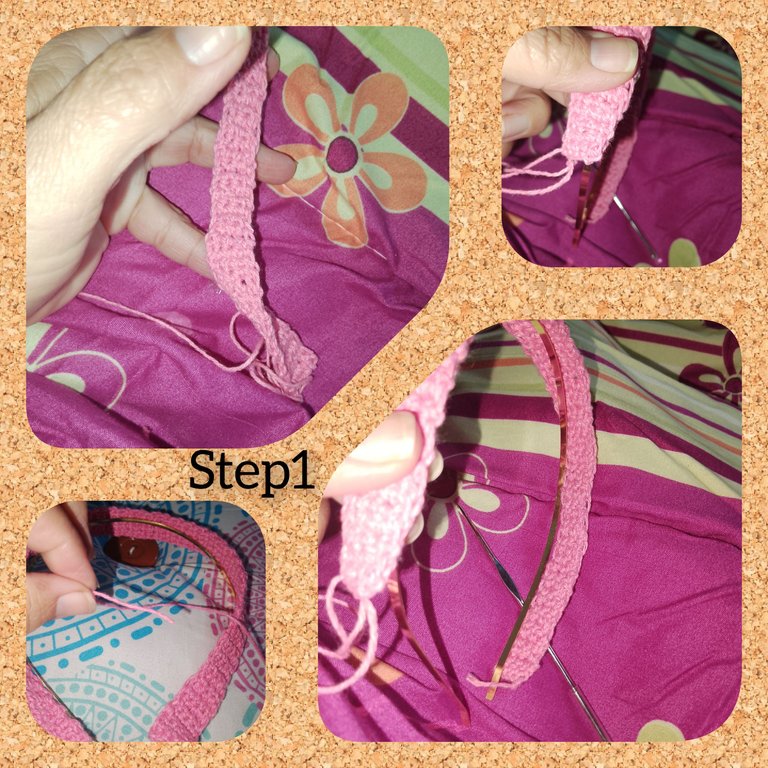
1.) I begin, weaving with the pink thread, a braid of four, chain stitches and in each one a half stitch, turning the fabric, I make a total of fifty turns. I finish off and leave a considerable strand of thread. This number of turns are enough to cover the metal headband.
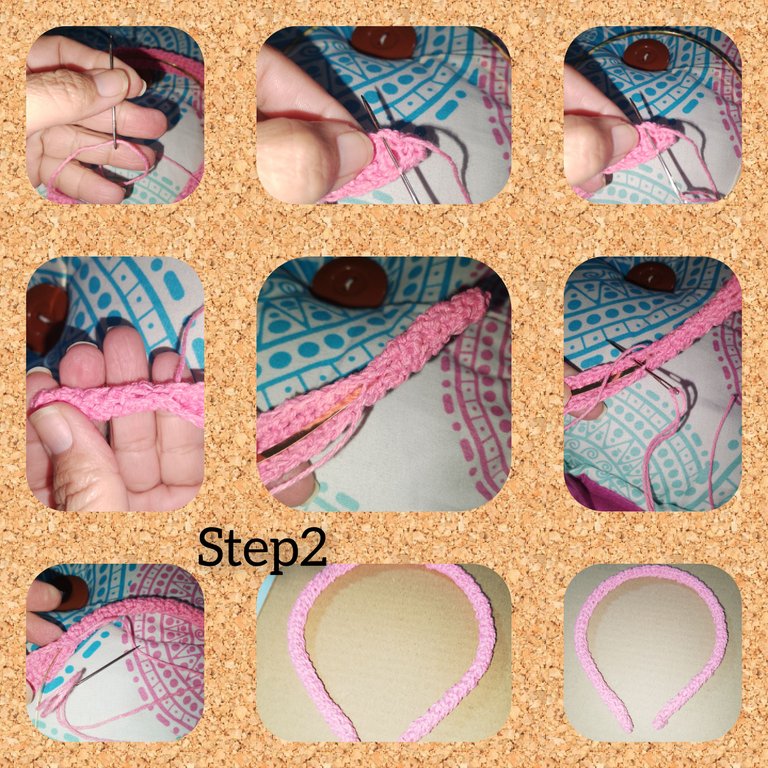
2.) I place the strand of thread on the wool needle and begin to join the sides of the woven braid and in turn I will go, covering the metal headband, until it is completely covered, I cut the residual thread.
3.) in a magic ring, I knit six half stitches, I close the ring, for the next pass, I will knit six increases for, it says half stitches. For the third pass, after half stitch, knit an increase, for eighteen half stitches, continuous and for the next two half stitches, for twenty four half stitches. I continue knitting three rounds of twenty-four half stitches, I make a stop and fill the sphere. And decreasing I close the small sphere.
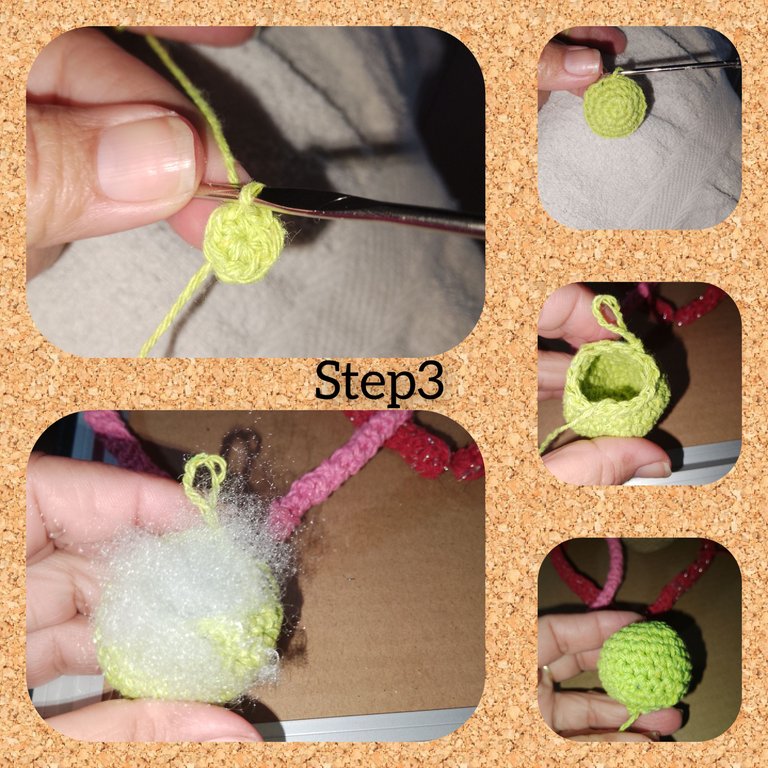
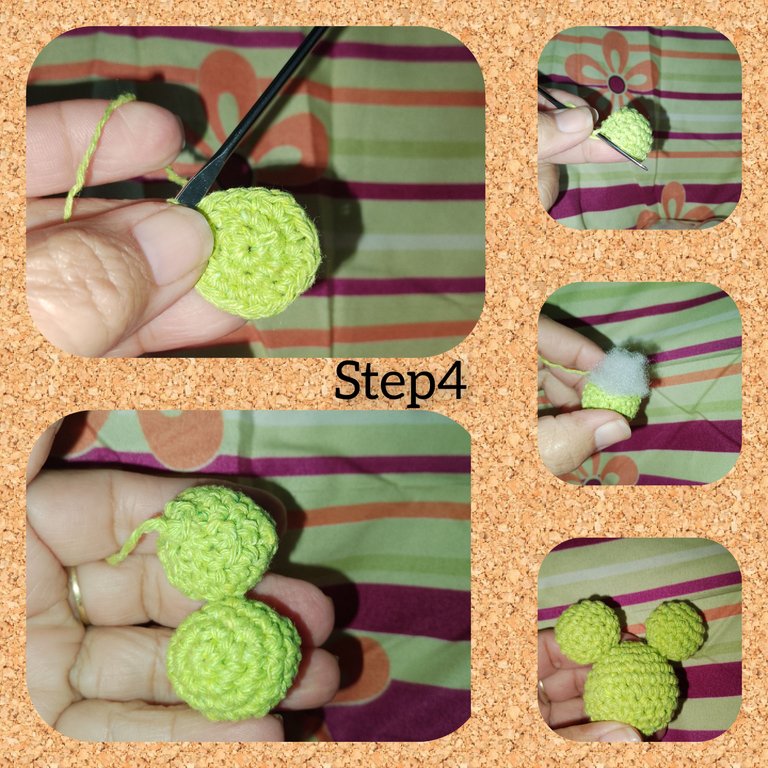
4.) I knit, two new spheres, these are smaller in size, filled in the same way. With the wool needle, I glue the two smaller ones on the large sphere. Thus forming the figure of the frog.
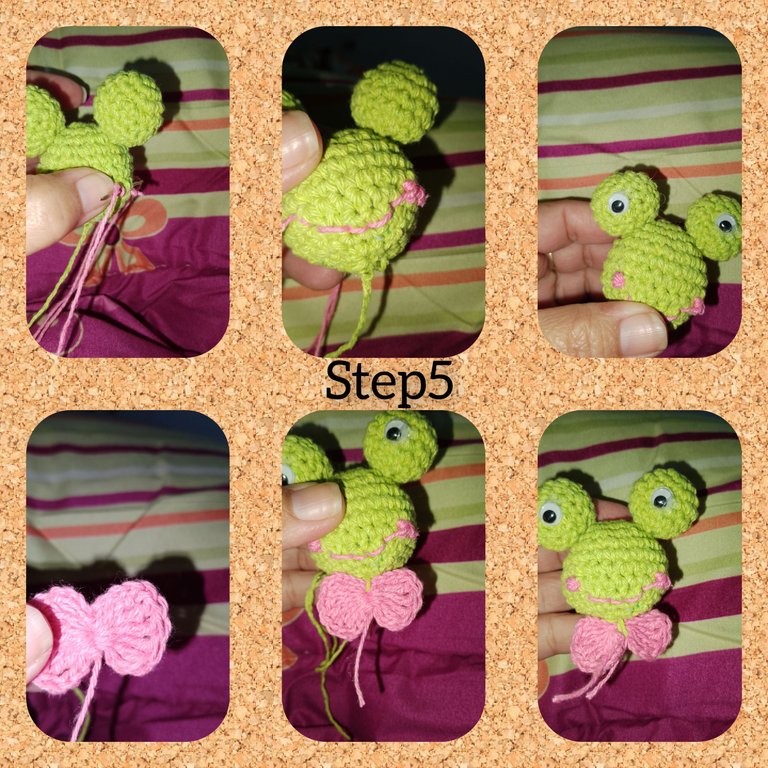
5.) I glue the googly eyes, and with pink thread, I embroider the mouth and smile on the frog's face. I also knit a small pink bow and sew it to the bottom of the frog's head.
6.) I continue knitting and this time, in a magic ring, I knit eight half stitches, I close the ring, I knit five, chain stitches, and in six triple double crochets, then I go down with five chain stitches, in the next half stitch and I knit a slipped stitch, in this way, I will knit and form the petals of the flower. Following the process and changing colors in the thread, I will knit three small flowers.
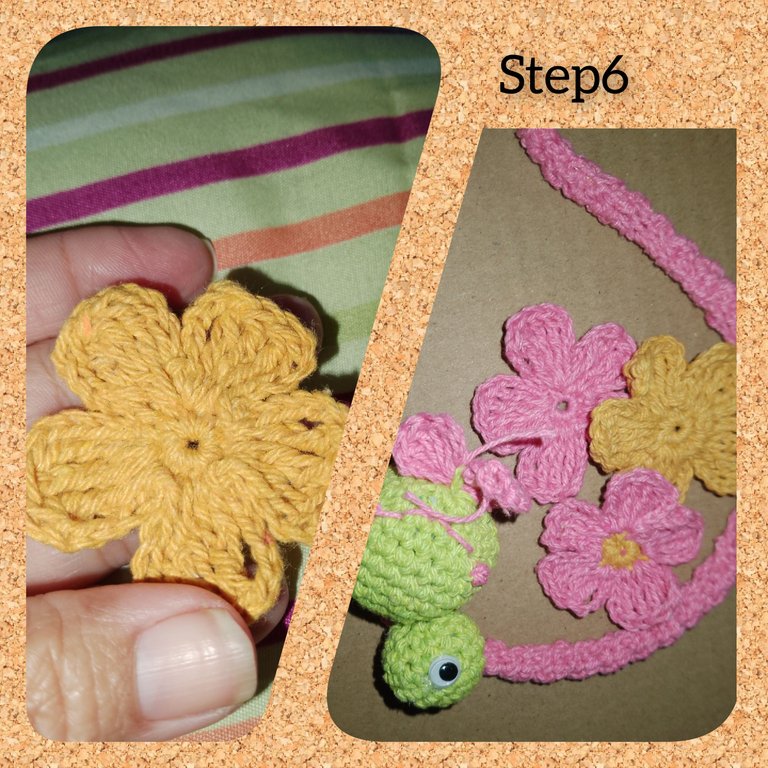
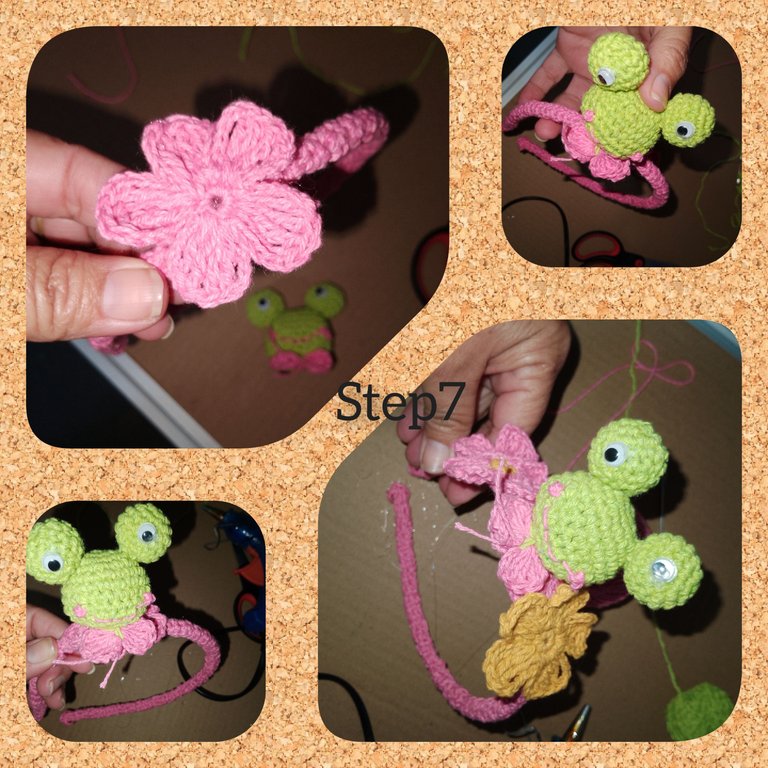
7.) The next thing will be to decorate the headband, I place a flower at the top of one of the sides, and on it I glue the frog, I apply silicone and on the sides I glue the following flowers. Leaving it like this, readyheadband
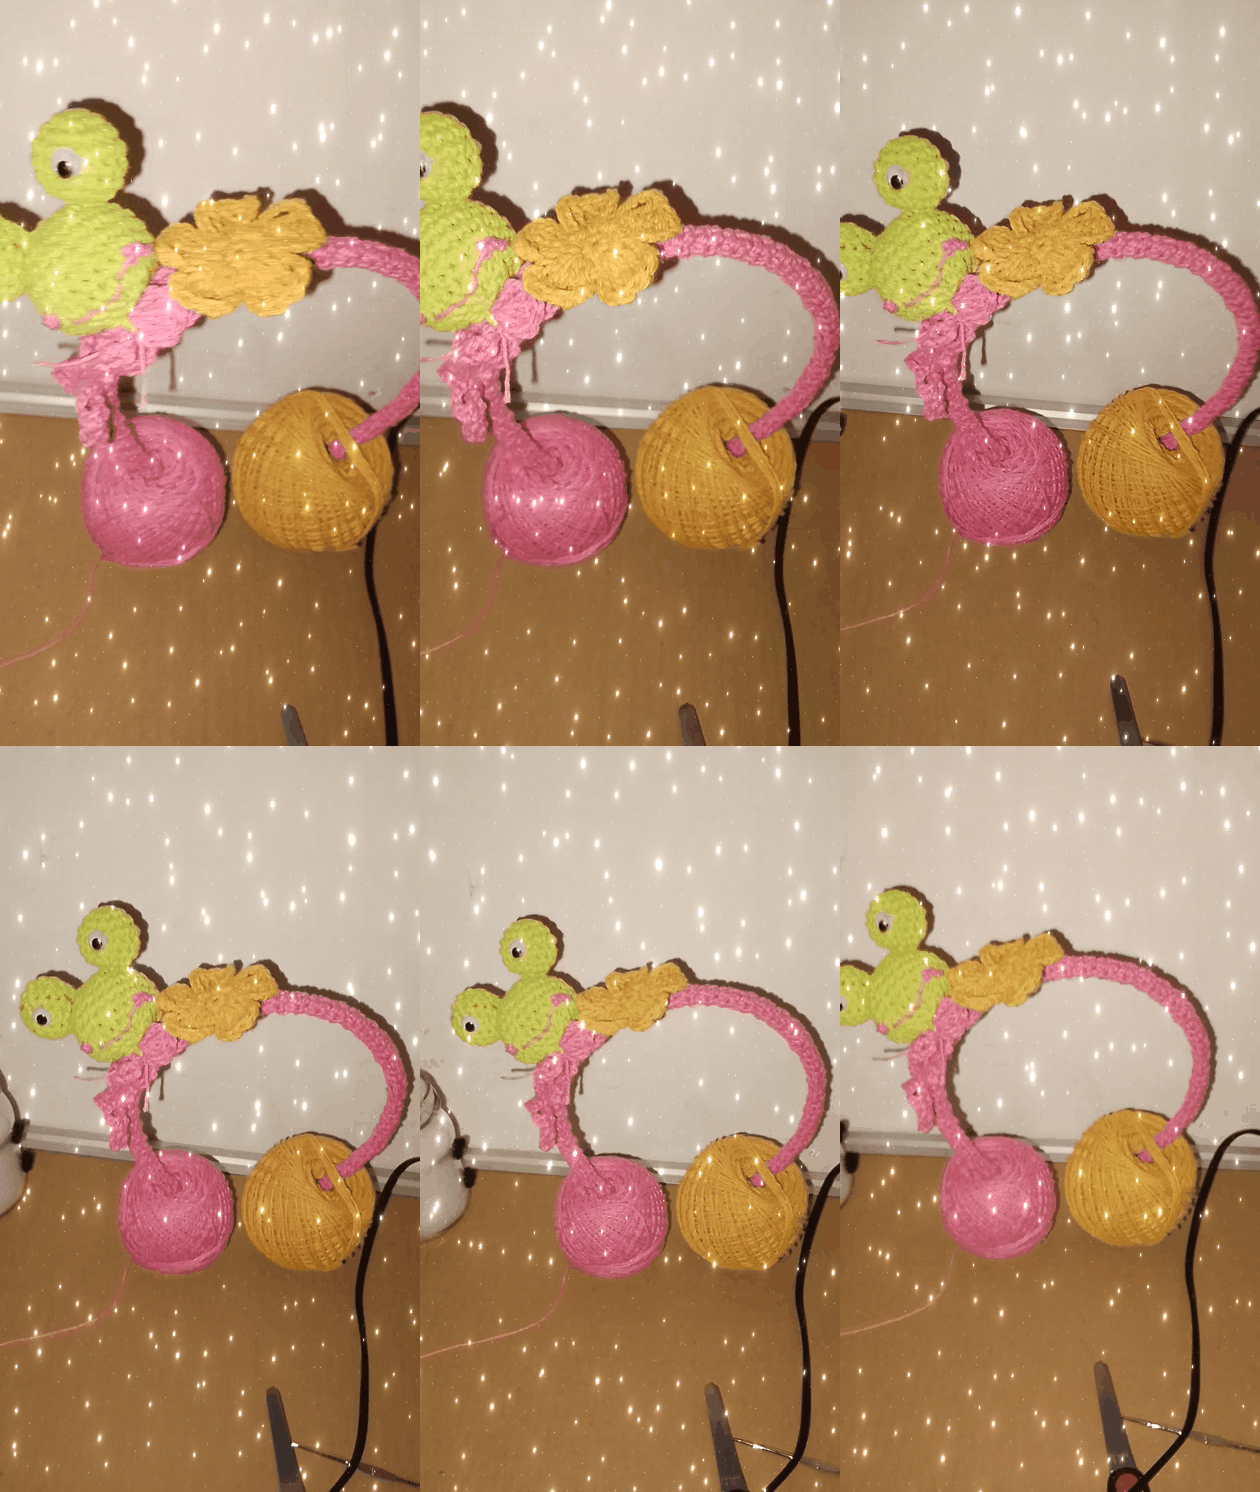
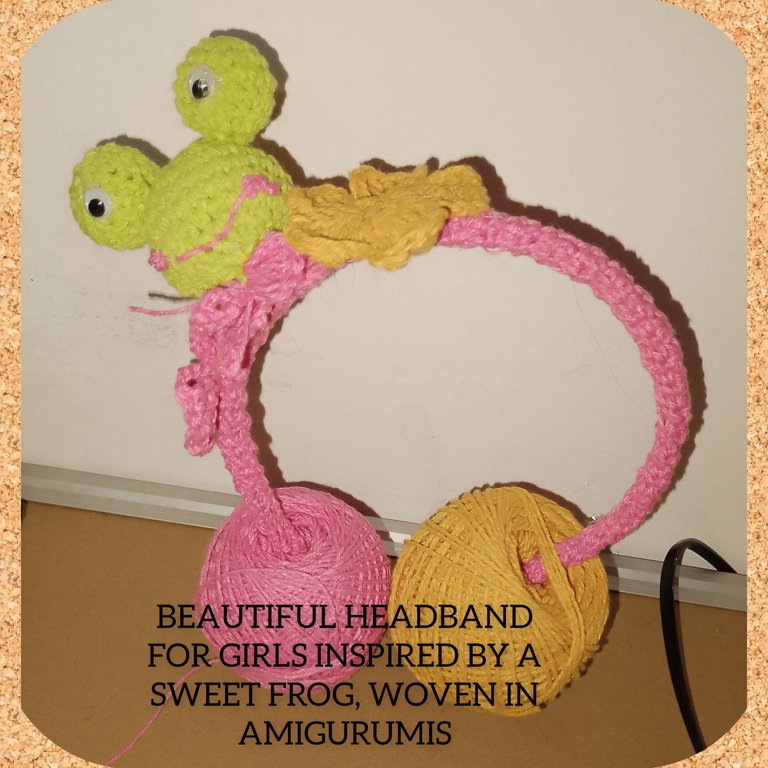
This is how the project looks, already completed.
. All photos are my property.
. Use incollage to show the steps.
. Use video gifs for the central presentation of the project.
. Use language translator.
You will always be welcome on my blog until the next opportunity.
(Esp
Hola a todos en @jewelry, me complace iniciar, está semana, con ustedes, deseando estén siempre bien, y con mucho ánimo de crear. Hoy les mostraré un muy bonito y fácil, paso a paso, de como realizar un hermoso cintillo, para niñas, dónde utilice técnica de amigurumis, para su creación,respirando en una delicada y llamativa rana. Les invito, a el recorrido de los pasos y les mostraré, como hacelo.

Materiales usados:
. Hilos para tejer, colores ( amarillo, rosado, verde(.
. Aguja lanera.
. Aguja para tejer.
. Silicón caliente.
. Tijeras
. Ojitos saltones pequeños.
. Relleno.
. Cintillo delgado de metal.

Pasos:
1.) Comienzo, tejiendo con el hilo de color rosado, una trenza de cuatro, puntos cadenas y en cada uno medio punto, dando vuelta a el tejido, doy un total de cincuenta vueltas. Remato y dejo una considerable hebra de hilo. Está cantidad de vueltas, son suficientes, para cubrir el cintillo de metal.

2.) Coloco, la hebra de hilo, a la aguja lanera y comienzo a unir los lados de la trenza tejida y a su vez iré, cubriendo el cintillo de metal, hasta cubrirlo en su totalidad, corto el hilo residual.

3.) en un anillo mágico, tejo seis medios puntos, cierro el anillo, para la siguiente pasada, tejere seis aumentos para, dice medios puntos. Para l tercer pasada, luego de medio punto, tejer un aumento, para, dieciocho medios puntos, continuo y para la siguiente dos medios puntos, para veinticuatro medios puntos. Continuo tejiendo tres vueltas de veinticuatro medios puntos, hago un alto y relleno la esfera. Y disminuyendo cierro la pequeña esfera.

4.) tejo, dos nuevas esferas, estás me menos tamaño, rellenas de igual manera. Con la aguja lanera, pego sobre la esfera grande las dos más pequeñas. Formando así, la figura de la rana.

5.) Pego los ojitos saltos, y con hilo de color rosa, bordo la boca y sonrisa en el rostro de la rana.asi mismo tejo un pequeño lazo de color rosa y cosos en la parte inferior, de la cabeza de la rana.

6.) Continuo tejiendo y enta oportunidad, en un anillo mágico, tejo ocho medios puntos, cierro el anillo, tejo cinco, puntos cadenas, y en seis puntos altos triples, luego bajo con cinco puntos cadenas, en el siguiente medio punto y tejo un punto deslizado, de esta manera, tejere y formaré los pétalos de la flor. Siguiendo el proceso y cambiando de colores en el hilo, tejere tres pequeñas flores.

7.) Lo siguiente será, decorar el cintillo, coloco en la parte alta de uno de los lados una flor,ny sobre ella pego la ranita, aplicó silicón y en los lados pego las siguiente flores. Quedando así, listo el cintillo.

De esta manera luce el proyecto, ya concluido.

. Todas las fotos son de mí propiedad.
. Use incollage para mostrar los pasos.
. Use gifs video para la presentación central de el proyecto.
. Use traductor lenguaje.
Siempre serán bienvenidos a mí blog será hasta una próxima oportunidad.
Está muy bonito este accesorio, y muy buena la idea de haberle colocado un amigurumi tejido a la diadema.
A una pequeña debe lucirle muy bonito.
Gracias por dejarnos tu trabajo...
Gracias por apoyar amiga...hermoso dia
This is lovely
Hola @patience2, muy agradecida con su comentario.
Preciosa la diadema. Las ranitas me encantan. Gracias por compartir ☺️
Abrazos, gracias por apoyar. Que bueno le haya gustado.
Ay pero con esta diadema dan ganas de ser niña otra vez😍 jeje te ha quedado preciosa! Todos los detalles son muy bonitos y la combinación de colores perfecta✨ la ranita es mi parte favorita💖
Muy agradecida por su comentario, abrazos
The choice of colors and how the frog face is just sitting there, with those cute little eyes looking pretty. I can tell that anyone wearing this beautiful headband will stand out, and it will catch people's attention. I would love to make one myself. I would love to see more from you in the future.
Hola, muy agradecida amiga ☺️... abrazos
Hermosa, me encantan las ranas en todos los materiales, menos las verdades ☺️ te quedó muy bonito.
Gracias @carolycesar15 que gusto saber su opinión
Thank you so much for sharing this beautiful headband with us and for walking us through the entire creation process, you did a great job, well done.
I really want to learn this skill but it's really difficult, but you have a great grip on your skill. I loved this hair band and its colors💖