Hola muy buenas noches tengan todos mis amigos creadores de contenidos, espero que se encuentren pasando una agradable noche , hoy les quiero compartir un cintillo con el rostro de Baltasar un modelo sencillo para estrenar algo diferente el día de los reyes magos , uno de los personajes que forman parte de la historia del nacimiento del niño Jesús
Hello very good evening to all my friends content creators, I hope you are having a nice evening, today I want to share a headband with the face of Balthazar a simple model to release something different on the day of the three kings, one of the characters that are part of the story of the birth of the baby Jesus.
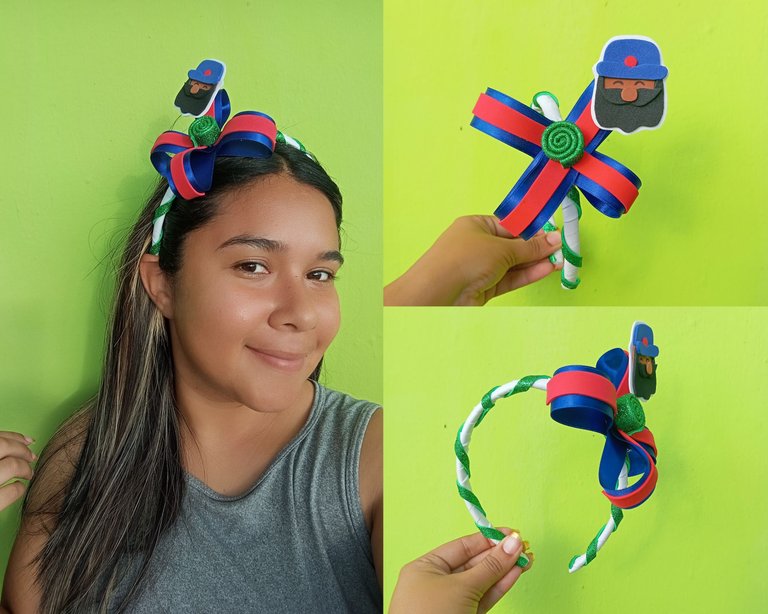
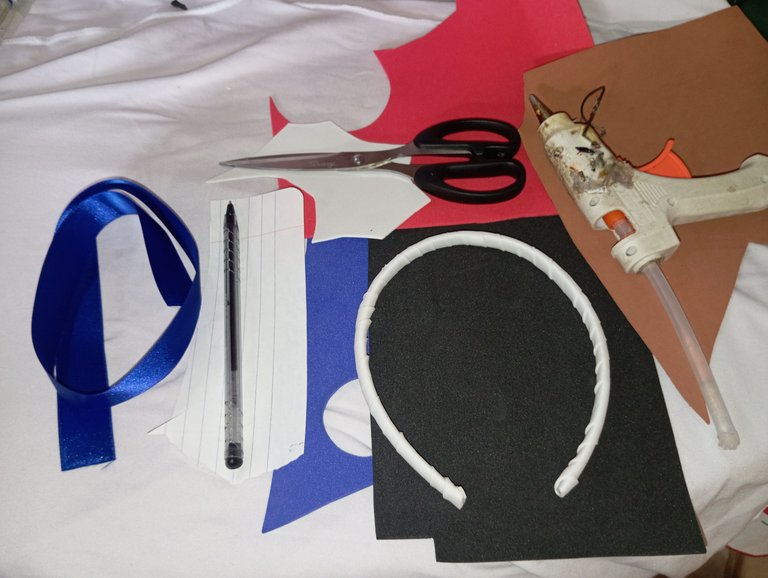
Materiales qué utilice para elaborar mi cintillo :
-Cintillo
-Foamis
-Tijera
-Silicon
-Papel y lápiz
-Cinta
Materials I used to make my headband:
-Cintillo
-Foamis
-Scissors
-Silicon
-Paper and pencil
-Tape
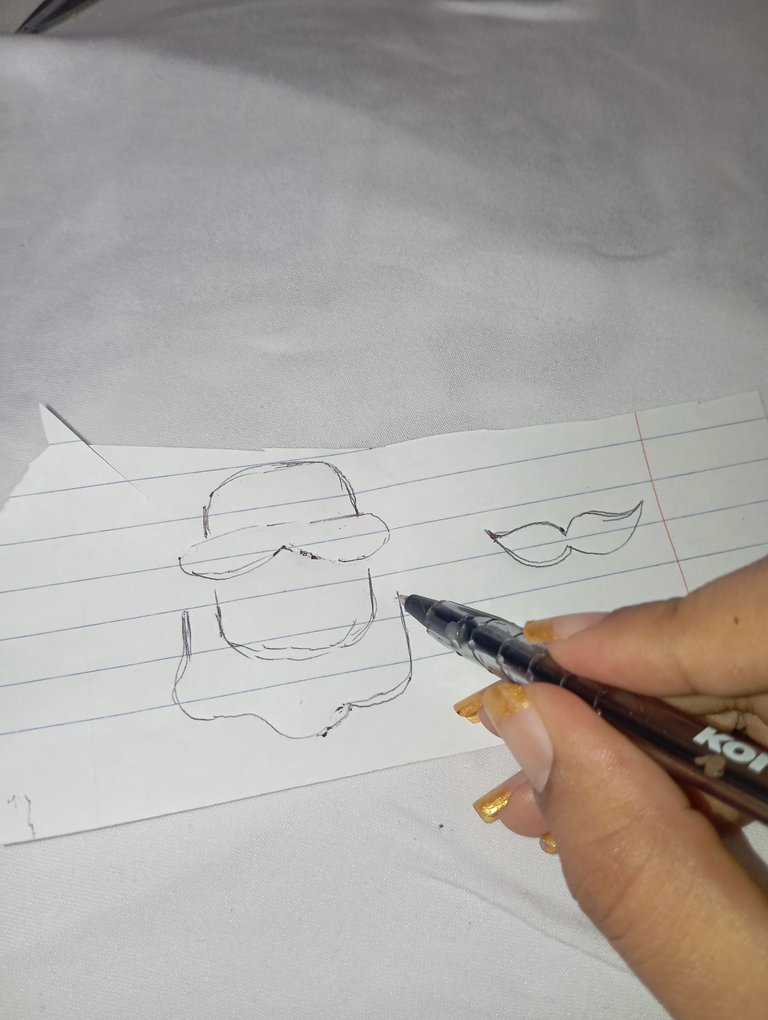
A continuación los pasos a seguir:
Paso número 1: iniciaremos primeramente dibujando un patrón con la temática con la que vamos a trabajar, en esta ocasión dibujaremos el rostro de Baltasar uno de los magos que asistieron a conocer al niño Jesús, solamente vamos a realizar el rostro es decir (cabeza,barba,bigote y turbante)
Here are the steps to follow:
Step number 1: we will start first drawing a pattern with the theme with which we will work, this time we will draw the face of Balthazar one of the magicians who attended to meet the baby Jesus, we will only make the face (head, beard, mustache and turban).
Paso número 2: una vez que tengamos nuestro patrón listo , vamos a proceder marcando las piezas en los foamis que correspondan o de nuestra preferencia el turbante
Step number 2: once we have our pattern ready, we will proceed by marking the pieces in the foamis that correspond or our preference the turban.
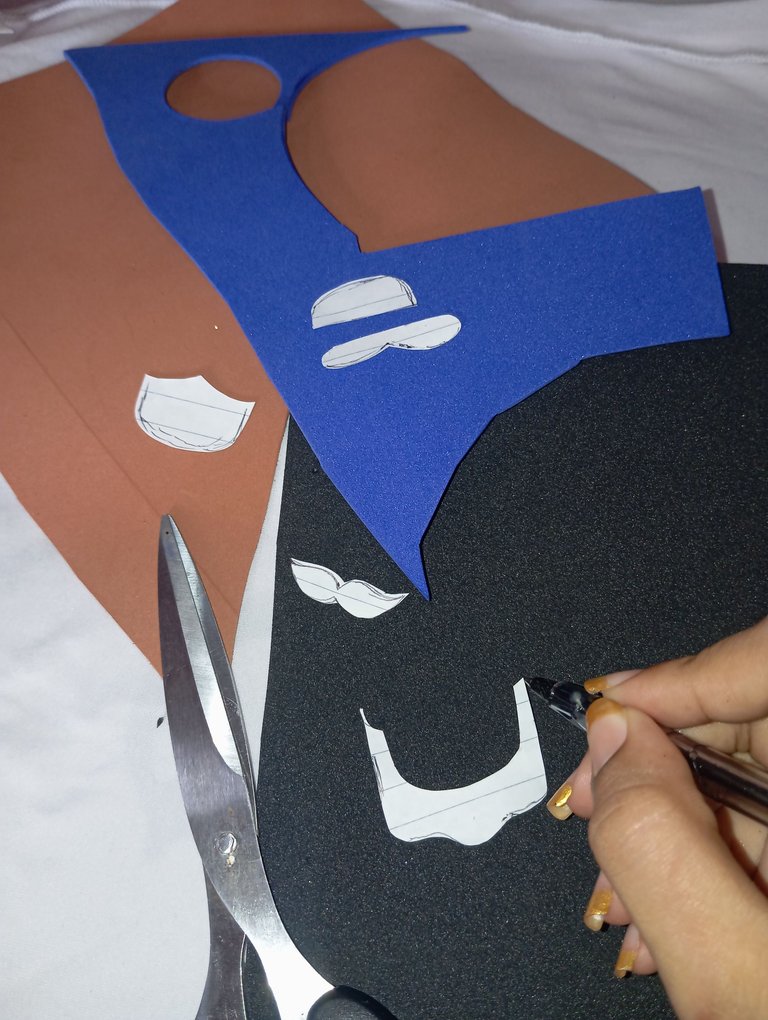
Paso número 3: seguidamente vamos a continuar tomando nuestra tijera y recortando las piezas que marcamos en el paso anterior
Step number 3: then we will continue taking our scissors and cutting out the pieces we marked in the previous step.
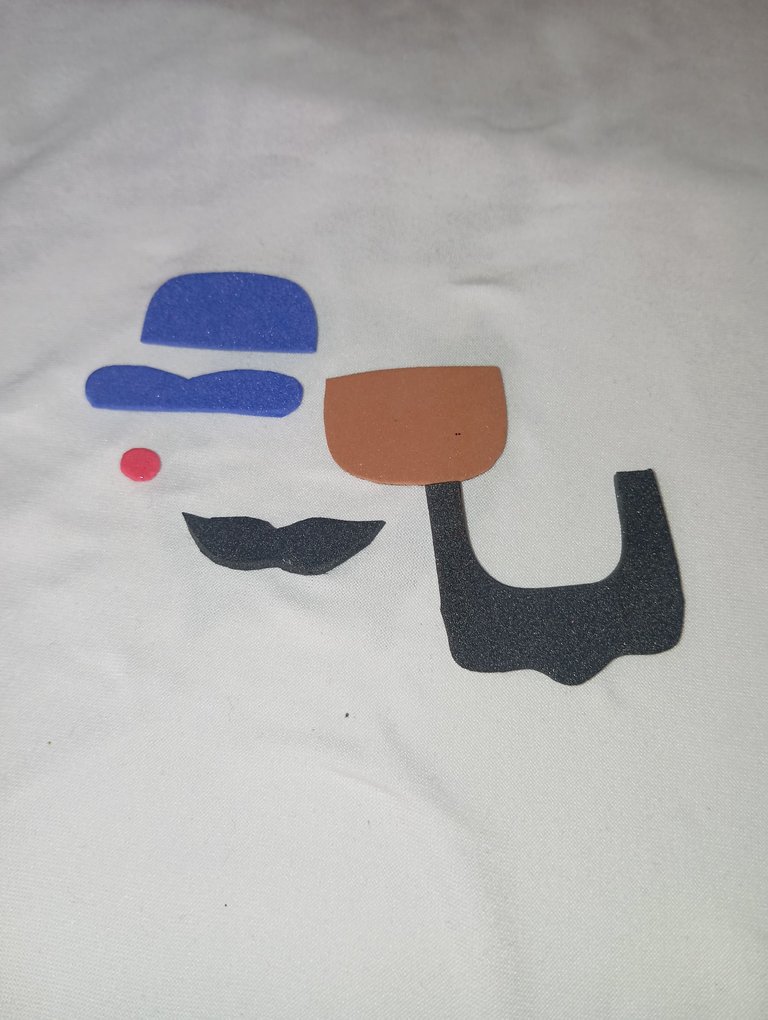
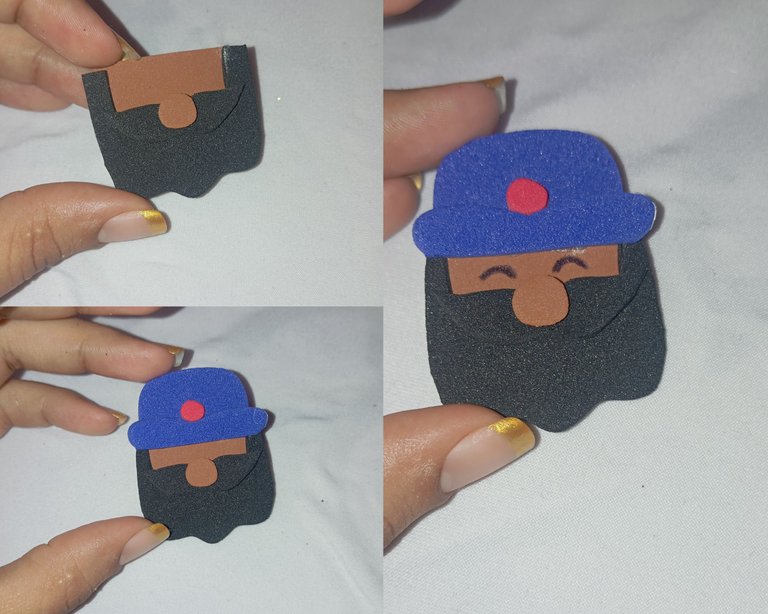
Pasos número 4: luego vamos a continuar en nuestro cuarto paso tomando la cara junto con la barba y el bigote de Baltasar y lo pegaremos , luego vamos a continuar pegando el turbante en la parte de arriba de la cabeza , finalmente vamos a continuar realizando el rostro de nuestro mago , culminando así nuestro rostro
Steps number 4: then we will continue in our fourth step taking the face along with the beard and mustache of Balthazar and paste it, then we will continue pasting the turban on top of the head, finally we will continue making the face of our magician, thus culminating our face.
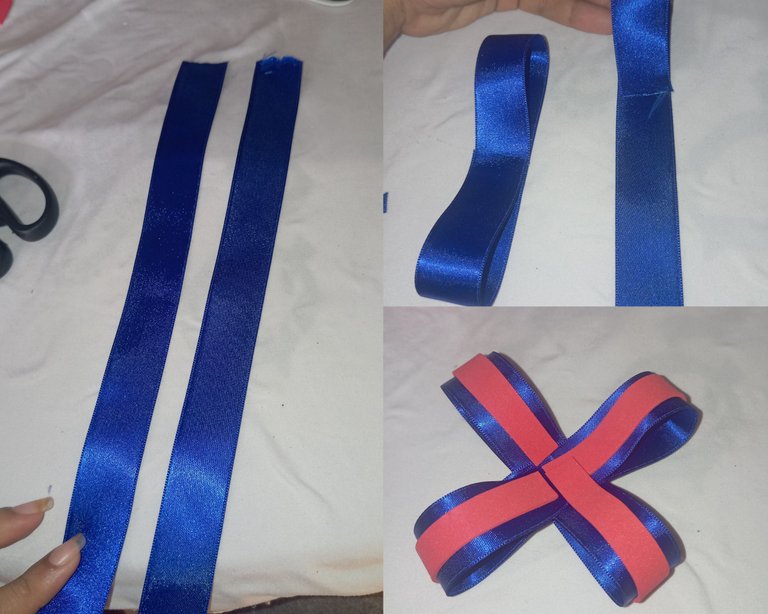
Paso número 5: a continuación vamos a proceder tomando nuestra cinta y la dividiremos o recortaremos en dos , tomaremos cada punta y la pegaremos llevándola hacia el centro de esta manera , seguidamente siguiendo el mismo modelo en todo el centro de la cinta azul pegaremos una tira de foamis para que resalte , ambas piezas las pegaremos dobladas formando nuestro lazo
Step number 5: next we will proceed taking our ribbon and we will divide it or cut it in two, we will take each end and we will glue it taking it towards the center in this way, then following the same model in the center of the blue ribbon we will glue a strip of foamis to highlight it, both pieces we will glue them folded forming our bow.
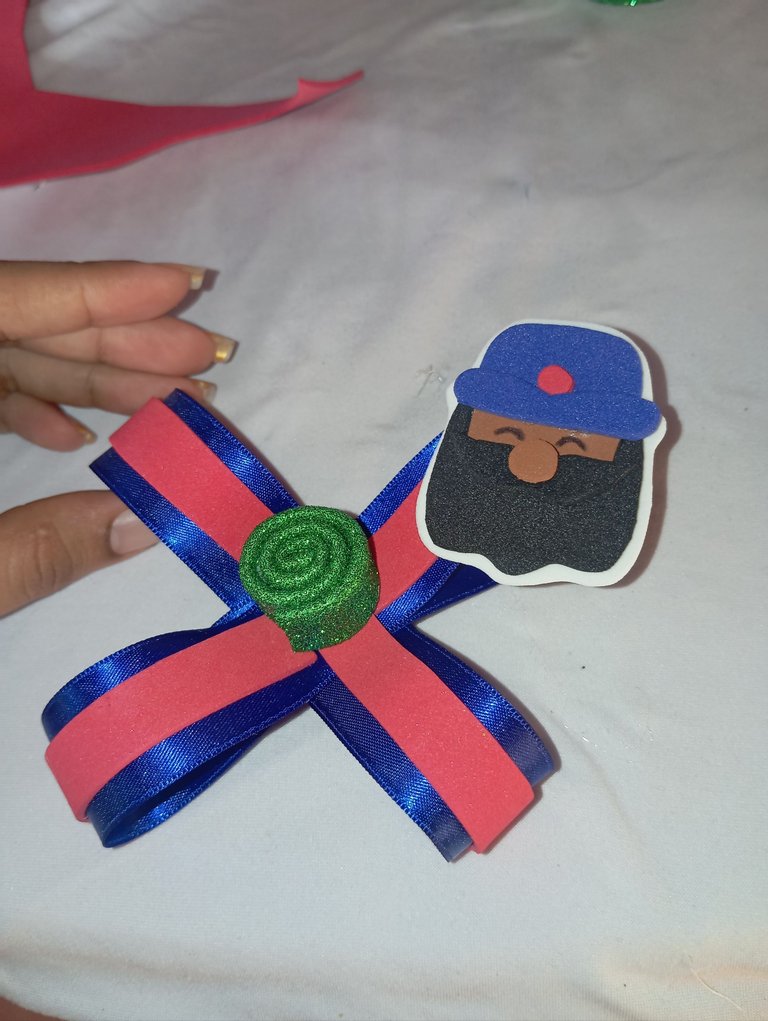
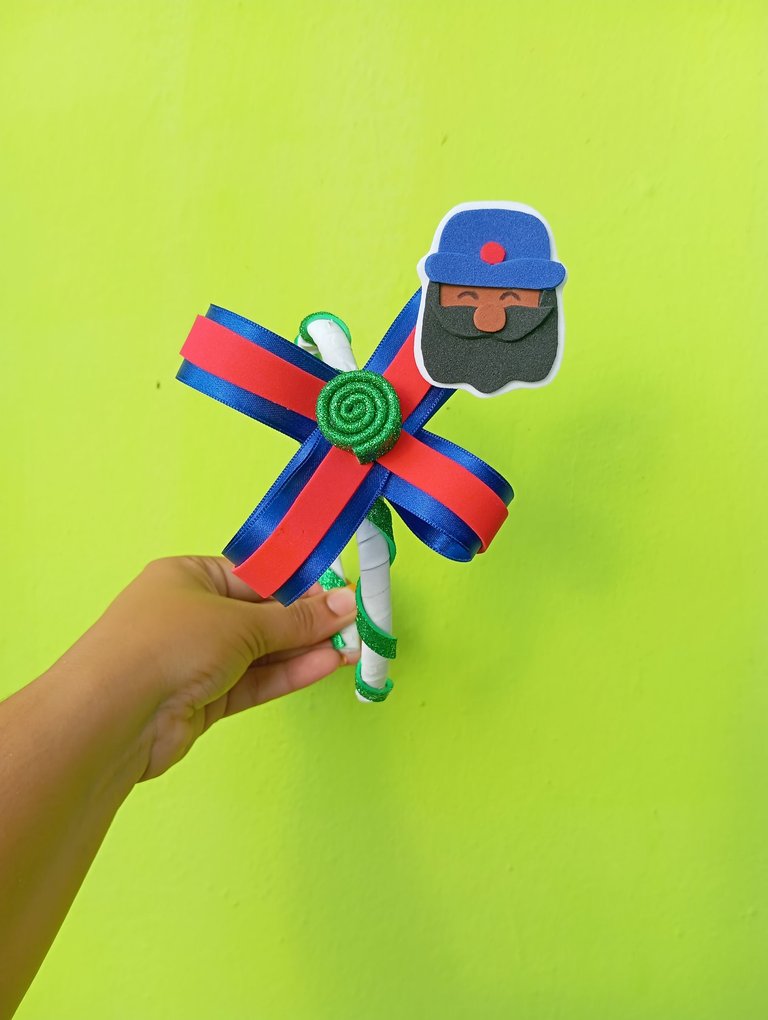
Paso número 6: en nuestro sexto paso vamos a tomar una tira de foamis verde escarchado y la pegaremos de forma enrollada tipo caracol en todo el centro del lazo , en una esquina llegaremos el rostro de Baltasar , finalizando nuestro diseño
Step number 6: in our sixth step we are going to take a strip of frosted green foamis and we will glue it in a snail-like rolled way around the center of the ribbon, in one corner we will get Balthazar's face, finishing our design.
Paso número 7: seguidamente continuaremos decorando el cintillo con una tira de foamis verde escarchado , la pegaremos de forma enrollada y separada
Step number 7: next we will continue decorating the headband with a strip of frosted green foamis, we will glue it in a rolled and separated way.
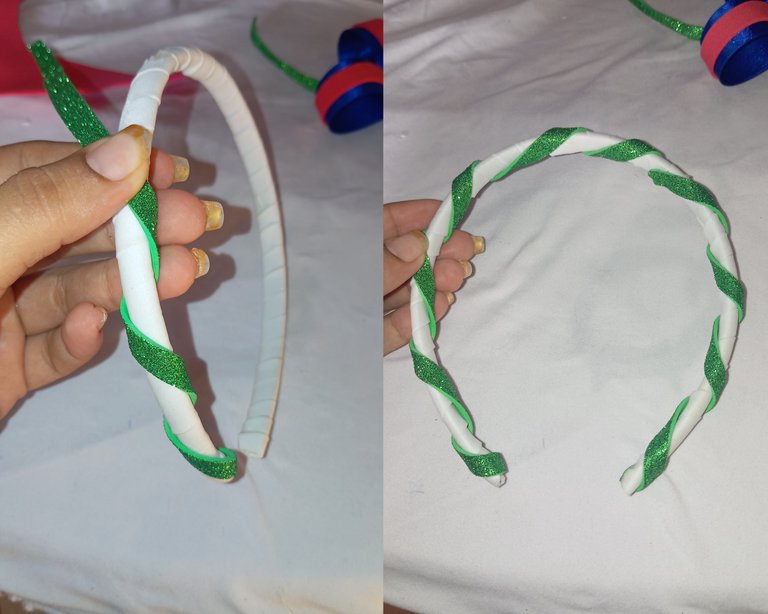
Paso número 8: finalmente vamos a tomar el diseño de nuestro lazo y lo pegaremos en una esquina de nuestro cintillo, finalizando nuestra decoración ideal para celebrar los reyes magos
Créditos: las fotos las tomé con mi redmi 12 y traduje mis textos con el traductor deepl, feliz noche amigos
Step number 8: finally we will take the design of our ribbon and glue it in a corner of our headband, finalizing our ideal decoration to celebrate the Three Wise Men.
Credits: the photos were taken with my redmi 12 and I translated my texts with the deepl translator, happy night friends.
Wow, you carved that head so well; the whole headband looks stunning and fits perfectly on you.
Thank you very much for appreciating it
This headband looks really good on you. It's obvious how much effort you put into making it.
Thank you very much, that's right my friend, I always try to give my best
You made it very well. And it looks beautiful on you.
Well done you made nice piece!
Thanks Friends
very beautiful, I like it.