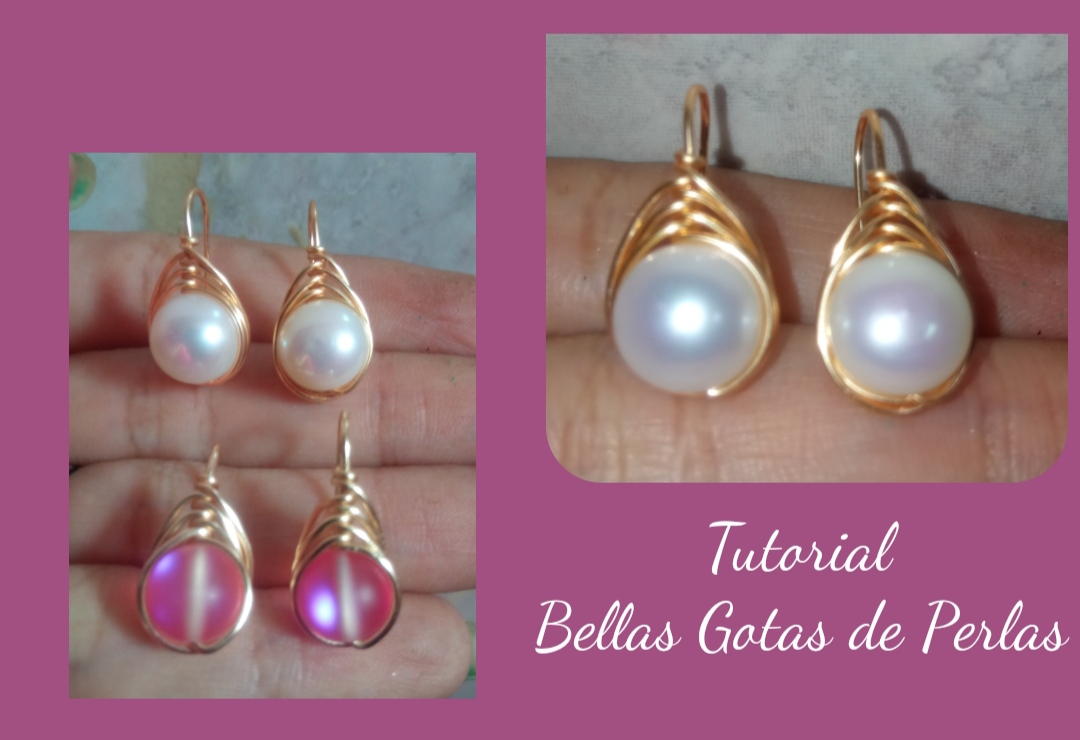
Feliz y bendecido día, sean todos bienvenidos a mi blog es para mí un gran placer el poder compartir una vez más con todos ustedes esa oportunidad quiero regalarles o muy sencillo tutorial donde podremos elaborar juntos unos muy sencillos zarcillos con la técnica del alambrismo de una forma muy fácil y sencilla ideal para elaborarlos por principiantes en Esta técnica. Es un diseño muy sencillo pero elegante ideal para todas esas personas que no les gusta usar zarcillos de Gran tamaño y colorido y desean algo más sencillo pero de Gran elegancia.
Happy and blessed day, everyone welcome to my blog, it is a great pleasure for me to be able to share once again with all of you that opportunity I want to give you a very simple tutorial where we can make together some very simple tendrils with the wire technique in a very easy and simple way, ideal for making them by beginners in this technique.
It is a very simple but elegant design ideal for all those people who do not like to use large and colorful earrings and want something simpler but of great elegance.
To create this beautiful design I used original pearls which are a little expensive but they are a material that will last us for a long time. I also share some photographs of the same model made with moonstones.
For all of you I created this very simple tutorial to show you step by step how easy it is to make this design.
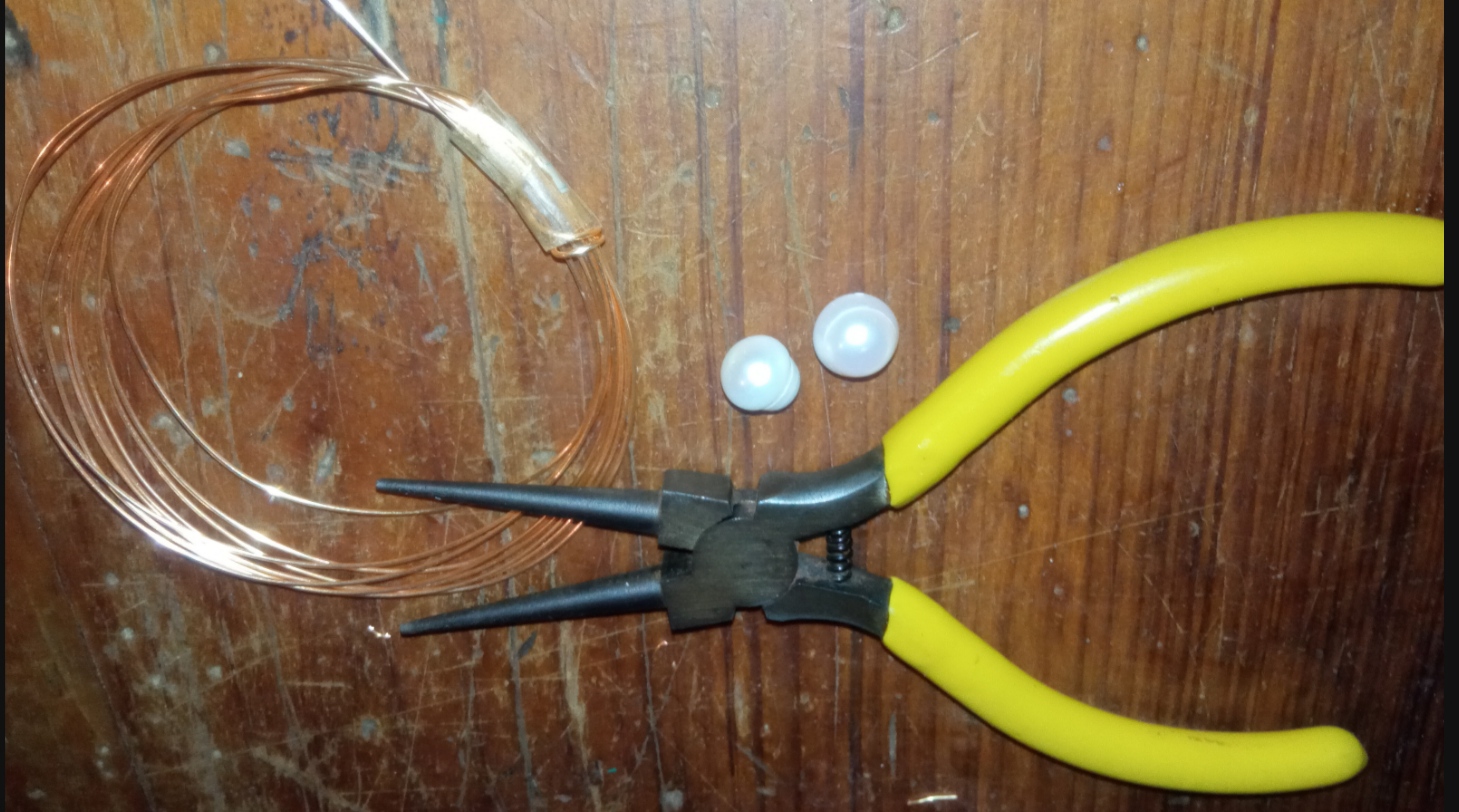
- Alambre de bisutería calibre 20.
- perlas blancas.
- Pinza de bisutería.
- 20 gauge jewelry wire.
- white pearls.
- Jewelry clamp.
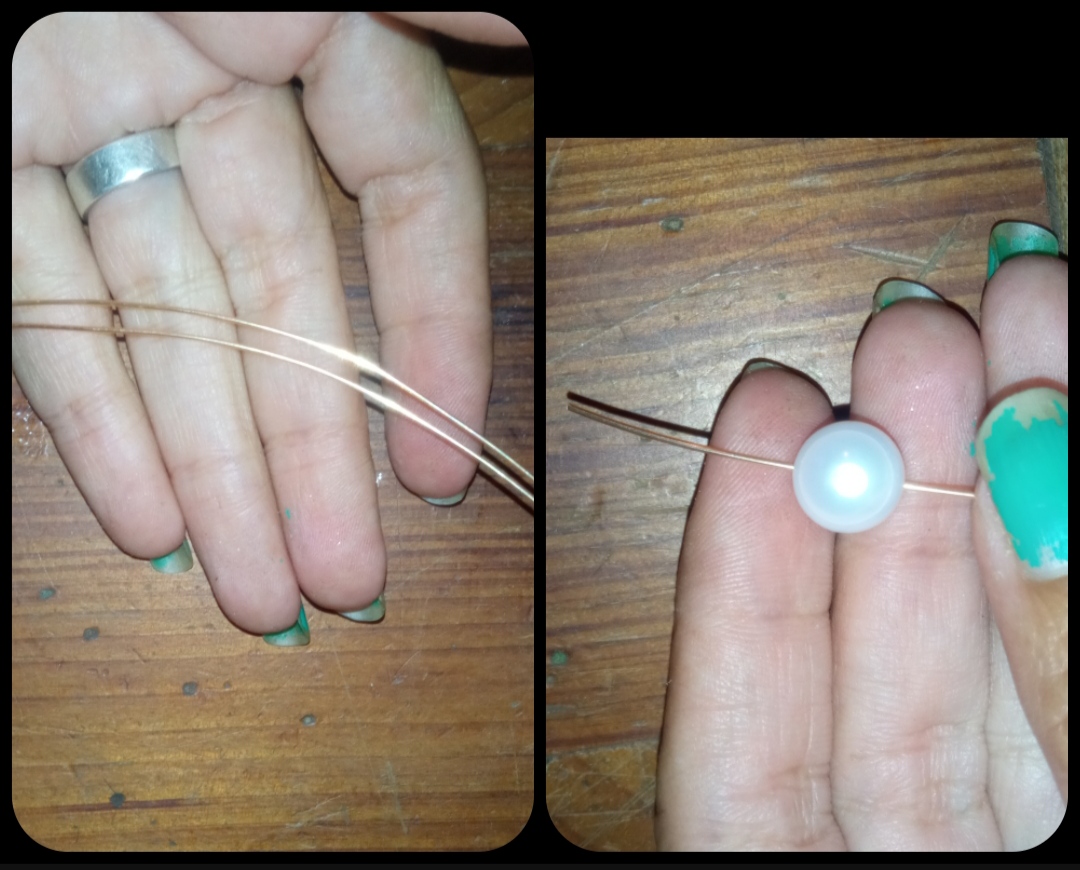
✴️ Paso 1: para iniciar la elaboración de este muy sencillo diseño lo primero que debemos realizar es tomar el alambre calibre 20 y cortaremos un pedazo de aproximadamente 20 cm. Seguidamente tomaremos la perla que hemos seleccionado para esta elaboración, tomando en cuenta que las perlas no son piedras perfectas es decir no poseen una forma circular perfecta y tienden a diferenciarse unas que otras Por lo cual debemos seleccionarlas con mucho cuidado Si queremos que ambos zarcillos sean perfectamente igual, también debemos tomar en cuenta que las perlas no poseen un agujero de Gran grosor así que debemos intentar primero y probar si las perlas que hemos seleccionado podemos introducirle el alambre calibre 20 o debemos utilizar otro tipo de alambre, esta piedra que hemos seleccionado la introduciremos por el alambre dejando por encima de ella 4 cm de alambre.
✴️ Step 1: to start making this very simple design, the first thing we must do is take the 20 gauge wire and we will cut a piece of approximately 20 cm.
Next we will take the pearl that we have selected for this elaboration, taking into account that pearls are not perfect stones, that is, they do not have a perfect circular shape and they tend to differ one from another. Therefore, we must select them very carefully. If we want both tendrils to be perfectly the same, we must also take into account that the pearls do not have a very thick hole so we must first try and test if the pearls that we have selected can be inserted with the 20 gauge wire or we must use another type of wire, this stone that we have selected We will insert it through the wire, leaving 4 cm of wire above it.
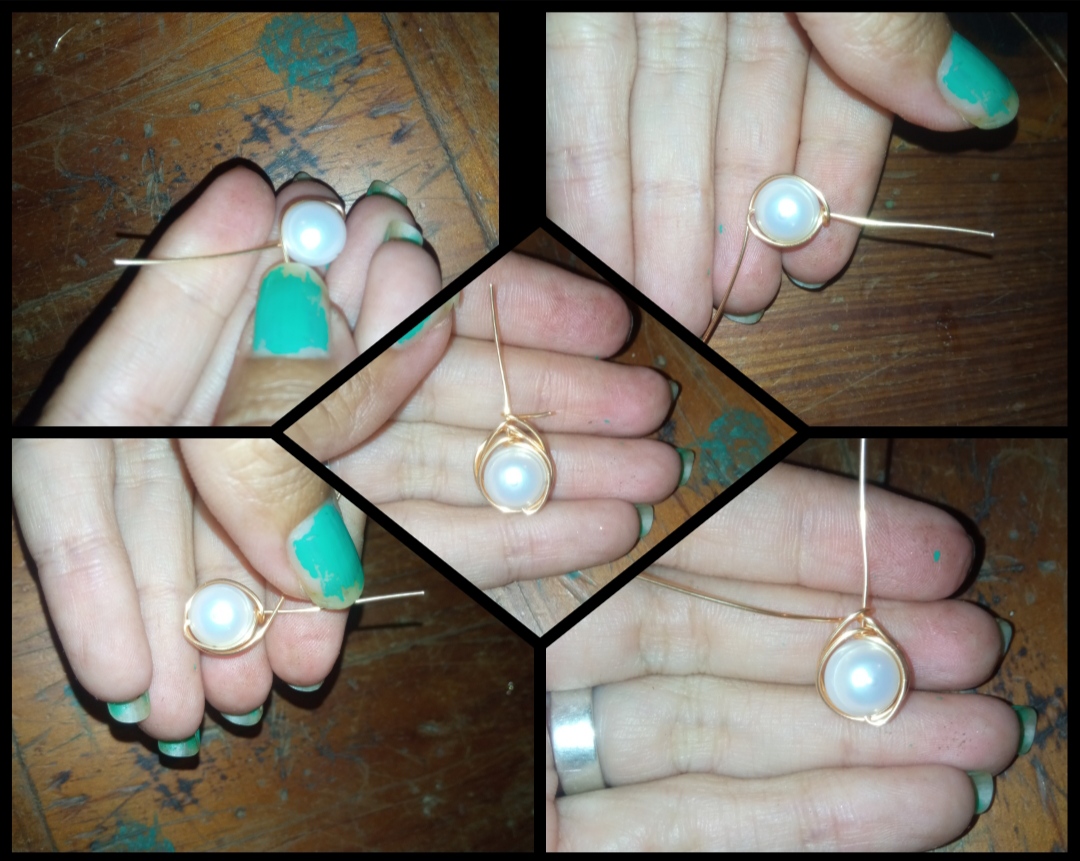
✴️ Paso 2: ahora doblaremos el alambre hacia el lado izquierdo lo subiremos moldeando el borde de la perla y lo doblaremos el alambre que nos queda en la parte superior de La perla bajandolo nuevamente por el mismo lado izquierdo moldeando la perla completamente hacia el lado derecho hasta llevar el alambre y doblarlo encima del doblez anterior. Así bajamos nuevamente ahora por el lado derecho el alambre realizamos la vuelta completa moldeando La perla y llevamos el alambre a la parte superior del doblez anterior este procedimiento lo elaboraremos en esta misma forma las veces que deseemos hasta lograr esta linda forma de gota y la perla quede en el centro de ella.
✴️ Step 2: now we will bend the wire to the left side, we will raise it, molding the edge of the pearl and we will bend the wire that remains at the top of the pearl, lowering it again on the same left side, molding the pearl completely towards the right side until you bring the wire and bend it over the previous fold.
So we go down again now on the right side of the wire, we make the complete turn molding the pearl and we take the wire to the top of the previous fold. We will do this procedure in this same way as many times as we want until we achieve this beautiful drop shape and the pearl. stay in the center of it.
✴️ Paso 3: por último allá tener nuestro hermoso diseño de zarcillo casa totalmente elaborado en su parte frontal procederemos a trabajar con el pedazo de alambre que hemos dejado en la parte superior de este trabajo para ello con ayuda de la pinza de bisutería lo moldearemos y daremos forma de anzuelo para guindar este hermoso zarcillo. Y así con solo dos materiales podemos elaborar este hermosísimo diseño.
✴️ Step 3: finally, having our beautiful house tendril design fully elaborated on its front, we will proceed to work with the piece of wire that we have left at the top of this work to do this with the help of the jewelry tweezers We will shape it and shape it into a hook to hang this beautiful tendril.
And so with only two materials we can create this beautiful design.
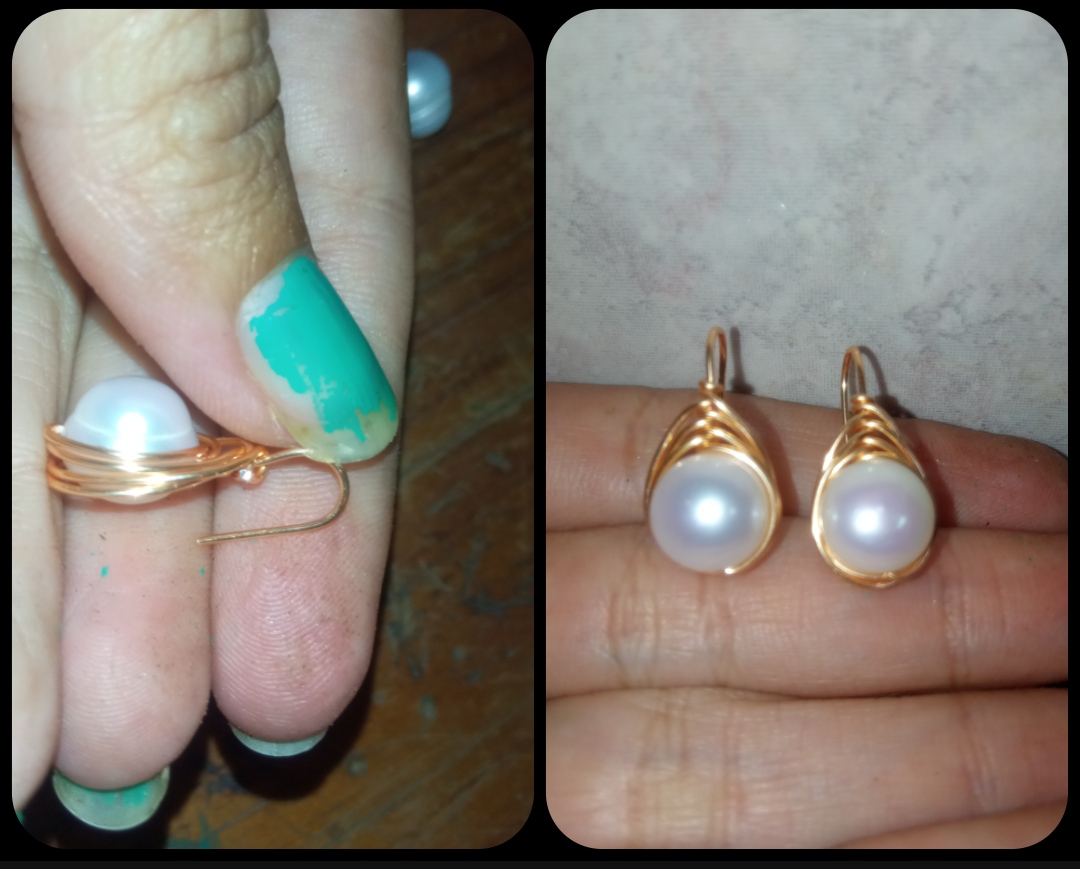
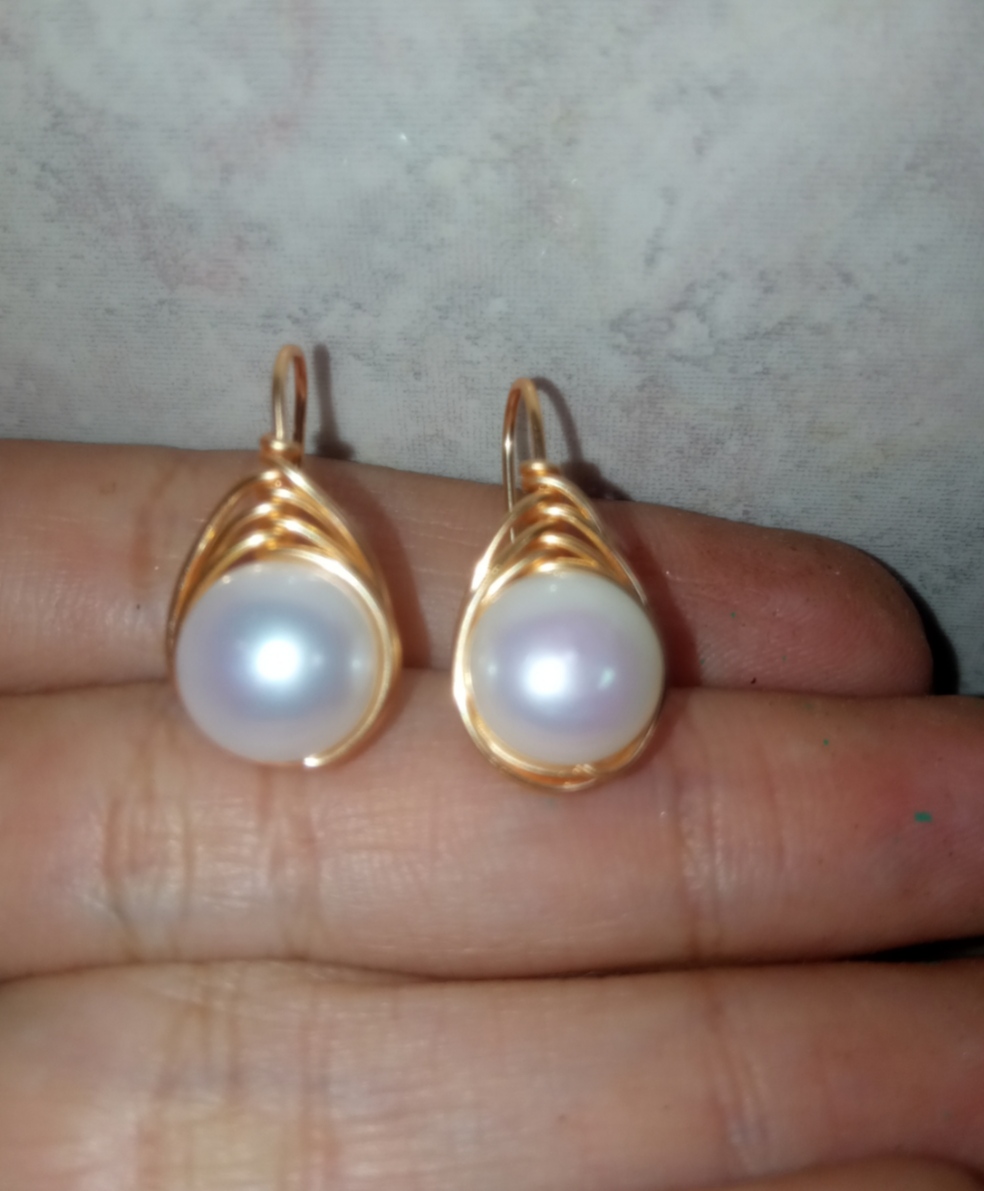
Todas las Fotos son de mi autoría y fueron tomadas con mi Celular Redmi 9And so, my dear friends, we can make some beautiful, super elegant and beautiful earrings, which it says to make today with pearls, but if the pearls are not to your liking or they are very difficult or expensive to get, we can also make this beautiful design with different stones that you like and desire.
It has been a pleasure for me to share this simple design today with all of you. I say goodbye, hoping that this is to the liking of all of you. I appreciate your visit and your time shared, greetings and blessings.
All Photos are my authorship and were taken with my Redmi 9 Cellphone
Hermosos ambos pares. Los de piedra lunar me encantaron. Hiciste un lindo trabajo amiga. Muy elegantes.
Muchas gracias ☺️
Thank you for sharing this wonderful tutorial. Your instructions make it look so simple, even for beginners.
Están bellísimos, me encanta el diseño de estos zarcillos 👍
Me alegra que te haya gustado amiga 😊
Demasiado bellas. Un trabajo prolijo y muy delicado. Te felicito.
Gracias amiga.
Saludos.
Hermoso trabajo me encanta como realizas tus accesorios siempre tienen un toque elegante.
!discovery 35
Muchas gracias amiga, me alegra que te haya gustado.
Saludos.
This post was shared and voted inside the discord by the curators team of discovery-it
Join our Community and follow our Curation Trail
Discovery-it is also a Witness, vote for us here
Delegate to us for passive income. Check our 80% fee-back Program
Nunca me he atrevido a hacer bisutería con alambre ya que siento que es muy complicado para mí y me daría lástima gastar material y que no me guste el resultado, pero este trabajo que has hecho se ve sumamente sencillo de hacer y aparte muy bonito.
hermosos me encantan feliz tarde.
Muy bonitos te quedaron estos aretes