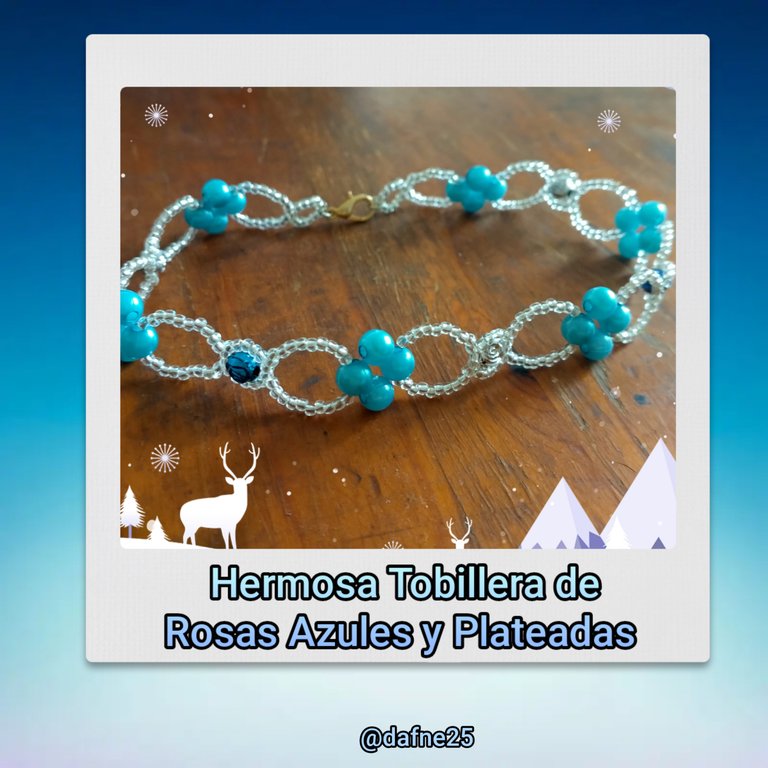

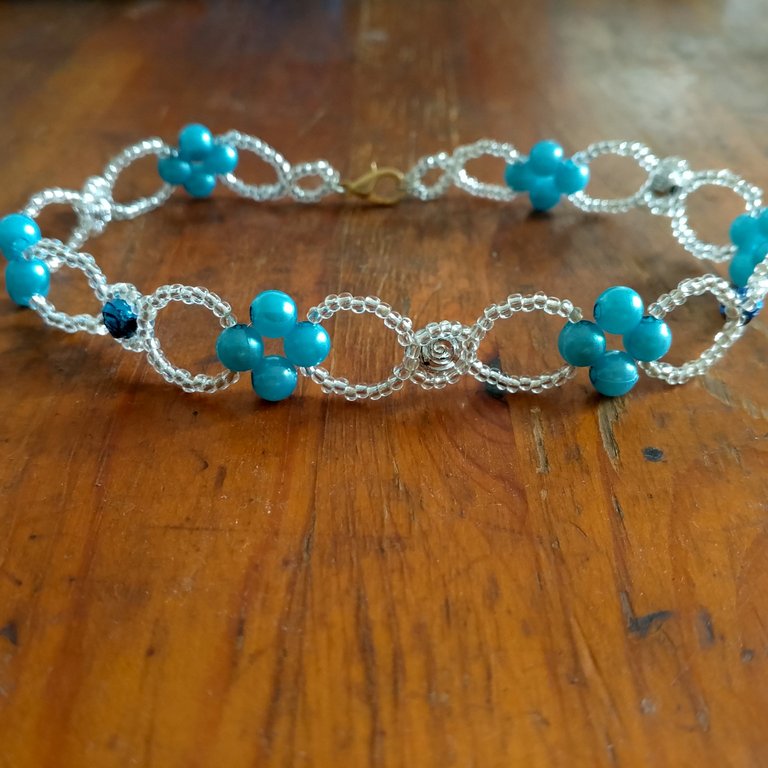
Buenas tardes queridos amigos de Hive y Jewelry, cómo están?, espero que estén muy bien y que hayan tenido y disfrutado de este bello día. En el día de hoy les quiero compartir cómo he hecho está bella tobillera de color azul con plateado que me ha gustado muchísimo, es muy sencilla, pero gracias a las perlas azules y las cuenta en forma de rosas es muy vistosa, además los materiales son muy fáciles de conseguir y muy económicos, está es una de las tobilleras que más me gustan.
Los Materiales que vamos a necesitar son:
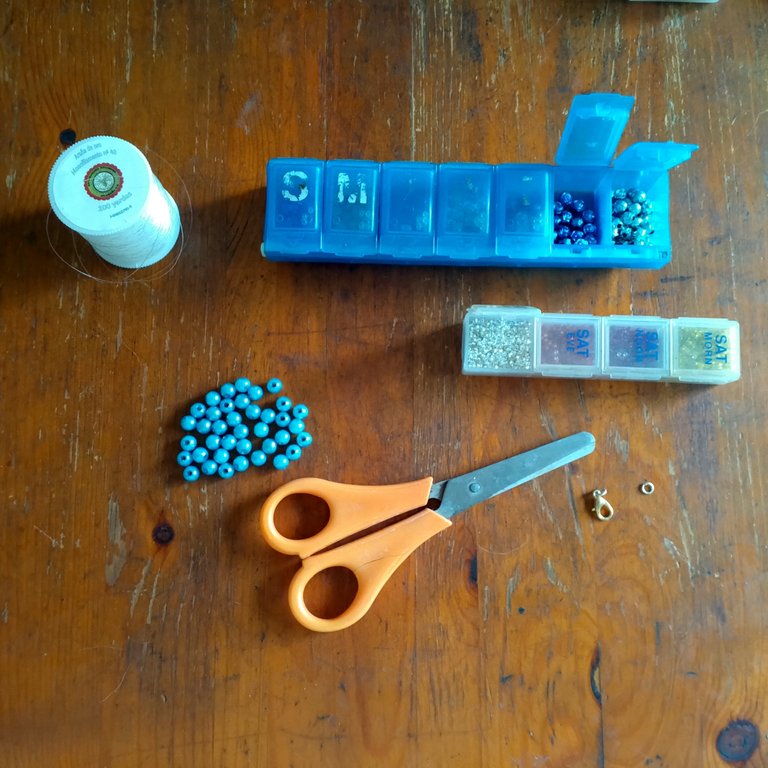
Cuentas en forma de rosa de color azul oscuro
Perlas redondas de color azul y tamaño pequeño
Mostacillas transparentes
Broche y Argolla
1,5mt de nylon 0,4
Procedimiento
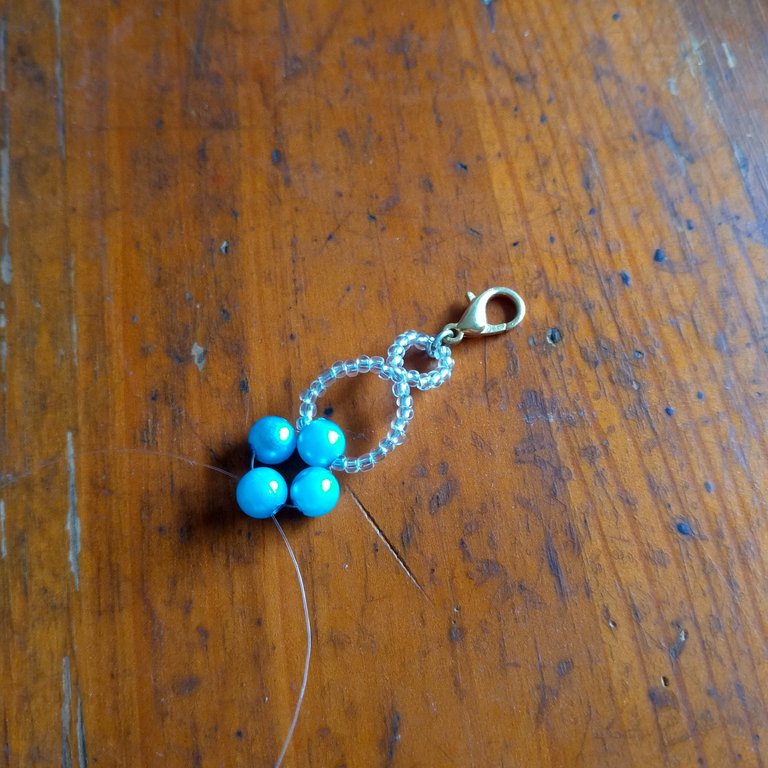
En el nylon insertamos 6 mostacillas transparentes, el broche, 6 mostacillas transparentes y cruzamos por una nueva mostacilla. Llevamos todo al centro del nylon y en cada lado agregamos 10 mostacillas transparentes, cruzamos por una perla redonda de color azul, en cada nylon agregamos una nueva perla de color azul y volvemos a cruzar los nylon por una nueva perla de color azul.
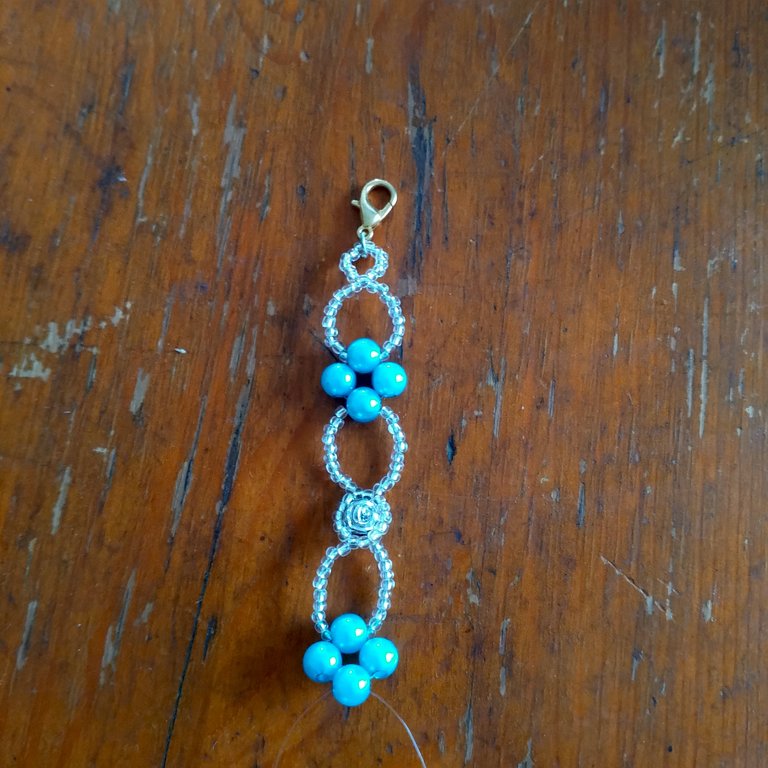
Insertamos en cada nylon 10 mostacillas transparentes, cruzamos por dos mostacillas transparentes, añadimos 5 mostacillas en cada nylon, cruzamos por dos nueva mostacillas transparentes, juntamos los nylon y agregamos una cuenta en forma de rosa de color plateado, cruzamos los nylon nuevamente por las mostacillas transparentes del cruce anterior a dónde estamos. Repasamos las mostacillas a los lados dándole más estabilidad al círculo y cruzamos nuevamente por las últimas dos mostacillas transparentes del extremo del tejido. Agregamos nuevamente en cada nylon 10 mostacillas transparentes y cruzamos por una perla redonda de color azul, añadimos en cada nylon nuevamente una perla de color azul y cruzamos nuevamente por una nueva perla de color azul.
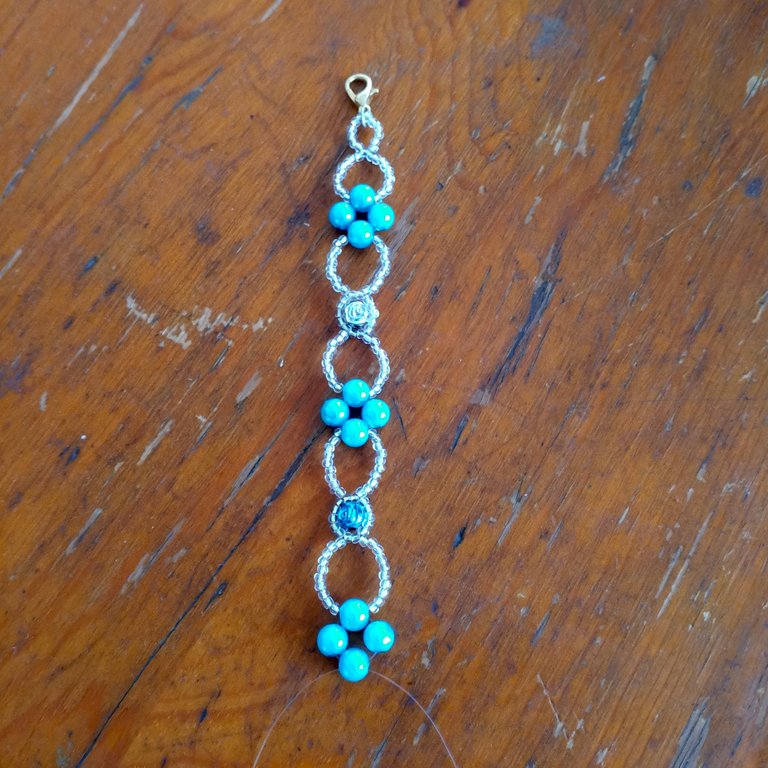
Volvemos a insertar en cada nylon 10 mostacillas transparentes, cruzamos por dos mostacillas transparentes, añadimos 5 mostacillas en cada nylon, cruzamos por dos nueva mostacillas transparentes, juntamos los nylon y agregamos una cuenta en forma de rosa de color azul oscuro, cruzamos los nylon nuevamente por las mostacillas transparentes del cruce anterior a dónde estamos. Repasamos las mostacillas a los lados dándole más estabilidad al círculo y cruzamos nuevamente por las últimas dos mostacillas transparentes del extremo del tejido. Agregamos nuevamente en cada nylon 10 mostacillas transparentes y cruzamos por una perla redonda de color azul, añadimos en cada nylon nuevamente una perla de color azul y cruzamos nuevamente por una nueva perla de color azul.
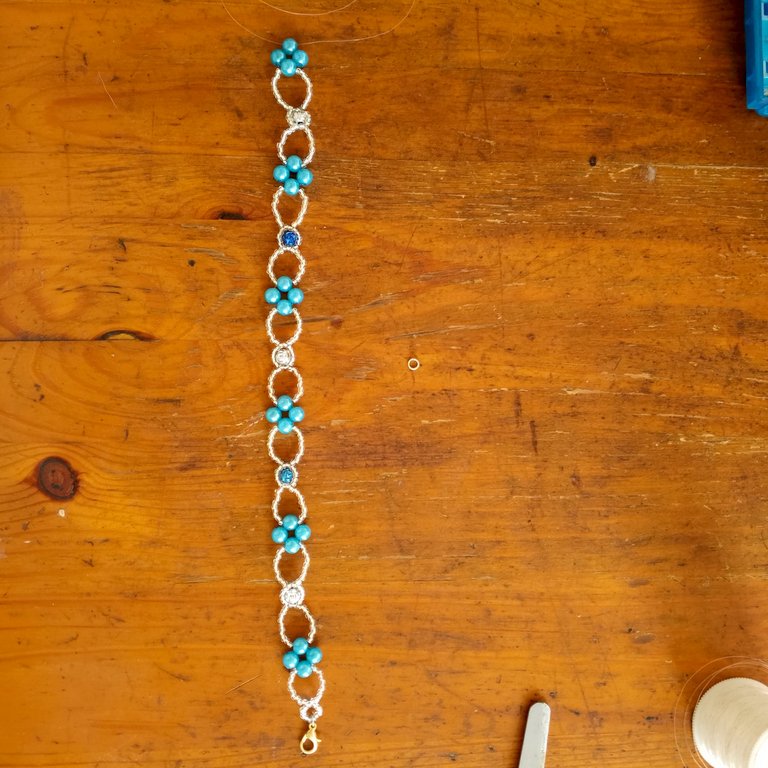
Repetimos nuevamente el paso 2, el paso 3 y nuevamente el paso 2. Esto para completar el largo de la tobillera.

Para terminar insertamos 10 mostacillas transparentes en cada nylon y cruzamos por una nueva mostacilla transparente, añadimos 6 mostacillas transparentes en un nylon, la argolla, 6 mostacillas transparentes más y hacemos un nudo doble para asegurar bien la tobillera. Y listo, terminamos, tenemos una nueva tobillera para estrenar.
Hasta la próxima 👋
Créditos
Traductor: App DeepL
Editores de fotos usado: editor de fotos FotoCollage

Good afternoon dear friends of Hive and Jewelry, how are you, I hope you are very well and that you have had and enjoyed this beautiful day. Today I want to share with you how I have made this beautiful blue and silver anklet that I really like, it is very simple, but thanks to the blue pearls and beads in the shape of roses is very colorful, also the materials are very easy to obtain and very economical, this is one of the anklets that I like the most.
The materials that we will need are:

Dark blue rose-shaped beads
Blue round beads in small size
Clear beads
Brooch and ring
1,5mt of nylon 0,4
Procedure

In the nylon we insert 6 transparent beads, the brooch, 6 transparent beads and cross through a new bead. We bring everything to the center of the nylon and on each side we add 10 transparent beads, we cross through a round blue bead, on each nylon we add a new blue bead and we cross again the nylons through a new blue bead.

We insert in each nylon 10 transparent beads, we cross through two transparent beads, we add 5 beads in each nylon, we cross through two new transparent beads, we join the nylons and add a silver colored rose shaped bead, we cross the nylons again through the transparent beads of the previous crossing to where we are. We go over the beads on the sides giving more stability to the circle and we cross again through the last two transparent beads at the end of the weave. We add again in each nylon 10 transparent beads and we cross through a round blue bead, we add in each nylon again a blue bead and we cross again through a new blue bead.

We re-insert in each nylon 10 transparent beads, cross through two transparent beads, add 5 beads in each nylon, cross through two new transparent beads, join the nylons and add a rose-shaped bead of dark blue color, cross the nylons again through the transparent beads of the previous crossing to where we are. We go over the beads on the sides giving more stability to the circle and we cross again through the last two transparent beads at the end of the weave. We add again in each nylon 10 transparent beads and we cross through a round blue bead, we add in each nylon again a blue bead and we cross again through a new blue bead.

We repeat step 2 again, step 3 and again step 2. This to complete the length of the anklet.

To finish we insert 10 clear beads in each nylon and cross through a new clear bead, add 6 clear beads in a nylon, the ring, 6 more clear beads and make a double knot to secure the anklet well. And that's it, we have a new anklet to wear for the first time.

Until next time 👋
Credits
Translator: App DeepL
Photo editors used: FotoCollage photo editor.
Niçe bracelet, I love it design, nice creativity, thanks for sharing
Thank you 👍
This look simple and beautiful. I love some like this
Thank you 👍
The anklet looks super cute and simple too. Would definitely look great when worn. Great work
Thank you 👍