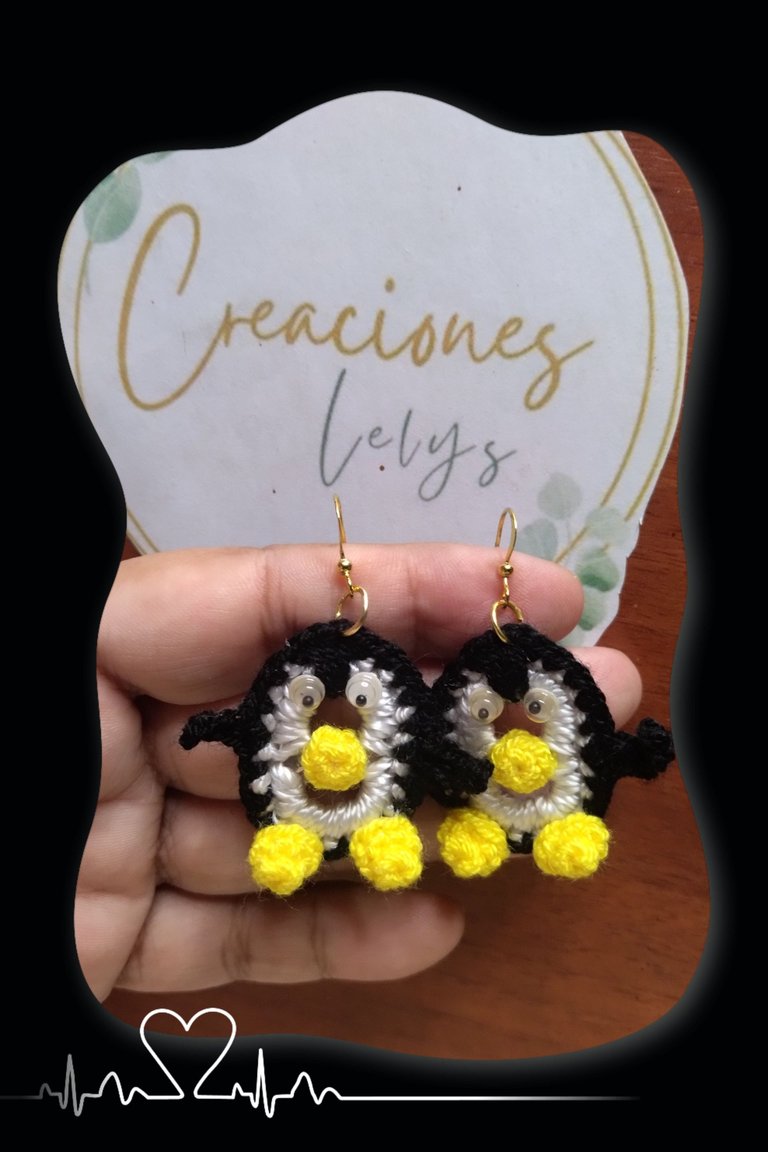
Hola 👋 buenas noches 😪 o buenos días 😗 según donde te encuentres. Siempre es un placer pasar por la comunidad, disfrutar de sus creaciones 🙋 y leerlos. En esta ocasión quiero mostrarle un trabajo de reciclado que realicé. Les cuento que me motivé a crear con estas chapitas, anillas o seguros de latas una vez que la amiga @katiuskamata mostró algunas de sus creaciones de reciclaje. Luego de eso empecé a caminar viendo para el suelo, ya que estas chapitas son en su mayoría de latas de refresco o bebidas con alcohol. También estoy guardando las chapitas de latas de productos que van llegando a la casa. Se hacen trabajos muy lindos, útiles y prácticos reciclando estos materiales.
Hello 👋 good evening 😪 or good morning 😗 depending on where you are. It's always a pleasure to stop by the community, enjoy your creations 🙋 and read them. On this occasion I want to show you a recycling work I made. I tell you that I got motivated to create with these little buttons, rings or can latches once the friend @katiuskamata showed some of her recycling creations. After that I started to walk around looking for the floor, since these caps are mostly from soda cans or alcoholic beverages. I'm also saving the canning sheets from products that are coming into the house. It is very nice, useful and practical work to recycle these materials.

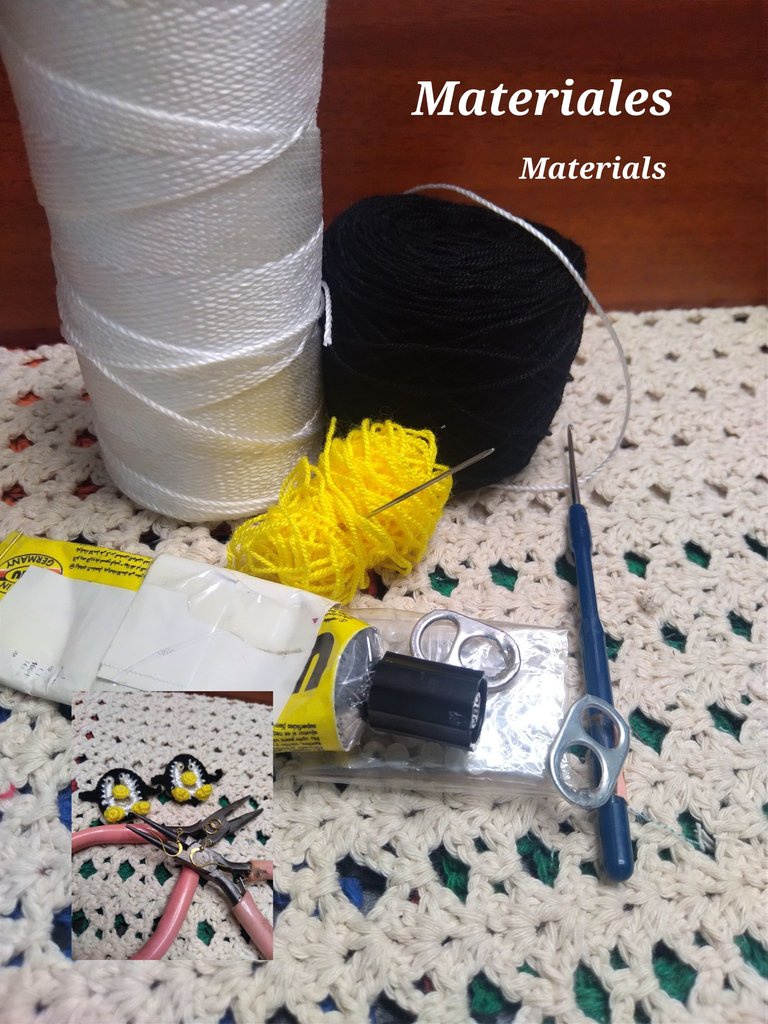
Para la elaboración de estos lindos y divertidos aretes de pingüinos utilicé los siguientes materiales:
- Chapitas o anillas de latas.
- Hilos nylon de los colores blanco y rojo.
- Hilos acrílicos amarillo.
- Aguja de crochet de 1,60mm.
- Ojos locos o móviles de los más pequeños.
- Anzuelos para zarcillos.
- Tijeras.
- Aguja lanera.
- Pinzas de bisutería.
- Aros de alambre.
- Pegamento.
To make these cute and fun penguin earrings I used the following materials:
- Tin plates or rings.
- White and red nylon threads.
- Yellow acrylic threads.
- Crochet needle of 1,60mm.
- Crazy or mobile eyes of the smallest ones.
- Hooks for tendrils.
- Scissors.
- Wool needle.
- Jewelry tweezers.
- Wire hoops.
- Glue.
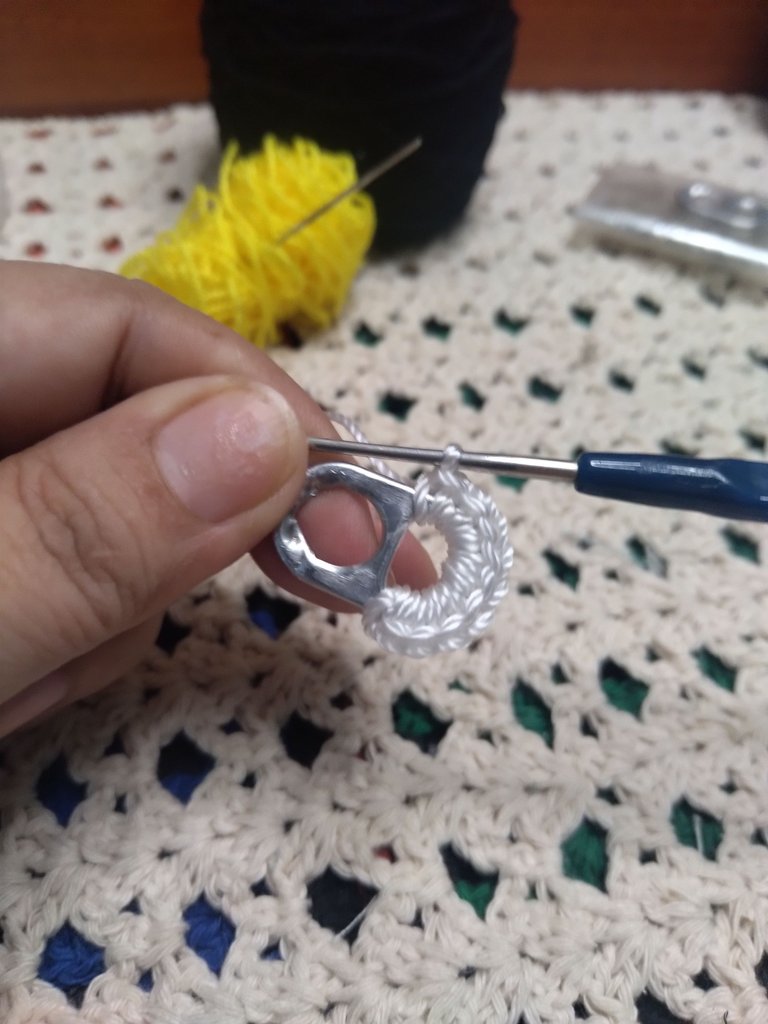
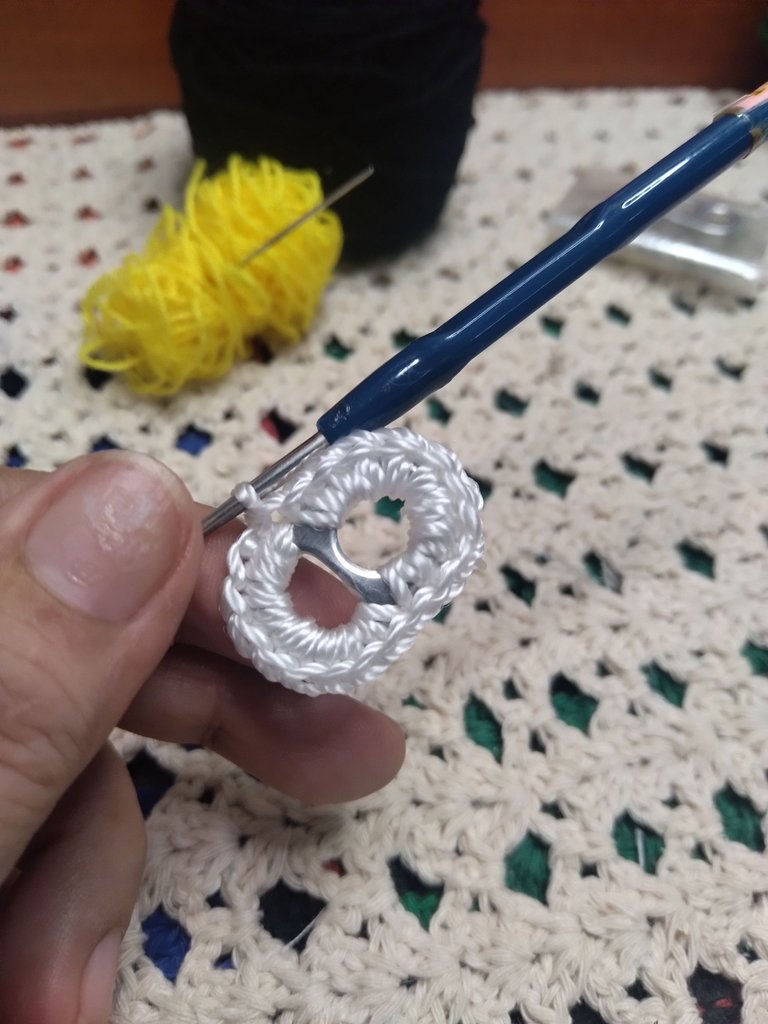
- Lo primero que hacemos para crear estos accesorios es cubrir con el hilo nylon color blanco toda la la chapita. Para ello iniciamos tejiendo puntos bajos por donde están los orificios. Al finalizar cerramos con punto deslizado, cortamos y escondemos la hebra. Cómo es hilo nylon también podemos pasar un poco de calor y quemar para que se pegue la punta sobrante al tejido.
- The first thing we do to create these accessories is to cover with the white nylon thread the whole of the badge. To do this we start by knitting low stitches where the holes are. At the end we close with slipped stitch, cut and hide the thread. As it is nylon thread we can also pass a little heat and burn it so that the excess tip sticks to the fabric.
- Tomamos el hilo acrilico color negro y lo enganchamos en un punto del tejido. Iniciamos tejiendo puntos bajos, punto sobre punto.
- We take the black acrylic yarn and we hook it in a stitch of the fabric. We start by knitting single crochet, stitch over stitch.
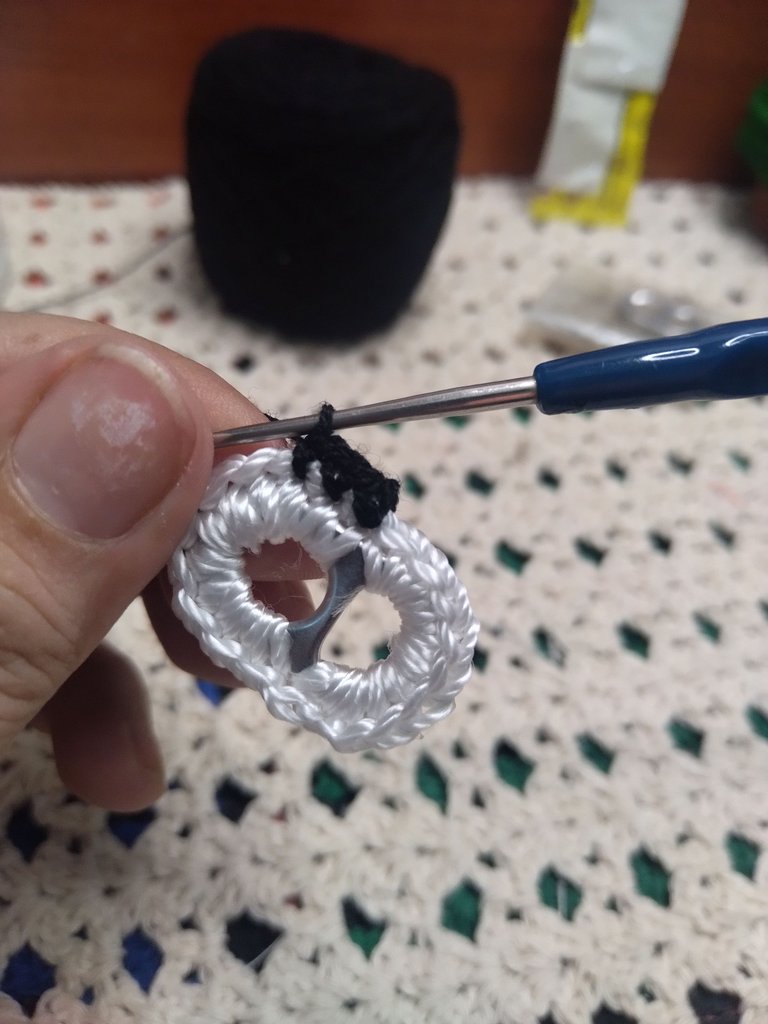
- Al llegar a la parte superior de uno de los lados de la chapa tejemos puntos bajos alargados, es decir pasando la lazada por en medio de todo lo tejido. Hacemos tres puntos y luego seguimos tejiendo puntos bajos.
- When we reach the top of one of the sides of the sheet, we knit long single crochet stitches, i.e. passing the loop through the middle of the knitted area. We knit three stitches and then continue knitting single crochet.
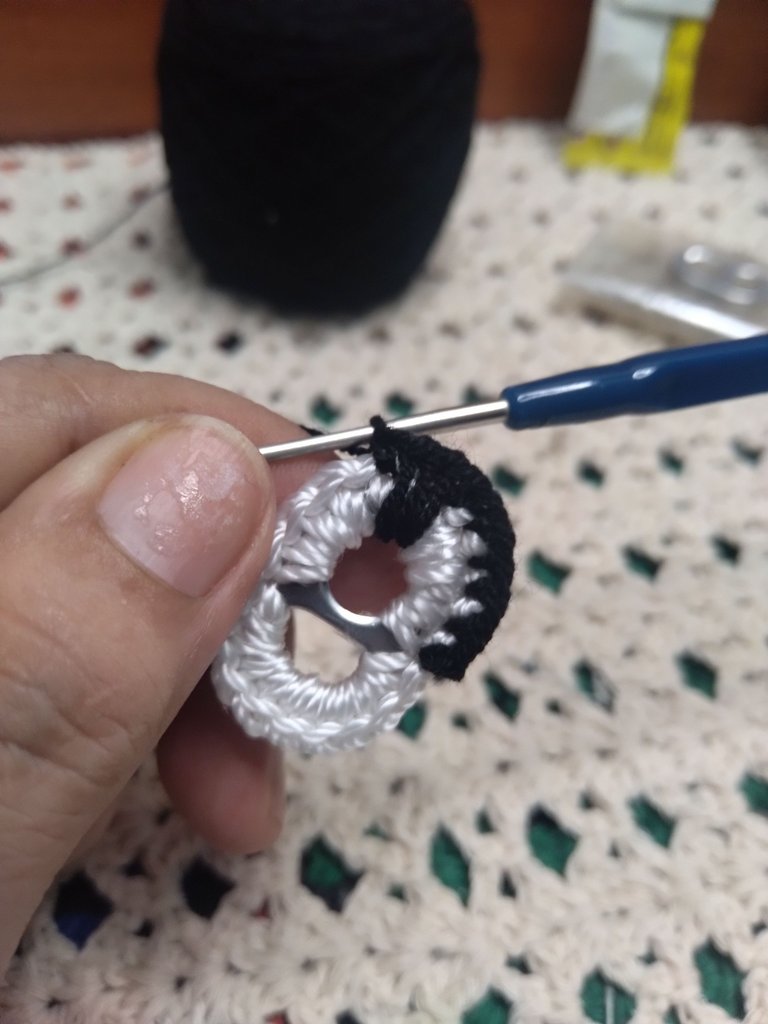
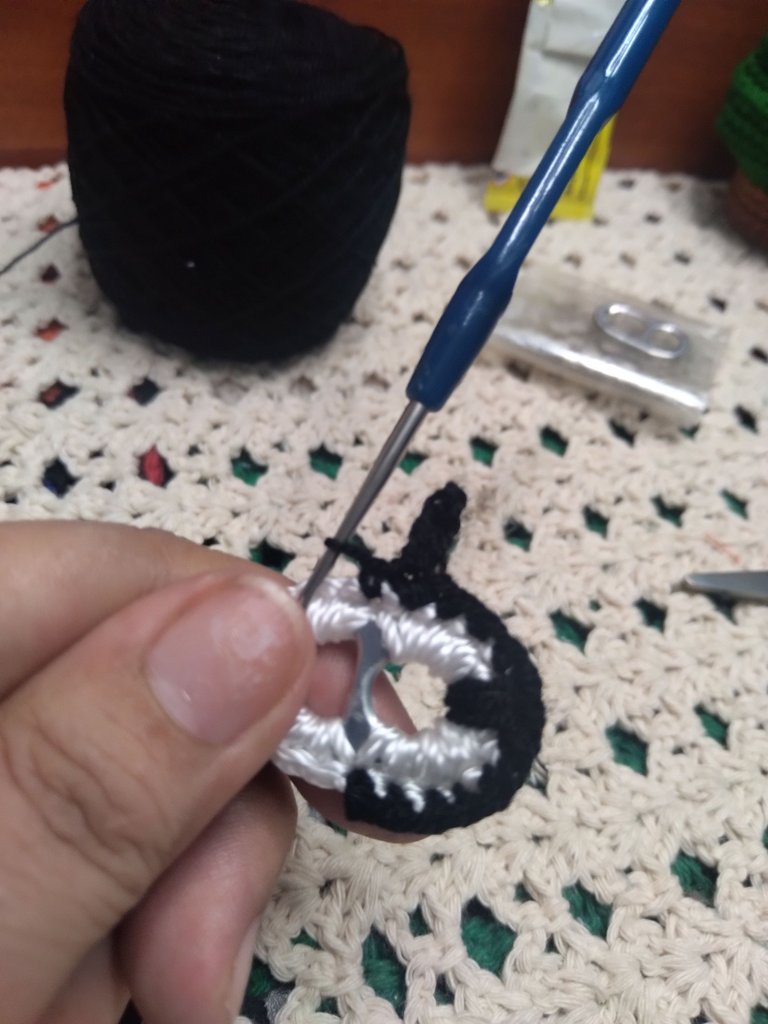
- Al llegar al medio de la chapa, por los lados vamos a tejer cinco o seis cadenas y nos devolvemos sobre ellas tejiendo puntos bajos. Después tejemos un punto deslizado dónde empezamos y continuamos tejiendo puntos bajos hasta volver a llegar al otro lado y repetimos. Finalizamos con punto deslizado, cortamos el hilo y lo ocultamos entre el tejido.
- When we get to the middle of the sheet, we will knit five or six chains on the sides and go back over them knitting single crochet. Then we knit a slip stitch where we started and continue knitting single crochet until we get back to the other side and repeat. We finish with a slip stitch, cut the yarn and hide it in the fabric.
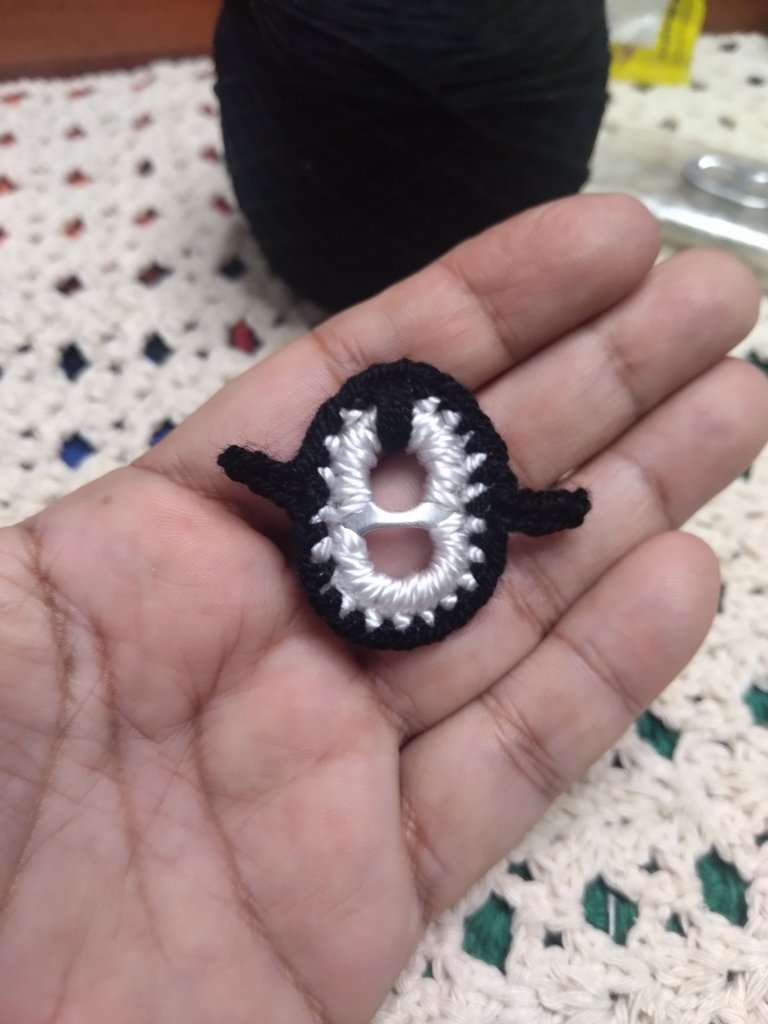
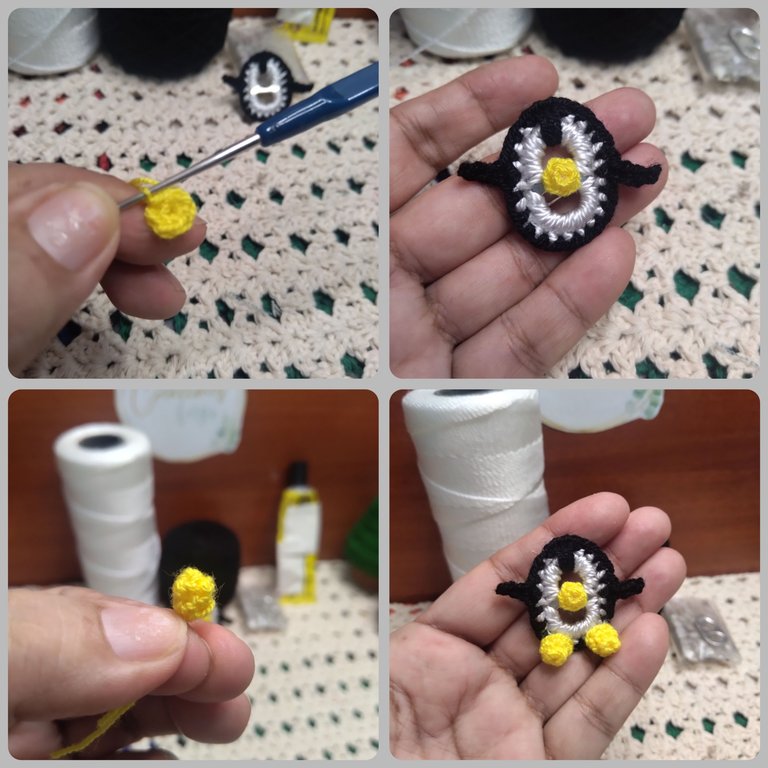
- Con el hilo acrilico color amarillo vamos a tejer dos piezas iniciando con 5 puntos bajos. Subimos una vuelta de cinco puntos y cerramos con punto deslizado. Estas piezas son las narices de los pingüinos. Una para cada uno.
- Igualmente vamos a tejer cuatro piezas más iguales, pero con una vuelta más de puntos bajos. Estas serán las patitas del pingüino. Dos para cada uno. Se cosen o se pegan con silicón frío. Yo las pegué.
- With the yellow acrylic yarn we are going to knit two pieces starting with 5 single crochet stitches. We go up one row of five stitches and close with slip stitch. These pieces are the penguins' noses. One for each penguin.
- We are going to knit four more of the same pieces, but with one more row of single crochet. These will be the penguin's feet. Two for each one. They are sewn or glued with cold silicone. I glued them.
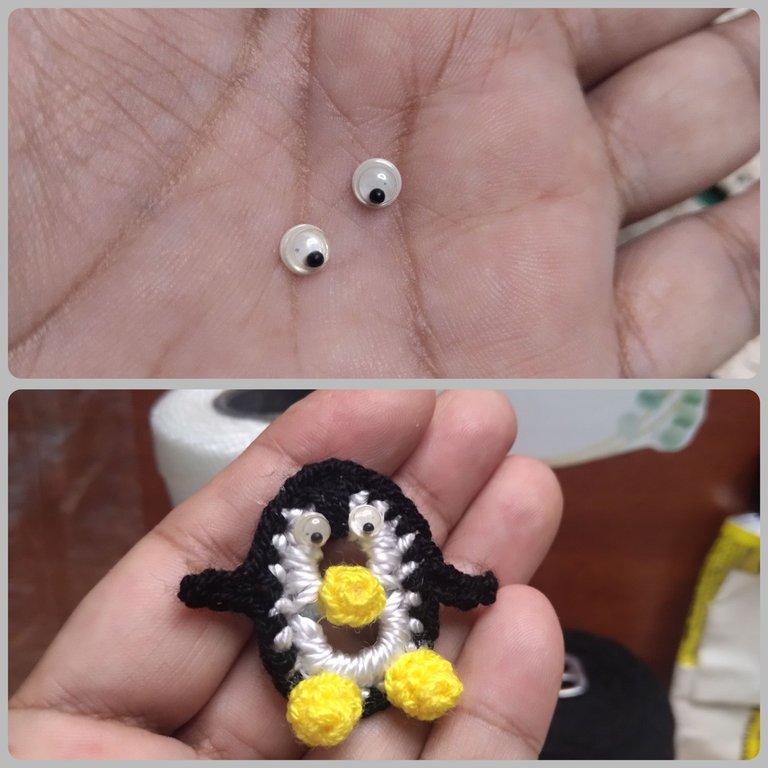
- Pegamos los ojos en medio de la chapita. Tal como verás en las imágenes.
- We glue the eyes in the middle of the badge. As you can see in the images.
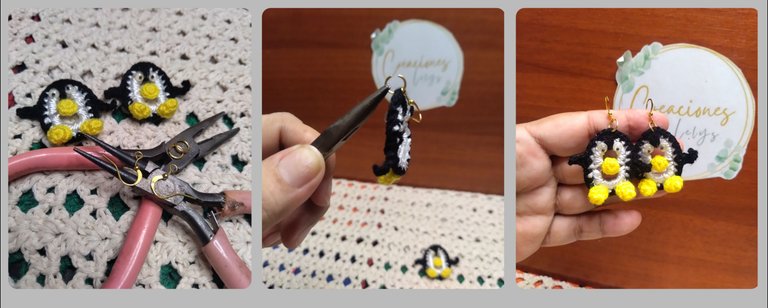
- Para finalizar, colocamos los aros y el anzuelo para convertir estos lindos pingüinos en bellos accesorios. Nos ayudamos con las pinzas de bisutería para asegurar las piezas. Y así llegamos al final. ¿Qué tal los ven?
- Finally, we place the earrings and the hook to turn these cute penguins into beautiful accessories. We helped ourselves with the jewelry clips to secure the pieces. And so we come to the end, how do you see them?
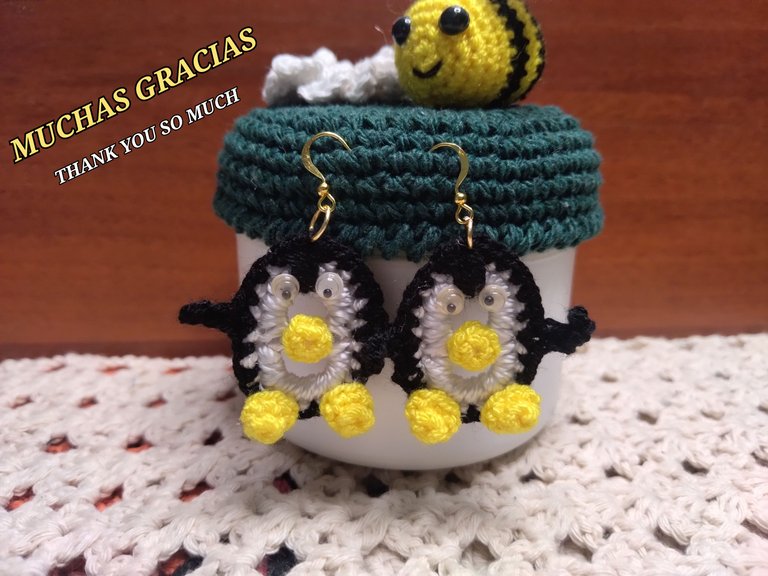
Espero que les haya gustado este tutorial. Muchísimas gracias por apoyarme. Todas las fotos son de mi propiedad. Edité con Polish. Usé el traductor de Deelp. Hasta pronto. Bendiciones 🙏
I hope you liked this tutorial. Thank you very much for supporting me. All photos are my property. I edited with Polish. I used Deelp translator. See you soon. Blessings 🙏
This so beautiful 😍, and your tutorial is very easy to follow. Your color combination is on point and I love that you used a strong earrings hook to make it durable. !LUV
@creacioneslelys, @funshee(2/4) sent you LUV. | tools | discord | community | HiveWiki | <>< daily
Thanks You 🫂
Te quedaron super graciosos Lelys y la combinación de colores me encanta!! Abrazo y que tengas un hermoso día!😃
Muchísimas gracias 😊
Ooow que ternura, se ve genial esta creación, unos pinguinos muy hermosos, felicitaciones por este gran trabajo que nos regalas 😉
Hola. Me alegra que les guste. Feliz día 💐 muchas bendiciones 🙏🏽
Jjjj, que lindos, te quedaron preciosos... gracias por la mención amiga. Un fuerte abrazo de artesana, se te quiere
Gracias a ti por inspirarnos. 🫂
Hermosos 🥰💜.... Me encantan. Un trabajo impecable como siempre. Eres la mejor!!!
!PIZZA 🍕
Hola amiga. Muchas gracias. Valoro mucho tu comentario. Un abrazote 🫂
$PIZZA slices delivered:
@chacald.dcymt(3/5) tipped @creacioneslelys
Ainss niomiooo pero que preciosidad. Dios bendiga tus manitos creadoras de tantas cositas delicadas y hermosas...
Hola amiga. Feliz día. Muchas gracias por apreciar esta creación. Lo aprecio mucho. 🫂
Lovely
Thanks You 👋🏽
Wow!! this is indeed creative. The outcome of the earrings is so beautiful that you can never tell what is underneath it. We applaud your effort in creating this, well done, and thanks for sharing.
Thanks a lot 🙋
Ay DIossss. es una ternurita. Me encanta, La creatividad al usar esos ganchitos de lata, quien podría imaginar algo así, felicidades, amiga,
Hola!!! Muchas gracias. Me alegra saber que te gustaron 🙂
Wow, I must confess that you had a nice talent of crochet, this beautiful and creative, thanks for sharing this with us.
I appreciate your words. I really enjoy knitting 🙋🏽♀️
Omo this is so lovely.
Thank you 😌
Awww que lindos te quedaron amiga, se ven cuchi,como siempre un trabajo impecable y creativo. 🐧😍
Saludos!
Hola amiga. Me alegra que te guste . Feliz tarde. 🙋🏽♀️😄🎃🫂😊🌻😀
Always doing the best. It is indeed beautiful and I love the outcome. Thanks for sharing
Hi, friend. Nice to meet you.
Thank you very much 🙋🏽♀️