It's time to make the girls fall in love, beautiful ghost necklace with a beautiful pendant of the virgin of the valley (ISLA DE MARGARITA).
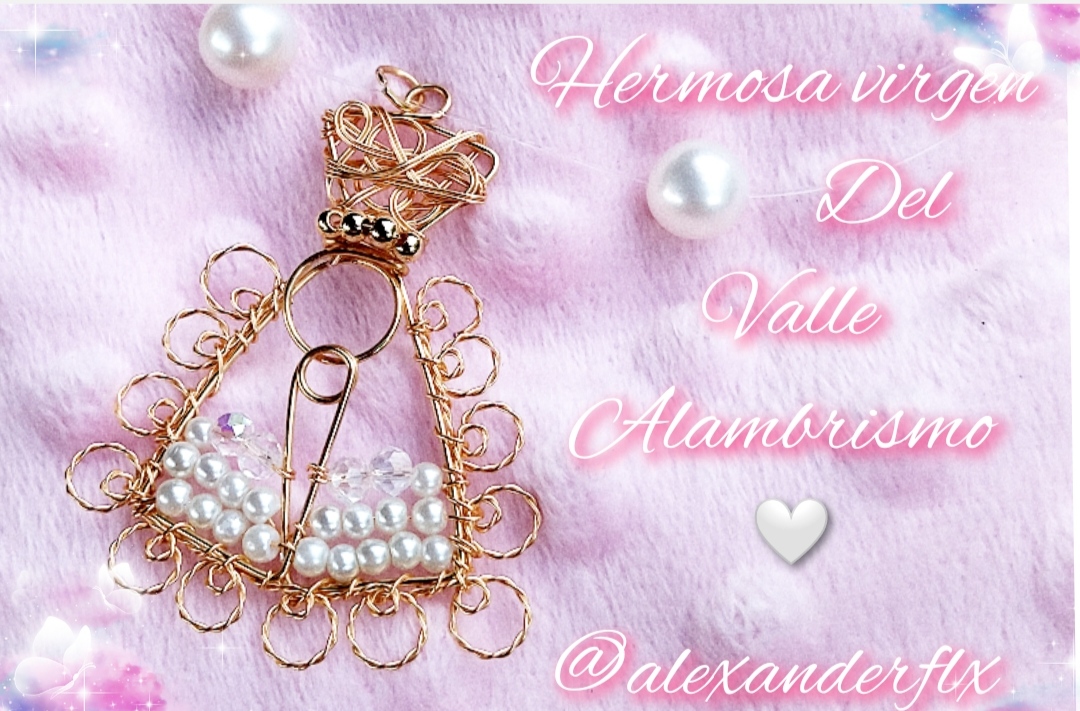
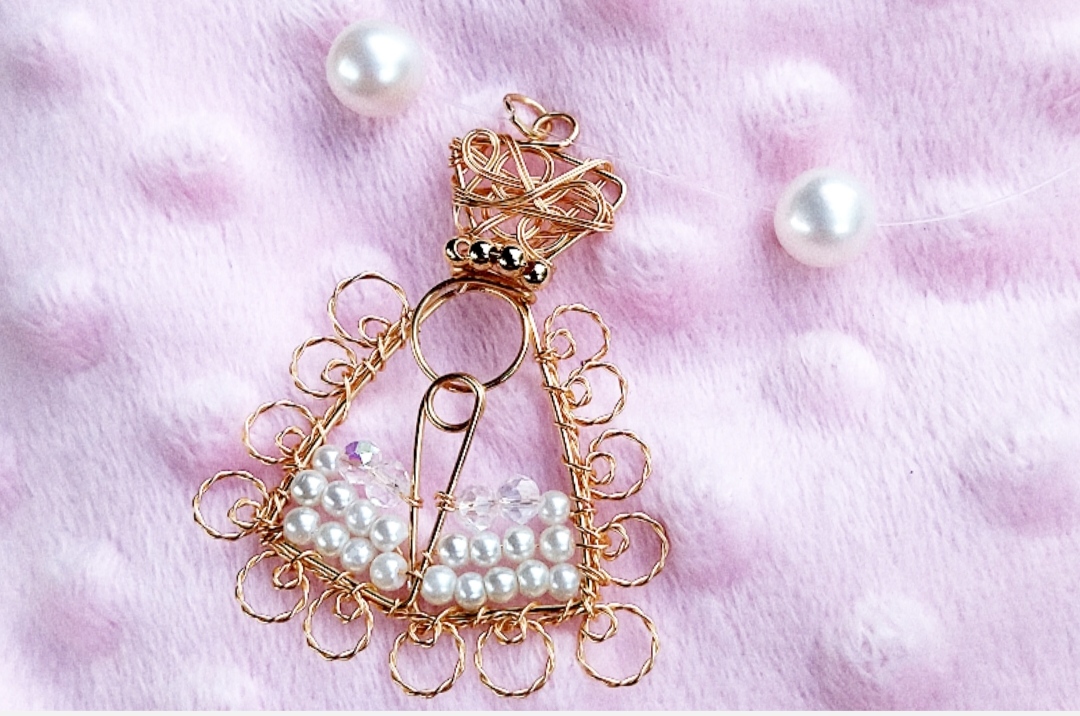
Hola feliz noche espero se encuentren bien la noche de hoy les deseo lo mejor del mundo y también quiero aprovechar para compartir con ustedes unas de las cosas más lindas que tenemos en nuestra hermosa isla de margarita está hermosa imagen es muy querida por todos los margariteños como todos saben es la imagen de nuestra virgen del valle ya avía realizado una pieza casi igual ya como tengo un poquito más de experiencia decidí volver hacerla pero con otras técnicas como pueden ver esta un poquito más grande y tienen otras cositas que le dan calidez y vista espero les guste esta echa con mucho cariño y amor,♥️♥️♥️😁🥰🤍❤️
Hello, happy night, I hope you are well tonight, I wish you the best in the world and I also want to take the opportunity to share with you some of the most beautiful things we have on our beautiful island of Margarita, this beautiful image is very loved by all The Margariteños, as everyone knows, is the image of our Virgin of the Valley, and I had already made a piece almost the same, and since I have a little more experience, I decided to do it again, but with other techniques, as you can see, it is a little bigger and they have other little things that give it warmth and view I hope you like this shot with lots of love and love,♥️♥️♥️😁 ❤️
What do we need.
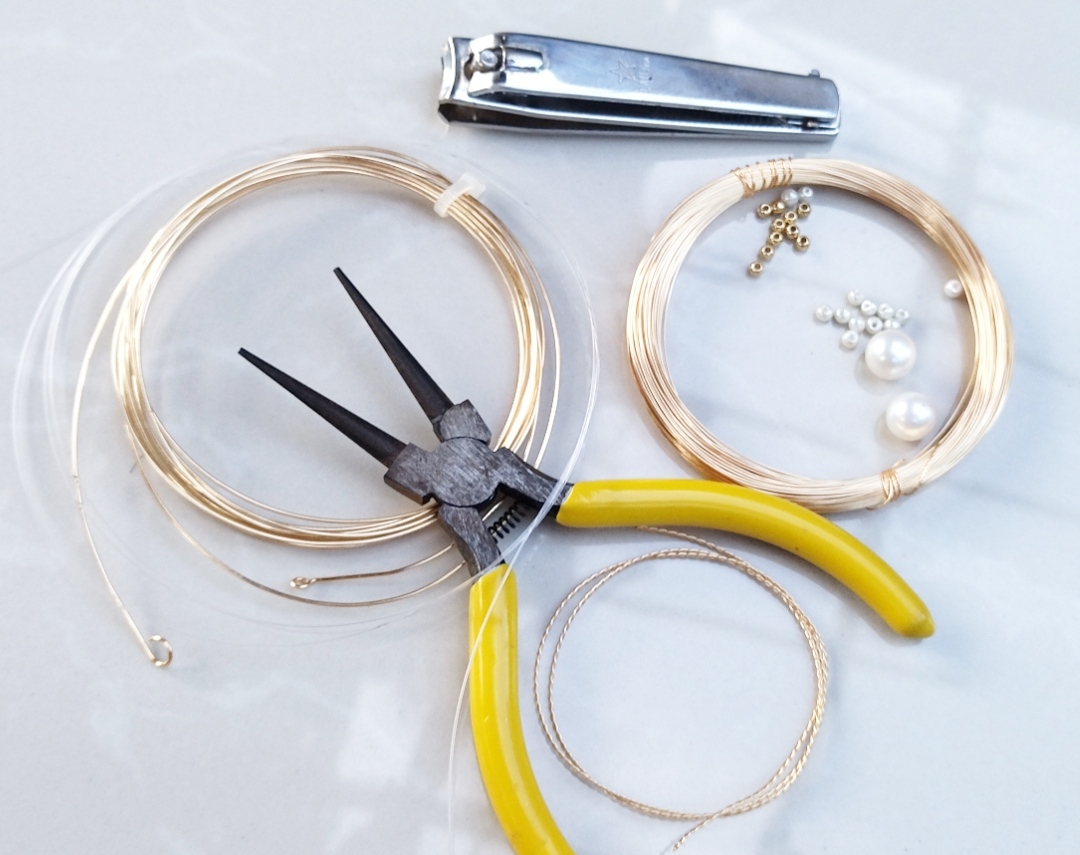
- perlas
- alambre para bisutería calibre 20 . 26
- pinzas
- piedras para bisutería o cristales
- nilón
pearls
20 gauge costume wire
tweezers
nylon
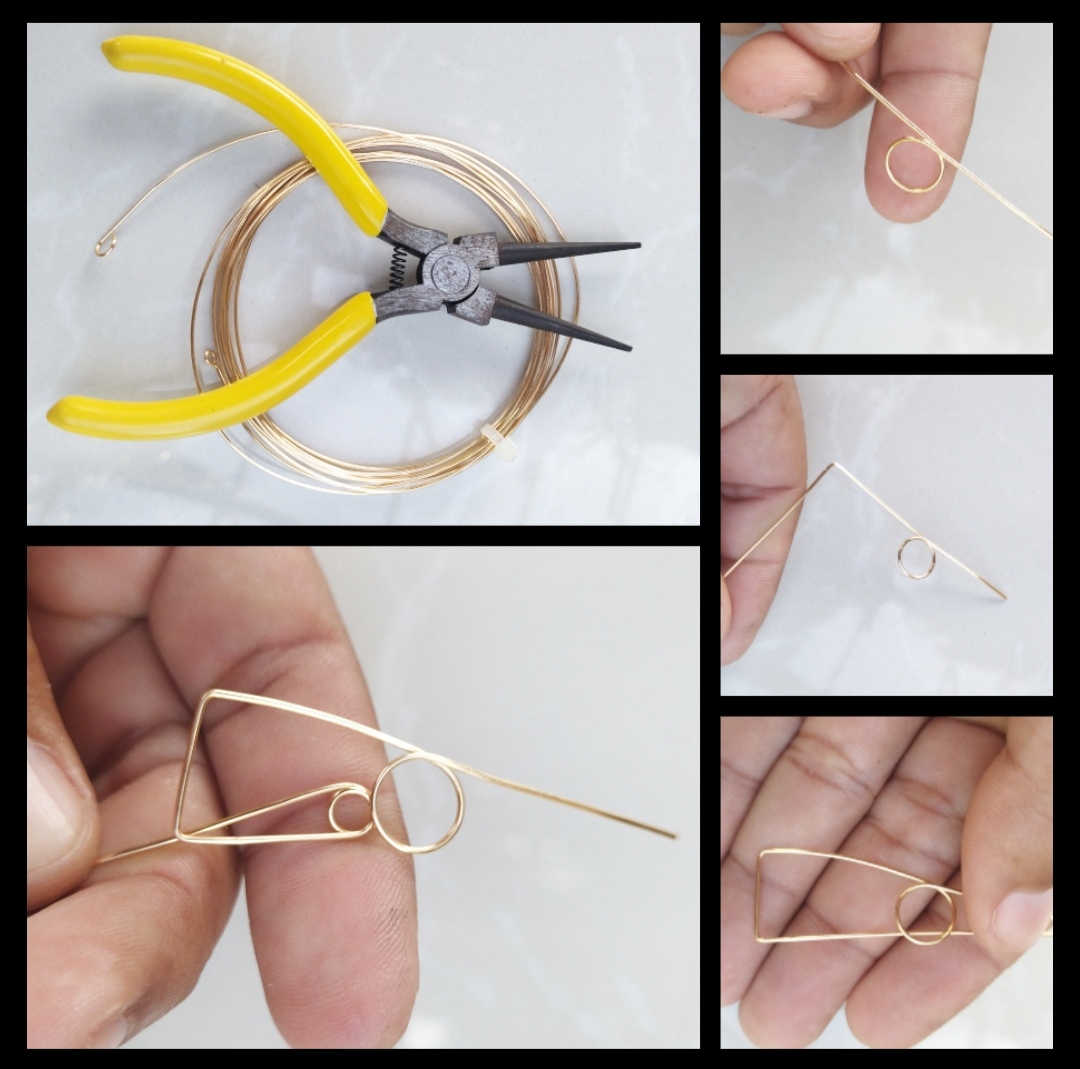
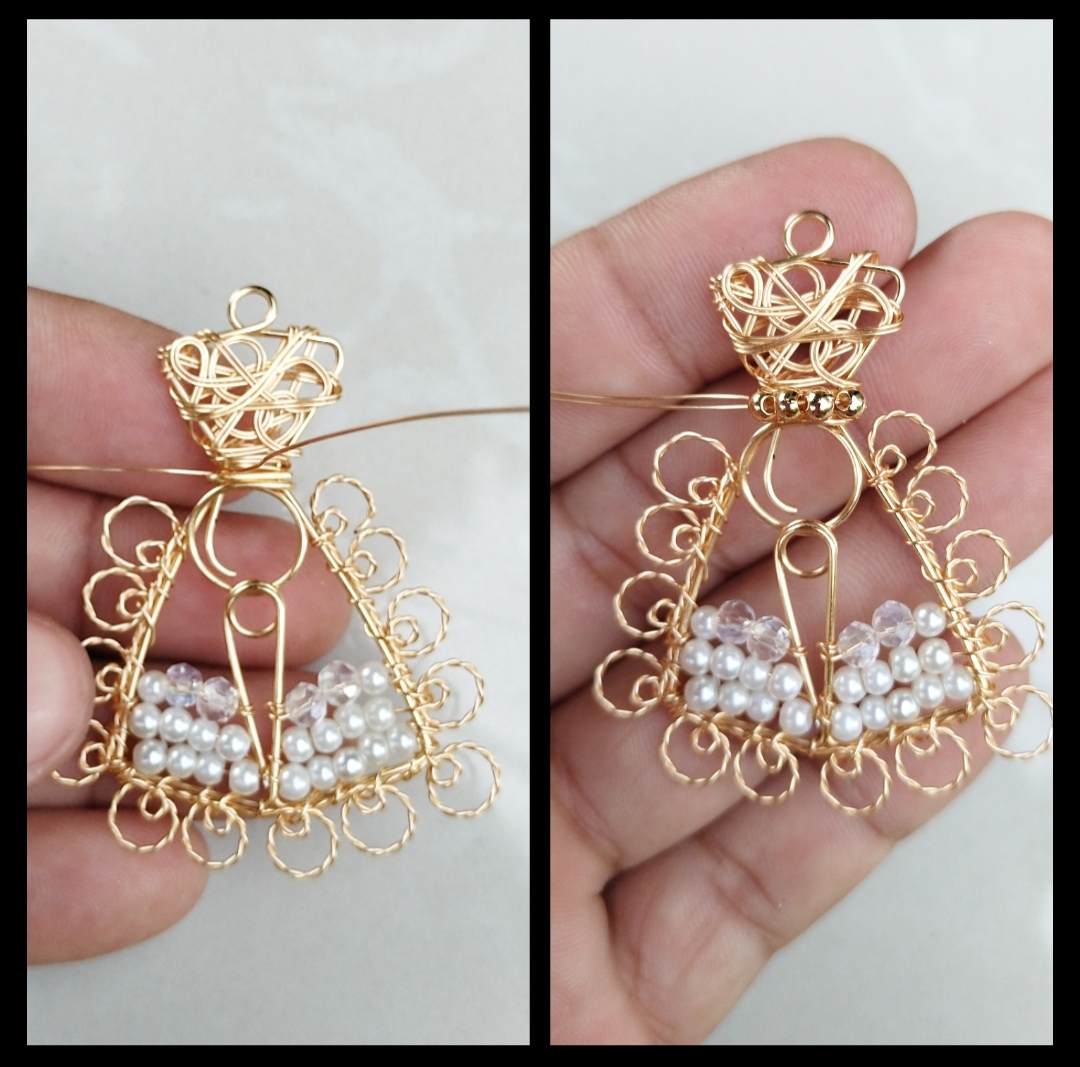
Paso 1: En nuestro primer paso empezaremos hacer la forma de nuestra virgen les confieso que no es nada fácil explicar este paso pero espero hacerlo bien de igualanes trate de que las imágenes se vieran lo mejor posible, para empezar utilizaremos alambre 20 y pinza redonda primero cortamos un trozo de alambre y aremos un redondo dejamos un espacio y doblaremos hacia la derecha luego doblamos hacia arriba dejando otro pequeño espacio luego aremos oñun redondo pequeño lo más seraca que podamos del redondo grande como pueden ver el trozo de alambre quedó hacia abajo doblamos hacia la derecha dejamos nuevamente otro espacio y doblamos hacia arriba como pueden ver ya está quedando ahora aremos la coronita doblamos hacia la derecha un poquito no mucho luego dejamos un pequeño espacio y doblamos hacia la izquierda hacemos un redondo muy pequeño en medio y de igual manera aremos el otro lado cuando estemos listo le damos unas vueltas al rededor de la corona para asegurar y ya dejarla lista..
Step 1: In our first step we will begin to make the shape of our virgin, I confess that it is not easy to explain this step but I hope to do it well even though I try to make the images look as good as possible, to begin with we will use 20 wire and round pliers first we cut a piece of wire and we will make a round one leaving a space and we will bend to the right then we will bend upwards leaving another small space then we will make a small round as close as we can to the large round as you can see the piece of wire was towards down we fold to the right again we leave another space and we fold up as you can see it is already finished now we will make the little crown we fold to the right a little bit not much then we leave a small space and fold to the left we make a very small round in the middle and from In the same way we will do the other side when we are ready we give it a few laps around the crown to secure and leave it ready .
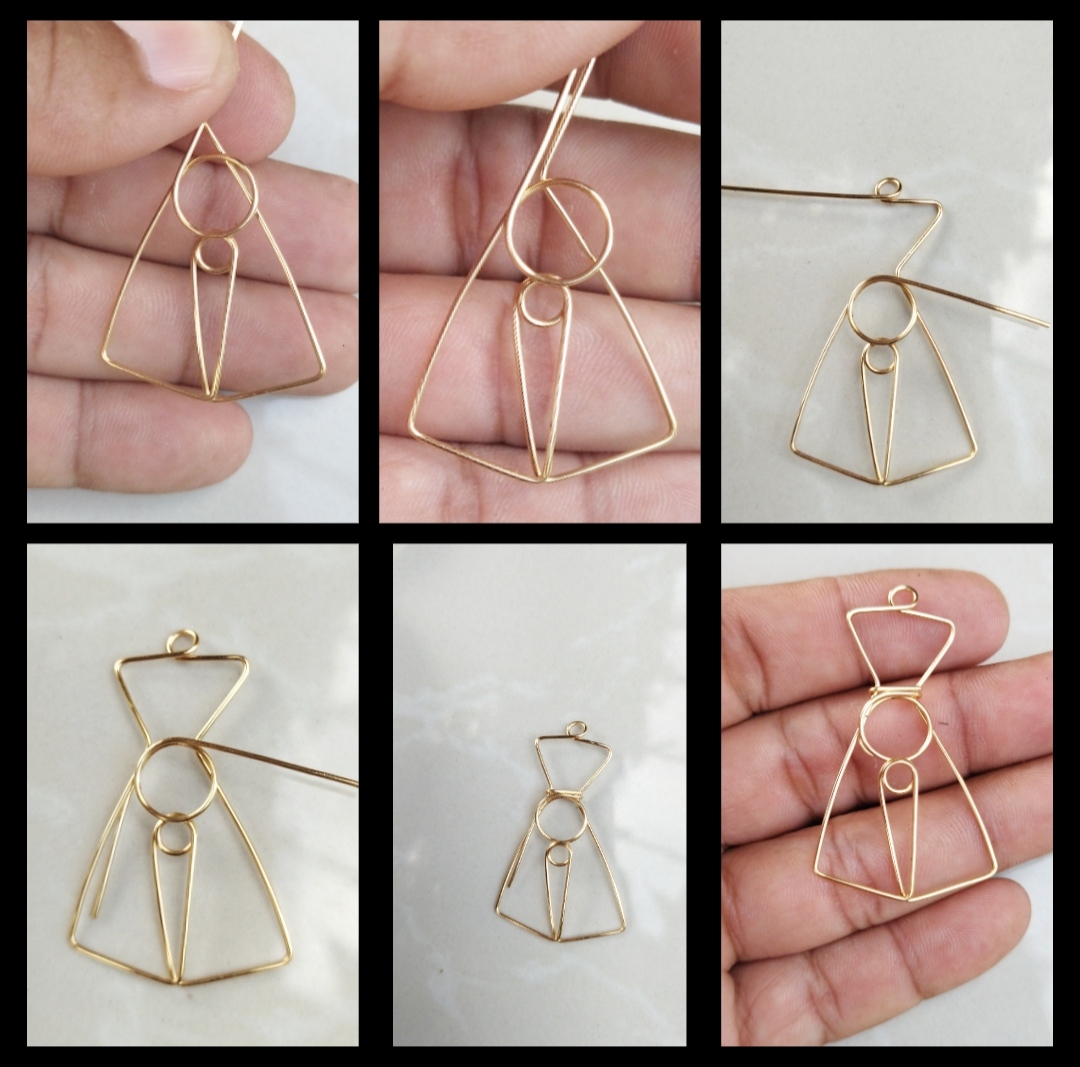
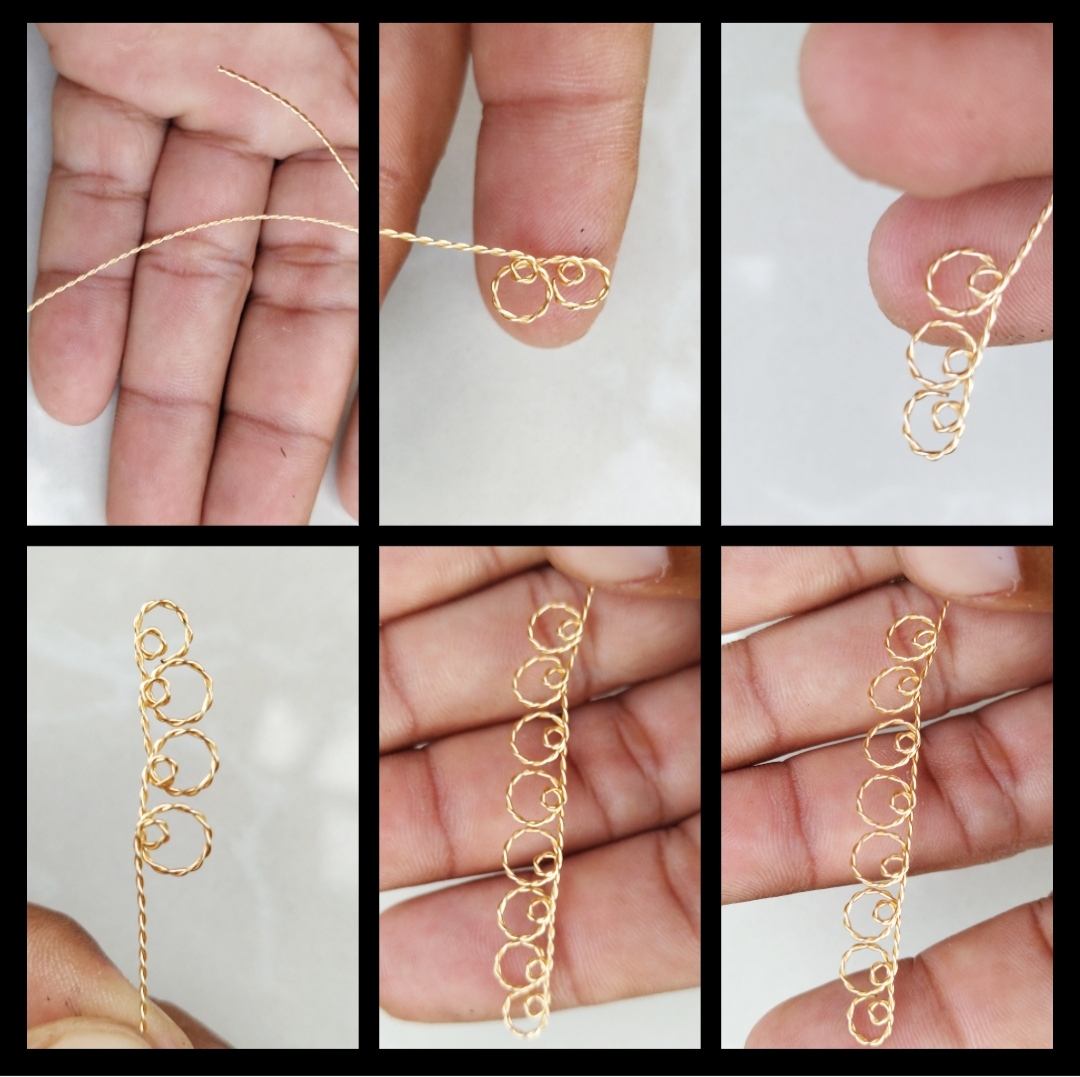
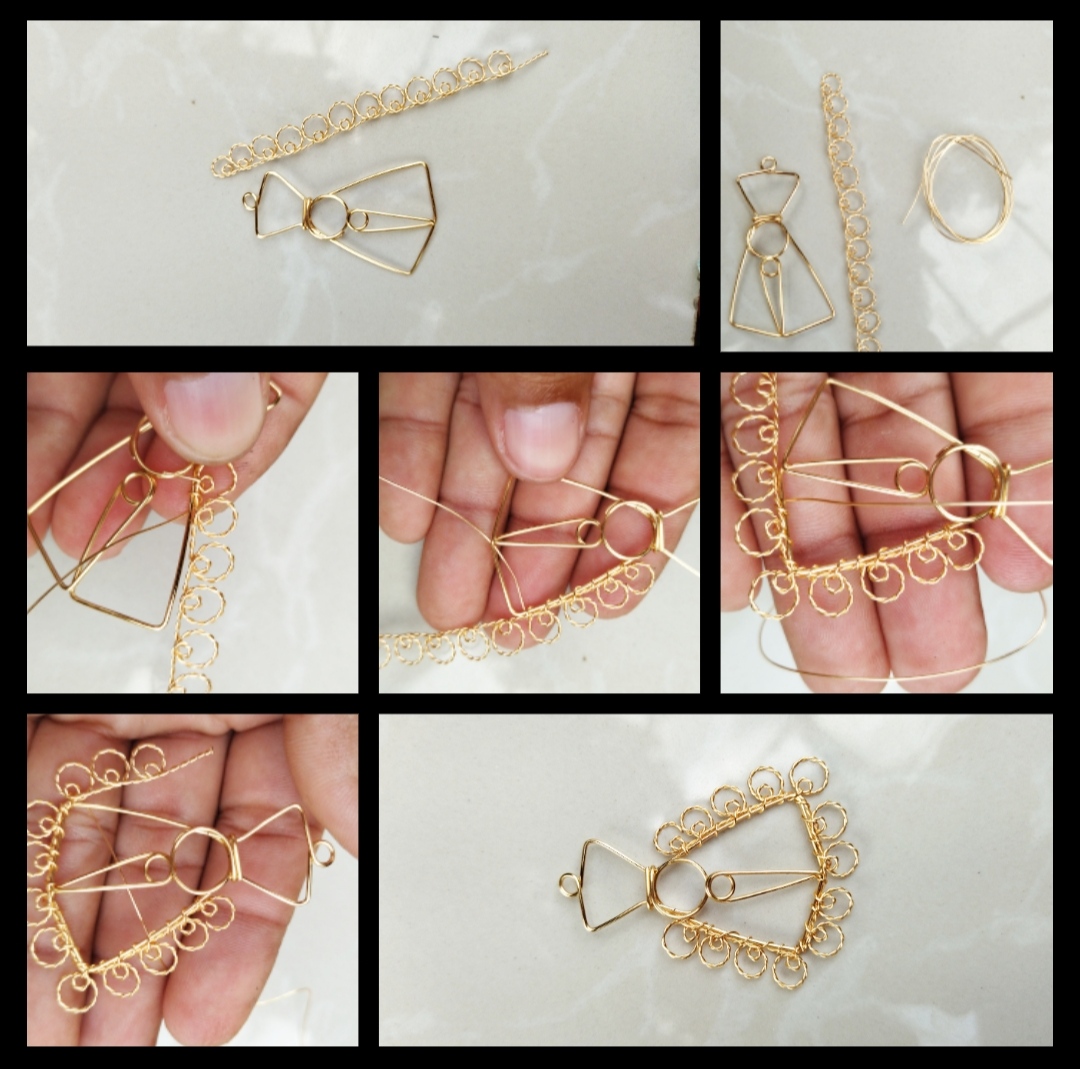
Paso 2: Para este paso ys las cosas serán un poquito más faciles para empezar tomaremos un trozo de alambre entorchado este es calibre 26 es super fácil entorchar el alambre ok luego de tener el alambre aremos un redondo grande y en medio aremos uno más pequeño y así seguiremos haciendo asta tener varios redondo luego de terminar tomaremos nuestras dos piezas y las uniremos utilizaremos alambre calibre 26 tejemos muy bien las dos piezas y al final cortamos el exceso de alambre
Step 2: For this step and things will be a little easier to begin we will take a piece of twisted wire this is 26 gauge it is super easy to twist the wire ok after we have the wire we will make a large round and in the middle we will make one smaller and like this we will continue making until we have several round ones after finishing we will take our two pieces and join them we will use 26 gauge wire weave the two pieces very well and at the end we cut the excess wire
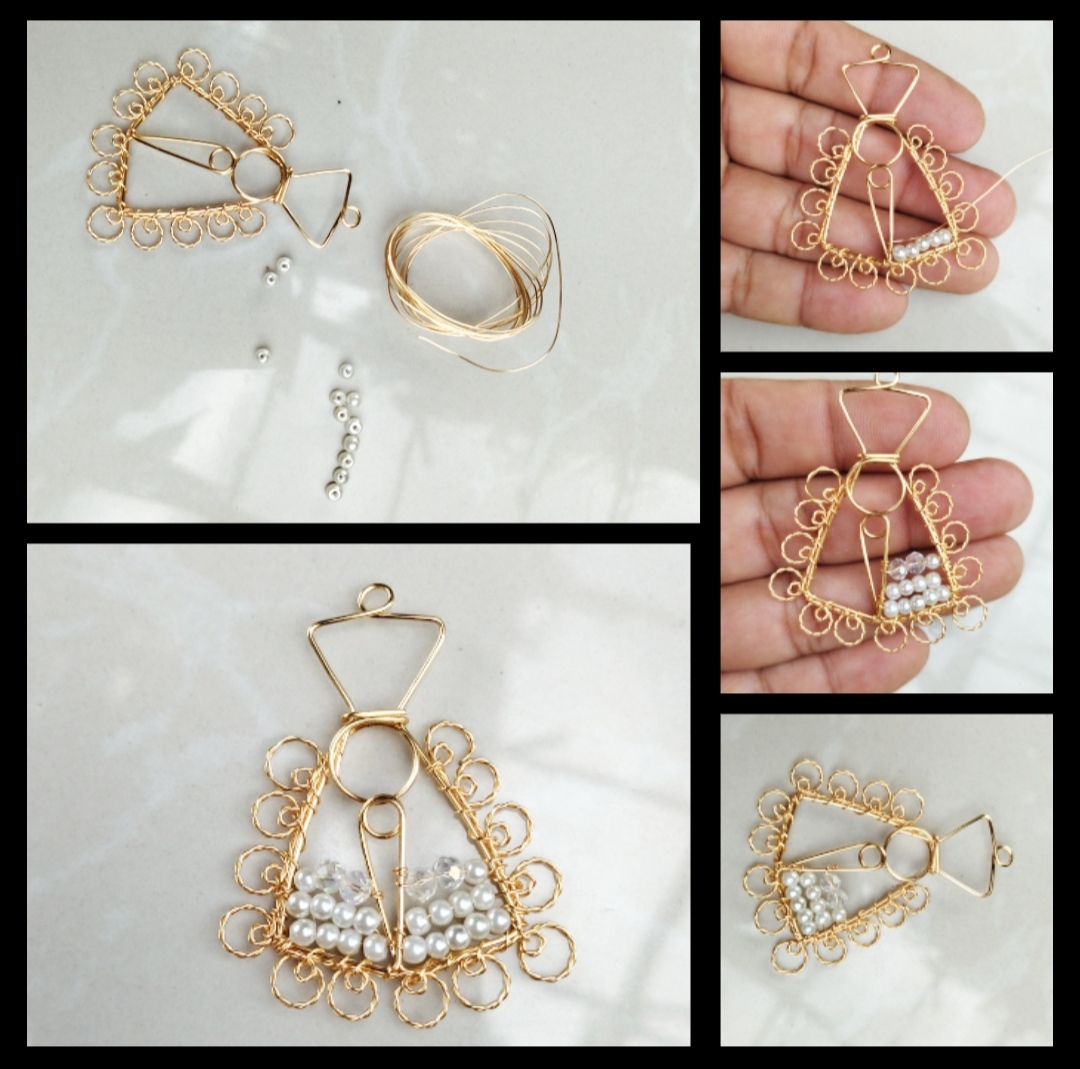
Paso 3: Buenos chicas ahora pondremos unas hermosas piedras, para poner las piedras cortaremos un trozo de alambre calibre 26 y claro unas piedras blanca perladas y unos cristales trasparente para poner las piedras sujetamos la punta del alambre de nuestra pieza principal luego de sujetar mi bien meteremos las piedras y aseguraremos del otro lado este paso lo podemos hacer como queramos y podemos poner tantas piedras como podamos, ahora les mostraré un pequeño truco pero muy elegante y lo puede. Utilizar en cualquier zarcillo o cosas que quieran hacer tomaremos un trozo de alambre 26 y lo pondremos doble aseguramos una punta del alambre dándole tres vueltas en un lado del la corona luego hacemos redondo utilizando nuestras manos es super fácil pero muy difícil de explicar luego con el mismo alambre le pondremos cuatros piedras Doradas a nuestra corona utilizando el mismo alambre luego de asegurar las piedras cortamos el exceso y listo ya tenemos la corona adornada espero les guste.
Step 3: Good girls now we will put some beautiful stones, to put the stones we will cut a piece of 26 gauge wire and of course some pearly white stones and some transparent crystals to put the stones we hold the tip of the wire of our main piece after holding my well, we will put the stones and we will secure this step on the other side, we can do it as we want and we can put as many stones as we can, now I will show you a little trick but very elegant and you can do it. Use in any tendril or things that you want to do, we will take a piece of wire 26 and we will double it, we secure one end of the wire by turning it three times on one side of the crown, then we make it round using our hands, it is super easy but very difficult to explain later with the With the same wire we will put four golden stones on our crown using the same wire, after securing the stones we cut the excess and that's it we already have the decorated crown I hope you like it.
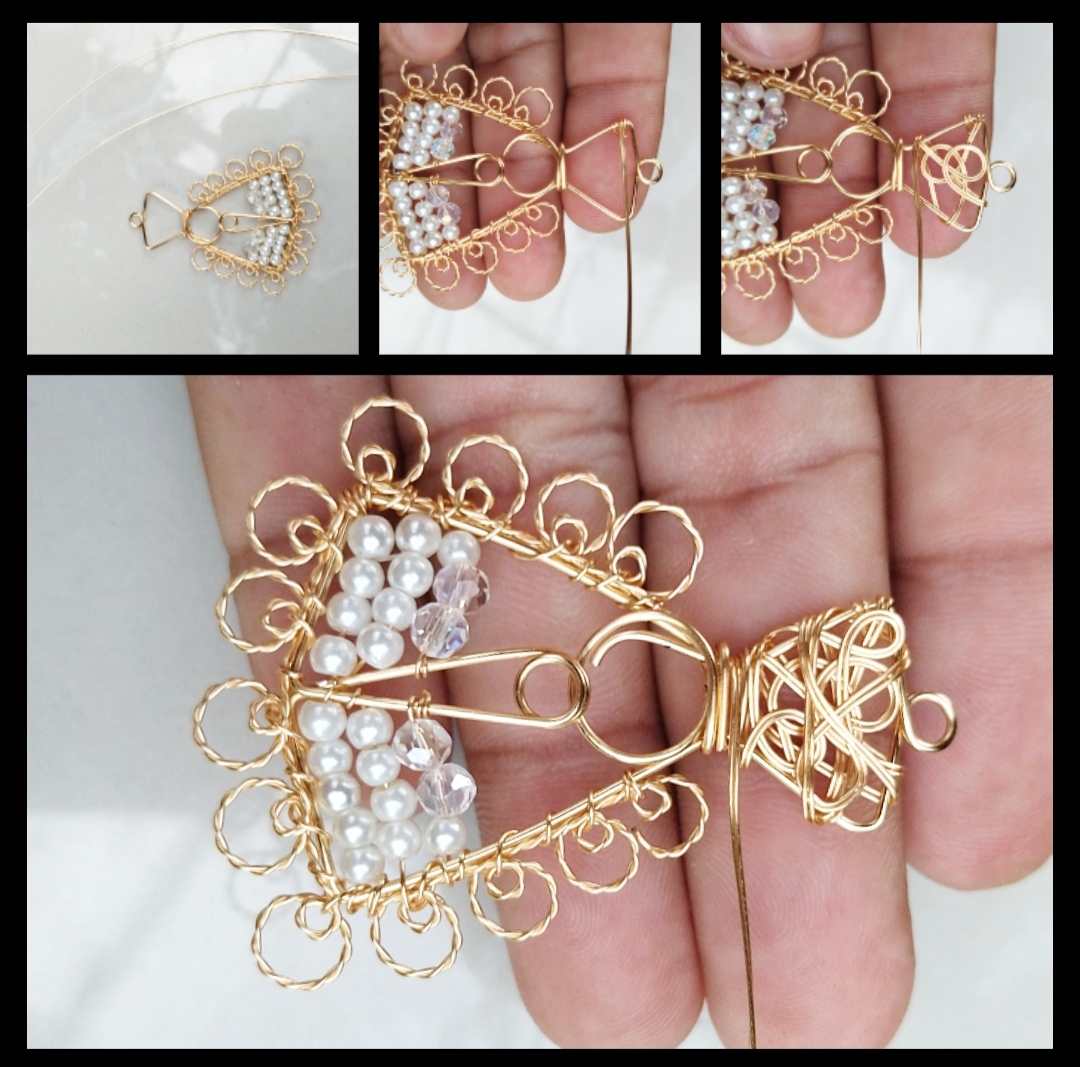
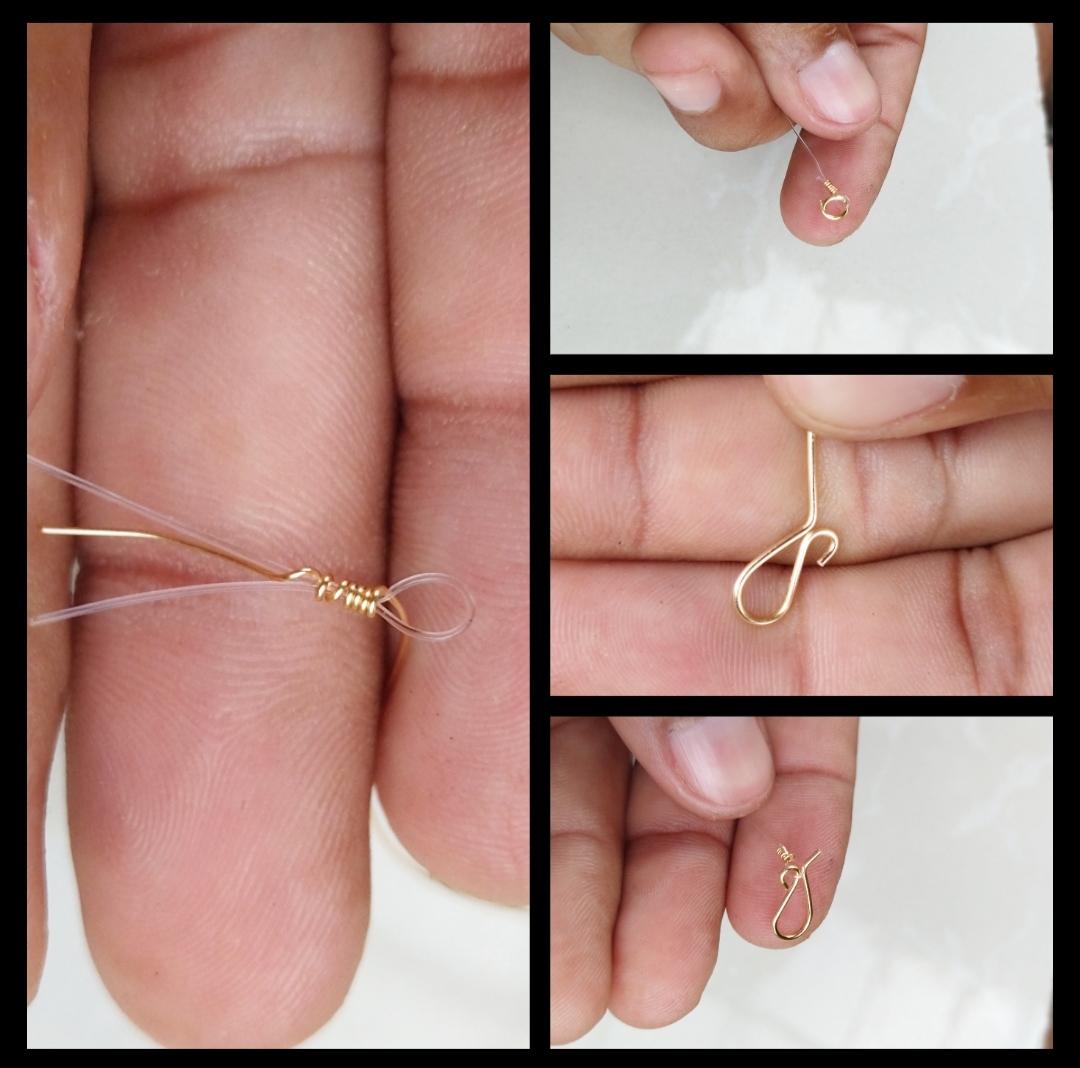
Paso 4: para nuestro último paso armaremos nuestro collar fantasma cortamos un trozo de nilón unas perlas y la pieza principal para empezar primero aremos un redondo muy pequeño que le pondremos al redondo de la corona de la virgen. Ahora si empezamos metemos una perla luego metemos el redondo que le colocamos a la virgen seguida de otra perla luego en un extremo del nilón aremos una argolla y la aseguraremos con alambre 26 de igual manera aremos el otro lado por último hacemos un redondo y un pequeño gancho y pondremos cada uno en los extremo del nilón y listo ya tenemos nuestro hermoso collar.
Step 4: for our last step we will assemble our phantom necklace, we cut a piece of nylon, some pearls and the main piece to begin with, first we will make a very small round that we will put on the round of the virgin's crown. Now if we start we put a pearl then we put the round one that we put on the virgin followed by another pearl then at one end of the nylon we will make a ring and we will secure it with wire 26 in the same way we will make the other side finally we will make a round and a small hook and we will put each one in the end of the nylon and ready we already have our beautiful necklace.
.
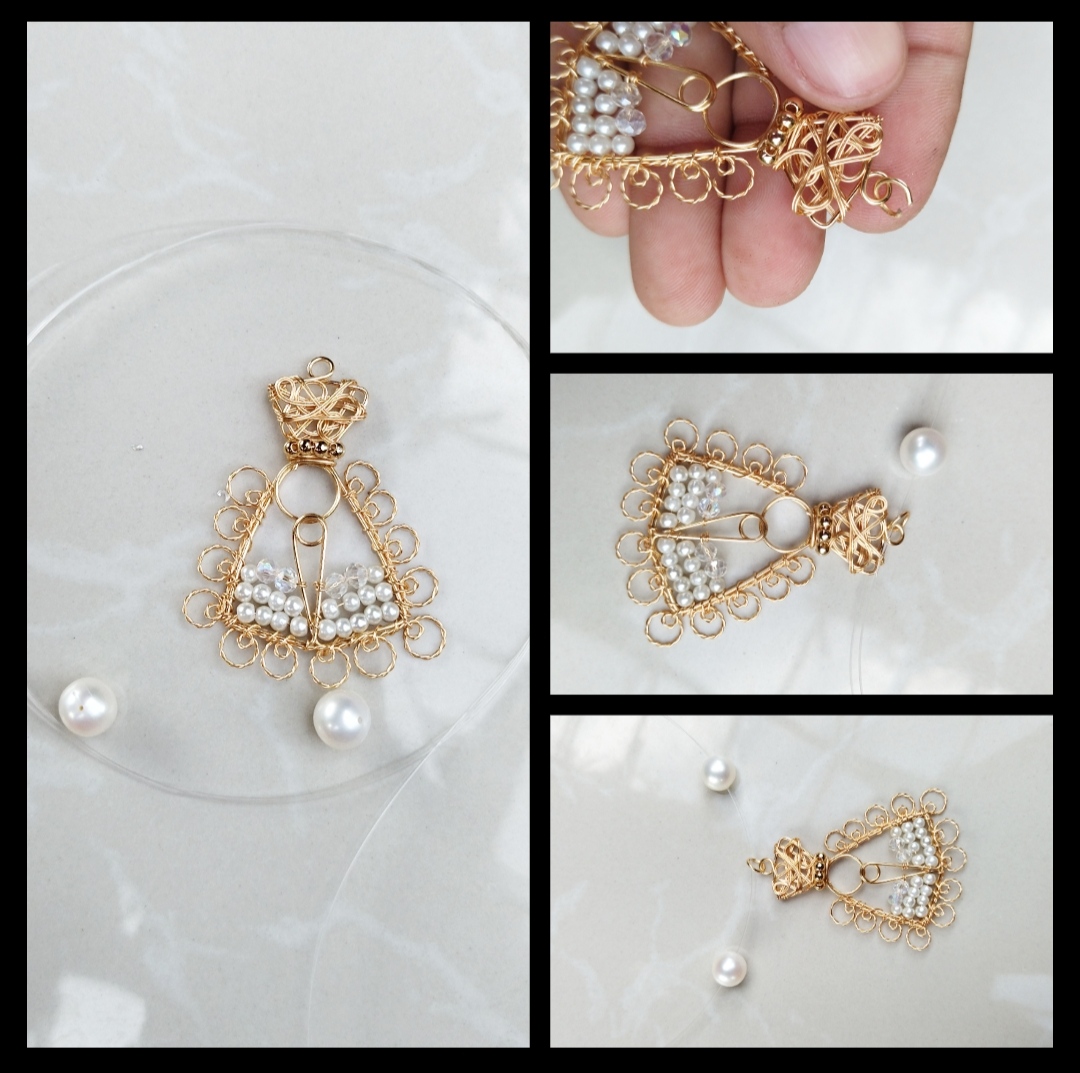
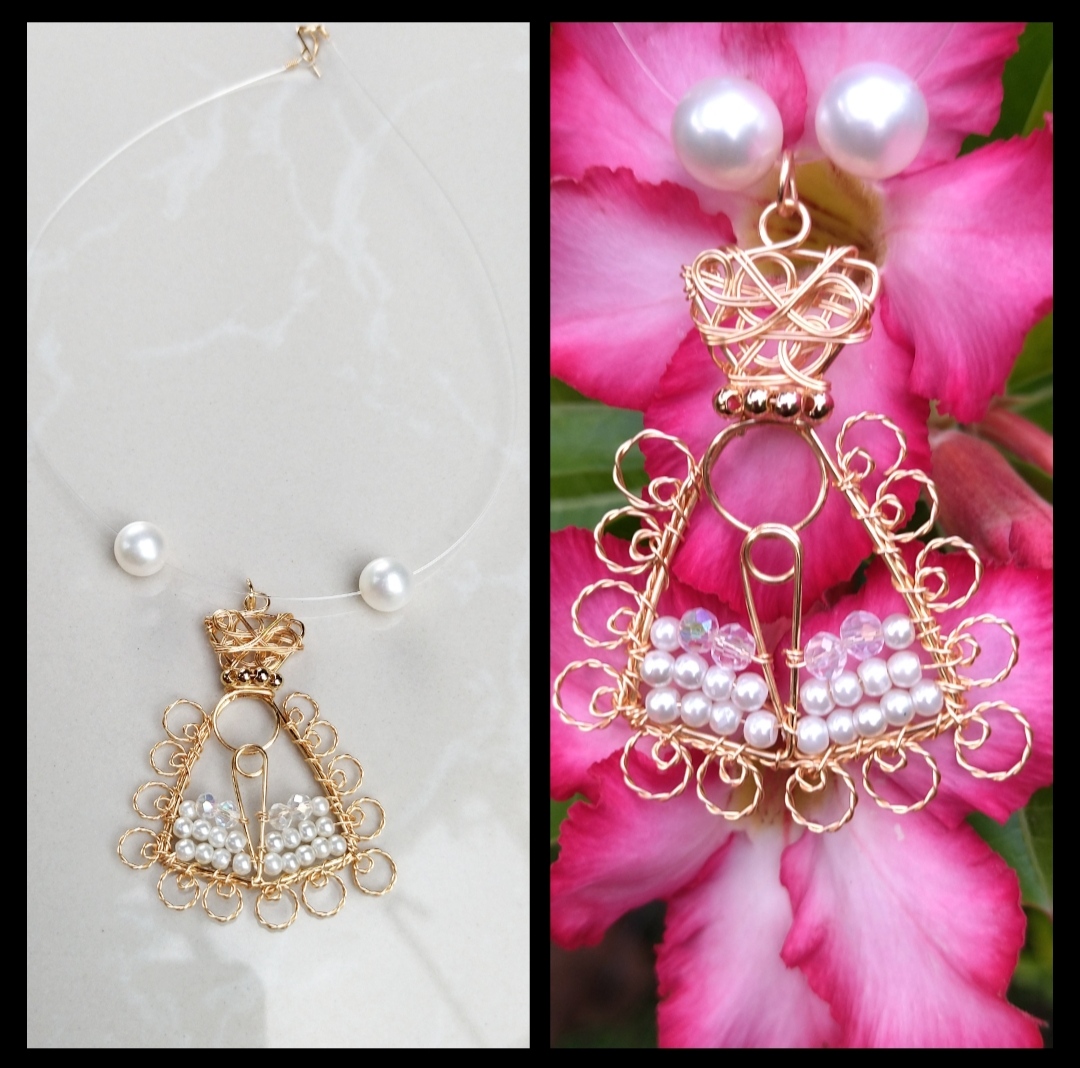
listo nuestros hermoso collar , espero que a las damas les guste, fue un gusto compartir con ustedes .
our beautiful necklace is ready, I hope the ladies like it, it was a pleasure to share with you.
Todas las Fotos son de mi autoría y fueron tomadas con mi Celular Redmi 9T
All Photos are my authorship and were taken with my Redmi 9T Cellphone
You did an excellent job, a great creation and very well explained el.proxeso, reaente pareve a virgin, the crown I really like how it has been.
We remind you of the commitment to make community, it is important that in addition to uploading valuable content, you can create community.
Hola feliz día, me siento muy contento al saber que le gustó, si ya estoy apoyando a mis compañeros gracias por su observación 😊🤗🤗😁🌞🌹🍓🍓🍓
Hola amigo, espero te encuentres bien. Hermosa creación me encantó 👏 te felicito. Saludos 🤗 y bendiciones!
Hola gracias por tu visita 😊🌹🌹
Thank you for sharing this post on HIVE!
Your content got selected by our fellow curator sharminmim & you just received a little thank you upvote from us for your great work! Your post will be featured in one of our recurring compilations which are aiming to offer you a stage to widen your audience within the DIY scene of Hive. Stay creative & HIVE ON!
Please vote for our hive witness <3
@alexanderflx Hermoso trabajo, me encantó,mis felicitaciones 😊, gracias por compartir esta creación,que tengas un año lleno de muchos éxitos, un abrazote 🤗
Hola buenos días, que bueno saber que le gustó, siempre es un gusto compartir con ustedes, igual para ti 😊😁❤️♥️
Wuaoh! esta super pulcro y hermoso tu trabajo. Felicitaciones infinitas!
Hola muchísimas gracias por la visita
Bello, hermoso trabajo amigo @alexanderflx , me encantan tus creaciones .
Hola gracias por tu visita que bueno que le gustó