Hola! buenos días/tardes/noches hoy me gustaría enseñarles a como hacer un efecto glitch en letras en tal solo unos pocos minutos, sin mas que decir comencemos
Hi! good morning / afternoon / evening today I would like to teach you how to make a glitch effect in letters in just a few minutes, without more to say let's get started
Pasos a seguir
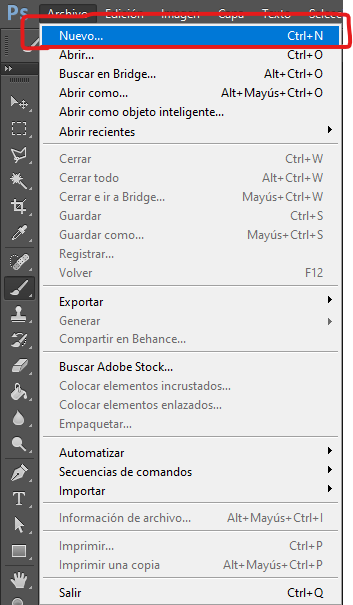
1)En Adobe Photoshop de cualquier versión debes de crear un nuevo archivo.
Steps to follow
1) In Adobe Photoshop of any version you must create a new file.
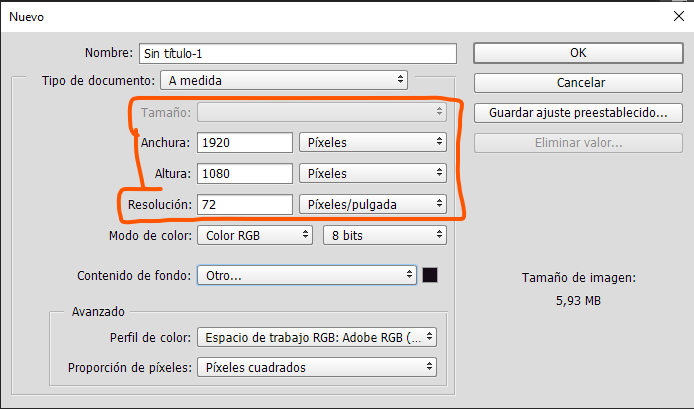
2)Colocamos una anchura de 1920 píxeles y altura de 1080 píxeles y una resolución de 72 píxeles/pulgada.
2) We set a width of 1920 pixels and height of 1080 pixels and a resolution of 72 pixels / inch.
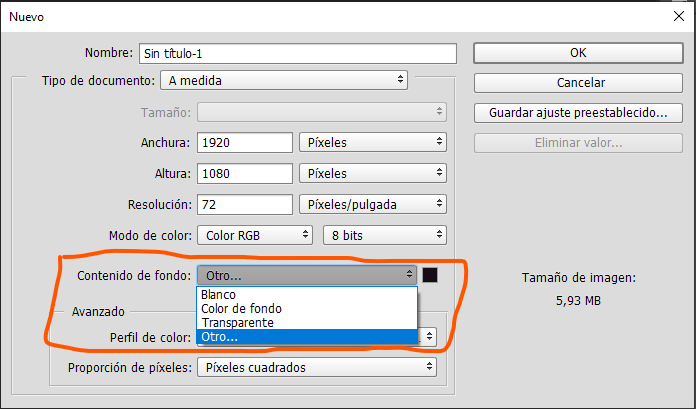
3)Colocamos un fondo de color negro, para el fondo color negro le damos click en contenido de fondo y seleccionamos la opción llamada "otro" y nos aparecerá un recuadro,le damos click en ok después de seleccionar el color.
3) We place a black background, for the black background we click on background content and select the option called "other" and a box will appear, we click ok after selecting the color.
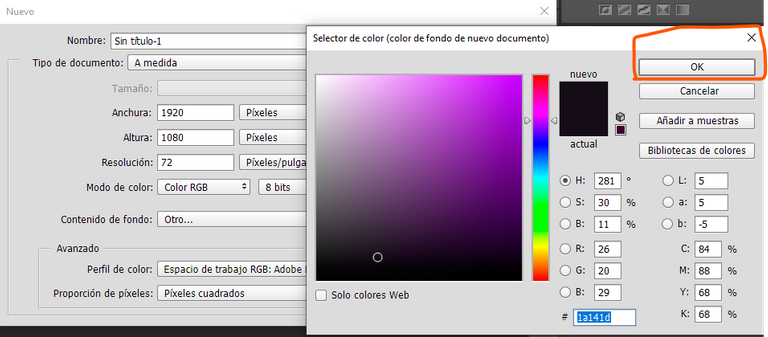
4)Damos click en ok y habremos creado nuestro archivo, después de esto creamos un texto con la herramienta texto.
4) We click on ok and we will have created our file, after this we create a text with the text tool.

5)Para hacer este efecto les recomiendo la fuente de letra llamada "Impact".
5) To do this I recommend the font called "Impact".

6)Colocamos el texto de color blanco.
6) We place the text in white.
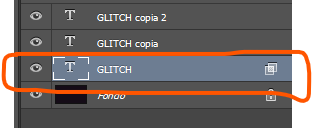
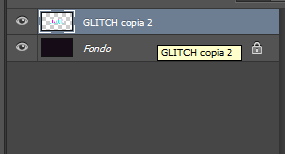
7)Duplicamos la capa 2 veces.
7) We duplicate the layer 2 times.

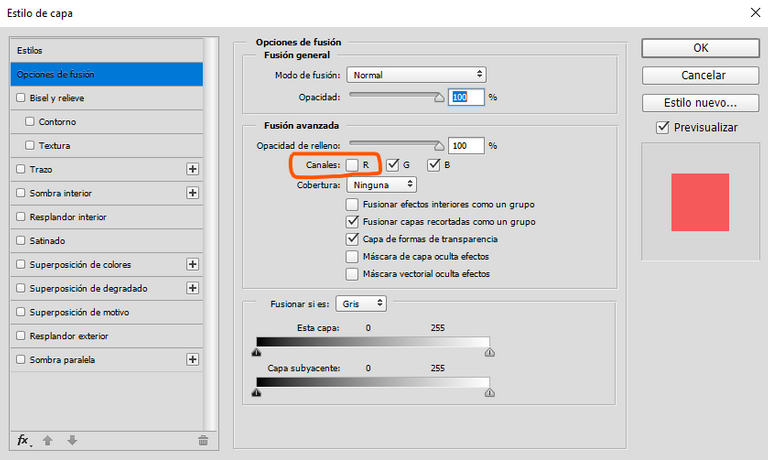
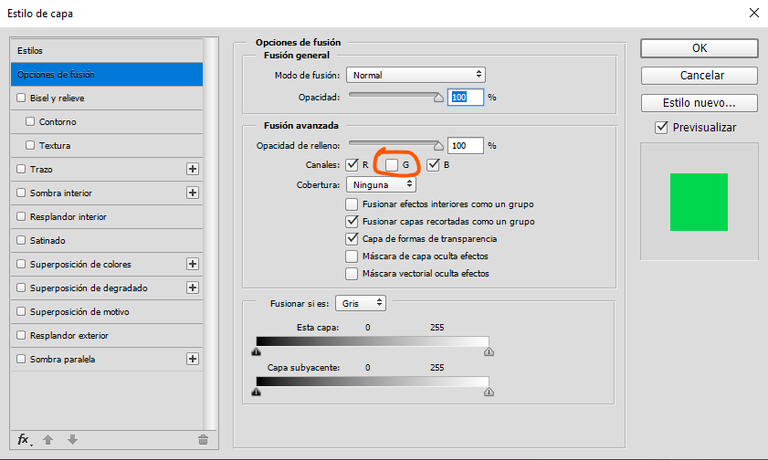
8)Damos doble click en nuestra primera capa, nos aparecerá los estilos de capa y quitamos la R, después de esto damos click en ok y movemos nuestra capa hacia un lado y hacia abajo con las flechas de su teclado.
8) We double click on our first layer, the layer styles will appear and we remove the R, after this we click ok and move our layer to the side and down with the arrows on your keyboard.

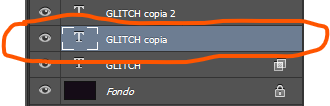
9)Damos doble click a nuestra segunda capa, nos aparecerá nuevamente la ventana de estilos de capa, desmarcamos la G, damos click en ok y movemos nuestra capa hacia arriba y a la derecha con las flechas de tu teclado.
9) We double click on our second layer, the layer styles window will appear again, we uncheck the G, we click on ok and we move our layer up and to the right with the arrows on your keyboard.
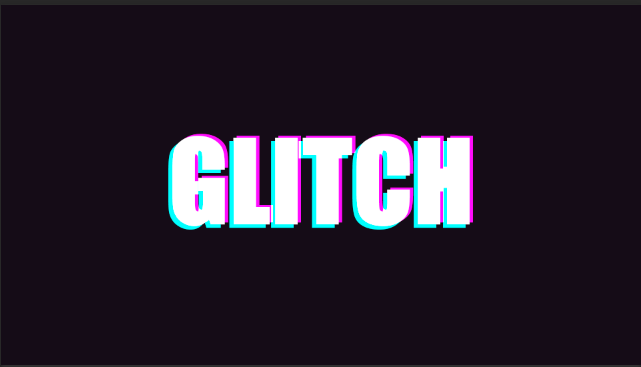
Ya casi tenemos listo nuestro efecto Glitch!
Ahora seguimos con el paso Número 10
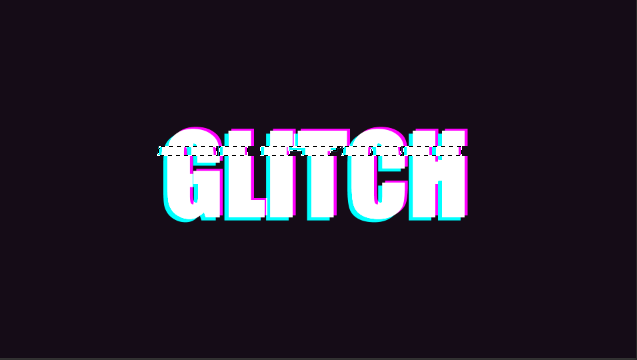
10)juntamos todas nuestras capas con las teclas Ctrl+e, con la herramienta Marco rectangular vamos a seleccionar partes de nuestro texto y moverlas, Deseleccionamos con las teclas Ctrl+D.
We are almost done with our Glitch effect!
Now we continue with step Number 10
10) we join all our layers with the Ctrl + e keys, with the rectangular Marquee tool we are going to select parts of our text and move them, we deselect with the Ctrl + D keys.


Y Listo ya tenemos nuestro texto Glitch... Pero porqué no le agregamos unas cosas mas a nuestro archivo.
Con la herramienta rectángulo vamos a hacer pequeños recuadros de color violeta y azul celeste.
And that's it, we already have our Glitch text ... But why don't we add a few more things to our file.
With the rectangle tool we are going to make small purple and light blue squares.


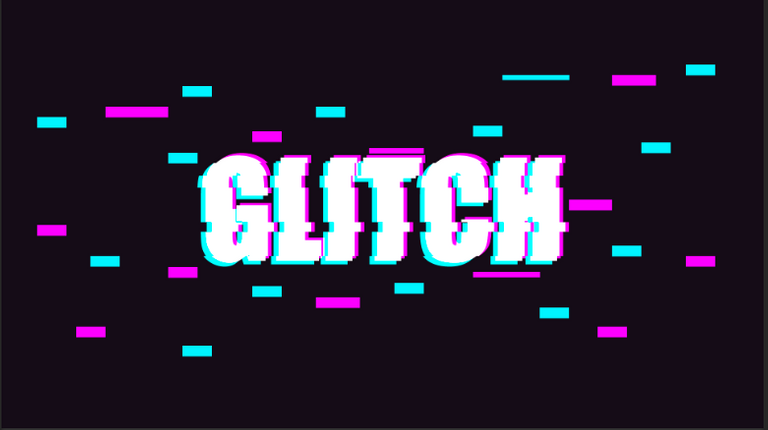
Según sus gustos pueden ir haciendo formas distintas con sus recuadros pero para mí está bien así. Y Listo! texto mejorado, espero les haya gustado y se diviertan haciendo este texto tan curioso de hacer.
Depending on your tastes, you can make different shapes with your squares, but for me it's fine like this And ready! improved text, I hope you liked it and have fun making this text so curious to do Thanks so much for reading
Congratulations @drakengfx! You have completed the following achievement on the Hive blockchain and have been rewarded with new badge(s) :
Your next target is to reach 50 upvotes.
You can view your badges on your board and compare yourself to others in the Ranking
If you no longer want to receive notifications, reply to this comment with the word
STOP