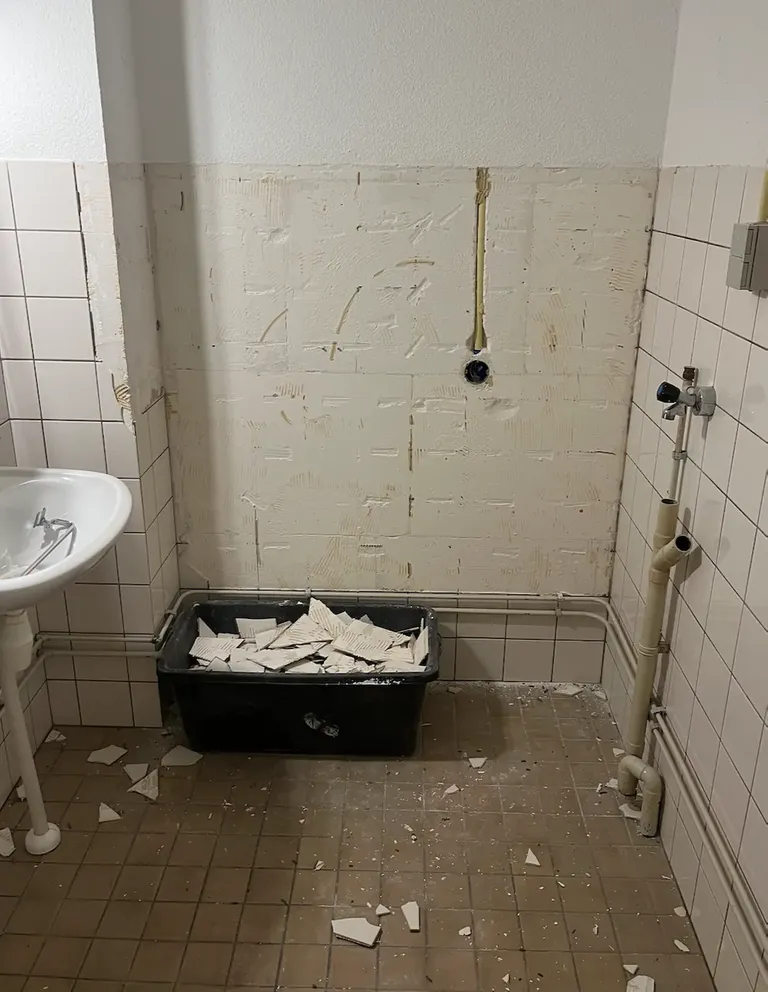
It's been quite some weeks since my last post on my house renovation project. Last time, I was still in the demolishing phase. Removing wallpaper, bashing away walls and removing bathroom tiles.
Lately, I've been focussing on more bathroom related chores. The plumber has removed all piping and routed them through the walls, a concrete floor has been pored, and recently I started tiling. Here's an overview in pictures.
First, before rebuilding the bathroom, the tiles needed to be removed and piping had to go into the walls. Here's a before and after picture in which the tiles are removed and the piping is rerouted in the walls:


In this last picture, not all the work has been finished yet. The piping in the middle are there for the future sink, which will be placed against this wall. The piping on the left and right will be removed. Another view on this where the pipes are gone is shown below:

Note that here, part of the pipes are now covered by concrete. The next step in the bathroom renovation is to place a new concrete floor. Partially to cover the new piping on the floor, and partially to make the floor smooth. We mixed an pored a total of 25 bags of concrete in just an hour or so. Don't mind the makeshift waterproof shoes :p

The final concrete floor looks like this. Here I've put some wood on the floor to walk on as I was afraid the concrete wasn't fully cured.

In the toilet, the same process took place. We removed the tiles, toilet and sink. Afterwards we installed a hanging toilet frame and rerouted all the piping into the walls:


With the floor installed, I could already build the toilet housing on which later the tiles will be placed. It slowly starts to look like something reasonable again:

Note the connections on the right. These will be for the toilet sink.
With the floors and piping done, it was time to start tiling the bathroom. For this, of course we needed some tiles. I had ordered 60x60cm tiles for both the floor and walls. After they got dropped off by the shipping company, I hauled them all upstairs to the apartment and started tiling. These are the tiles we will place on the bathroom floor:

In total we received 32 boxes of tiles. Each 25kg a piece. Quite the exercise :P
Once the bathroom floor cured, the bathroom tiling could finally start. My dad helped me with starting up the tiling process. As of currently the wall tiles in the bathroom are in as well as a few tiles in the toilet. In the toilet this was mostly important such that I could hang the toilet for temporary use. Here's some overview pics of the tiling:


Here are some first tiles in the toilet:

And of course, with the tiles in, we could start with installing the toilet at least temporarily:

This weekend I will further work on the toilet tiles and maybe some floor tiles. But for that I first want to grout the wall tiles. Otherwise the floor tiles will get dirty with grouting.
As you can see in the above update, quite some work has been done. This week, the plasterer started in the other rooms of the apartment. He will fix all the walls and ceilings. More updates on that in a later post.
For the previous updates see these posts:
Thanks for stopping by, an update on the project will follow soon!
Yay! 🤗
Your content has been boosted with Ecency Points
Use Ecency daily to boost your growth on platform!
Support Ecency
Vote for new Proposal
Delegate HP and earn more, by @michelmake.