Heeeyho Readers! More bits and bobs for the monstercross.
Holy busy week! I've been running around like a headless chicken solving all sorts of problems — monstercross included. Just as I'm about to shoot photos for this post... Bang! Camera battery dies.
At least I managed to finish the last machined parts for the monstercross. Missing thread on the derailleur hanger is done. Rear brake spacers done. And lastly, a friend of mine lent me his workshop to drill a bunch of holes onto the frame.
Before we start, a disclaimer: Don't do this at home. I'll explain further my decision to drill holes onto the frame to pass the cables and delve into why the idea isn't for everyone. Perhaps that'll justify the absence of a "how to do it" within the post. Enjoy.
There are basically two types of cabling on modern bicycles. Those with external cabling, where cables and cable housings are visible and attached externally to the frame; and those with internal cabling, where cables are hidden inside the frame.
The purpose of internal cabling is mostly aesthetic, since having the cable housings inside the frame creates a cleaner look. Sure, internal cables are better protected from the environment, but... unlikely that someone would damage their external cables easily. Totally a personal thing when buying a bicycle: some love for the look, other's hate for the maintenance hassle.
For this project I decided to convert the monstercross from external to internal cabling, which means drilling holes into the frame. {Fear}. Which means (2) that the frame might become compromised. Maybe(?!) Let's say I wanna test the idea.
From the engineering stand-point, blindly modifying a bicycle frame alters the project's planned integrity. Unless we can measure the impacts of a mod (a hole, for example), there's no way to know if the frame will withstand the stress under the new structural conditions. Also, a poorly executed modification might add unwanted localized stress that'll later become a crack/tear.
I decided to roll the dice anyways. Why? Because my frame is an inexpensive one from 1993 that has incredibly overdimensioned tubes. A modern aluminium frame feels like an egg shell compared to mine. (Worst engineering explanation ever). To end the case: I'd never drill holes onto a modern frame or high-end older frame (perhaps on Cromoly, but not on aluminium ones, and defo not on carbon.)
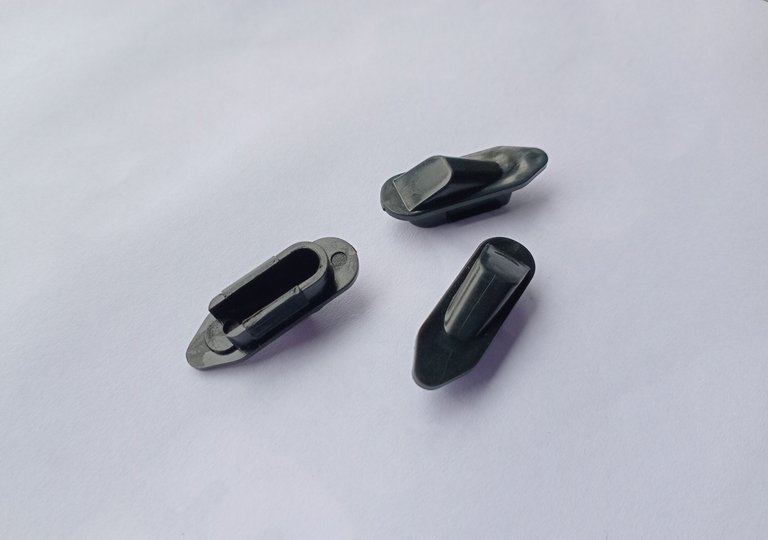
To cut story short, I went ahead and bought these plastic cable ports to give the holes a professional finish. They go over the holes (8x20mm), then, the cable housings enter smoothly into the frame.
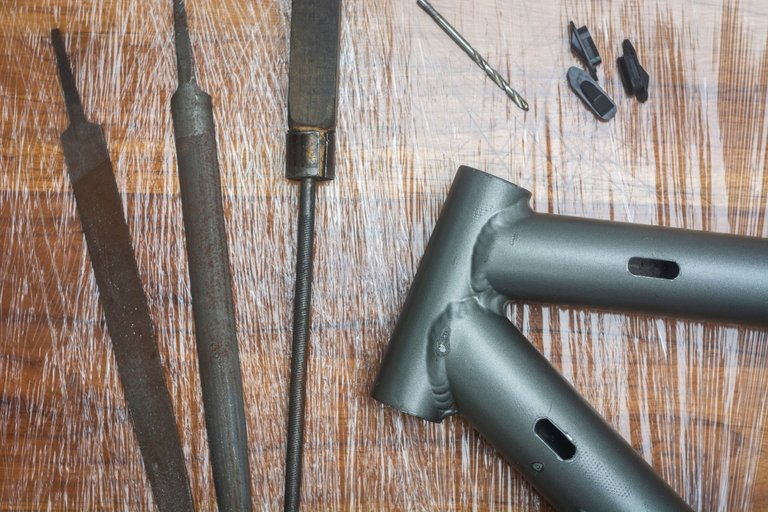
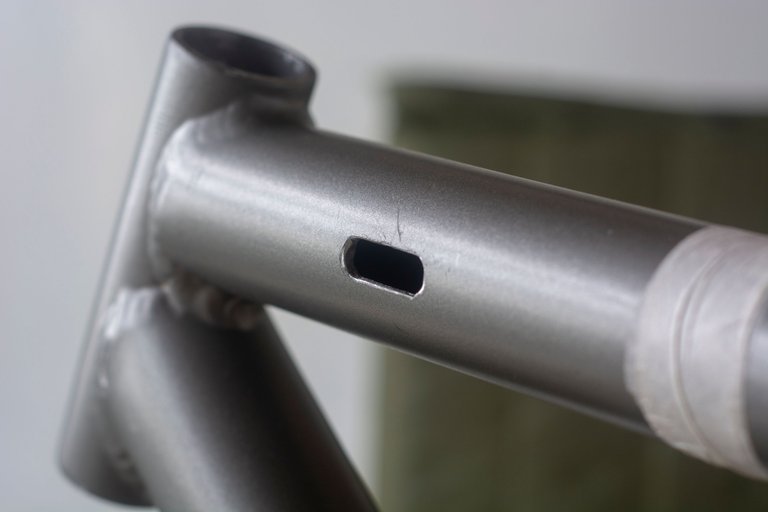
I don't want to give instructions on how I drilled the frame because that might inspire others to do the same. Not advisable, as I said. The holes need to be perfect to avoid future cracks and not everyone has the knack to do it. The result is shown below.
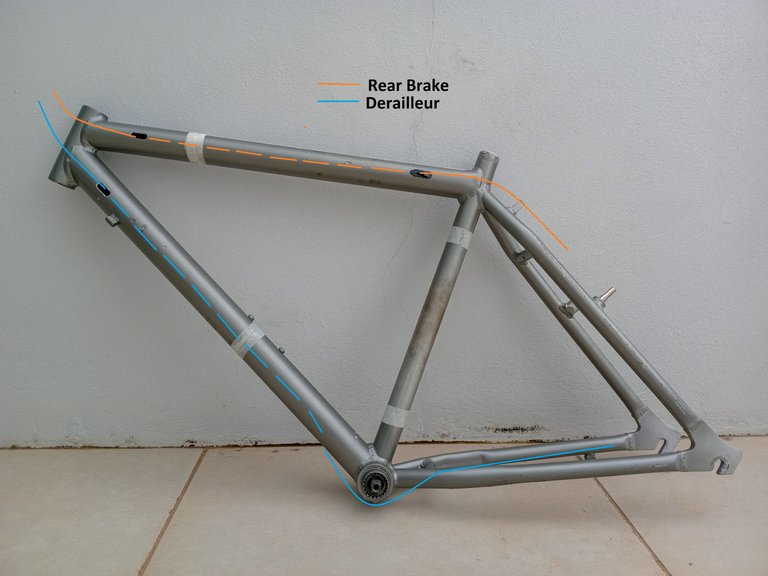
There are two holes for the rear brake at the top-tube and two for the rear derailleur at the down-tube.
Below you can see the internal cabling "diagram". Orange illustrates the rear brake cabling route (dotted line indicates the internal route). Blue illustrates the derailleur cable (it enters the frame, goes internally along the down-tube, then leaves the frame to go externally below the bottom-bracket and along the chainstay (right side). Will be easier to see when I finally assemble the bicycle.
The plastic ports could be better finished imho, but I couldn't find top-notch ones. These are cheap and do the job; better than bare holes anyway. They click in place nicely and, because the holes are precise, don't move nor fall. They're gonna work to test the concept. I've seen aluminium inserts that are way better and add rigidity to the edges near the hole, but those require some sort of brazing that I don't have.
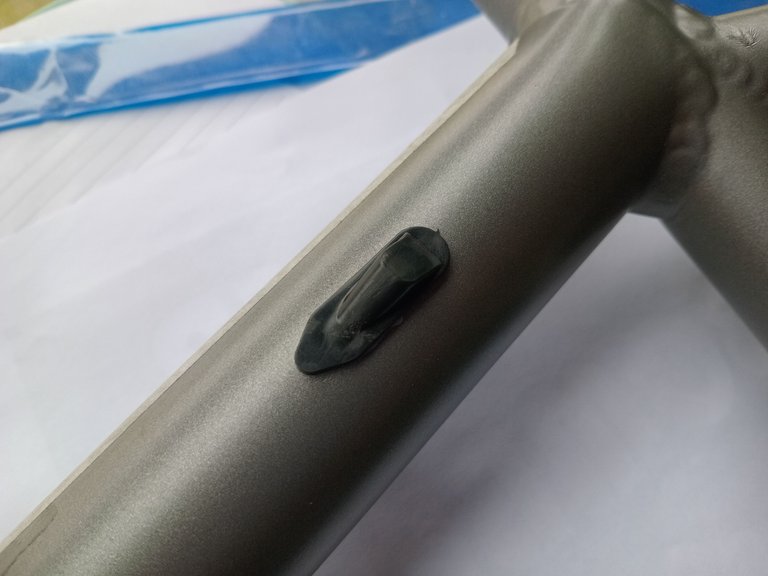
With this little mod the bicycle is ready to be assembled (if no fitting problem appears). You know how these things work, right? There's always a tiny detail we forget. I'm now brainstorming a way to record the entire assembly process on video and photo formats. It's gonna be epic!
Final thoughts
I don't think readers feel inspired to drill their frames after reading this post, but, just in case you do, think wisely. On 99% of cases you are better off selling your external cabling frame and buying another with internal routing.
Next post is gonna be massive, so stay tuned for that.
Peace.
If you enjoyed this post consider leaving your upvote for a hot coffee.
Find me on Twitter: https://twitter.com/mrprofessor_
~Love ya all,
Disclaimer: The author of this post is a convict broke backpacker, who has travelled more than 10.000 km hitchhiking and more than 5.000 km cycling. Following him may cause severe problems of wanderlust and inquietud. You've been warned.

This post was upvoted by the Cycling Community
Subscribe to the Cycling Community and share your cycling related posts with us.
Join our Discord Channel if you want to chat about cycling.
You can support the Cycling Community by delegating HP
| 25 HP | 50 HP | 100 HP | 250 HP | 500 HP |
Your detailed explanation and clear warnings are incredibly helpful for anyone considering a similar project @mrprofessor
We have chosen this post to be curated by MCGI Cares Hive community. We are inviting you to join our community that study the words of God. You can also follow our official Youtube Channel. Keep doing the great job ❤️
I really wanted to advise people to go for it and see what happens, but people's safety spoke louder -- I don't want people to compromise their frames.
Thank you for the appreciation.