LMAC School - How to add shadows to picture elements
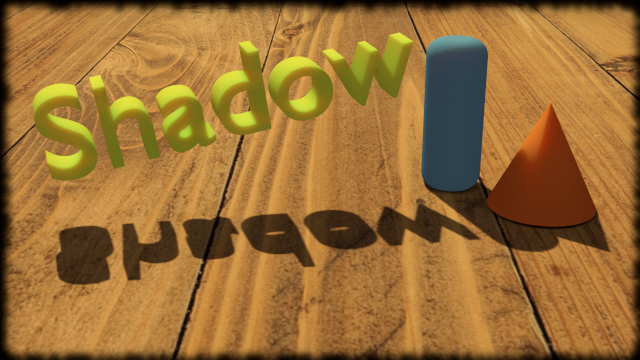
After all the theory in "What are the principles of light and shadow ...?", this tutorial is about the practical implementation of custom shadows in a collage.
It often looks like a picture element that is inserted into a collage is floating above the collage.
With a happy little drop shadow and umbra, this problem is solved in most cases. Image elements then look more integrated, more natural.
Requirements
You may need the GIMP software to understand this tutorial. GIMP is a free, open source tool for image processing of all kinds. Lots of people say GIMP is the open source Photoshop. I agree with this statement at least for the functionality I personally need.
You can download GIMP here: Click
I created this tutorial for GIMP version 2.10.20 (and higher).
We will work with layers in this tutorial. If you do not know how to work with layers, just take a look into the LMAC School - How to work with layers post.
It is also helpful to know how to cut out parts of a picture. Just read LMAC School - How to cut out a picture part, if necessary.
Basics
1. Two ways
I am aware of exactly two ways of adding shadows to an existing image in GIMP.
One way is to paint a shadow by hand. And shadows can be created with mirrored object copies too.
I always make hand-painted shadows when the image of the shadow has to be too complex due to the circumstances in the image (lighting and details) (see "Complexity" section).
I only use mirrored copies if they would be favorable from a perspectively point of view, for creating a shadow. In example, when the mirrored copy of an object could be geometrically corrected in a propper way and then looks good as a shape of a shadow. I do this by using the "Perspective tool" in GIMP.
If you have already worked with this tool, you will have noticed, that it is not always possible to correct the perspectives of some objects. Sometimes, the result doesn't look good. In such cases, I decide to draw the shadow by hand.
2. Perspective tool
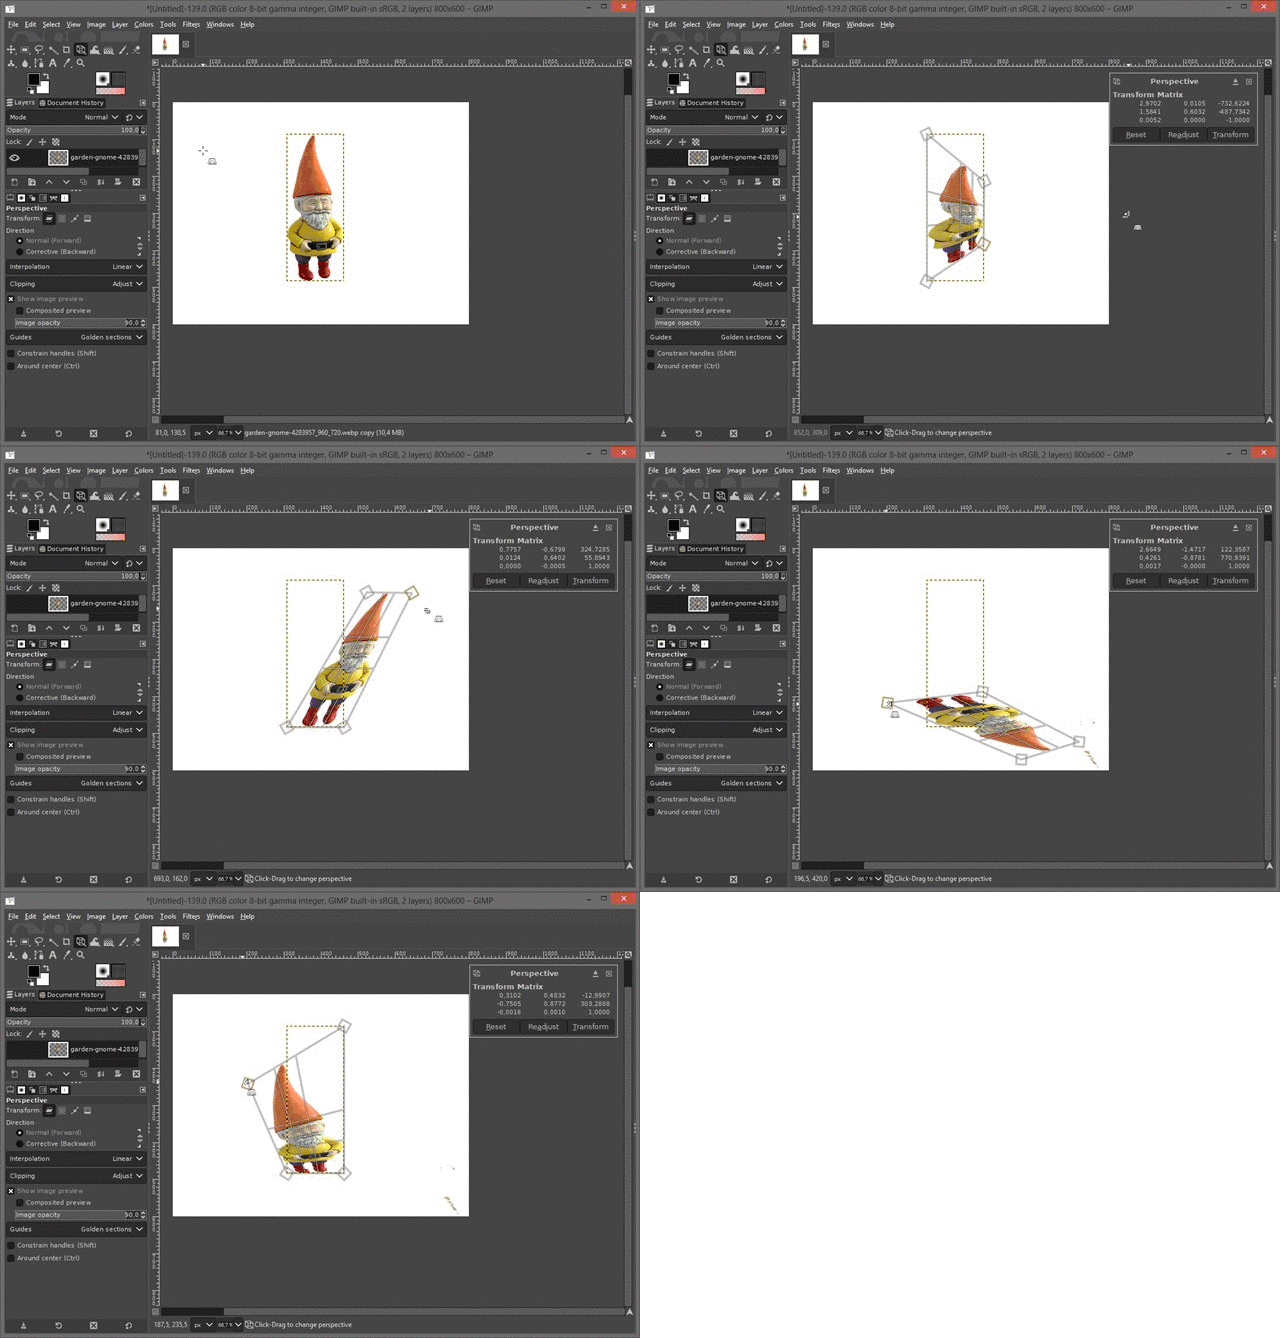
In the examples section I will make heavy use of the Perspective Tool. It is a deformation tool with which a layer can be corrected optically in perspective.
The tool provides four handles for this. One of these handles is then at each corner of the layer.
If you drag one of these handles by mouse, the respective corner of the layer is also moved. This then also has an impact on the image data of the layer.
In principle, you can imagine the tool like a rubber mat on which the picture is printed. If you pull the imaginary rubber mat at one corner, the image on it also warps in the corresponding direction.
You can activate the tool by clicking its icon in the toolbar or by pressing Shift+P on your keyboard.
3. Complexity
In the tutorial about the principles of light & shadow, I already told what shadows actually are and how they are created.
But there I worked with flat surfaces to make the principles clear in a simple way.
Unfortunately, nature is not that simple. Because most shadows are drawn on several objects at the same time or on an uneven surface instead of a single flat surface. Then the image of a shadow is no longer drawn linearly on a photo, but in a certain perspective for each object on which a shadow is drawn.
That is an important aspect. Because if we want to bring shadows into an existing photo, we are dealing with a hodgepodge of individual objects, represented by a single image.
Starting from an object, simply drawing a shadow straight across the scene would therefore often be very counterproductive.
Examples
In the previous LMAC School tutorials we already covered the basics such as Layers. Therefore, I will reduce the step-by-step instructions in the following examples to the essentials.
1. Method "Mirrored Copy"
"Mirrored copy" means a copy of the picture element to which a shadow is to be added. This copy is first colored completely in black, apart from the transparent area. Then it is deformed into a shadow with the Perspective Tool.
This variant only works if the shape of the picture element is cut out and is available as a layer.
1.1 Step-By-Step
- Duplicate the layer of the object (picture element).
- Drag this copy beneath the layer of the object, in the layer list.
- Change the layer mode to "Darken only". In many cases "Grain merge" is also suitable. In example, when the surface of the shadow is very complex and bumpy and the shadow should be more bright.
- Change the opacity of the layer until the shadow optically fits into your scene.
- Use the Perspective tool to deform the object and align it to the direction of other main shadows in the scene. (If there are no shadows, use the light as a guide.)
- Use the Brightness&Contrast tool to make the copy deeply and homogenous black.
- Then use the color picker to acquire the darkest color as foreground color from a shadow in the area where your object is placed. If there are no shadows, select a dark gray or black color.
- Activate the Fuzzy Select tool and click outside the shadow shape.
- Then invert the selection to have the shadow shape itself selected.
- Use the "Fill with FG color" tool to colorize the shadow with the previously selected shadow color.
- Undo the selection.
- Use the Gaussian Blur tool to blur the shadow. Use the values that makes the shadow fit into your scene.
- Click to the foreground color in the color box and make it darker.
- Activate the Pencil tool and configure hardness and force to suitable values for drawing a core shadow.
- Draw the umbra along the shape of the object where the edges touch the ground, right into the penumbra. Inside the penumbra, the umbra should be strongest and largest. See tutorial "LMAC School - What are the principles of light an shadow in a picture?"
1.2 Example
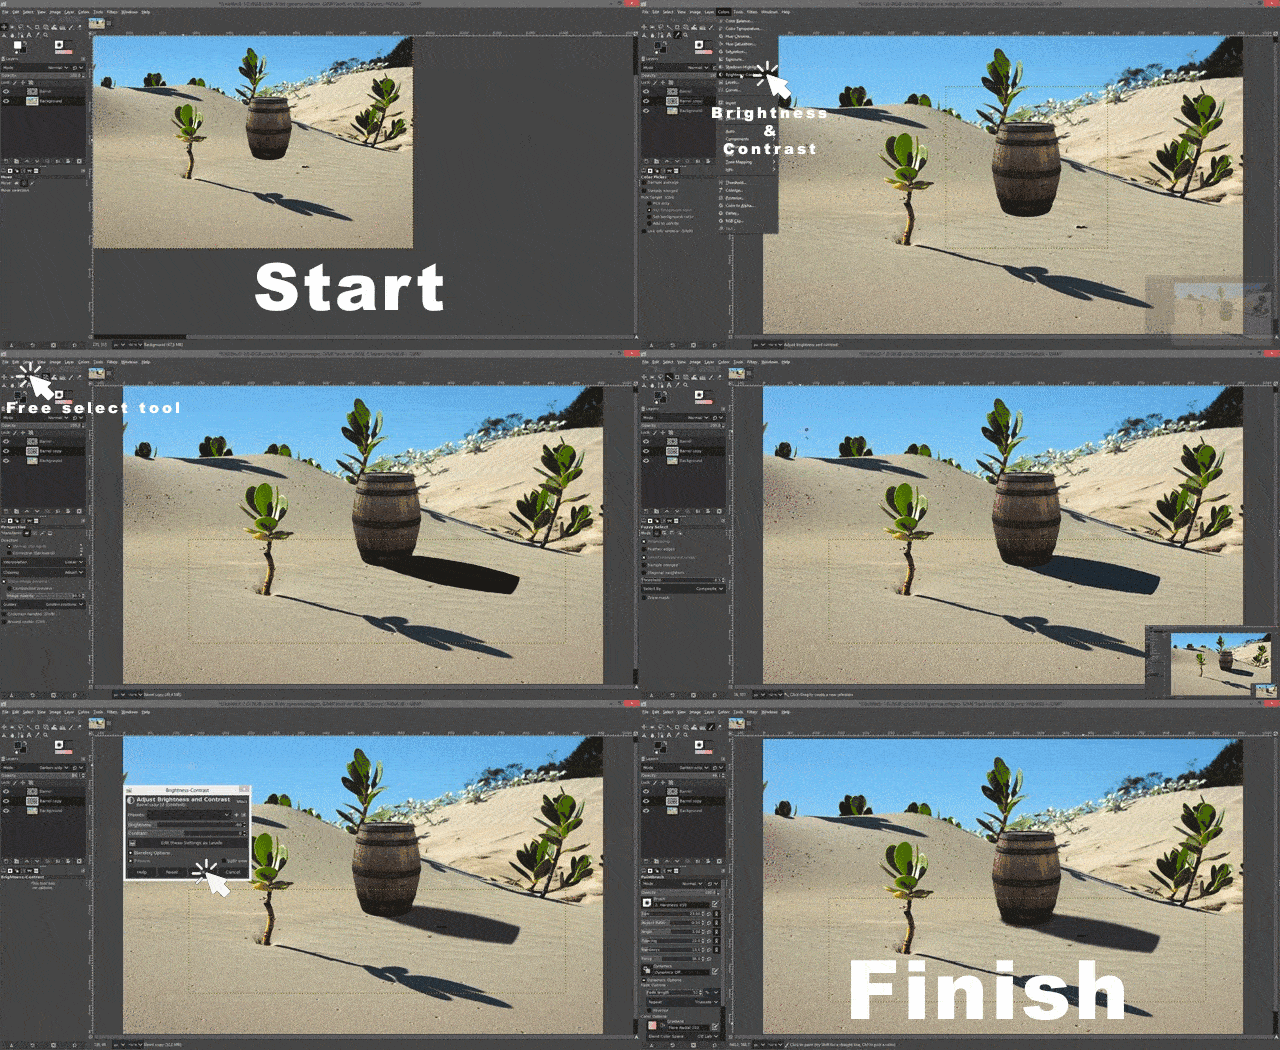
This example was done with the aid of the steps described above. I placed a barrel into the desert scene and then I made a copy of it. I blacked the copy and then I mirrored it by using the Perspective Tool.
Then I painted the umbra into the penumbra by hand. Unfortunately, this last step cannot be avoided. But by using the mirrored copy of the object, I didn't have to draw the penumbra by hand and saved time in this way.
2. Method "Hand drawn"
Whenever it is too complicated to make a shadow with a mirrored copy, I choose to draw it by hand, as already written.
You don't necessarily have to be super talented in drawing. It's just a little experience you need to create beautiful shadow shapes.
As long as you draw the shadow in the right direction, draw a few happy little accidents on it, and stick a little to the shape of the object that is supposed to cast the shadow, and then the shadow is quickly finished.
2.1 Step-By-Step
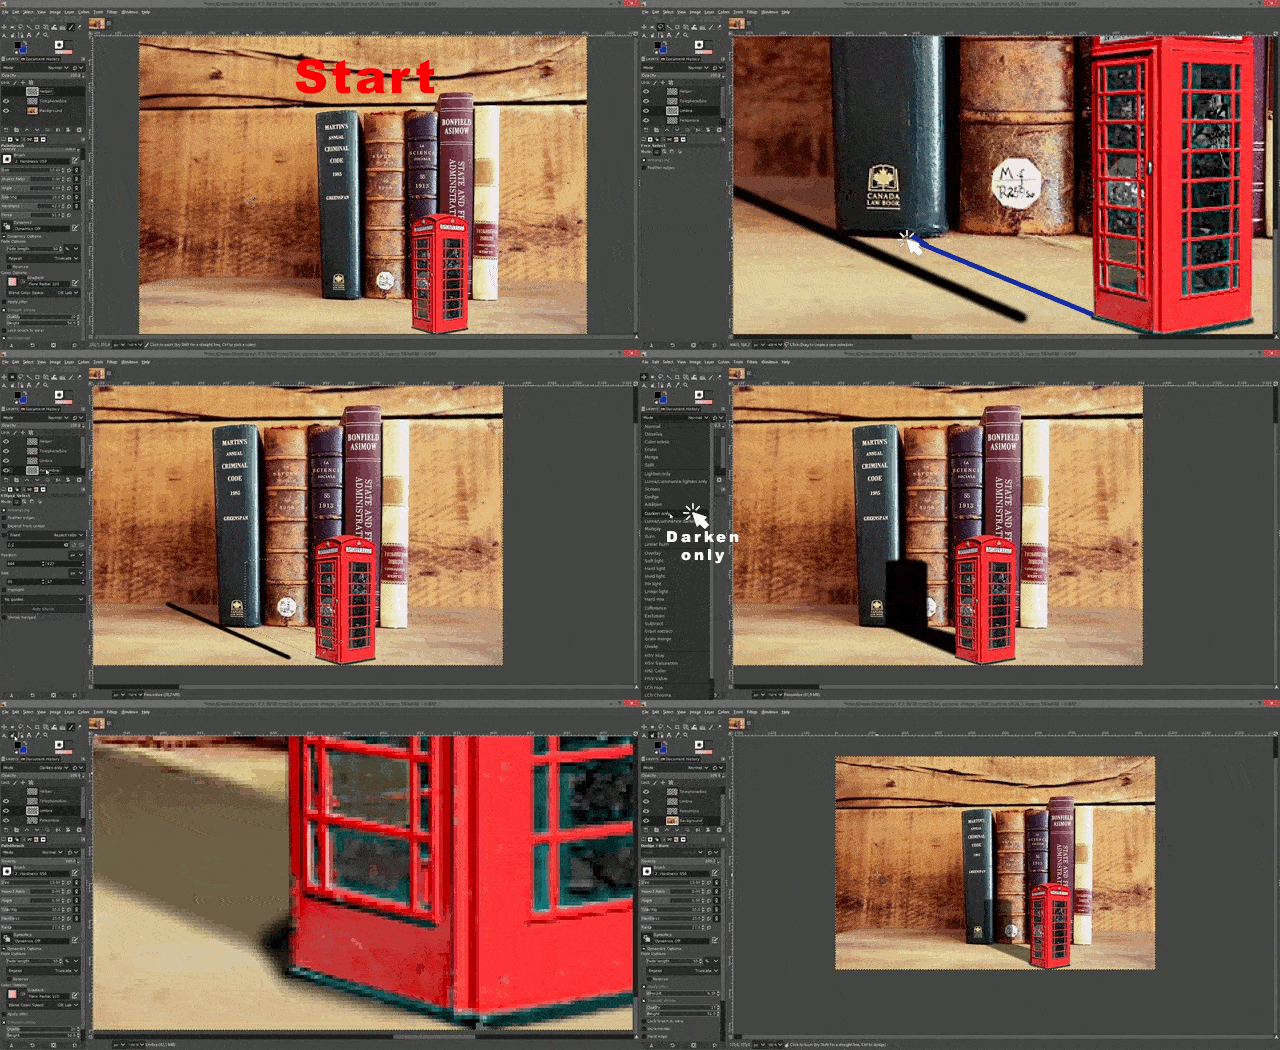
- Create a new layer underneath your object (picture element) layer and name it "Penumbra".
- Create another new layer above the penumbra layer and name it "Umbra".
- Change the layer modes of both new layer to "Darken only" and change their opacity to -+85%.
- Select the penumbra layer in the layer list.
- Draw a shadow shape using the Fuzzy Select tool and other Select tools if necessary. Have an eye to existing shadows or the light when aligning the shape. (In the example, I'm using a help line.)
- Select a black or dark color in the color box as foreground color.
- Use the "Fill with FG color" tool to fill the selection shape.
- Undo the selection.
- Blur the penumbra layer by using the Gaussian Blur tool. Look at existing shadows to see how much blurred the edges of the shadow need to be.
- Select the umbra layer.
- Select the Pencil tool. Change the tool's attributes until you feel you can use it to draw a good umbra.
- Draw the umbra. In the example below, the umbra is on the ground where the bottom edges of the object touch the ground. It is the area below and behind the object where there is no or less light.
- Blur the umbra layer by using the Gaussian Blur tool oder by using the Blur Pencil tool.
2.2 Example
In this example I added a telephone box to the scene. According to the light in the scene, the shadow of the telephone box would not only be cast to the ground. It also would be cast to the box behind. I used the shadow of the books as guide when I aligned my hand made shadow.
Addendum
Of course, I had to save some time for the examples so that the GIF files didn't get too big in their file size. So the shadows do not have the quality that can be achieved with the methods presented.
How good your shadows will be depends entirely on how much time you take and detail work you do to create them.
Always keep an eye on the shadows that already exist in the scene. If you align your own shadow with the existing shadows in terms of illumination, length and direction, nothing can actually go wrong.
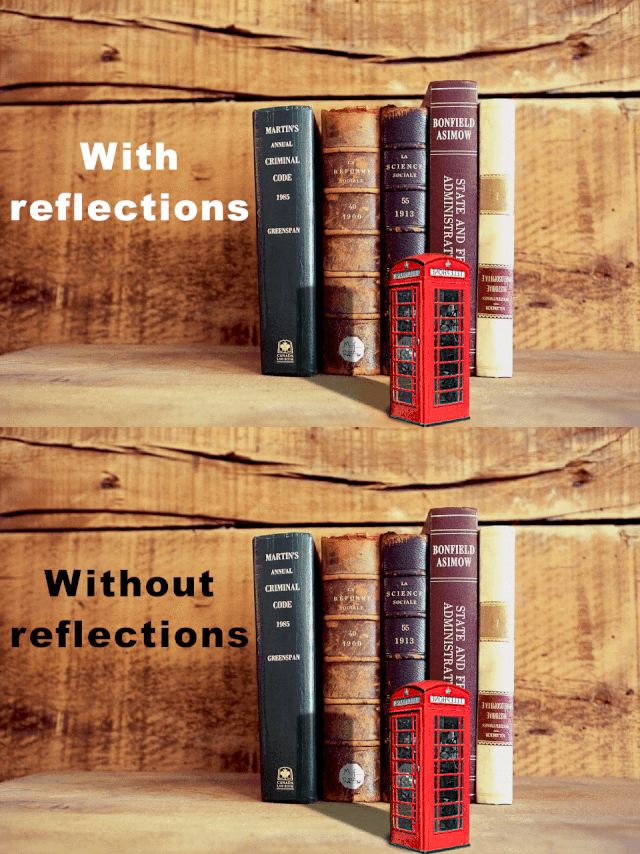
Not really a matter of shadows themselves. But reflections can add immense quality to your shadows.
Let's look at the phone booth ... It's red and probably painted with a slightly reflective paint. This reflects a lot of light into the environment, right into the shadows.
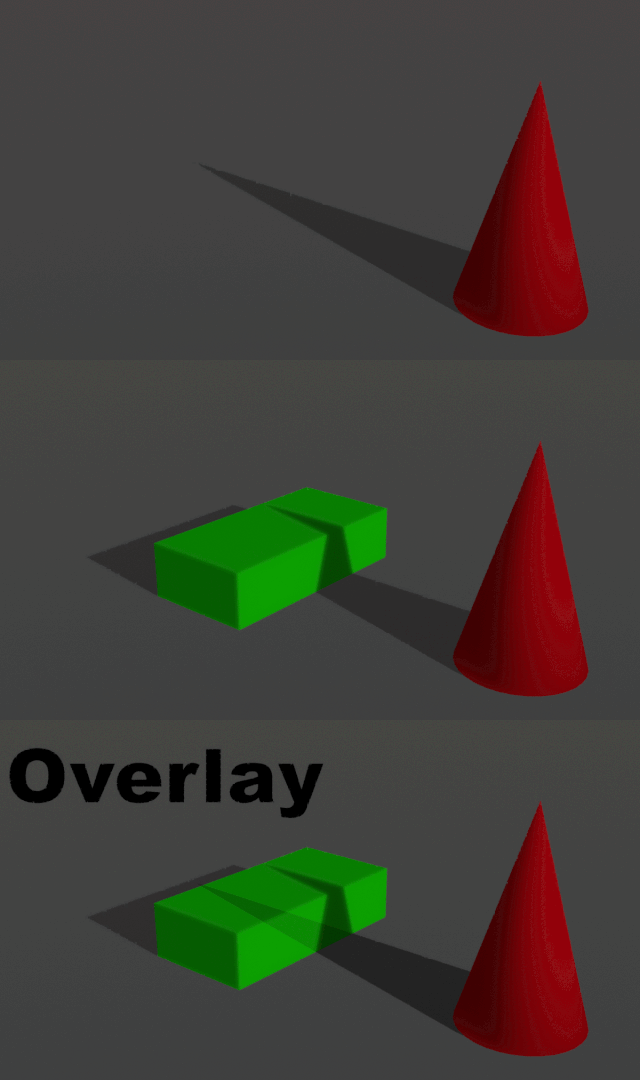
I would now copy the red color of the telephone box with the Color Picker tool and dab the surroundings with a weak brush on a new layer and then apply Gaussian Blur. This reflection layer should then have the layer mode "Overlay".
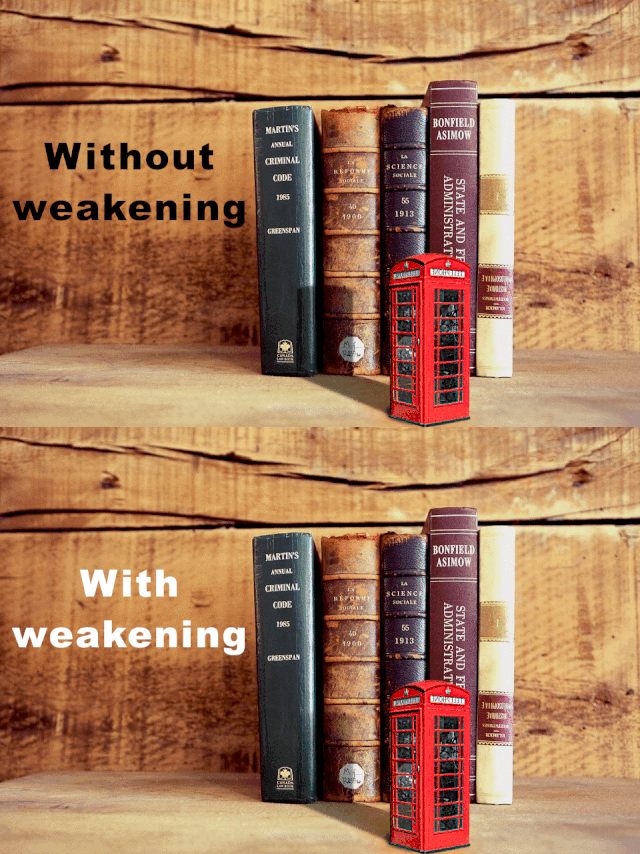
Sometimes a shadow is loosing intense on the distance, because of light sources interfering the shadow. You can simulate it by using the Eraser tool with less force and hardness on the relevant sections of your shadow.
I hope I didn't forget to mention something.
Best regards
QuantumG
PS: 33% of the rewards for this post go to LMAC as beneficiary ( #supportlmac ).
You will have noticed that I am not a native English speaker. Therefore, there are probably a few linguistic bumps in my texts. If there are any passages that could trigger accidently a world war or something similar, please let me know so I can change it. :-)
Of course, I am also interested in making the text easier to understand if it is partially necessary.

Ready!
Lesson viewed. I already have the GIMP software and will now be able to apply each of these courses. Thank you for the great contribution to our knowledge boy.
I am pleasantly surprised by the magnificent, neat and tidy explanation of this post. I will be reviewing all the materials of the School. They are a treasure.
Thank you, sincerely. There is nothing more generous and commendable than sharing knowledge.
Apparently, 'studying' art involves more than just copying the Masters. You are brilliant. Thank you!
You have used the Hashtag #CC and can now reward 14 comments under your post with one CC.
More information about the Commentcoin-Project can be found on this account.
You can easily add an upvote to this post to support the project.
Thanks for using it.
Happy comments.
Your CC-Team:
@kristall97 ([Code-Designer, Witness]) @alucian ([Project-Designer])