Hello everyone, today I bring you a drawing that I made almost two months ago for a very special person for me, drawing traditionally one of her biggest husbands of manhwas (Korean comics), Seung-ho of Painter of the night. Of course, as usual, showing the step-by-step, so without further ado, let's get started.
Muy buenas a todos, el día de hoy les traigo un dibujo que hice hace casi dos meses para una persona muy especial para mí, dibujando de manera tradicional a uno de sus mayores husbandos de manhwas (comics coreanos), Seung-ho de Pintor nocturno. Por supuesto, como es costumbre, mostrando el paso a paso, así que sin más dilación, empecemos.


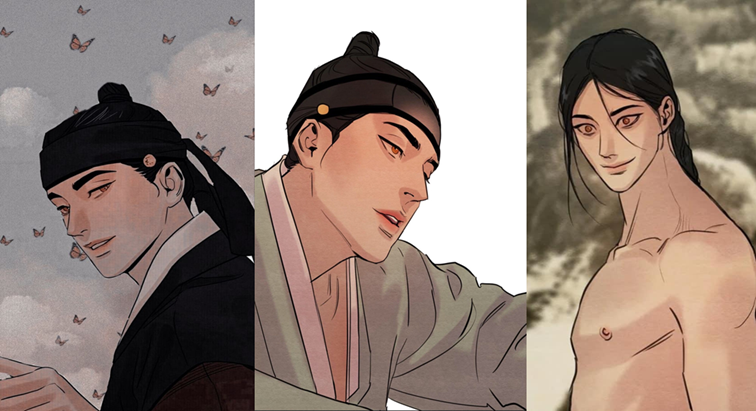
To begin with, the first thing I did was to look for reference images to draw the character (thank goodness I knew what the manhwa was about because otherwise, it would have been a not very nice surprise), which I wanted to use as a base the young Seung-ho for a change, and draw him in his typical traditional robe (I know he has a name, don't kill me for being uneducated) just for aesthetic preference. I used more reference images, but these are the main ones.
Para empezar, lo primero que hice fue buscar imágenes de referencia para dibujar al personaje (menos mal sabía de qué trataba el manhwa porque de lo contrario hubiera sido una no muy bonita sorpresa), quise usar como base al jóven Seung-ho para variar un poco, y dibujarle su típica bata tradicional (sé que tiene un nombre, no me maten por inculto) ya por mera preferencia estética. Usé más imágenes de referencia, pero estas son las principales.
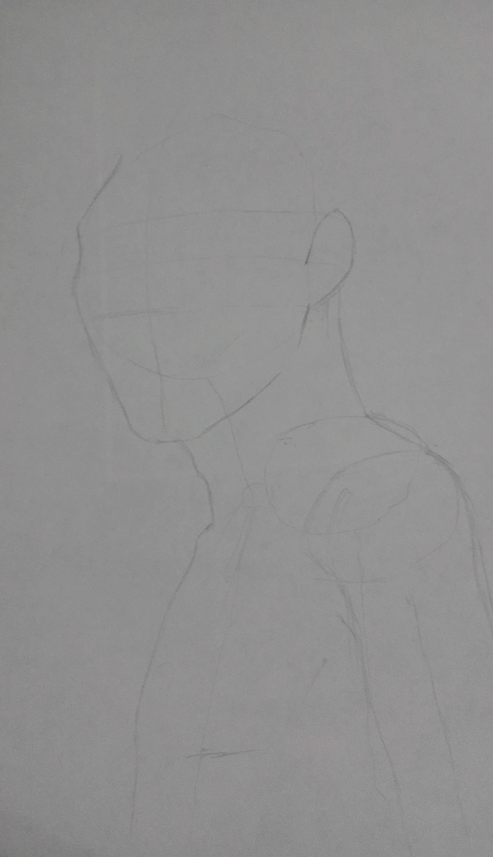
Already starting with the drawing, the first thing I did was to make the skeleton and go taking the measures to maintain correct proportions (adapted to the style), trying to keep the first strokes as clean as possible I avoided making erasures to avoid staining the drawing, which would result in an inconvenience to start making the details, also worth mentioning that I was changing some strokes as the drawing was taking shape, to correct any irregularities that I found in the process.
Ya empezando con el dibujo, lo primero que hice fue hacer el esqueleto e ir sacando las medidas para mantener correctas proporciones (adaptadas al estilo), al tratar de mantener los primeros trazos lo más limpios posibles evité hacer borrones para que no se manchara el dibujo, lo que resultaría en un inconveniente al empezar a hacer los detalles, también cabe mencionar que fui cambiando algunos trazos conforme el dibujo iba tomando forma, para ir corrigiendo cualquier irregurlaridad que hallara en el proceso.
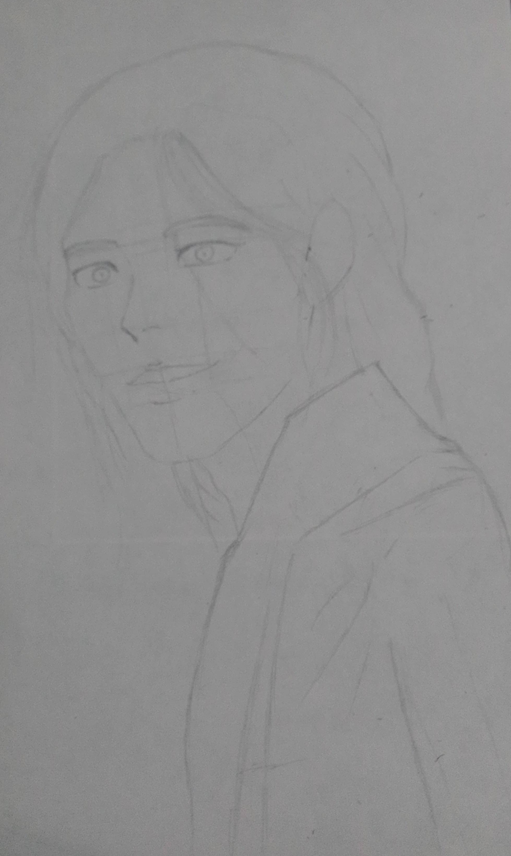
Once the structure was finished I started to define facial features, hair, and clothing. With the facial features, there was no major problem, of course, I had to take several measurements before doing everything, and they fulfilled their function because the positioning was more than correct, being the lips probably the part with which I had more problems but because I did not calculate well its thickness, otherwise both drawing the eyes, hair, and clothing were quite entertaining processes.
In the case of the clothing, I had quite a few conflicts concerning the distance of the neck about the shoulder, something that made me desperate more than once but in the end, I managed to capture it well.
Ya con la estructura terminada empecé a definir rasgos faciales, cabello, y vestimenta. Con los rasgos faciales no hubo mayor inconveniente, claro está que tuve que sacar varias medidas antes de hacer todo, y cumplieron su función pues el posicionamiento fue más que correcto, siendo los labios probablemente la parte con la que tuve mayores problemas pero porque no calculaba bien su grosor, de resto tanto dibujar los ojos, el cabello, y la vestimentas fueron procesos bastante entretenidos.
En el caso de la vestimenta tuve bastantes conflictos con respecto a la distancia del cuello en relación al hombro, cosa que me desesperó más de una vez pero al final logré plasmarlo bien.
Now we enter the final process, which is to give life to the drawing, and here I will make a clarification, I do not have good materials to make this type of drawing, I only have a pencil, an eraser, and some other piece of soft paper to blur, if you want to increase the quality of a drawing of this style, it would be best to have a more varied range of materials to provide even more life to the drawing, but that would be my recommendation, in my case for fewer materials that I have, I will still make my best effort to achieve my goal.
To begin with, I erased as much as I could from the base of the drawing carefully, superficially, and very softly I passed the eraser over the drawing to be able to redefine the strokes with their respective contours, being very careful not to make the strokes too strong so that the details were the protagonists, however, I could not avoid abusing them on more than one occasion.
Ahora entramos en el proceso final, el cual es darle vida al dibujo, y aquí haré una aclaración, yo no poseo buenos materiales para hacer este tipo de dibujos, sólo cuento con un lapiz, una goma, y algún que otro trozo de papel suave para difuminar, si se quiere aumentar la calidad de un dibujo de este estilo, lo mejor será tener una gama más variada de materiales para brindarle aún más vida al dibujo, pero esa sería mi recomendación personal, en mi caso por menos materiales que posea, igual haré mi mayor esfuerzo para lograr mi objetivo.
Para empezar, borré todo lo que pude de la base del dibujo con cuidado, y de manera superficial y con mucha suavidad pasé el borrador por encima del dibujo para poder volver a definir los trazos con sus respectivos contornos, con mucho cuidado de no hacer muy fuertes los trazos para que los detalles fueran los protagonistas, no obstante no pude evitar abusar de ellos en más de una ocasión.
After the drawing, I proceeded to draw the hair in its entirety, making some strokes stronger than others to mark the ends, and focusing the pencil more on the darker areas, stabilizing everything with the blurring as I was adding more and more detail.
With the face was something interesting, at several moments I felt that I had spoiled the drawing, but in the end, it was not so, first I was superficially blurring most areas while I retouched some parts with the pencil to repeat the process and make the details. With the eyes, I went over the upper part with a pencil, blurred, and redrew them to give a better effect, and with the lips, I tried to mark them without making them too dark, something similar to the manhwa style. And with all that done, I did the darker blurring in the areas where not so much light reached, or in points where I wanted to give more emphasis.
Después del retrazado, procedí a dibujar el cabello en su totalidad, haciendo algun que otro trazo más fuerte que otro para marcar las puntas, y afincando más el lapiz en las zonas más oscuras, estabilizando todo con el difuminado conforme iba añadiendole más y más detalle.
Con la cara fue algo interesante, en varios momentos sentí que había estropeado el dibujo, pero al final no fue así, primero fui difuminando superficialmente la mayoría de zonas mientras retocaba algunas partes con el lapiz para repetir el proceso y hacer los detalles. Con los ojos repasé la parte superior con lapiz, difuminé, y volví a trazarlos para dar un mejor efecto, y con los labios traté de marcarlos sin terminar haciéndolos muy oscuros, algo similar al estilo del manhwa. Y ya con todo eso hecho, hice el difuminado más oscuro en las zonas en las que no llegaba tanta luz, o en puntos en los que quería dar más énfasis.
And to conclude, the clothing, which was not so much work but it did have a good detailing process. It could have been much better not to mark the edges but to play more with the shades of black and gray of the whole drawing to mark more the white color, but not knowing at that time how to do it I decided to play with grayish tones to keep the same spectrum of grays. I followed a similar process as in the previous parts to blur and darken areas and make several strokes to mark the folds and wrinkles of the robe.
The rest I blurred a little more on top, I gave some more detail to the hair and the face by carefully passing the eraser, and with that, I would be ready, finished drawing.
Y para concluir, la vestimenta, que no fue tanto trabajo pero sí tuvo su buen proceso de detallado. Bien pudo haber sido muchísimo mejor no marcar los bordes sino que jugar más con los matices de negro y gris de todo el dibujo para marcar más el color blanco, pero al no saber en ese momento cómo hacerlo decidí jugar con tonos grisáceos para que mantuviera el mismo espectro de grises. Seguí un proceso similar que en las anteriores partes para difuminar y oscurecer zonas, y hacer varios trazos para marcar los pliegues y las arrugas de la bata.
De resto difuminé un poco más por encima, le dí algún que otro detalle más al cabello y al rostro pasando con cuidado el borrador, y ya con eso estaría listo, dibujo terminado.
That was the whole process, it was quite fun to make the drawing, being (I think) the best drawing I've done with this style so far, which made me much happier because it was dedicated to a very special person for me, who received the gift with great joy and even has it hanging on the door of her room (<3).
And that's all, thank you for making it this far, you are free to leave your opinions and advice.
Ese fue todo el proceso, fue bastante divertido hacer el dibujo, siendo (creo) el mejor dibujo que he hecho con este estilo hasta la fecho, lo cual me alegró mucho más debido a que era dedicado a una persona muy especial para mí, quien recibió el regalo con mucha alegría y hasta lo tiene colgado en la puerta de su cuarto (<3).
Y eso es todo, gracias por llegar hasta aquí, son totalmente libres de dejar sus opiniones y consejos en los comentarios, me gustaría mucho leerlos, tampoco olviden seguirme si no quieren perderse de contenido similar, no voy a estar tan activo debido al trabajo, pero voy a tratar de no perder el ritmo. Con todo eso dicho, me despido, nos vemos en el siguiente post.
- Farewell image and subtitle made in canva (photo editing and presentation tool) by me.
- Translated in Spanish to English with DeepL translator.