Please watch the video from start to finish for effective and efficient steps. Don't hesitate to click the Upvote and Follow buttons to support me make more videos.
Hello! My name is Hira Karmachela a.k.a BABE ODED. On this occasion, I will share my experience to create sprite animation in pixel style using Clip Studio Paint.
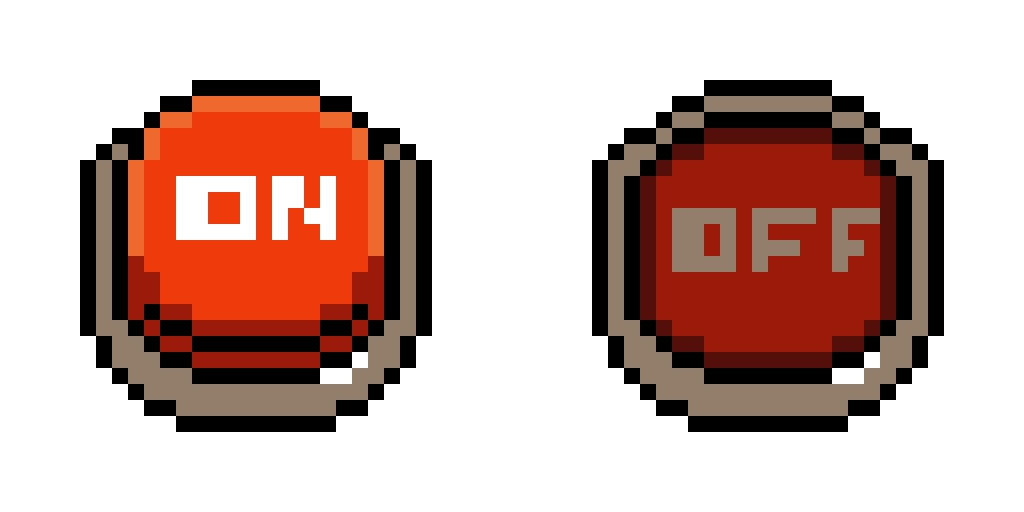
The video above use Bahasa. Please read this post to know the summary in English. Below is a summary of the steps explained via video.
Download and Install Pixel Studio
Of course, before starting to work, make sure you have downloaded and installed the Pixel Studio application on your smartphone or computer. Below are the links that you can access according to the device you have:
Setting Up a New Project
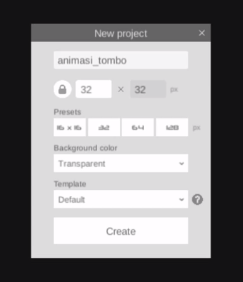
We start by setting the dimensions and background color of the document or canvas. There are presets available to make it easier for us to set the canvas dimensions, you can choose 16 x 16, 32, 64, or 128 all in pixels. For the background color I chose to use a transparent background. Do not forget to provide a title for the project to be created.
Understanding User Interface
I'm using Pixel Studio for PC. So there will be a slight difference in the orientation of the user interface for smart phone devices.
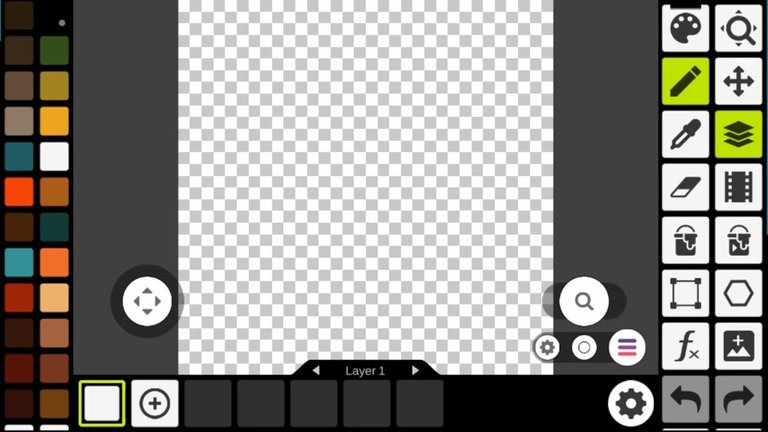
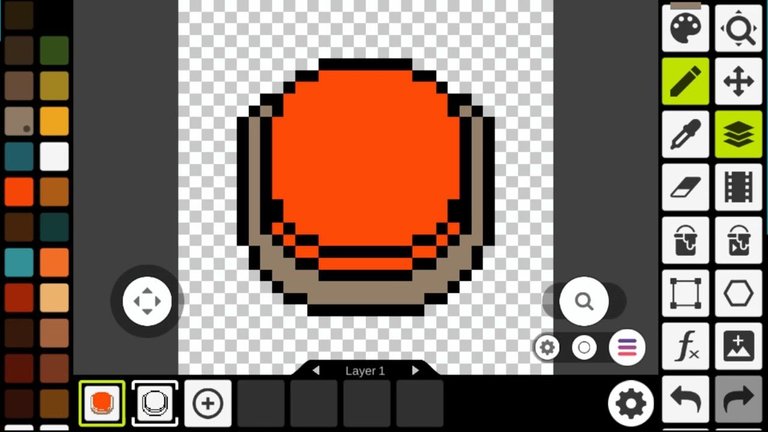
After setting new project settings. We enter the workspace view in the Pixel Studio application. The interface is quite simple and user friendly. On the right is the tools panel and on the left is the swatches panel. The most important thing in a graphics processing application is the layer panel, and the Pixel Studio application has this feature with a very convenient placement at the bottom of the screen. The middle part that remains is the canvas for processing the graphics.
Assembling Pixels to Form Objects
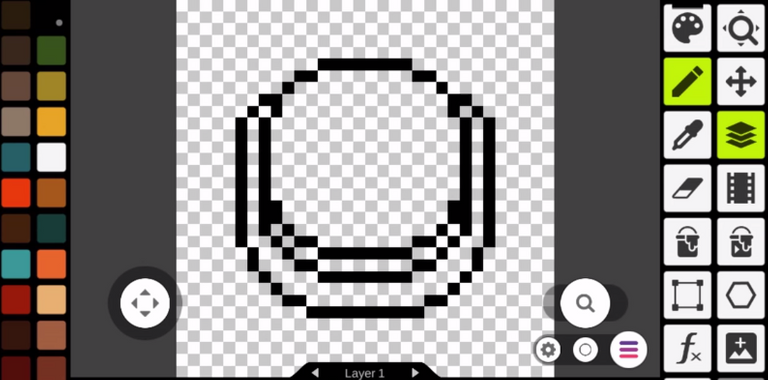
Next, we can use the available tools to string pixels and shape objects. In this tutorial, I used the pencil tool to create the shape of a button.
Applying Object Color
Applying color can easily be done with a variety of tools. Colors can also be selected in the swatches panel as needed. However, the most important thing in this process is the arrangement of layers. Don't forget to always make layer settings for the created objects. Layer settings will greatly affect the editing and animating process.
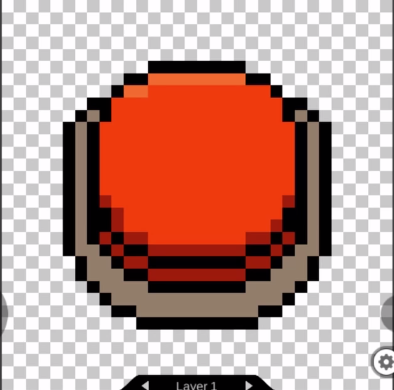
The next level of the color application process is to determine the shades and the highlights so that it gives a 3D impression to the object.
Applying Text
As a complement, we can add text to the object as needed. I added the text "on" and "off" on the button object that I created and of course this process must be made on a different layer.
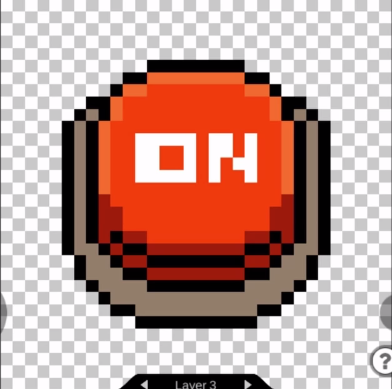
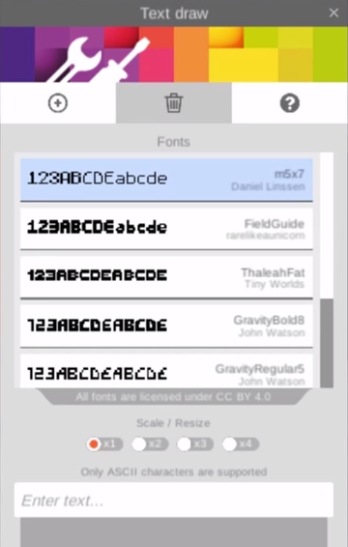
In Pixel Studio, it's easy to apply text using the text tool. We only need to write the required words and this application has a font with a pixel typeface. Then, the text is easily resized and the set of pixels will be adjusted automatically.
Animating Process
After the object has been created, the object is ready to be animated. In principle, in making animation, we need a timeline feature in an application. In Pixel Studio, we can enable the timeline feature by pressing the tool with the celluloid ribbon icon in the tools panel.
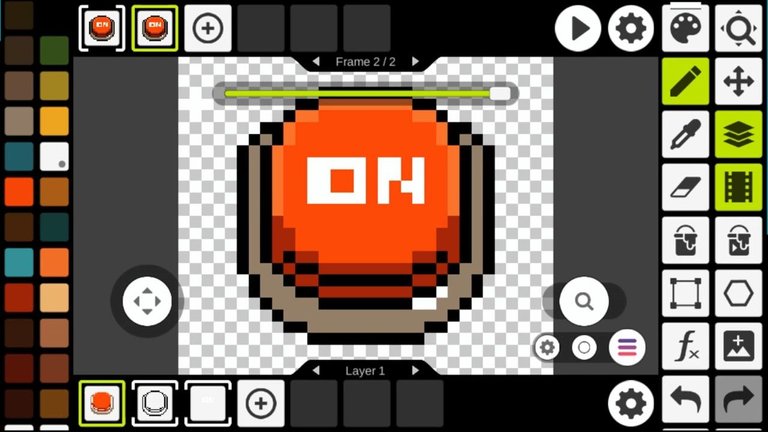
The timeline panel will appear at the top of the view. It looks similar to the layers panel but the available boxes represent frames to be assembled so as to produce the illusion of movement.
Rendering Process
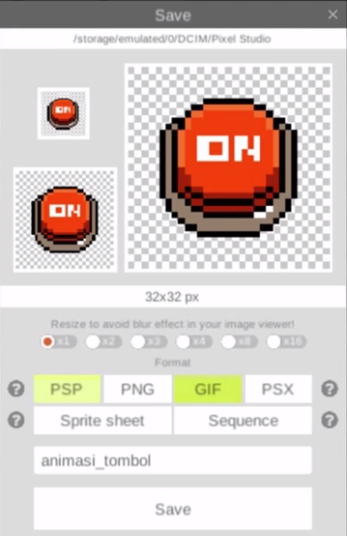
After we have assembled the frames and the illusion of movement has been generated, the animation is complete and ready to render. You can save and export animations as GIFs or image sequences.
Thank you for visiting this post. Look forward to my next works.
Visit My Gallery:
Twitter: babeoded
Instagram: babeoded
Henext: babeoded
Opensea: babeoded
NFT Showroom: karmachela

▶️ 3Speak
I love your post!!
Thanks for the appreciation 😄
The rewards earned on this comment will go directly to the person sharing the post on Twitter as long as they are registered with @poshtoken. Sign up at https://hiveposh.com.