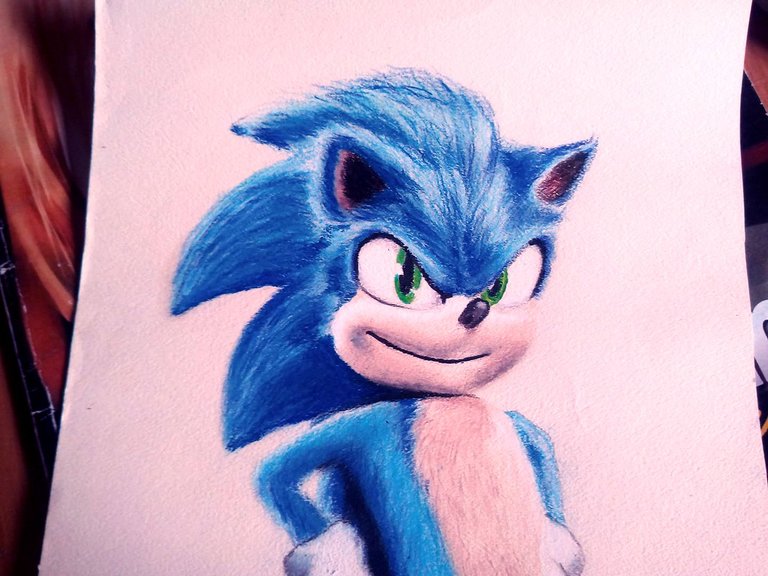
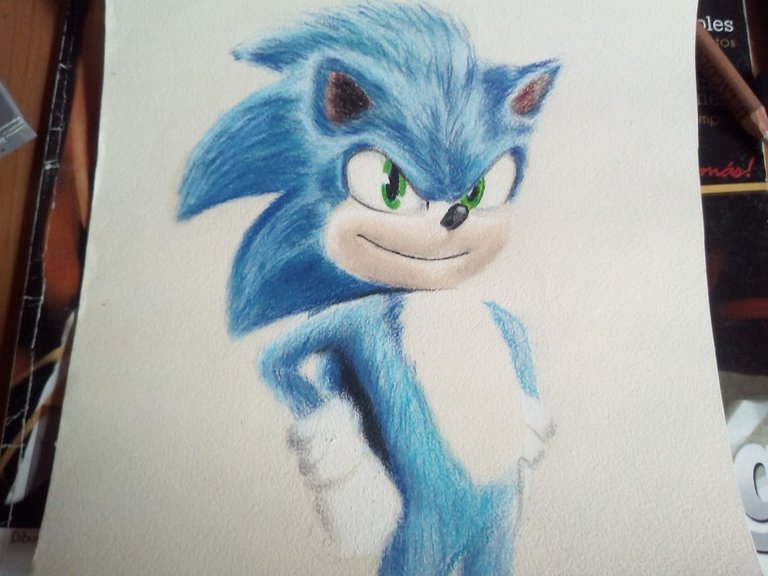
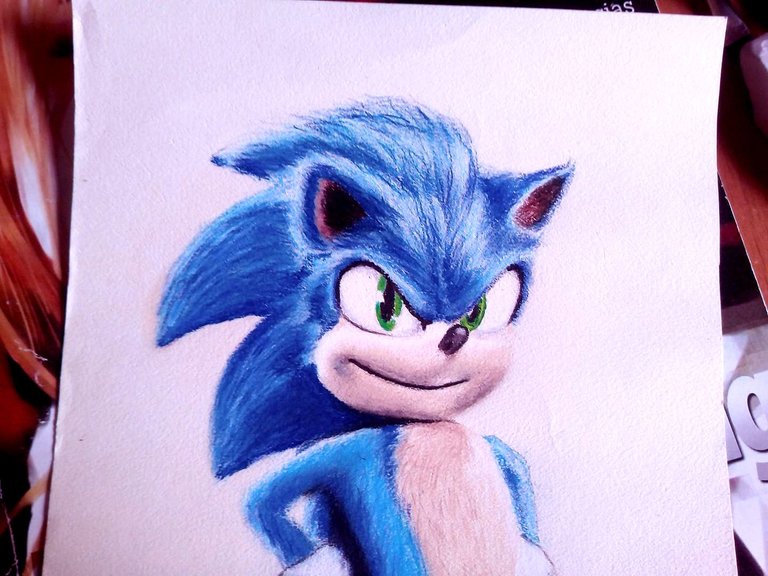
Hello friends, I hope you are very well. A few days ago I saw the Sonic movie, and I really liked it, especially the villainous role of Jim Carrey, I recommend you see it. For this drawing I made Sonic in his presentation in the film, I really liked his final design, since in the first trailers his design was not well received by all the fans, fortunately they heard the criticism and thus made better changes in the character. Hope you like.
Hola amigos, espero que se encuentren muy bien. Hace algunos días atrás vi la película de Sonic, y me gustó muchísimo, especialmente el papel de villado de Jim Carrey, recomiendo que la vean. Para este dibujo hice a Sonic en su presentación en la película, me gustó mucho su diseño final, ya que en los primeros trailers su diseño no fue bien recibidos por todos los fans, afortunadamente oyeron las críticas y así hicieron mejores cambios en el personaje. Espero que les guste.

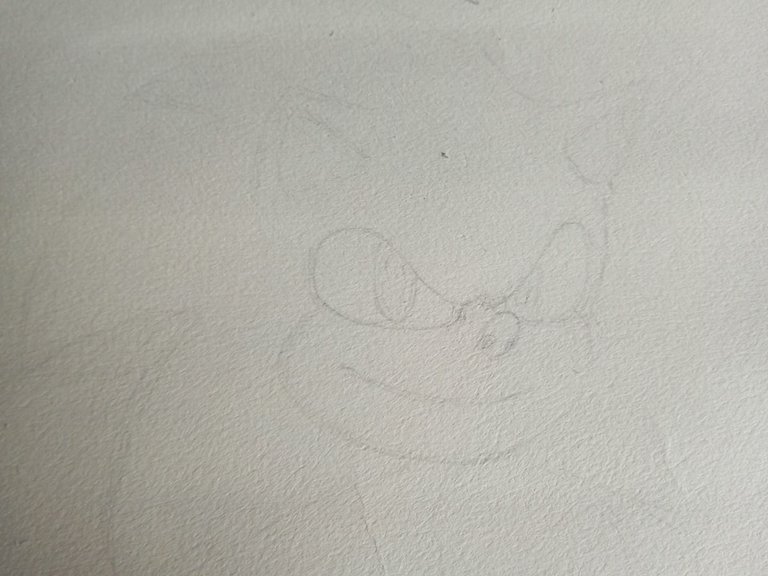
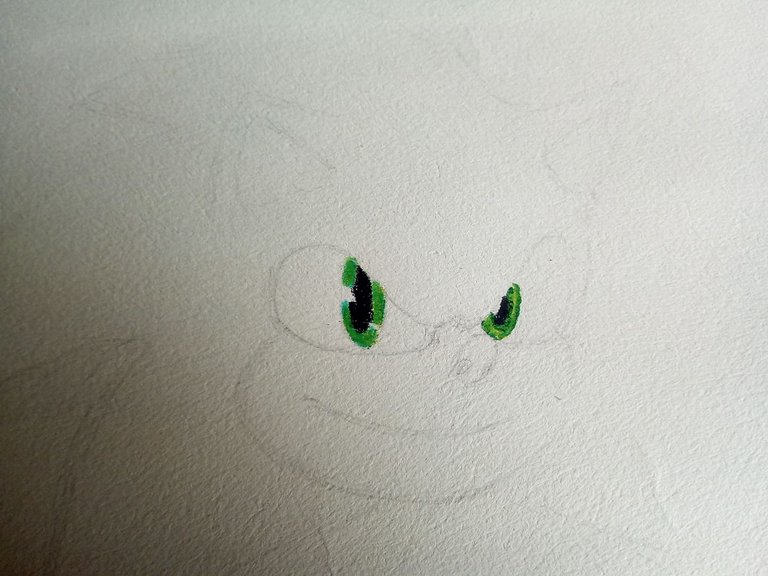
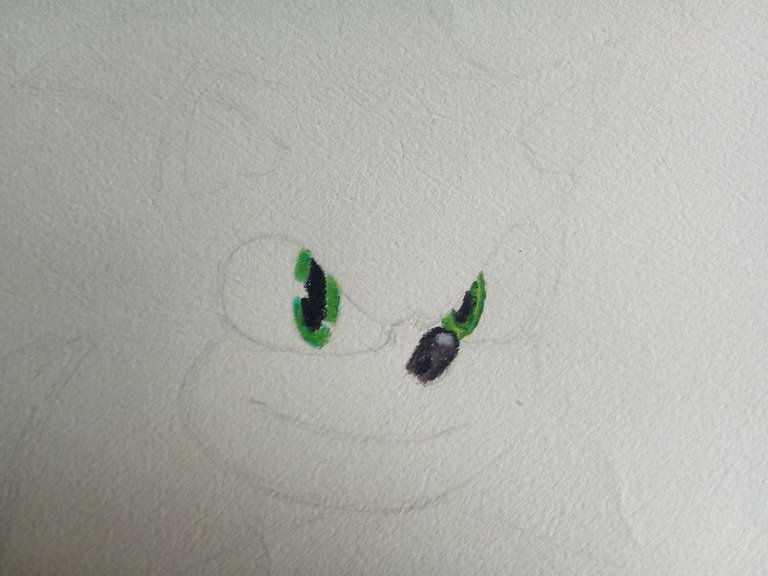
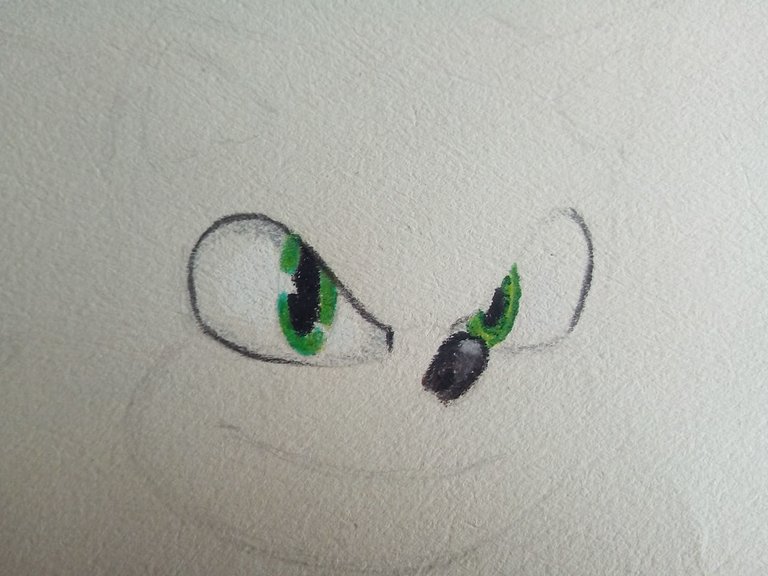
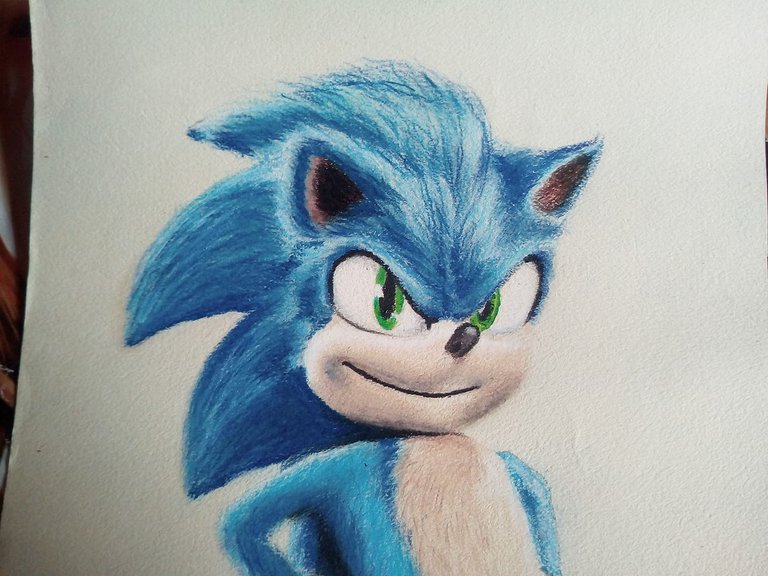
The first step is to sketch Sonic with a hard lead pencil to make the strokes very smooth. Once we have done it we begin by painting the eyes which are of a somewhat green tone.
El primer paso es hacer el boceto de Sonic con un lápiz de mina dura para hacer los trazos muy suaves. Una vez que lo hayamos hecho comenzamos pintando los ojos los cuales son de un tono algo verde.
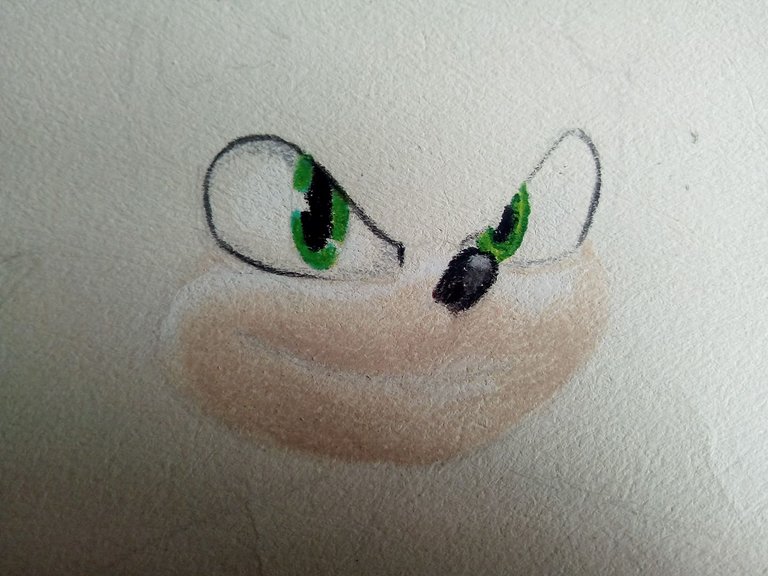
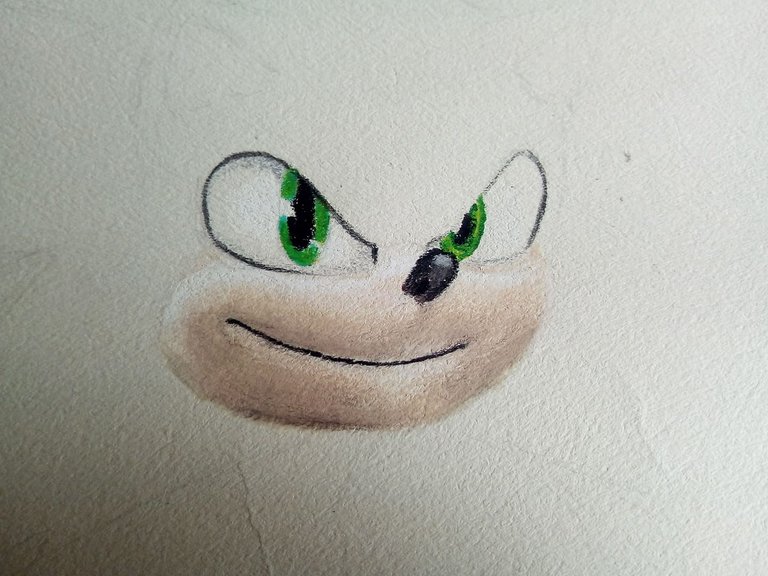
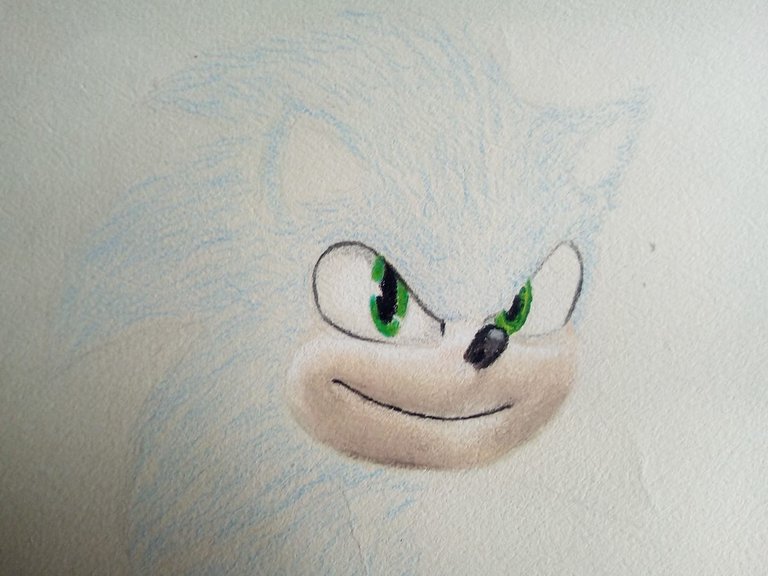
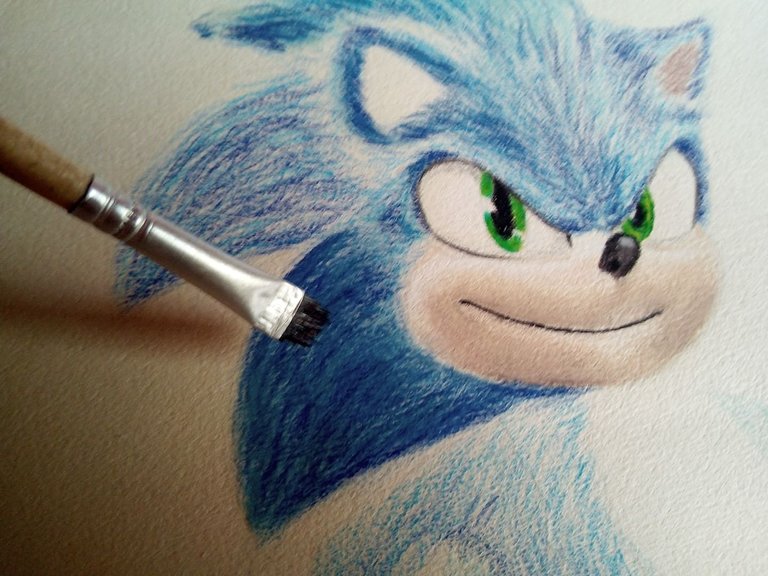
Then when we finish painting the eyes we continue with the lower part of the face, for that we use light pastel colors and we darken with light brown and dark brown and the part where the light is reflected we paint with white. Then we begin to draw Sonic's hair, with light blue color, we use it as a base and we make quick and soft strokes, this we will do all over the body and it will be our first layer.
Seguidamente cuando terminamos de pintar los ojos continuamos con la parte inferior del rostro, para eso utilizamos colores pasteles claros y vamos oscureciendo con marron claro y marron oscuro y la parte donde la luz se refleja la pintamos con blanco. Despues comenzamos a dibujar el pelo de Sonic, con color azul claro, lo usamos y de base y hacemos trazos rápidos y suaves, esto lo haremos por todo el cuerpo y será nuestra primera capa.
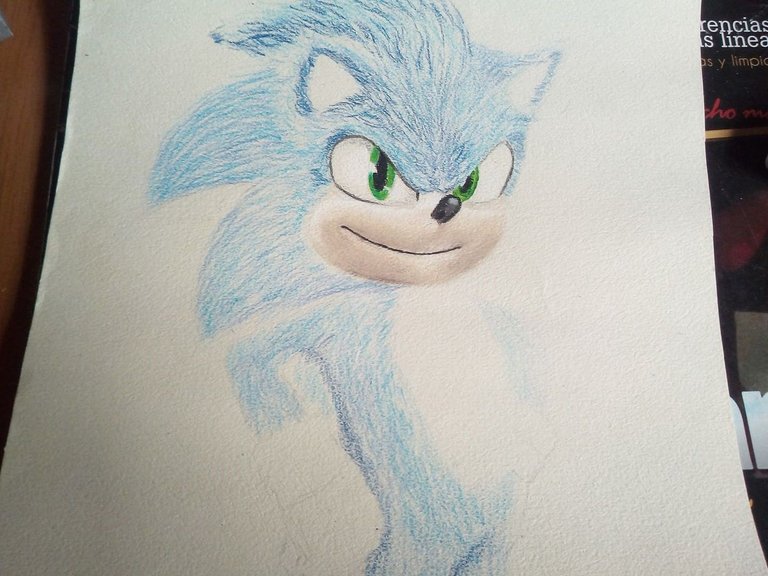

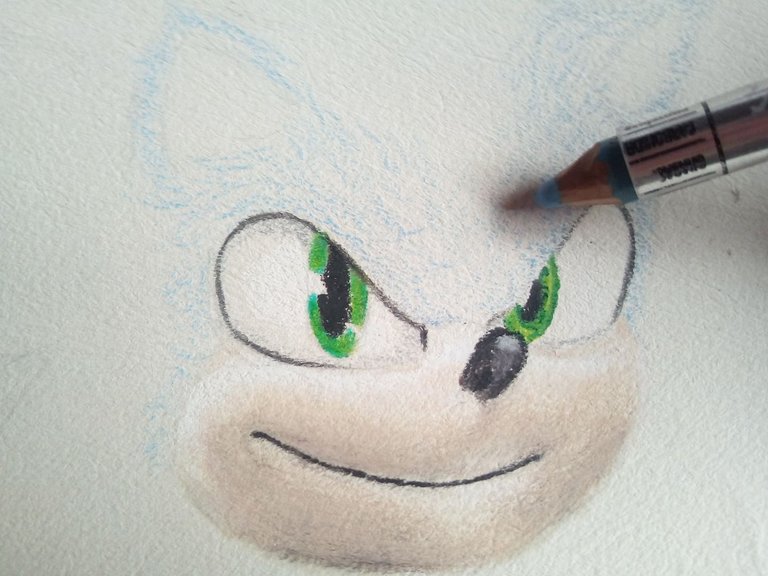
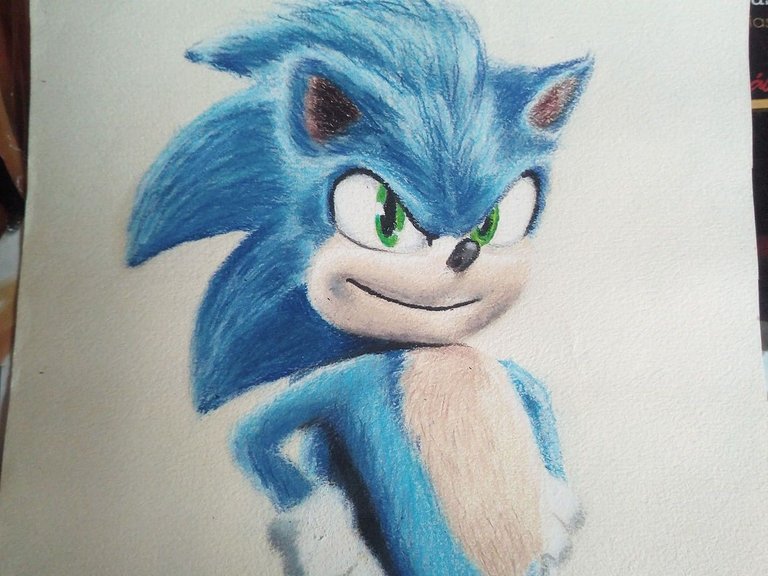
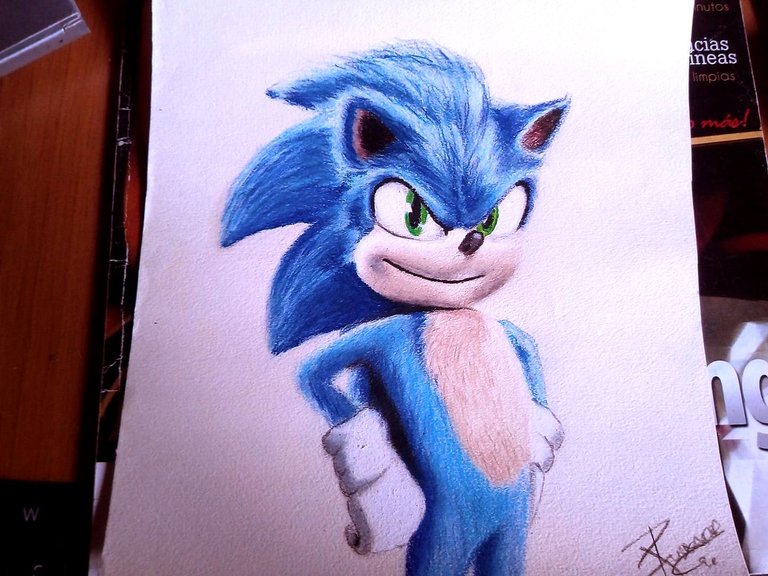
Once we have made the first base color layer, we change to a dark shade of blue and we make the strokes a little stronger, this we do with the purpose of there being contrast. Then we use the ultramarine blue color, which is darker, and repeat the same process. Here we can see how the tones can be differentiated in each stroke.
Una vez hemos hecho la primera capa de color base, cambiamos a un tono oscuro de azul y los trazos los hacemos un poco más fuerte, esto lo hacemos con el proposito de que haya contraste. Luego usamos el color azul ultramar, que es más oscuro y repetimos el mismo proceso. Aquí podemos ver como en cada trazo se puede diferenciar los tonos.
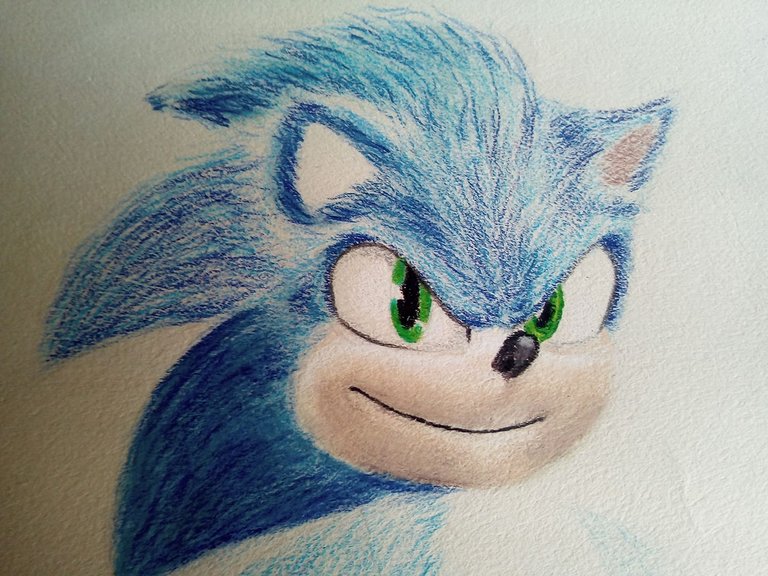
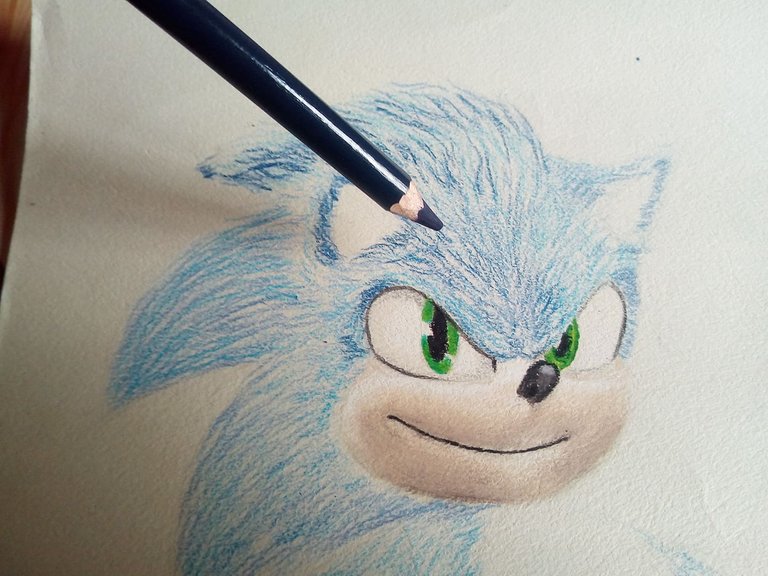
The next step is to take a small brush and we begin to blur the colors. This will help us spread the color in those areas where the original stroke does not reach. So then we apply the same process all over the face and head. We can apply one more layer of color to reinforce the lights and shadows.
El siguiente paso es tomar un pequeño pincel y comenzamos a difuminar los colores. Esto nos ayudara a esparcir el color en aquellas áreas donde no llega el trazo orginal. Así luego aplicamos el mismo proceso por todo el rostro y cabeza. Podemos vover aplicar una capa mas de color para reforzar las luces y las sombras.
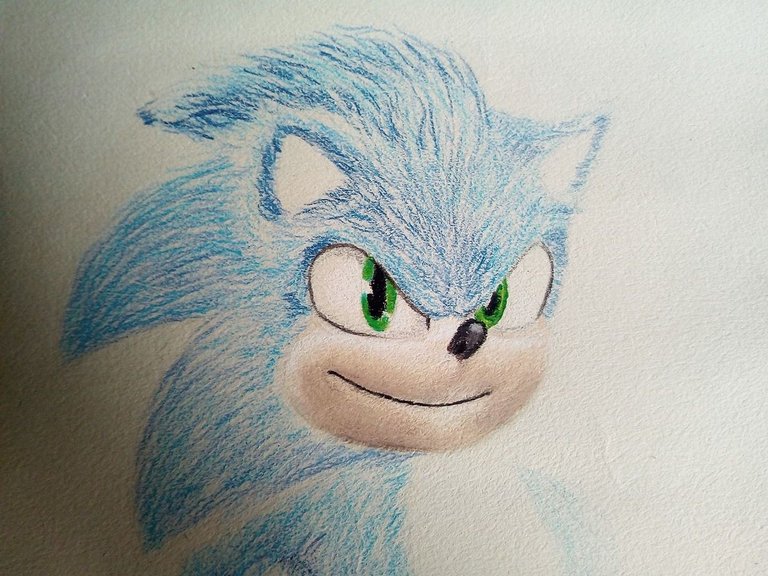
Once we have finished blurring the part of the face and head, let's continue with the other parts of the body, such as the arms, part of the chest and the legs. We repeat the same blending process and apply one more layer of color.
Una vez que hayamos terminado de difuminar la parte del rostro y la cabeza, continuemos con las demas partes del cuerpo, como los brazos, parte del pecho y las piernas. Repetimos el mismo proceso de difuminado y aplicar una capa más de color.
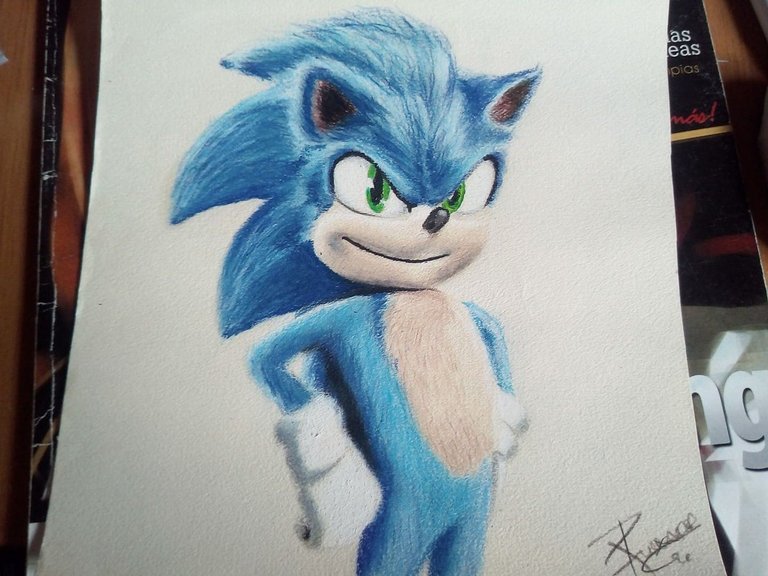
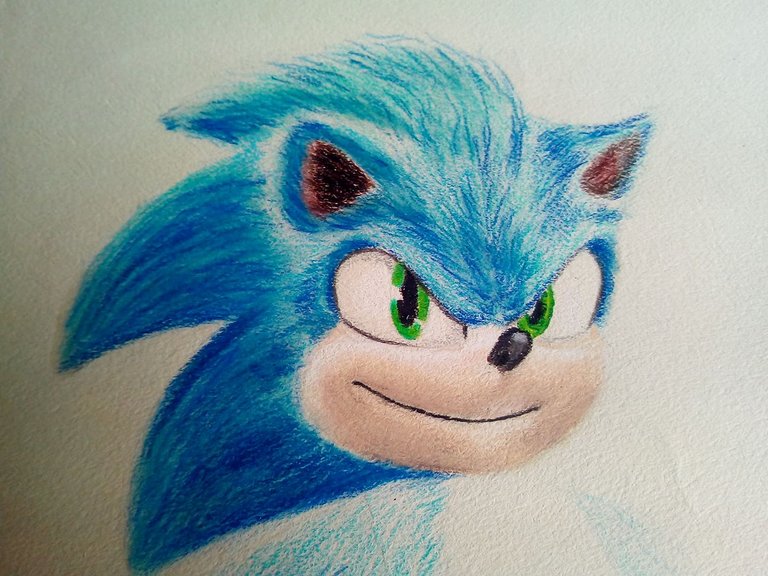
To finish we paint the part that corresponds to the chest, we paint it using the same pastel colors that we use to paint the face. We also paint the shaded parts of the gloves with gray and a little light brown and thus we will have finished the drawing of Sonic.
Para finalizar pintamos la parte que corresponde al pecho, lo pintamos utilizando los mismos colores pastel que usamos para pintar el rostro. También pintamos las partes sombreadas de los guantes con color gris y un poco de marron claro y así habremos terminado el dibujo de Sonic.
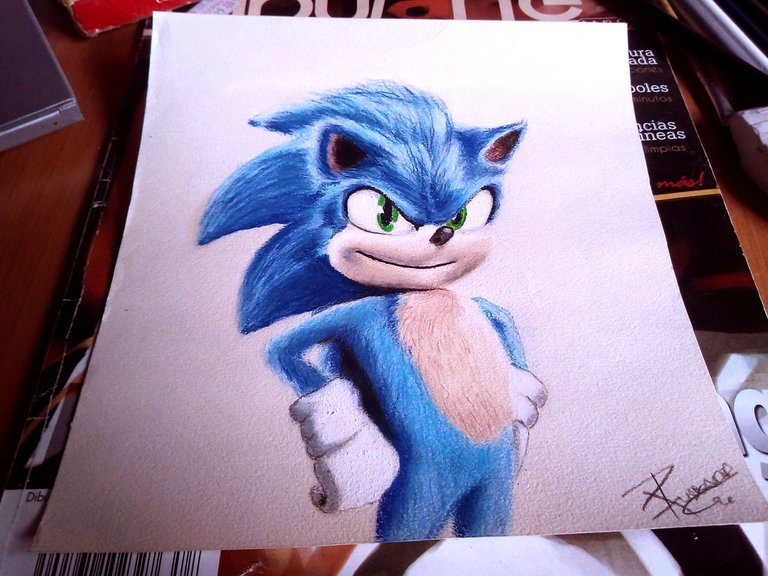
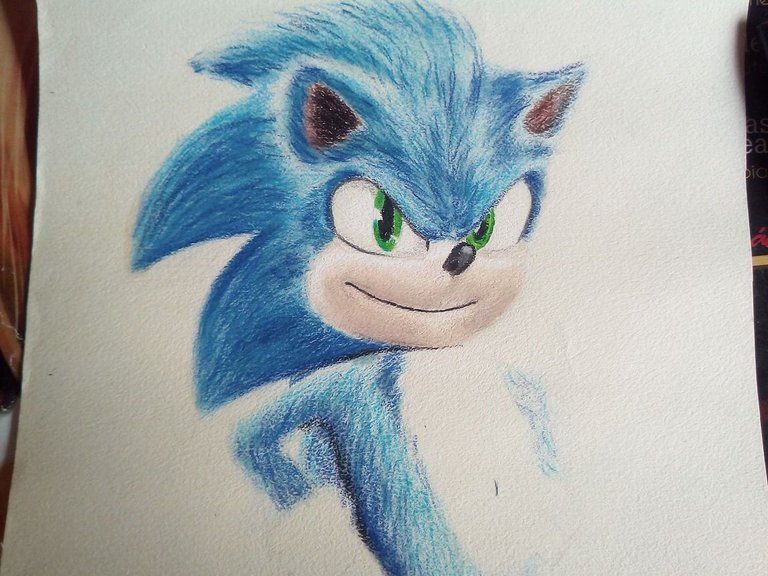
This is how our drawing of Sonic has remained, this movie came out after Detective Pikachu so it also has many influences from it. Both the main character and the design, I liked the changes they made and thanks to that I am now doing the drawing. I hope you liked the final result, and if you have not seen the movie, I recommend that you do so, to have a different time. Do not forget to comment that you think so, I say goodbye until a new opportunity. Greetings!
Así ha quedado nuestro dibujo de Sonic, esta película salió después de Detective Pikachu por lo que también tiene muchas influencias de esta. Tanto el personaje principal como el diseño, me gustó los cambios que hicieron y gracias a eso es que ahora estoy haciendo el dibujo. Espero que les haya gustado el resultado final, y si no han visto la película, recomiendo que lo hagan, para pasar un rato diferente. No olviden comentar que tal le sha parecido, me despido hasta una nueva oportunidad. Saludos!
You are quite an artist. I love this Sonic, Mainly because my 5 years old grandsons love him. I have to show it to them next time I see them 💙😍💙
I hope your grandchildren like my drawing. I am also a very fan of Sonic since childhood. Thanks for commenting on my drawing!
Oh yes they love it! You are most welcome my friend 🙂
¡Te quedó increíble! Se ve muy complicado teniendo en cuenta que es pelo por pelo ¡Me encanta!
Hola, gracias, que bueno que te gusto. Si la parte del pelo lleva mucho tiempo pero una vez que lo dominas con trazos rápidos se te hace facil!
WoW, me gusta mucho tu proceso y el resultado. Para las etiquetas te recomendaría usar las que más se relacionen al tema de tu post para clasificarlo directamente y que los curadores puedan acceder fácilmente a el. Ya que usar el nombre de los curadores como etiqueta, no clasifica tu post en ninguna categoría. Puedes aprender más en el post al respecto leyendo post ubicados en comunidades como @aliento
muchas gracias por ese super consejo.. Ahora pondré mas atención a la hora de loas etiquetas para que la publicación tenga mas alcance!
The rewards earned on this comment will go directly to the person sharing the post on Twitter as long as they are registered with @poshtoken. Sign up at https://hiveposh.com.
So beautiful!🥰
Thank you Bro :)
Amazing art as always!!! ^^
I'm glad you liked how the drawing turned out.
Demasiado espectacular!!
Gracias señorita, me alegra que te haya gustado! Saludos!