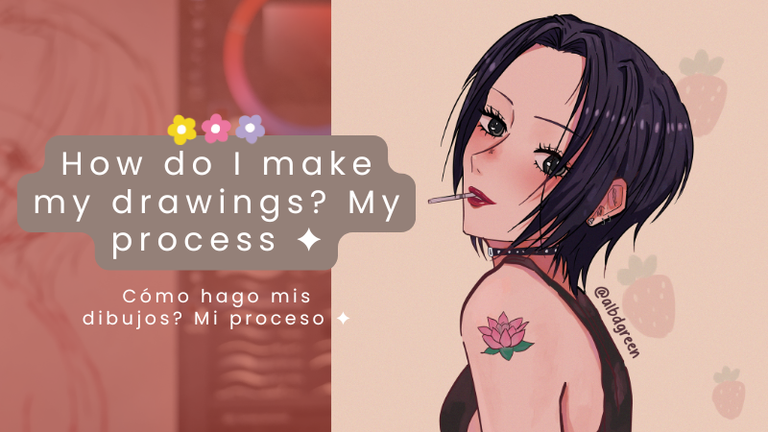

Greetings, dear friends of this beautiful Hive community, I hope you are feeling well today, happy start of the weekend! 🧡 Lately, and even more with the beginning of this new year that transmits me all the good vibes, I've had enough motivation to keep creating, as well as to keep sharing with you on this platform.
Today, I would like to give you a brief demonstration of how I make my digital drawings, I will show you a little bit about the program I use, settings, brushes, and other details that I would like to share, stay until the end!
Saludos queridos amigos de esta hermosa comunidad de Hive, espero se encuentren bien el día de hoy, ¡feliz inicio de fin de semana! 🧡 Últimamente, y más con el inicio de este nuevo año que me transmite toda la buena vibra, he tenido la motivación suficiente para seguir creando, así como para seguir compartiendo con ustedes en esta plataforma.
Hoy quiero hacerles una breve demostración de cómo hago mis dibujos digitales, les mostraré un poco sobre el programa que uso, ajustes, pinceles, y otros detalles que me gustaría compartir, ¡Quédate hasta el final!
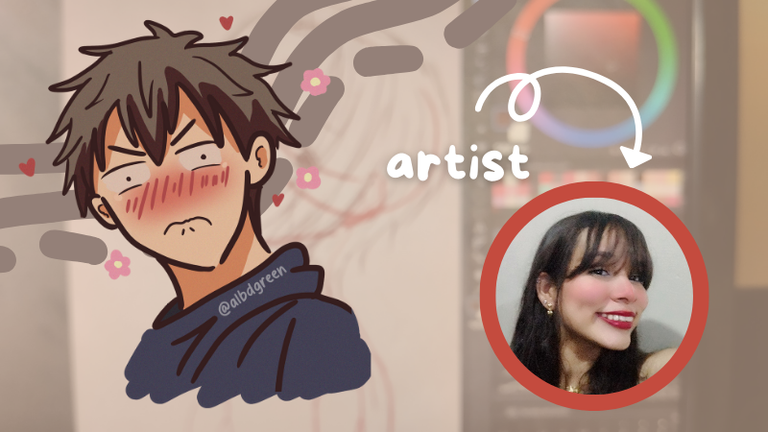

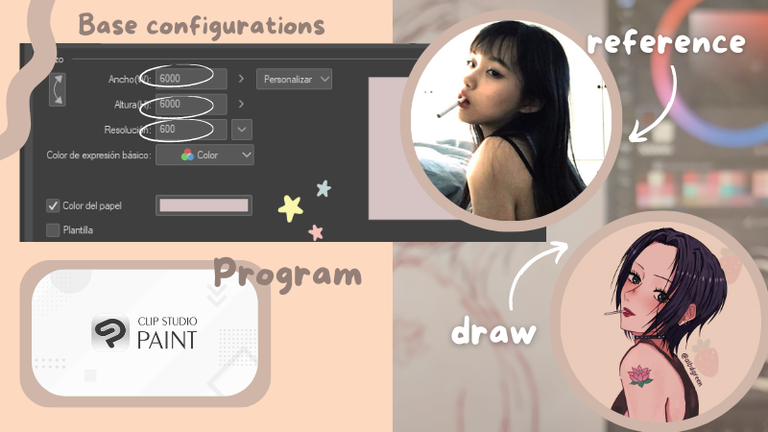
Well guys, first of all I want to mention that always before making my drawings I select some photo as a reference from the pinterest platform, I know it's something very common to do, but if you have never tried it I super recommend it. I have a board on pinterest where I keep many references that I would like to use later or directly when I'm going to make a drawing I look for the reference I need, although, I usually always start with some of the ones I already have saved on my board. I will explain this process through one of my most recent drawings, which is a Fanart of our favorite girl, Nana! 🍓 I did it mainly because my instagram feed is really lacking for me to draw women, so I chose her.
The program I use is Clip Studio Paint, the truth is that I haven't worked with too many programs because the first time I used Clip it was a little difficult to handle but I got very comfortable with the program. Now yes, the first thing I do when I'm going to make a drawing is to choose the dimensions and settings of the canvas I'm going to work on. As I share all the drawings, I always make sure that they are in good quality, I use a resolution of 600 dpi and as for the dimensions, this time I used a square canvas of 5000X5000, I recommend these configurations so that they are always in the best quality what can become your best works, even more if it is something you want to share or offer to the public. Also as a great tip, I recommend not to use the color of the paper completely white, I always use warm shades of gray, this so that our view does not suffer too much ♡.
Bueno chicos, antes de nada comentaros que siempre antes de hacer mis dibujos selecciono alguna foto como referencia de la plataforma pinterest, se que es algo muy común de hacer, pero si nunca lo habéis probado os lo super recomiendo. Yo tengo un tablero en pinterest donde guardo muchas referencias que me gustaría utilizar más adelante o directamente cuando voy a hacer un dibujo busco la referencia que necesito, aunque, suelo empezar siempre por alguna de las que ya tengo guardadas en mi tablero. Voy a explicar este proceso a través de uno de mis dibujos más recientes, que es un Fanart de nuestra chica favorita, ¡Nana! 🍓 Lo hice principalmente porque en mi feed de instagram me hace mucha falta dibujar mujeres, así que la elegí a ella.
El programa que uso es Clip Studio Paint, la verdad es que no he trabajado con demasiados programas porque la primera vez que usé Clip me costó un poco manejarlo pero me fui sintiendo muy cómoda con el programa. Ahora sí, lo primero que hago cuando voy a hacer un dibujo es elegir las dimensiones y la configuración del lienzo en el que voy a trabajar. Como comparto todos los dibujos, siempre me aseguro de que estén en buena calidad, uso una resolución de 600 dpi y en cuanto a las dimensiones, esta vez usé un lienzo cuadrado de 5000X5000, recomiendo estas configuraciones para que siempre estén en la mejor calidad lo que puede llegar a ser tus mejores obras, más aún si es algo que quieres compartir u ofrecer al público. También como un gran tip, te recomiendo no utilizar el color del papel completamente blanco, yo siempre uso tonos cálidos de gris, esto para que nuestra vista no sufra demasiado ♡.

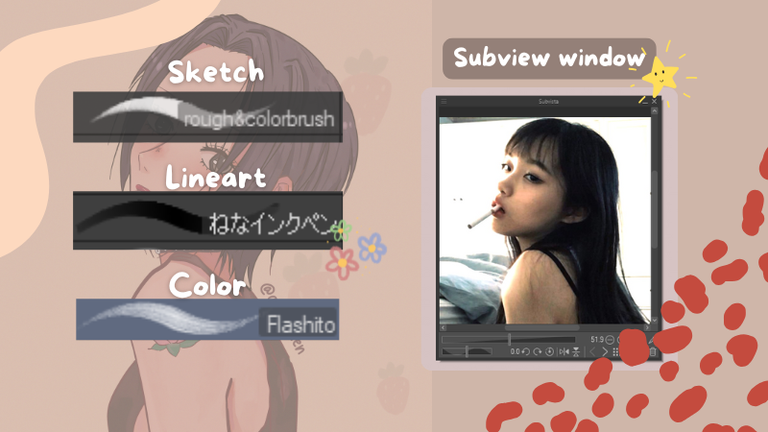
Once I have the canvas where I am going to work I use the Clip Studio tool called “Sub-View” to put there my reference image, it is a very comfortable tool and you can put it anywhere, besides, you can move it to your liking while you are working.
The brushes I use are not too many, I know I have TOO MANY brushes saved, but my drawings don't have a great variety, I use only three main brushes, which are:
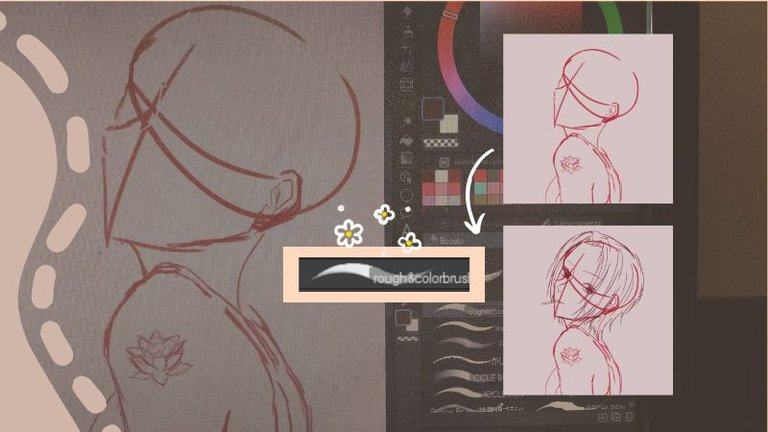
⁎ “rough&colorbush” for sketching, I super recommend it, the strokes are neither too marked and perfect, nor too unsettled, it has a good balance and a good opacity, it is also useful for painting although I have not tried it for that, I only do with it the sketches, it is really comfortable for me.
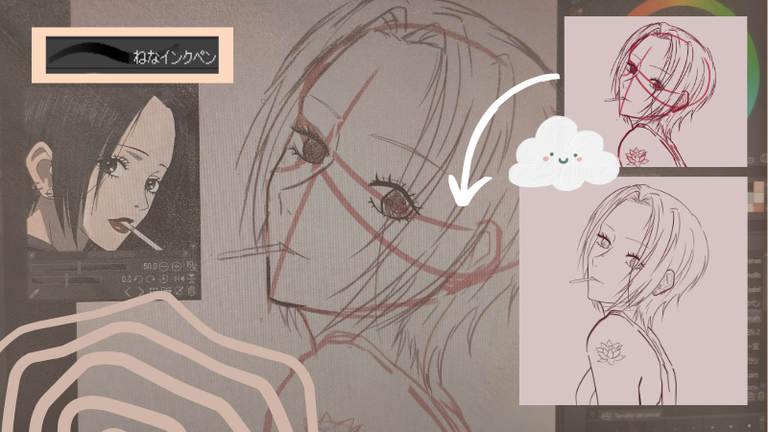
⁎ ねなインクペン It is a brush from someone from Japan and I use it for lineart, I really like the stroke because it is not perfect like a basic pen brush, it has more like a marker texture and I find it amazing playing with its thicknesses and sizes.
⁎ Flashito for coloring, it is a WONDERFUL brush, it has multiple options that you can edit according to your taste so that your drawings have much more variety of colors, it also has very good blending options that with a little bit of practice you are adapting it more to your style.
These are the main brushes I use, if I use any other, it's more for small details and that kind of things.
Una vez tengo el lienzo donde voy a trabajar uso la herramienta de Clip Studio llamada «Sub-View» para poner ahí mi imagen de referencia, es una herramienta muy cómoda y la puedes poner en cualquier sitio, además, la puedes mover a tu gusto mientras estás trabajando.
Los pinceles que uso no son demasiados, se que tengo DEMASIADOS pinceles guardados, pero mis dibujos no tienen una gran variedad, solo uso tres pinceles principales, que son:
⁎ «rough&colorbush» para bocetar, lo super recomiendo, los trazos no son ni demasiado marcados y perfectos, ni demasiado desestabilizados, tiene un buen equilibrio y una buena opacidad, también sirve para pintar aunque no lo he probado para eso, solo hago con él los bocetos, me resulta realmente cómodo.
⁎ ねなインクペン Es un pincel de alguien de Japón y lo uso para lineart, me gusta mucho el trazo porque no es perfecto como un pincel de rotulador básico, tiene más textura de rotulador y me parece increíble jugando con sus grosores y tamaños.
⁎ Flashito para colorear, es un pincel MARAVILLOSO, tiene múltiples opciones que puedes editar a tu gusto para que tus dibujos tengan mucha más variedad de colores, también tiene muy buenas opciones de difuminado que con un poco de práctica lo vas adaptando más a tu estilo.
Estos son los pinceles principales que uso, si uso algún otro es más para pequeños detalles y ese tipo de cosas.

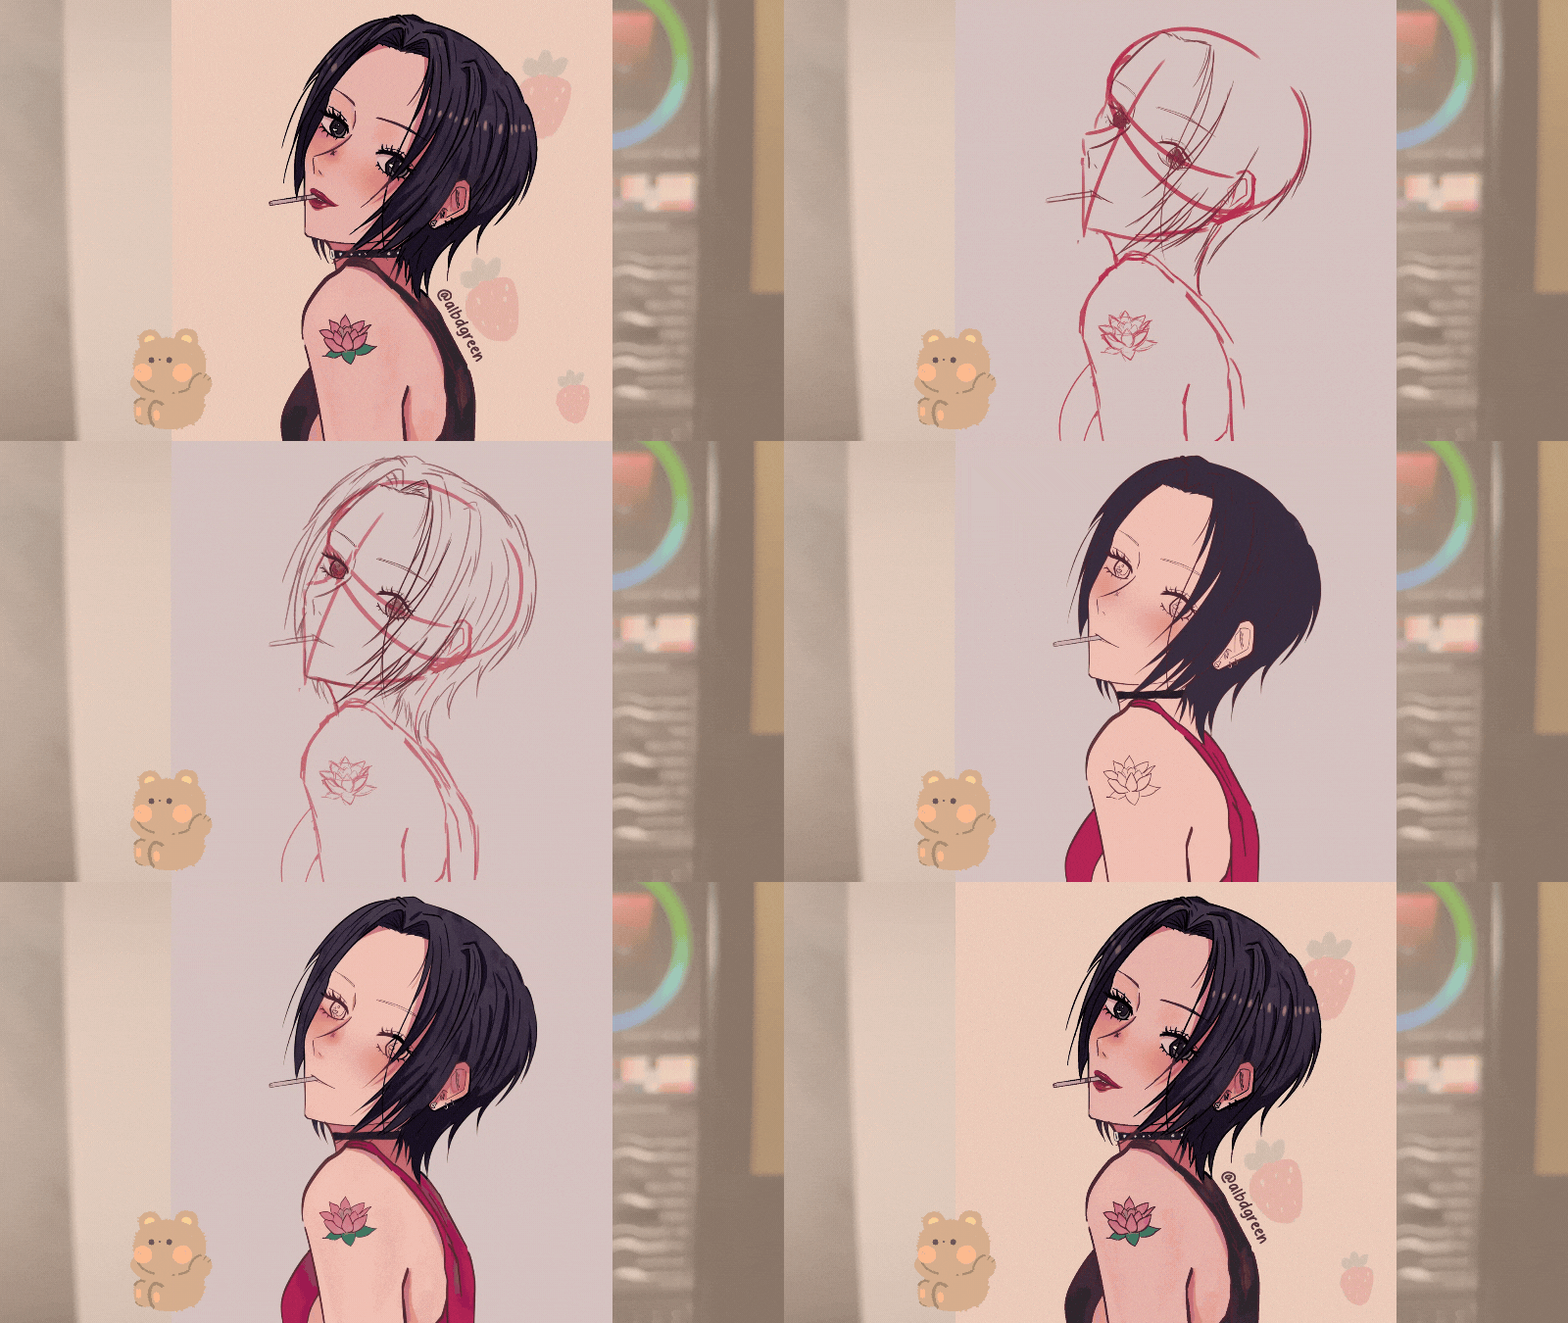
Then now I start with the main sketch, I always use bright colors for the sketches, mainly red and in other occasions I have even used blue when they are very complex sketches. I make a layer where I make the base sketch, and in another layer destined to the same sketch, I make more details that I know I can't make them in the lineart layer, so to be sure I make at once these details in another sketch layer, I also change slightly the color to a darker one to differentiate both layers.
When adding the character's features to the sketches, I always have also in the subview window several images of the character in question to know exactly how to recreate his personal traits in the drawing 🌸.
Entonces ahora empiezo con el boceto principal, siempre uso colores vivos para los bocetos, principalmente rojo y en otras ocasiones incluso he usado azul cuando son bocetos muy complejos. Hago una capa donde hago el boceto base, y en otra capa destinada al mismo boceto, hago más detalles que sé que no puedo hacerlos en la capa de lineart, así que para asegurarme hago a la vez estos detalles en otra capa de boceto, también cambio ligeramente el color a uno más oscuro para diferenciar ambas capas.
Al añadir los rasgos del personaje a los bocetos, siempre tengo también en la ventana de subvista varias imágenes del personaje en cuestión para saber exactamente cómo recrear sus rasgos personales en el dibujo 🌸.

When I am satisfied with the sketch and I have corrected any errors it may have, I proceed with the Lineart, for this, I lower the quality of the sketch layers enough so that they can still be seen without getting in the way, then in another separate layer, I start to do the Lineart. I use the brush that I mentioned before and I don't use a black color directly, I use for the lineart brown tones, reddish, dark tones, but not getting to black completely.
While I am making the lineart I remove visibility to the sketch layer to see more or less how it is going to be, here I add completely details that I don't do in the sketch, for example here I made the earrings, the details in the eyes, eyelashes, among others.
This is how it looks, the lineart of the drawing completely clean and ready to paint 🎨.
Cuando estoy satisfecha con el boceto y he corregido los errores que pueda tener, procedo con el Lineart, para ello, bajo la calidad de las capas del boceto lo suficiente para que aún se puedan ver sin estorbar, luego en otra capa aparte, empiezo a hacer el Lineart. Uso el pincel que mencioné antes y no uso un color negro directamente, uso para el lineart tonos marrones, rojizos, tonos oscuros, pero sin llegar al negro completamente.
Mientras estoy haciendo el lineart le quito visibilidad a la capa de boceto para ver más o menos como va a quedar, aquí agrego completamente detalles que no hago en el boceto, por ejemplo aquí hice los aretes, los detalles en los ojos, pestañas, entre otros.
Así es como queda, el lineart del dibujo completamente limpio y listo para pintar 🎨.

To start painting, I first do a step that makes it easier for me to paint the drawing. I lower a little the opacity of the lineart, and I select a color, in this case I used a pink color, then with the “Selection” tool I mark ALL the edge of the drawing, it doesn't matter the way it is done, as long as the edge of the drawing is well marked. I used to do this with the brush on the edge and then with the paint bucket I painted the whole drawing, now I do it with the selection tool because it saves me a lot more time.
Why do I do this? Because at the moment of adding my base colors, by means of a couple of tools, this color will not go out of the border with which I painted the drawing before, and it saves me a lot of having to clean the drawing later. These tools are “Lock transparent pixels” and “Snap to bottom layer”.
Para empezar a pintar, primero hago un paso que me facilita pintar el dibujo. Bajo un poco la opacidad del lineart, y selecciono un color, en este caso utilicé un color rosa, luego con la herramienta «Selección» marco TODO el borde del dibujo, no importa la forma en que se haga, siempre y cuando quede bien marcado el borde del dibujo. Antes lo hacía con el pincel en el borde y luego con el cubo de pintura pintaba todo el dibujo, ahora lo hago con la herramienta de selección porque me ahorra mucho más tiempo.
¿Por qué hago esto? Porque a la hora de añadir mis colores base, mediante un par de herramientas, este color no se saldrá del borde con el que antes pinté el dibujo, y me ahorra mucho tener que limpiar el dibujo después. Estas herramientas son «Bloquear píxeles transparentes» y «Ajustar a capa inferior».
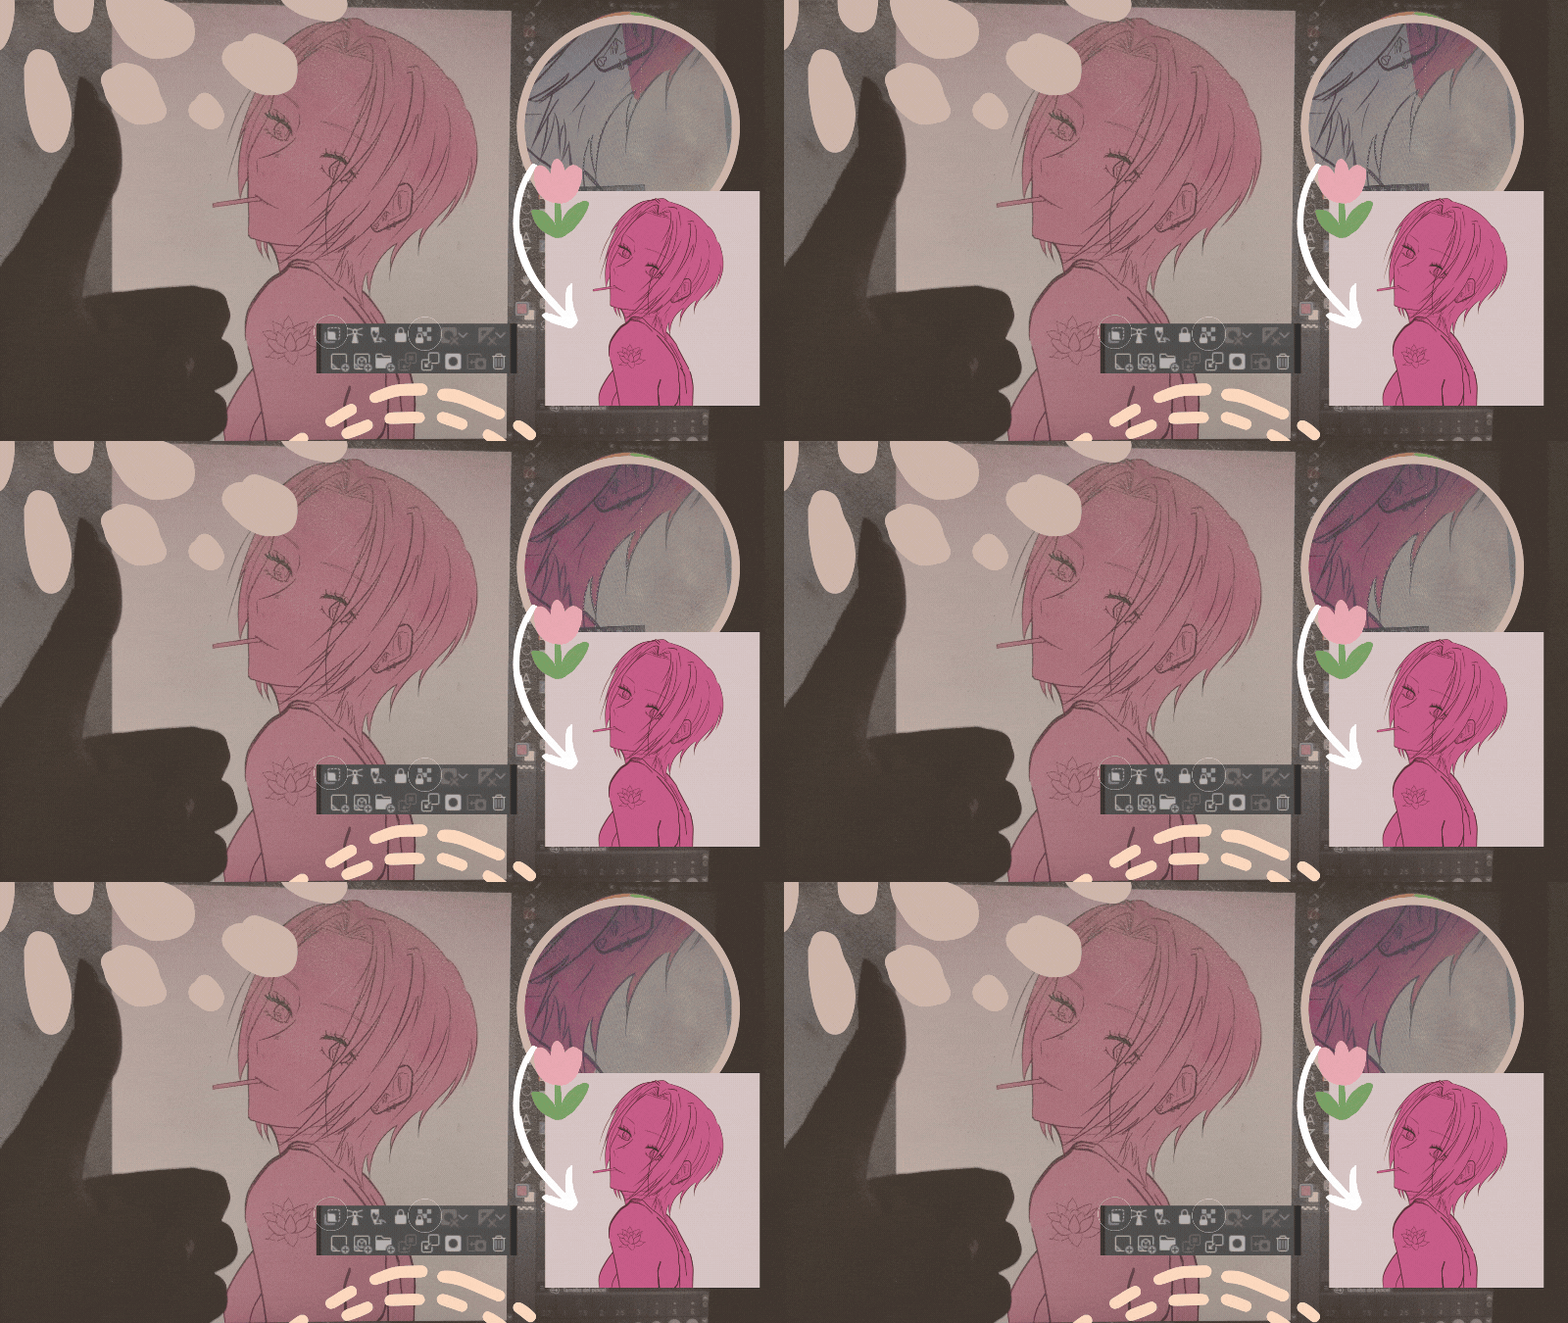

This is how the tool works. Here I'm adding the color of the skin, and as you can see, it doesn't get out of the coloring I did before in the whole drawing. For this to work, the layer where you made this painted border must have the “Lock transparent pixels” option activated and then, the layers where you are adding your base colors, must be above this layer with the “Adjust to bottom layer” option activated 💞.
Así es como funciona la herramienta. Aquí estoy añadiendo el color de la piel, y como puedes ver, no se sale del coloreado que hice antes en todo el dibujo. Para que esto funcione, la capa donde hiciste este borde pintado debe tener activada la opción «Bloquear píxeles transparentes» y luego, las capas donde estás añadiendo tus colores base, deben estar por encima de esta capa con la opción «Ajustar a capa inferior» activada 💞.


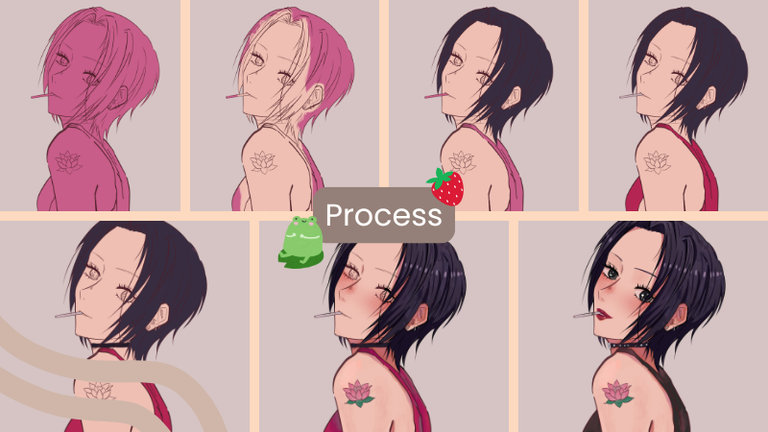
Once this is explained, I proceed with the rest of the drawing. I add the rest of the base colors in separate layers, generally, I always have the layers of: Skin, Hair and clothes above the color layer, it is also possible that I add more layers depending on drawing, when it has more details or objects around it and on it, I also make a separate layer for them.
When I have the base colors on, I start to give him details, on the face with a reddish color I make blush and lips details (it depends a lot also on the skin tone I am handling), when I make these details I add the strong shadows of the skin and then I do the same with the hair and the rest, always in a cycle of: Details | Strong shadows, and so on.
This is how it looks (If you want a tutorial on how exactly I do this separately you can suggest it to me in the comments) 💓.
Una vez explicado esto, procedo con el resto del dibujo. Agrego el resto de los colores base en capas separadas, generalmente, siempre tengo las capas de: Piel, Pelo y ropa encima de la capa de color, también es posible que añada más capas dependiendo del dibujo, cuando tiene más detalles u objetos alrededor y sobre él, también hago una capa aparte para ellos.
Cuando tengo los colores base puestos, empiezo a darle detalles, en la cara con un color rojizo hago detalles de colorete y labios (depende mucho también del tono de piel que esté manejando), cuando hago estos detalles añado las sombras fuertes de la piel y luego hago lo mismo con el pelo y el resto, siempre en un ciclo de: Detalles | Sombras fuertes, y así sucesivamente.
Así queda (Si queréis un tutorial de cómo lo hago exactamente por separado me lo podéis sugerir en los comentarios) 💓.

When I have practically finished with the whole drawing, I only have to add the details that for some reason are always in my drawings and I got used to use them because I like the way they look.
I put a noise filter to each layer, no more than 30 range. I duplicate the lineart layers to make it look sharper, I change the background color to how I manage the colors in my instagram feed, I put my watermark and I edit the colors a bit by putting a layer in “Multiply” with opacity on top of the drawing, and that's the result! 💗
Cuando prácticamente he terminado con todo el dibujo, sólo me queda añadir los detalles que por alguna razón siempre están en mis dibujos y me acostumbré a usarlos porque me gusta como quedan.
Pongo un filtro de ruido a cada capa, no más de 30 de rango. Duplico las capas de lineart para que se vea más nítido, cambio el color de fondo a como manejo los colores en mi feed de instagram, pongo mi marca de agua y edito un poco los colores poniendo una capa en «Multiplicar» con opacidad encima del dibujo, ¡y ese es el resultado! 💗

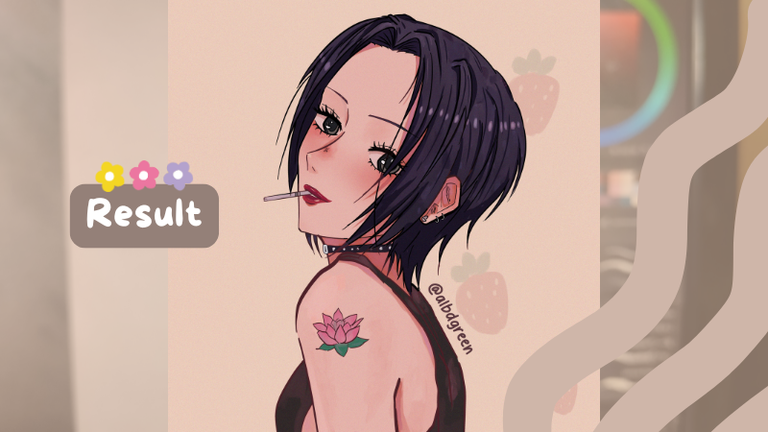

I also leave you the timelapse so you can see it in more detail!
¡Os dejo también el timelapse para que podáis verlo con más detalle!

And well guys, that would be all I do explained in a pretty summarized way, I hope you liked this post and if you have any recommendations or any questions on how exactly I do any specific part, feel free to let me know in the comments, see you in another post! ♡
Y bueno chicos, eso sería todo lo que hago explicado de una forma bastante resumida, espero que os haya gustado este post y si tenéis alguna recomendación o alguna duda sobre cómo hago exactamente alguna parte en concreto, no dudéis en hacérmelo saber en los comentarios, ¡nos vemos en otro post! ♡

Muchas gracias por el tiempo dedicado a leer este post y también por vuestro apoyo!♡ Espero veros en los próximos. Hasta luego 🌸
Los textos y fotos son míos, las traducciones son de Deepl y los diseños están hechos en la plataforma Canva.
