Hey there Guys , how are you doing hope you are doing well , yea thanks for asking i am alos doing fine thanks 😃 , i will like to share a tutorial of mine with you today it is a slideshow using HTML , CSS , AND JS....
this slideshow will be able to loop over other images within it container but first...
A Carousle is somewhat of a roller of a particular item keeping them in loop repeating the over and over again till................................................................ well.... till ...... till...
so you gert the picture .
nopw lets start with the code to sreate a slideshow
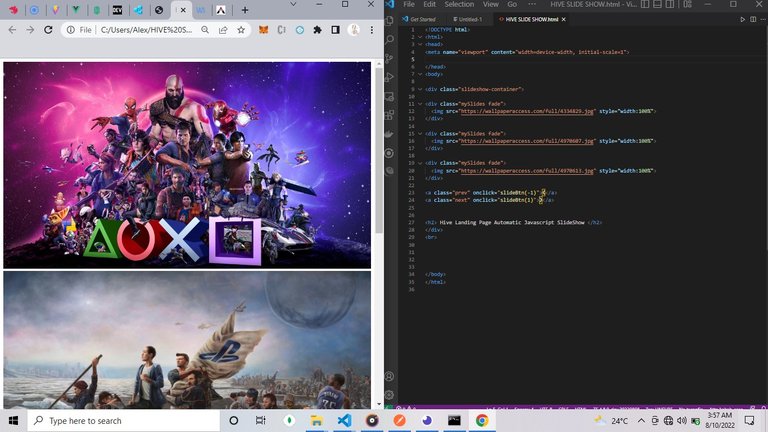
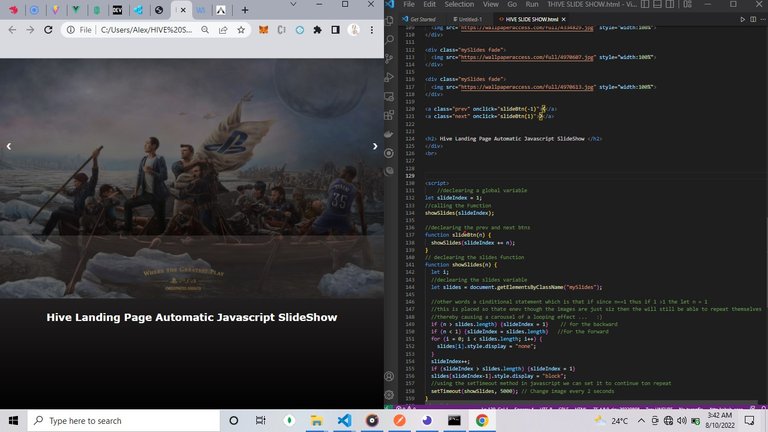
here is my HTML CODE :
<div class="slideshow-container">

<div class="mySlides fade">
  <img src="https://wallpaperaccess.com/full/4334829.jpg" style="width:100%">
</div>

<div class="mySlides fade">
  <img src="https://wallpaperaccess.com/full/4970607.jpg" style="width:100%">
</div>

<div class="mySlides fade">
  <img src="https://wallpaperaccess.com/full/4970613.jpg" style="width:100%">
</div>

<a class="prev" onclick="slideBtn(-1)">❮</a>
<a class="next" onclick="slideBtn(1)">❯</a>


<h2> Hive Landing Page Automatic Javascript SlideShow </h2>
</div>
<br>
Now as you can see the slideshwo-container is the one that holds all of the contents of itself..
while the images a placed within a div element to place the as an inline-element to a block element which is the DIV tag .
the output without CSS
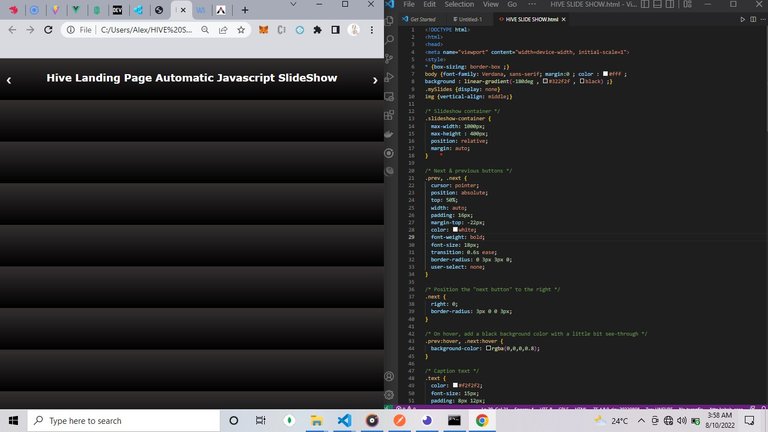
Here is my CSS :
* {box-sizing: border-box ;}
body {font-family: Verdana, sans-serif; margin:0 ; color : #fff ;
background : linear-gradient(-180deg , #322f2f , black) ;}
.mySlides {display: none}
img {vertical-align: middle;}

/* Slideshow container */
.slideshow-container {
  max-width: 1000px;
  max-height : 400px;
  position: relative;
  margin: auto;
}

/* Next & previous buttons */
.prev, .next {
  cursor: pointer;
  position: absolute;
  top: 50%;
  width: auto;
  padding: 16px;
  margin-top: -22px;
  color: white;
  font-weight: bold;
  font-size: 18px;
  transition: 0.6s ease;
  border-radius: 0 3px 3px 0;
  user-select: none;
}

/* Position the "next button" to the right */
.next {
  right: 0;
  border-radius: 3px 0 0 3px;
}

/* On hover, add a black background color with a little bit see-through */
.prev:hover, .next:hover {
  background-color: rgba(0,0,0,0.8);
}

/* Caption text */
.text {
  color: #f2f2f2;
  font-size: 15px;
  padding: 8px 12px;
  position: absolute;
  bottom: 8px;
  width: 100%;
  text-align: center;
}

/* Number text (1/3 etc) */
.numbertext {
  color: #f2f2f2;
  font-size: 12px;
  padding: 8px 12px;
  position: absolute;
  top: 0;
}

/* The dots/bullets/indicators */
.dot {
  cursor: pointer;
  height: 15px;
  width: 15px;
  margin: 0 2px;
  background-color: #bbb;
  border-radius: 50%;
  display: inline-block;
  transition: background-color 0.6s ease;
}

.active, .dot:hover {
  background-color: #717171;
}
h2{
    text-align :center ;
    margin-top : 30px;
    display : block ;
}
/* Fading animation */
.fade {
  animation-name: fade;
  animation-duration: 1.5s;
}

@keyframes fade {
  from {opacity: .4}
  to {opacity: 1}
}

/* On smaller screens, decrease text size */
@media only screen and (max-width: 300px) {
  .prev, .next,.text {font-size: 11px}
}
Well You Guessed it we create a css animation using the keyframes to make the fadin effect on the image as they disappear...
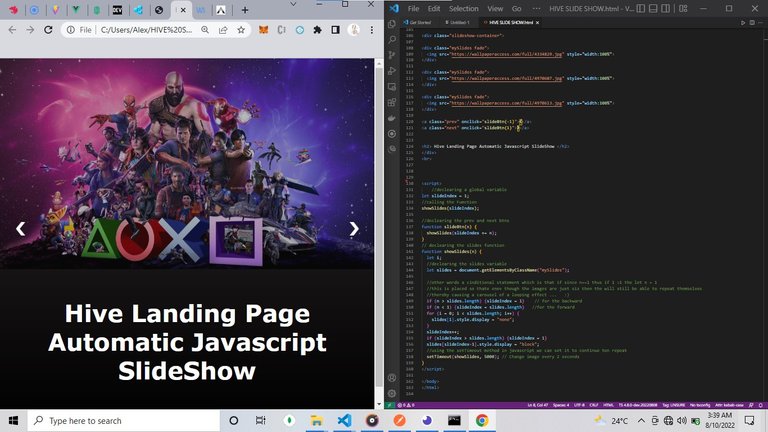
output with CSS :
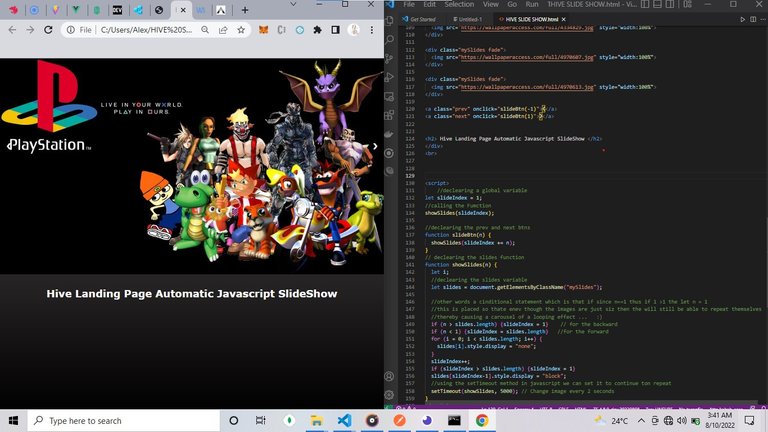
Now Here is MY JAVASCRIPT :
<script>
    //declearing a global variable
let slideIndex = 1;
//calling the Fumction
showSlides(slideIndex);

//declearing the prev and next btns
function slideBtn(n) {
  showSlides(slideIndex += n);
}
// declearing the slides function
function showSlides(n) {
  let i;
  //declearing the slides variable
  let slides = document.getElementsByClassName("mySlides");

  //other words a cinditional statement which is that if since n==1 thus if 1 >1 the let n = 1
  //this is placed so thate enev though the images are just siz then the will still be able to repeat themselves
  //thereby causing a carousel of a looping effect ...   :)
  if (n > slides.length) {slideIndex = 1}    // for the backward
  if (n < 1) {slideIndex = slides.length}   //for the forward
  for (i = 0; i < slides.length; i++) {
    slides[i].style.display = "none";
  }
  slideIndex++;
  if (slideIndex > slides.length) {slideIndex = 1}
  slides[slideIndex-1].style.display = "block";
  //using the setTimeout method in javascript we can set it to continue ton repeat
  setTimeout(showSlides, 5000); // Change image every 2 seconds
}
</script>
I enclosed the javascript into the script tag which makes it to work in a SFC (single-file-cpmponent VueJs terminology(front-end-framework)).
full VIEW ;

Alright Guys this brings me to an end of this tutorial and ill see you nest time with a cool one Animations Usng Pure Css....

Well done sir
Thanks Sir
Thanks for your contribution to the STEMsocial community. Feel free to join us on discord to get to know the rest of us!
Please consider delegating to the @stemsocial account (85% of the curation rewards are returned).
You may also include @stemsocial as a beneficiary of the rewards of this post to get a stronger support.
Congratulations @foxlead! You have completed the following achievement on the Hive blockchain and have been rewarded with new badge(s):
Your next target is to reach 2000 upvotes.
You can view your badges on your board and compare yourself to others in the Ranking
If you no longer want to receive notifications, reply to this comment with the word
STOPCheck out the last post from @hivebuzz:
Support the HiveBuzz project. Vote for our proposal!