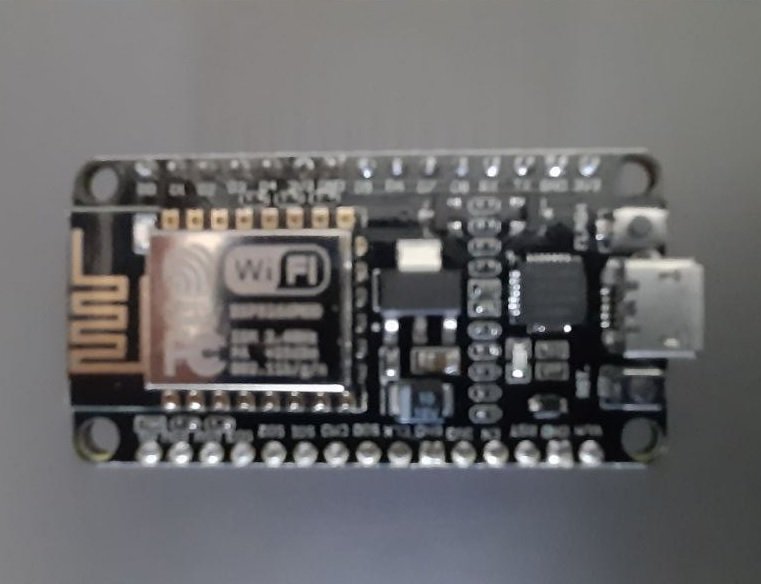
Hello friends, today i will be talking about NodeMCU board that we'll use to mine some Duino Coins.
If you don't have one NodeMCU you could purchase one for a very cheap price from sites like Amazon. I'm also gonna introduce you to a type of cryptocoin that probably most of you out there might have never even heard of and they are the Duino Coins.
You can check the Duino Coin Homepage https://duinocoin.com/ and they have mentioned that they are the only type of coins that can be mined with microcomputers like Raspberry Pi or Arduino.
Even though there are a lot of coins out there that can be mined using computers and Raspberry Pi, Duino Coin is the only coin that can be mined using an Arduino or an ESP board without much hassle.
You wouldn't make a lot of money mining Duino Coins but if you are someone who is interested to get started with crypto mining then this coin is great to start with.
Our first step is that we have to install the Arduino IDE in your computer/laptop. Go to https://www.arduino.cc/en/software and download it.
Now there are a few setup process that you have to do because the NodeMCU that we'll use requires some additional packages. This is just a one-time process.
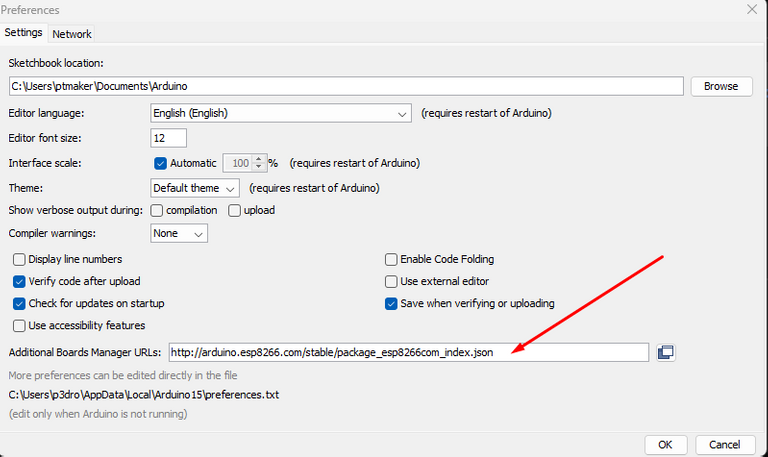
Go to Files - Preferences and paste the following link in the Additional Boards manager url:
http://arduino.esp8266.com/stable/package_esp8266com_index.json
Now go to Tools and under Boards Manager, search for ESP8266 and you would find the ESP8266 board package by the ESP8266 community. Just select the latest version and hit install.
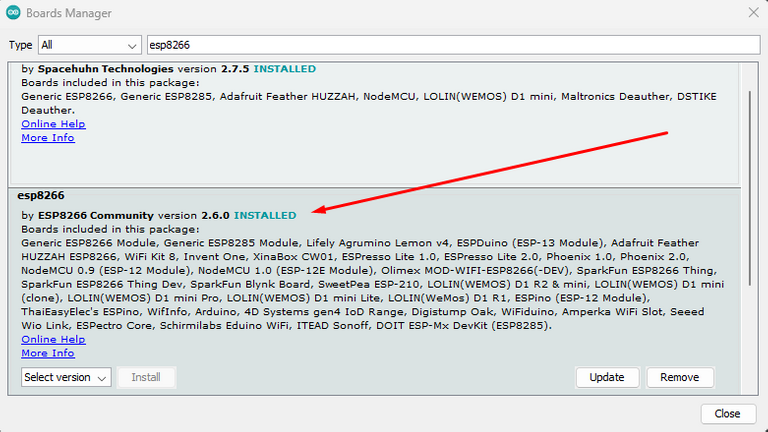
This installation process can take roughly any time between one to two minutes.
Now go to Tools and under Boards you can see the ESP8266 boards are listed and if you scroll down you can find the node NodeMCU ESP12 module which we will be using in this project.
Select that and then you are done with the setup process in the Arduino IDE.
Now go to the DuinoCoin website where you can register your account.
The Duino Coin this is actually an open source project that developers from all around the world started contributing into this project making it better day by day they also have an active discord community where they post all the recent updates and you can also get in touch with these developers.
In the home page you can see that they have mentioned it's completely open source and that it has been under constant development since the last two years.
The ticker symbol for Duino Coin is DUCO and you can trade it on Pancakeswap.
https://pancakeswap.finance/swap?outputCurrency=0xCF572cA0AB84d8Ce1652b175e930292E2320785b
Now click on Get started guide and under the table of contents you can see that they have mentioned that you can mine with your computer, your Arduino board, Raspberry Pi, NodeMCU and your smartphones but today we will be mining with our NodeMCU board.
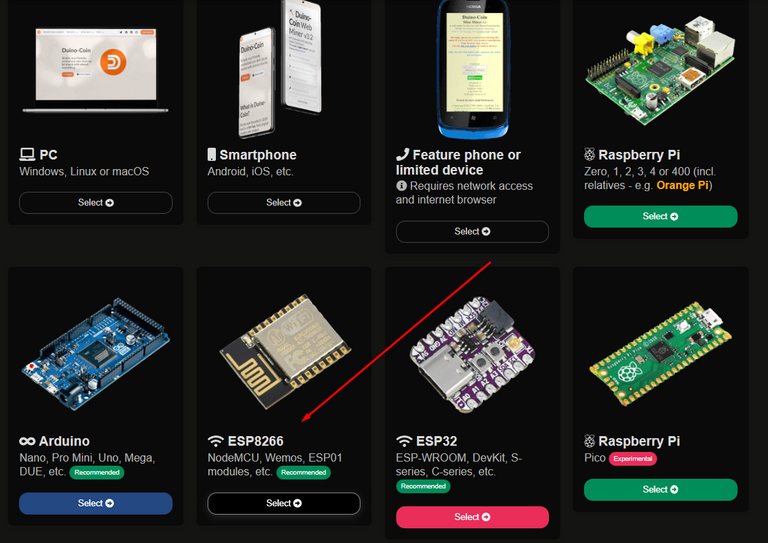
Now download the Duino Coin zip file from the link below and extract it:
https://github.com/revoxhere/duino-coin
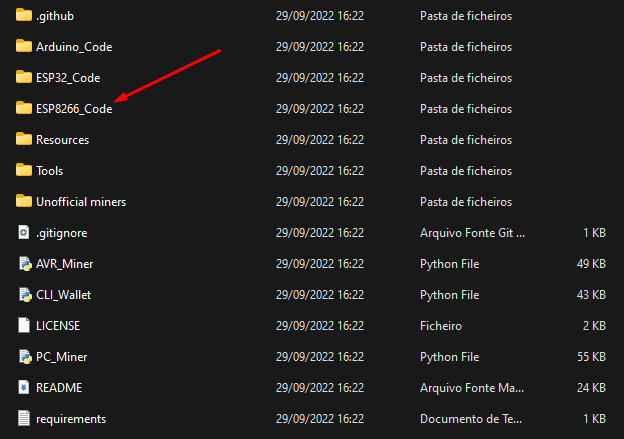
Now you can see that there are some folders that contains the codes for your Arduino board, ESP32 and ESP8266. Open ESP8266 folder and launch the ESP8266_Code.ino file.
There's a small thing that we have to do here. You may know the NodeMCU is a wi-fi module and if it has to mine it has to be connected to a wi-fi network so all you do is just scroll down and the place where you see wi-fi SSID just enter the name of your wi-fi to which you want your NodeMCU to be connected to followed by the password of your wi-fi.
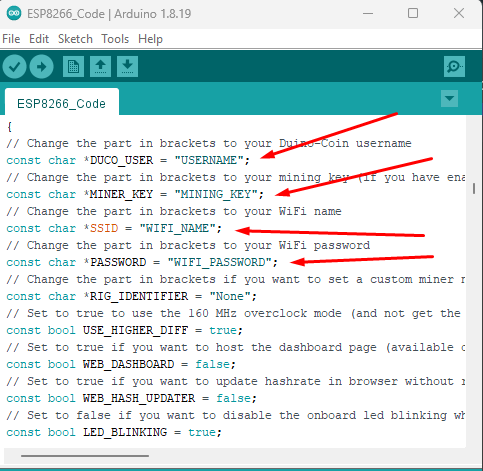
Then in the Username is where you enter the username of your Duino Coin account that you give at the time of registration.
In the rig identifier is where you can give a name to your board. You can give any name you want you can also choose not to give a name.
So since i'm using a single ESP8266 board i would give the name as esp01 so that's all the changes that you have to make to this code.
Now let's grab our NodeMCU and connect it to our computer and now let's head over to Tools and make sure that NodeMCU is selected under Boards.
The baud rate would be set to 115200 by default so you don't have to change that and the CPU frequency if it is set to 80 megahertz in your system make sure that you change to 160 megahertz.
Then in the port section just select the port to which your NodeMCU is connected and that's all!
Now click upload and wait until the code has successfully uploaded to NodeMCU.
Now let's open the Serial monitor and see if everything is working perfectly fine. Set the baud rate to 500000 and give it a few minutes before something appears on your Serial monitor.
You can see that it is connected to the server and it's asking for a new job for user ptmaker which is me. You would see job received and that means everything is working fine.
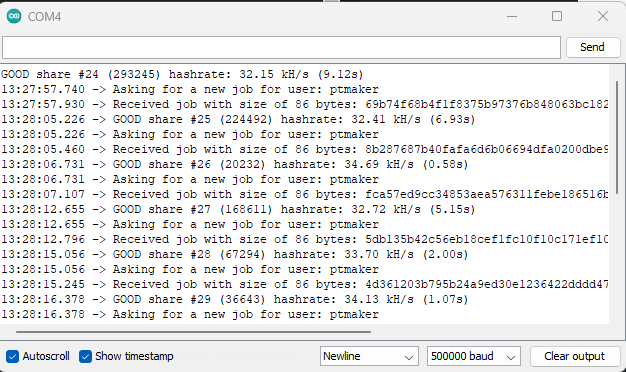
Your NodeMCU has started to mine after the NodeMCU is up and running.
Now go to your wallet https://wallet.duinocoin.com/ and see if mining has actually started and where the Duino Coins are getting added to the wallet.
My NodeMCU has successfully started mining with a hash rate of 32kH per second so if you see it in your dashboard that means everything is working perfectly fine.
The estimated daily profit which is the amount of Duino Coins that you mine in a day would be around 3 to 4 Duino Coins a day.
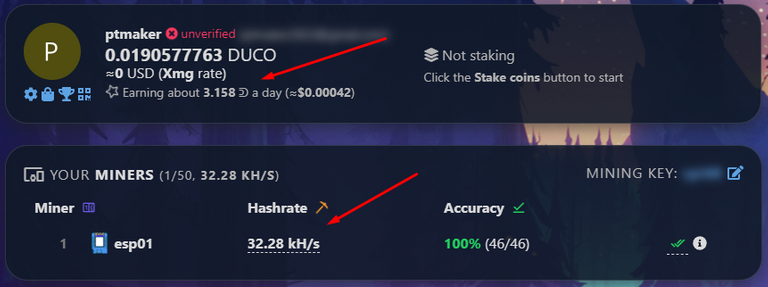
Don't think that your board is not mining properly because it's just that these estimations are based on a lot of factors and you can see that this value keeps changing over time. I know it's not a huge amount but if you have a couple of these NodeMCU that are right lying around doing nothing then why not use them to mine you at least something?
You know as far as these NodeMCU used they have uninterrupted power supply and a stable wi-fi connection they would just keep mining without any issues.
I hope you liked it and if you have any question, please let me know in the comments!
Thank you all for your time!
The rewards earned on this comment will go directly to the people( @ptmaker ) sharing the post on Twitter as long as they are registered with @poshtoken. Sign up at https://hiveposh.com.
Hopefully you get some profit in there lol! At least you had some fun configuring it
!1UP
Hi @gwajnberg, yes it's more for fun because it's not profitable. but it's cool to see how these microcontrollers have so many uses.
You have received a 1UP from @gwajnberg!
@stem-curator
And they will bring !PIZZA 🍕.
Learn more about our delegation service to earn daily rewards. Join the Cartel on Discord.
PIZZA Holders sent $PIZZA tips in this post's comments:
@curation-cartel(19/20) tipped @ptmaker (x1)
Please vote for pizza.witness!
Congratulations @ptmaker! You have completed the following achievement on the Hive blockchain and have been rewarded with new badge(s):
Your next target is to reach 3000 upvotes.
You can view your badges on your board and compare yourself to others in the Ranking
If you no longer want to receive notifications, reply to this comment with the word
STOPTo support your work, I also upvoted your post!
Check out the last post from @hivebuzz:
Support the HiveBuzz project. Vote for our proposal!