as I go about the creation of this picture.)@jamerussell was saying the other night that he didn't know much about using GIMP, so I'm going to take you through step-by-step (ask if I confuse you anywhere...) and try to teach you a little about this powerful and totally-free program that you can use to create great images. (Unusually, I'm writing this post
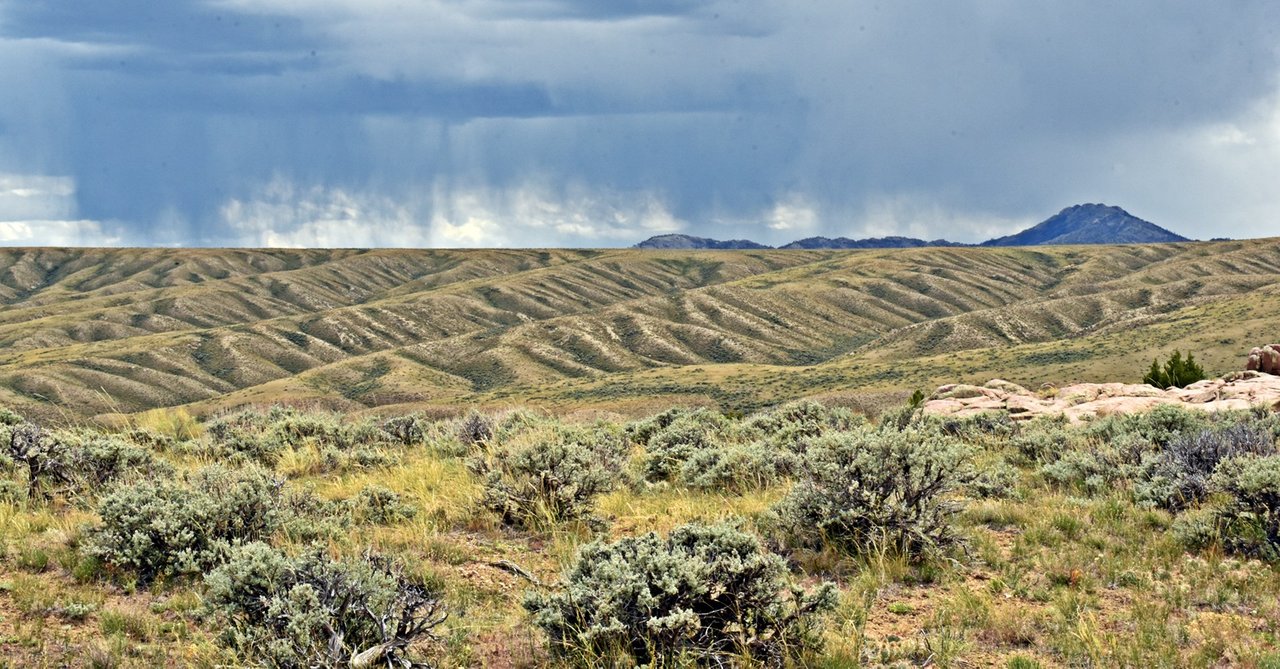
I began with this image that I took below Pathfinder Dam here in Wyoming.
1. Duplicate the original layer
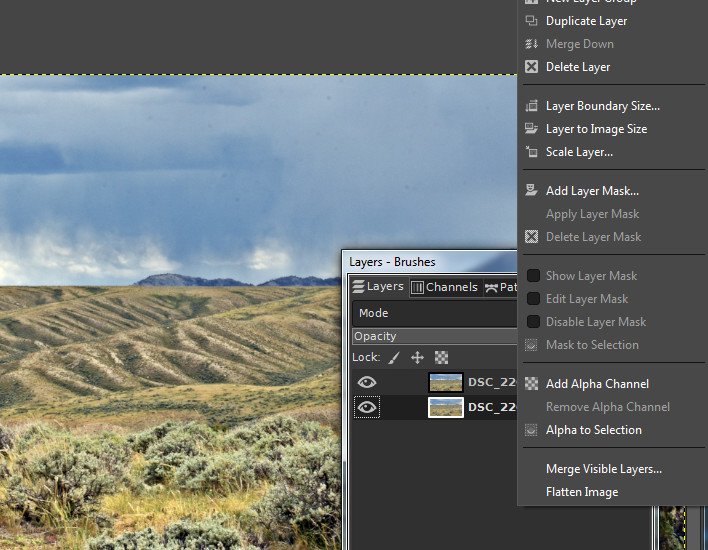
The first thing I did was to duplicate the layer. (Right-click on the layer name in the "layers" box and select "duplicate layer.")
I did this for several reasons. One is to make sure I have a clean copy there in case I screw up one. The second is that I may decide to reduce the opacity on one of them later... Not sure at this point.
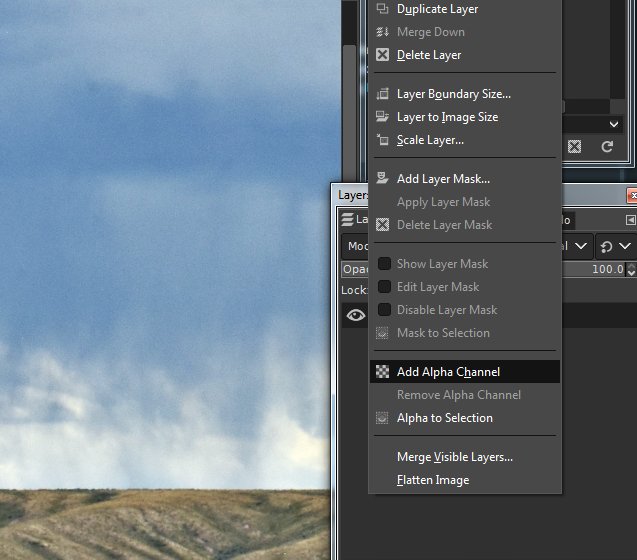
2. Add "alpha channel" for each layer
I should have done this first, but I forgot. This is important so that you can create "transparent" areas which is necessary if you want to have another layer behind any cut-out areas. (Right-click on the layer name in the "layers" box and select "add alpha channel.")
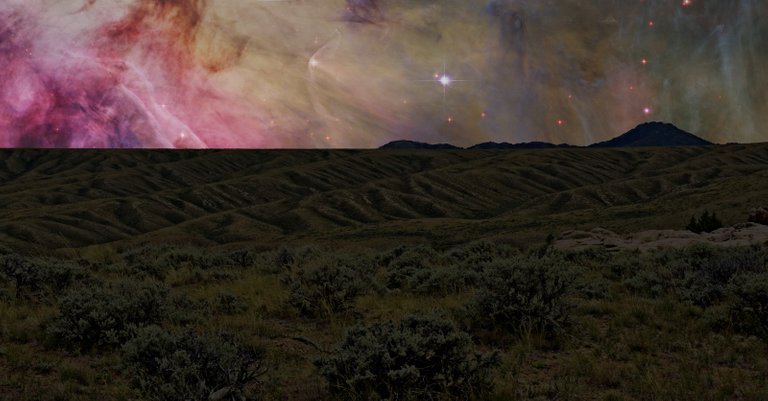
I've decided to make this image into a night scene with a picture of the night sky showing through the clouds. To do this, I'm going to need a layer without the sky so that I can place the night sky behind it.
3. Delete the sky from one layer
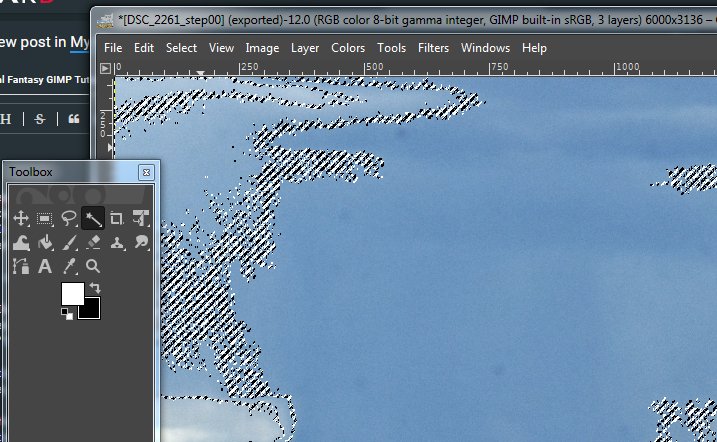
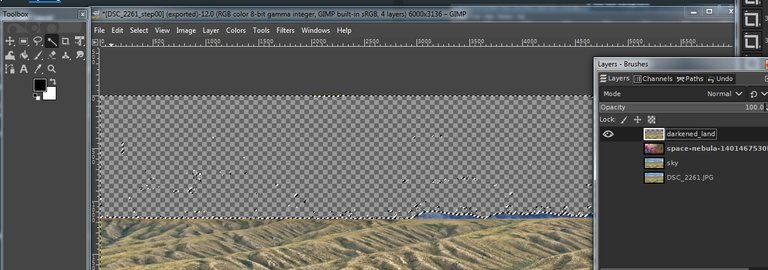
I am using my top layer (the one at the top of the layer list). I use the fuzzy select tool first. It looks like a magic wand in your toolbox.
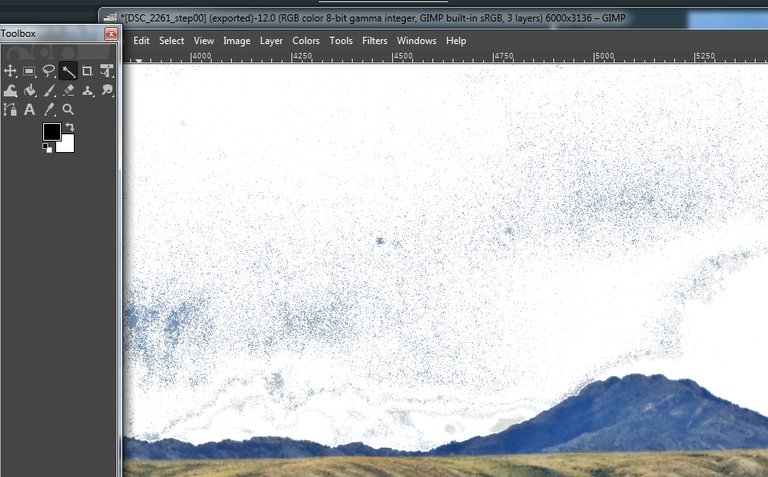
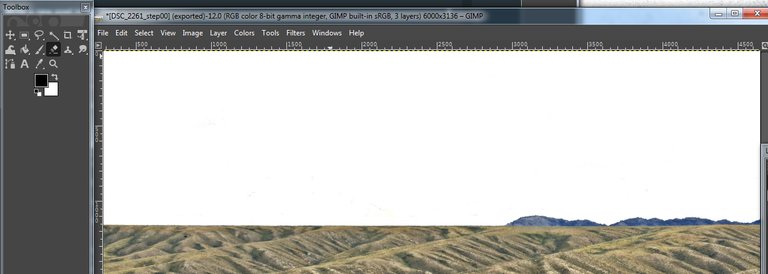
After I do this on all the main areas, my picture looks like this:
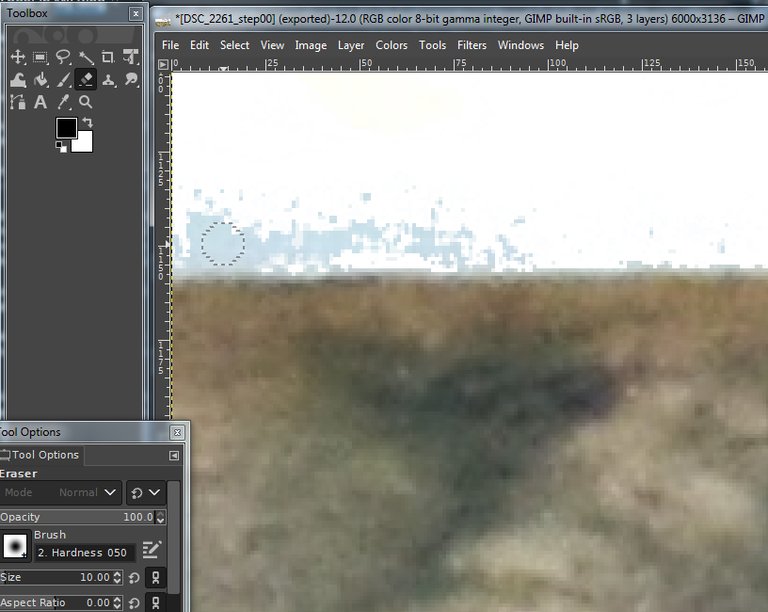
Next, I grab the eraser tool and clean up the sky. I first enlarge the picture (I am working at 400% to begin with) so that I can work right next to the ground. Then, I change the size of my eraser to be 10.0 pixels so that I can work more precisely.
BTW, if you find the eraser "doesn't work" make sure that you don't have anything selected. Go to the "Select" drop-down menu in the main menu and select "None." Now, it should work.
If you hit something wrong, just hit CRTL-Z to undo the last thing. (It's also a reason to only do a little at a time and not try to do it all in one operation.)
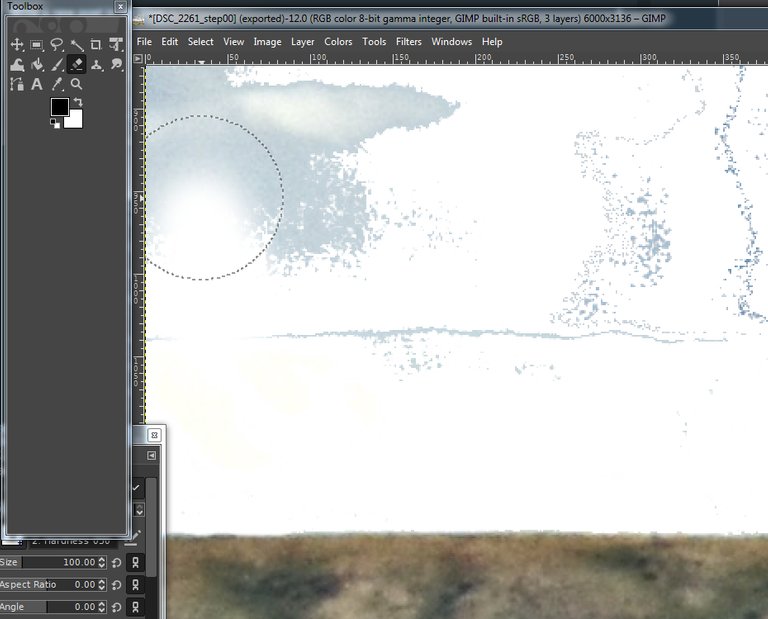
After I finish the area along the ground, I zoom back to 100% and increase the size of my eraser... 100 ought to do.
Next, I can add my new background...
4. Add New Background
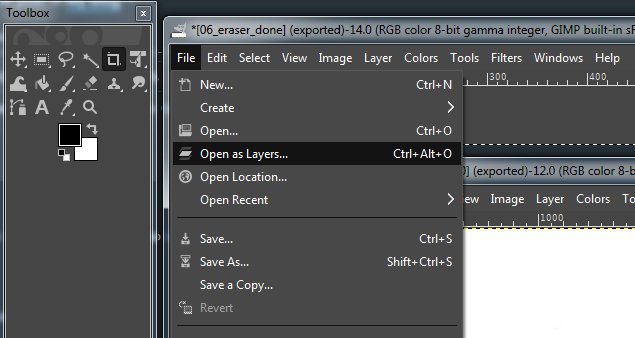
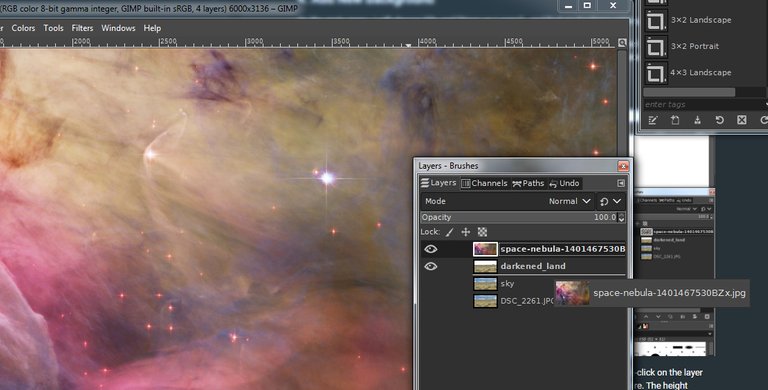
On the main menu, I will choose File and "Open as Layers" - and find my background image.
This time, I chose a picture from my "Public Domain Pictures" downloads folder. (I label my folders by site so that I (at least) have the correct site source... even if I lose the original link or it's taken down from the site.)
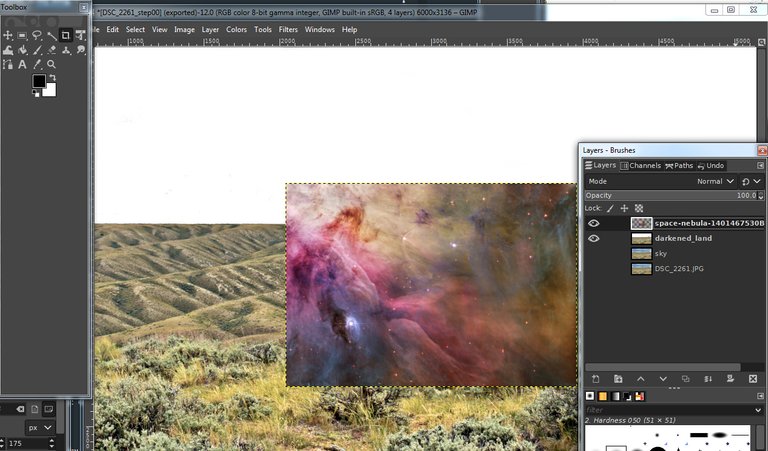
Here's what it looks like now:
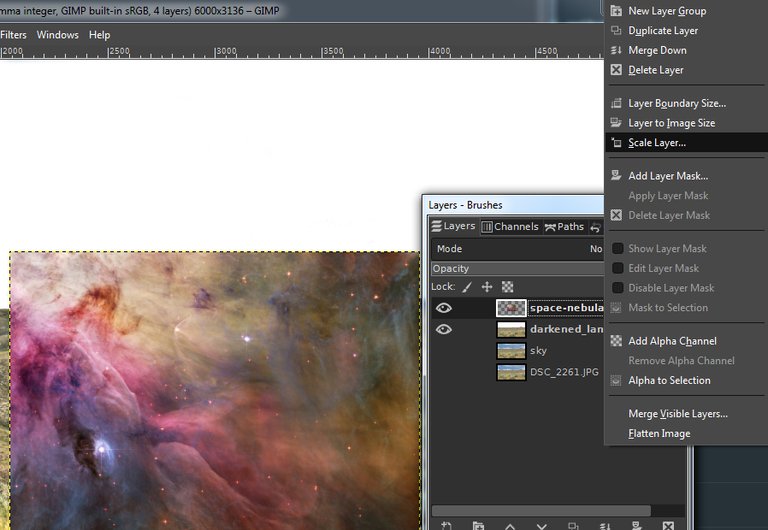
So, my new layer isn't big enough... no problem. I will just resize the layer. I simply right-click on the layer and choose "scale layer." I will make the width of the new layer match my original picture. The height doesn't matter because the sky section is fairly narrow.
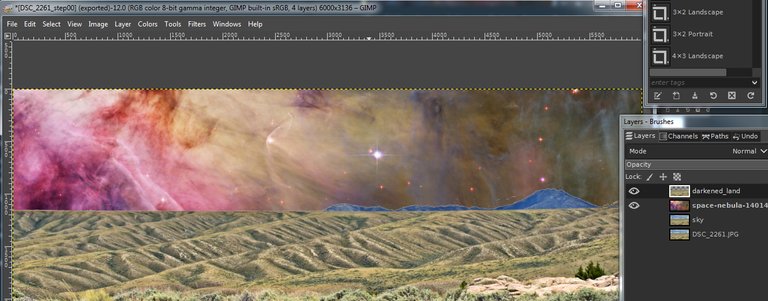
After I did the resize, I needed to move the layer... because the top layer in the list will be the one that is seen first. I need this nebula behind the land, so I just grab the layer (left-click) and drag it to below the next layer.
Here is what it looks like now - I really love it! But it's not done...
I want to bring back the clouds, but they're not going to be at full strength...
Let's find an easy way to do the deletion of everything except the clouds... I'm going to use one of my other layers and "hide" my nebula for the moment.
5. Editing the cloud layer
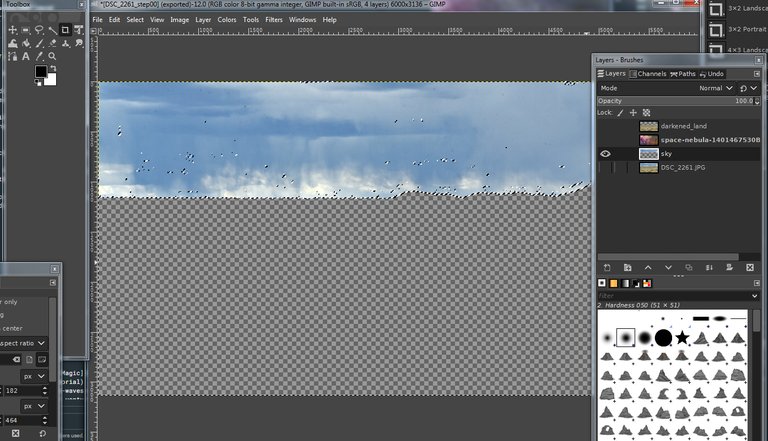
I start this section by using my "fuzzy select" on the top layer sky. So, now the entire sky section is selected.
I go back to the "Select" heading and choose "Invert" in the drop-down menu, so that now everything except the sky is selected.
Then, I go down to the "sky" layer... making sure I have an alpha channel on this layer, I "delete" the ground and mountains.
Note that I made the top layer invisible and only the "sky" layer visible for the moment.
I duplicated this sky layer for safety.
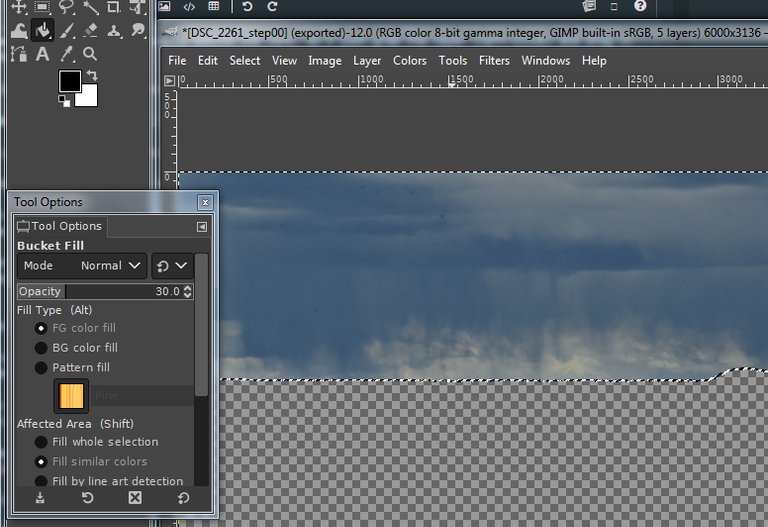
Next, I'll use the bucket fill at about 30-40% opacity to add some darkness to the clouds.
- I used the "fuzzy select" tool on the transparent area and "invert" so that the cloud area is selected.
- I choose the "bucket fill" tool, make sure that black is selected and using 30% opacity, fill black.
- Do make sure the "fill whole selection" is selected.
I hit this three times at 30% opacity before I liked it.
Next, I'll just erase all that lighter area before I move the layer to the top.
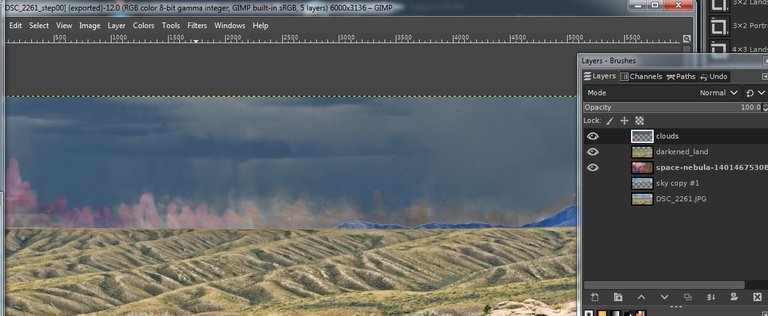
So, the clouds are too dark. I will reduce the opacity of that layer (see the above picture where you see "opacity" in the layers box.)
Next, I'm just going to make a couple of new layers... I will duplicate the clouds again as well as the land. Those will be just black at a low opacity until I like the over all image...
In the end, I mostly dumped the clouds - just barely keeping it to reduce the glare of the nebula.
Save your image!
The typical "save as" will safe as a Gimp file - complete with all the layers - which is important if you decide to change something later...
For a .png or .jpg image, you will need to choose "export as" - which will basically give you a snapshot of all visible layers of the picture right now. That exported picture won't have layers, so you really do want both the .xcf file and whatever picture export you want.
I made another version of this picture as well which I'll share another day...
All work done by myself on GIMP. Photo of Pyramid Peak taken in June 2020 with my Nikon D7200. Background image from Public Domain Pictures.
Previous works of fantasy
Destruction Island Night Magic , Birds Over Sunset Waves , Starry Happy Little Rock , Winter Baker, Full Moon Over Dorset , Bright Starry Night Dorset ,
Lori Svensen
author/designer at A'mara Books
photographer/graphic artist for Viking Visual
(Buy my work at RedBubble, TeePublic, PicFair and DeviantArt.)
verified author on Goodreads
(Buy my books at Books2Read and at LBRY)
find me on Twitter



@tipu curate
Upvoted 👌 (Mana: 0/12)
Thank you!
I have picked your post for my daily hive voting initiative, Keep it up and Hive On!!
Thank you!