Hello Hivers,
Last time, I loaded a 3D model to our localhost. Now I will add some CSS to style the page.
Here is part 1: How to upload the still model to a page [three.js series - part 1]
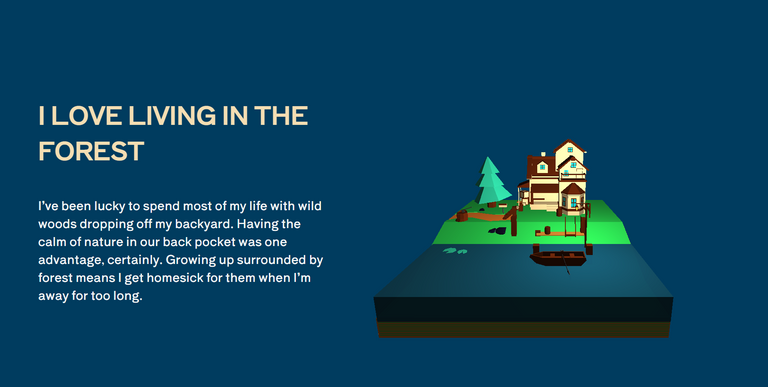
Here is a sneak peek to today final product: a colorful webpage where you load your digital artwork with some descriptions. For sale ? Maybe ? 😄
Ok, back to where we left off last time :
Add some divs into index.html
I link the stylesheet in the tag to load CSS when loading the web page.
<link rel="stylesheet" href="./3dmodel.css">
I then add one big div and 2 small divs inside. One div is the content of the web page. The other div is the model.
The
tag defines a division or a section in an HTML document. Any sort of content can be put inside the tag. I add class to the tags to style them later. Remember that you can name the classes whatever you want.<!DOCTYPE html>
<html lang="en">
<head>
<meta charset="UTF-8">
<meta http-equiv="X-UA-Compatible" content="IE=edge">
<meta name="viewport" content="width=device-width, initial-scale=1.0">
<title>Document</title>
<link rel="stylesheet" href="./3dmodel.css">
</head>
<body>
<div class="flex-container">
<div class='intro'>
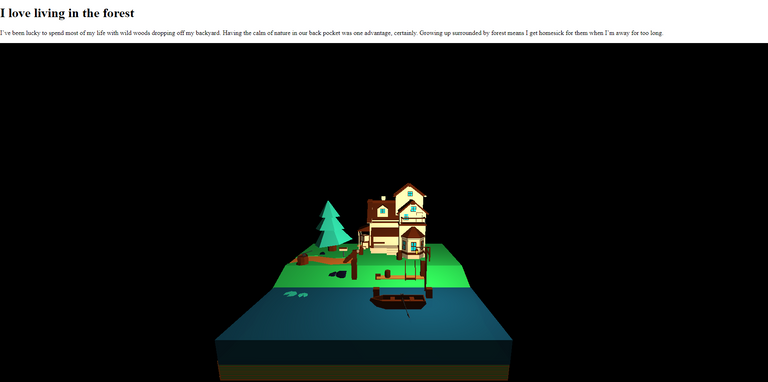
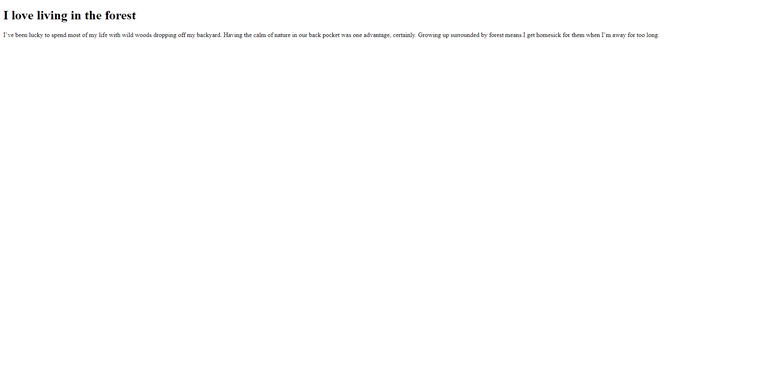
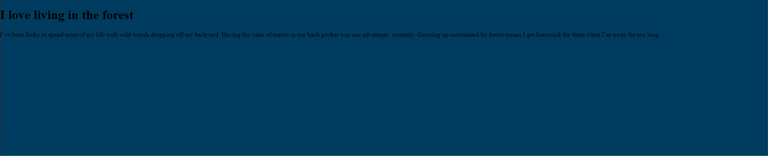
<h1> I love living in the forest </h1>
<p> I’ve been lucky to spend most of my life with wild woods dropping off my backyard. Having the calm of nature in our back pocket was one advantage, certainly. Growing up surrounded by forest means I get homesick for them when I’m away for too long. </p>
</div>
<div class='container'></div>
</div>
<script type="module" src="./3d_lib/three.js"></script>
<script type="module" src="./3d_lib/three.min.js"></script>
<script type="module" src="./3d_lib/three.module.js"></script>
<script type="module" src="./3d_lib/GLTFLoader.js"></script>
<script type="module" src="./3d_lib/OrbitControls.js"></script>
<script type="module" src="./app.js"></script>
</body>
</html>
My web page will look like this after adding some content in HTML file.
Make some changes in app.js
I add a container using querySelector(). The querySelector() method only returns the first element that matches the specified selectors. This container will contain the model. I can resize the model / the container as I want.
let container = document.querySelector(".container");
In part 1, I used window.innerWidth and window.innerHeight so the model takes the whole space of the window.
Now I want my model to move next to the intro and just be within a specific area of the page.
Therefore, I change window.innerWidth and window.innerHeight to container.clientWidth and container.clientHeight.
Before change:
//camera's aspect ratio
const camera = new THREE.PerspectiveCamera(
  75,
  window**.innerWidth/ window.innerHeight,**
  0.1,
  1000
);

//set size for the render
renderer.setSize(window**.innerWidth, window.innerHeight**
After change:
//camera's aspect ratio
const camera = new THREE.PerspectiveCamera(
  75,
  **container.clientWidth/ container.clientHeight,**
  0.1,
  1000
);

//set size for the render
renderer.setSize(**container.clientWidth, container.clientHeight**);
I set alpha of the renderer to true so the background of the model becomes transparent. Alpha adjusts the opacity or transparency of a color.
const renderer = new THREE.WebGLRenderer({
  alpha: true,
});
Last but not least, I change document.body.appendChild → container.appendChild as I want the model to be resized in regard to the container not the document's body.
//append the renderer to document's body
//in part 1 post
document.body.appendChild(renderer.domElement);
// now I change document.body -> container
// so the model lies within the container besides the text
container.appendChild(renderer.domElement);
After this change, the model disappears because I haven't added CSS for class='container'. Don't worry, I will do it later.
Final Javascript file after making above changes
import { GLTFLoader } from "./3d_lib/GLTFLoader.js";
import { OrbitControls } from "./3d_lib/OrbitControls.js";

// we need scene, camera, renderer, so that we can render the scene with camera
let container = document.querySelector(".container");
// let canvasSize = document.querySelector(".canvas-element");
const scene = new THREE.Scene();
const camera = new THREE.PerspectiveCamera(
  75,
  **container.clientWidth/ container.clientHeight,**
  0.1,
  1000
);
camera.position.set(0, 0, 100);
// camera.lookAt(0, 0, 0);

const renderer = new THREE.WebGLRenderer({
  alpha: true,
});
renderer.setSize(**container.clientWidth, container.clientHeight**);
**container**.appendChild(renderer.domElement);

////Code below keeps the same as part 1 post /////
3dmodel.css - where the decoration happens
Let's talk about how I added CSS to each class.
Style the flex-container class / main div
.flex-container{
    background: #003C5F;
  display: flex;
    flex-direction: row;
  width: 100%;
    height: 100%;
}
I set background color to #003C5F. The color name is Prussian Blue.
Since the model is not here, you won't see the display flex takes action.
Style the intro class
If you are not used to flexbox, you can read this blog post from CSS tricks: https://css-tricks.com/snippets/css/a-guide-to-flexbox/ They illustrate and explain the concepts so well.
I import google fonts to make font-family look better.
Google fonts: https://fonts.google.com/
Font-size should be big enough so the page doesn't have too much blank space.
Margin is the space outside the element's border while padding is the space inside. Don't mistake them.
@import url('https://fonts.googleapis.com/css2?family=Shippori+Antique&display=swap');
.intro{
    width: 40%;
    display: flex;
    flex-direction: column;
    justify-content: center;
    color: whitesmoke;
    padding-left: 10vh;
    font-family: 'Shippori Antique', sans-serif;
    font-size: 30px;
    margin-top: 1vh;
}

Style the h1 tag
Since I want to make the h1 element less dull, I transform it to uppercase and change its text color.
The !important will override ALL previous styling rules on that element.
.intro>h1{
    color: wheat !important;
    text-transform: uppercase;
}

Set the container's dimensions
.container{
    width: 60%;
    height: 100vh;
}
After finishing the last piece in CSS, I go back to JS file and Ctrl+S ,then the model will appear in the right place.
Remove white space around the main div
I will set the margin and padding of all to 0 so there is no white space surrounding the flex-container div anymore.
*{
    margin: 0;
    padding: 0;
}
Now I'm done with using CSS to style the website. Next up, we are gonna add OrbitControls and more animation to the model.
Congratulations @mikevuu! You have completed the following achievement on the Hive blockchain and have been rewarded with new badge(s):
Your next target is to reach 100 upvotes.
You can view your badges on your board and compare yourself to others in the Ranking
If you no longer want to receive notifications, reply to this comment with the word
STOPTo support your work, I also upvoted your post!
Check out the last post from @hivebuzz:
Em là dân công nghệ hả
dạ đúng r chị
wow. A N giỏi quá. Ngưỡng mộ ghê @trangtran23
😂😂😂 Thank you