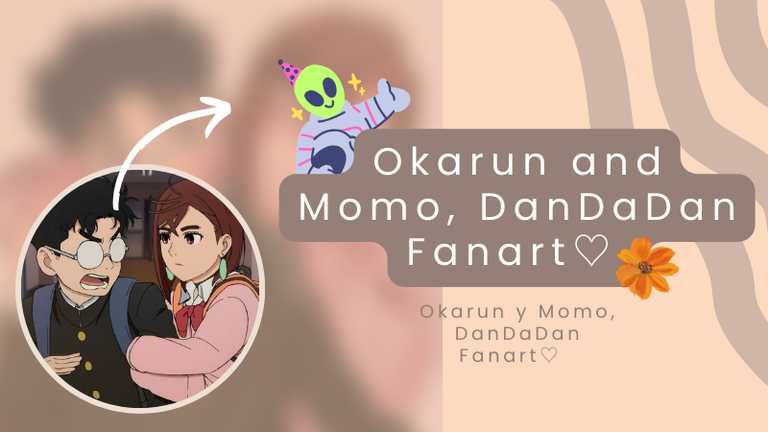

Hello, dear friends of this beautiful Hive community! I wish you a very happy beginning of the weekend, I hope this week has been for you a very profitable week, with a lot of learning and beautiful experiences, and if not, don't worry, we are just starting the year and I'm sure that many beautiful things are coming for you.
Today, I want to show you this Fanart I made a few months ago of Momo Okarun from the anime DanDaDan, as well as a little bit of the process I did making it. The truth is that I watched the whole anime, and also the manga and I can say that it is already one of my favorites, I think it's a hilarious anime, with a super good story and the characters are just wonderful, my favorite is, obviously, my beautiful Okarun 😿💗. If you haven't seen it, I highly recommend it a lot, you won't regret it.
I liked so much the anime and also this couple, that I couldn't help myself to make a drawing of it, so I show you here how I did it 👇.
¡Hola queridos amigos de esta hermosa comunidad de Hive! Les deseo un muy feliz inicio de fin de semana, espero que esta semana haya sido para ustedes una semana muy provechosa, con mucho aprendizaje y lindas experiencias, y si no, no se preocupen, apenas estamos empezando el año y estoy segura que vienen muchas cosas lindas para ustedes.
Hoy quiero enseñaros este Fanart que hice hace unos meses de Momo Okarun del anime DanDaDan, así como un poco del proceso que hice haciéndolo. La verdad es que me vi todo el anime, y también el manga y puedo decir que ya es uno de mis favoritos, me parece un anime divertidísimo, con una historia súper buena y los personajes son simplemente maravillosos, mi favorito es, obviamente, mi bonito Okarun 😿💗. Si no lo han visto, se las recomiendo muchísimo, no se arrepentirán.
Me gustó tanto el anime y también esta pareja, que no pude evitar hacer un dibujo de ella, así que aquí les muestro cómo lo hice 👇.
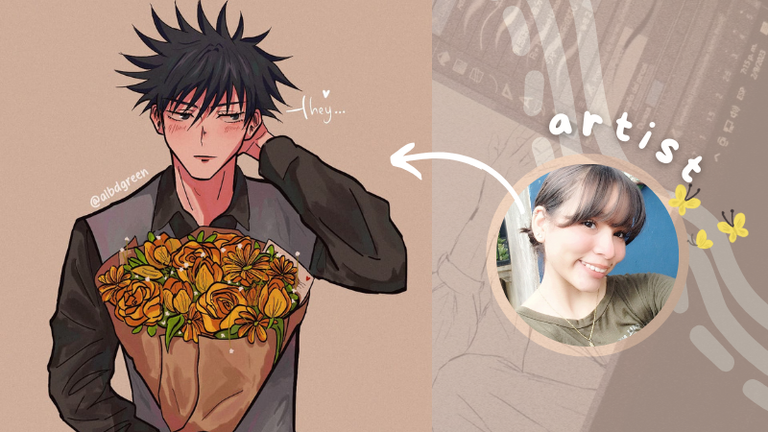

First I'd like to mention that if you want a more detailed post on how I make my drawings and Fanarts, I have a post on my blog where I explain everything a little better, in case you'd like to stop by and check it out ♡. This post will be a bit shorter, so let's get started!
Primero me gustaría mencionar que si queréis un post más detallado sobre cómo hago mis dibujos y Fanarts, tengo un post en mi blog donde lo explico todo un poco mejor, por si queréis pasaros a echarle un vistazo ♡. Este post será un poco más corto, ¡así que empecemos!

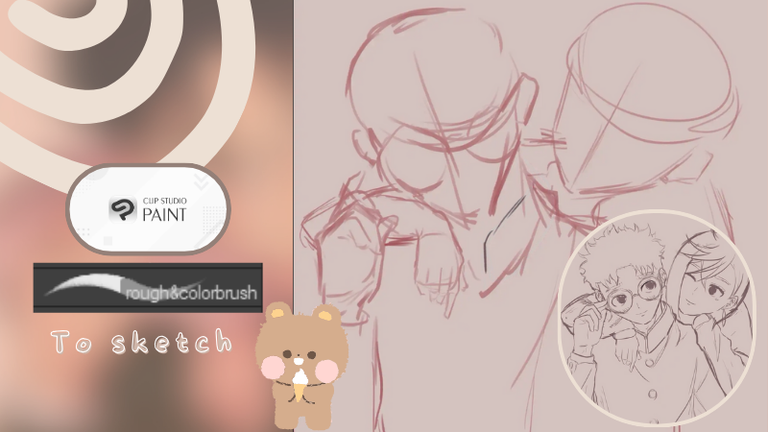
The program I always use for my drawings is Clip Studio Paint. For this Fanart, I started with a reference I got on pinterest of a couple. Although it was a bit complicated because I had to merge two references to make exactly what I wanted for them or what was closest to it. I wanted to make the closeness of the two of them stand out, for the drawing to have a very cute and loving, but also shy innocent love vibe. So I merged two references so that this could happen. First I made the sketch with the brush that I always use, in red color, the truth is that this brush seems to me super comfortable for sketches and is the one I use all the time. I always use red or blue in my sketches, since I got used to this way of sketching and it is not very difficult for me to make my lineart 💐.
El programa que siempre utilizo para mis dibujos es Clip Studio Paint. Para este Fanart, partí de una referencia que conseguí en pinterest de una pareja. Aunque fue un poco complicado porque tuve que fusionar dos referencias para hacer exactamente lo que quería para ellos o lo que más se le parecía. Quería que destacara la cercanía de ellos dos, que el dibujo tuviera un rollo de amor inocente muy mono y cariñoso, pero también tímido. Así que fusioné dos referencias para que así fuera. Primero hice el boceto con el pincel que siempre uso, en color rojo, la verdad es que este pincel me parece super cómodo para bocetos y es el que uso siempre. Siempre uso rojo o azul en mis bocetos, ya que me acostumbré a esta forma de bocetar y no me es muy difícil hacer mi lineart 💐.

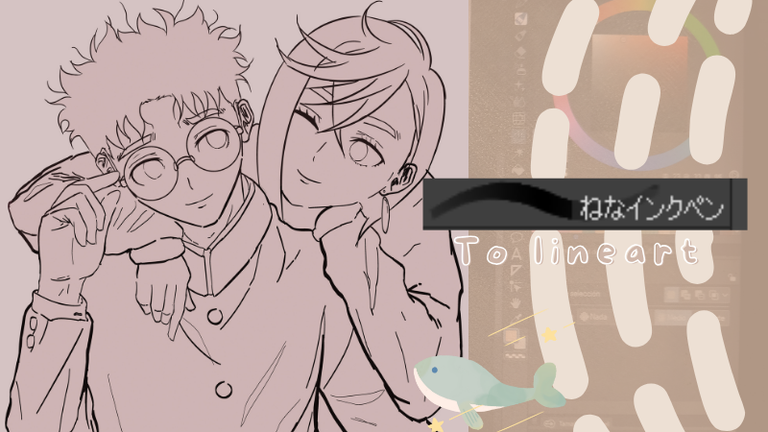
Once I made the sketch, I lowered the opacity and in a new layer on top of the sketch, I start to make the lineart with another type of brush. I started to use this brush not long ago in my drawings and the truth I have to say that I LOVE it, before I didn't know much about it but later I liked it a lot for having that texture like a marker, and the thickness of the lineart is in a way that really pleases me a lot, besides, the lineart is in a much more natural way compared to how it is when you make the lineart with a basic brush like the pen, in this case I like it more because it is more natural.
In this part of the lineart I do more details that I don't do in the sketch, like details in the eyes, I change some things to make the sketch cleaner, etc ✨.
Una vez hecho el boceto, bajé la opacidad y en una capa nueva encima del boceto, empiezo a hacer el lineart con otro tipo de pincel. Este pincel lo empecé a usar no hace mucho en mis dibujos y la verdad tengo que decir que me ENCANTA, antes no sabía mucho de él pero después me gustó mucho por tener esa textura como de rotulador, y el grosor del lineart es de una forma que realmente me gusta mucho, además el lineart queda de una forma mucho más natural comparado a como queda cuando haces el lineart con un pincel básico como la pluma, en este caso me gusta más porque queda más natural.
En esta parte del lineart hago más detalles que no hago en el boceto, como detalles en los ojos, cambio algunas cosas para que el boceto quede más limpio, etc ✨.

After I was happy and satisfied with the lineart, I could erase the sketch layer directly so it wouldn't get in the way or confuse me later. Then, I lowered the opacity of the lineart layer a little and in another layer below the lineart layer, I bordered the whole drawing with a color and painted the whole drawing, then I raised the opacity of the lineart bed back to 100%.
I do this because I always turn on the “Lock transparent pixels” option on the color layer I made, so that when I add my base colors, they don't go outside the drawing and the lineart paints the way I paint. This helps me a lot and also saves me a lot of time having to clean up the drawing afterwards, I highly recommend this tip if you are clip studio illustrators 💖.
Cuando estuve contenta y satisfecha con el lineart, pude borrar directamente la capa de dibujo para que no me estorbara ni me confundiera más tarde. Luego, bajé un poco la opacidad de la capa de lineart y en otra capa debajo de la capa de lineart, bordeé todo el dibujo con un color y pinté todo el dibujo, luego volví a subir la opacidad de la capa de lineart al 100%.
Esto lo hago porque siempre activo la opción «Bloquear píxeles transparentes» en la capa de color que hice, para que cuando añada mis colores base, no se salgan del dibujo y el lineart pinte como yo pinte. Esto me ayuda mucho y además me ahorra mucho tiempo al tener que limpiar el dibujo después, les recomiendo mucho este tip si son ilustradores de clip studio 💖.
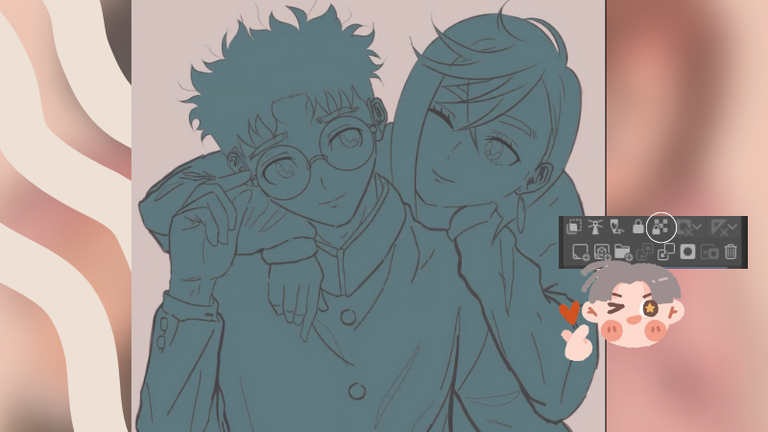

When I have this ready, I can start directly with the base colors. As I did the drawing some time ago I don't have pictures of how I did it step by step, but I can explain it with what I have here. I always make several layers on top of the color layer I made before, there I add the base colors. The number of layers I always work with are skin, hair and clothes. Here I painted the skin layer, the brush I use is Flashito and I find it very comfortable to paint because it has many options where you can change the density, the blending, among other things. I take advantage of this to paint details on the faces like blushes, lips or other details of the skin, this is how it looks 🧡.
Cuando tengo esto listo podré empezar directamente con los colores base. Como el dibujo lo hice hace tiempo no tengo fotos de como lo hice paso a paso, pero puedo explicarlo con lo que tengo aquí. Siempre hago varias capas encima de la capa de color que hice antes, ahí añado los colores base. El número de capas con las que siempre trabajo son piel, pelo y ropa. Aquí pinté la capa de piel, el pincel que uso es Flashito y me parece muy cómodo para pintar porque tiene muchas opciones donde puedes cambiar la densidad, la mezcla, entre otras cosas. Aprovecho para pintar detalles en las caras como coloretes, labios u otros detalles de la piel, así es como queda 🧡.
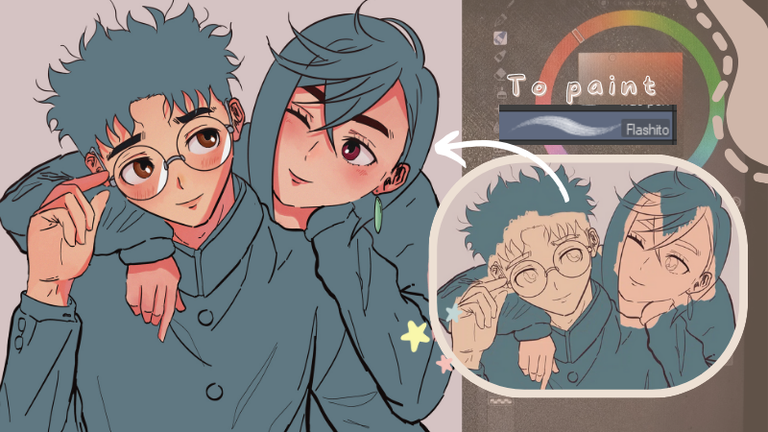

When I paint the skin, I paint the hair afterwards, with these characters it was quite easy to paint the hair because Okarun simply has black hair and the shape of Momo's hair if very quirky, but it doesn't have many strands or anything that should stand out, so even though I used my technique to paint hair, it doesn't show much.
Whenever I have the base hair color I add on the lower parts of the hair with the airbrush a darker color and a lighter one for the top part of the hair, then I make a series of small spots which I mix later with the base hair color. Then I add the shadows of the highlights and other light stains in certain areas. It looks something like this 💗.
Cuando pinto la piel, pinto el pelo después, con estos personajes fue bastante fácil pintar el pelo porque Okarun simplemente tiene el pelo negro y la forma del pelo de Momo es muy peculiar, pero no tiene muchos mechones ni nada que deba destacar, así que aunque usé mi técnica para pintar el pelo, no se nota mucho.
Cuando tengo el color base del pelo añado en las partes bajas del pelo con el aerógrafo un color más oscuro y uno más claro para la parte superior del pelo, luego hago una serie de pequeñas manchas que mezclo después con el color base del pelo. Luego añado las sombras de los mechonesy otras manchas claras en determinadas zonas. Queda más o menos así 💗.
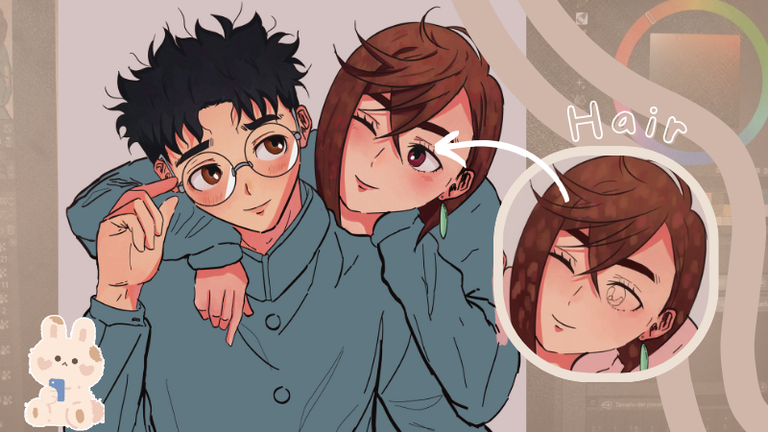

After I finish with the hair I go directly to the last thing which would be the clothes. I really liked painting Momo and Okarun's clothes because I allowed myself to play with different colors, stains, and I really liked the result. First I paint the base colors on the clothes, and with the base colors ready, I make spots of shadows with another color, but without getting to put very dark shadows, I do this simply to give more depth to the clothes and more variety of colors ♡, then when I did this series of spots, now I go with the strong shadows in the areas where appropriate and also add colors for reflections and that the drawing has more dynamism. To Okarun I added water green details when his clothes are originally black, and to momo I added blue details to his pink clothes, giving me a combination that is subtle, but makes a lot of difference 🌸.
Después de terminar con el pelo paso directamente a lo último que sería la ropa. Me gustó mucho pintar la ropa de Momo y Okarun porque me permití jugar con diferentes colores, manchas, y me gustó mucho el resultado. Primero pinto los colores base en la ropa, y con los colores base listos, hago manchas de sombras con otro color, pero sin llegar a poner sombras muy oscuras, esto lo hago simplemente para darle más profundidad a la ropa y más variedad de colores ♡, luego cuando hice esta serie de manchas, ahora voy con las sombras fuertes en las zonas donde corresponda y también añado colores para los reflejos y que el dibujo tenga más dinamismo. A Okarun le agregué detalles verde agua cuando su ropa originalmente es negra, y a momo le agregué detalles azules a su ropa rosa, dándome una combinación que es sutil, pero hace mucha diferencia 🌸.
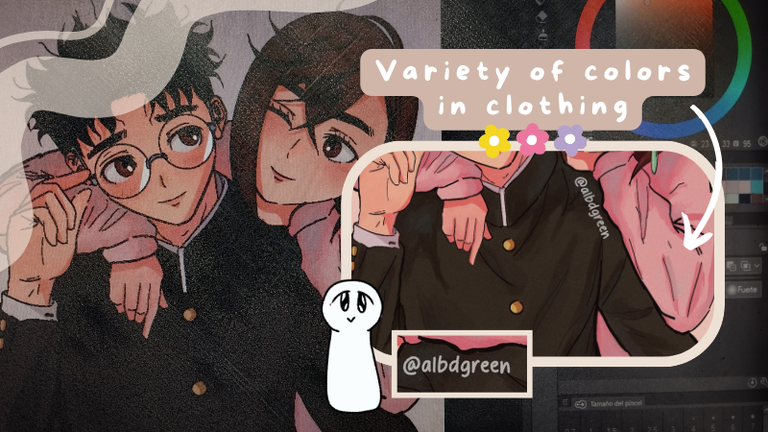

Here I have practically finished the drawing, then on top of all these colors I put a layer of some random color with the opacity quite low and in “Multiply” mode. I do this so that my colors have more harmony with each other (another tip ✅) I also duplicated a number of times my lineart because I do like it to look a lot 😭, I put a background according to my Instagram feed, lately I'm liking a lot the neutral warm colors, like several types of brown, I also added a very slight noise effect and finally I added my watermark.
And this is how the final result looks like ♡🌸🌷💘.
Aquí tengo prácticamente terminado el dibujo, luego encima de todos estos colores puse una capa de algún color aleatorio con la opacidad bastante baja y en modo «Multiplicar». Esto lo hago para que mis colores tengan más armonía entre sí (otro consejo ✅) También dupliqué varias veces mi lineart porque sí me gusta que se vea mucho 😭, puse un fondo acorde a mi feed de Instagram, últimamente me están gustando mucho los colores neutros cálidos, como varios tipos de marrones, también añadí un efecto de ruido muy leve y por último añadí mi marca de agua.
Y así es como queda el resultado final ♡🌸🌷💘.
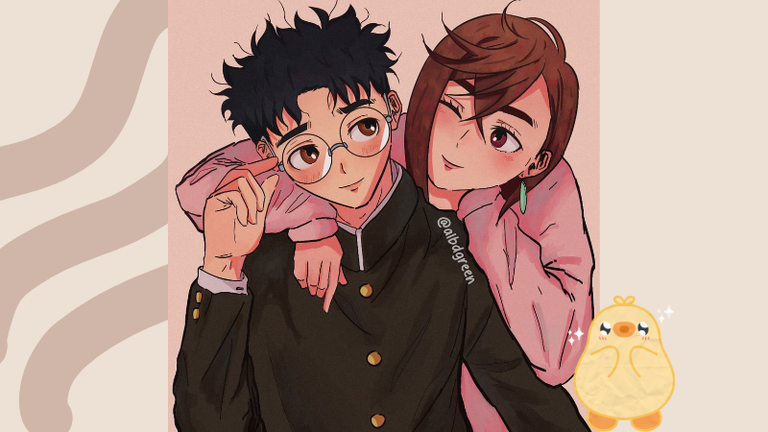

I also leave the time-lapse for you to see how I do it in more detail 💞.
También os dejo el time-lapse para que veáis cómo lo hago con más detalle 💞.
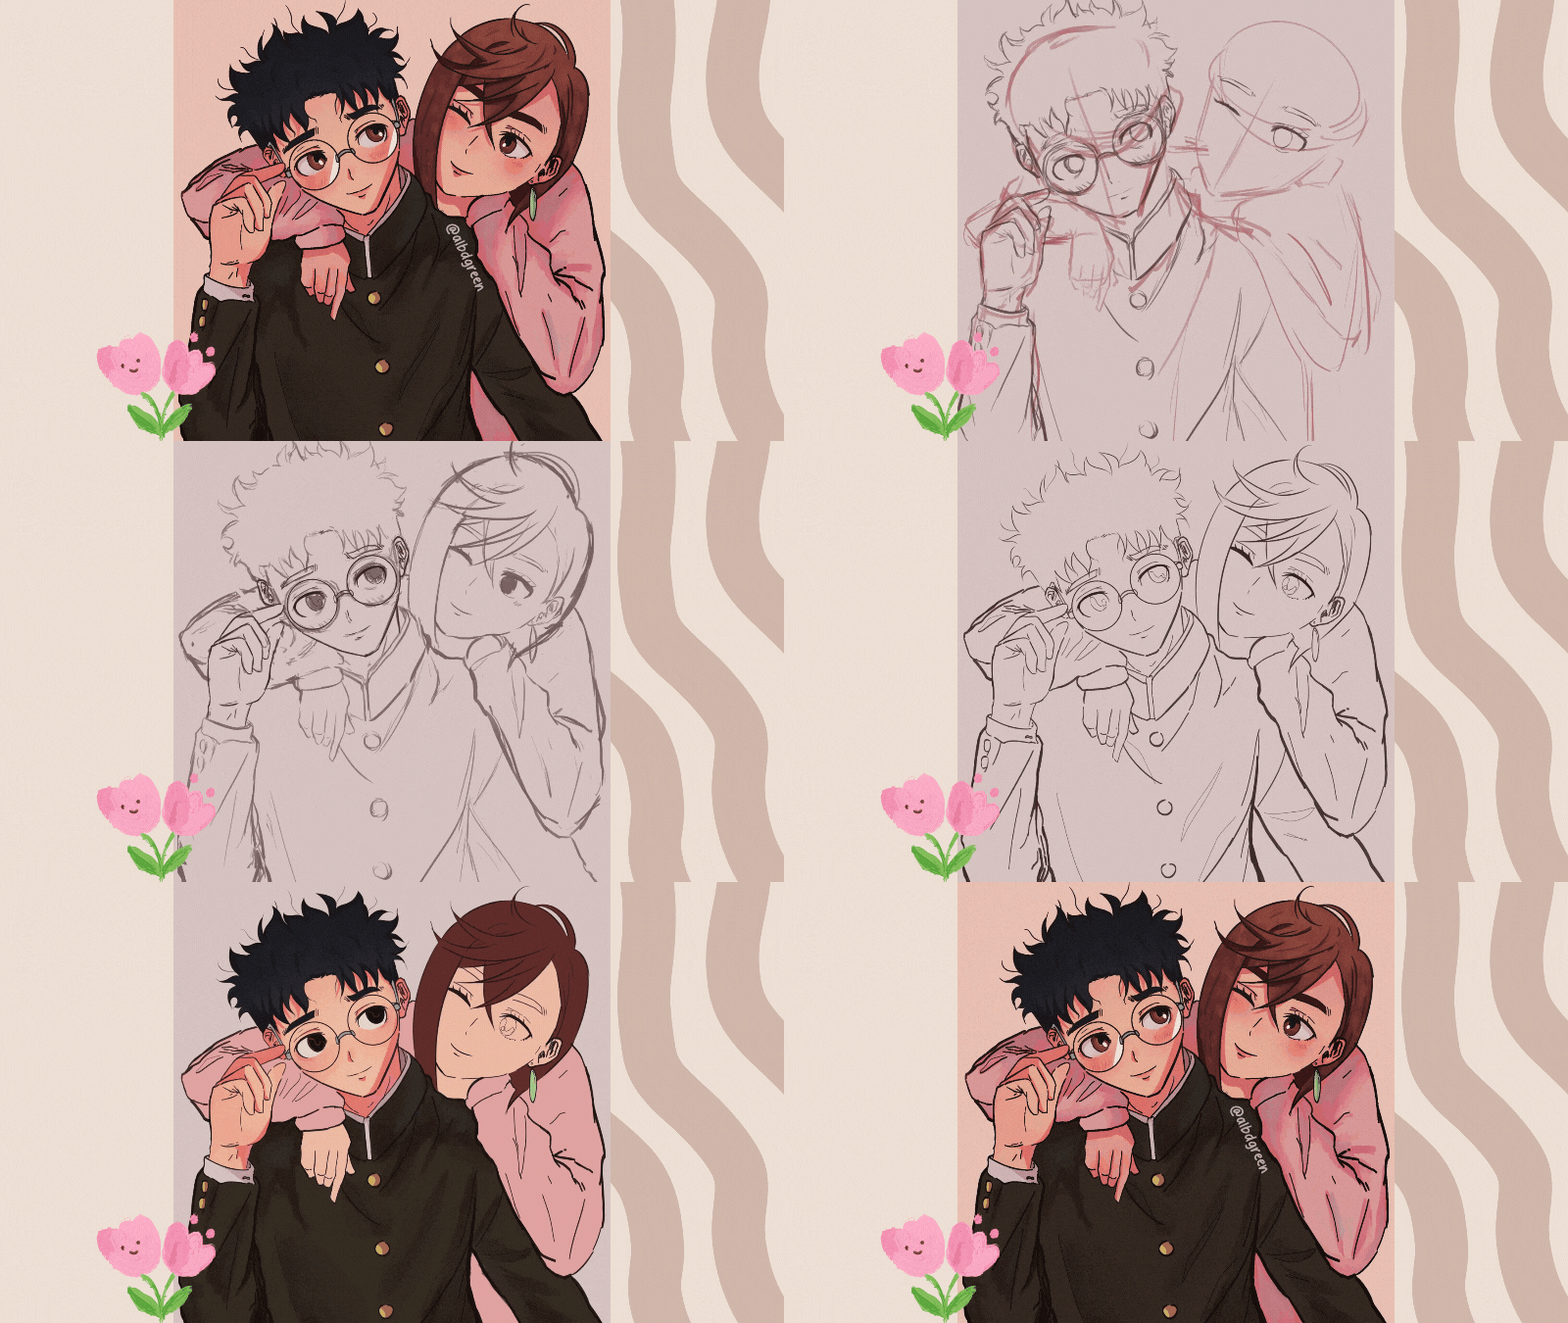

And that's it guys, that would be it, technically I should have done this demo with a bit more details but I don't have the pictures from when I did the drawing, but I wanted to show it anyway. If you want any tutorial on how I do something specific don't hesitate to tell me, also tell me in the comments what you thought and of course, I would like to know if you like this anime as much as I do 💗.
I hope you liked it a lot and see you in next posts ♡.
Y eso es todo chicos, eso sería todo, técnicamente debería haber hecho esta demo con un poco más de detalles pero no tengo las fotos de cuando hice el dibujo, pero quería mostrarlo de todas formas. Si quieren algún tutorial de cómo hago algo en específico no duden en decírmelo, también díganme en los comentarios qué les pareció y por supuesto, me gustaría saber si les gusta este anime tanto como a mí 💗.
Espero que os haya gustado mucho y nos vemos en próximos posts ♡.

Muchas gracias por el tiempo dedicado a leer este post y también por vuestro apoyo!♡ Espero veros en los próximos. Hasta luego 🌸

Los textos y fotos son míos, las traducciones son de Deepl y los diseños están hechos en la plataforma Canva.


Congratulations @albdgreen! You have completed the following achievement on the Hive blockchain And have been rewarded with New badge(s)
Your next target is to reach 400 upvotes.
You can view your badges on your board and compare yourself to others in the Ranking
If you no longer want to receive notifications, reply to this comment with the word
STOPQué hermoso fanart de Momo y Okarun! Me encanta cómo compartes tu proceso creativo, es muy inspirador ver cómo combinas referencias y trabajas los detalles. La forma en que juegas con los colores y las sombras realmente resalta la profundidad de tus dibujos, tienes mucho talento, sigue creando!
Muchìsimas gracias! Lo aprecio mucho ❣
Thank you for sharing this post with the community and for preferring us, it is a pleasure for us to have you here.
We hope to see you soon. Best regards!