Our kitchen is something of a troublemaker, which we bought from the previous residents. When we bought it, one of the four burners on the stove didn’t work and the glass top had two cracked spots ... Then the oven had been burning everything at 240°C 😭
At the end of last year, my partner found a great deal on Amazon that included recycling the old one and installing new one. We decided to replace both at once. On the scheduled day, friendly technicians came to do the installation. Everything seemed to be going smoothly... until it turned out that the hole in the countertop was about 5mm too small in both dimensions, and to make things worse, it wasn’t cut straight. Thanks, previous residents! I wasn’t even surprised, considering the shelf that collapsed, the dishwasher that broke, and water leak ......
Although the stove could technically be put in the space, it wasn’t perfectly flush with the countertop. The technician explained that widening the hole wasn’t included in their services, leaving me with options like “placing something in between” or “filling the gaps with silicone.”
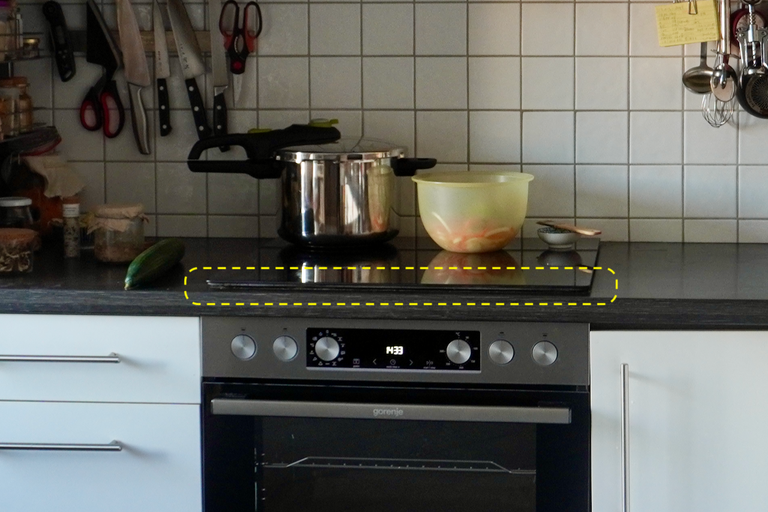
They left, and we ended up spending the New Year’s holidays with a stove slightly floating above the counter. It seemed my family didn't care much about the gaps but I couldn’t stop thinking about the gaps. And the idea of using silicone didn’t sit well with me. I had to find a better solution.
Today, I finally had a few hours to myself with no one else at home. I decided to tackle the issue and see if I could enlarge the hole in the countertop with my limited tools.
First, I tried using an electric sander. While it produced a smooth finish, the fine dust from the particleboard didn’t feel healthy, and progress was painfully slow. It wasn’t going to work.
Next, I remembered a technique I learned last year during a woodworking workshop where I made Puppie (@pupiko). The instructor used chisels and a mallet to carve out material. I didn’t have the same tools, so I improvised with regular chisels.
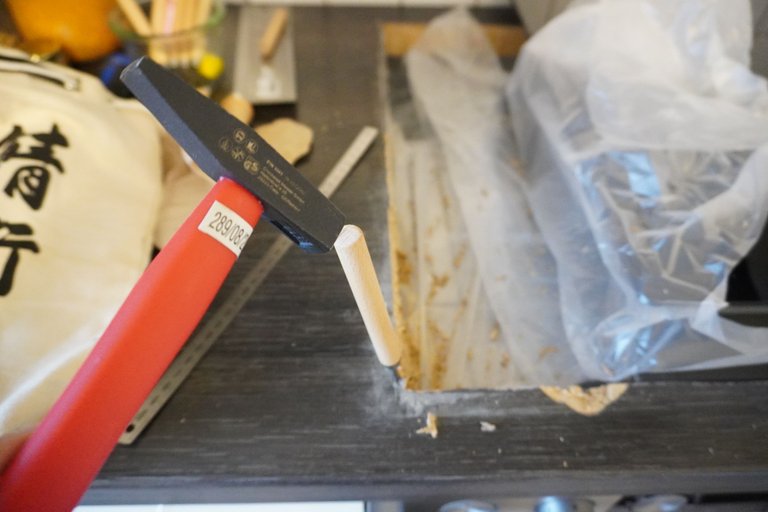
Thankfully, particleboard is easy to work with, and I managed to widen the hole by about 5mm on both sides using this method. I drew guide lines, carved along them with the chisel, and carefully chipped away material bit by bit. After two hours of hammering and chiseling…
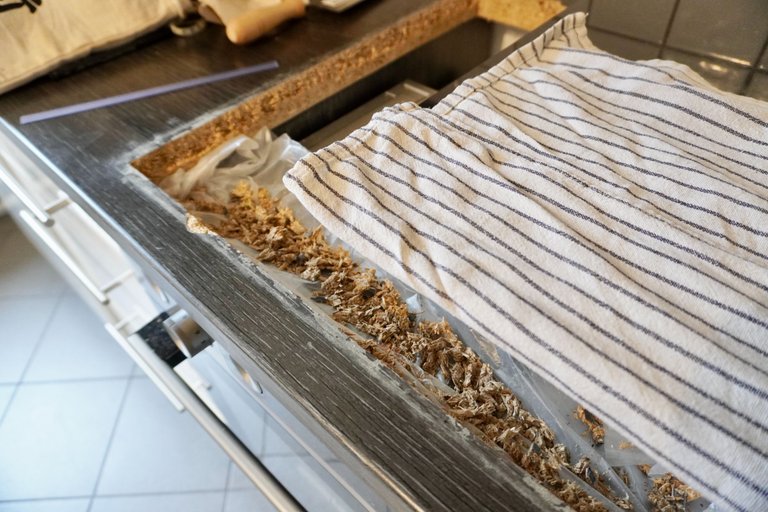
Success! The stove now fits perfectly, with no gaps 🥺
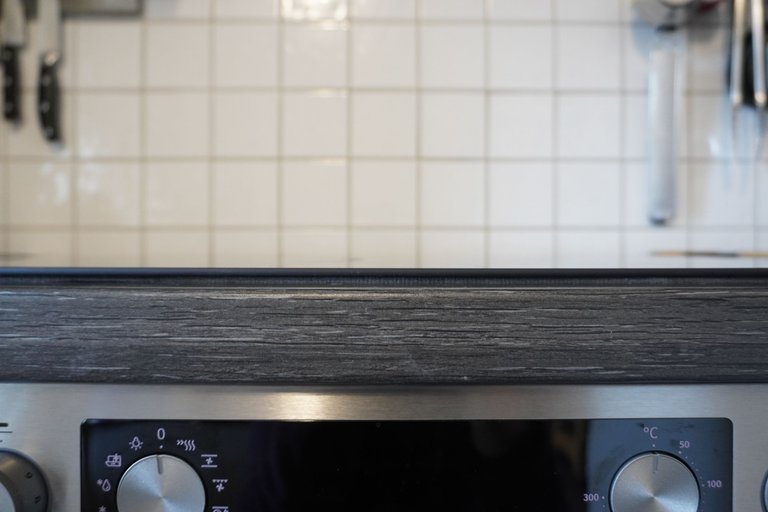
Thanks to the woodworking skills I learned last year, the stove looks great, and Puppie seems pleased too.
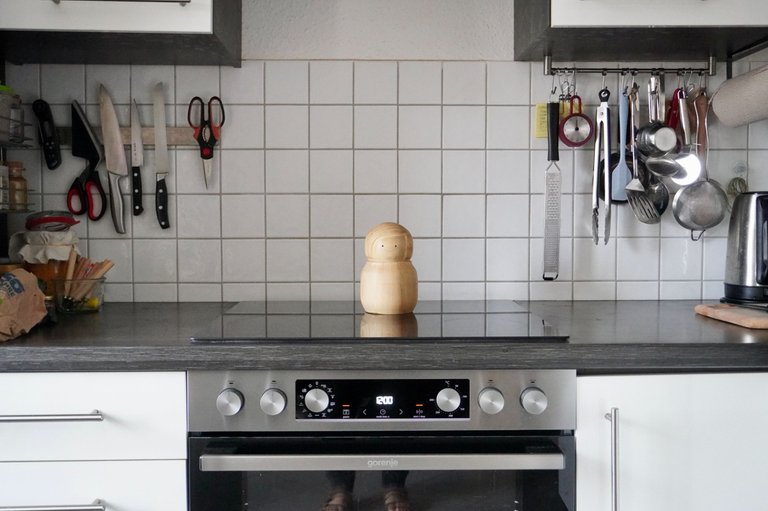
Living in the DIY country Germany, I feel like I’ve leveled up my skills for the day when I build my dream kitchen from scratch. For now, I’ll call this a win. Here’s to another year of fixing, making, and enjoying DIY projects 🛠️
(There are two DIY community on Hive. This time, I’m posting this in the DIYHub community on Hive Blog. Let’s see how it goes!)
我が家のキッチンは前住人から買い取った問題児で、買い取った時点でコンロ4つのうち一つがつかず、コンロのガラストップの二箇所割れている部分があって、オーブンの調子が悪くなりすべてを240度で焼き尽くす勢いでした 😭
去年の年末にAmazonで古いもののリサイクルと取り付け込みの良いオファーをみつけて、コンロとオーブンを一気に入れ替えることにしました。指定日に感じのよい業者の人が来てくれて、入れ替え完了・・・と思いきや、コンロをはめるために調理台に開けられた穴が縦にも横にも5mmほど微妙に小さく、かつ穴がまっすぐに開いていないというトラブルが。前住人め。棚が落ちて、食器洗い機が壊れて、水が漏れて・・・もうこんなことでは驚きません。
一応コンロは収まったものの、穴の拡張はサービスではないとのことで、業者の人は「間に何かを挟む」「隙間をシリコンで埋める」など選択肢を挙げて帰って行きました。若干コンロが浮いた状態で年末年始を過ごし、私はこの隙間が気になって気になって仕方がなく、無理にシリコンで埋めたりするのは嫌だなあ・・・となんとかコンロを納める方法を考えていました。

今日、久しぶりに私以外誰も家にいない時間が数時間あったので、意を決してコンロを収める穴を大きくできないか試してみることにしました。まずは電動やすりで削ってみました。削った表面はきれいに仕上がるものの、合板の明らかに体に良くなさそうな細かい粉が台所に散るのが気になって、たった5mmの厚みでも削るのでは作業が遅々として進まず断念。
次に昨年木工旋盤の使い方を習いに行った時に、木工の先生がPuppie頭を掘っていった方法を思い出して試してみることにしました。彫刻刀のようなツールをハンマーで叩いて、バキッと追って掘り進める手法です。うちには先生が持っていたような工具はないので彫刻刀を使いました。

幸い合板で作業がしやすく、この方法で縦横5mmほど穴を拡張することにしました。ガイドになる線を引いて、その線に沿って彫刻刀の刃を入れるラインを掘ります。このラインに沿って数ミリずつ彫刻刀を動かしては叩いて穴を拡張して・・・というのを繰り返すこと2時間。

無事コンロにピッタリのサイズの空いて、コンロがおさまりました🥺

木工の先生のテクニックが役立って、コンロが整ったことにPuppieもご満悦の様子です。

DIY天国のドイツに住んでいることを実感します。自分のドリームキッチンを自分で作る日のために腕を磨いたということにしましょう。今年もいろいろ直して、作ってDIYを楽しむ一年にしたいです🛠️
(Hive Blogには、Hive DIYとDIYHubふたつのDIYコミュニティがあって、今回はDIYHubに投稿してみます。)