 |  |  |
|---|


Hola!
¿Como han estado? espero que muy bien..
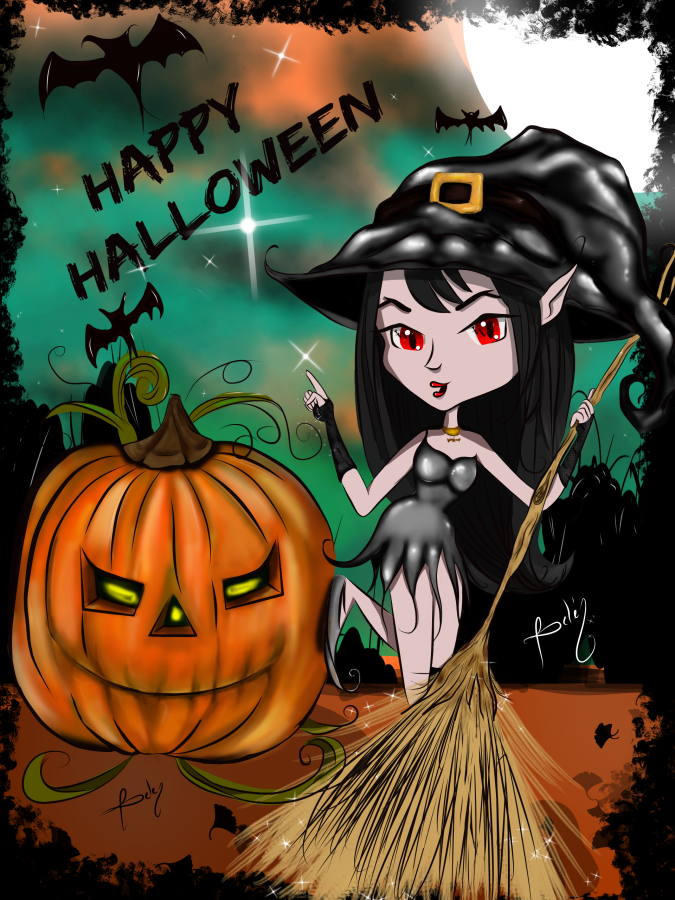
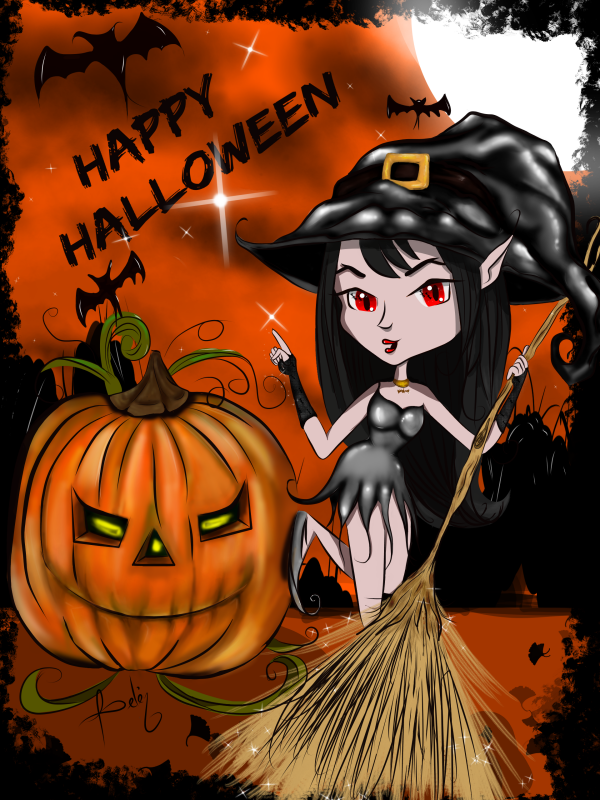
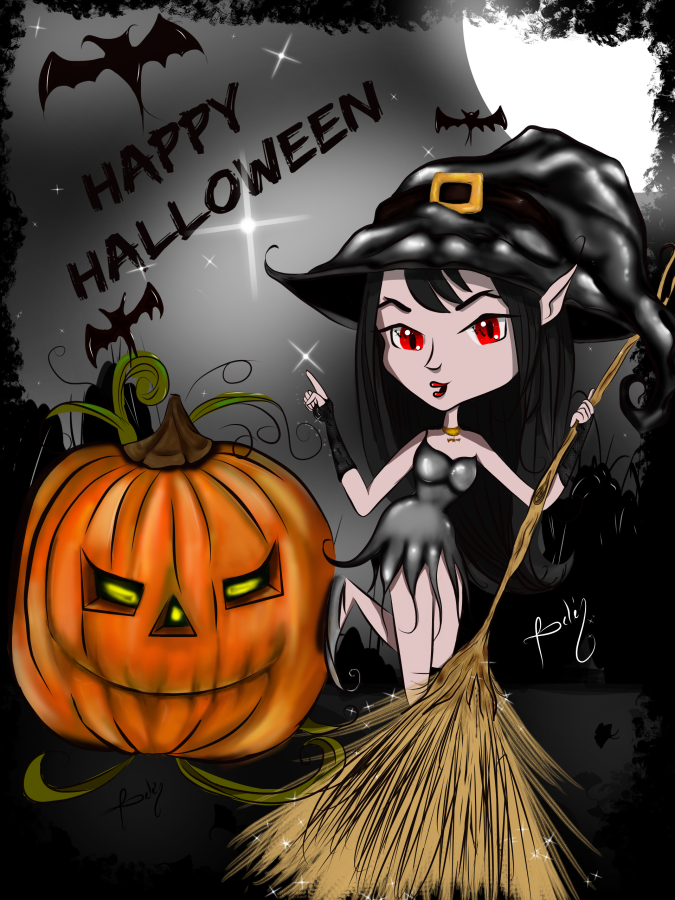
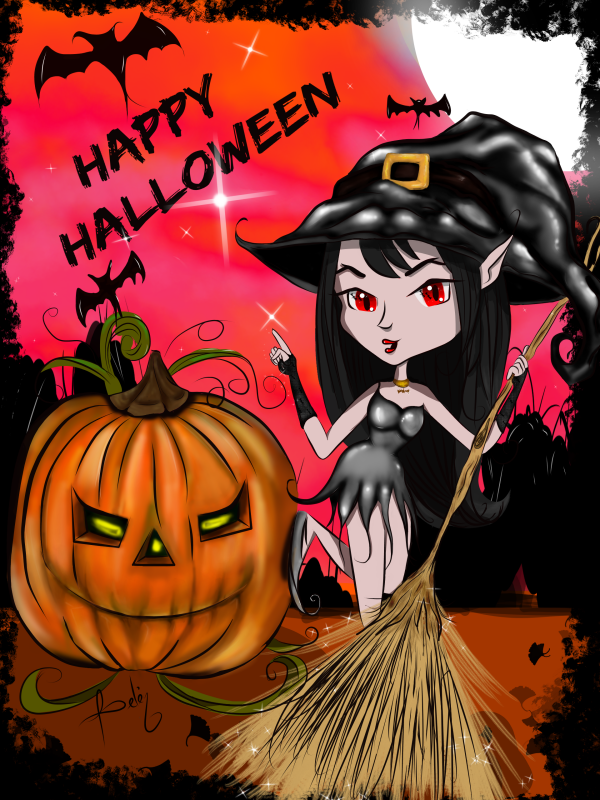
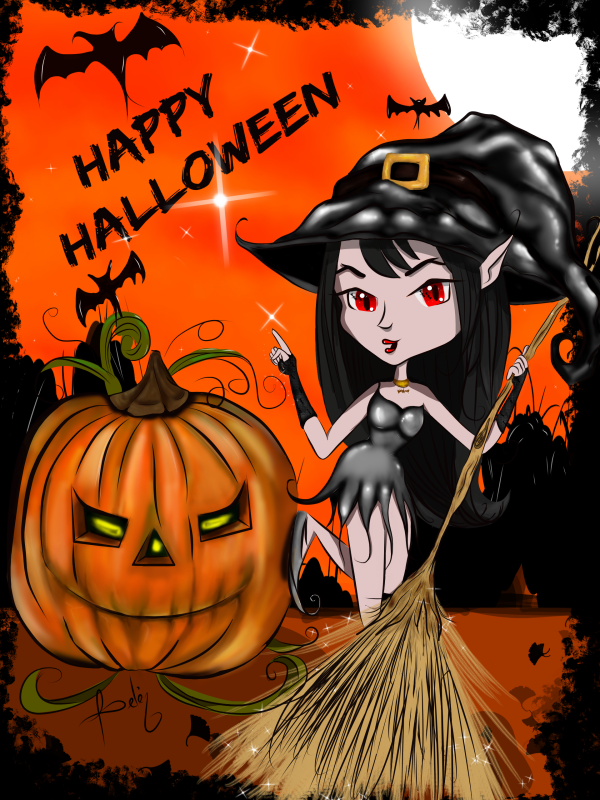
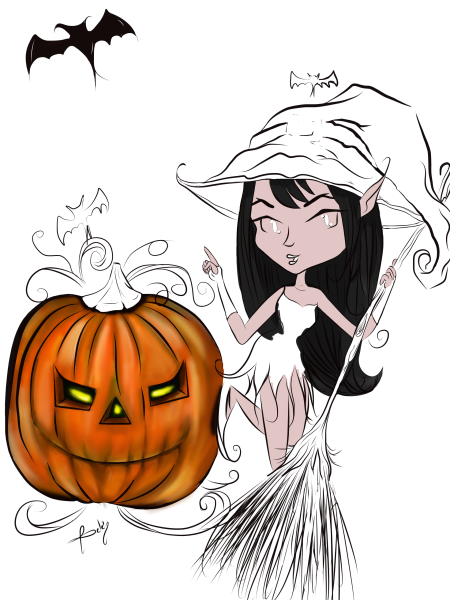
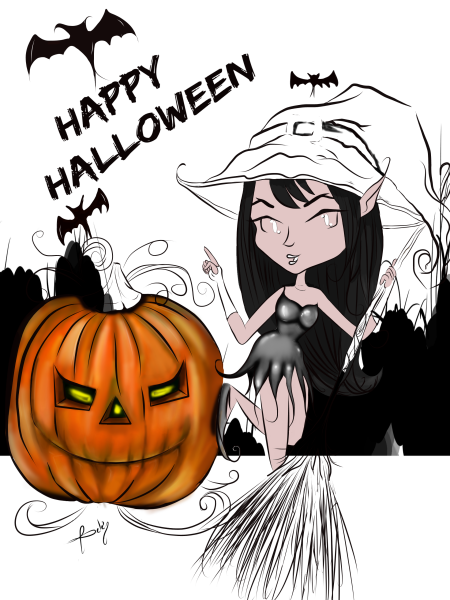
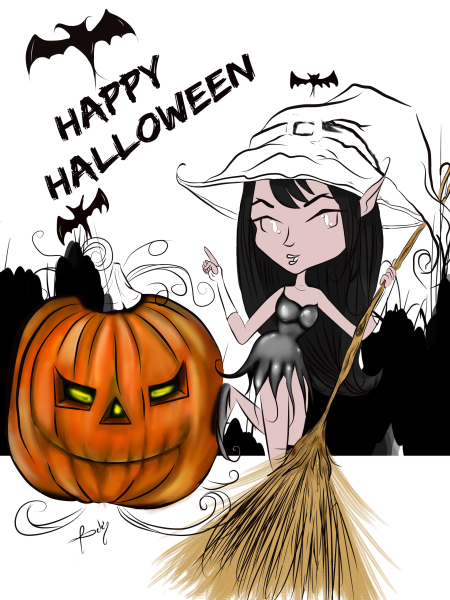
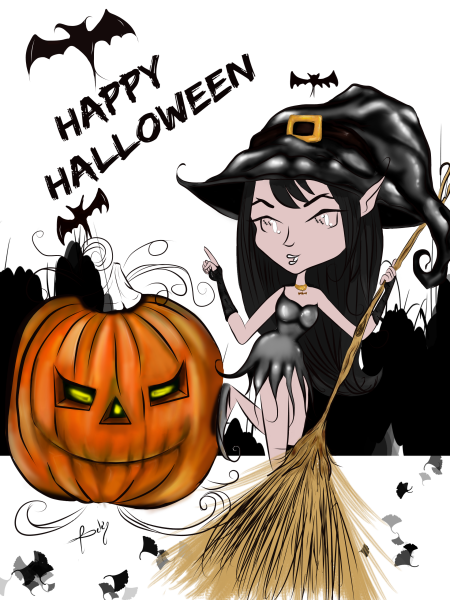
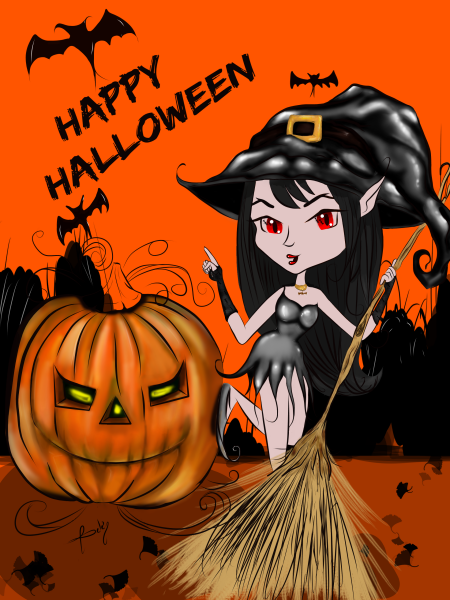
Por aquí he venido con una nueva ilustración que realicé hace unos días, alusiva a las festividades de halloween. Es un dibujo de una brujita y su calabaza,del cual saqué cinco diseños muy bonitos con fondos en diferentes colores.

Hello!
How have you been? I hope very well.
Here I have come with a new illustration that I made a few days ago alluding to the halloween festivities. It is a drawing of a little witch and her pumpkin, from which I took five very nice designs with backgrounds in different colors.

| | |
|---|

 |  |
|---|
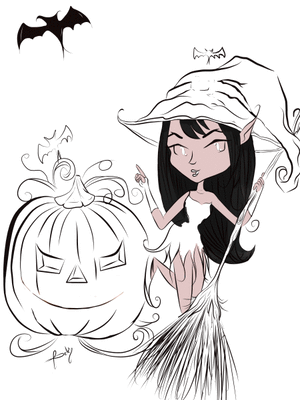
Inicié con el boceto como habitualmente hago.
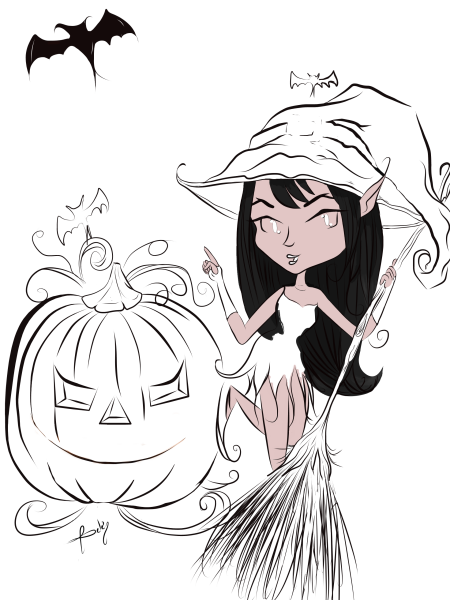
Paso siguiente,agregué los colores base con el pincel lápiz y la varita mágica, con la varita seleccioné el área que se iba a pintar, como les he comentado antes, esta herramienta les ayuda a ahorrar tiempo, ya que se pinta únicamente sobre la superficie escogida sin sobresalir del margen, evitando manchar otras áreas del dibujo. En el próximo trabajo les mostraré, si no se me pasa nuevamente hacer el capture de imagen😅
I started with the sketch as I usually do.
Next step, I added the base colors with the pencil brush and the magic wand, with the wand I selected the area to be painted, as I said before, this tool helps you to save time, since it is painted only on the chosen surface without sticking out from the margin, avoiding to stain other areas of the drawing. In the next work I will show you, if I don't miss again the capture from imagen😅
 |  |
|---|
La idea inicial era hacer la ilustración completamente tipo cartoon, pero en el proceso se me ocurrió mezclar con un toque de realismo.
Usé el aerógrafo para este paso.
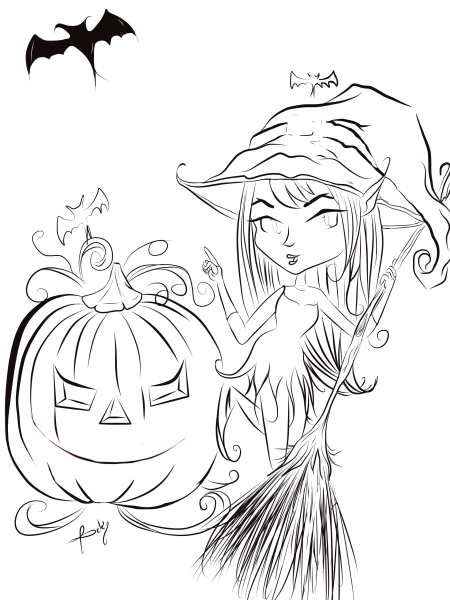
El fondo simplemente dibujé arbustos con el pincel pluma G y con el pincel delineador, tracé la hierba. Otros pinceles utilizados:gingko,pastel mullido y brillo 2.
The initial idea was to do the illustration completely cartoon-style, but in the process I came up with the idea of mixing it with a touch of realism.
I used the airbrush for this step.
I simply drew bushes in the background with the G feather brush and traced the grass with the eyeliner brush. Other brushes used:gingko,soft pastel and gloss 2.
 |  |
|---|
Para los ojos realicé un degradado de rojo oscuro a claro, una técnica muy sencilla que pueden hacer con el aerógrafo, si se les dificulta, después de aplicar los colores elegidos pueden apoyarse en el pincel difuminador a una presión entre dos y tres, sí, es laborioso el proceso, pero el resultado es bastante bueno. los murciélagos que se aprecian en los ojos, fue un pincel creado por mí.
For the eyes I made a gradient from dark red to light red, a very simple technique that they can do with the airbrush, if it is difficult for them, after applying the chosen colors they can lean on the diffuser brush at a pressure between two and three, yes, it is a laborious process, but the result is quite good. The bats that can be seen in the eyes, was a brush created by me.
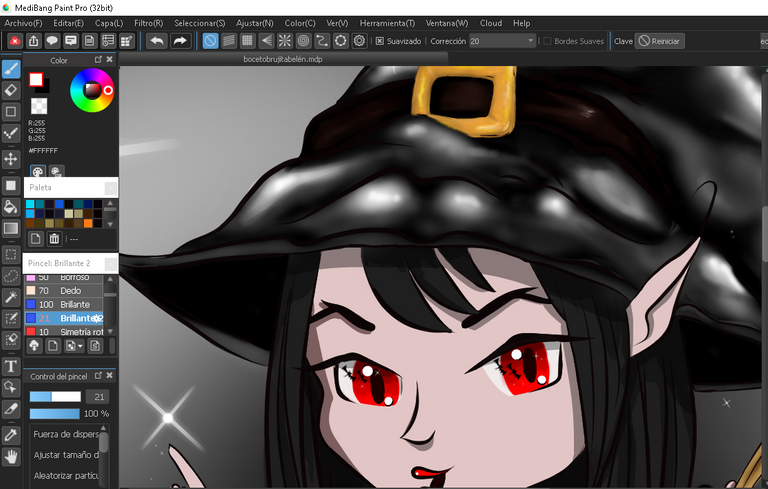
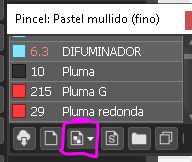
Crear pinceles en Medibang es muy sencillo, solo hagan el diseño de su preferencia y en el panel de pinceles, tienen entre otras, la opción: añadir pincel (mapa de bits). Con la herramienta lazo o de selección, elijan su diseño, presionen el icono que les muestro en la imagen,seguido de la opción: desde lienzo,eso es todo, se desplegará el panel del pincel ahi podran cambiar a gusto, la presión del pincel, el ancho, el espacio, etc.
Create brushes in Medibang is very simple, just make the design of your choice and in the panel of brushes, have among others, the option: add brush (bitmap). With the link or selection tool, choose your design, press the icon I show you in the image, followed by the option: from canvas, that's it, the brush panel will be displayed and you can change the pressure of the brush, the width, the space, etc.
 |  |
|---|
Presentación de las imágenes en GIF/Presentation of the images in GIF