
This content was written in Portuguese and was translated using the Google Translate tool.
You can read the original below.
My Collection / Do It Yourself
Welcome to all friends who do crafts! Here in Brazil we have a word to represent the act of performing technical tricks to solve mechanical, hydraulic, electrical problems, or anything that makes something work or even helps in any situation: "gambiarra".
This is my collection of DIY posts, spread across Hive:
- 03 - Android Multimedia Center
- 02 - looking for link
- 01 - looking for link
Sideboard
Today's goal is to build a sideboard, which is a piece of furniture designed to hold keys and small objects, and which is usually located near the entrance/exit of a residence or office. It can be a large platform or something more discreet.
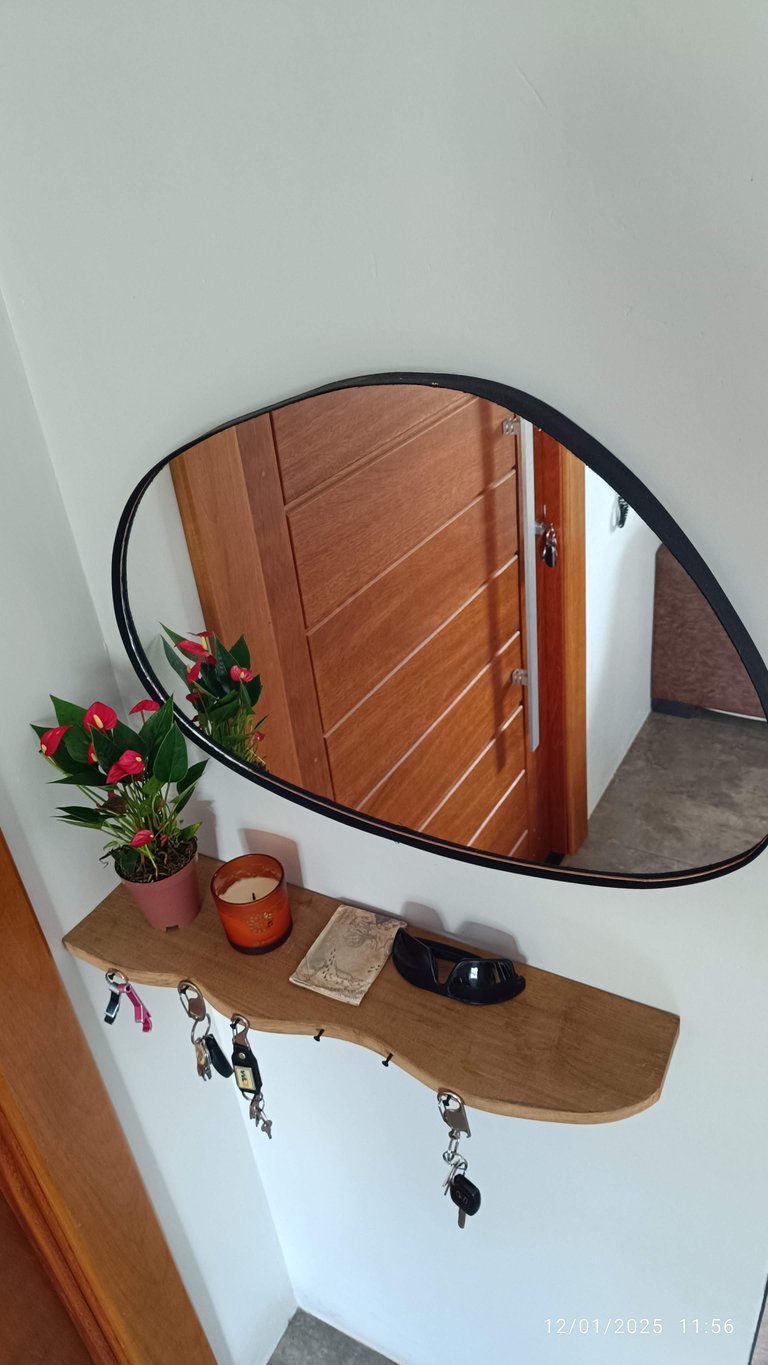
I received a request from the manager of the residence (my wife) determining that I should make a sideboard to keep my paper money wallet (it still exists!), keys and sunglasses. The location was determined by her: behind the front door. He even bought a mirror to match the sideboard. I didn't quite understand how these objects would match, but oh well.
And for this I prepared a piece of wood that I had in my stock (yes, I save scraps of wood from when I built my house).
Considering that the deadline for delivery of the work had already passed, I was already being charged to complete the activity. First, fix the supports to the wooden board, always measuring so that there would be some kind of symmetry. My wife doesn't like misaligned things.
My intention was actually to put the sideboard on the wall and use the pencil to mark where I should make the holes. I managed to do that. I put several things on top of it: keys, ornaments, glasses, and the screws that are those silver lines in the blurred image. You'll see what I'm going to do with them!
 *One thing that didn't work out so well was trying to hold the sideboard and take a photo from above.*
I thought it would be a good idea to be able to hang the keys instead of letting them hang loose on top of the sideboard. So I took some silver screws that I had in my toolbox and selected 5 or 6 of them to enhance my project. Since my house has black openings (doors and windows), I needed to adapt them to match the decor.
I let them dry in the sun and after a few minutes I was able to work with them again. But in the meantime another idea came to mind: sometimes we have guests who have bags so I thought of using the space underneath the sideboard to leave bag hooks for my female friends :) To do this I bent two screws and used two hooks that were available in my toolbox. I always save things so that maybe one day I can reuse them!
I thought I was doing well and finished by fixing everything and filling it with the things I thought should be there.
Apparently theThere was still something missing because when I called the inspector, I was immediately warned that there would be changes. Well, that was it for me, the rest was up to the boss.
All photos are mine, the objects are mine, and the house too!
Capture data
- Date: 12/01/2025
- Location: Paraná, Brazil
- Xaiomi Note 12 PRO, 50 MP, Auto
Thanks to everyone and see you next time!

 crazyphantombr supports the FreeCompliments community! Access via InLeo!
 crazyphantombr supports the Brazilian community! Access via InLeo!
Join our curation trail Access the tutorial!

This content was written in Portuguese and was translated using the Google Translate tool.
Você pode ler o original logo abaixo.
Minha Coleção / Do It Yourself /
Bem vindos todos os amigos que fazem artes manuais! Aqui no Brasil temos uma palavra para representar o ato de realizar artimanhas técnicas para solucionar problemas mecânicos, hidráulicos, elétricos, ou qualquer coisa que faça algo funcionar ou mesmo que ajude em qualquer situação: "gambiarra".
Esta é a minha coleção de postagens DIY, espalhadas pela Hive:
- 03 - Android Multimidia Center
- 02 - procurando link
- 01 - procurando link
Aparador
A meta de hoje é construir um aparador, que é um móvel destinado a receber chaves e objetos pequenos, e que geralmente fica próximo a entrada / saída de uma residência ou escritório. Pode ser um tablado grande ou algo mais discreto.
Eu recebi a demanda da gestora da residência (minha esposa) determinando que eu deveria confeccionar um aparador para deixar minha carteira de dinheiro em papel (ainda existe!), chaves e óculos de sol. O local foi determinado por ela: atrás da porta de entrada. Até mesmo comprou um espelho para combinar com o aparador. Eu não entendi direito como esses objetos combinariam, mas tudo bem.
E para isso preparei um pedaço de madeira que tinha em meu estoque (sim, eu guardo restos de madeira desde a construção da minha casa).
Considerando que o prazo já havia acabado para entrega do trabalho, eu já estava sendo cobrado para que concluísse a atividade. Realize primeiro a fixação dos suportes na tábua de madeira, sempre medindo para que houvesse algum tipo de simetria. Minha esposa não gosta de coisas desalinhadas.
Minha intenção na verdade era colocar o aparador na parede e usar o lápis para marcar onde deveria realizar os furos. Isso eu consegui fazer. Eu coloquei diversas coisas em cima dele: chaves, enfeite, óculos, e os parafusos que são essas linhas pratas da imagem borrada. VOcê já vai ver o que vou fazer com eles!
 *Uma coisa que não deu muito certo foi tentar segurar o aparador e tirar uma foto superior.*
Pensei que seria uma boa ideia poder pendurar as chaves ou invés de deixar elas soltar em cima do aparador. Então peguei parafusos prata que tinha em minha caixa de ferramentas e selecionei 5 ou 6 deles para incrementar meu projeto. Como a minha casa tem aberturas (portas e janelas) em preto, precisei adequar para que combinassem com a decoração.
Deixei secar ao sol e depois de alguns minutos eu já pude trabalhar com eles novamente. Mas enquanto isso outra ideia me veio à cabeça: algumas vezes recebemos visitas que tem bolsas então pensei em aproveitar o espaço inferior do aparador para deixar ganchos porta-bolsas para as amigas mulheres :) Para isso eu entortei dois parafusos e usei dois ganhos que estavam disponíveis na minha caixa de ferramentas. Sempre guardo coisas para quem sabe um dia reaproveitar!
Achei que estava indo bem e finalizei fixando tudo e preenchendo com as coisas que eu achei de deveriam estar ali.
Aparentemente ainda faltava alguma coisa pois quando chamei a inspetora, logo fui advertido que haveriam mudanças. Bom, da minha parte foi isso, o restante foi por conta da patroa.
Todas as fotos são minha, os objetos são meus, e a casa também!
Dados da captura
- Data: 12/01/2025
- Local: Paraná, Brasil
- Xaiomi Note 12 PRO, 50 MP, Auto
Obrigado a todos e até a próxima!

 crazyphantombr apoia a comunidade FreeCompliments! Acesse pelo InLeo!
 crazyphantombr apoia a comunidade brasileira! Acesse pelo InLeo!
Ingresse em nossa trilha de curadoria Acesse o tutorial!
Posted Using INLEO
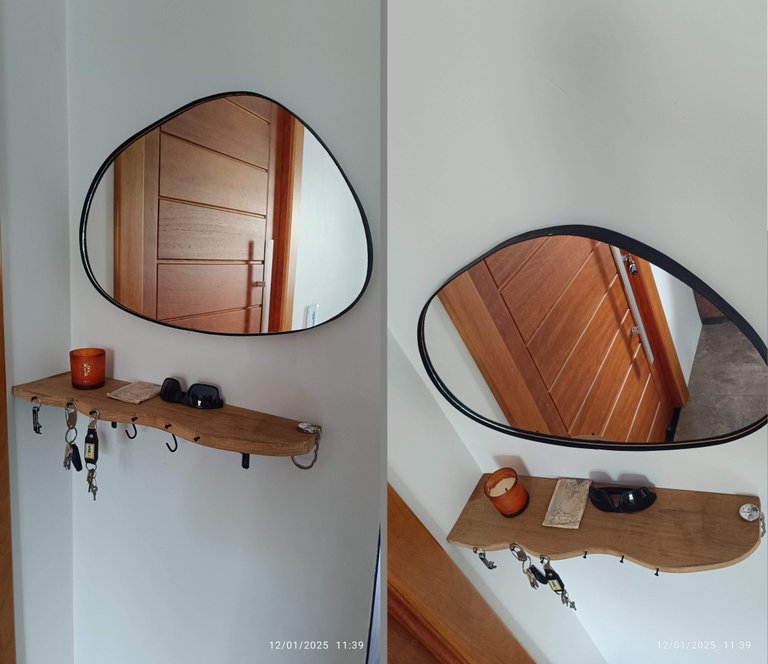 *Meu trabalho finalizado*
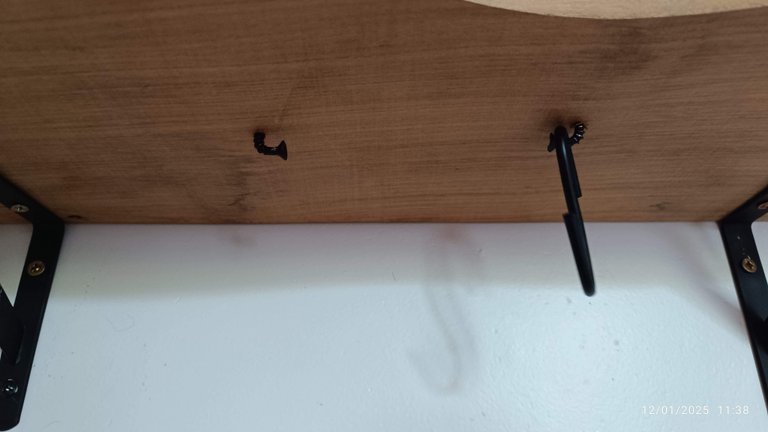 *Na parte inferior, um suporte para bolsas!*
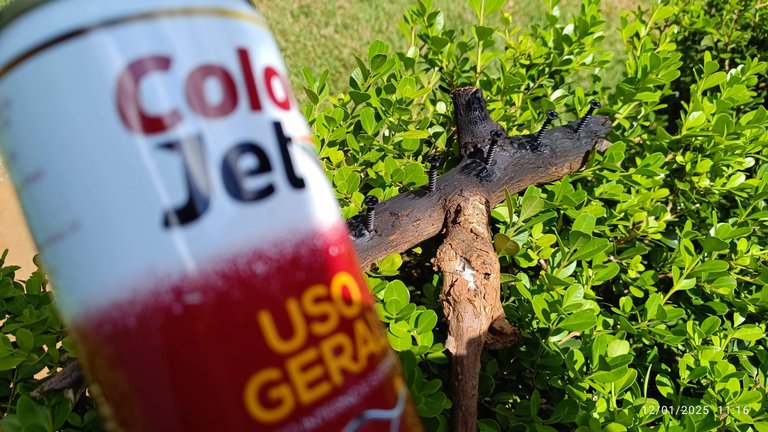 *Tinta spray foi utilizada para converter os parafusos prata em parafusos pretos!*
 *Fixei o suporte na madeira, visando utilizar o objeto como gabarito de furação da parede*
 *Madeira, parafusos, lápis especial para pedreiros, e suportes do tipo 'mão francesa', que é como chamamos aqui no Brasil*
 *Local da instalação: atrás da porta principal, abaixo do espelho*

 *My finished work*
 *At the bottom, a bag holder!*
 *Spray paint was used to convert the silver screws into black screws!*
 *I fixed the support to the wood, aiming to use the object as a template for drilling holes in the wall*
 *Wood, screws, special pencil for bricklayers, and 'French cleat' type supports, which is what we call them here in Brazil*
 *Installation location: behind the main door, below the mirror*
Congratulations @crazyphantombr! You have completed the following achievement on the Hive blockchain And have been rewarded with New badge(s)
Your next target is to reach 230000 upvotes.
You can view your badges on your board and compare yourself to others in the Ranking
If you no longer want to receive notifications, reply to this comment with the word
STOPAwwwwww this was so heartwarming to read. You did such an amazing job and I know for a fact that your wife was impressed, well done.
Thank you! I really enjoy doing crafts with scrap wood and also with electronics!
!LUV
(2/10) sent you LUV. | tools | discord | community | HiveWiki | <>< daily@ibbtammy, @crazyphantombr
This is so creative and useful, you nailed it friend. The final look is amazing, good job.