La elaboración del vino de frutas es en realidad un proceso bastante sencillo y totalmente realizable en casa con implementos normales que se encuentran en cualquier cocina y la idea de este post es que tu puedas hacerlo con artículos e ingredientes que muy probablemente tendrás en tu casa.
The elaboration of country wine is actually a quite simple process and totally doable at home with normal implements found in any kitchen and the idea of this post is that you can make it with items and ingredients that you most likely have at home.
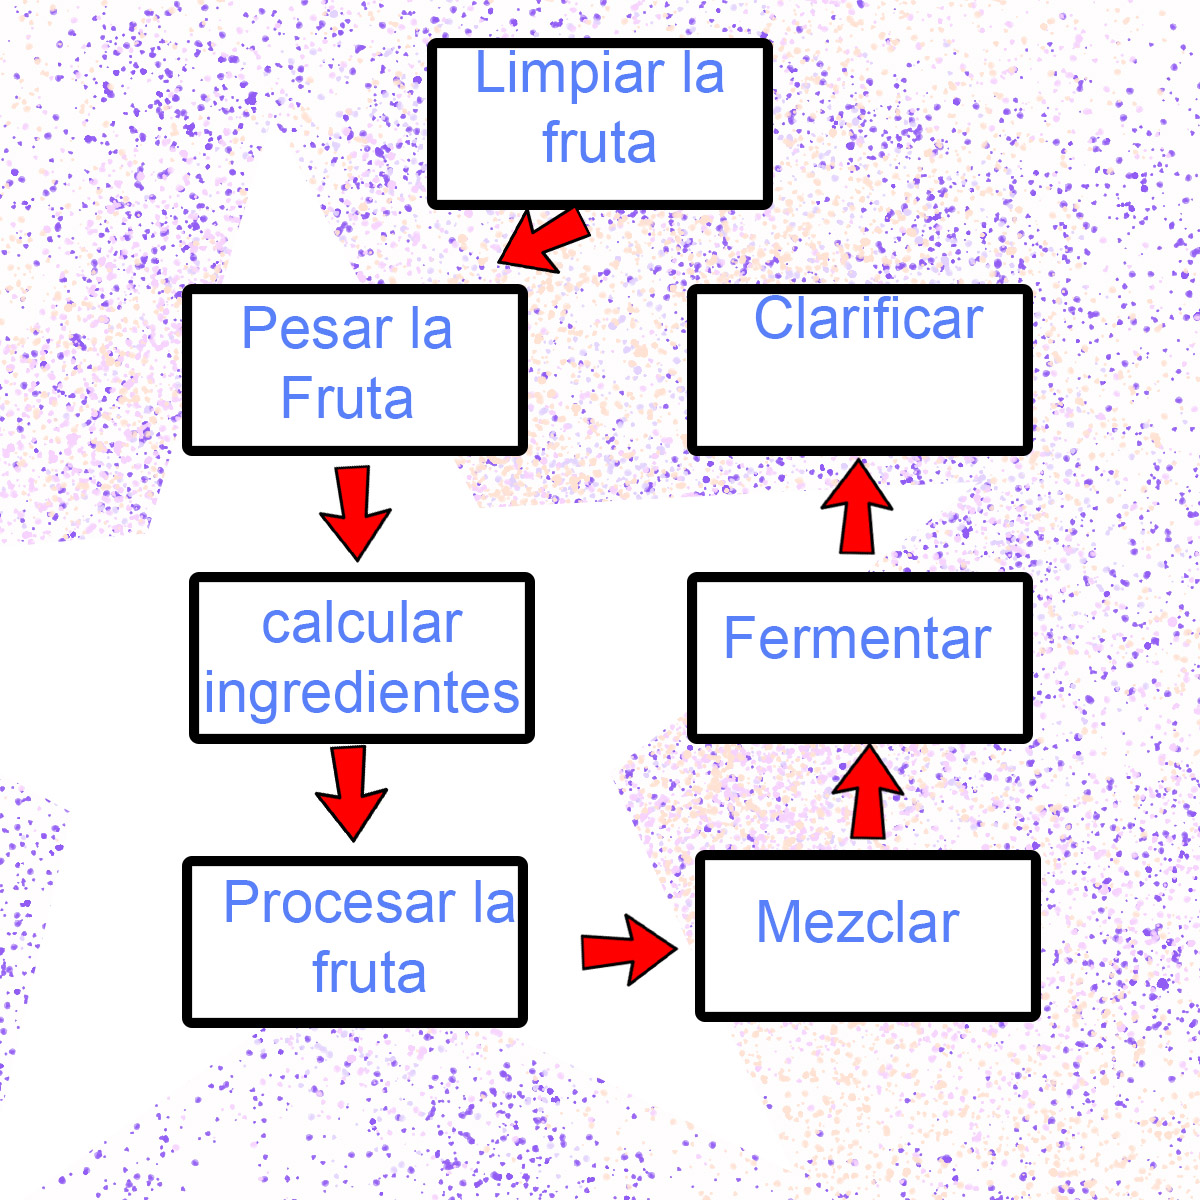
el proceso es básicamente este:

The process is basically this:
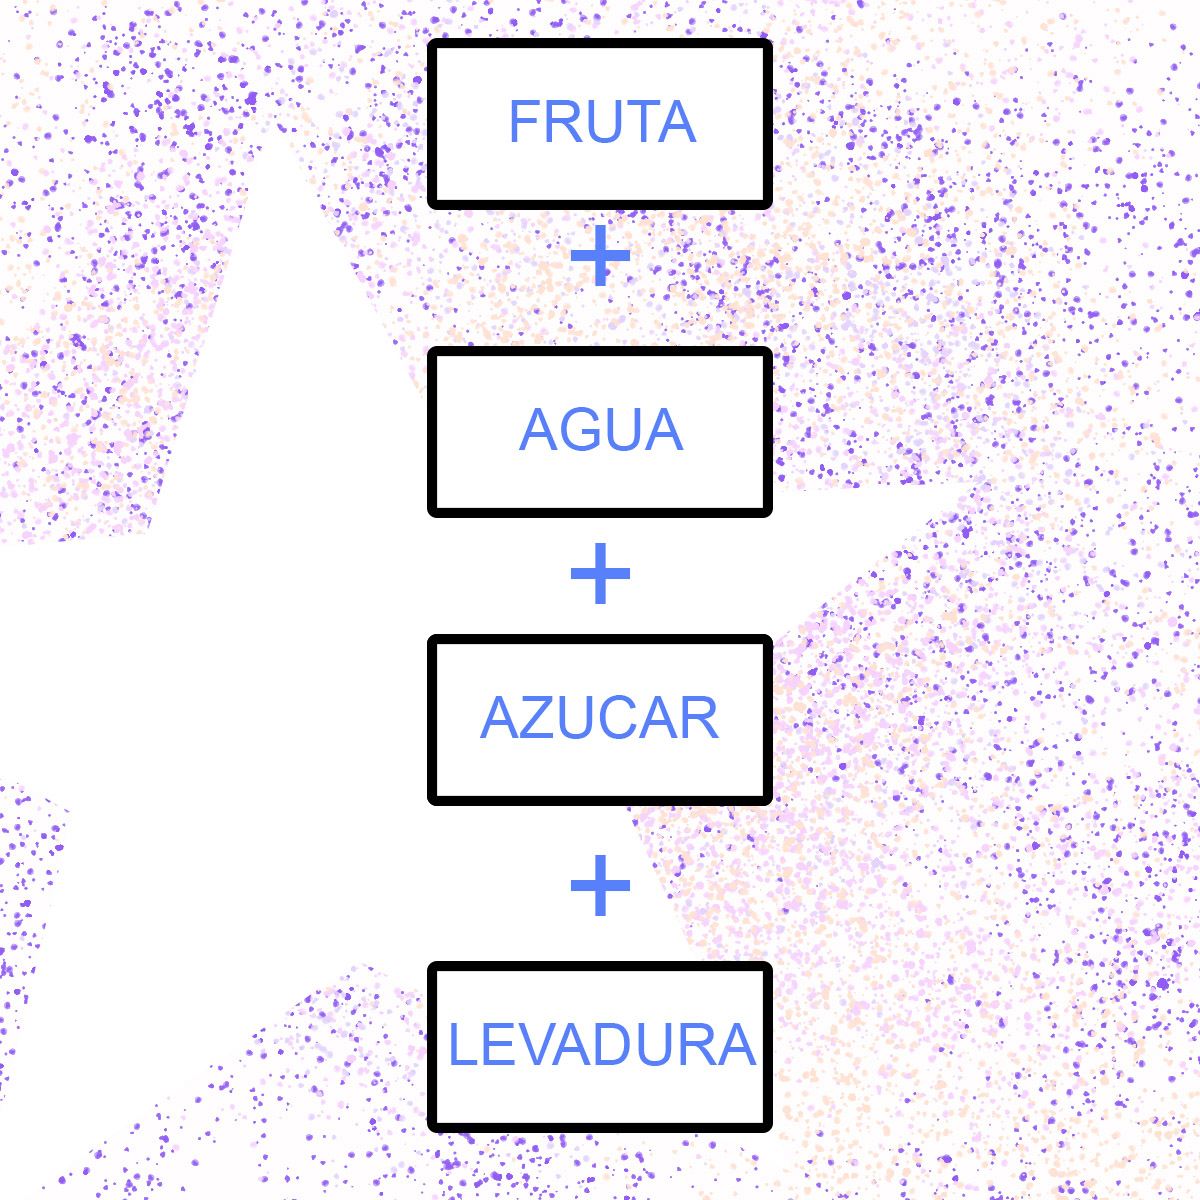
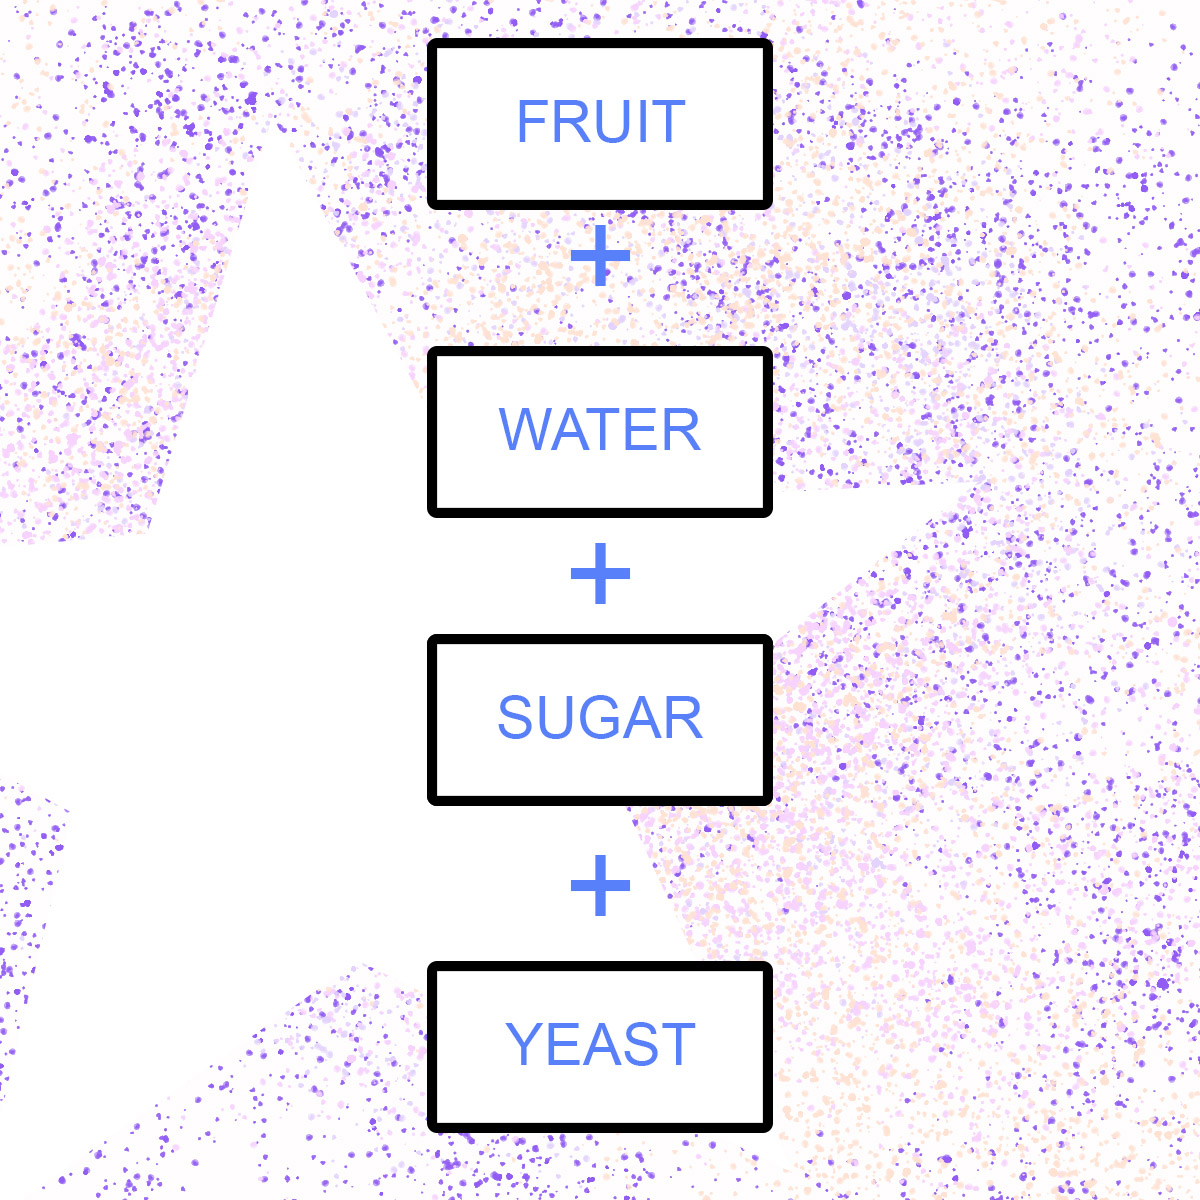
Un buen comienzo para elaborar vino de frutas en casa es la fórmula básica que consta de tres partes

A good start to make fruit wine at home is the basic formula that consists of three parts.
Ahora voy a explicar un poco sobre cada uno de los elementos de esta fórmula básica y como calcularlos, para ello hay que tener en cuenta los siguientes puntos:
• Por cada gramo de fruta se le agregaran 4 gramos de agua; Es decir, si tenemos 500 gramos de fresa (que utilizaremos en este ejemplo) se le debe agregar 2000 gramos de agua (que vendrían siendo 2 litros)
• El azúcar se calcula en base al contenido de agua y a la graduación alcohólica que deseamos obtener
• Por cada grado de alcohol que se desee obtener se debe agregar 17 gramos de azúcar por cada grado de alcohol que deseemos obtener por litro agua, es decir, si deseamos obtener un vino de 14º de alcohol (que es lo máximo que produce la levadura) se debe calcular de la siguiente manera: 17 gramos multiplicado por 14 grados del alcohol : 238 gramos de azúcar por litro, es decir, que para nuestro ejemplo deberíamos utilizar 476 gramos de azúcar para obtener los 14 grados.
• Al momento de preparar la mezcla se le puede agregar mas azúcar, pero esto no elevara el contenido alcohólico, sino que servirá para darle el dulzor deseado al vino, por ejemplo, yo para la preparación de este ejemplo usaría 200 gramos adicionales de azúcar, lo cual me daría como resultado 676 gramos de azúcar para los dos litros de agua que se utilizarían.
• Con respecto a la levadura, por cada litro de agua agregaremos 1.5 gramos de levadura seca
Now I am going to explain a little about each of the elements of this basic formula and how to calculate them, for this you have to take into account the following points:
• For each gram of fruit 4 grams of water will be added; that is to say, if we have 500 grams of strawberry (which we will use in this example) we must add 2000 grams of water (which would be 2 liters).
• The sugar is calculated based on the water content and the alcohol content we wish to obtain.
• For each degree of alcohol we wish to obtain, 17 grams of sugar should be added for each degree of alcohol we wish to obtain per liter of water, that is, if we wish to obtain a wine of 14º of alcohol (which is the maximum that the yeast produces) it should be calculated in the following way: 17 grams multiplied by 14 degrees of alcohol : 238 grams of sugar per liter, i.e., for our example we should use 476 grams of sugar to obtain 14 degrees.
• At the moment of preparing the mixture, more sugar can be added, but this will not increase the alcoholic content, but will serve to give the desired sweetness to the wine, for example, for the preparation of this example I would use 200 additional grams of sugar, which would give me as a result 676 grams of sugar for the two liters of water that would be used.
• the yeast, for each liter of water we will add 1.5 grams of dry yeast
Fermentación:
Para la fermentación se utilizan envases de vidrio o plástico de acuerdo a la cantidad que se valla a realizar, tomando en cuenta que la capacidad del envase debe ser por lo inimo un 25 a 30 % mayor a la cantidad de vino que deseamos elaborar, aunque si la capacidad fuese aun mayor, no habría ningún problema, el detalle realmente importante esta en que la tapa del envase debe sellar herméticamente.
El proceso de fermentación varia en duración dependiendo del clima, en climas más cálidos podría ser mas corto y en frios mas largo, pero por lo general son unos 8 a 12 días y notaremos fácilmente cuando haya culminado porque sencillamente dejara de burbujear la trampa de aire.
Fermentation:
Glass or plastic containers are used for fermentation according to the amount of wine to be fermented, considering that the capacity of the container should be at least 25 to 30% greater than the amount of wine we want to make, although if the capacity were even greater, there would be no problem.The fermentation process varies in duration depending on the climate, in warmer climates it could be shorter and in colder climates longer, but in general it is about 8 to 12 days and we will easily notice when it has finished because the air trap will simply stop bubbling.
Trampa de aire:
Para que el proceso de la fermentación se lleva a cabo correctamente, el envase debe tener una trampa de aire, que permita al envase expulsar el dióxido de carbono que producirá la levadura.
Comercialmente se consiguen unas bastante económicas, pero como el objetivo de este post es hacerlo totalmente casero, pasare a explicar como fabricar una perfectamente funcional en casa:
Para ello se requiere una manguera que sea unos 15 cms mas larga que el alto total del envase a utilizar, la tapa del envase y silicona caliente. Con un cuchillo se perfora la tapa del envase de manera que quepa ajustada la manguera, la cual se introducirá a través del hueco unos 2 centímetros, luego se sellara los bordes externo e interno de la unión entre manguera y tapa con silicona caliente y listo, la trampa de aire esta lista
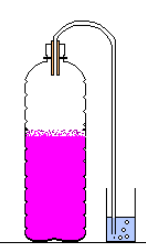
La manera en que funciona esta trampa de aire, es sellando el envase con su tapa y sumergiendo la punta libre de la manguera en un vaso con agua (ver diagrama adjunto)

Air trap:
For the fermentation process to take place correctly, the container must have an air trap, which allows the container to expel the carbon dioxide that the yeast will produce.
Commercially you can get quite cheap ones, but as the aim of this post is to make it totally homemade, I will explain how to make a perfectly functional one at home:
To do this you need a hose that is about 15 cms longer than the total height of the container to be used, the lid of the container and hot silicone. With a knife pierce the lid of the container so that the hose fits tightly, which will be introduced through the hole about 2 centimeters, then sealed the outer and inner edges of the joint between hose and lid with hot silicone and ready, the air trap is ready.
The way this air trap works is by sealing the container with its lid and submerging the free end of the hose in a glass of water (see attached diagram).
diagram: Argenis Duran
¡¡Manos a la obra!!
Ingredientes:
- 500 gramos de fresas lavadas.
- 2 litros de agua
- 700 gramos de azúcar (aproximadamente)
- 3 gramos de levadura seca.
Proceso:
Se lavan y se limpian las fresas, se colocan en un recipiente de tamaño adecuado y se agrega el azúcar; con la ayuda de un tenedor se trituran las frutas (no usar licuadora ni procesadores de alimentos) una vez obtenido una mezcla liquida con trozos mas bien notables de fresa se introduce la mezcla en el recipiente de fermentación. Se agrega el agua y la levadura en polvo, se cierra el envase y se agita durante un par de minutos. Colocar el envase de fermentación en un ambiente fresco con su trampa de aire hasta que termine la fermentación.
Let's get to work!!!
Ingredients:
- 500 grams of washed strawberries.
- 2 liters of water
- 700 grams of sugar (approximately)
- 3 grams of dry yeast.
Process:
Wash and clean the strawberries, place them in a container of adequate size and add the sugar; with the help of a fork, mash the fruits (do not use a blender or food processor) once a liquid mixture is obtained with rather noticeable pieces of strawberry, introduce the mixture into the fermentation container. Add the water and the yeast, close the container and shake for a couple of minutes. Place the fermentation container in a fresh environment with its air trap until the fermentation is finished.
¿¿Y ahora que??
Una vez culminado el proceso de fermentación comienza el proceso de filtrado. Al principio se utilizara un lienzo de tela para filtrarlo y exprimir la mayor cantidad de liquido posible; en este punto notaremos 2 cosas interesantes, uno es que las fresas, debido a la fermentación ya no parecerán fresas y dos es que la cantidad de liquido que agregamos ha aumentado un poco en el producto que tenemos ahora pro porque? Sencillo: el líquido que contenían las fresas se ha integrado al agua aportando su volumen, sabor y color al producto.
En este punto ya el vino, aunque se vea muy turbio, se puede probar y comprobar su sabor y aroma.
and nowWhat ?
Once the fermentation process is finished, the filtering process begins. At this point we will notice 2 interesting things, one is that the strawberries, due to the fermentation process will no longer look like strawberries and two is that the amount of liquid that we add has increased a little in the product that we have now because? Simple: the liquid contained in the strawberries has been integrated into the water, adding volume, flavor and color to the product.
At this point the wine, although it looks very cloudy, can be tasted and its flavor and aroma can be checked.
Clarificación :
Si bien el vino se puede consumir estando turbio, para obtener un mejor producto se suele dejar en reposo durante algunas semanas, para ello bastara con embotellarlo e introducirlo en la nevera, pero hay que tener especial cuidado en esta etapa, ya que si las botellas que uses son de vidrio podrían explotar estando cerradas y esto se debe a que aun el vino conserva restos de levadura entre otros y esos son los que queremos eliminar, el enfriarlo ocasiona que la levadura se desactive, pero tarda un poco, así que es recomendable los primeros 2 o 3 días abrir las botellas 2 veces por día y luego una vez por día de ahí en adelante hasta que ya no produzca gas.
Con respecto a la real clarificación, esta se producirá de manera espontánea aproximadamente a las 3 semanas luego de que ha culminado el proceso de fermentación, pero para ello hay que decantar el vino las veces que sea necesario, ¿pero que es la decantación? Es un proceso sencillo en el que se pasa el vino de una botella a otra procurando que el sedimento que se estanca en el fondo se quede en la botella y el liquido mas claro se pase a la nueva botella, luego de es proceso, se lava la botella original y se puede usar al día siguiente para decantar de nuevo y así sucesivamente.
Luego del proceso de clarificación, el vino se habrá estabilizado y tendrá ya su color, aroma y sabor definitivo.
Espero que les haya gustado el post y que lo pongan en práctica, lamento muchísimo no tener fotos del proceso, pero lamentablemente no tengo una cámara. Sin embargo espero que la explicación haya sido lo bastante clara como para que puedan hacer su propio vino.
Cualquier duda, dejen sus comentarios para explicarles cualquier cosa que se me haya pasado.
Saludos!
Clarification :
Although the wine can be consumed when it is cloudy, to obtain a better product it is usually left to rest for a few weeks, for this it is enough to bottle it and put it in the refrigerator, but special care must be taken at this stage, If the bottles you use are made of glass they could explode when closed and this is because the wine still retains traces of yeast among others and those are the ones we want to eliminate, cooling it causes the yeast to deactivate, but it takes a while, so it is advisable to open the bottles twice a day for the first 2 or 3 days and then once a day from then on until it no longer produces gas.
Regarding the actual clarification, this will occur spontaneously approximately 3 weeks after the fermentation process has finished, but for this you have to decant the wine as many times as necessary, but what is decanting? It is a simple process in which the wine is transferred from one bottle to another, making sure that the sediment that stagnates at the bottom stays in the bottle and the clearer liquid is transferred to the new bottle. After this process, the original bottle is washed and can be used the next day to decant again and so on.After the clarification process, the wine will have stabilized and will have its definitive color, aroma and flavor.
I hope you liked the post and that you put it into practice, I am very sorry I don't have pictures of the process, but unfortunately I don't have a camera. However, I hope the explanation was clear enough for you to make your own wine.
If you have any doubts, leave your comments so I can explain anything I missed.
Regards!


muy buena técnica creo que la probare yo una vez hice uno y queda muy bueno pero en vez de levadura se prepara un fermento con jengibre
hola! gracias por leer, en realidad hay muchas tecnicas y mucho por aprender, lo que tu mencionas del jengibre suena interesante, comoes eso?