[ESP-ENG]Bricolaje: Cofre para guardar botones con material reciclado/DIY: Button box made of recycled material

in GEMS4 years ago

BUENAS NOCHES!

GOOD NIGHT!
187198766_333150731502351_7396091980123114584_n.jpg

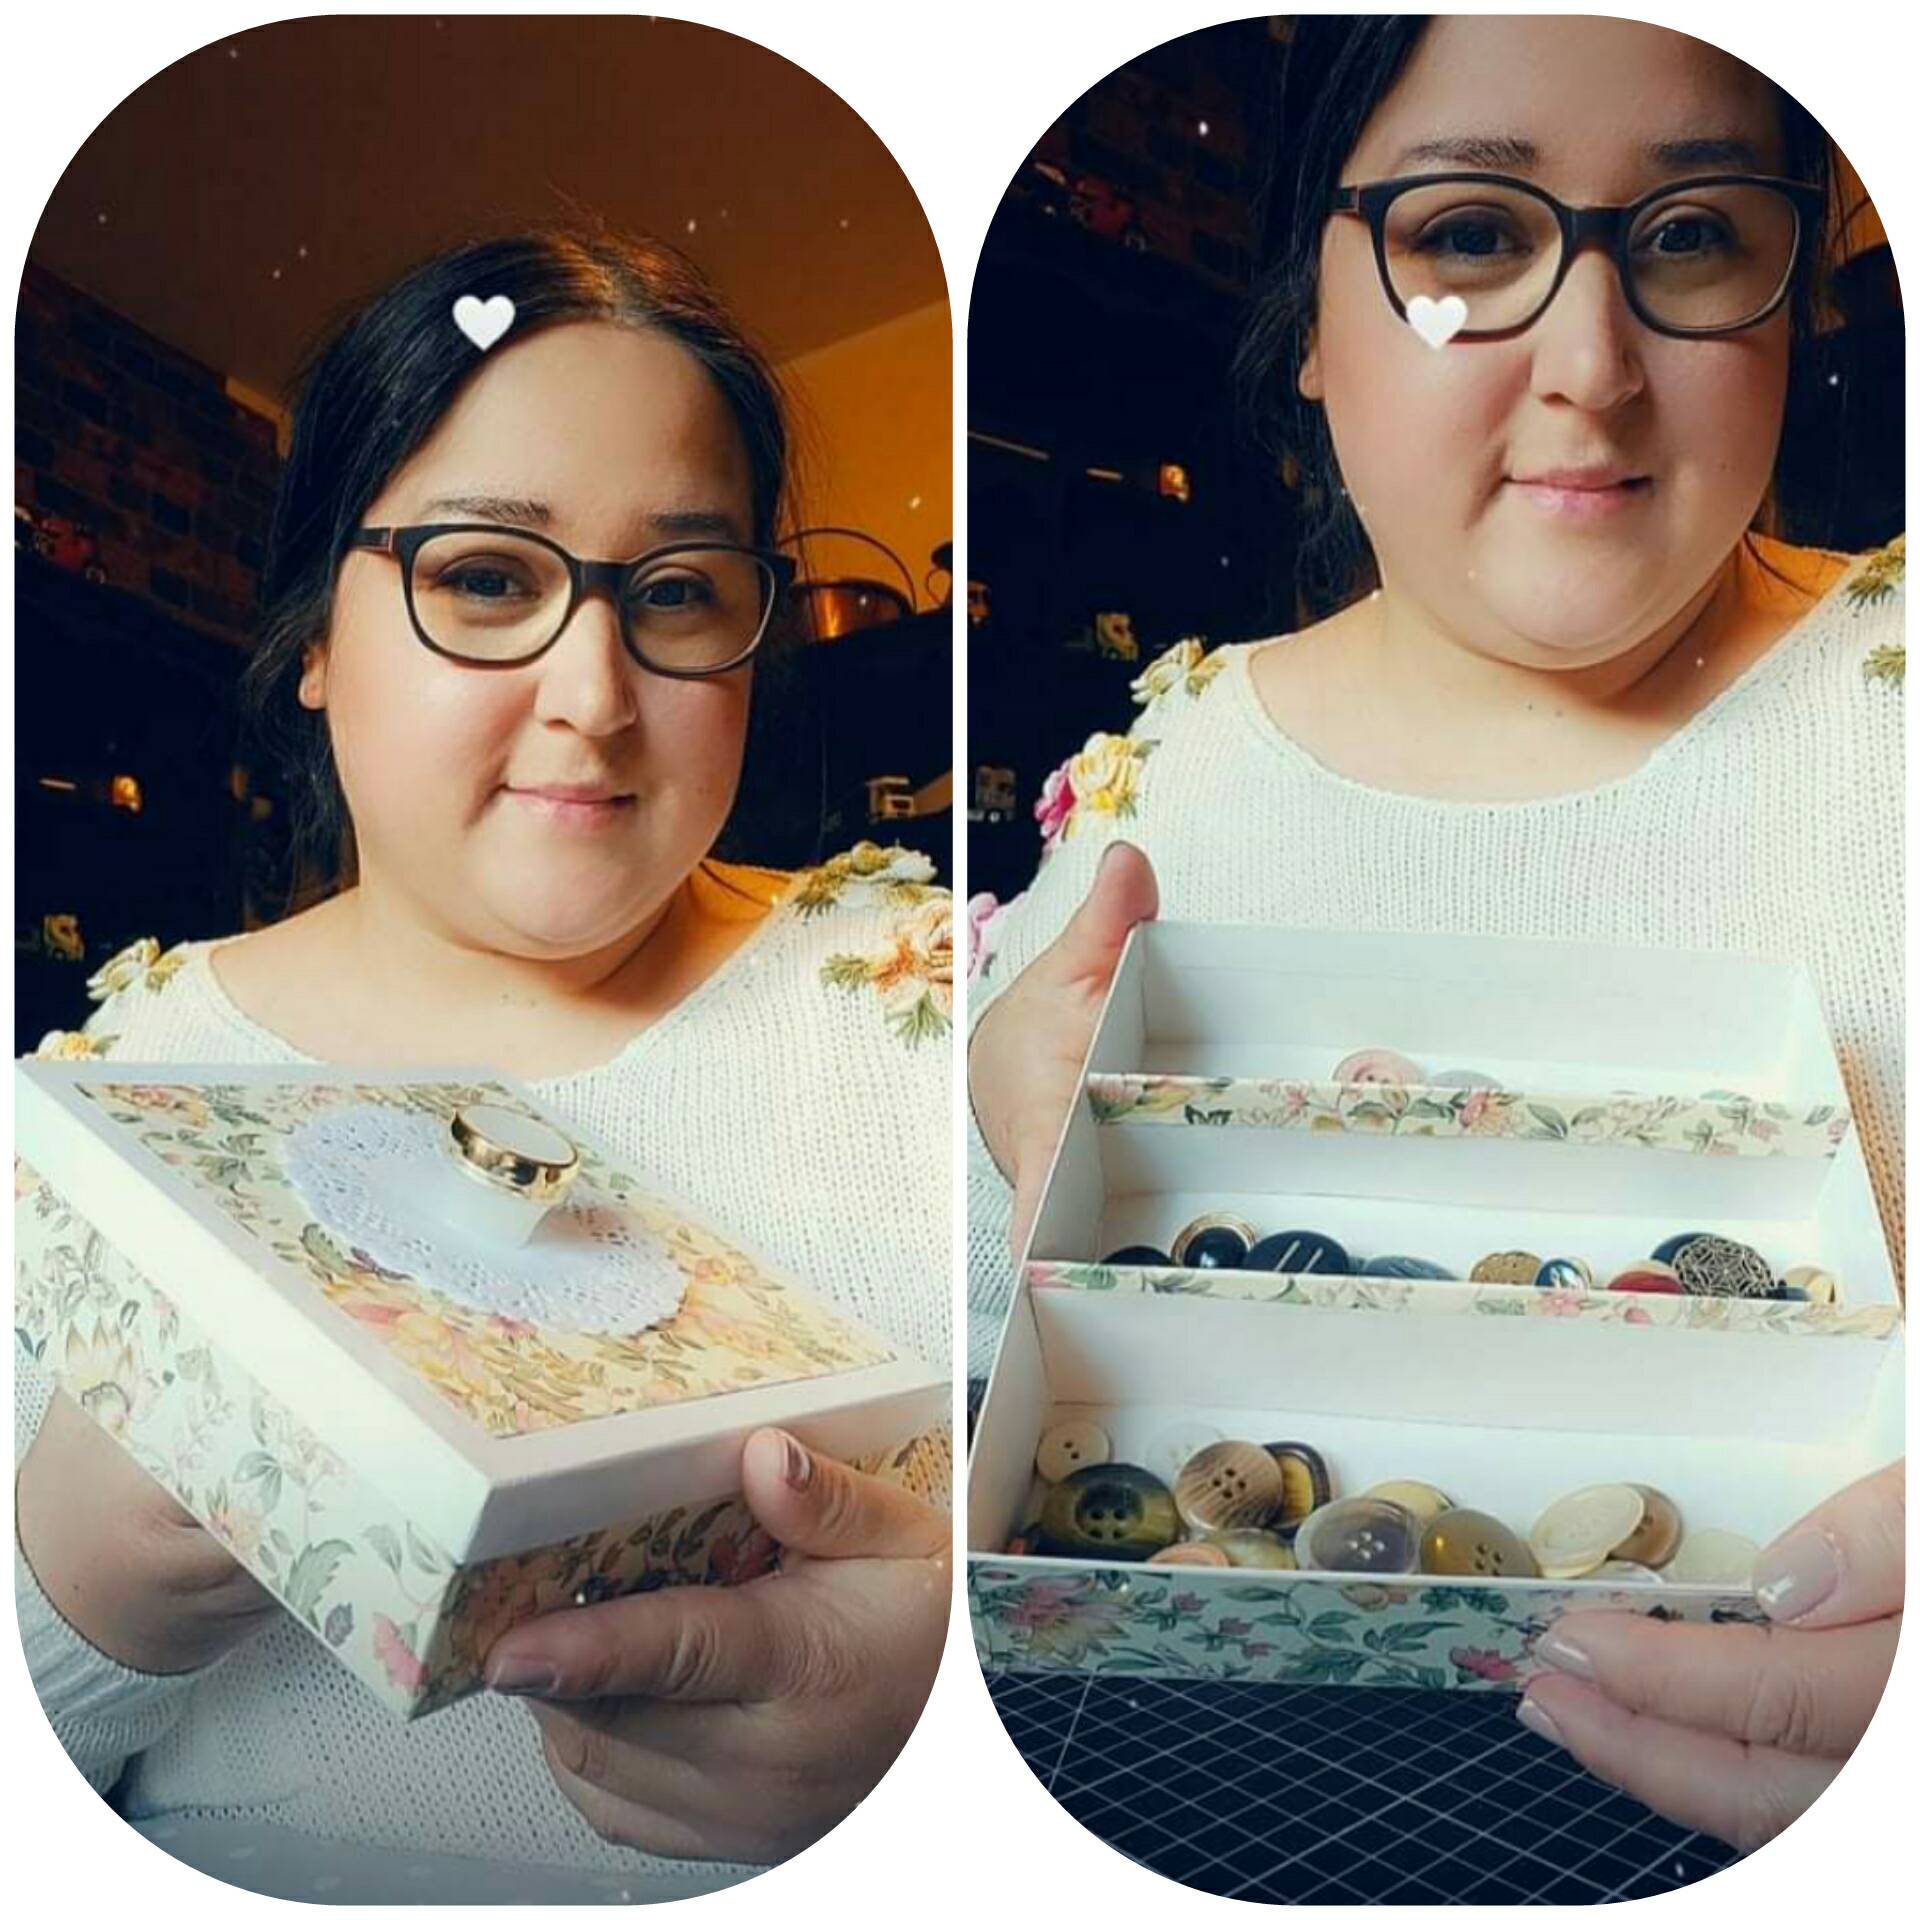
Querida comunidad esta noche les muestro un paso a paso de como hice un cofre para guardar botones, realizado con material reciclado, lleguemos al final..

Dear community tonight I show you a step by step of how I made a chest to store buttons, made with recycled material, let's get to the end ..

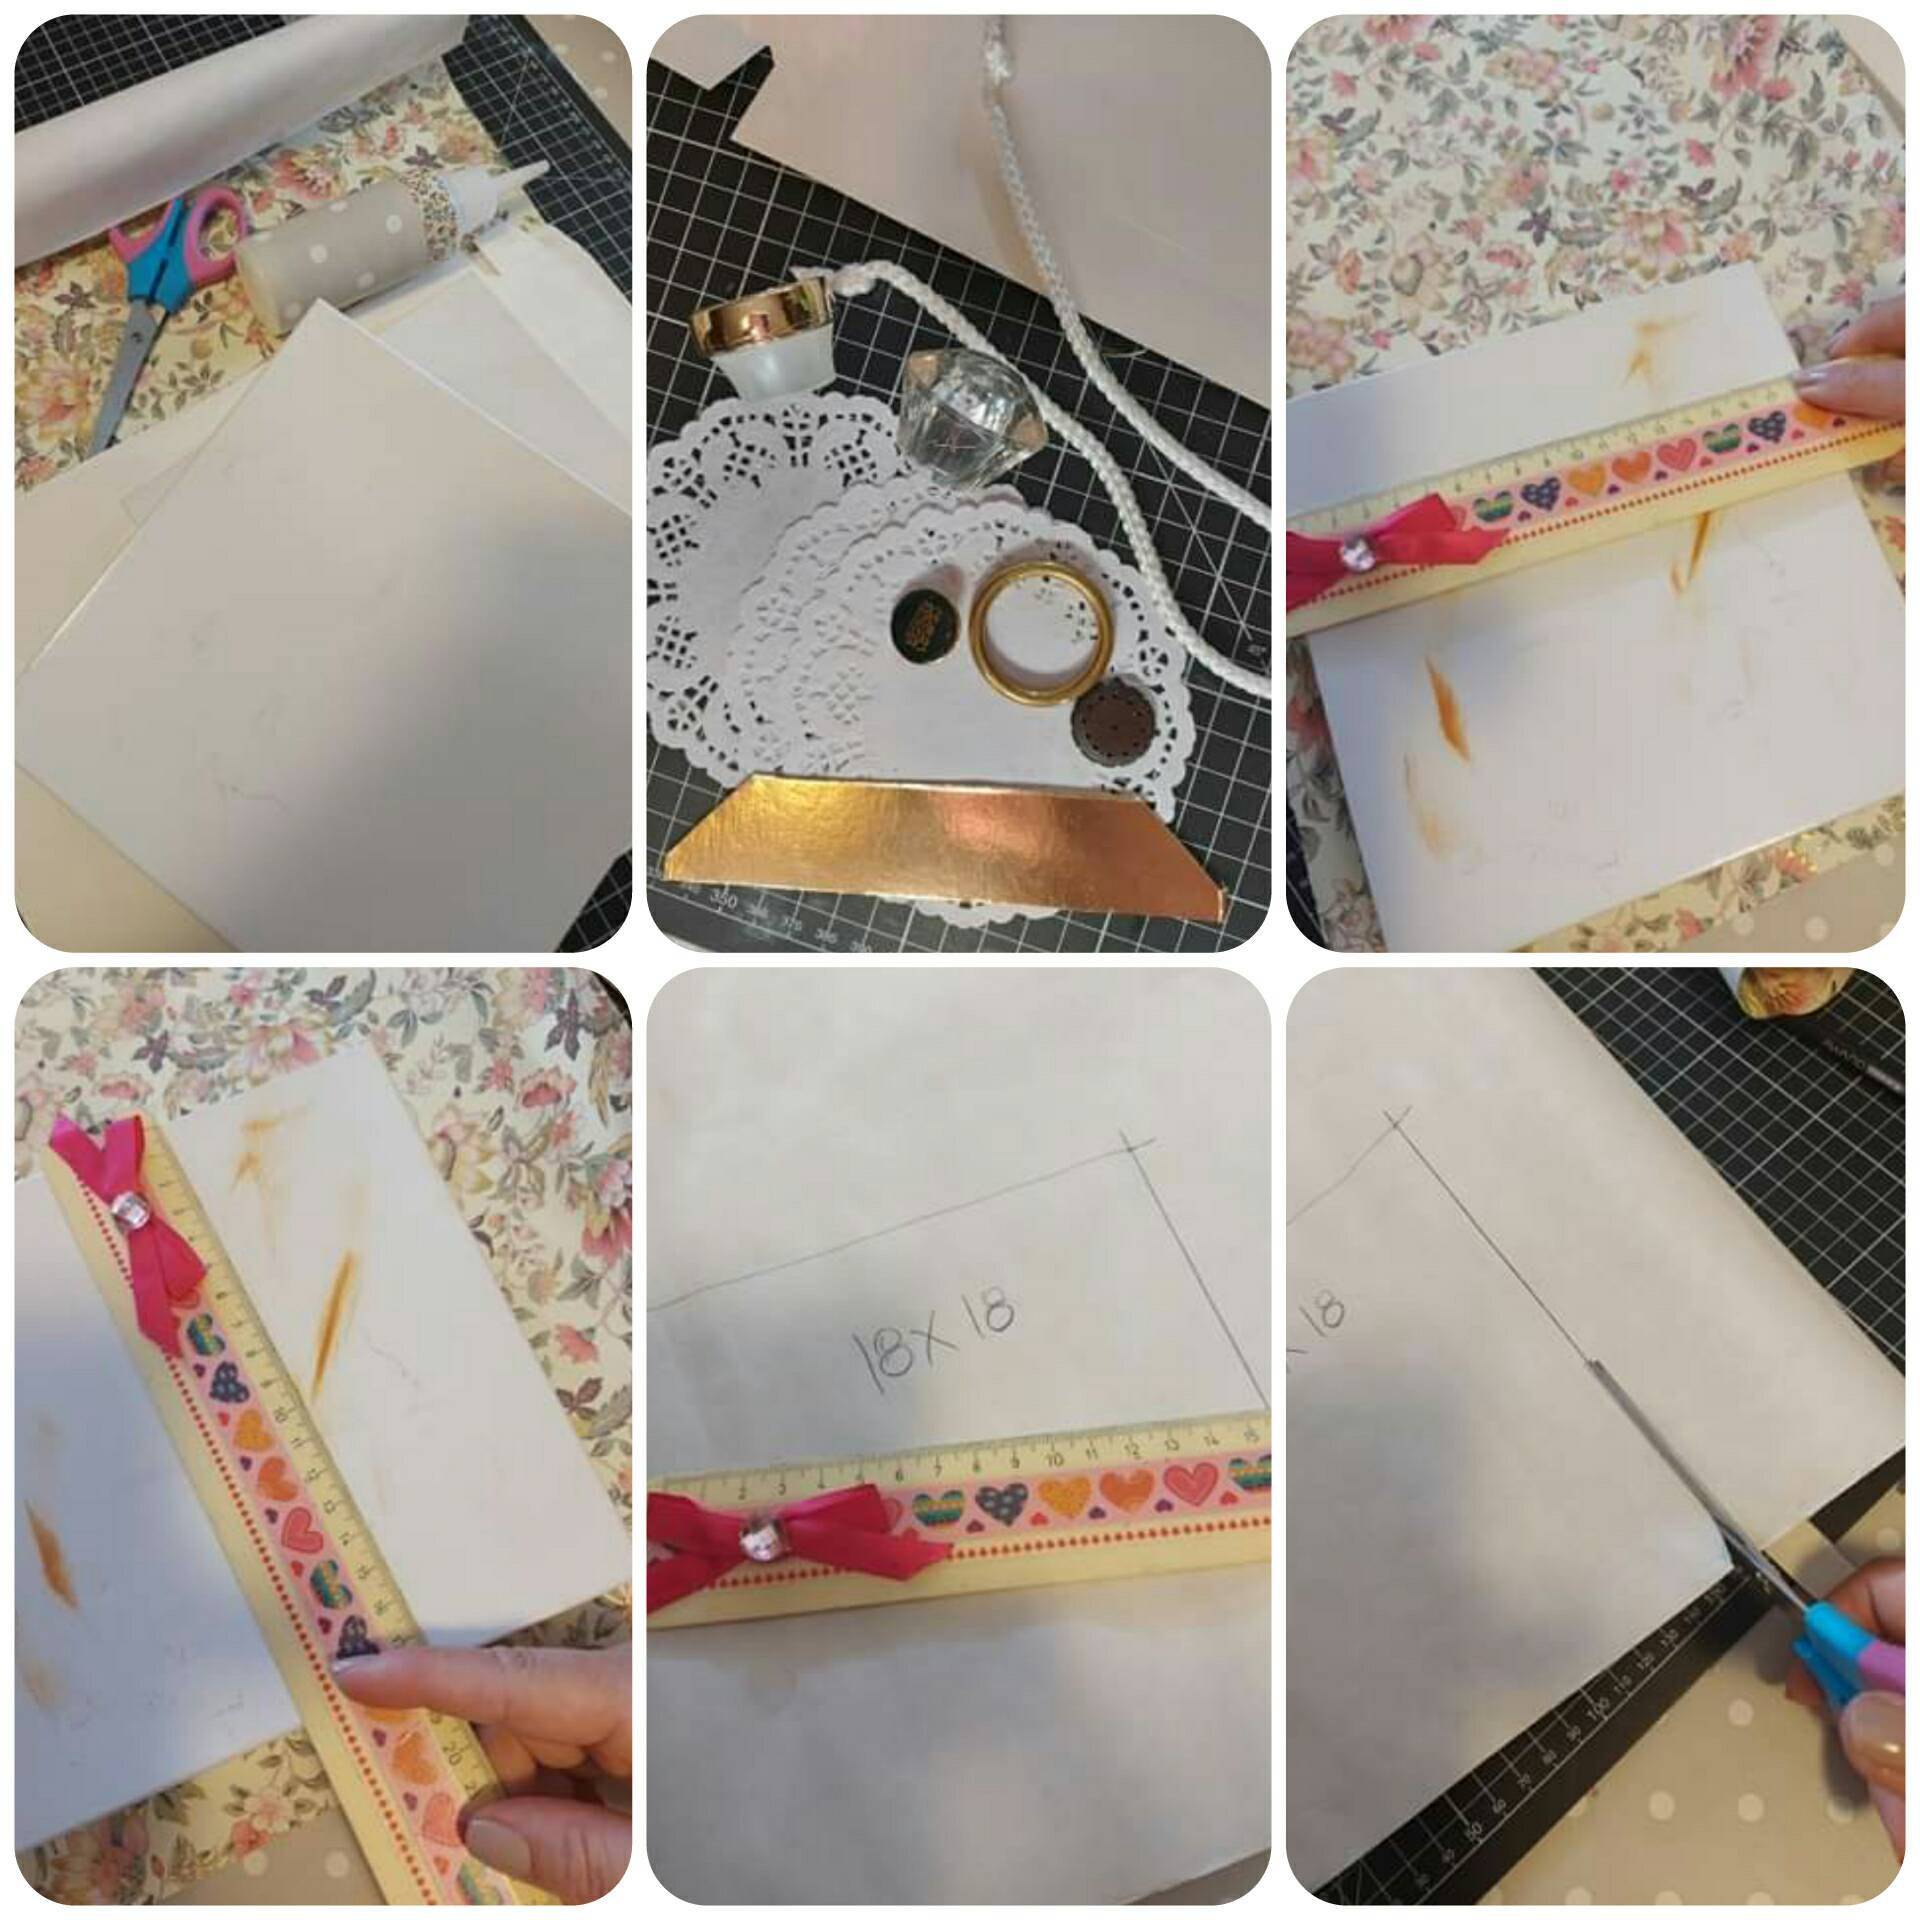
  • Materiales:
    caja de cartón
    retazos de cartón
    retazos de papel de regalo
    silicona caliente
    pega
    tijeras
    regla
    elementos decorativos.

Materials:
carton box
cardboard scraps
scraps of wrapping paper
hot silicone
job
pair of scissors
rule
decorative elements

Paso a paso

Step by Step
187122751_295903795415096_6934362534950130590_n.jpg

1. La caja que he utilizado estaba en muy bien estado, de no ser asi debemos pintar o limpiar todos los lados de la caja, tomamos sus medidas y marcamos en el papel de regalo.

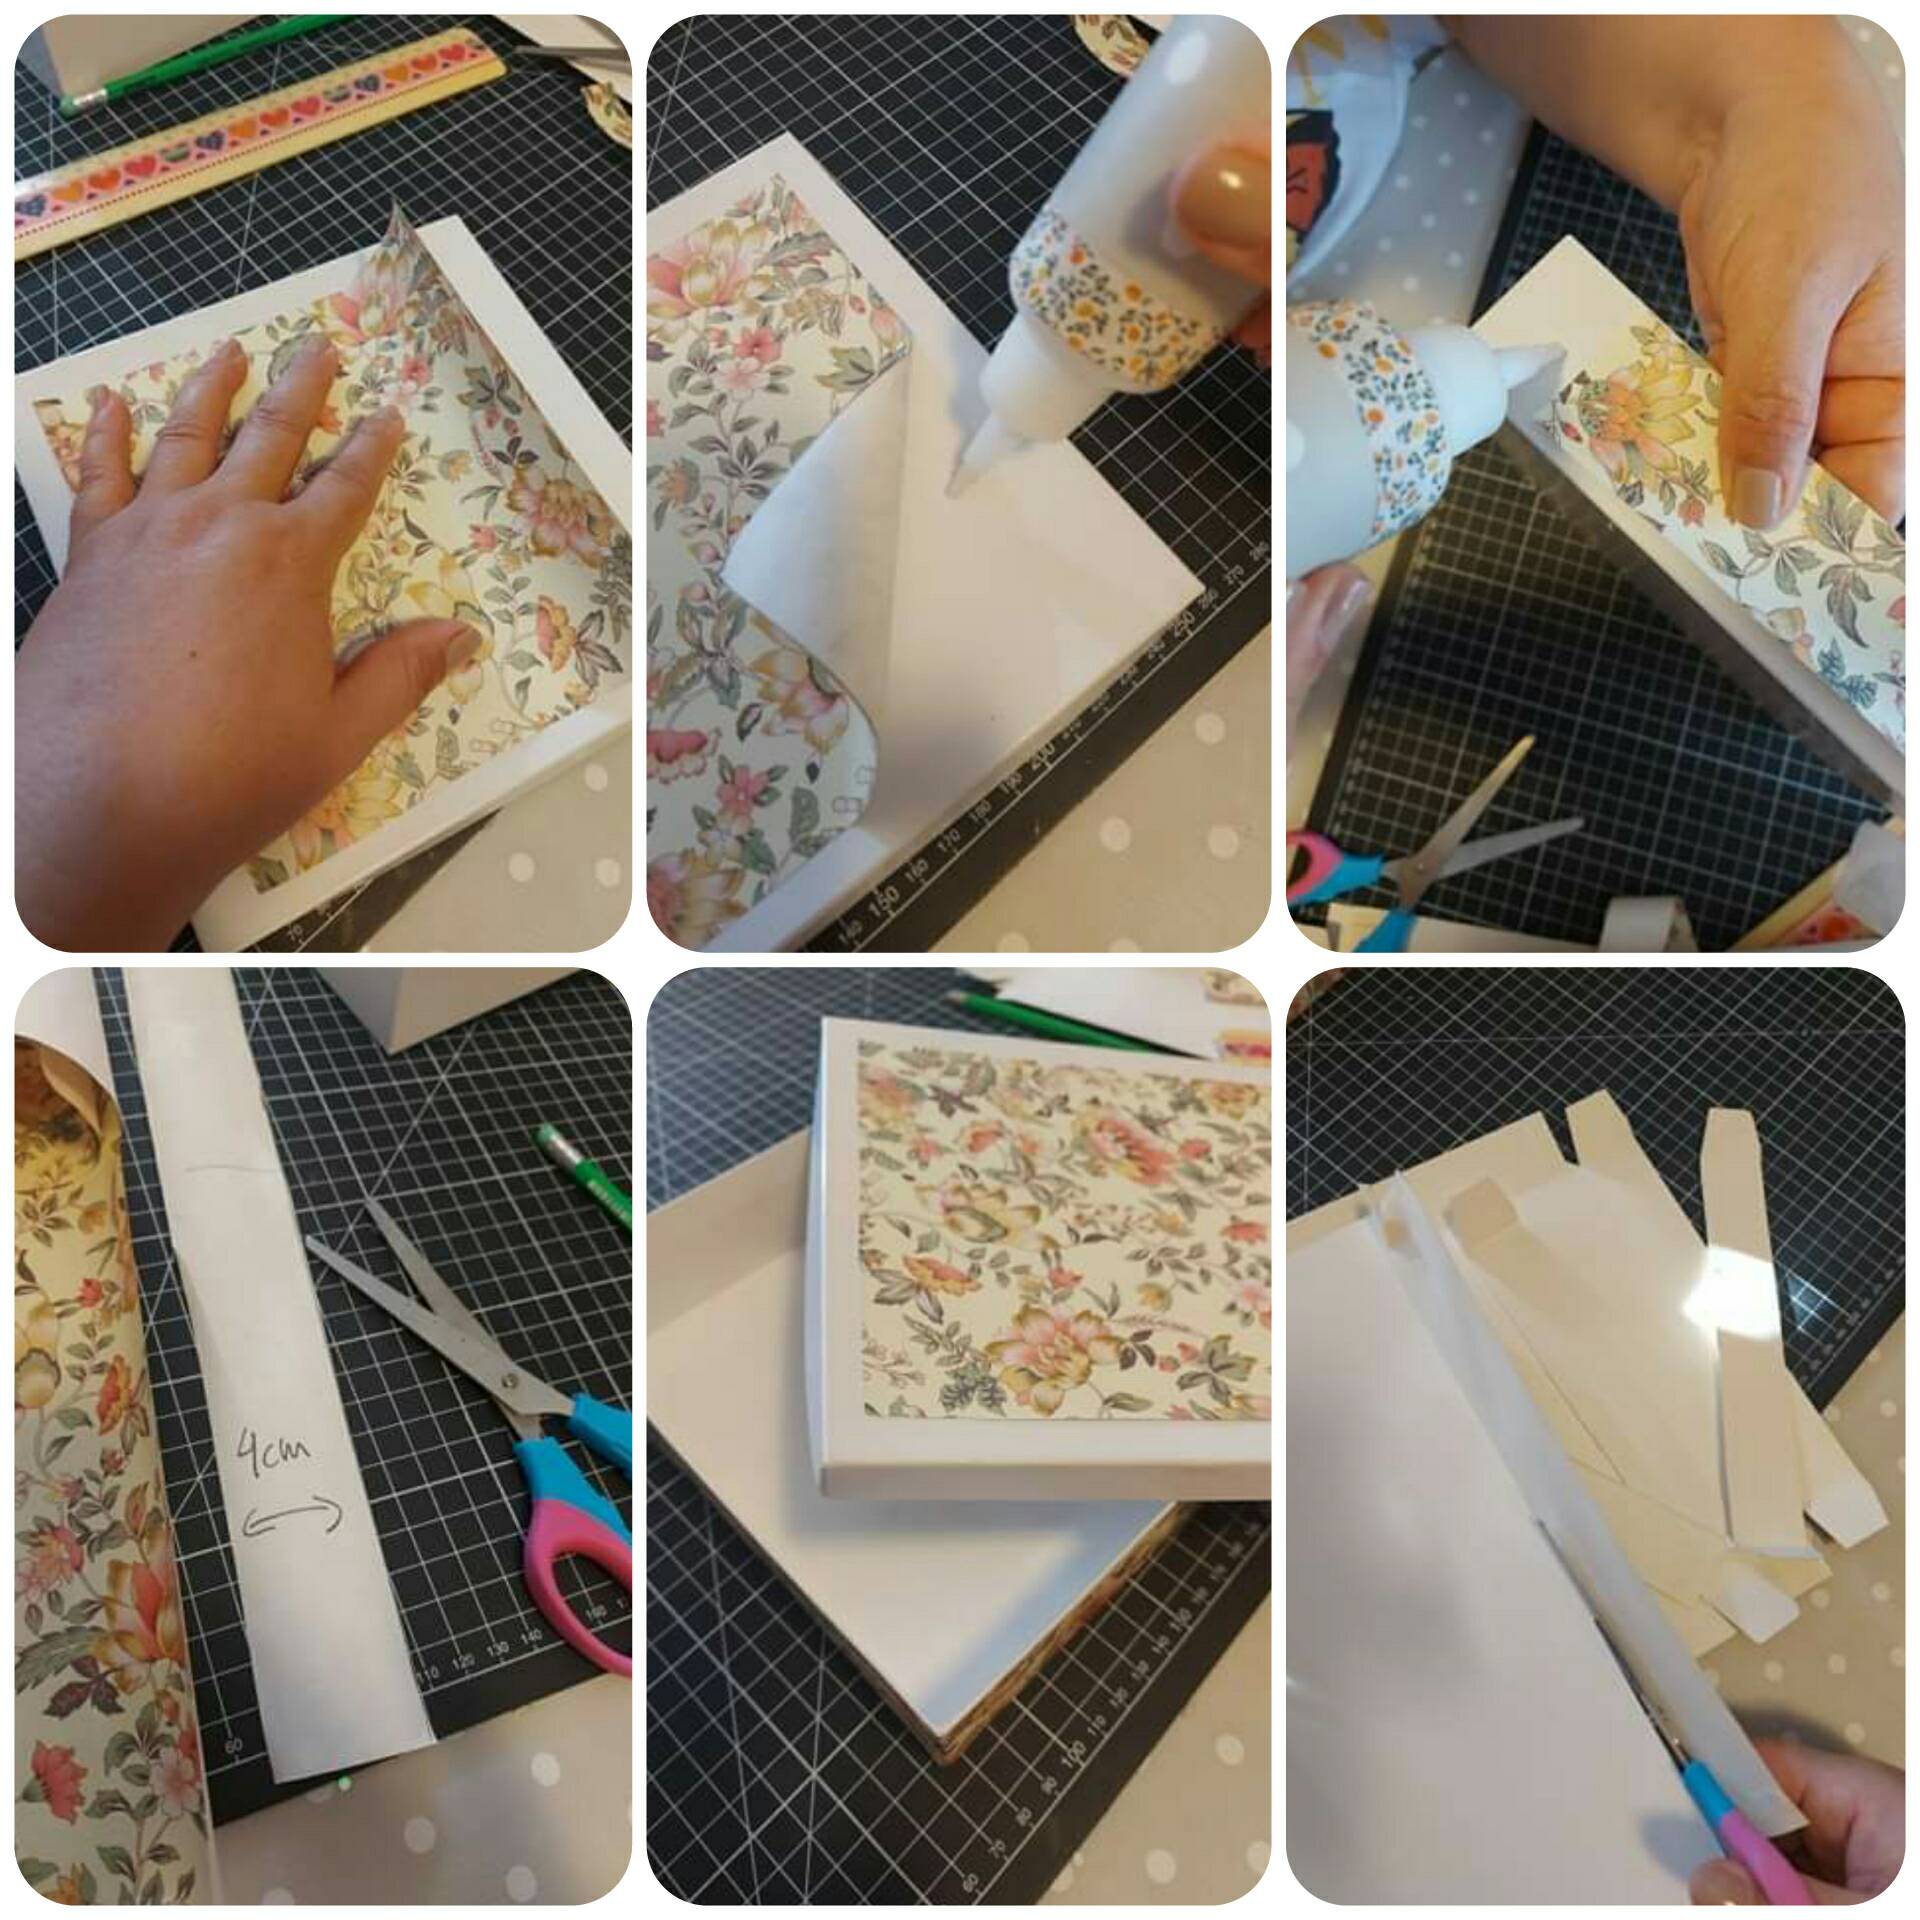
2. Recortamos las piezas para forrar la caja, las medidas de mi casa son 18x18cm. Luego las pegamos, forrando cuidadosamente la caja, en la tapa he dejado un margen de 1,5cm pues eso me permite resaltar el papel de regalo.

1. The box you used was in very good condition, if not, we must paint or clean all the sides of the box, take its measurements and mark it on the wrapping paper.

2. We cut out the pieces to line the box, the measurements of my house are 18x18cm. Then we glue them, correctly lining the box, on the lid I have left a margin of 1.5cm because that allows me to highlight the wrapping paper.
187073410_796005941021511_5184515243074024497_n.jpg

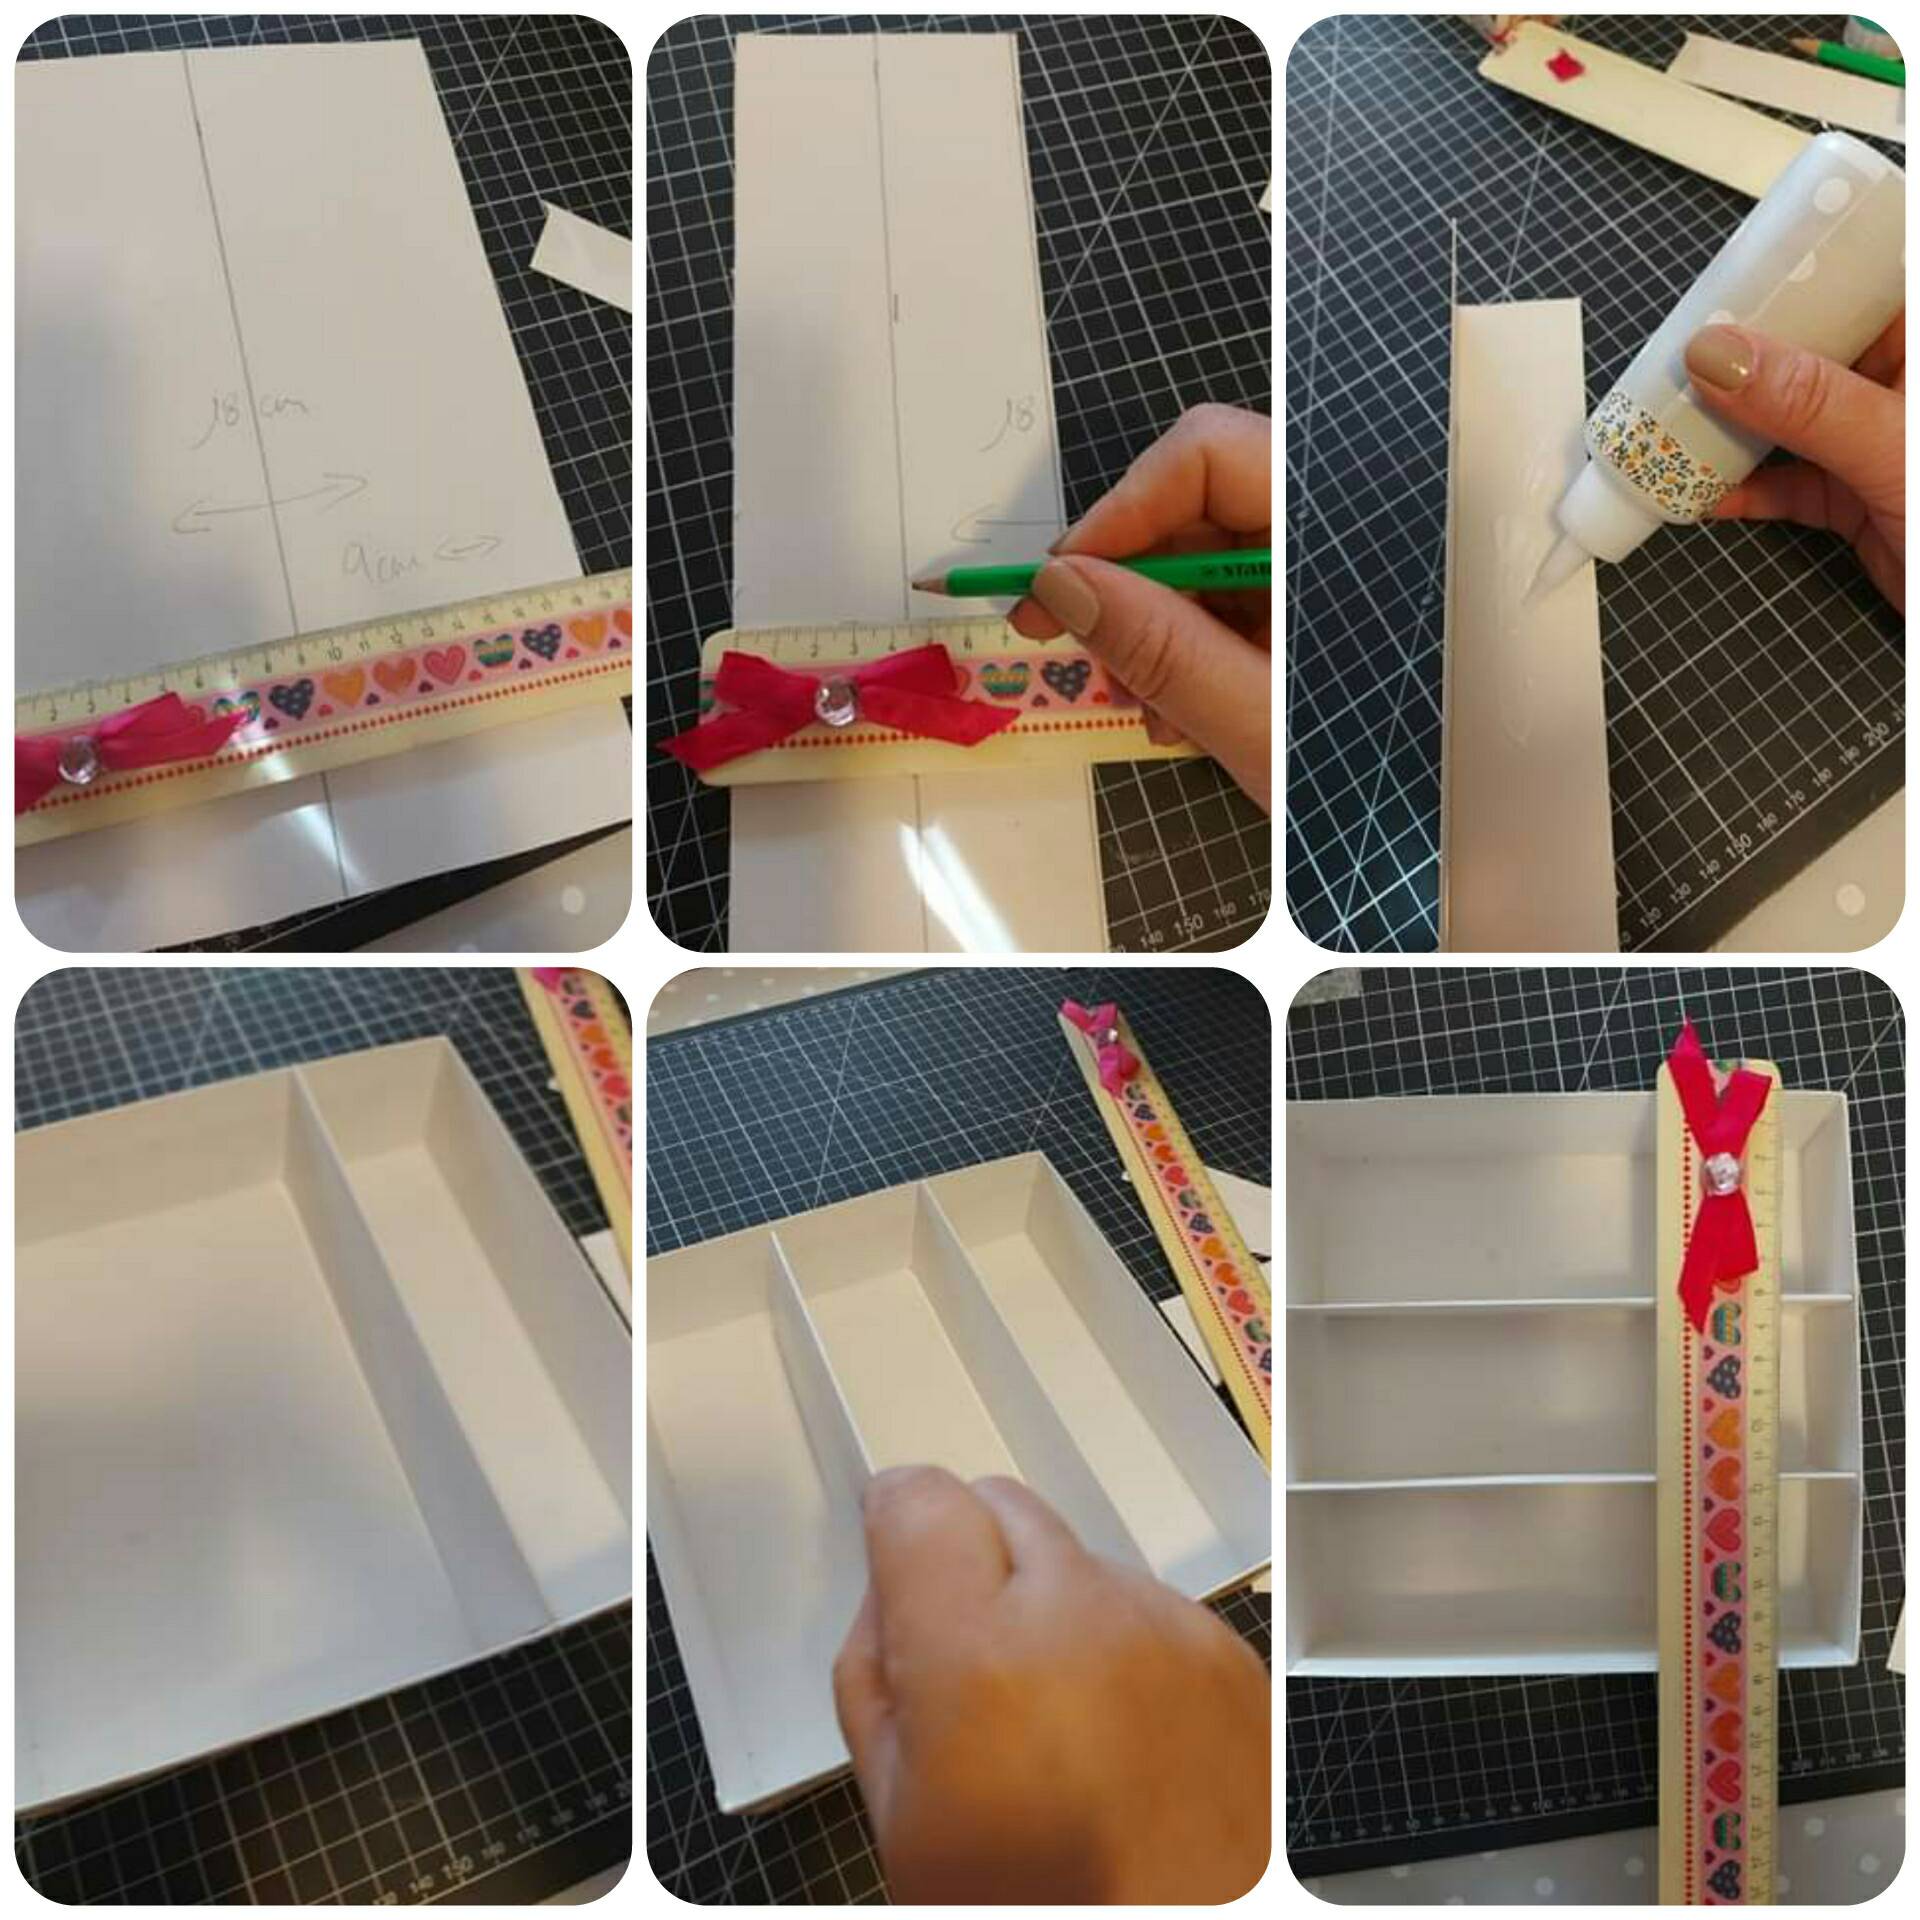
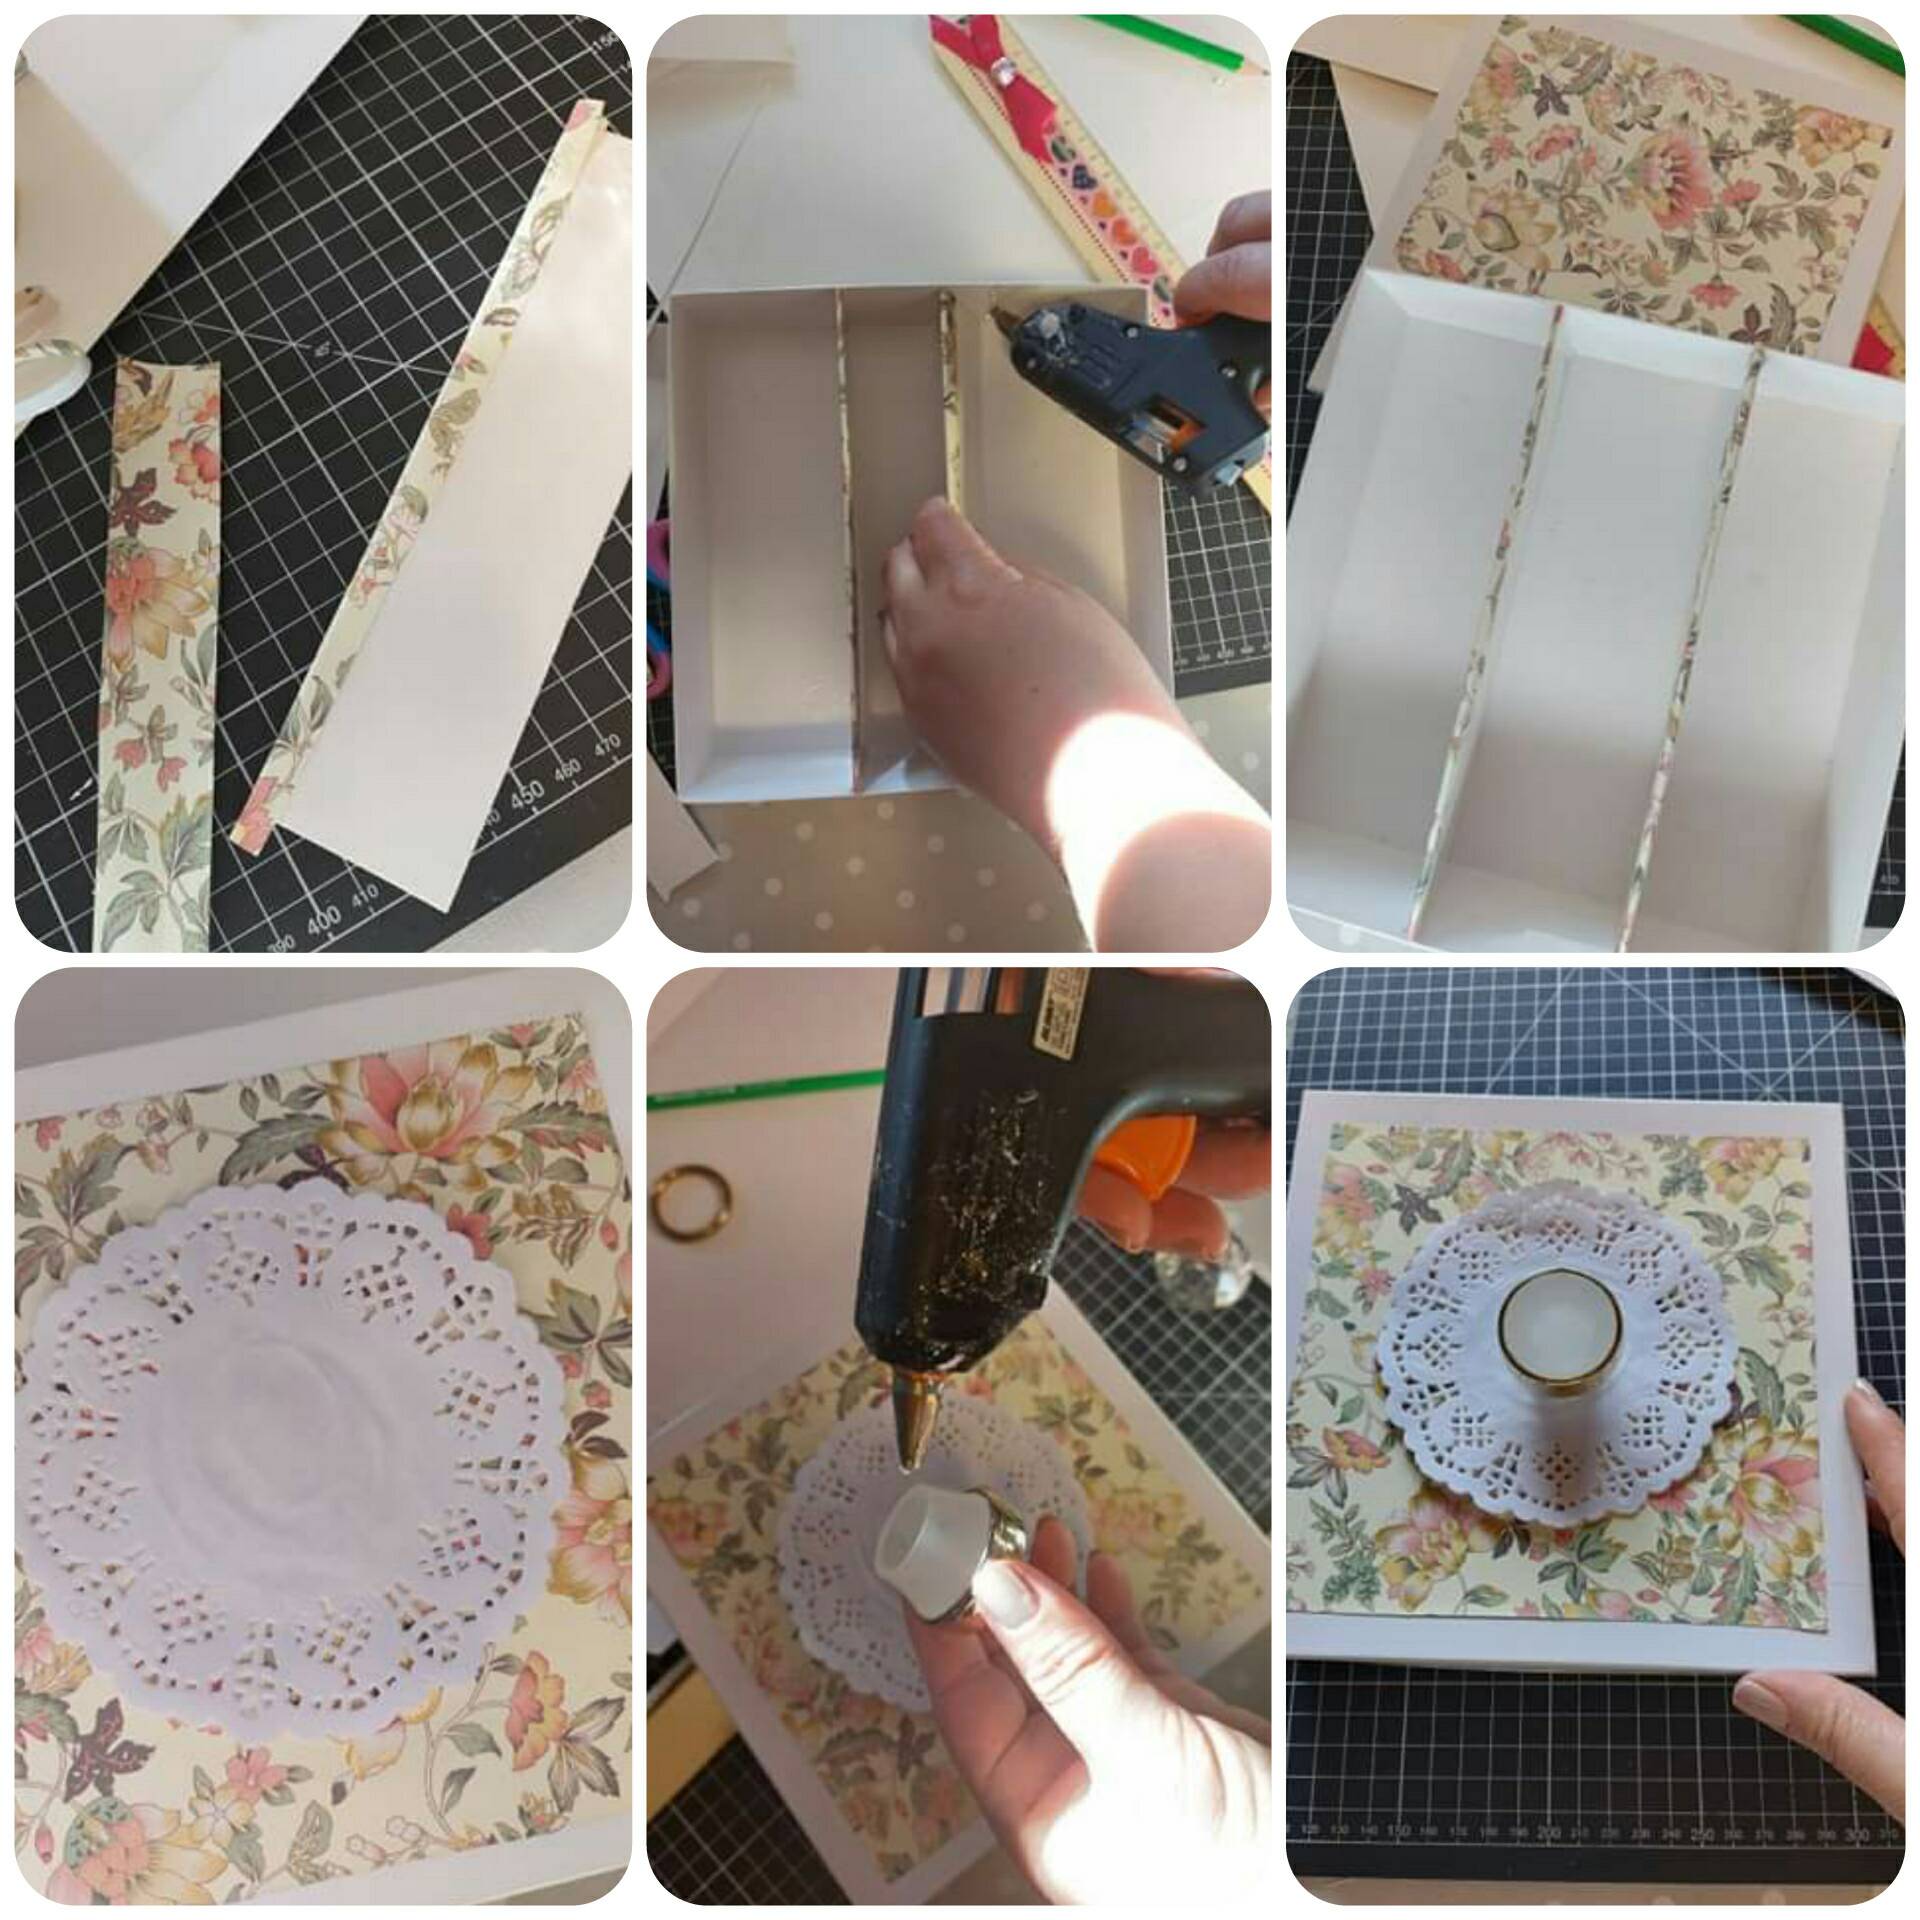
3. Con los retazos de cartón, realizamos tiras de 4cm de ancho y 18 de largo. Para realizar con ellos la división del interior de la caja.

4. Las tiras se doblan y pegan entre si con la finalidad de dar resistencia al cartón.

3. With the cardboard scraps, we make strips 4cm wide and 18cm long. To divide the inside of the box with them.

4. The strips are folded and glued together in order to give the cardboard strength.
187932803_1753073475058864_5304557956528296873_n.jpg

5. Pegamos las tiras dentro de la caja dejando igual distancia entre ellas.

6. Con retazos de papel decoramos el borde de las tiras y las colocamos en su lugar.

5. We glue the strips inside the box leaving equal distance between them.

6. With scraps of paper we decorate the edge of the strips and put them in place.
187517787_2589421411354174_711380665062612811_n.jpg

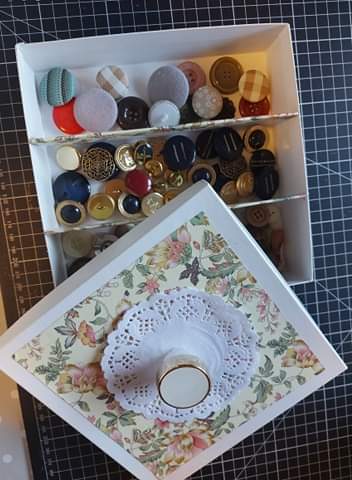
Para terminar colocamos los elementos decorativos, yo utilizo la tapa de un perfume y dos servilletas de torta pata decorar la tapa.

Y LISTO, ASÍ QUEDO NUESTRO BONITO COFRE, ESPERO LES HAYA GUSTADO Y GRACIAS POR LEERME

To finish we put the decorative elements, I use the lid of a perfume and two cake napkins to decorate the lid.

AND READY, SO IS OUR NICE CHEST, I HOPE YOU LIKED IT AND THANK YOU FOR READING ME
187465988_1199175230554787_8899606158219901334_n.jpg