
Go through the following steps to download & setup the Vessel wallet(Desktop wallet-HIVE):-
- Head over to https://github.com/netuoso/vessel/releases
- Click on Vessel.Setup.0.4.1.exe
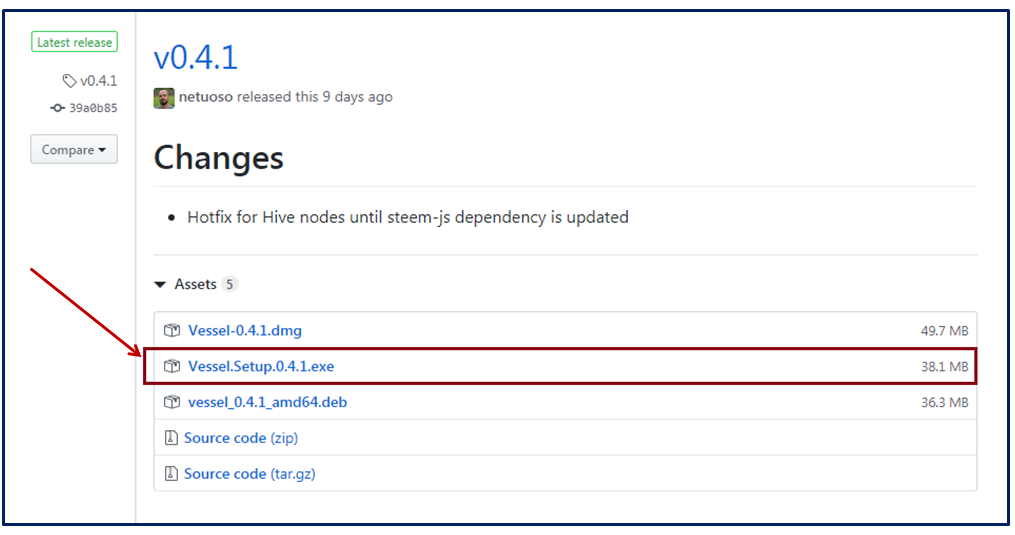
It will be downloaded automatically, then install it on your desktop.
Now open the wallet.
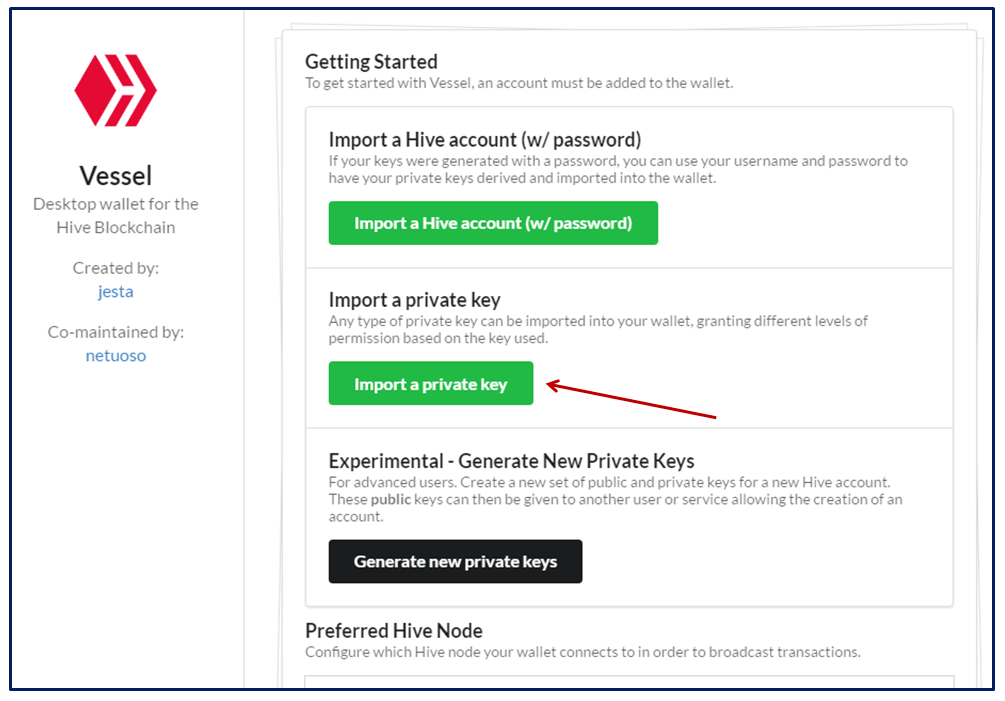
Click on “Import a private key”.
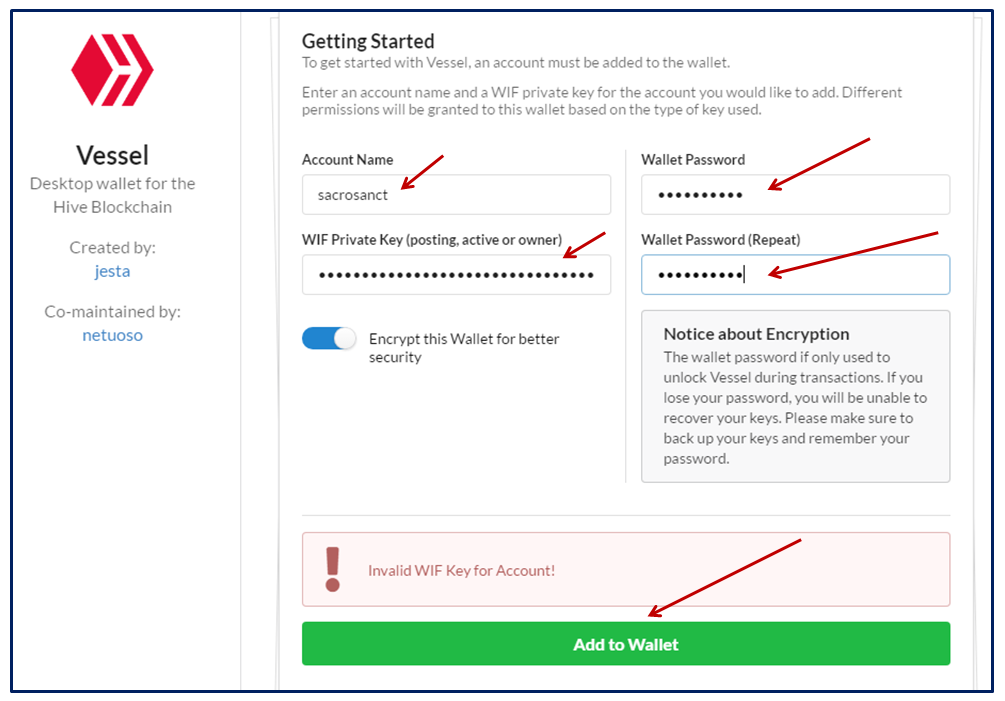
- Put your valid Hive username, Enter your Private key. You have three options here- Owner, Posting, Active key. Depending upon the key you input, the permission to use the wallet will be granted accordingly. For example, if you input the active key, you will be able to perform fund transfer. Now set the password for your vessel wallet. You also have the option to enable or disable “Encrypt this wallet”. For better security, it is recommended to enable this option. By default, it is always enabled. Then click on “Add to Wallet”.
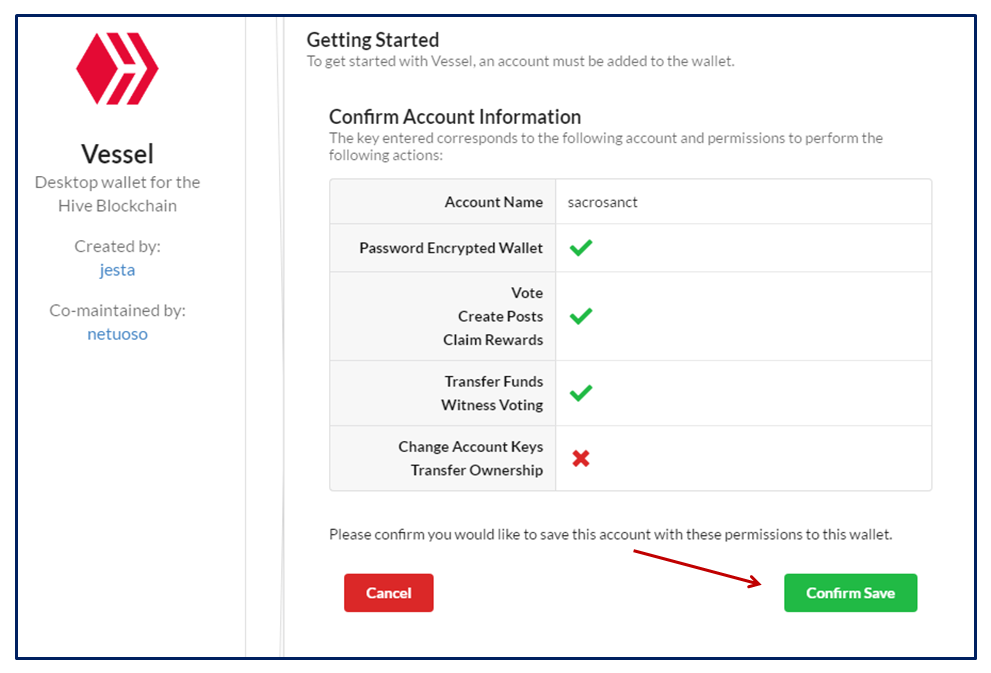
- Now as you can see, I have input my “Active key” the permission specific to Active key is granted in my vessel wallet & that is being displayed here. Now proceed with “Confirm Save”.
- You can see now your Total Wallet Balance as well as the Locked Balance (HP), Available Balance(Free HIVE & HBD), Saving account Balance, etc.
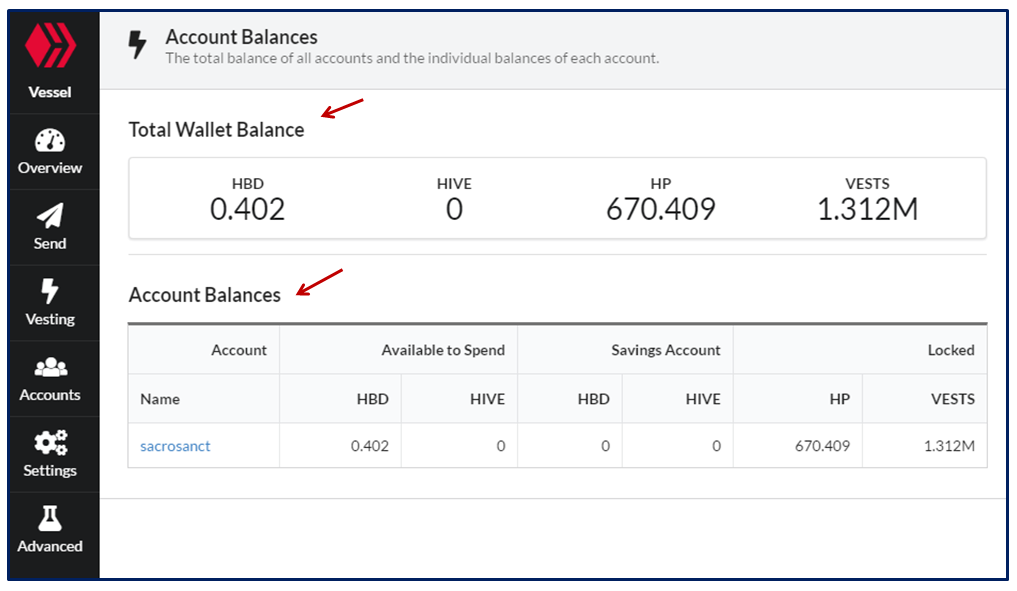
On the left side of the wallet, you can see a list of menu such as Overview, Send, Vesting, Accounts, Settings, Advanced, etc.
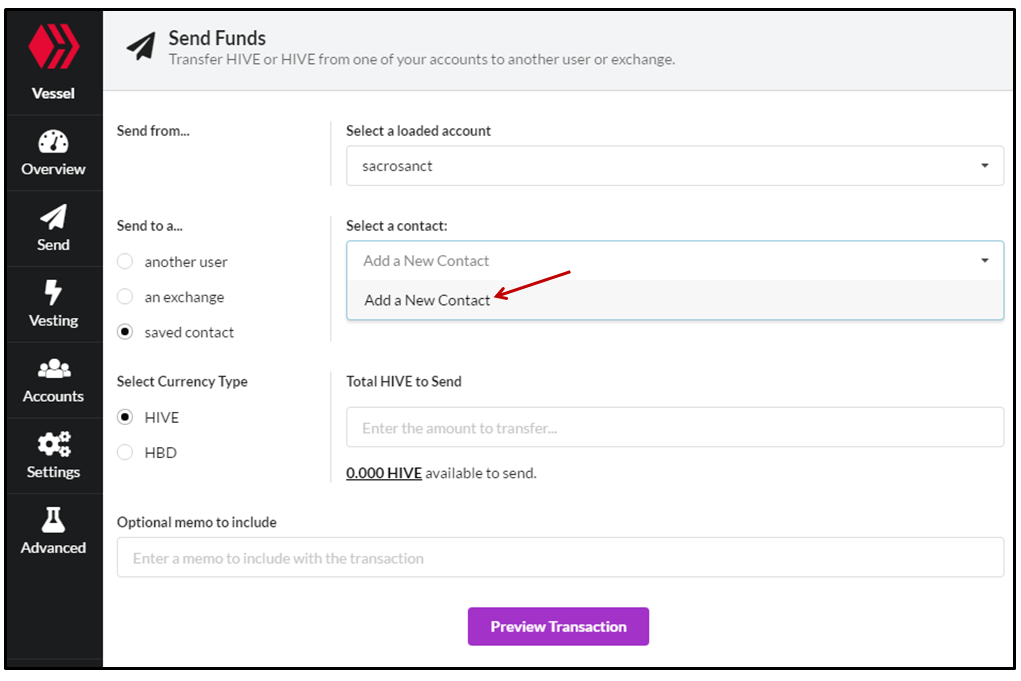
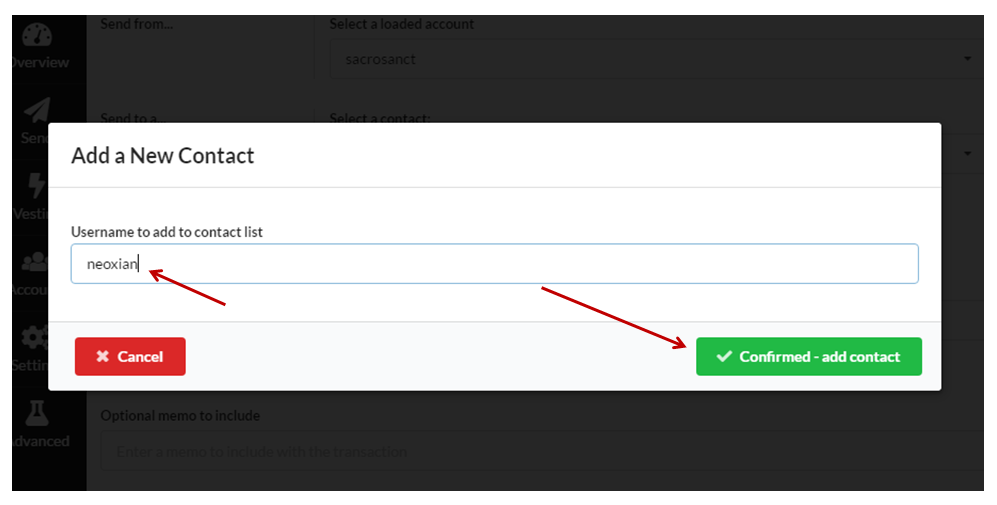
You can send HIVE or HBD directly from your vessel wallet to another user. If you are frequently transacting with another peer you can save that contact by clicking on “Add a new contact”. Input the username of Hive and then click on “Confirmed-add contact”. After that, you send a transaction to the saved contact just by selecting the added contact(you don’t need to type the username again).
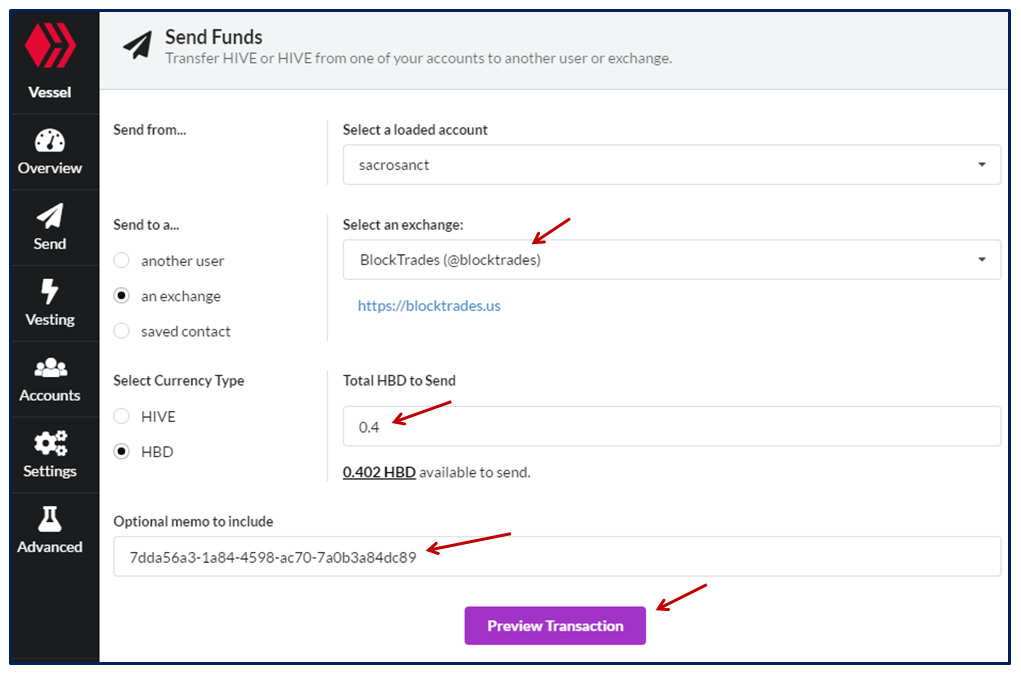
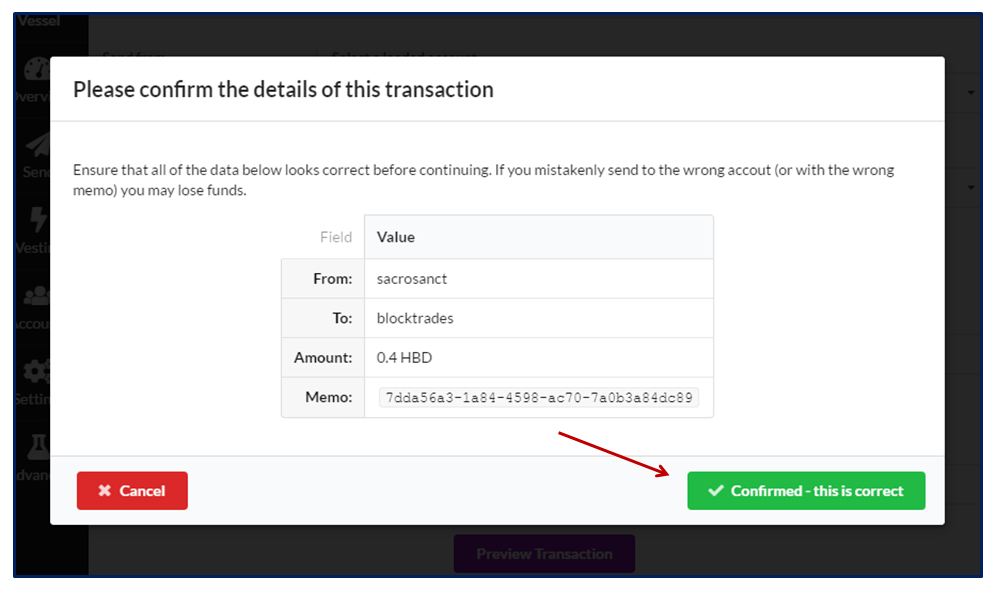
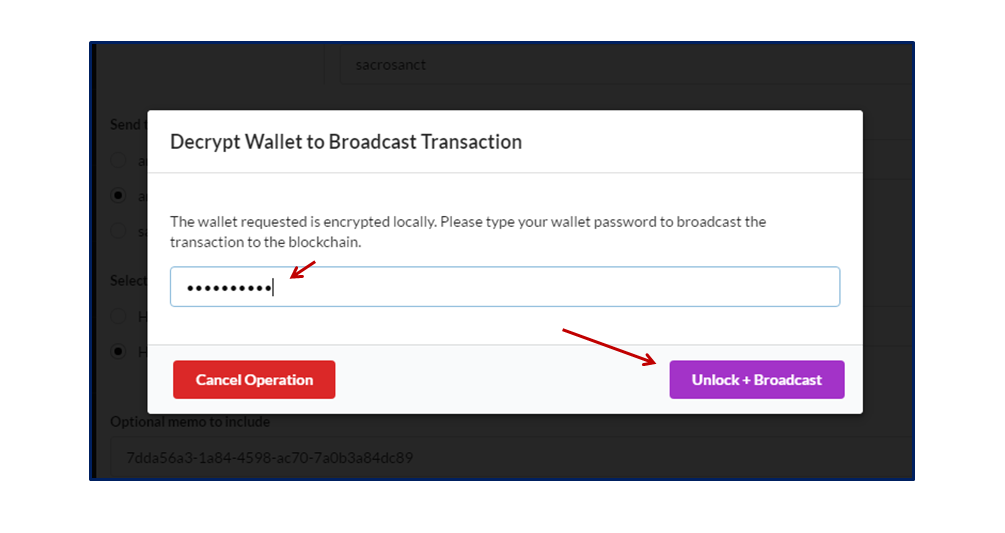
- Similarly, you can also send it to an exchange. While sending to an exchange “Memo” is important, so pay attention to that while sending tokens to an exchange. After putting all the details in the relevant field, click on “Preview Transaction”. A pop-up will appear, verify all the details, ensure that everything is correct, and then click on “Confirmed-this is correct”. Then input the wallet password(not key). Finally, click on “Unlock+Boradcast”.
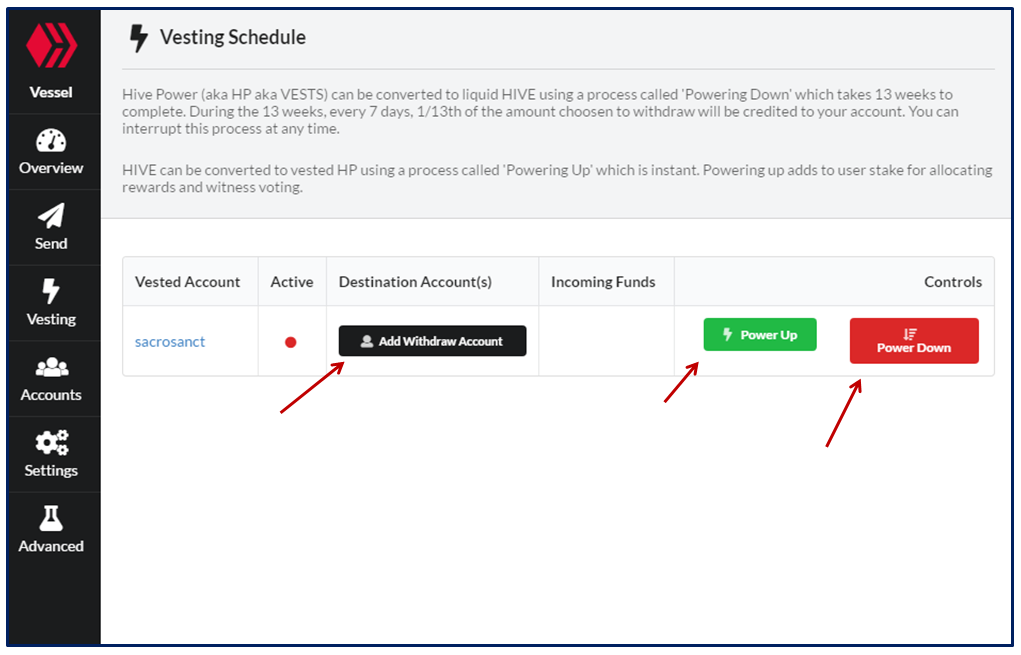
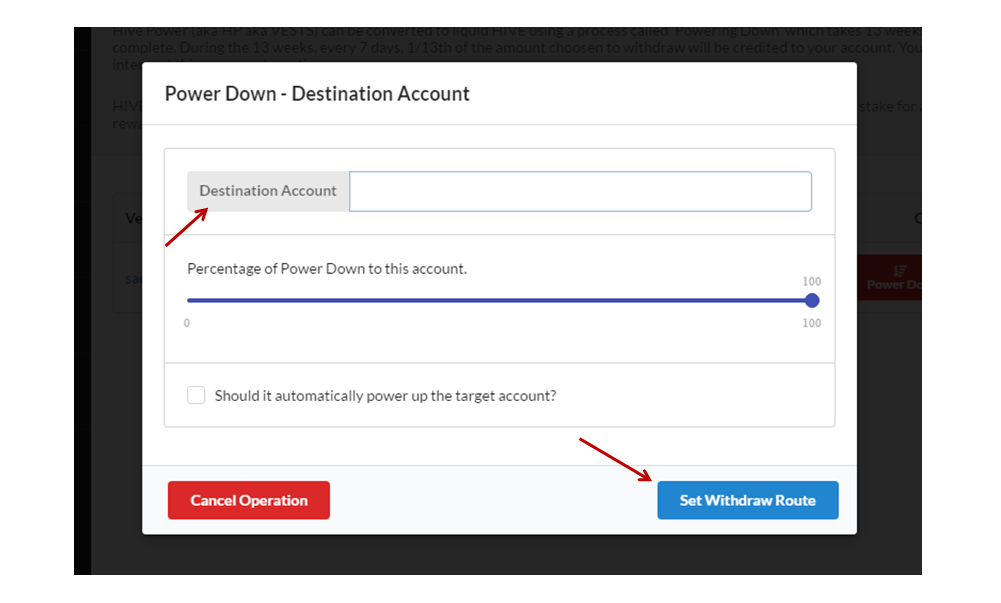
- In the “Vesting schedule”, you can power up, power down and set withdraw route to another destination account.
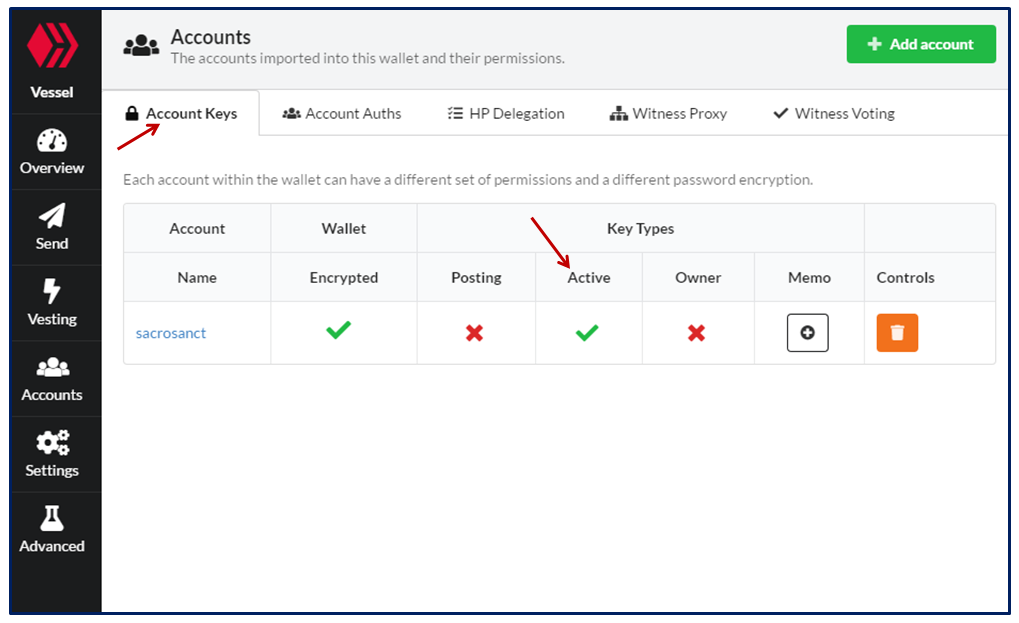
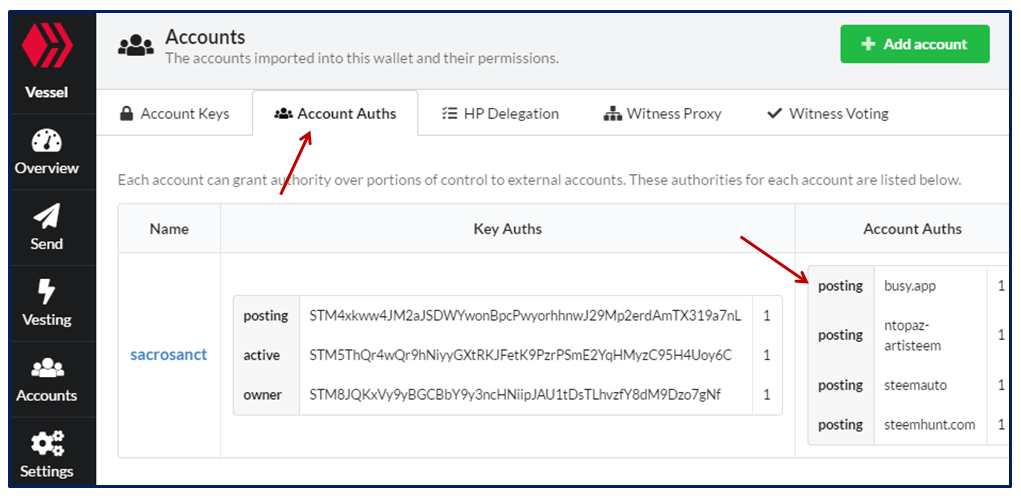
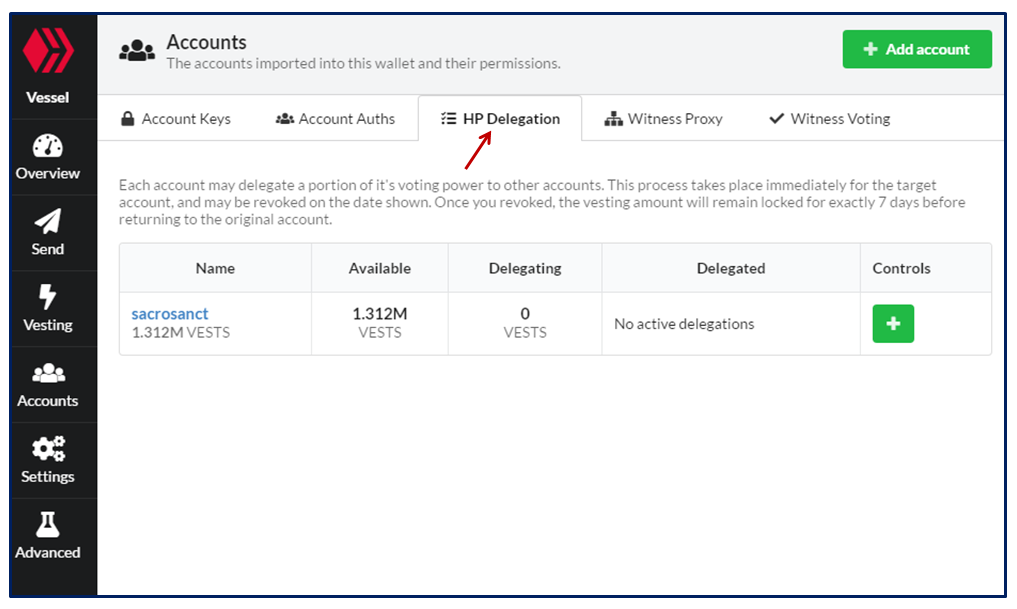
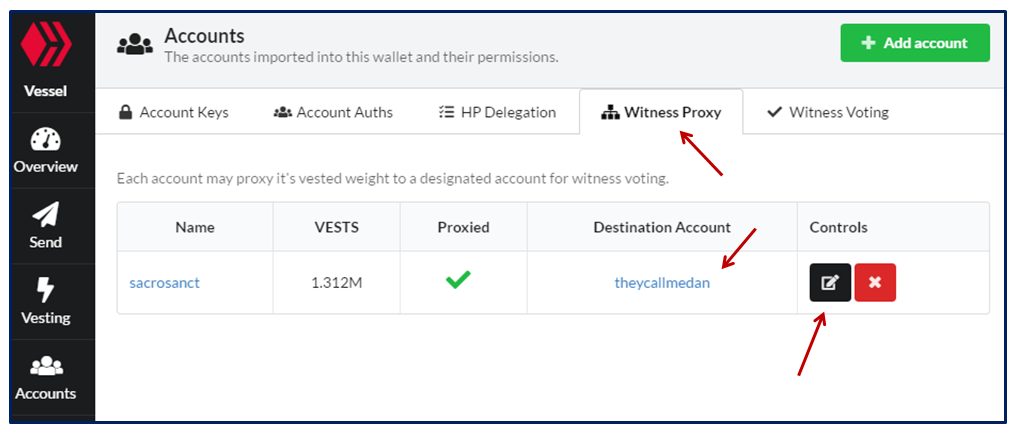
- In the “Accounts” section, you can see what is the set of permission you have in your vessel wallet. You can also see which dApps you have given posting authorities. Similarly, HP delegation, Witness Proxy, Witness voting, etc all you can check from here.
- You can also add multiple accounts here. For that click on “Add Account”(right top corner).
Thank you.