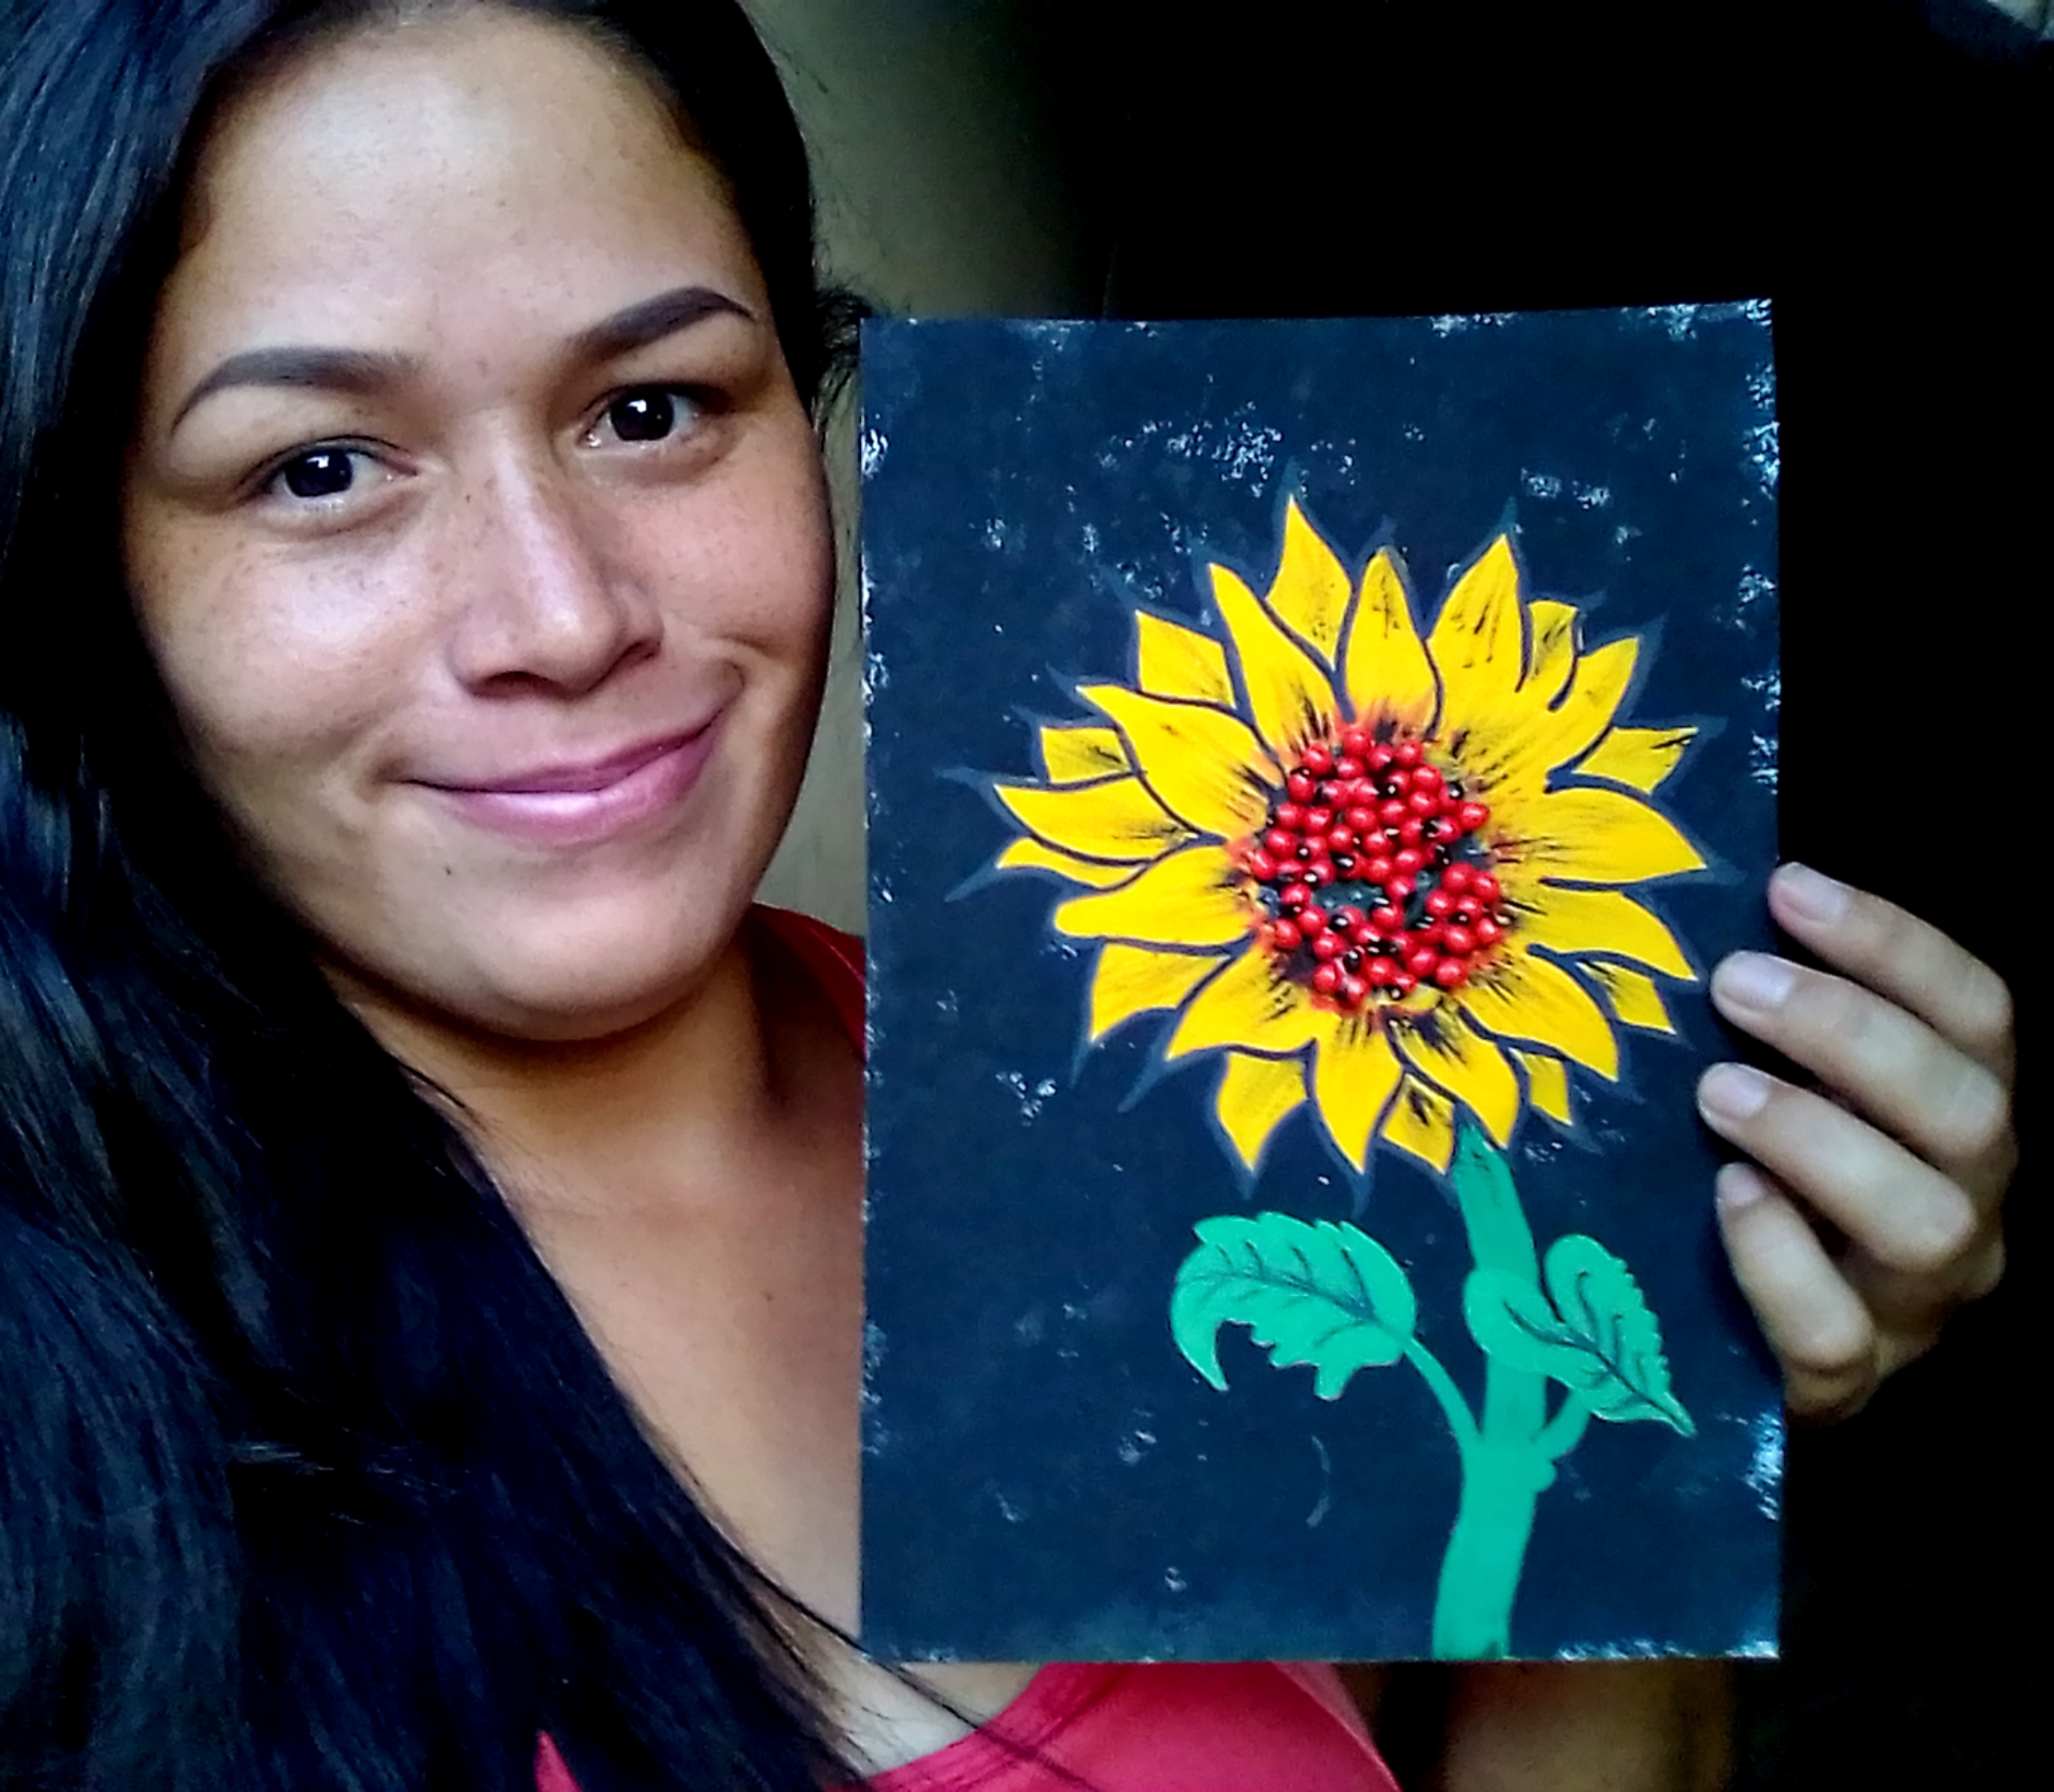
Buenos diaaaas bellos creativos❤️❤️ espero hayan amanecido muy bien en este día lunes. Son bienvenidos a mi blog!! Me complace mostrarles como realice esta hermosa flor. Sígueme hasta el final y aprenderás.
Good morning beautiful creatives❤️❤️ I hope you woke up very well on this Monday. You are welcome to my blog!! I am pleased to show you how to make this beautiful flower. Follow me to the end and you will learn.
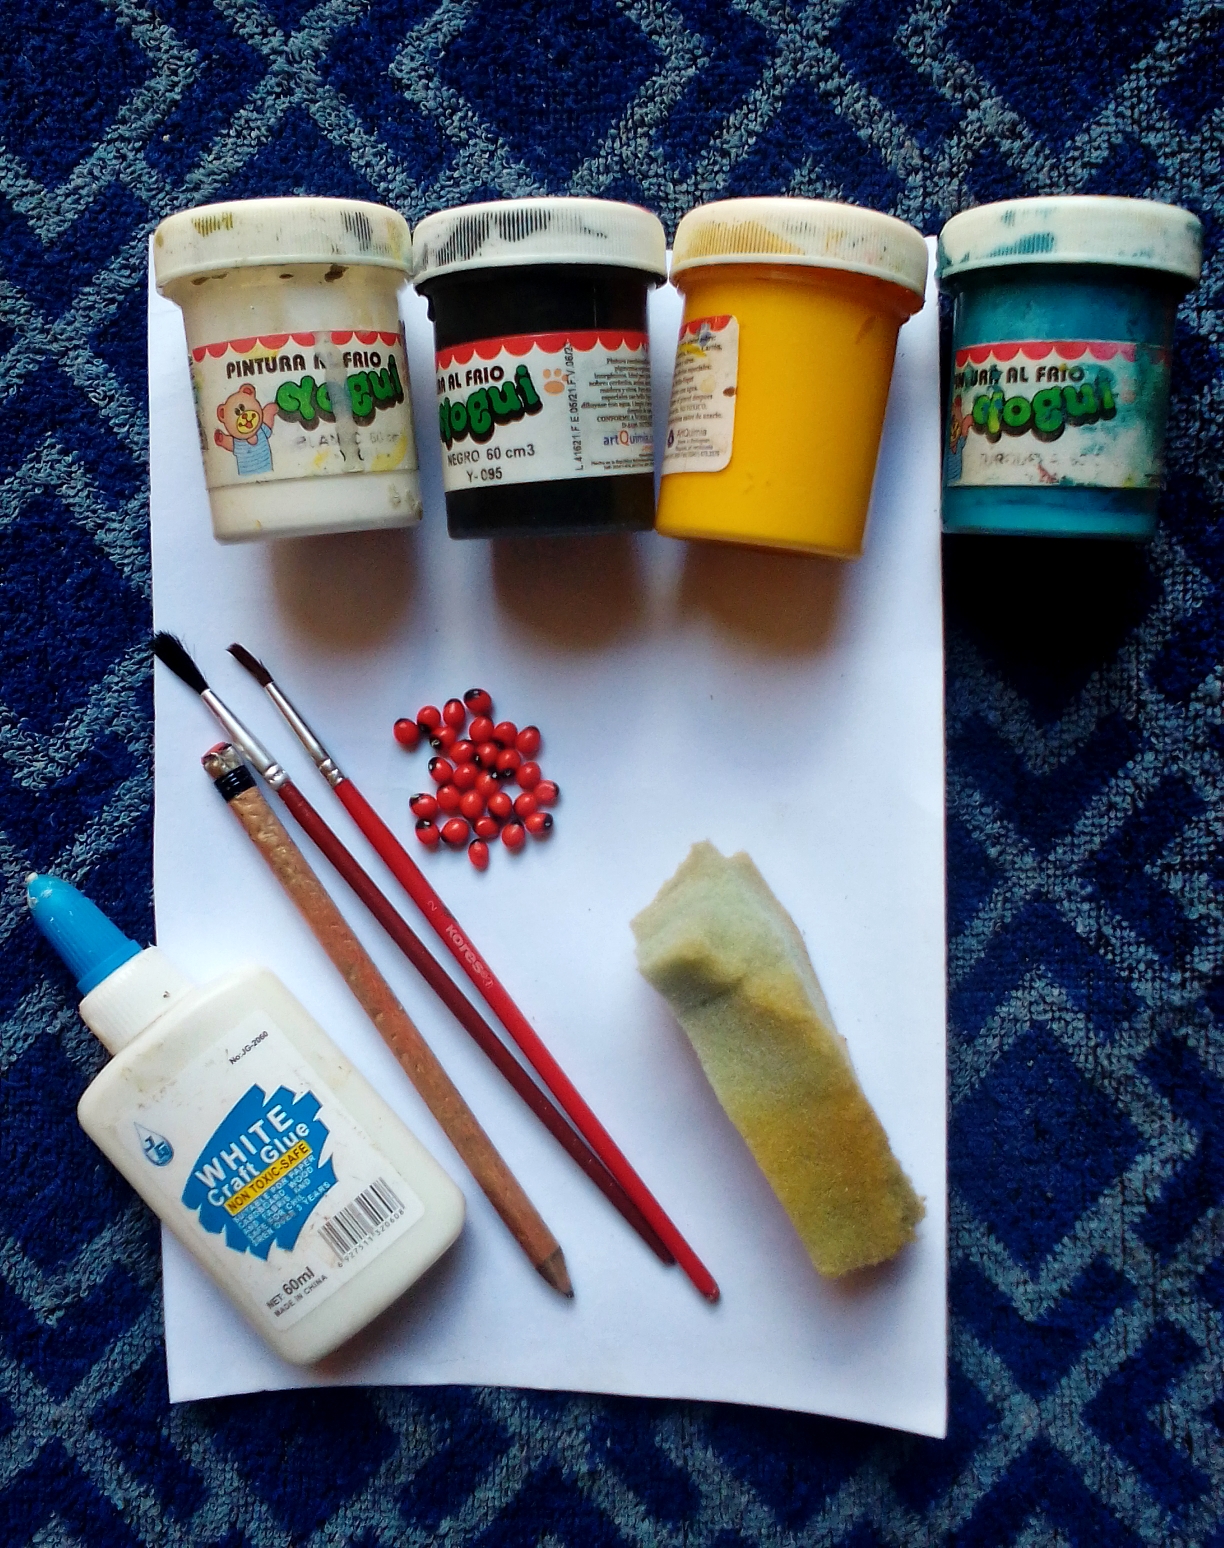
Materiales//Materials
- Cartulina blanca
- Pinturas al frío: roja, blanca, negra, amarilla, azul.
- Pincel
- Lápiz creyon
- Esponja
- Pionias
- Pega blanca
- White cardboard
- Cold paints: red, white, black, yellow, blue.
- gripper
- Crayon pencil
- sponge
- Ponies
- white glue
Manos a la Obra
Primer paso:
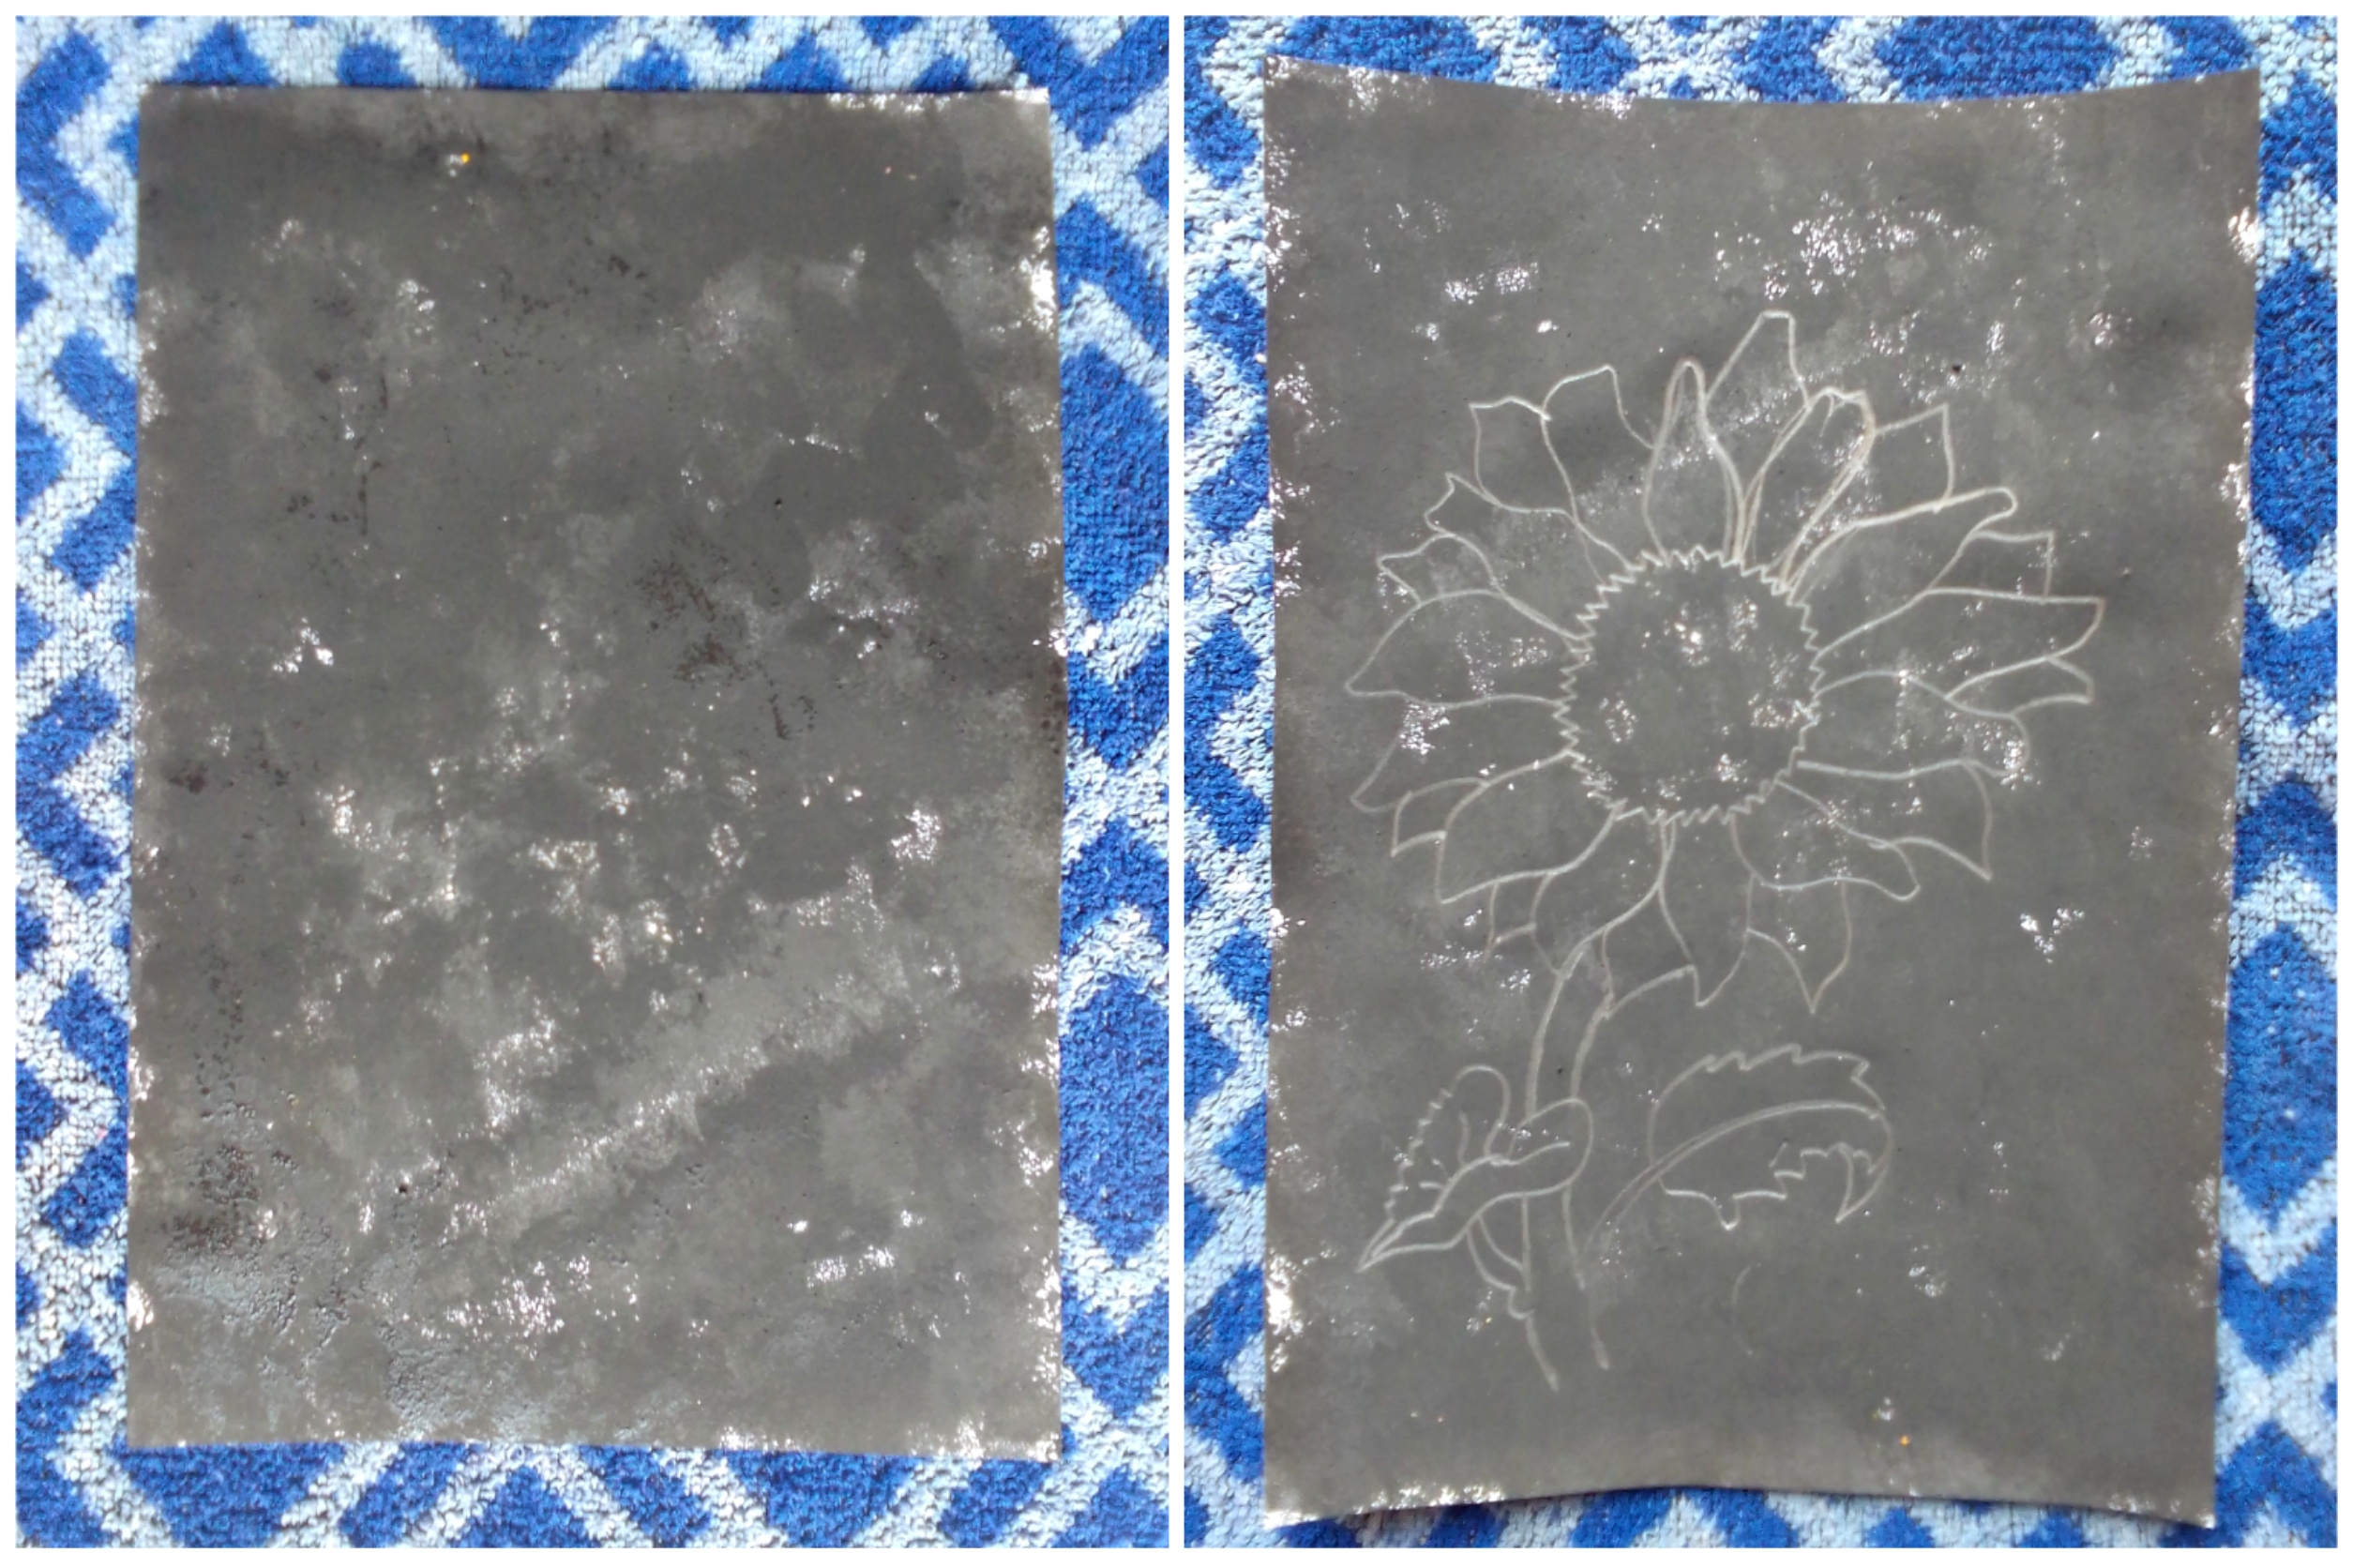
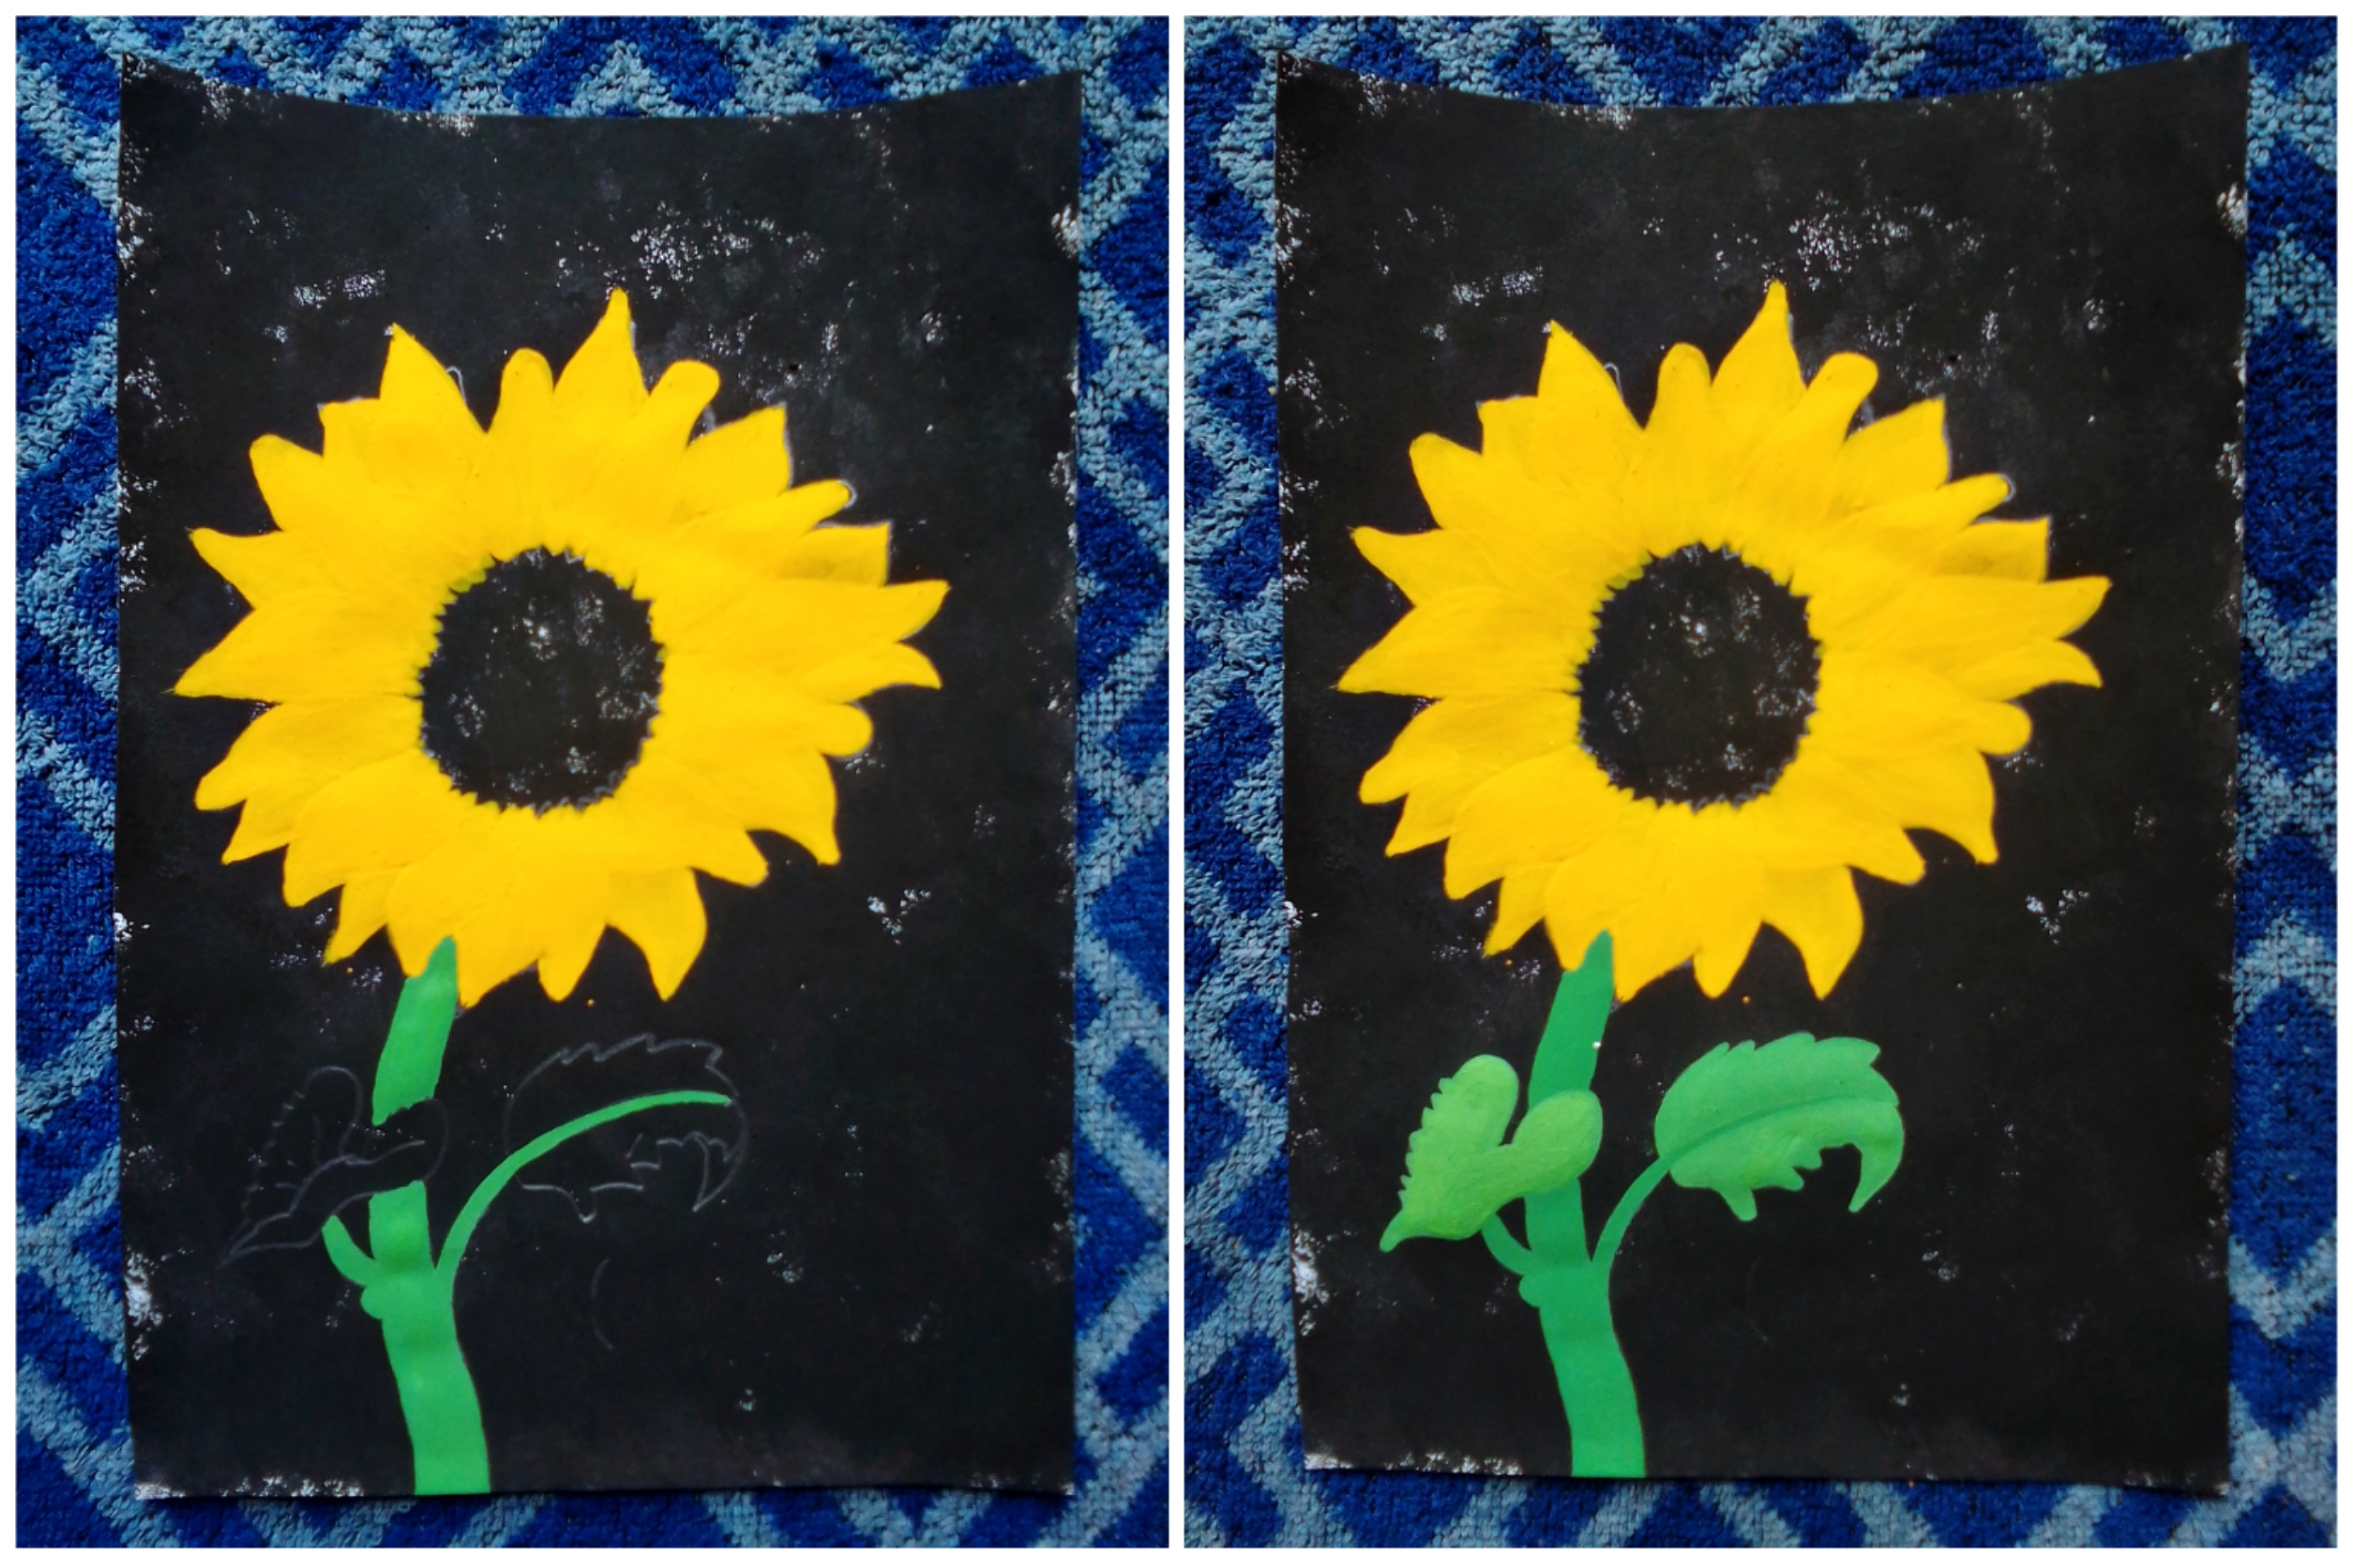
En la cartulina blanca crearás un fondo oscuro. Utiliza la esponja humedecida de pintura negra para añadir el fondo que buscamos. No importa que no quede totalmente cubierta de pintura negra, se vera bien. Al secar, trazar el boceto de un girasol sobre el mimo.
First step: On the white cardboard you will create a dark background. Use the sponge moistened with black paint to add the background we are looking for. It doesn't matter if it's not completely covered in black paint, it will still look good. When dry, trace the sketch of a sunflower on it.
Segundo paso:
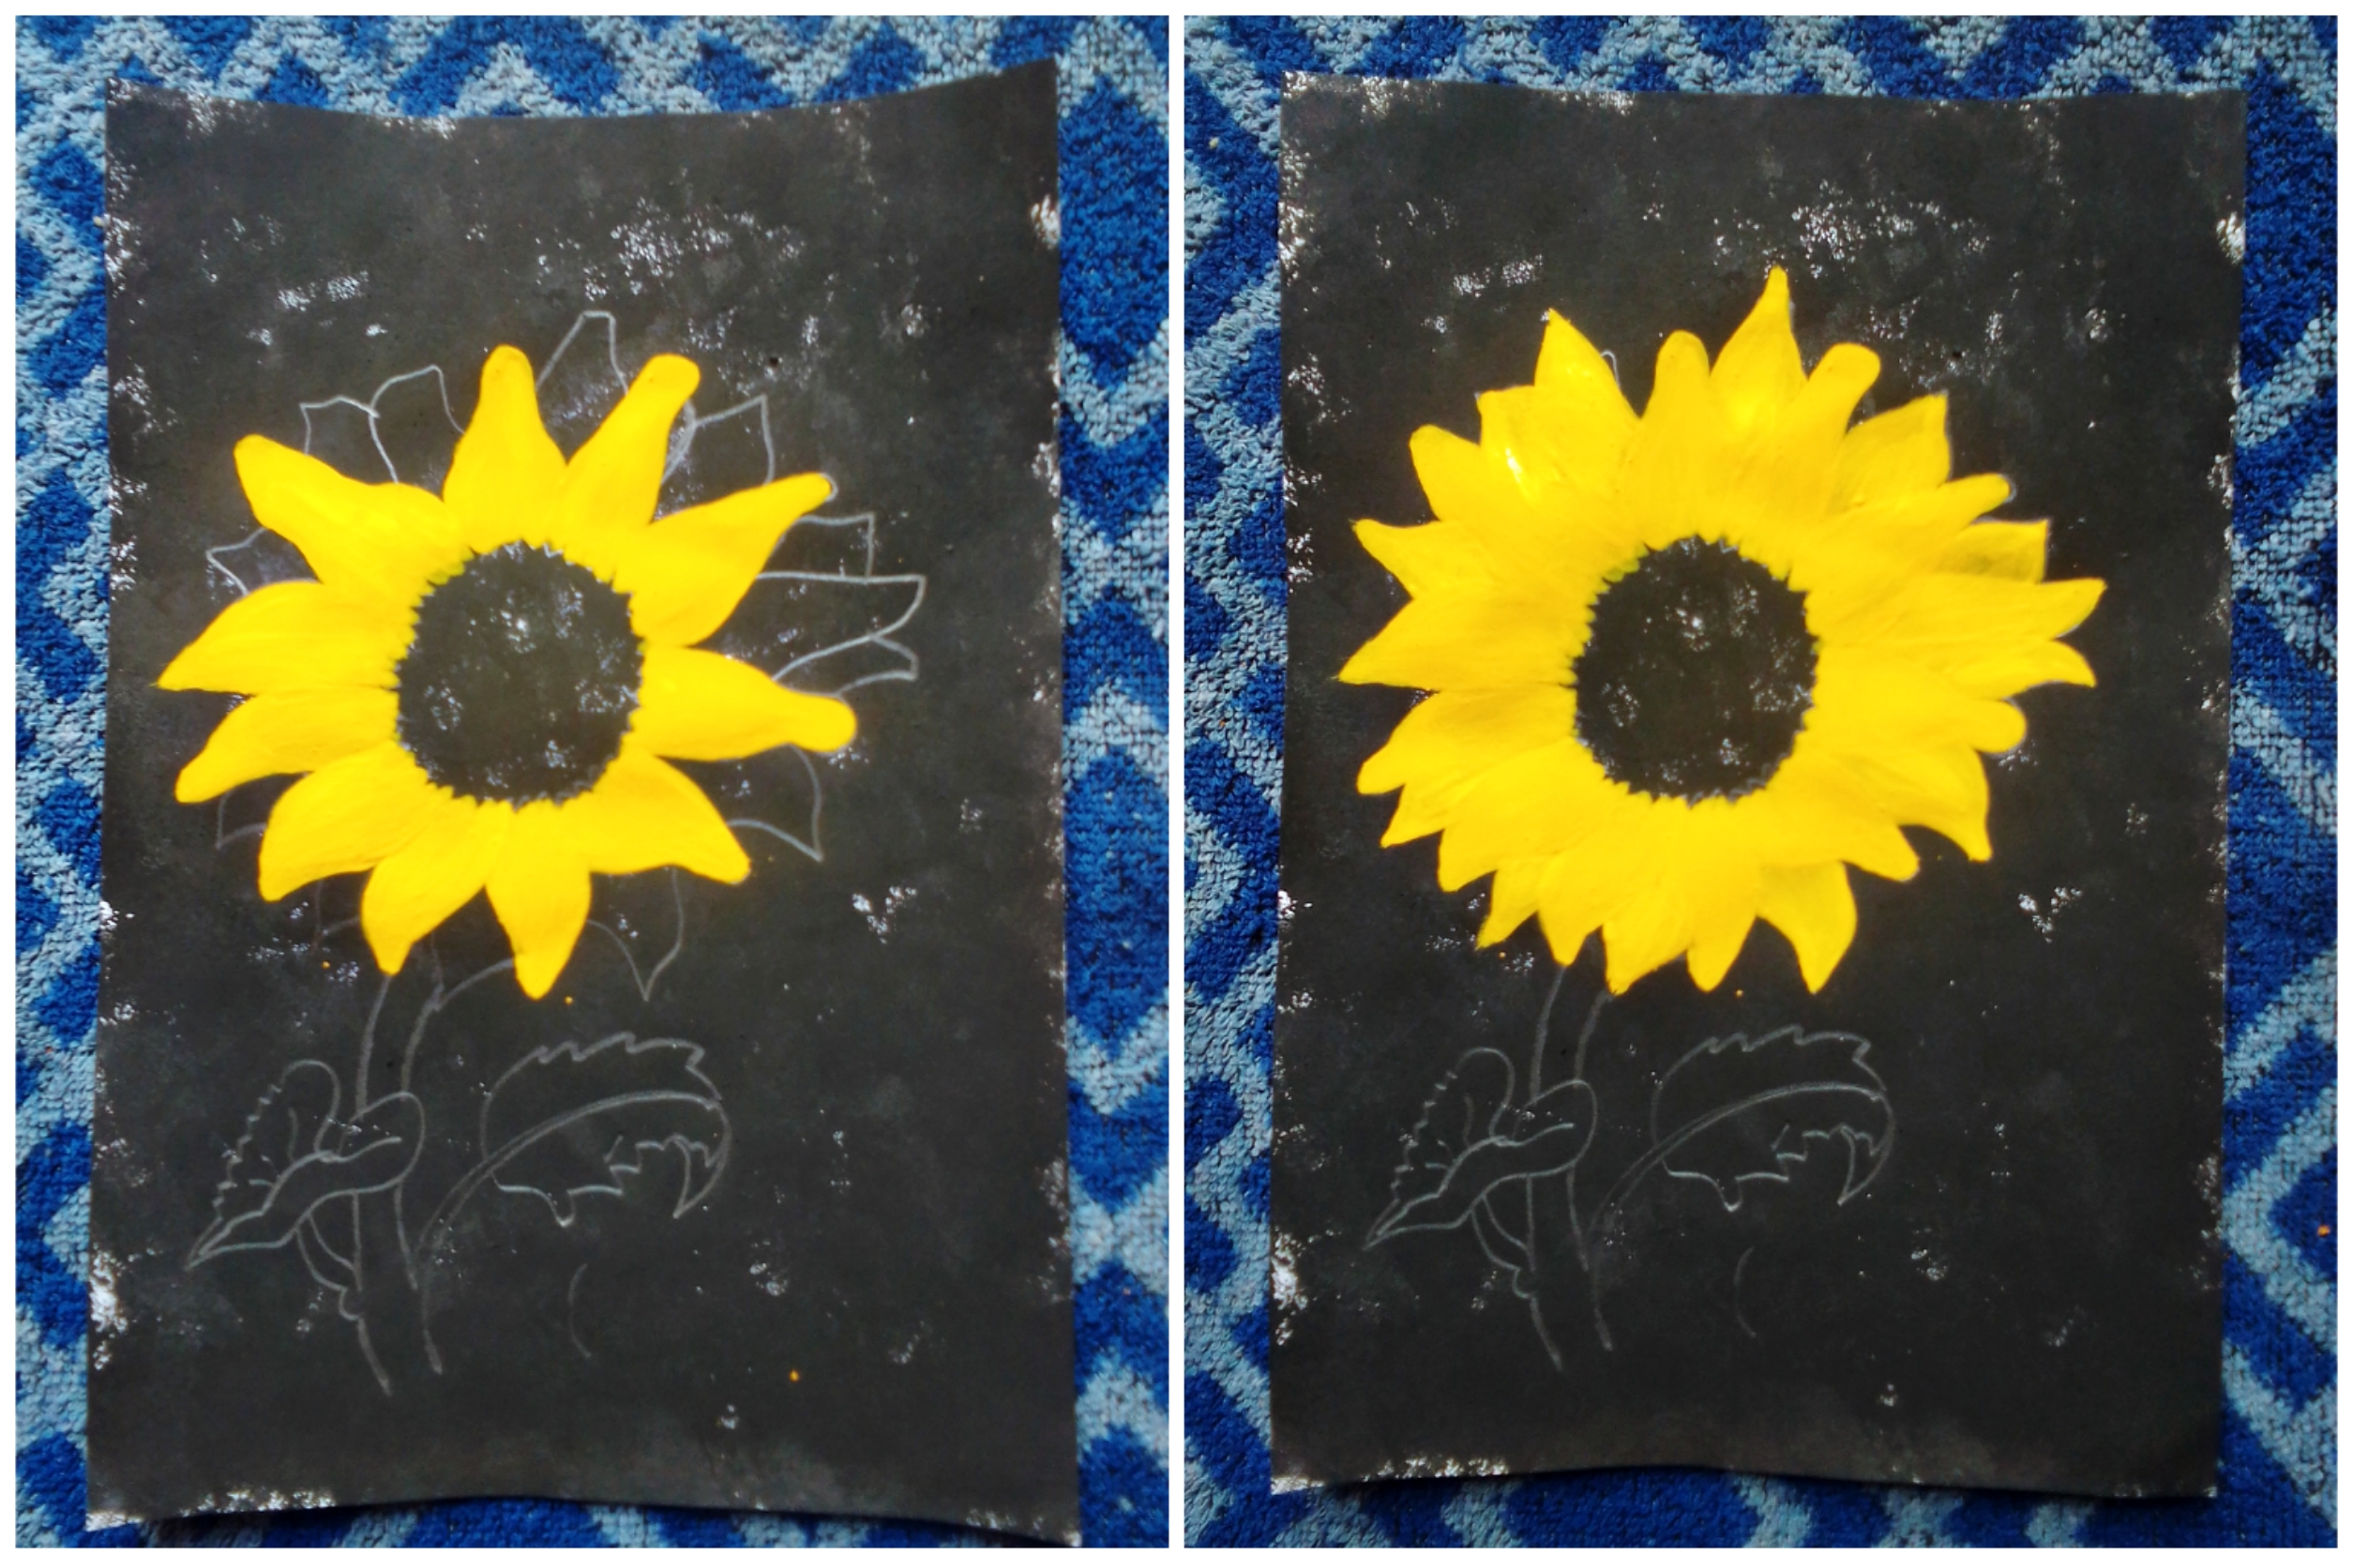
Deberás empezar a añadir pintura de color amarillo para dar vida a los pétalos de nuestra flor😗
2 step: You should start adding yellow paint to bring the petals of our flower to life😗
Tercer paso:
Notaras que no mencioné el color verde en los materiales requeridos. Decidí hacerlo yo misma, mezclando un poco de azul y amarillo. Al obtenerlo pinte el tallo y las hojas.
3 step: You will notice that I did not mention the color green in the required materials. I decided to do it myself, mixing a bit of blue and yellow. When you get it, paint the stem and leaves.
Quinto paso:
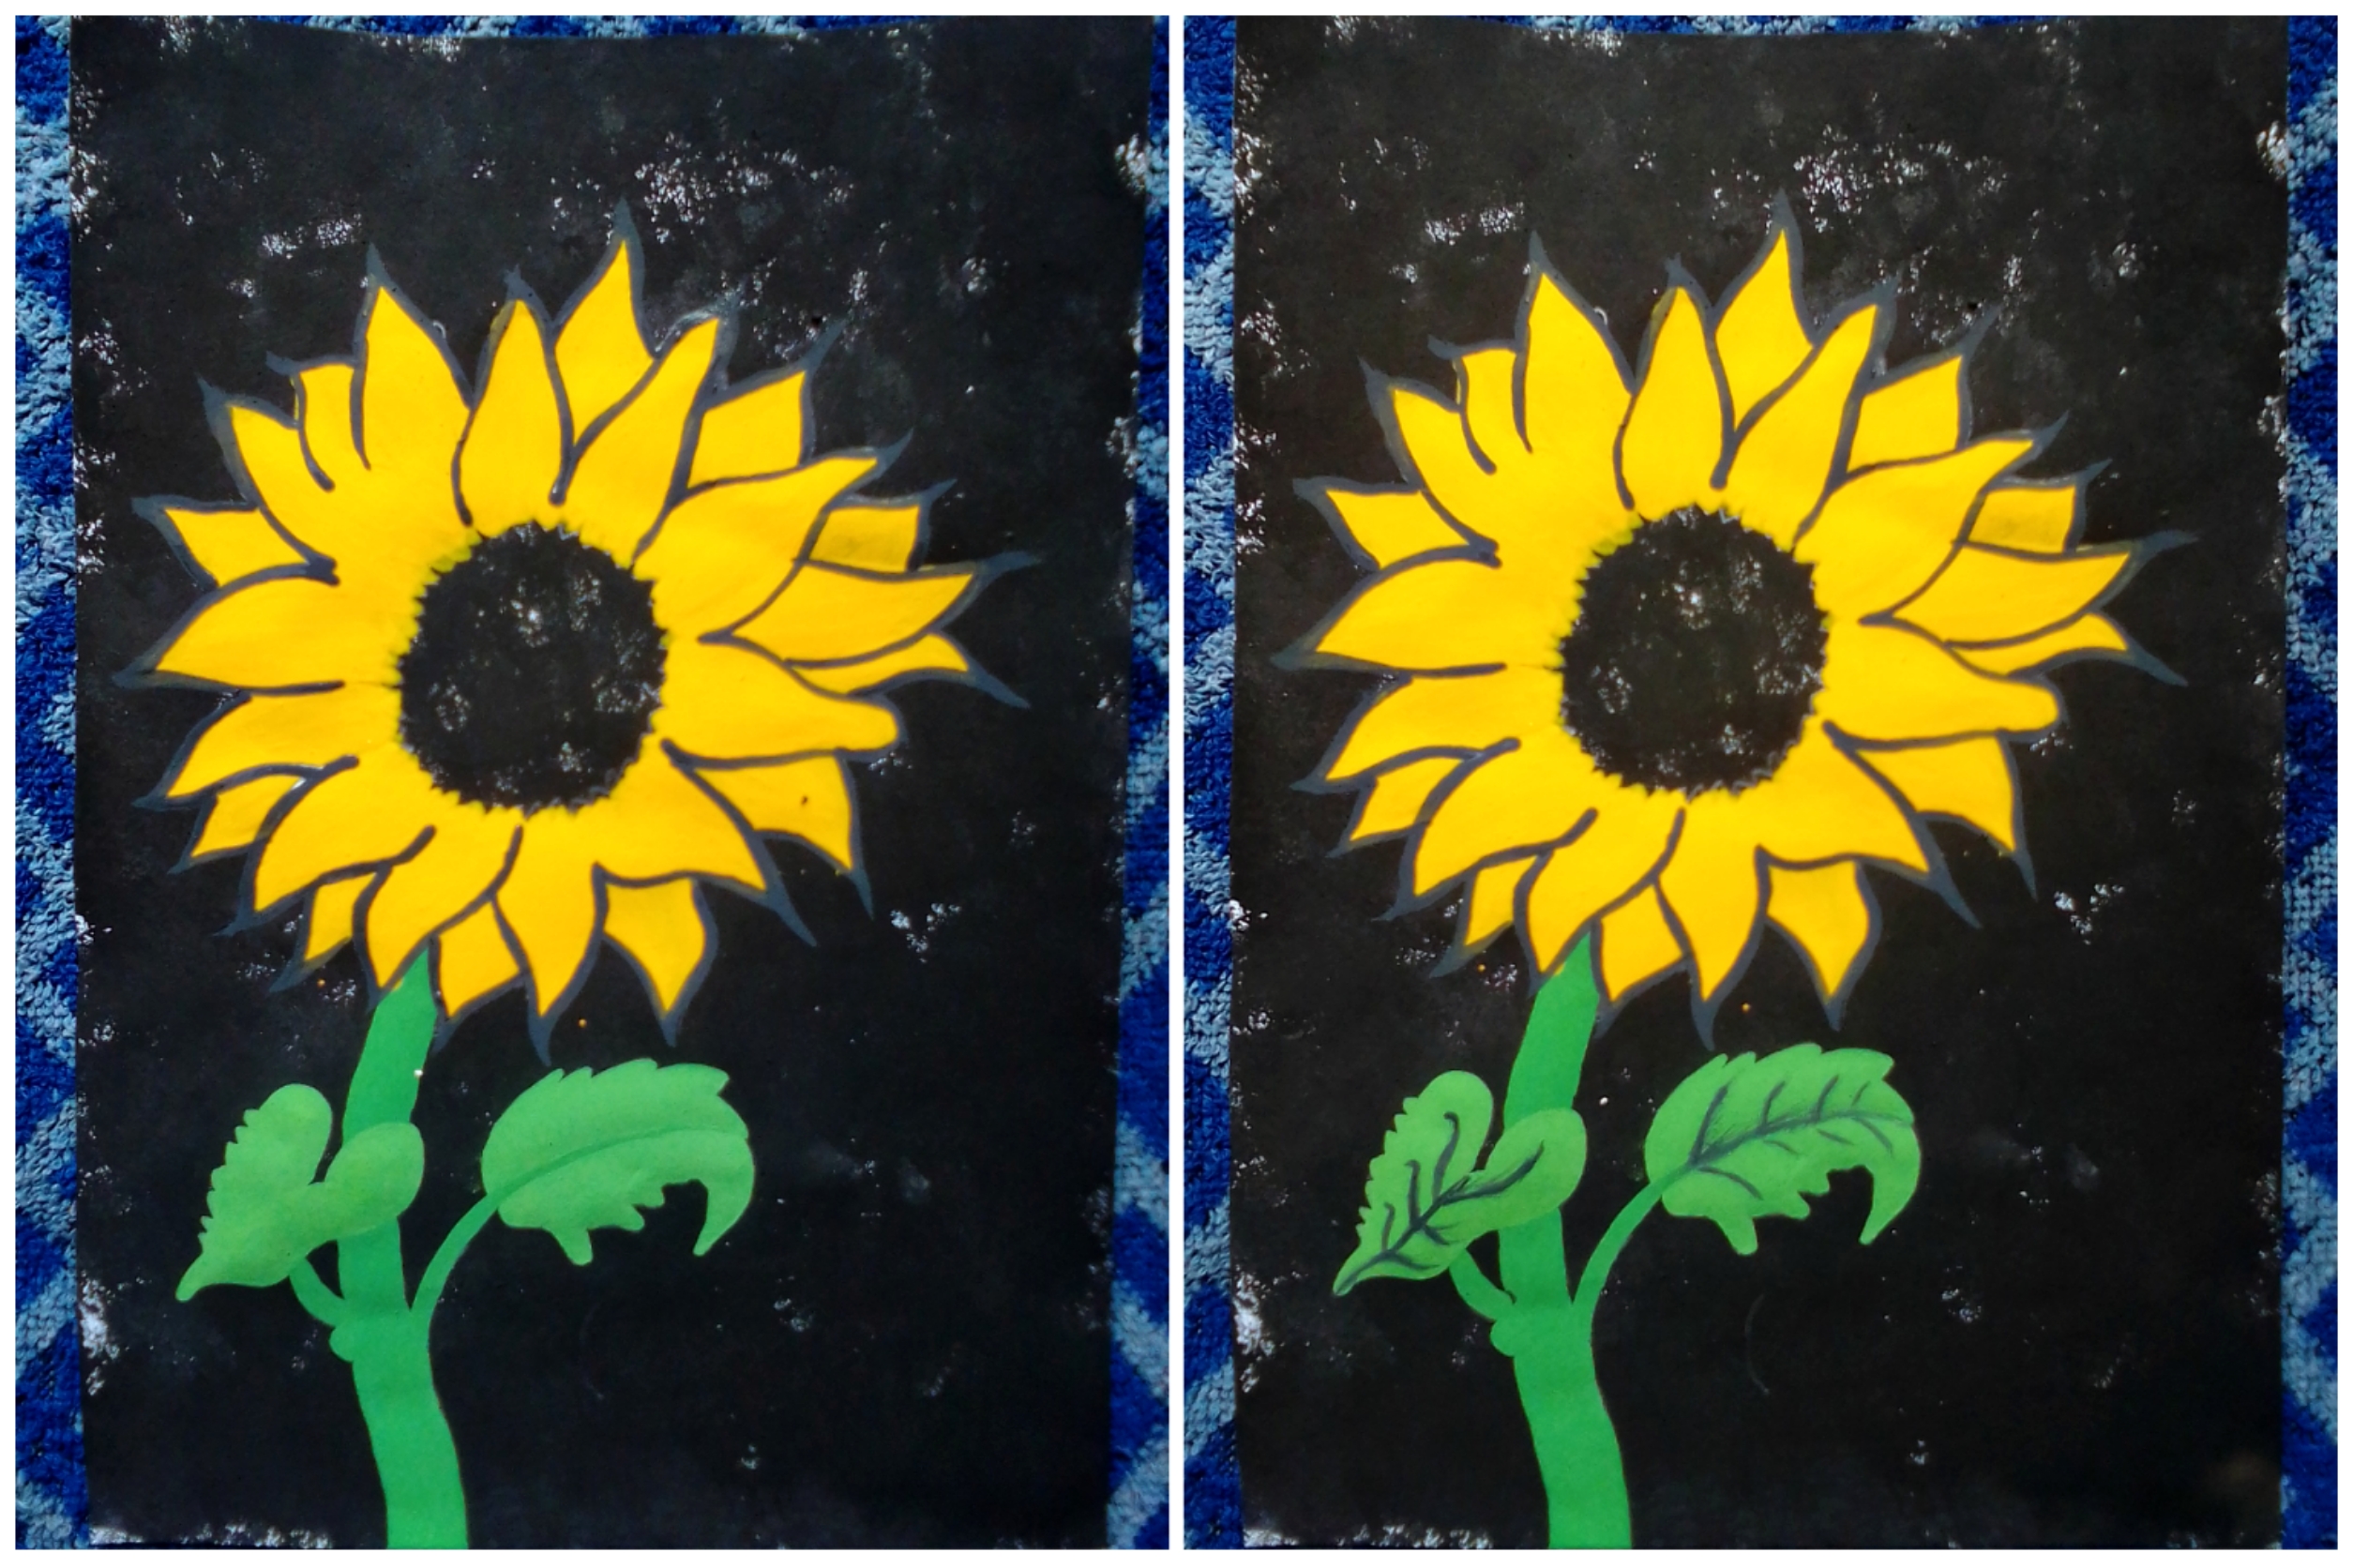
Delinea con pintura negra, todo el diseño, utilizando un pincel delgado.
Fifth step: Outline the entire design with black paint, using a thin brush.
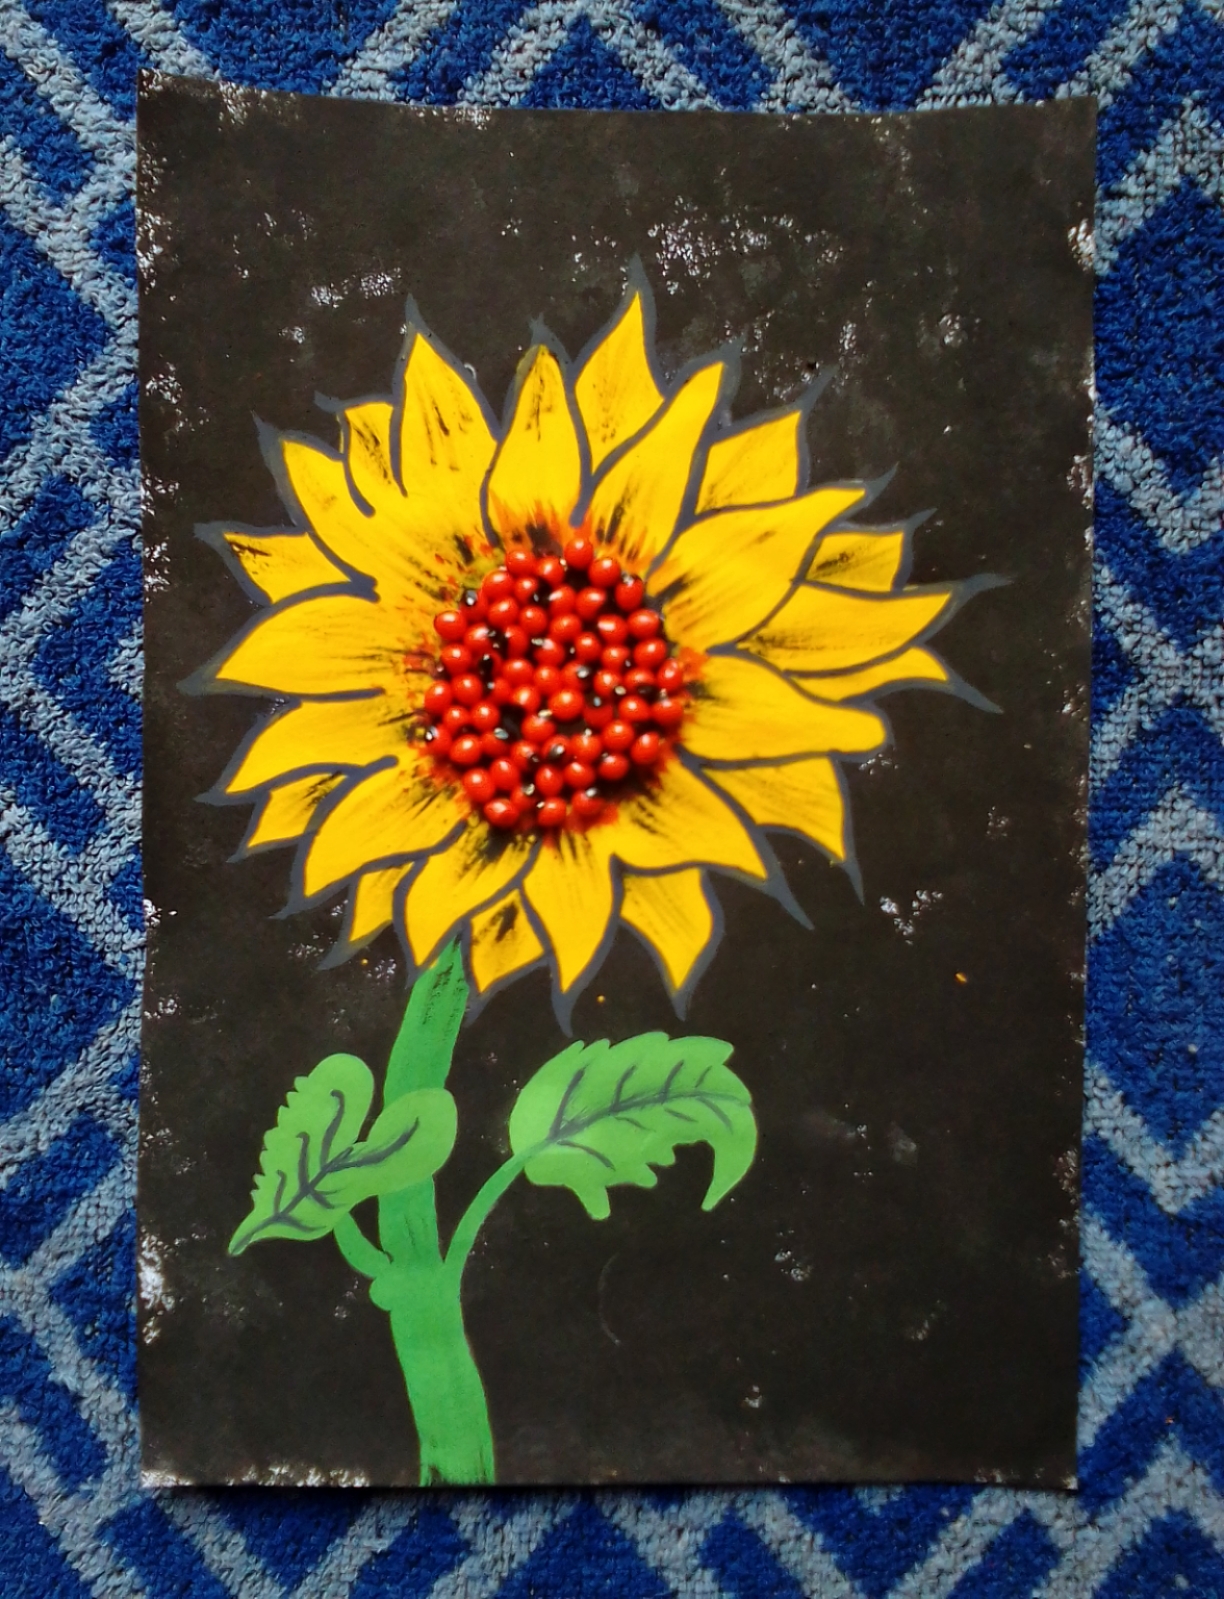
Sexto paso: para este paso, utiliza el pincel para añadir pega en el centro de la flor.
Step 6: For this step, use the brush to add glue to the center of the flower.

Último paso:
Deja caer las pionias sobre el lugar que tiene pega y allí quedarán. Añade algunos detalles en los pétalos, con el pincel. Tienes tu hermoso resultado 😁😁😁
Last step: Drop the pionias on the place that has glue and there they will be. add some details on the petals, with the brush. You have your beautiful result 😁😁😁
Me alegro que te haya gustado mi trabajo. Dios te continúe bendiciendo. Hasta la próxima. Chaooo.
I'm glad you liked my work. Hope God continue blessing you. Until next time. Bye.
¡Me encantó tu post!. Ese detalle al final en relieve le dio un toque especial y vida a tu trabajo. Me gustó mucho ver el paso a paso y disfruté de la manera en que llevas el post, además de su diseño, felicitaciones...
Me alegra que te haya gustado. Gracias por leer
Se ve muy bien el acabado de tu diseño, una sencilla y bonita técnica. Solo te recomiendo hacer la corrección de la palabra Peonía que colocaste pionia.
Saludos.
¡Felicidades! Esta publicación obtuvo upvote y fue compartido por @la-colmena, un proyecto de Curación Manual para la comunidad hispana de Hive que cuenta con el respaldo de @curie.
Si te gusta el trabajo que hacemos, te invitamos a darle tu voto a este comentario y a votar como testigo por Curie.
Si quieres saber más sobre nuestro proyecto, acompáñanos en Discord: La Colmena.
Thank you for sharing this amazing post on HIVE!
Your content got selected by our fellow curator @rezoanulvibes & you just received a little thank you via an upvote from our non-profit curation initiative!
You will be featured in one of our recurring curation compilations and on our pinterest boards! Both are aiming to offer you a stage to widen your audience within and outside of the DIY scene of hive.
Join the official DIYHub community on HIVE and show us more of your amazing work and feel free to connect with us and other DIYers via our discord server: https://discord.gg/mY5uCfQ !
If you want to support our goal to motivate other DIY/art/music/homesteading/... creators just delegate to us and earn 100% of your curation rewards!
Stay creative & hive on!
Congratulations @marlynale! You have completed the following achievement on the Hive blockchain and have been rewarded with new badge(s):
Your next target is to reach 3250 upvotes.
You can view your badges on your board and compare yourself to others in the Ranking
If you no longer want to receive notifications, reply to this comment with the word
STOPCheck out the last post from @hivebuzz:
Support the HiveBuzz project. Vote for our proposal!