Hello dear friends of Gems, I hope you are very well, starting this week with a super fun craft, and that we can do at home with whatever you have at hand. I decided to share with you a bunny that I made as a distraction, since I had days without leaving the house and I wanted to do some crafts to occupy my mind. I hope you like it.
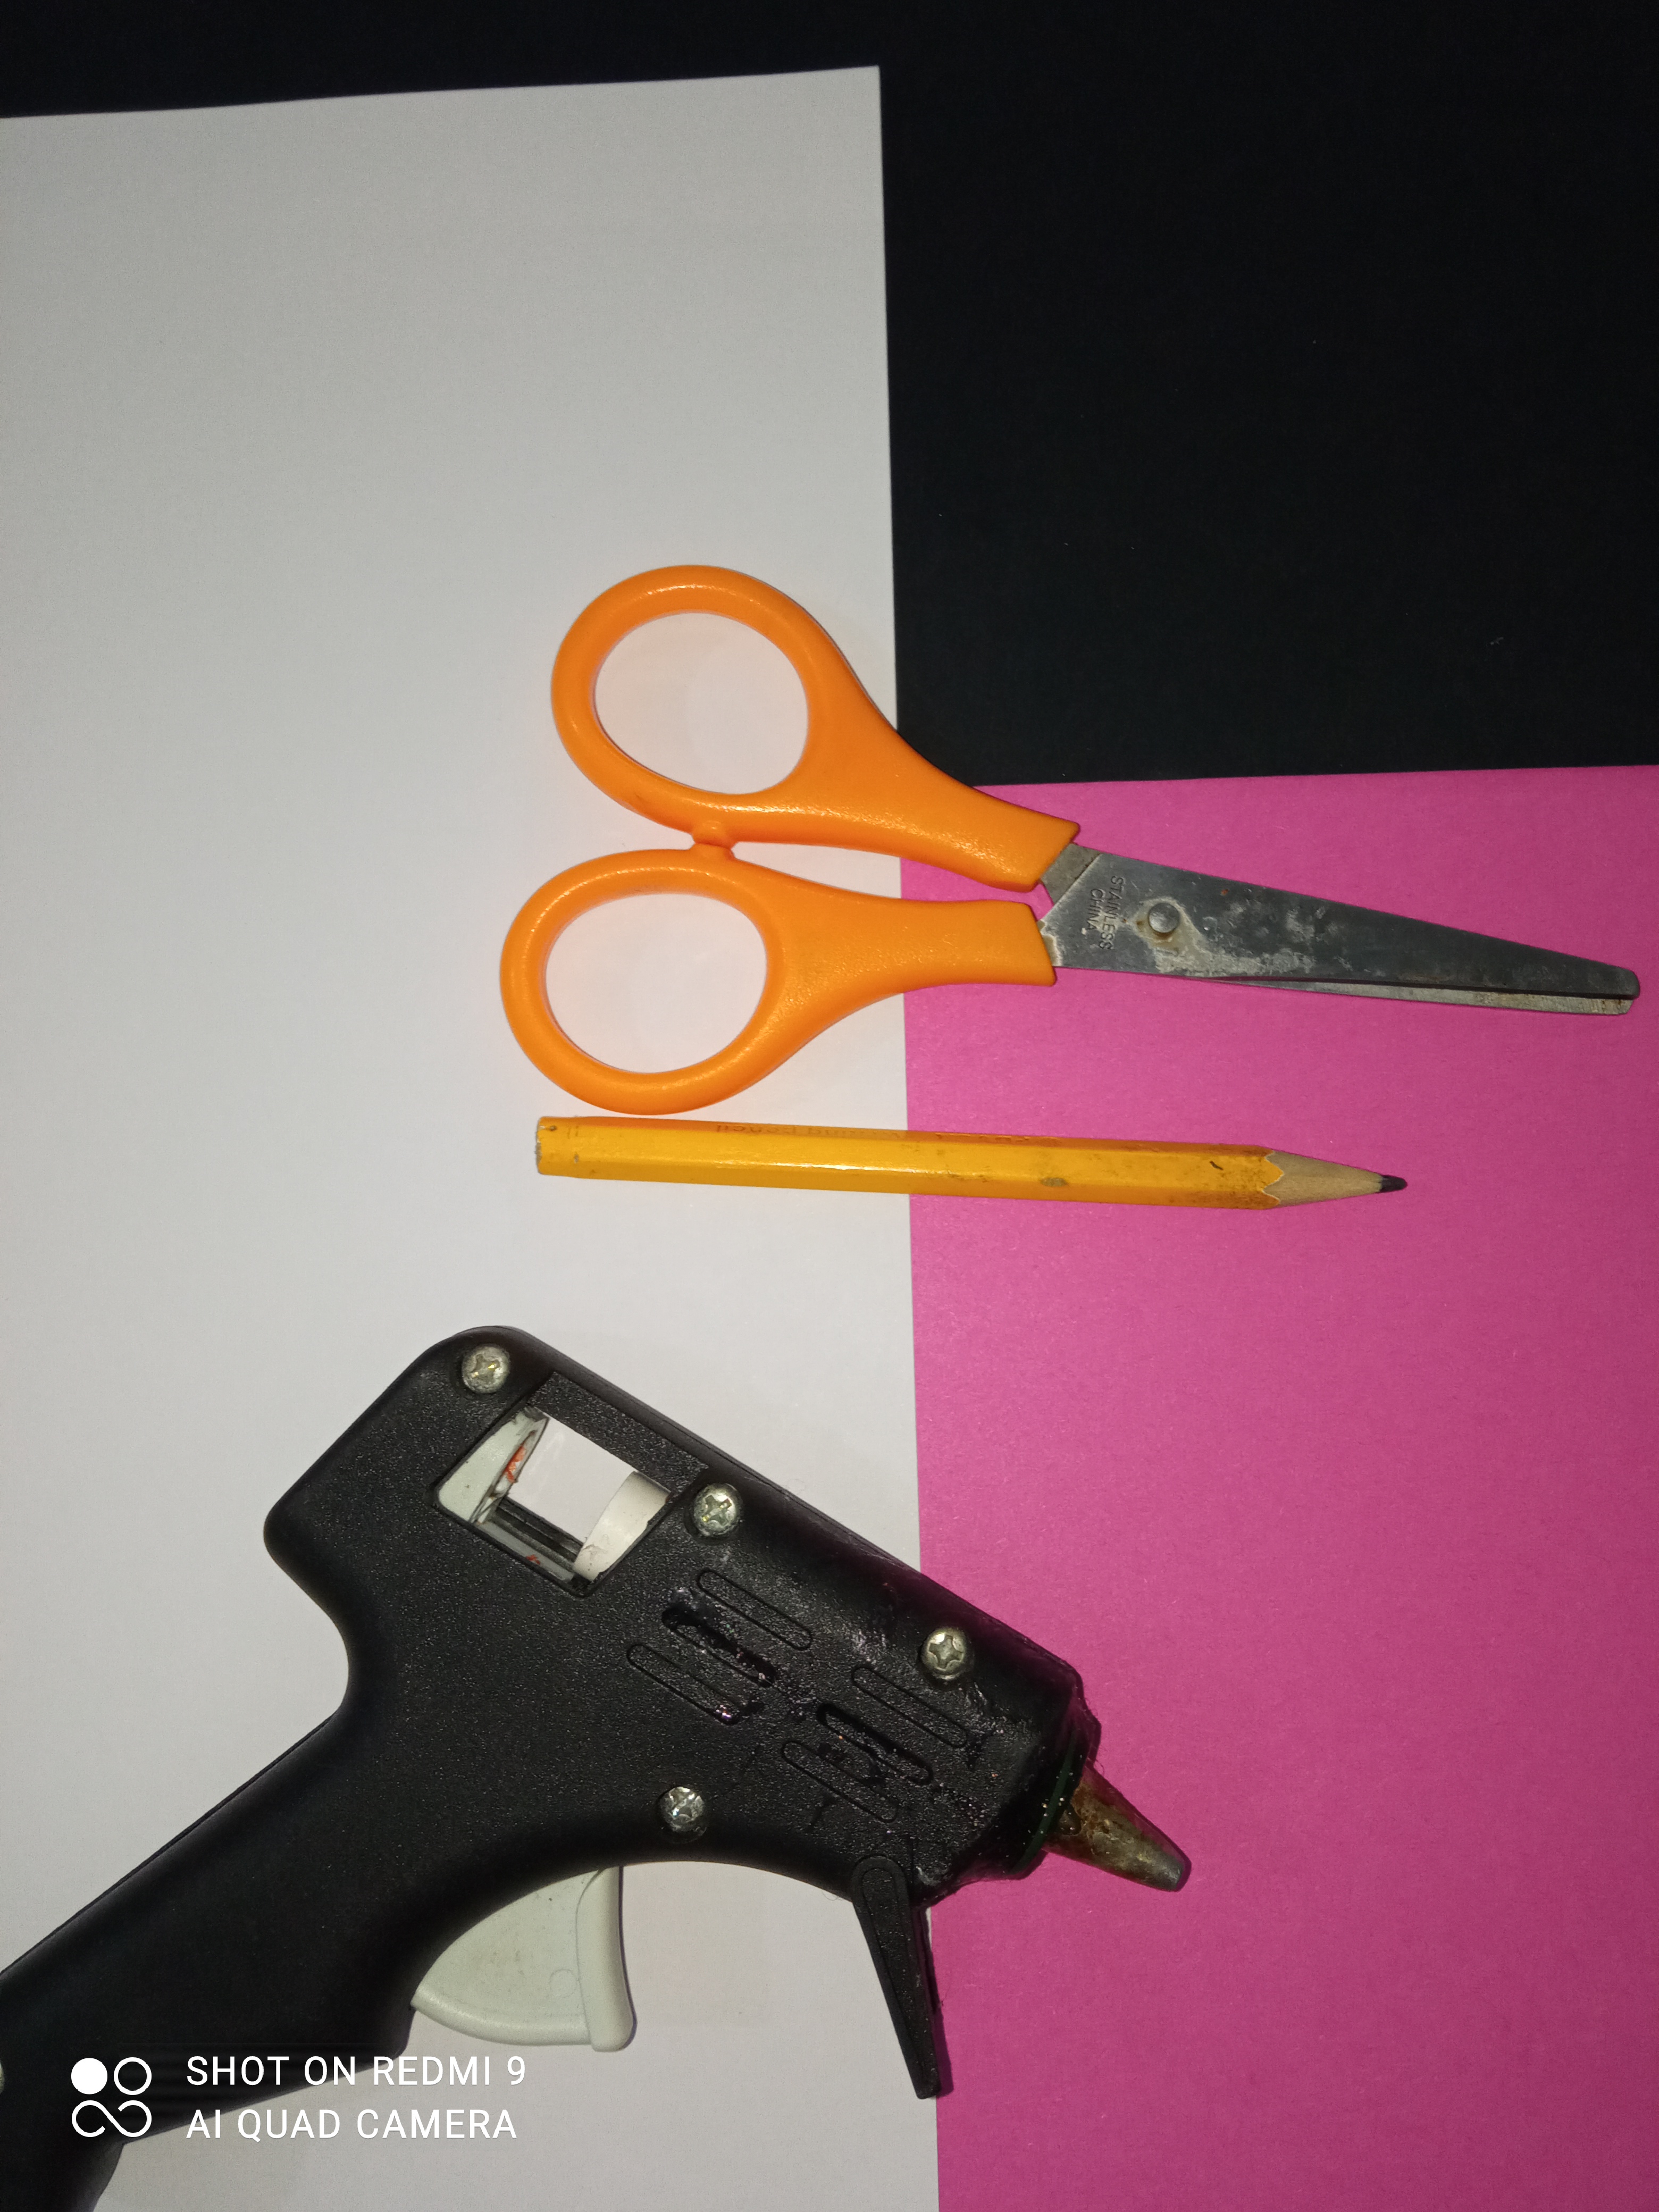
Materiales necesarios: Cartulina, lápiz, silicona caliente, tijera y una regla o escalímetro.
Materials needed: Cardboard, pencil, hot silicone, scissors and a ruler or scalimeter.
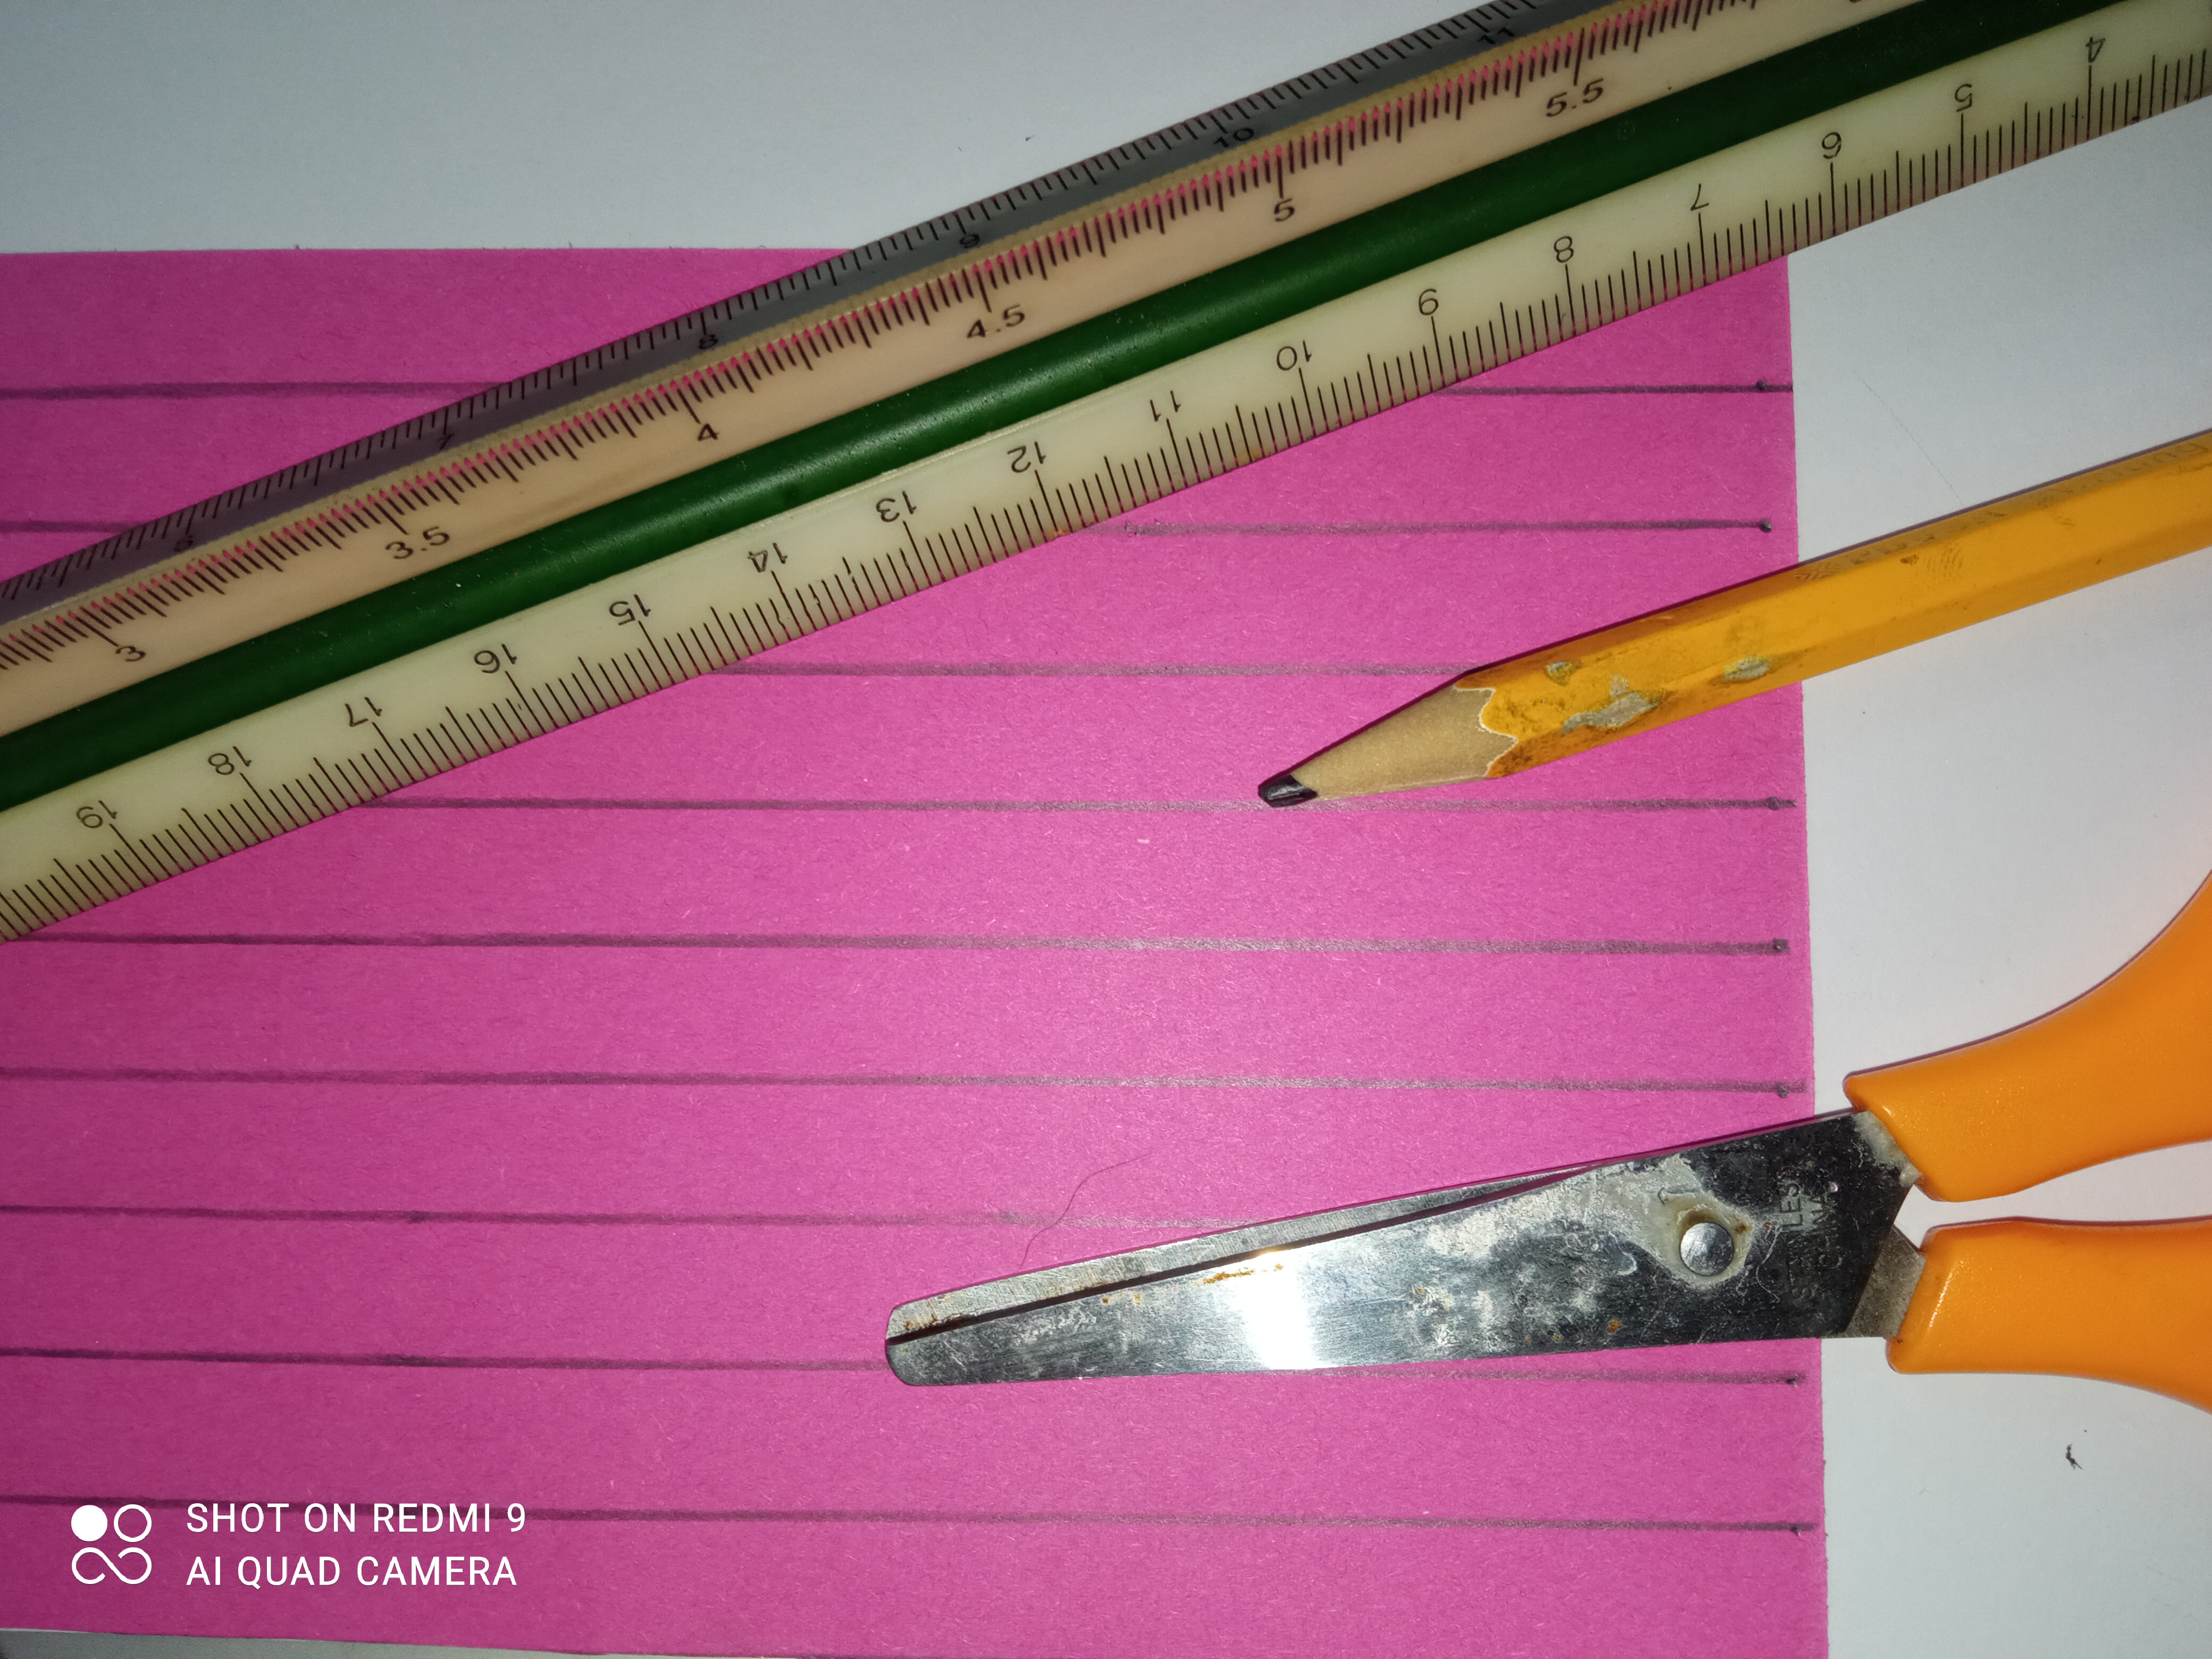
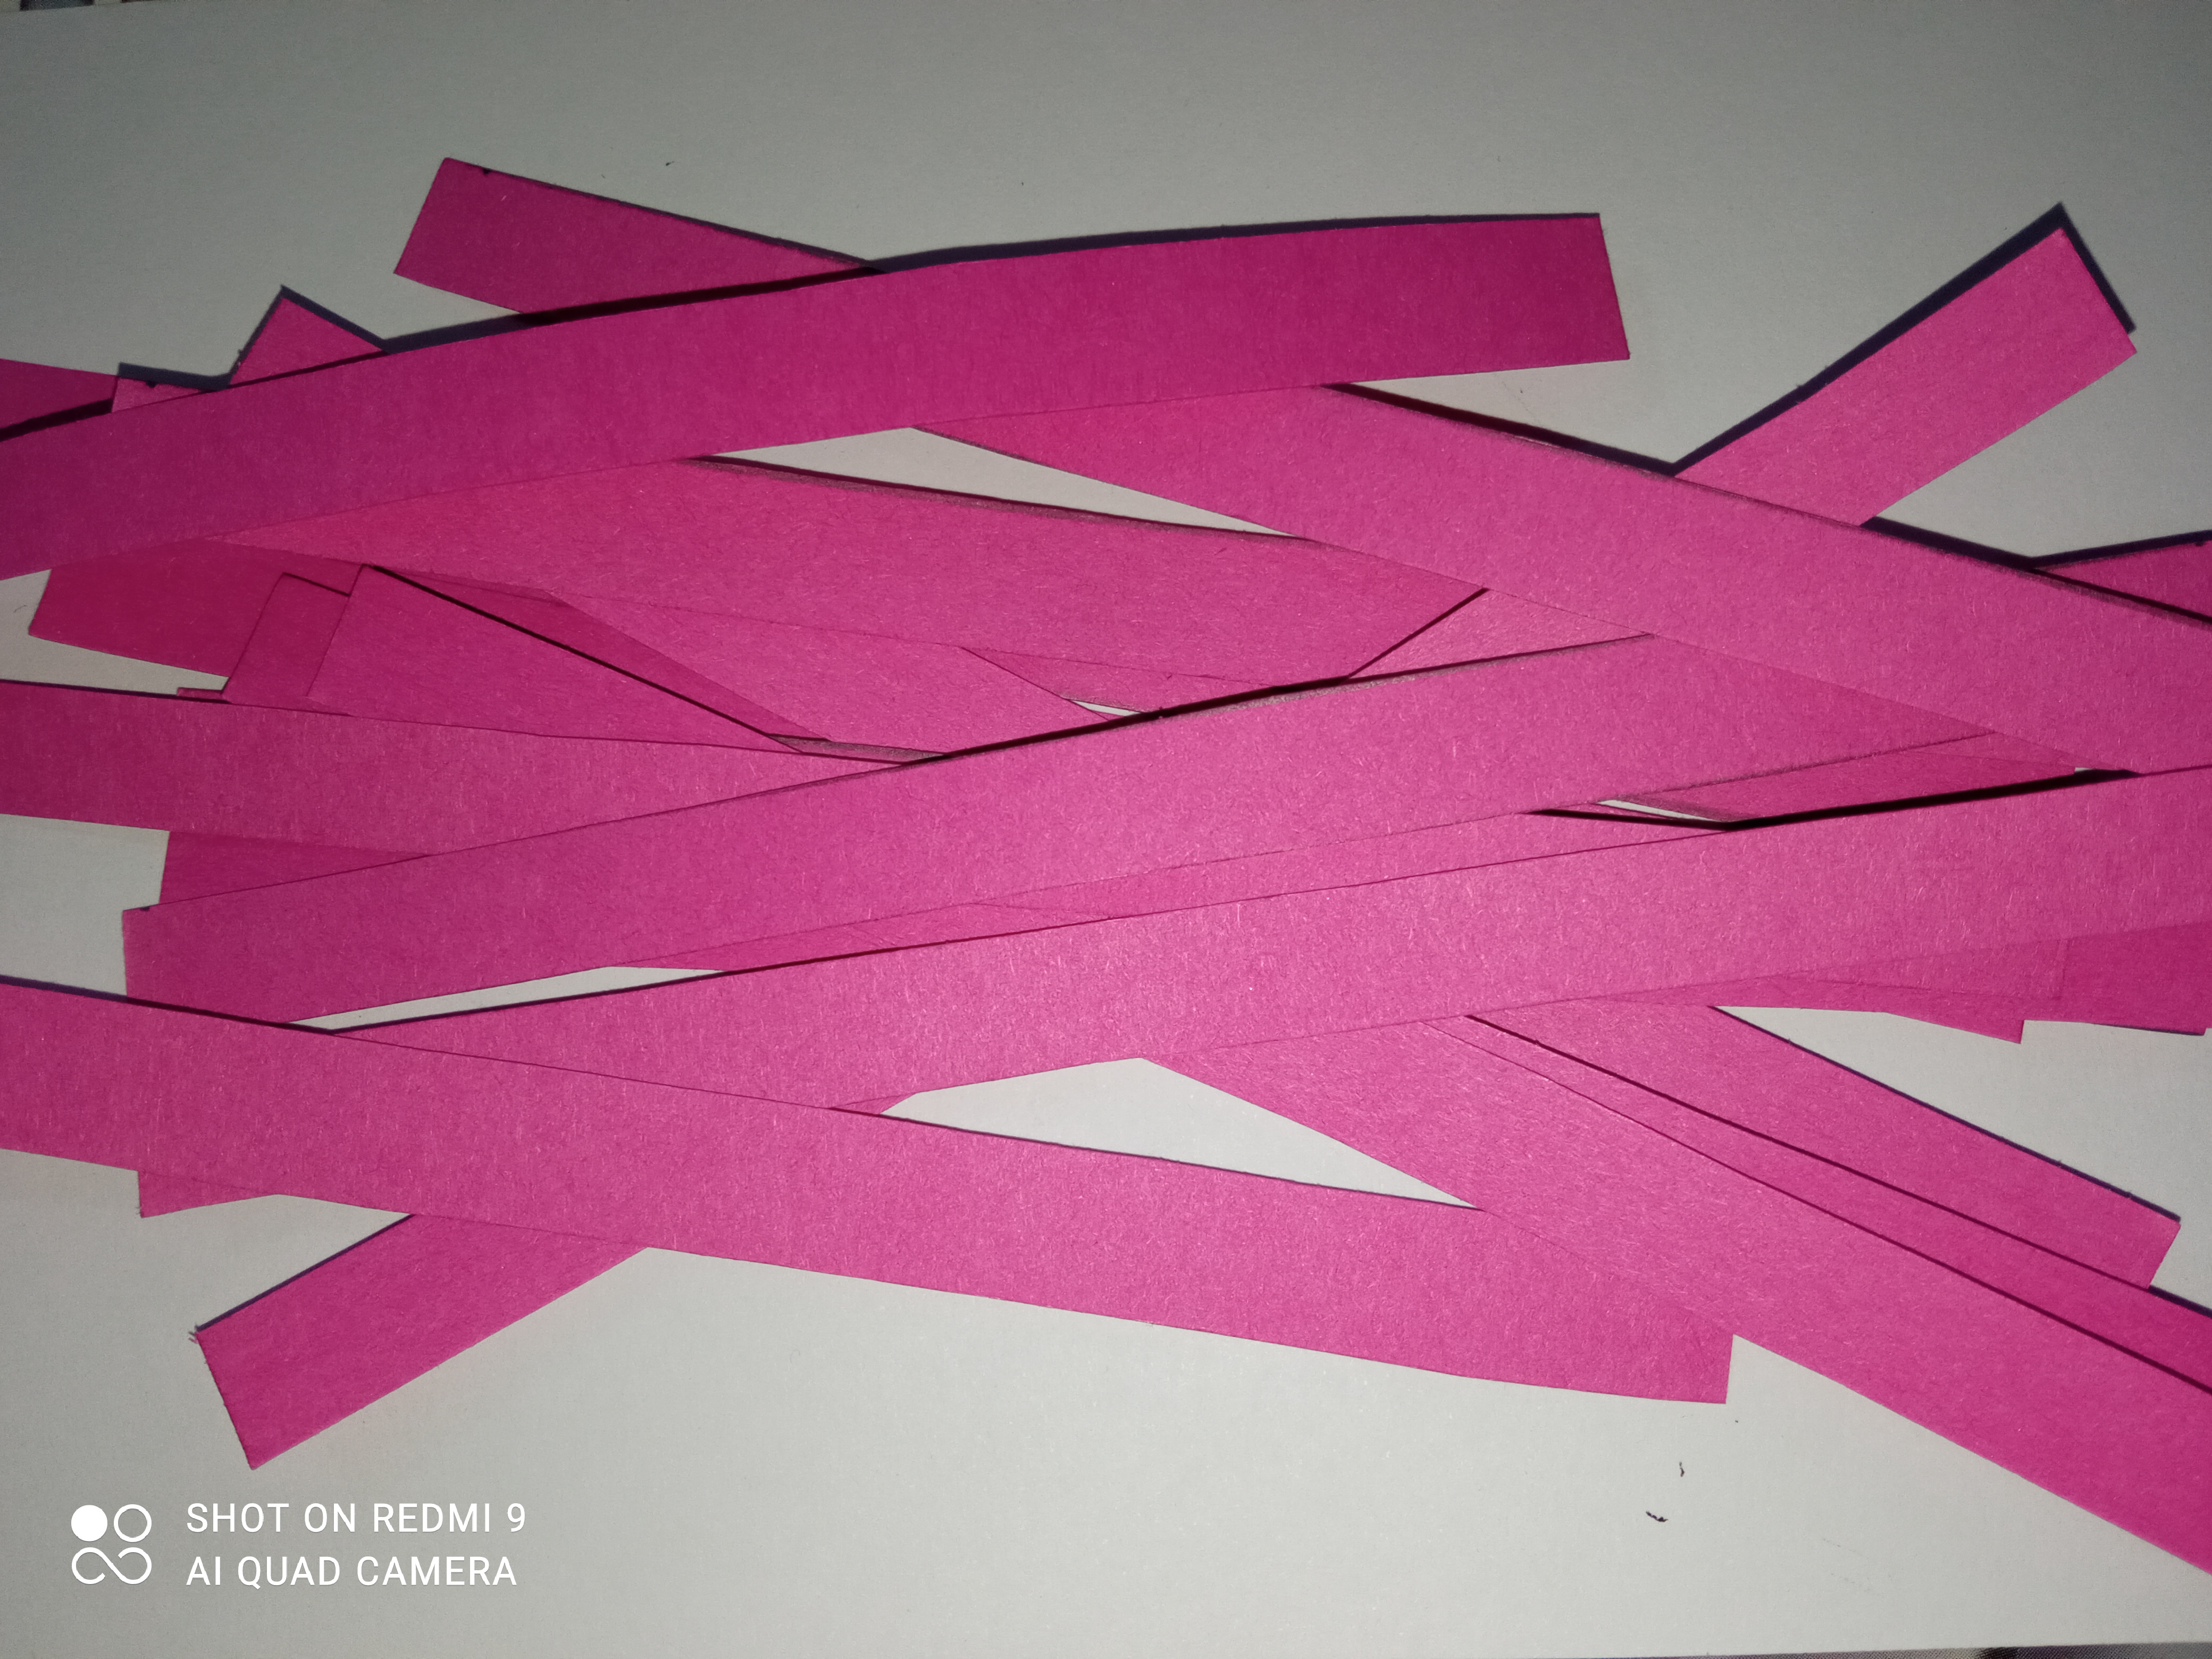
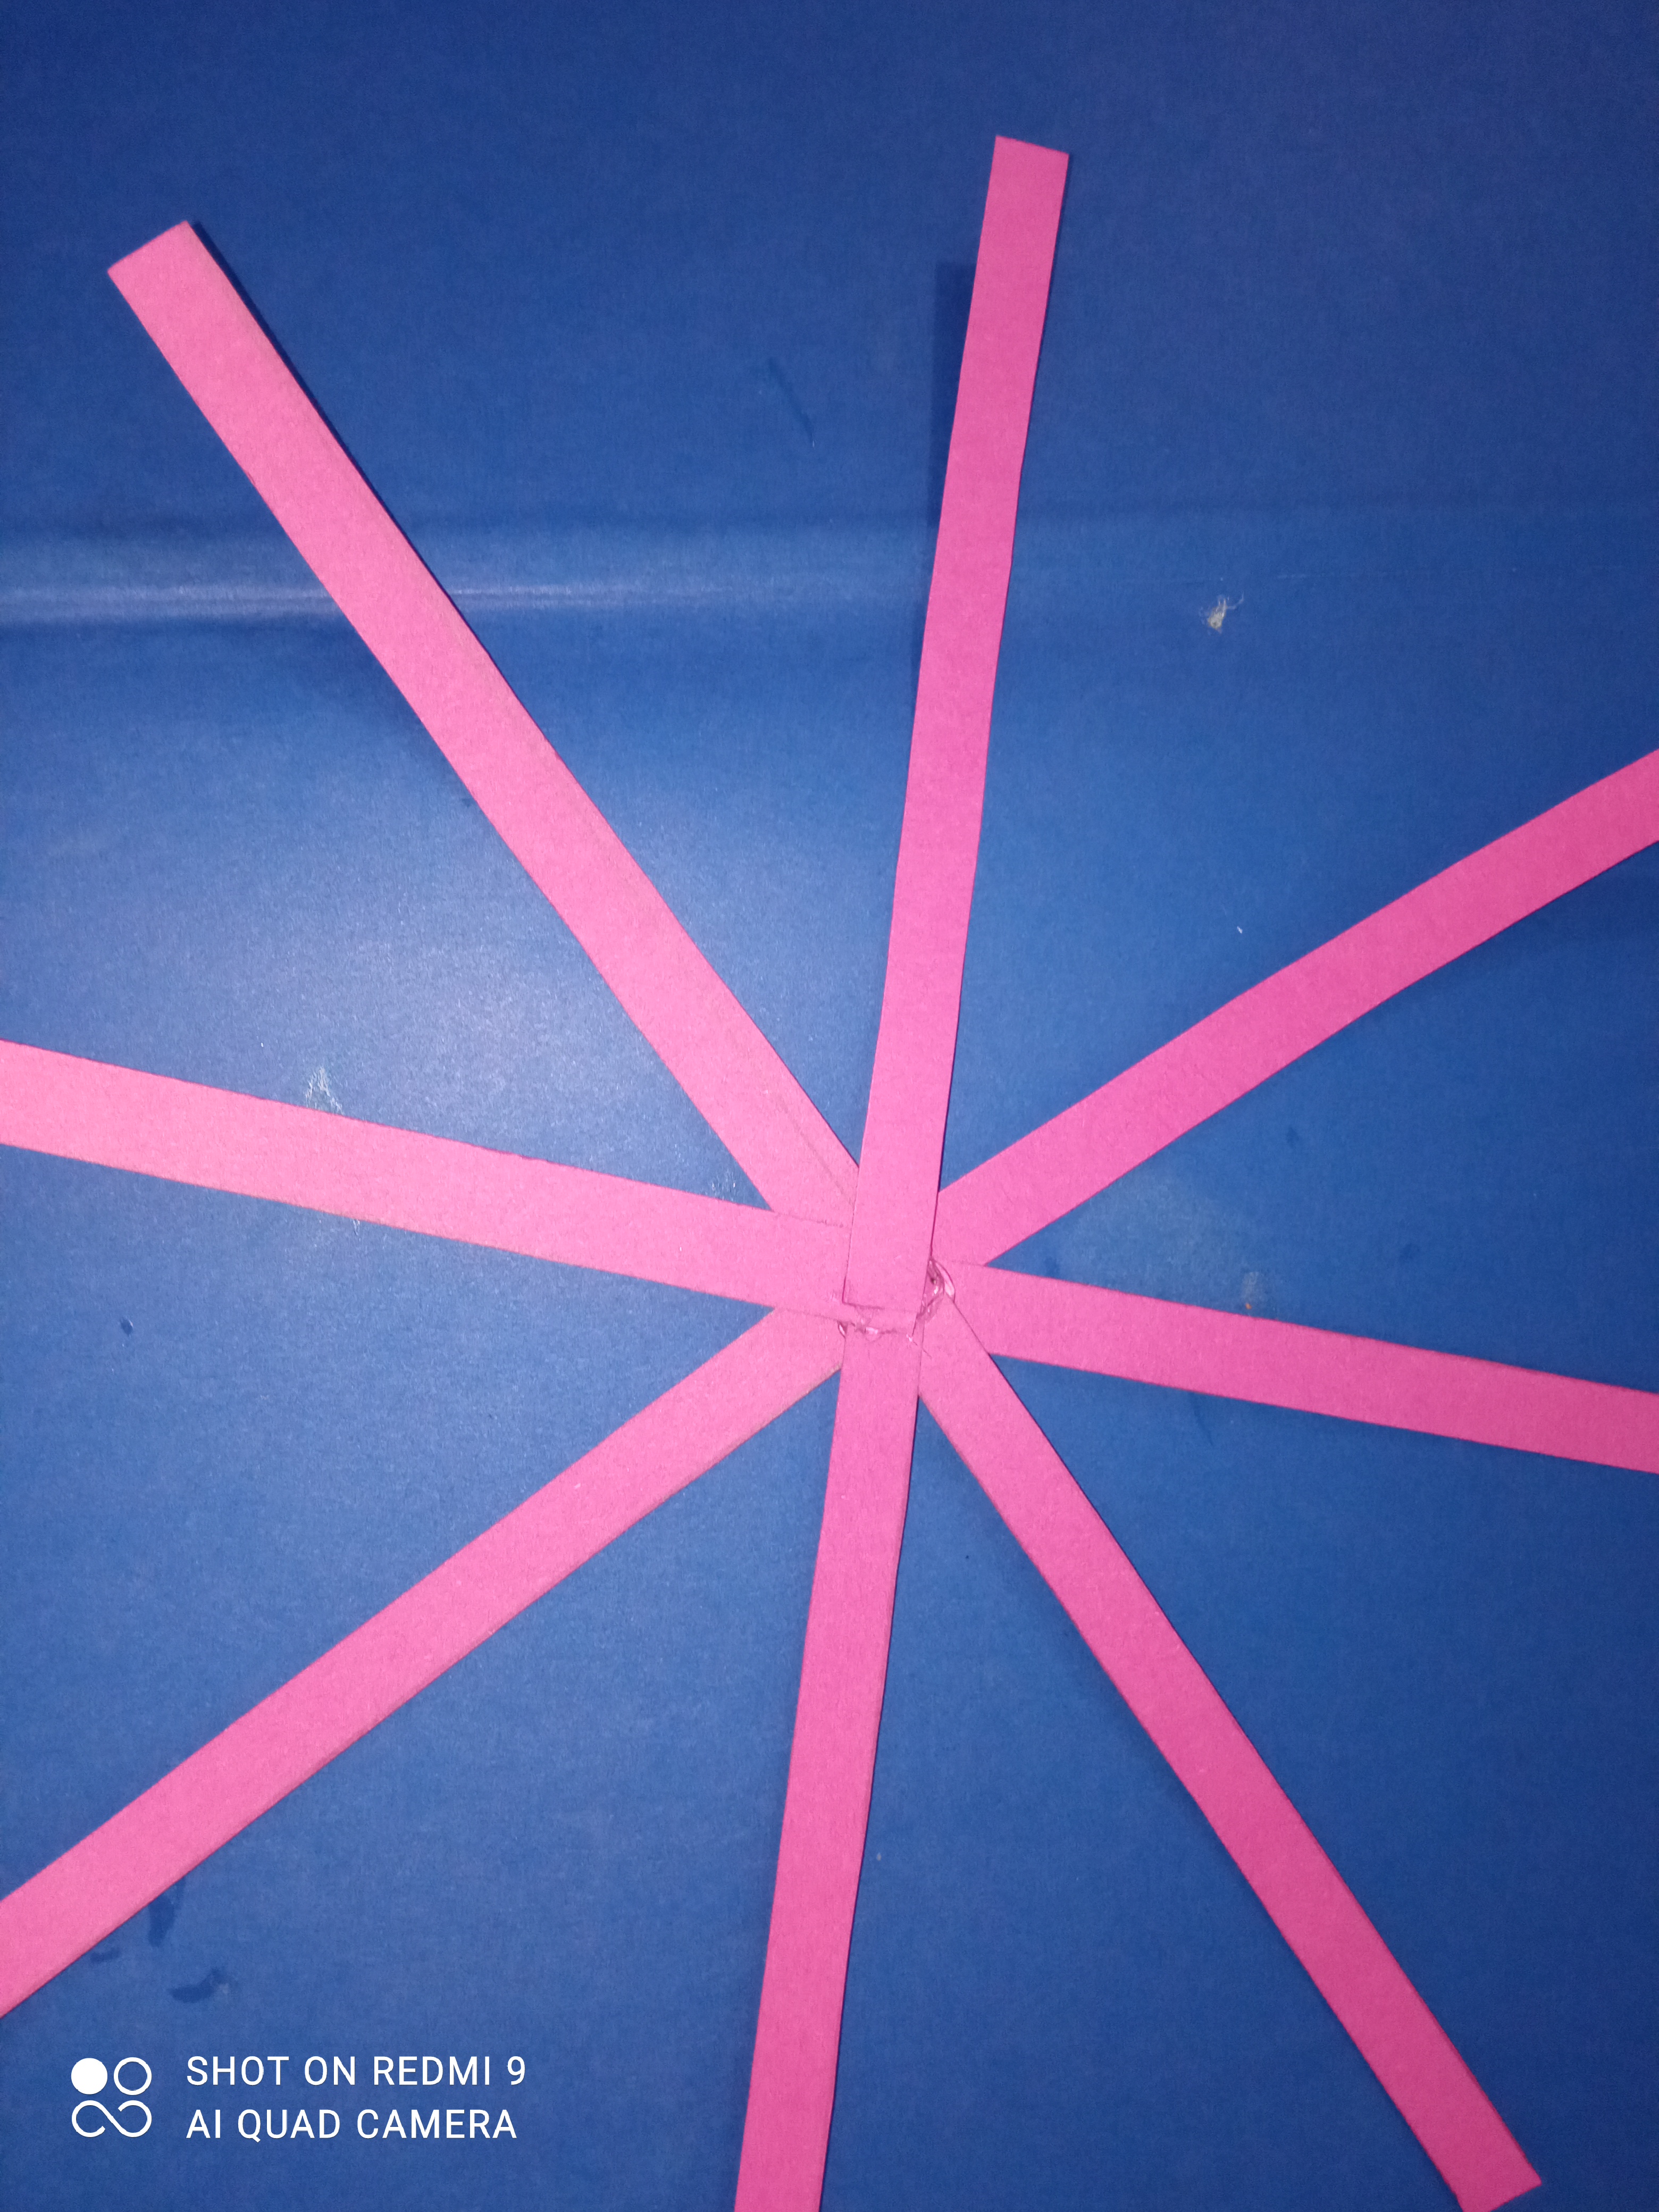
Para iniciar, se marca en la cartulina del color de tu preferencia unas líneas para hacer las tiras que formarán el cuerpo del conejo. Yo las hice con un ancho de 1 cm porque la cartulina era pequeña. Ustedes pueden hacerlo de 2 cm y se verá más ancho. Hice líneas para sacar 8 tiras de cartulina.
To start, mark some lines on the cardboard in the color of your choice to make the strips that will form the bunny's body. I did them with a width of 1 cm because the cardboard was small. You can make it 2 cm wide and it will look wider. I made lines to make 8 strips of cardboard.
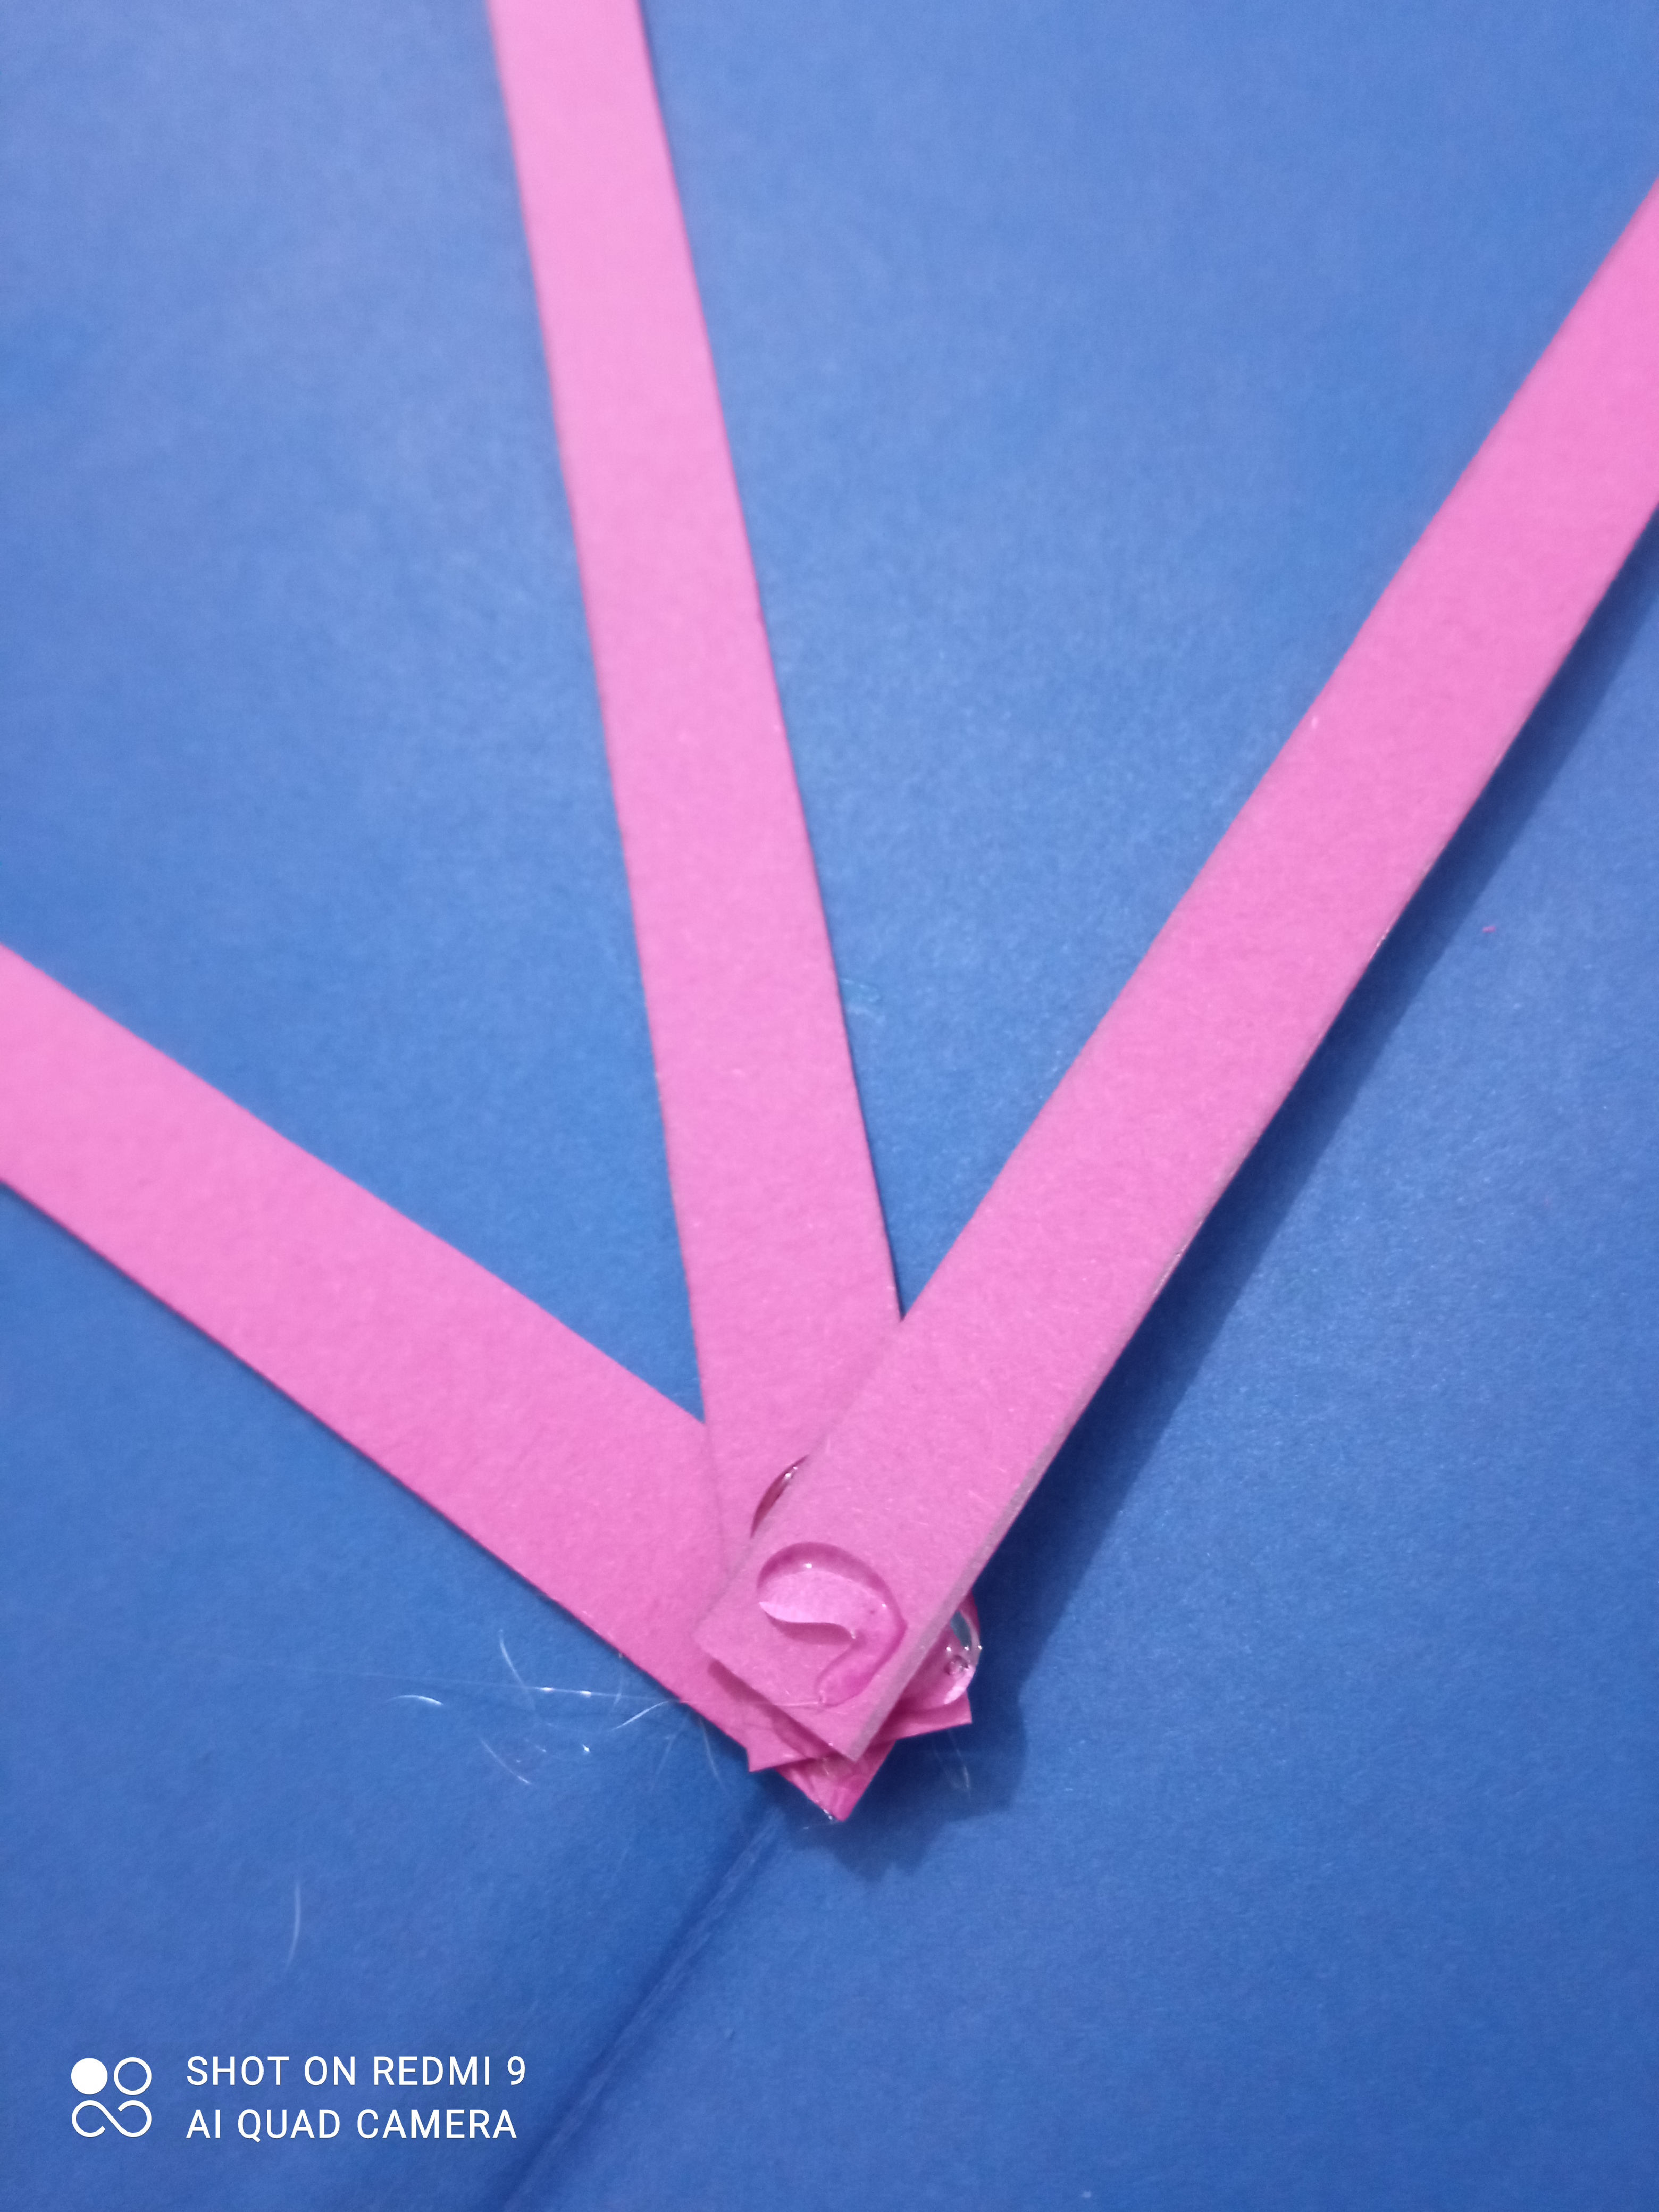
Una vez marcadas, se cortan, y se agrupan en forma de una rueda, y se pegan una sobre otra.
Once marked, they are cut, grouped in the shape of a wheel, and glued one on top of the other.
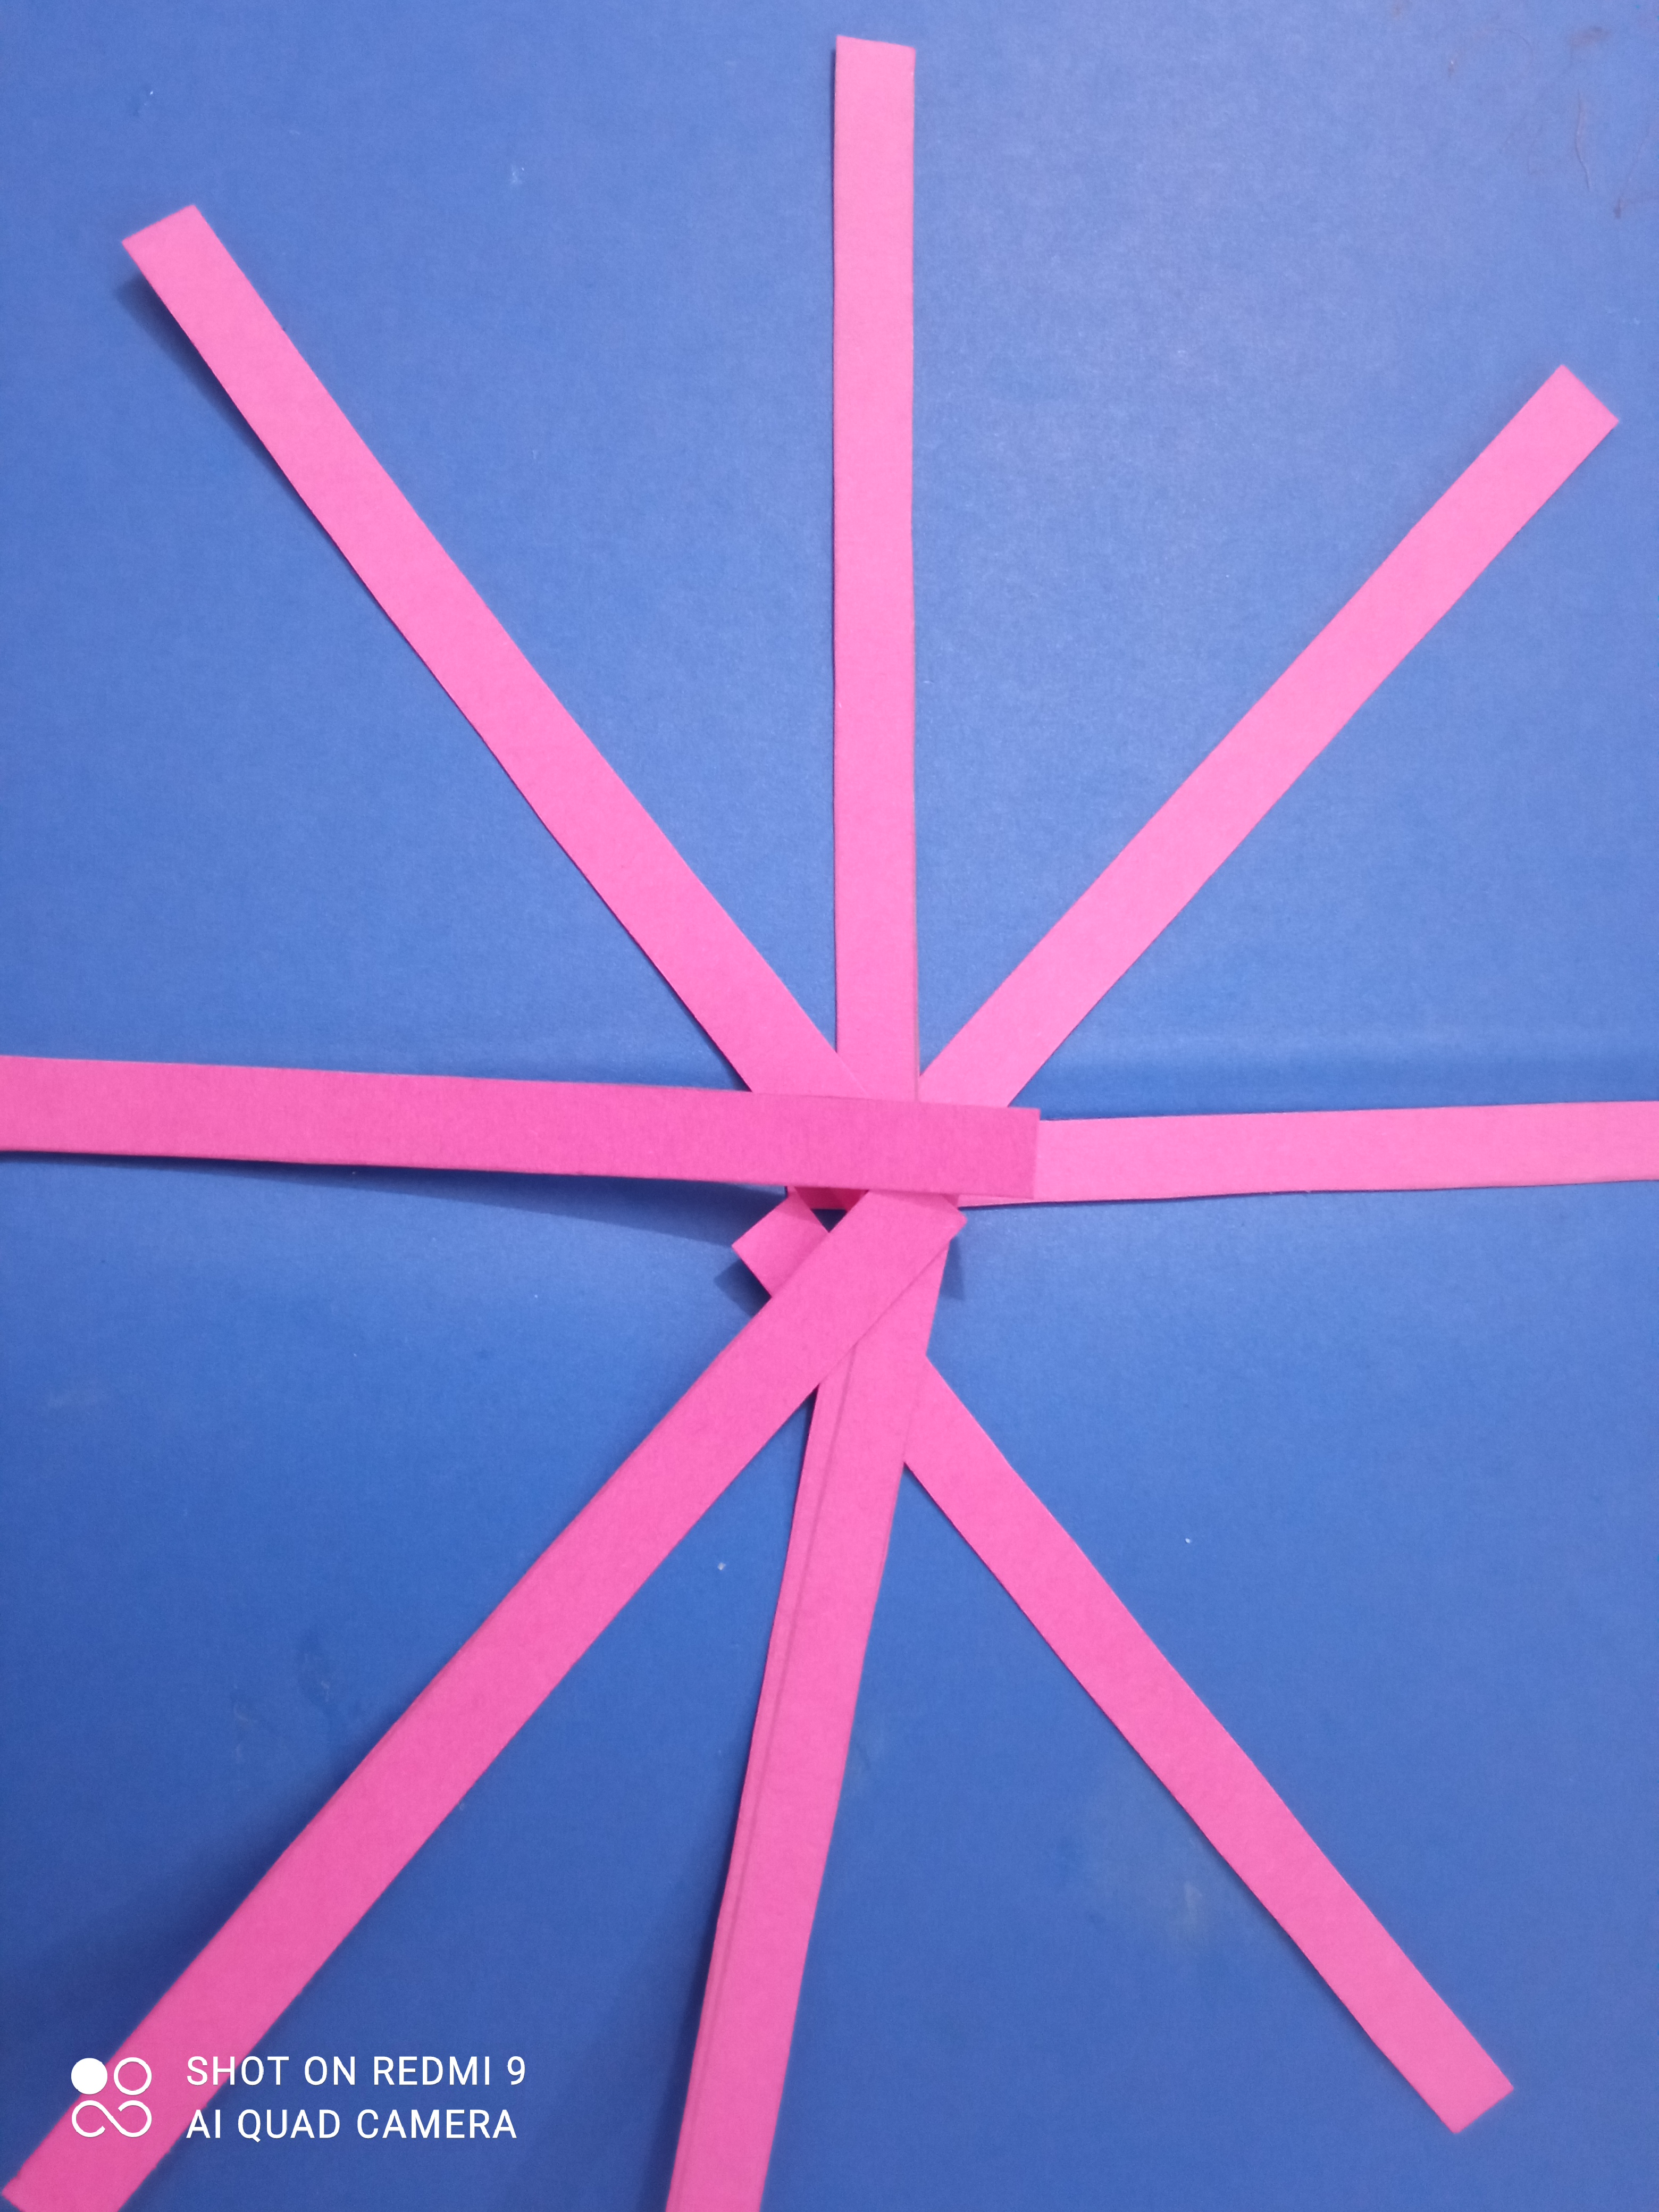
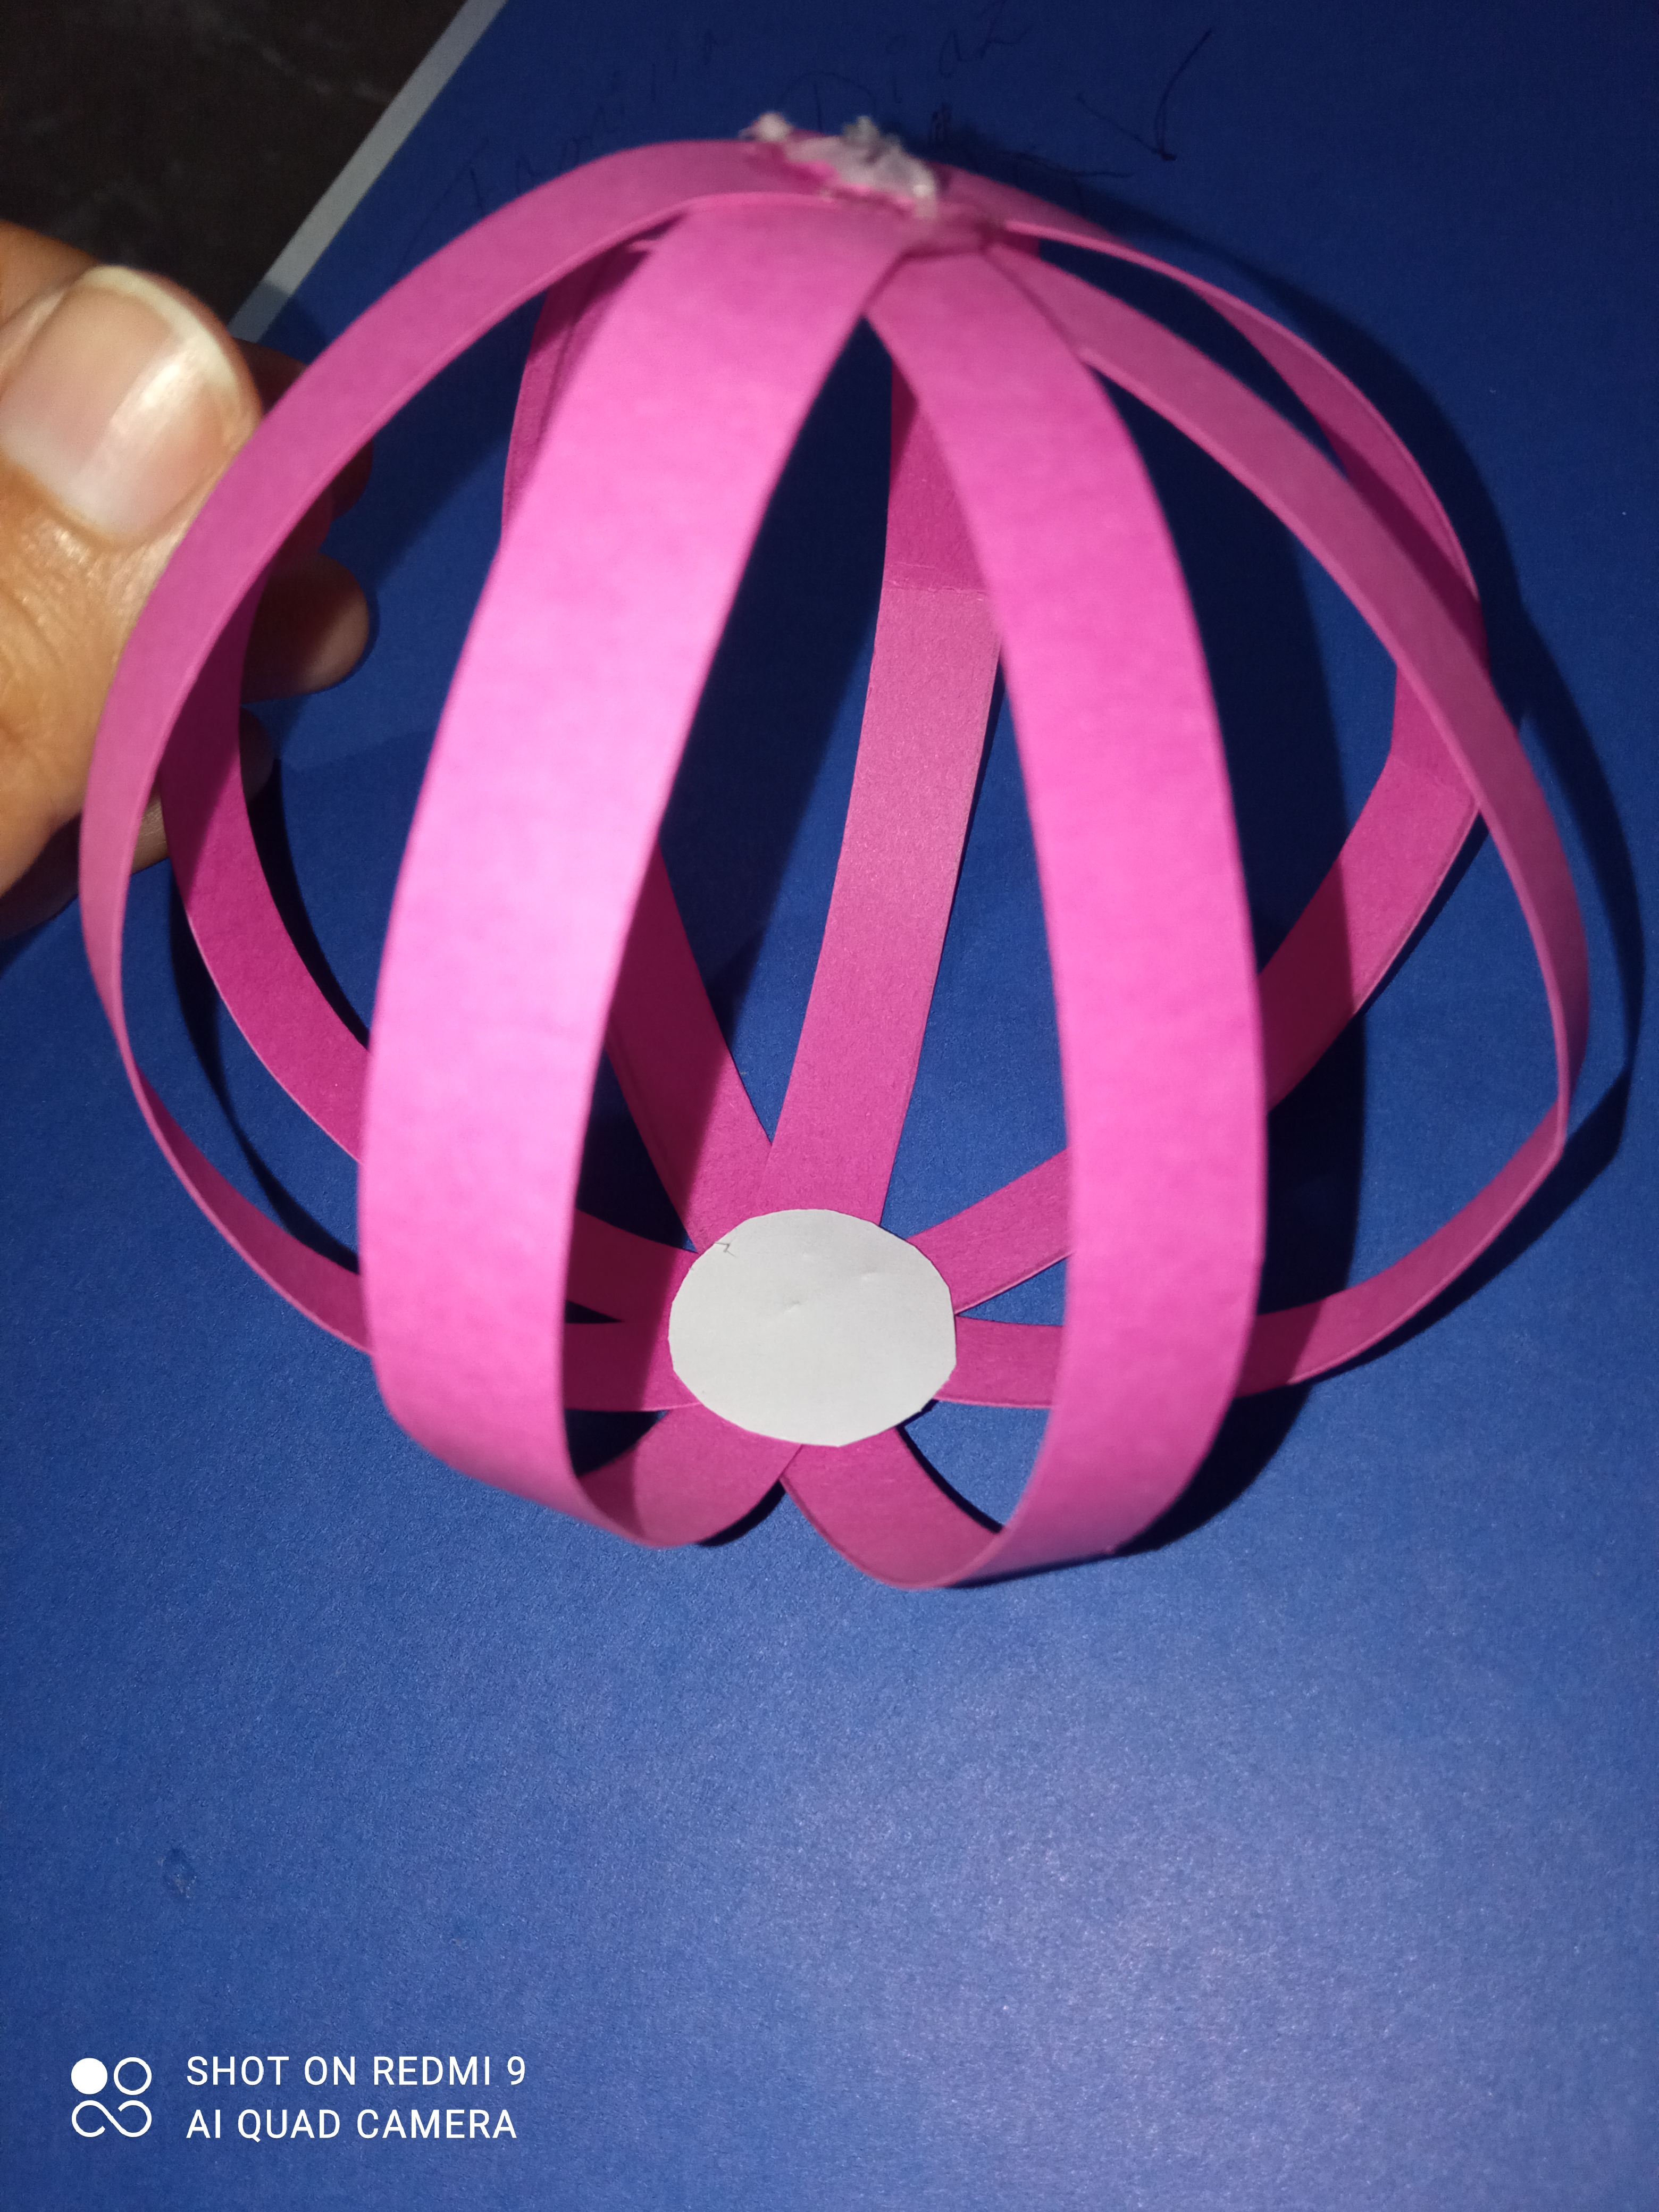
Y queda de la siguiente forma...
And it is as follows...
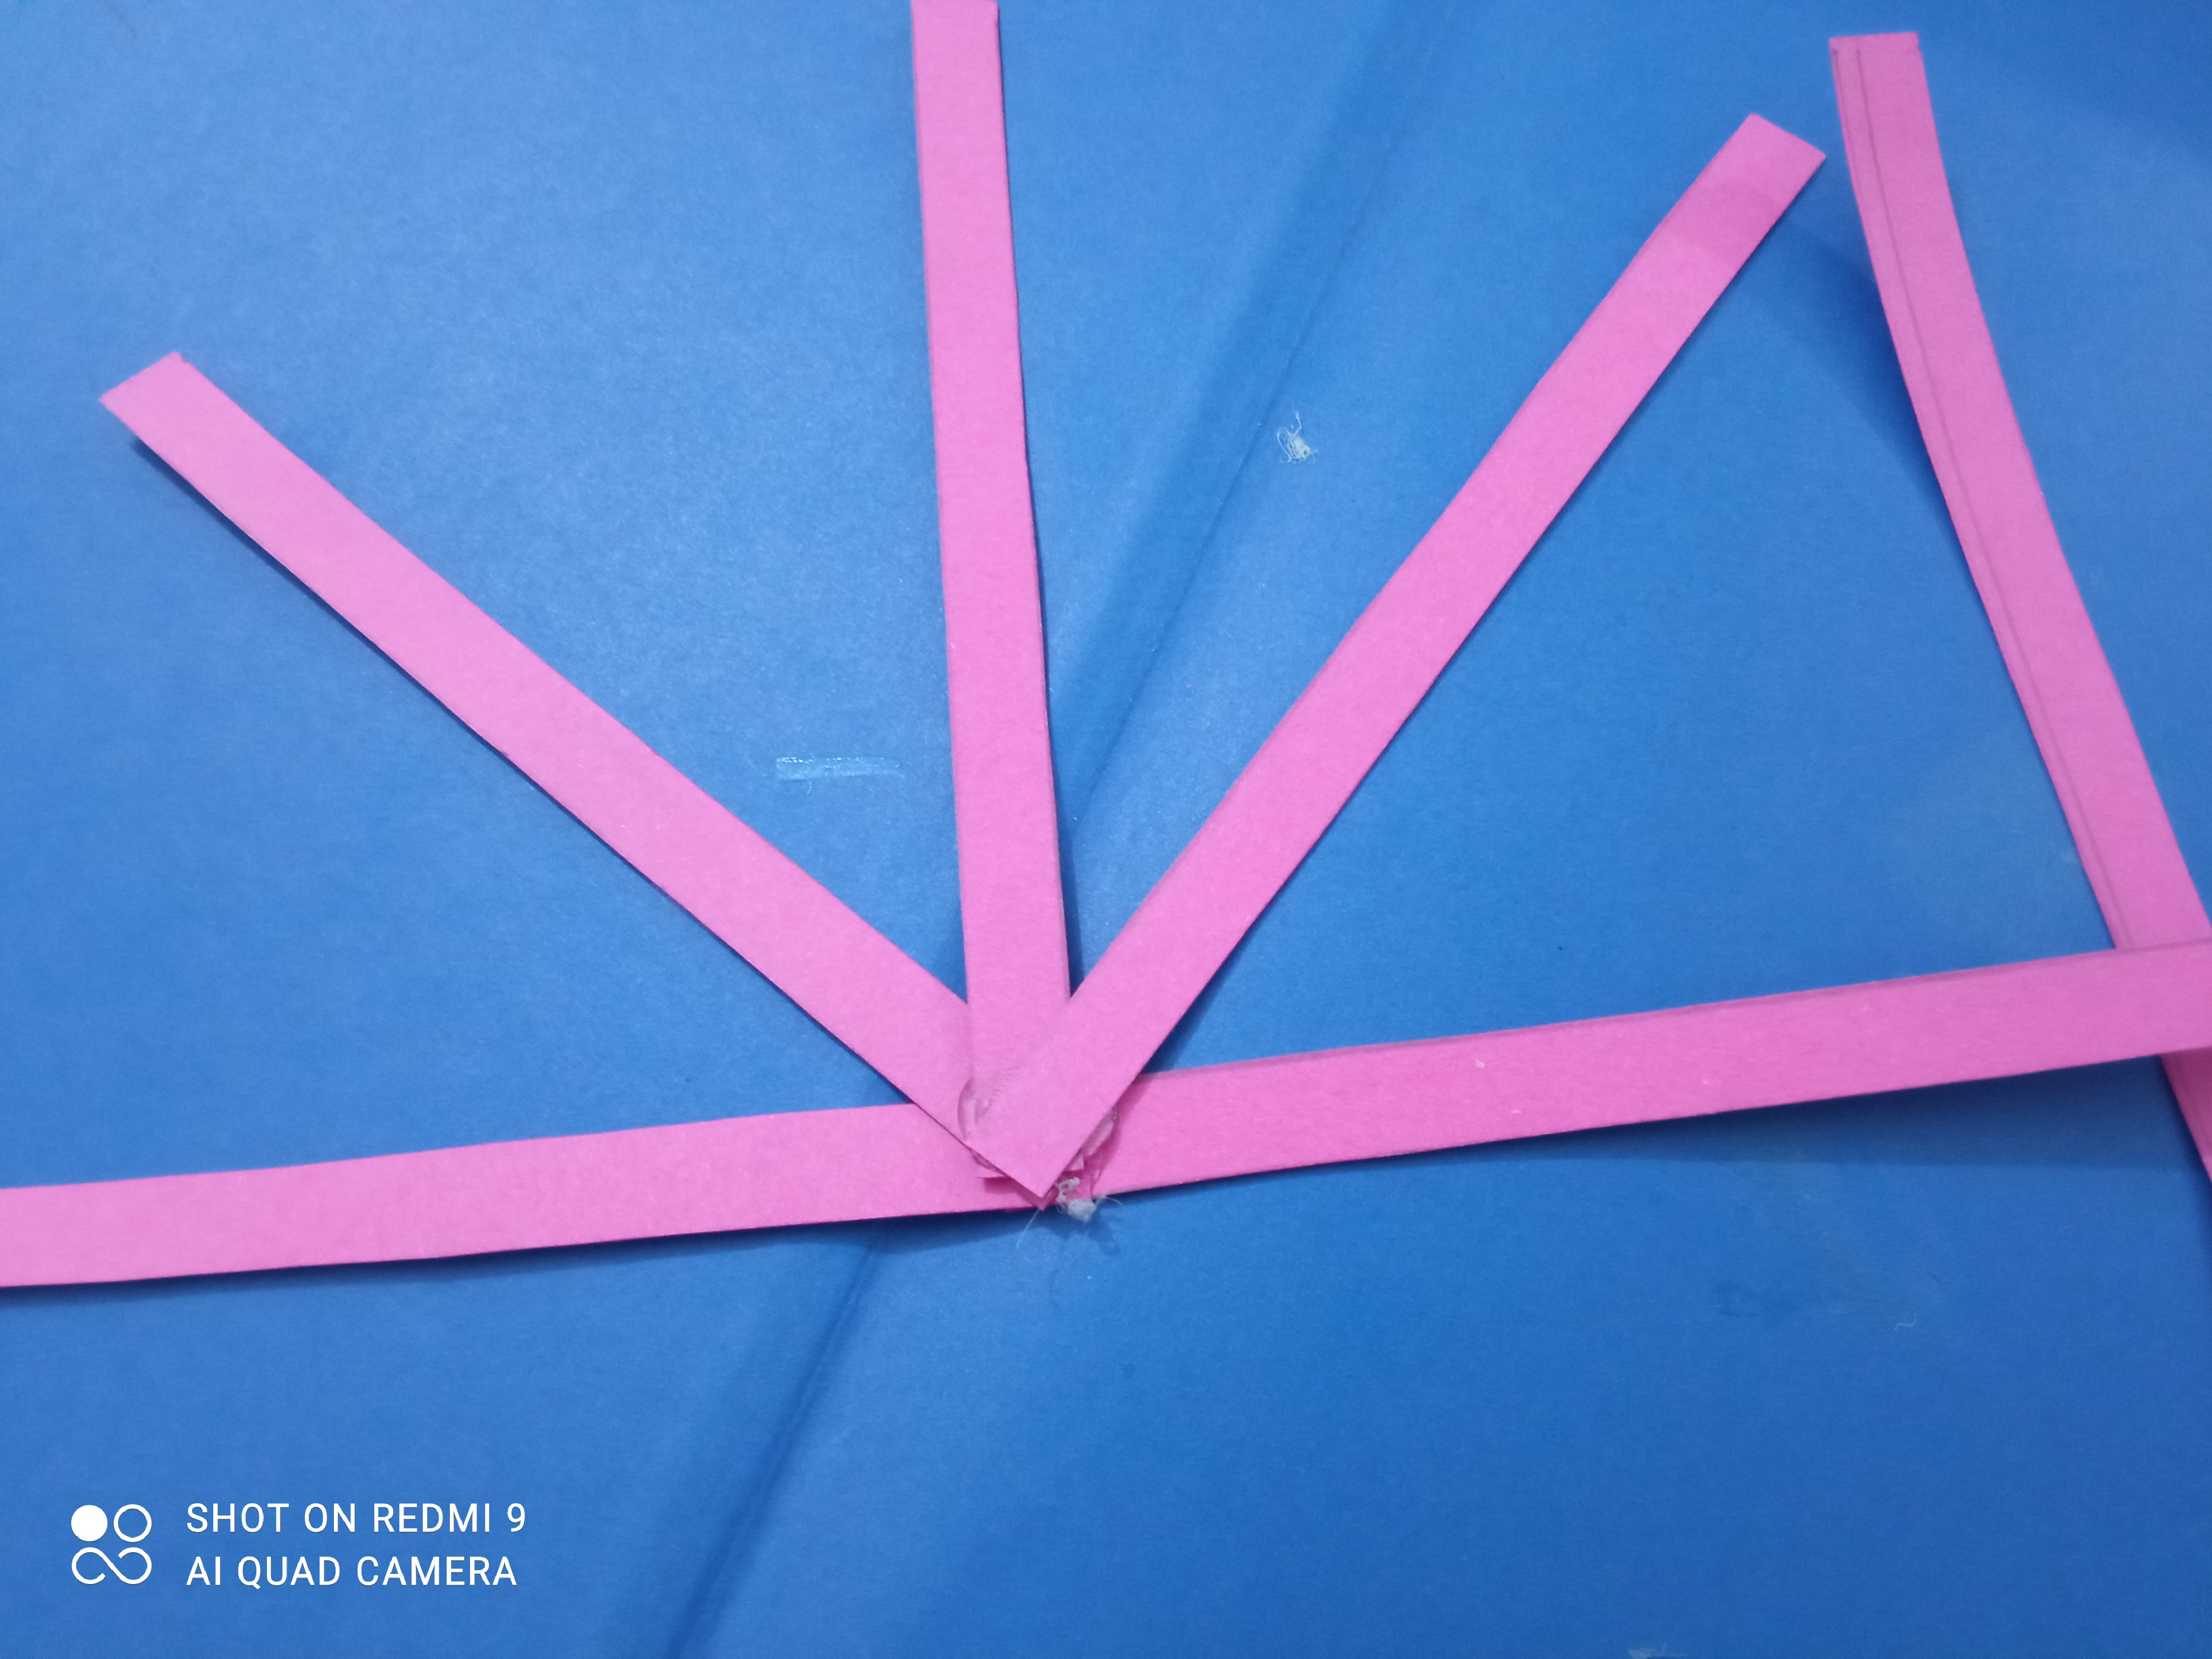
Una vez pegadas nuestras tiras en un extremo, se procede a unirlas del otro extremo, dándole forma de una bola. De estos hacemos 2, para que sea el cuerpo superior e inferior.
Once our strips are glued at one end, we proceed to join them at the other end, giving it the shape of a ball. Of these we make 2, to be the upper and lower body.

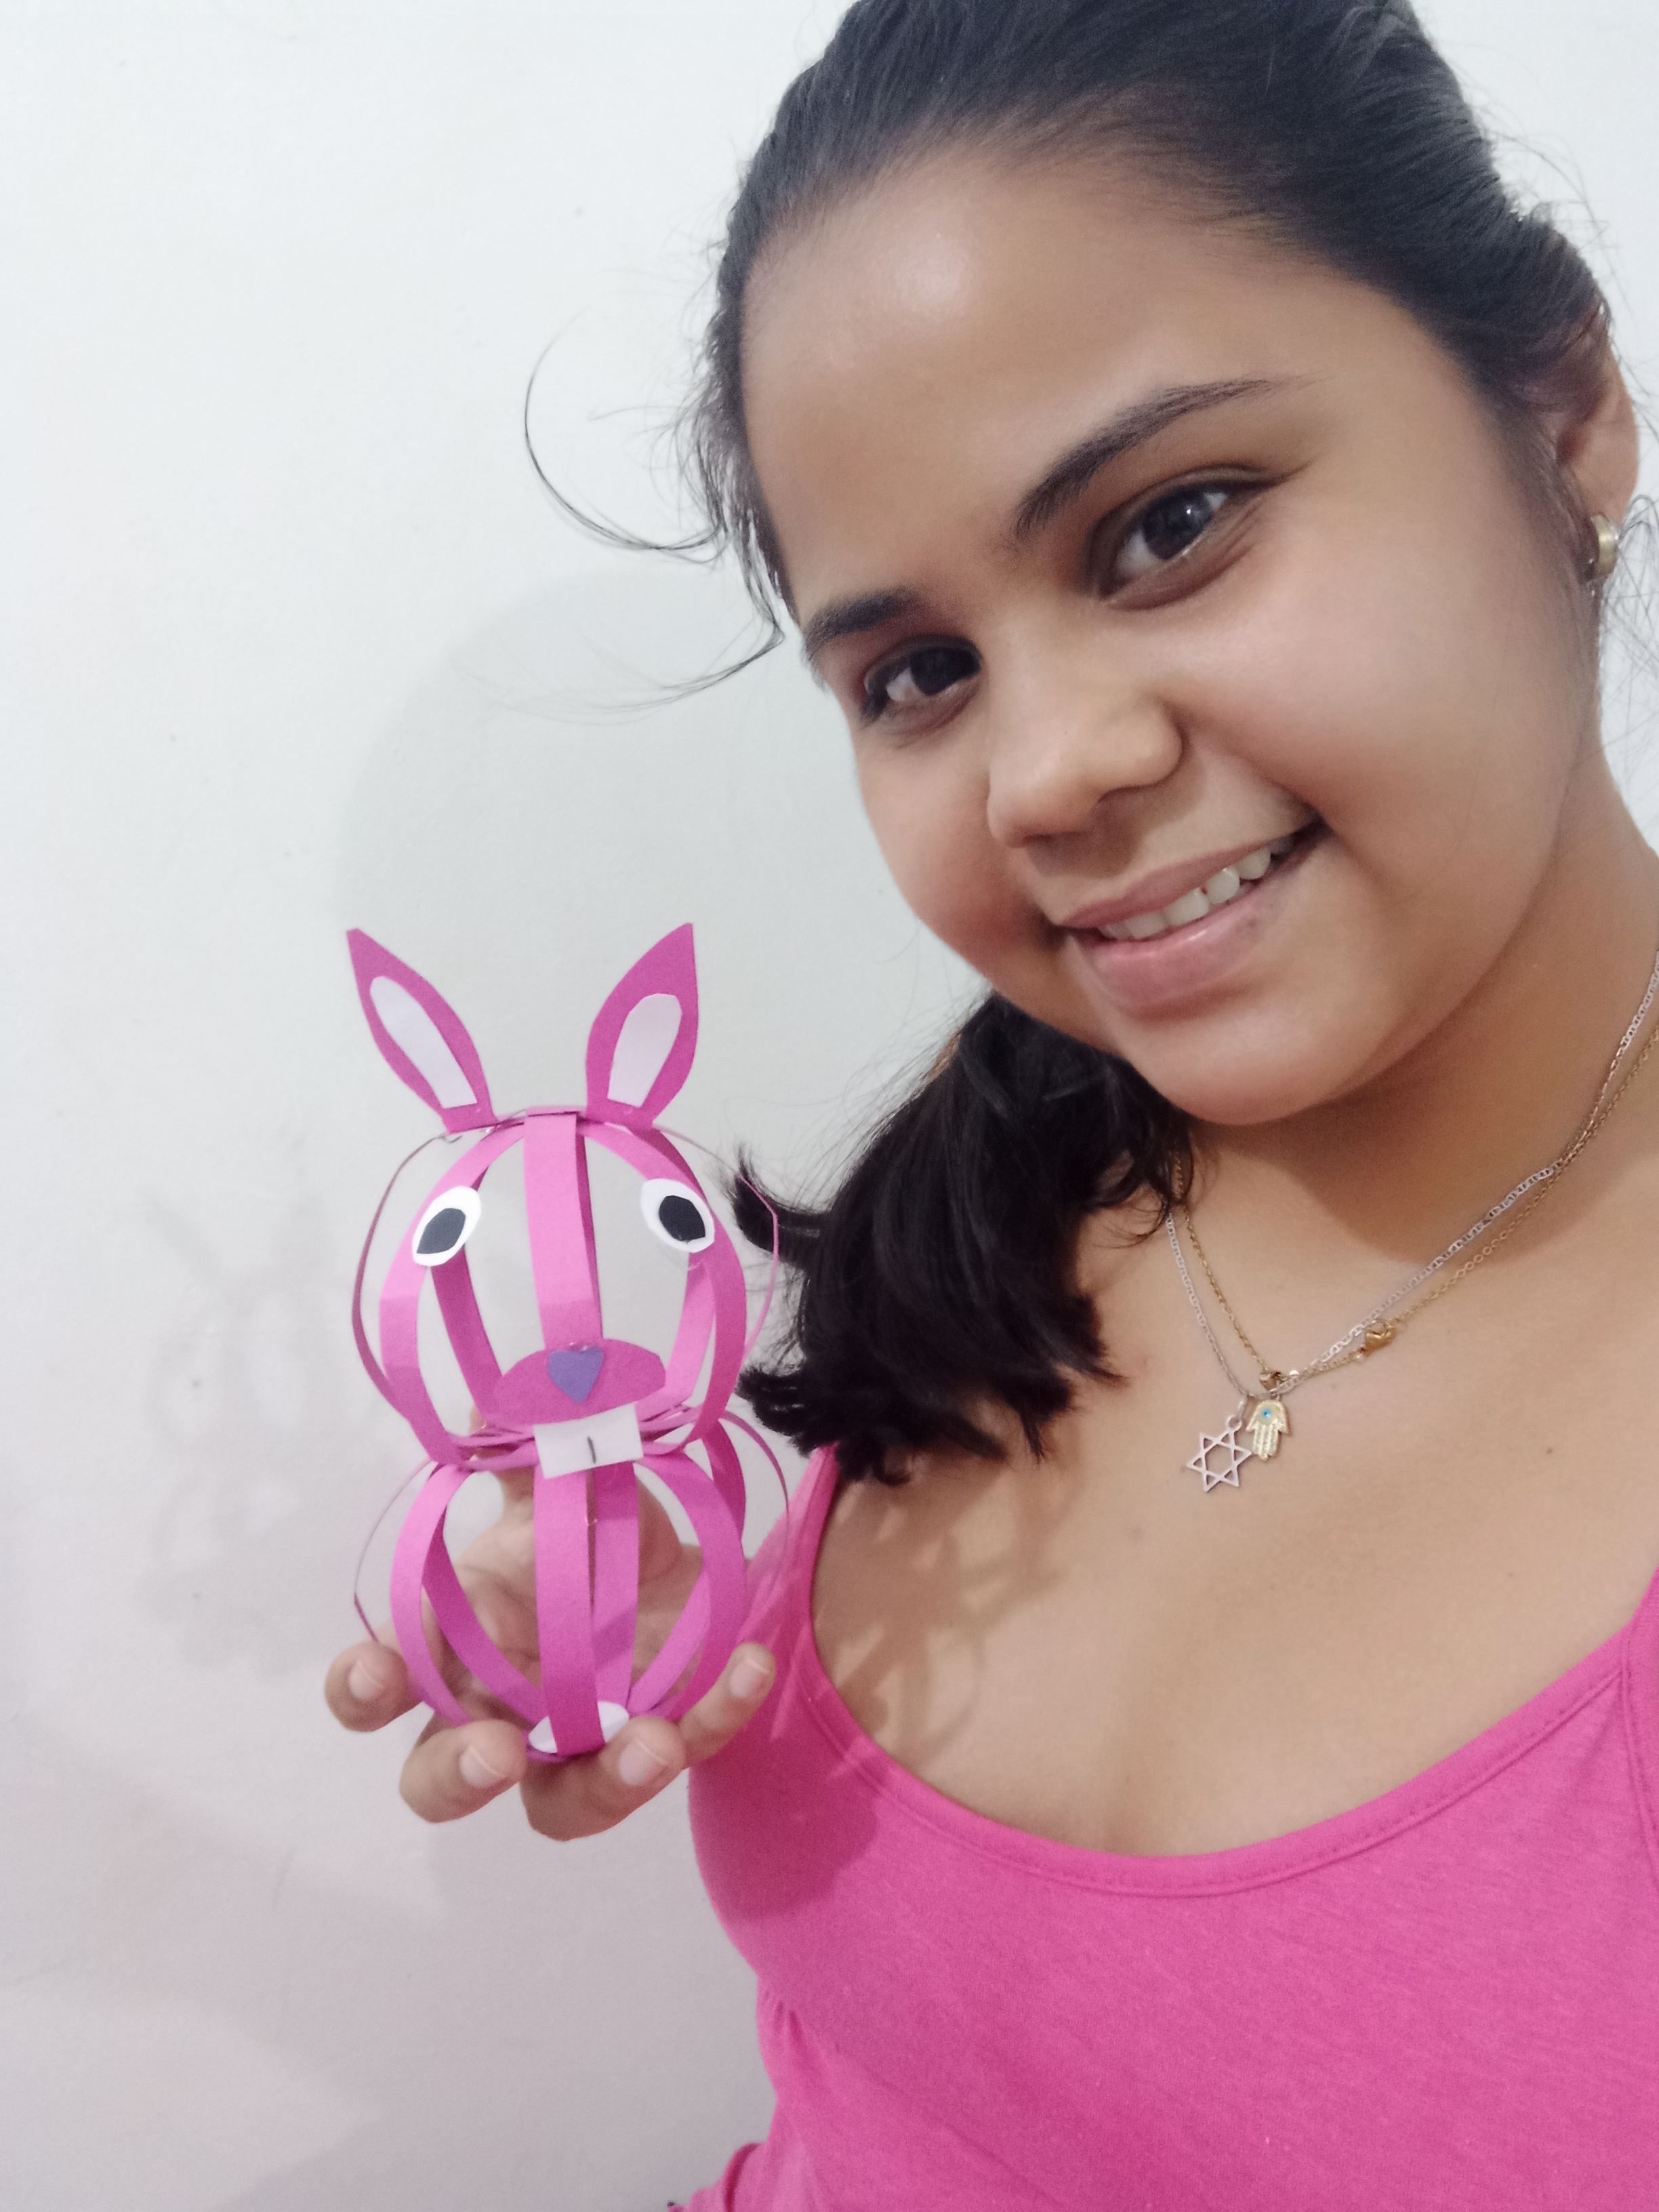
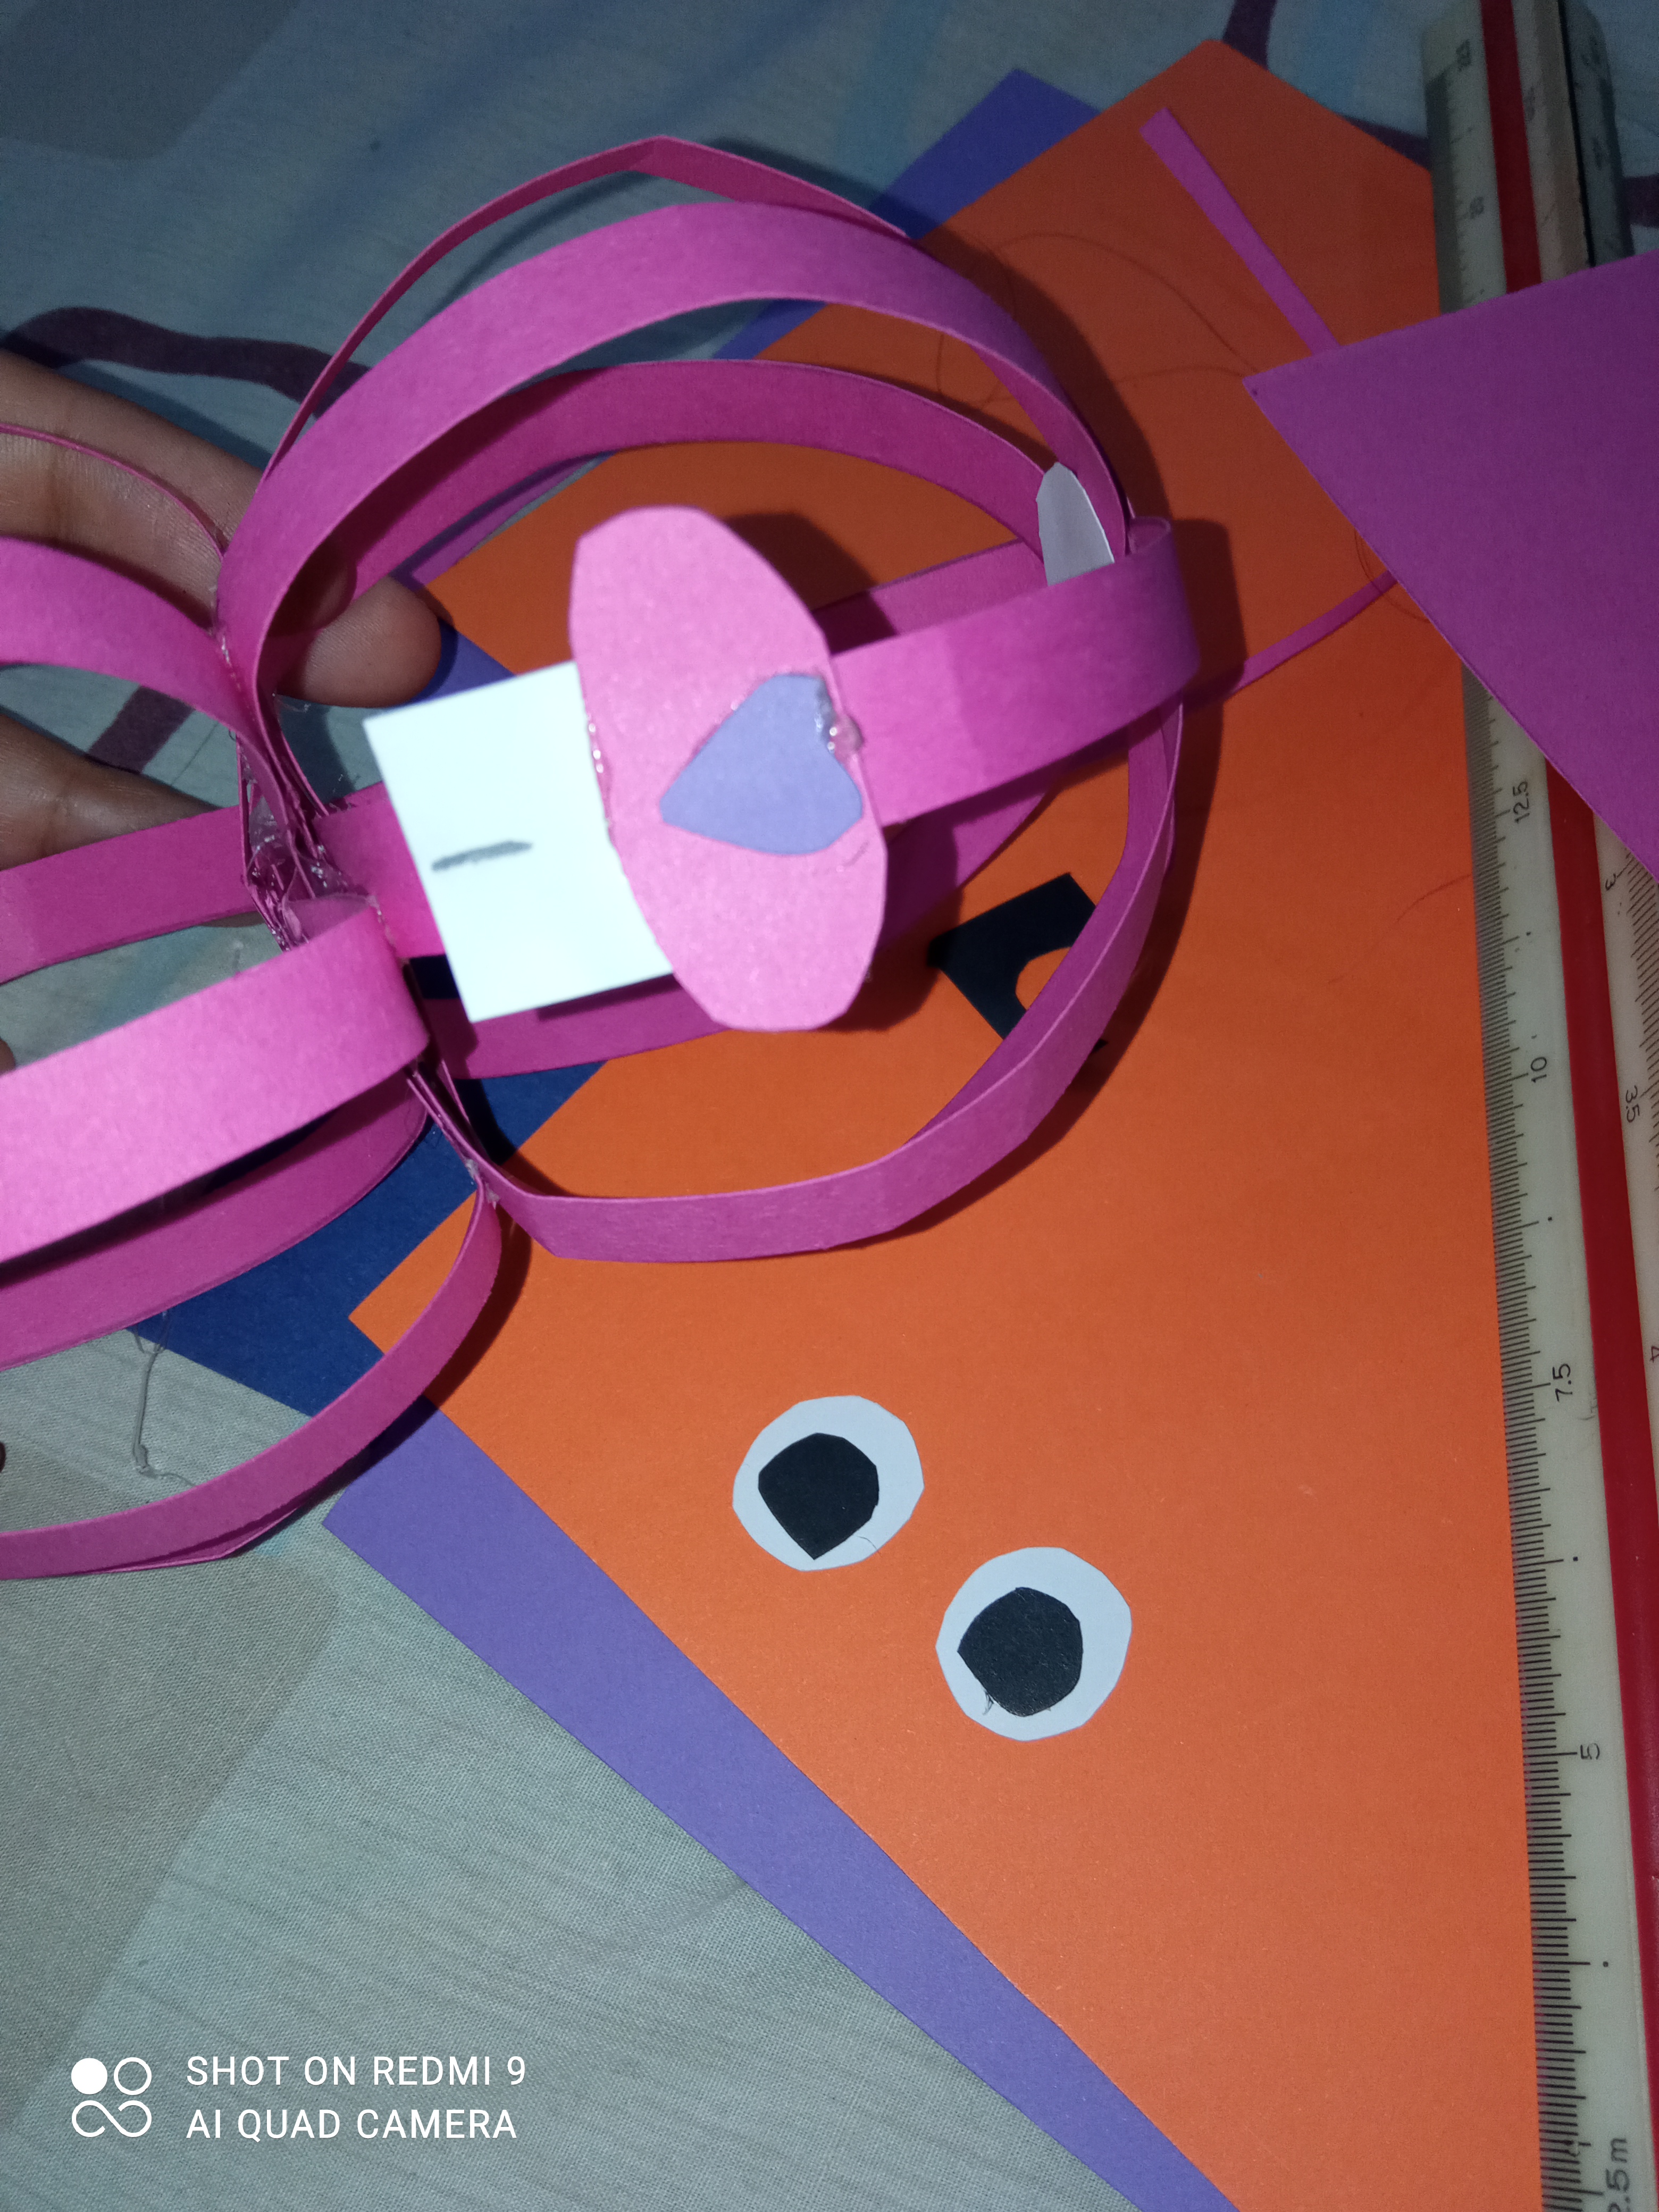
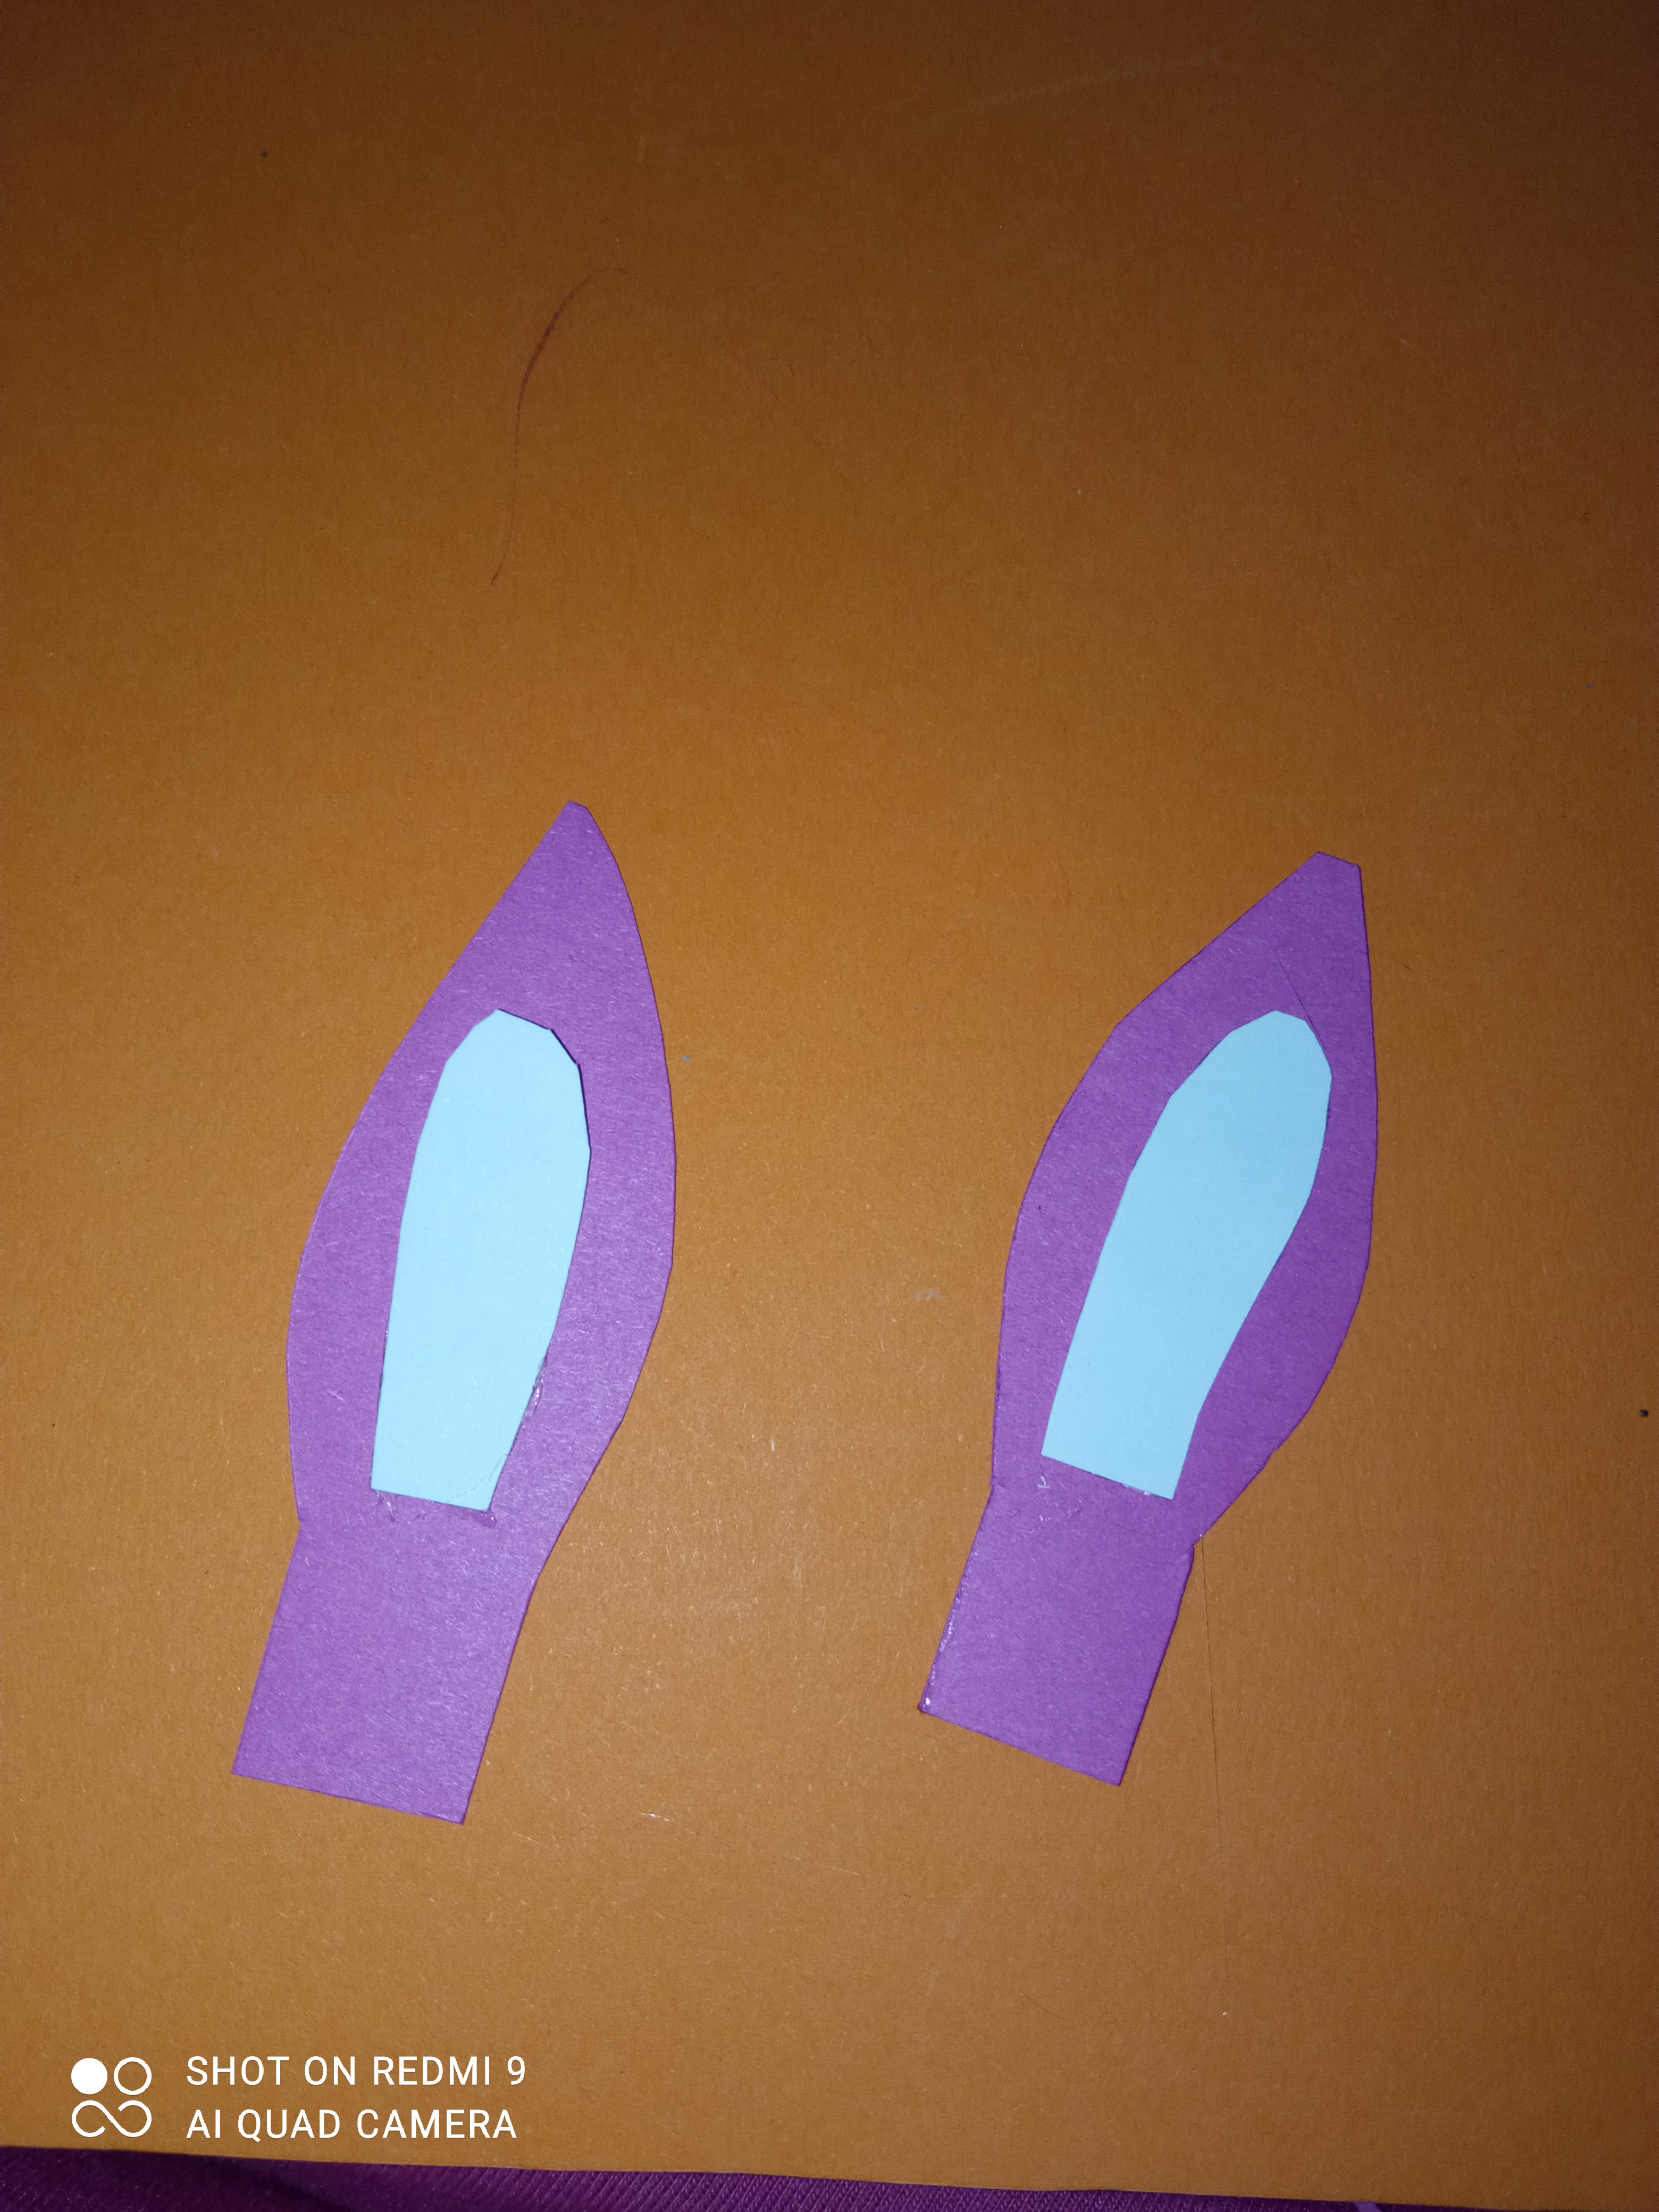
Una vez terminado, se hacen la forma de los ojos, nariz, dientes y orejas. Se pegan y queda terminado nuestro conejito.
Once finished, make the shape of the eyes, nose, teeth and ears. They are glued and our bunny is finished.
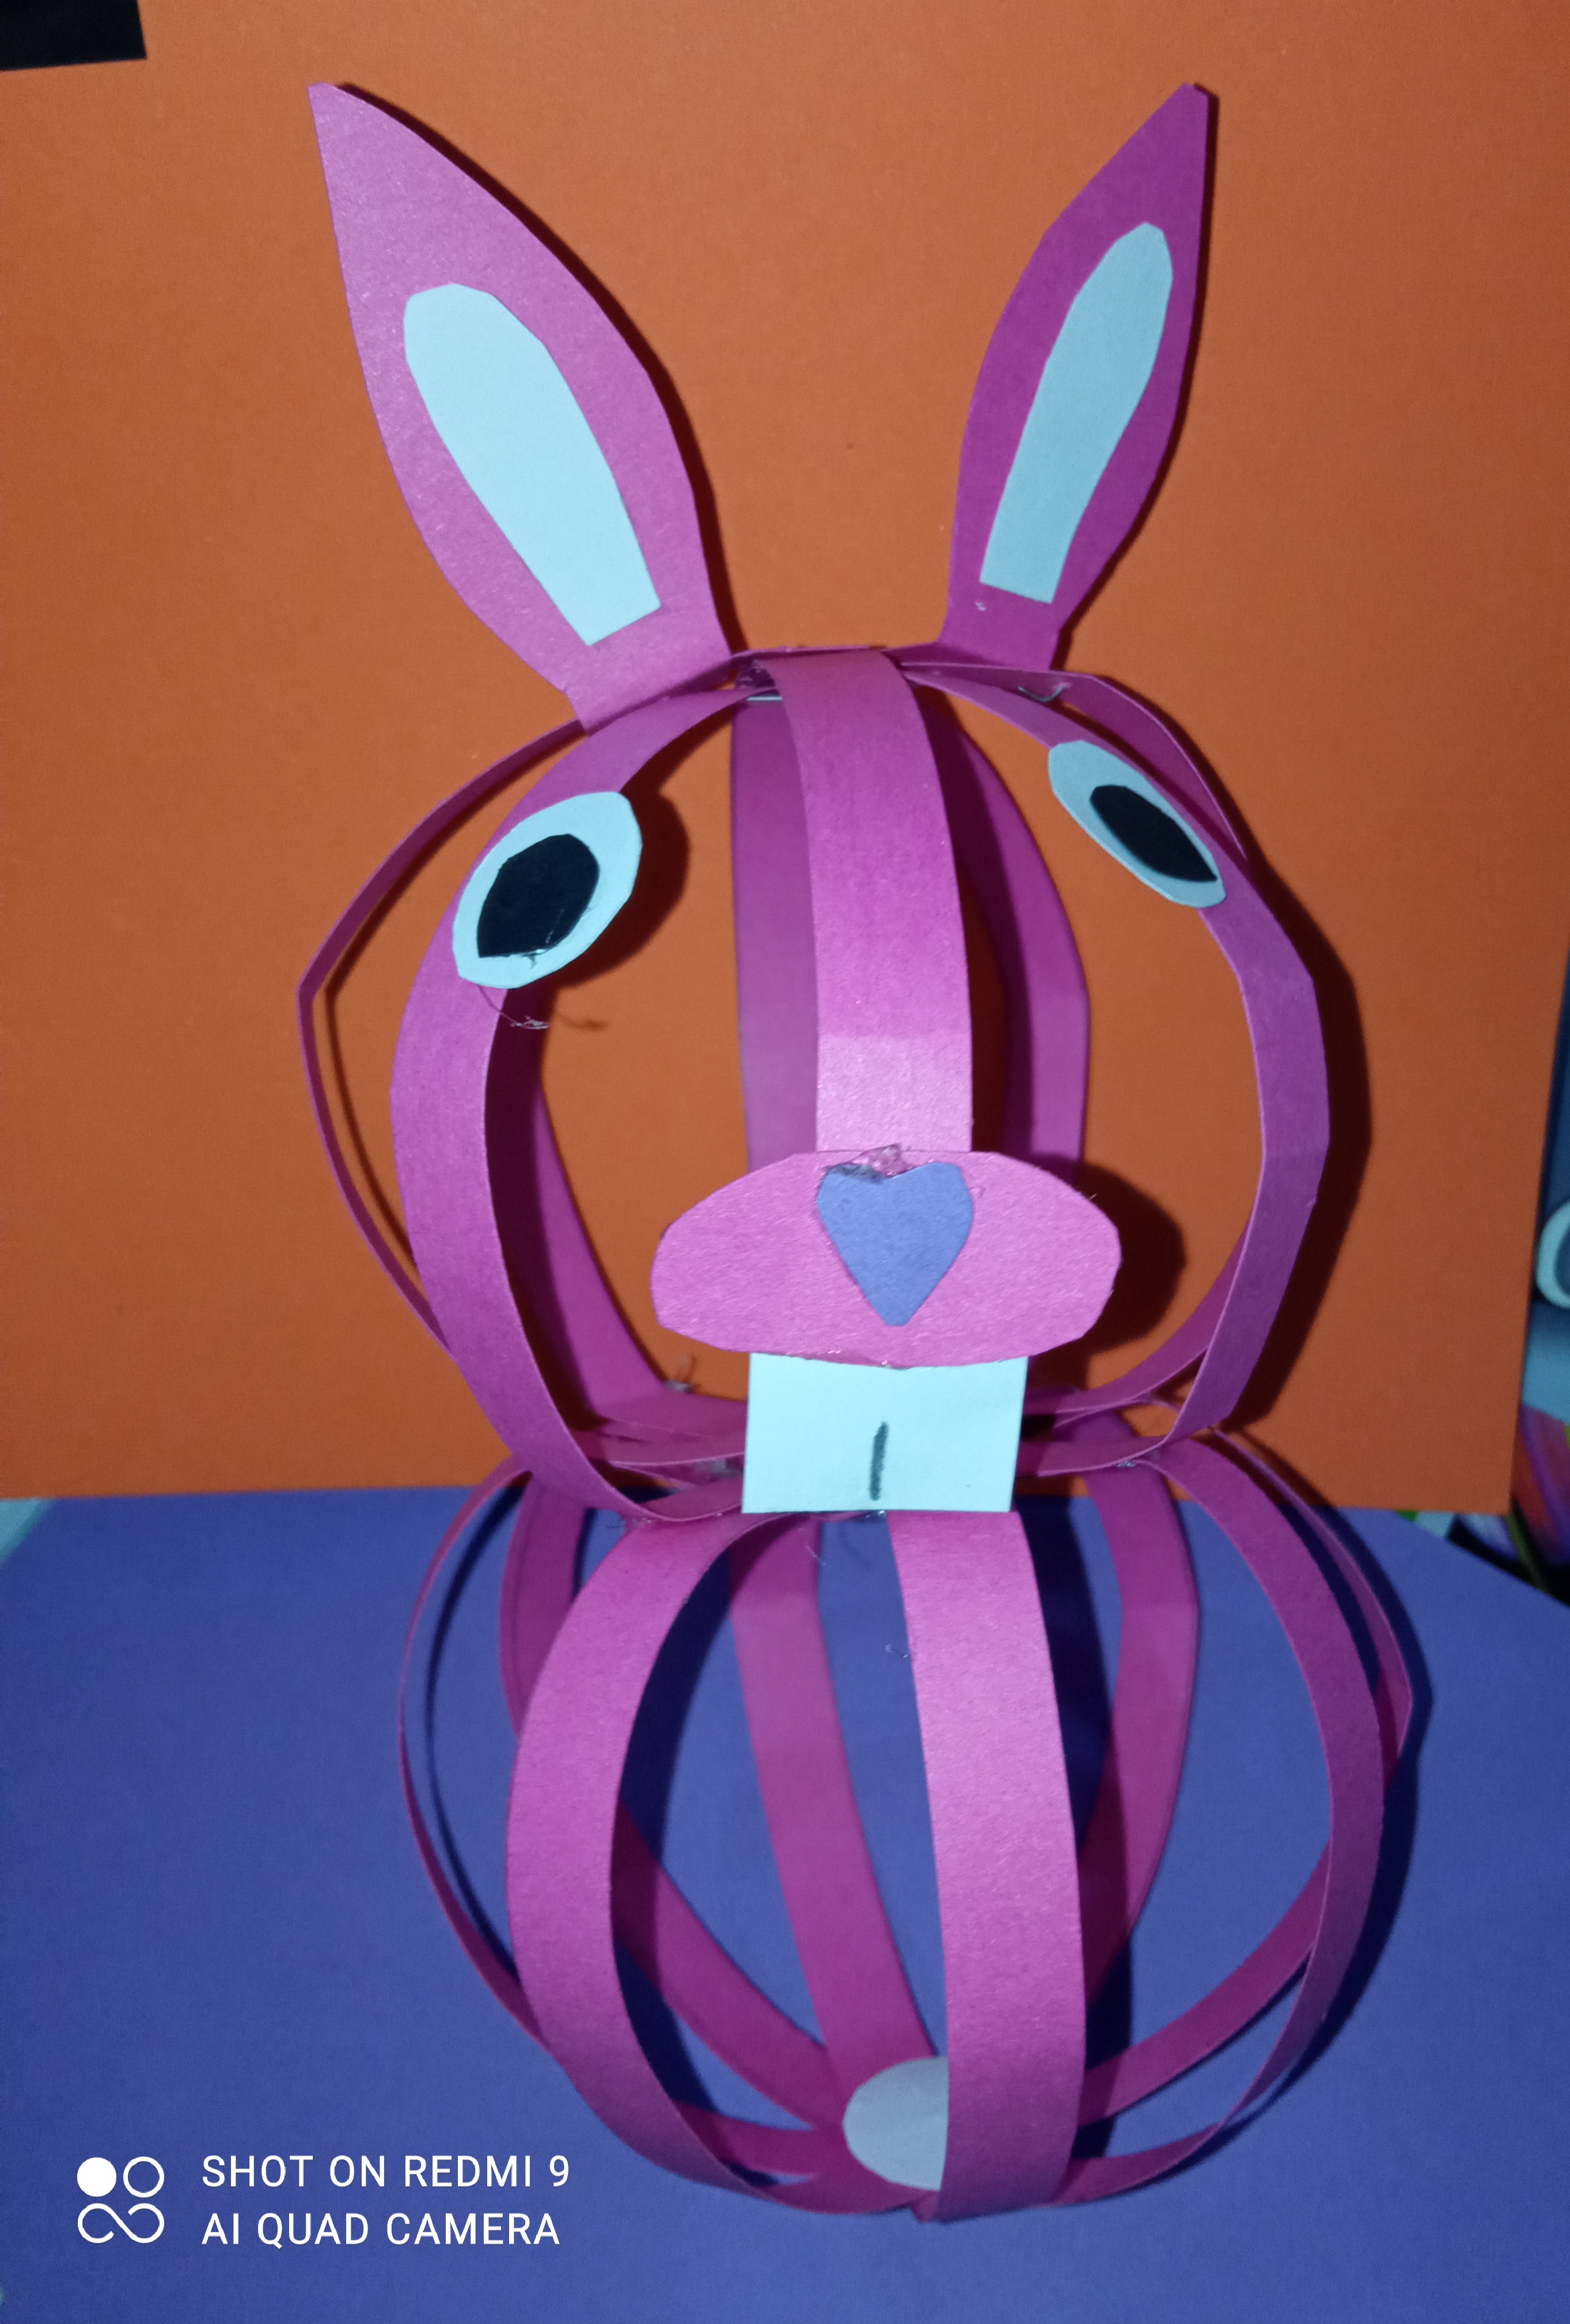
Y así queda este lindo conejito. Espero les haya gustado 😊
Thanks for visiting my blog
Las fotos fueron tomadas con mi teléfono Xiaomi Redmi 9 🐰
The pictures were taken with my Xiaomi Redmi 9 phone.🐰
Contenido original// Original content