Hola comunidad, gusto en saludarles como referí anteriormente, me gusta mucho la papelería creativa, hoy quiero compartir con ustedes la creación de una hermosa flor con papel crepe, muy fácil de realizar y con pocos materiales espero que sea de su agrado y de mucha utilidad.
Hello community, nice to greet you as I mentioned earlier, I really like creative stationery, today I want to share with you the creation of a beautiful flower with crepe paper, very easy to make and with few materials I hope you like it and very useful .
Materiales:
-Papel crepe
-Hilo de estambre
-Silicon
-Palillo de altura
Materials:
-Crepe paper
-Yarn yarn
-Silicon
-Height stick
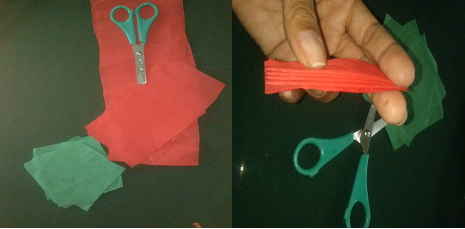
Paso 1: Elegimos el papel crepe del color que mas nos guste, colocamos tres o cuatro pedazos del papel uno encima del otro.
Step 1: We choose the crepe paper of the color that we like the most, we place three or four pieces of the paper one on top of the other.
Paso 2: Comenzamos el dobles del papel crepe ya ordenado como se indica en el paso 1.
Step 2: We begin the doubles of the crepe paper already ordered as indicated in step 1.
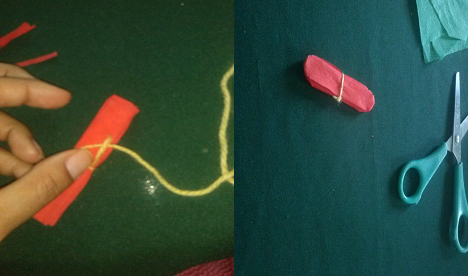
Paso 3: Con el hilo amarramos en la mitad del dobles realizado con el papel y cortamos las esquinas de forma ovalada.
Step 3: With the thread we tie in the middle of the double made with the paper and cut the corners in an oval shape.
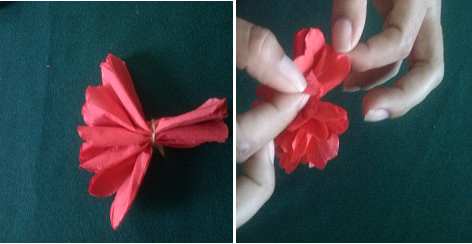
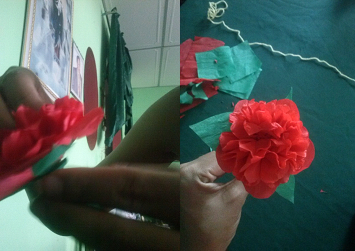
Paso 4: Comezamos a abrir el papel de manera que se vaya tornando la forma de flor.
Step 4: We begin to open the paper so that it becomes the shape of a flower.
Paso 5: Se debe despegar las capas del papel crepe que se encuentran unidas, así en ambas mitades.
Step 5: The layers of the crepe paper that are joined must be peeled off, like this in both halves.
Paso 6: En un pedazo del papel crepe del color de la flor, recortamos en forma de flor para formar la base de la misma.
Step 6: On a piece of crepe paper of the color of the flower, we cut out in the shape of a flower to form the base of it.
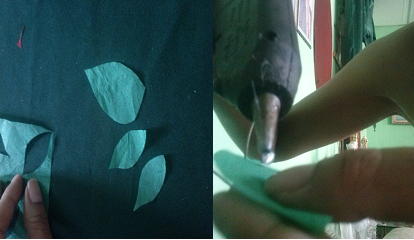
Paso 7: Realizamos y recortamos las hojas que llevara nuestra hermosa flor.
Step 7: We make and cut the leaves that our beautiful flower will carry.
Paso 8: Pegamos con silicon la base de la flor (paso 6) y las hojas (paso 7).
Step 8: We glue the base of the flower (step 6) and the leaves (step 7) with silicone.
Paso 9: Colocamos el palillo de altura que sostendrá la hermosa flor, y listo!
Step 9: We place the tall toothpick that will hold the beautiful flower, and voila!
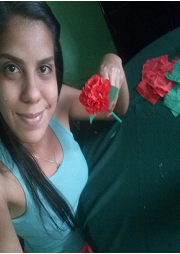
Con poco material podemos realizar hermosas creaciones para cualquier decoración, actividades de nuestros niños, o un hermoso detalle para cualquier ocasión, espero les guste. Acepto cualquier sugerencia, la cual sera muy bien recibida. Saludos amigos de #hive!
With little material we can make beautiful creations for any decoration, activities for our children, or a beautiful detail for any occasion, I hope you like it. I accept any suggestion, which will be very well received. Greetings #hive friends!
Copyright @luernis29. All rights reserved.
Your post has been curated by us! Received 20.00% upvote from @opb. Do consider delegate to us to help support our project.
Do join our discord channel to give us feedback, https://discord.gg/bwb2ENt
* This bot is upvoting based on the criteria : 1. Not plagiarised, 2. Persistent previous quality posts, 3. Active engagement with other usersDo upvote this commment if you 💚 our service :)
Congratulations @luernis29! You have completed the following achievement on the Hive blockchain and have been rewarded with new badge(s) :
Your next target is to reach 50 upvotes.
You can view your badges on your board and compare yourself to others in the Ranking
If you no longer want to receive notifications, reply to this comment with the word
STOP