Hoolaa mis hivers amigos! Cómo están? Bendiciones! Hoy haremos un divertido organizador de colores utilizando material de provecho. Te invito a ver el tutorial.
Hoolaa my hivers friends! How are they? Blessings! Today we will make a fun colored organizer using useful material. I invite you to see the tutorial.
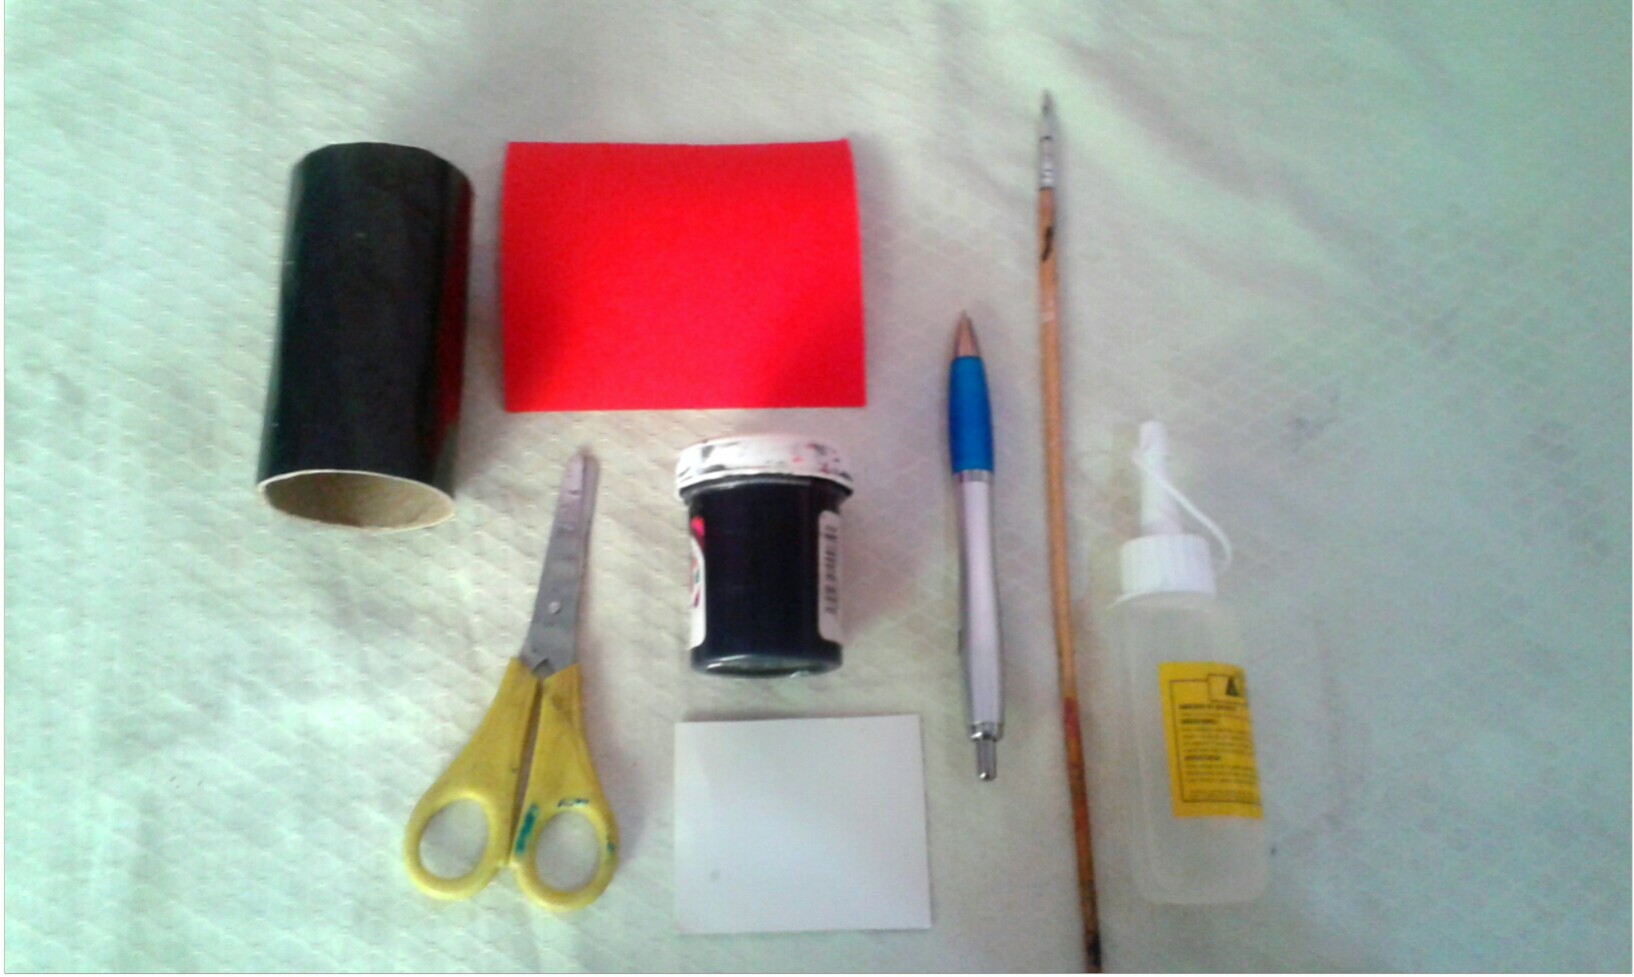
Materiales: // Materials:
- Un tubo de cartón envuelto de papel negro.
- Cartulina roja y blanca
- Pincel
- Silicón
- Bolígrafo
- Tijera
- A cardboard tube wrapped in black paper.
- Red and white cardstock
- Brush
- Silicone
- Ballpoint
- Scissor
Manos a la Obra!
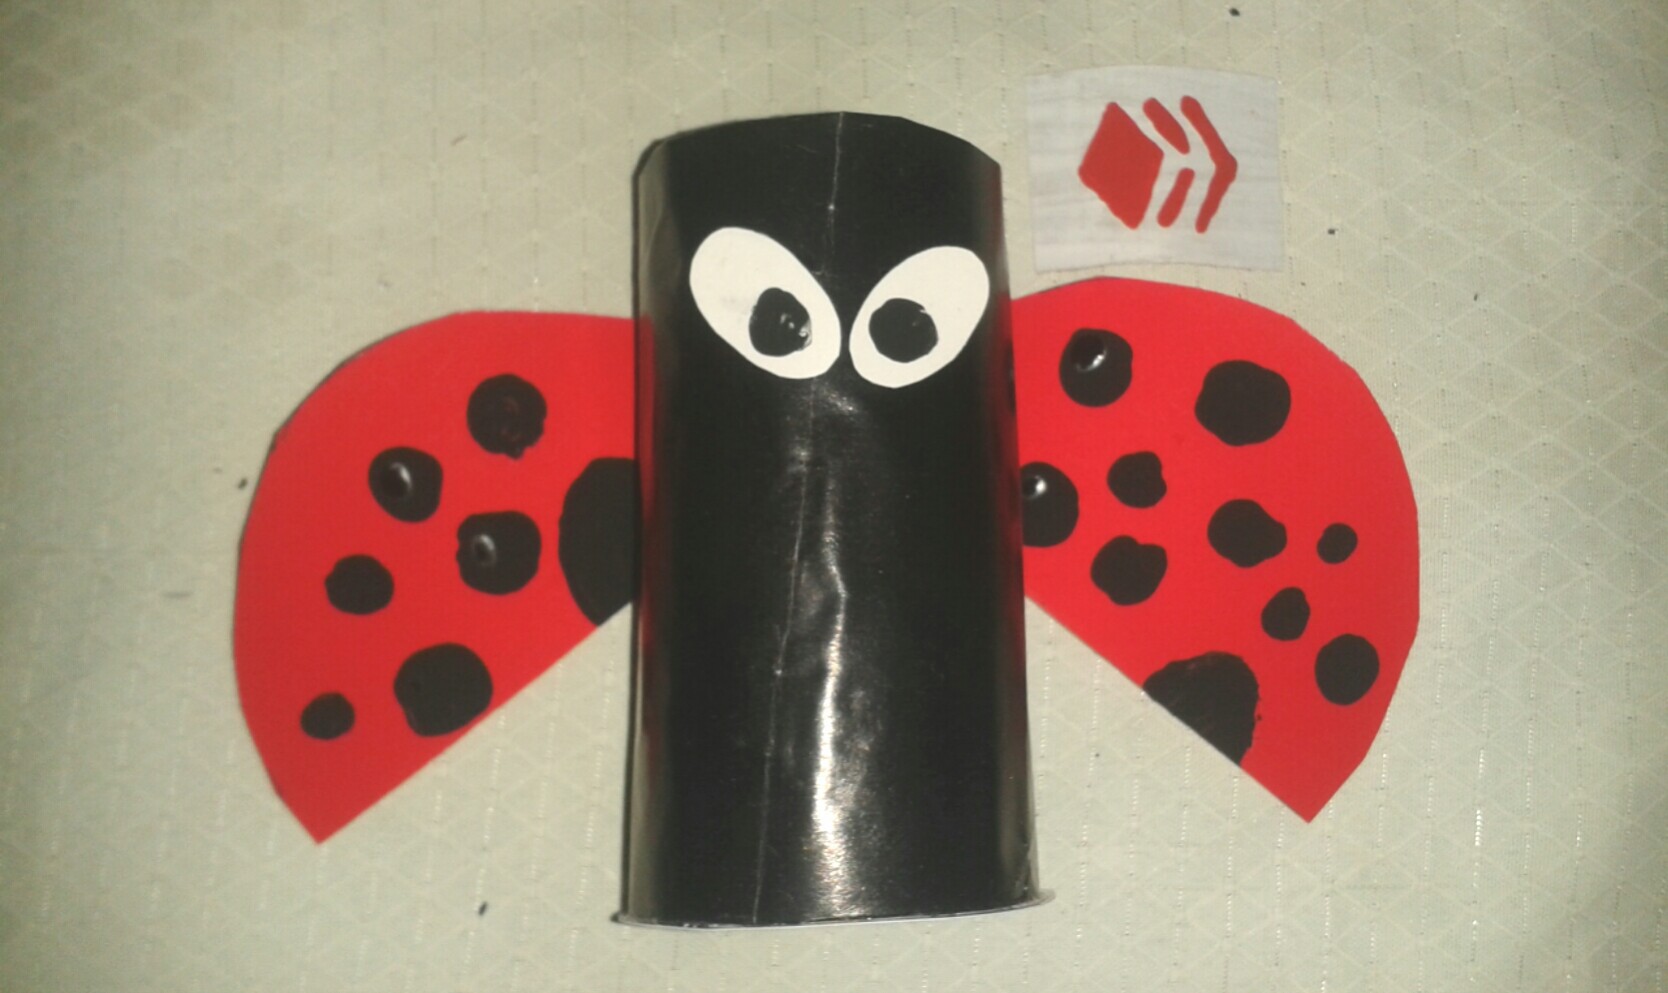
Paso 01: Trazaremos un óvalo en la cartulina roja (serán las alas) y los ojos en la cartulina blanca. Recortamos!
Step 01: We will trace an oval on the red cardboard (they will be the wings) and the eyes on the white cardboard. We cut!
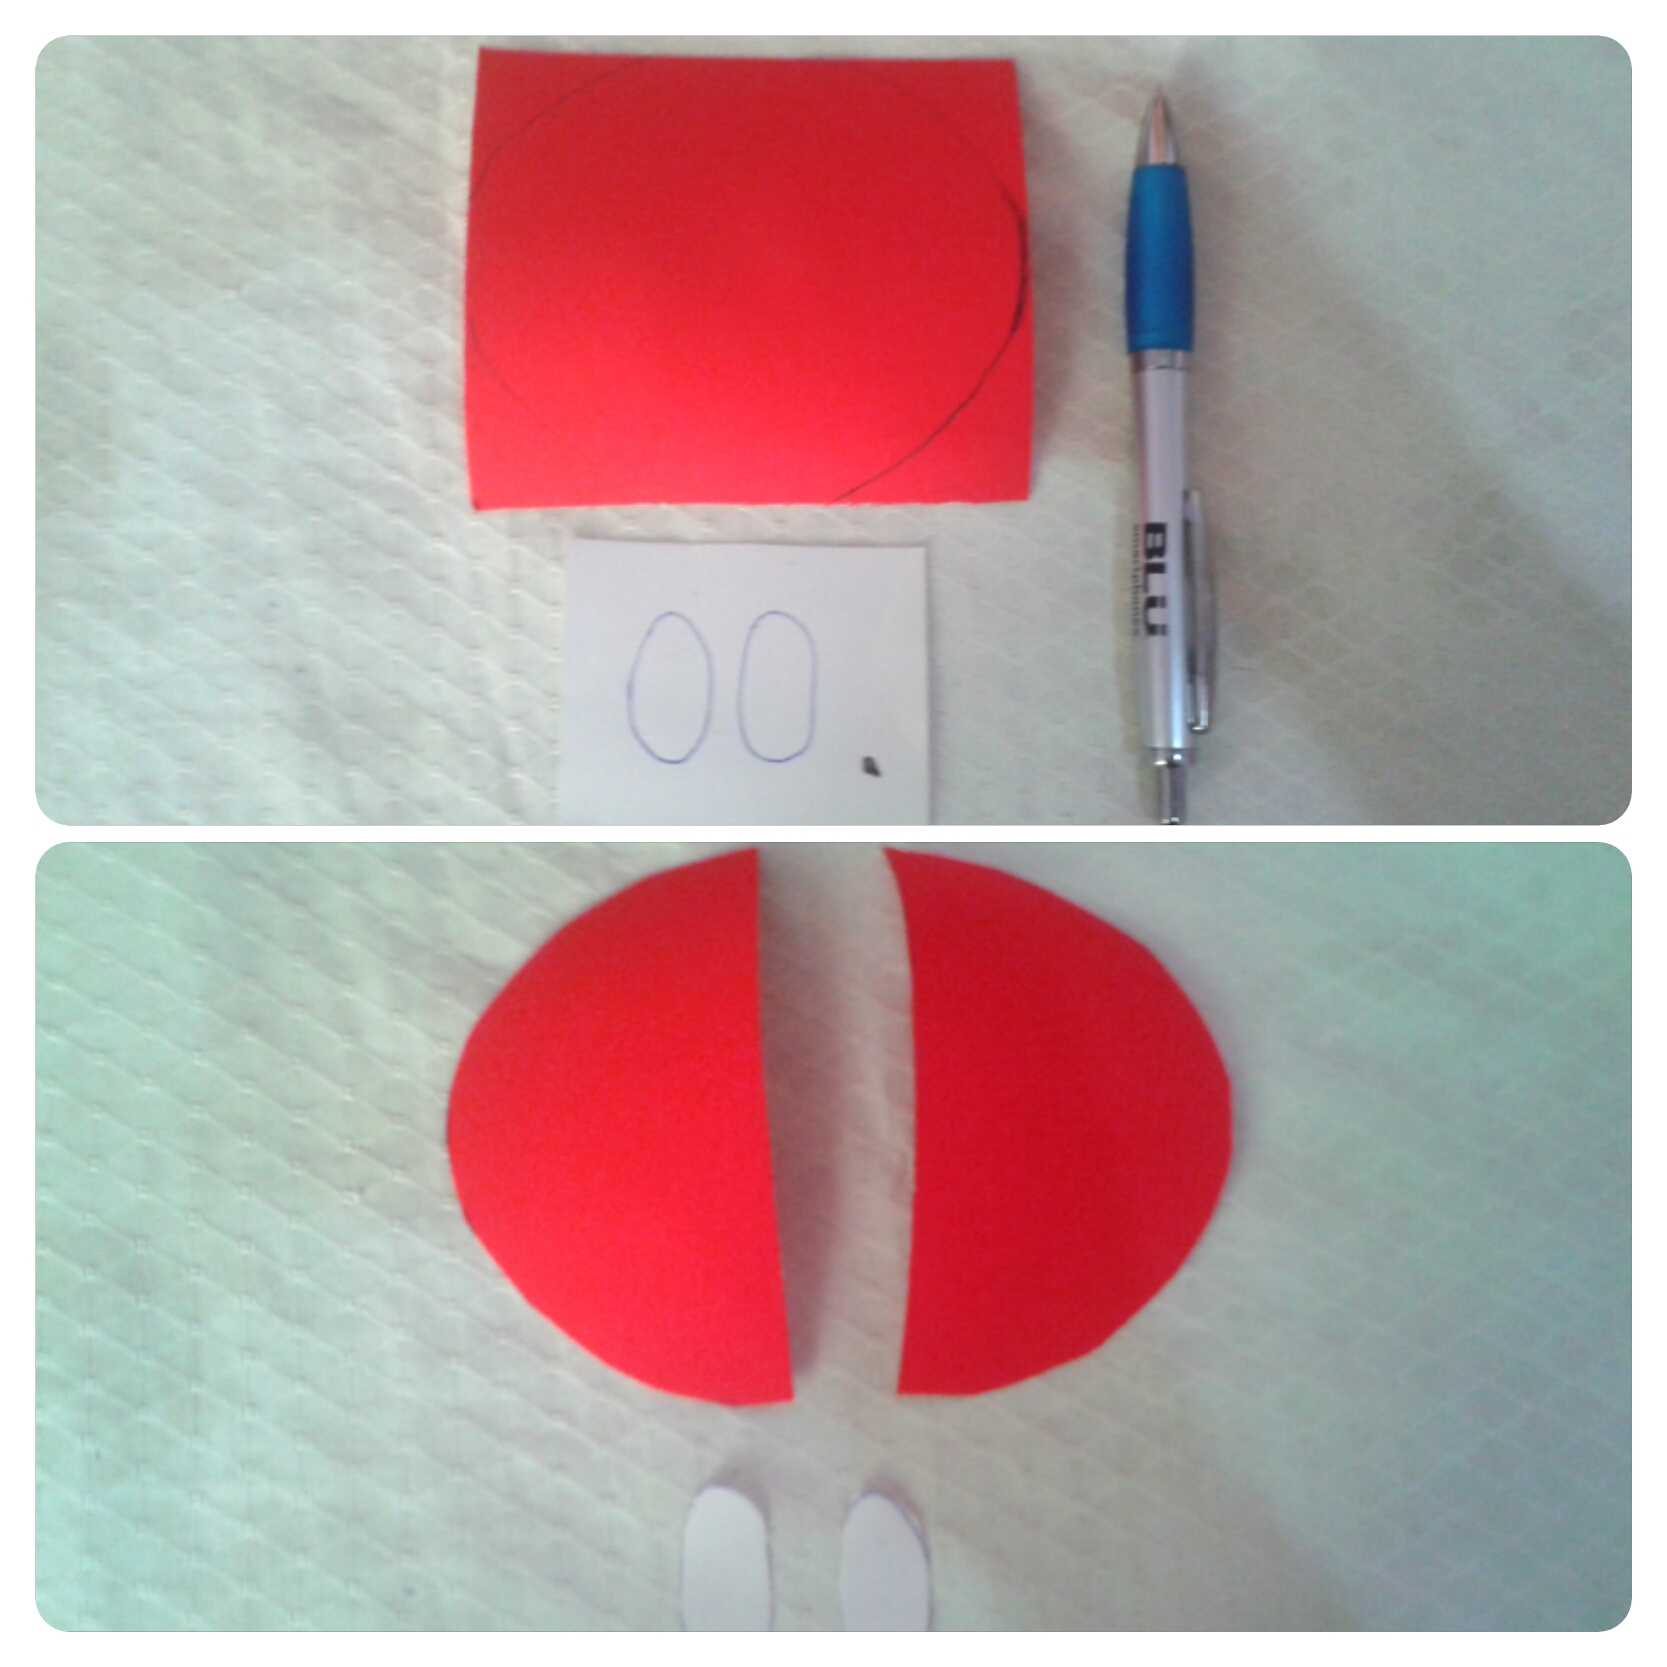
Paso 02: Haremos unos puntos en las alas (puedes hacerlos del tamaño que quieras). Y pondremos unas gotas negras en los ojos.
Step 02: We will make some points on the wings (you can make them the size you want). And we will put some black drops in the eyes.
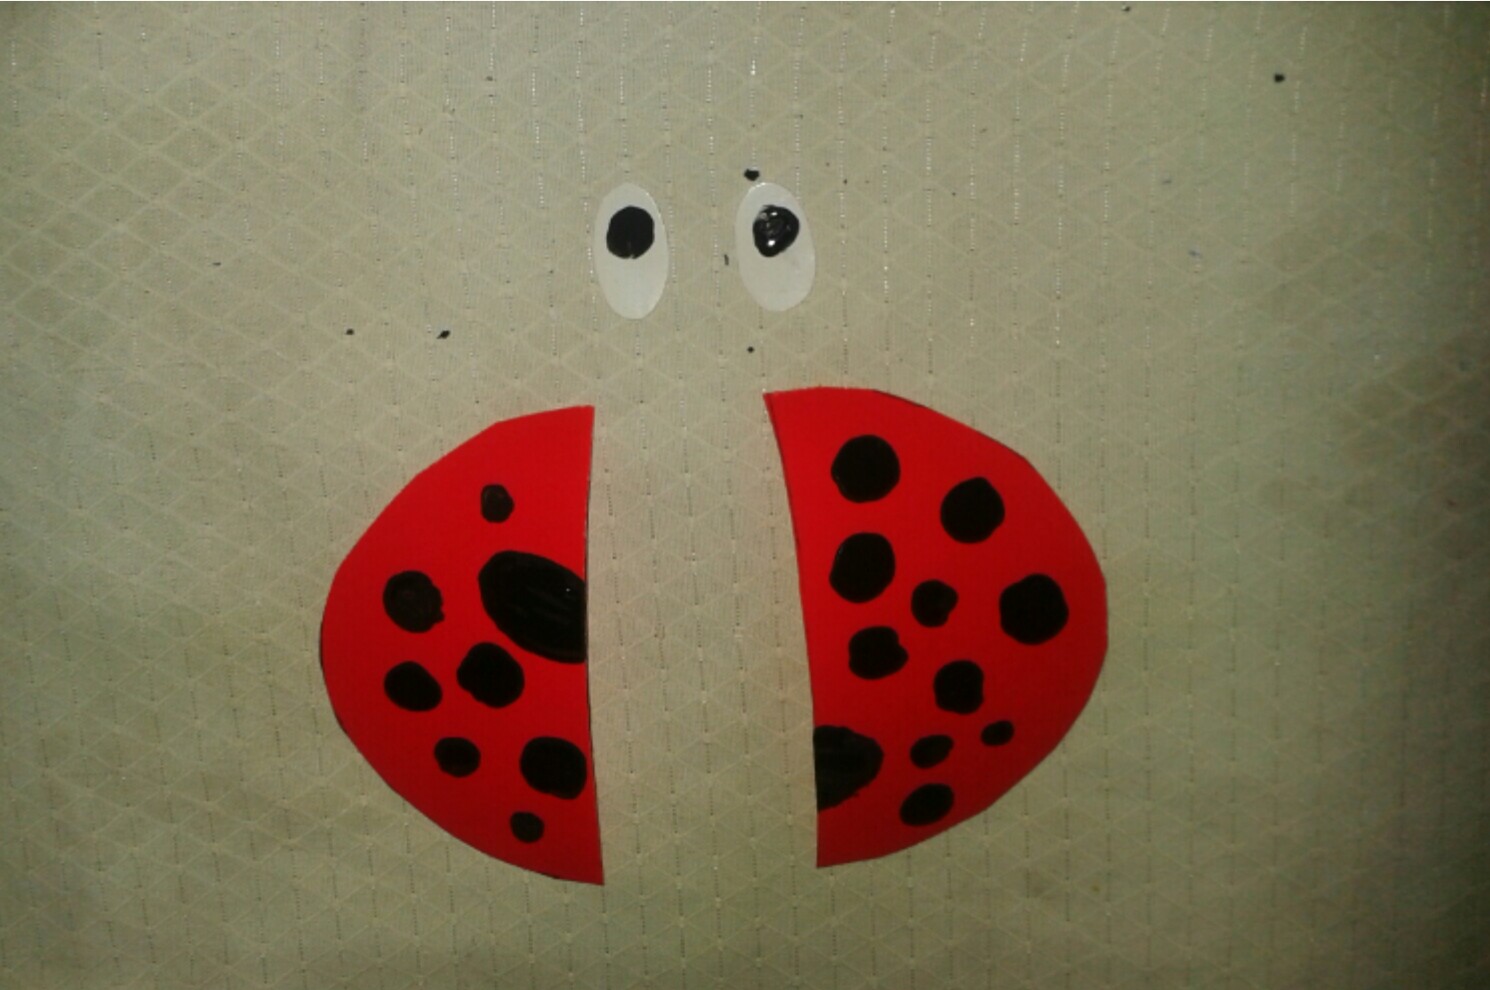
Paso 03: Será lo último que haremos. Pegaremos las alas y los ojos de la mariquita.
Step 03: It will be the last thing we will do. We will glue the wings and the eyes of the ladybug.

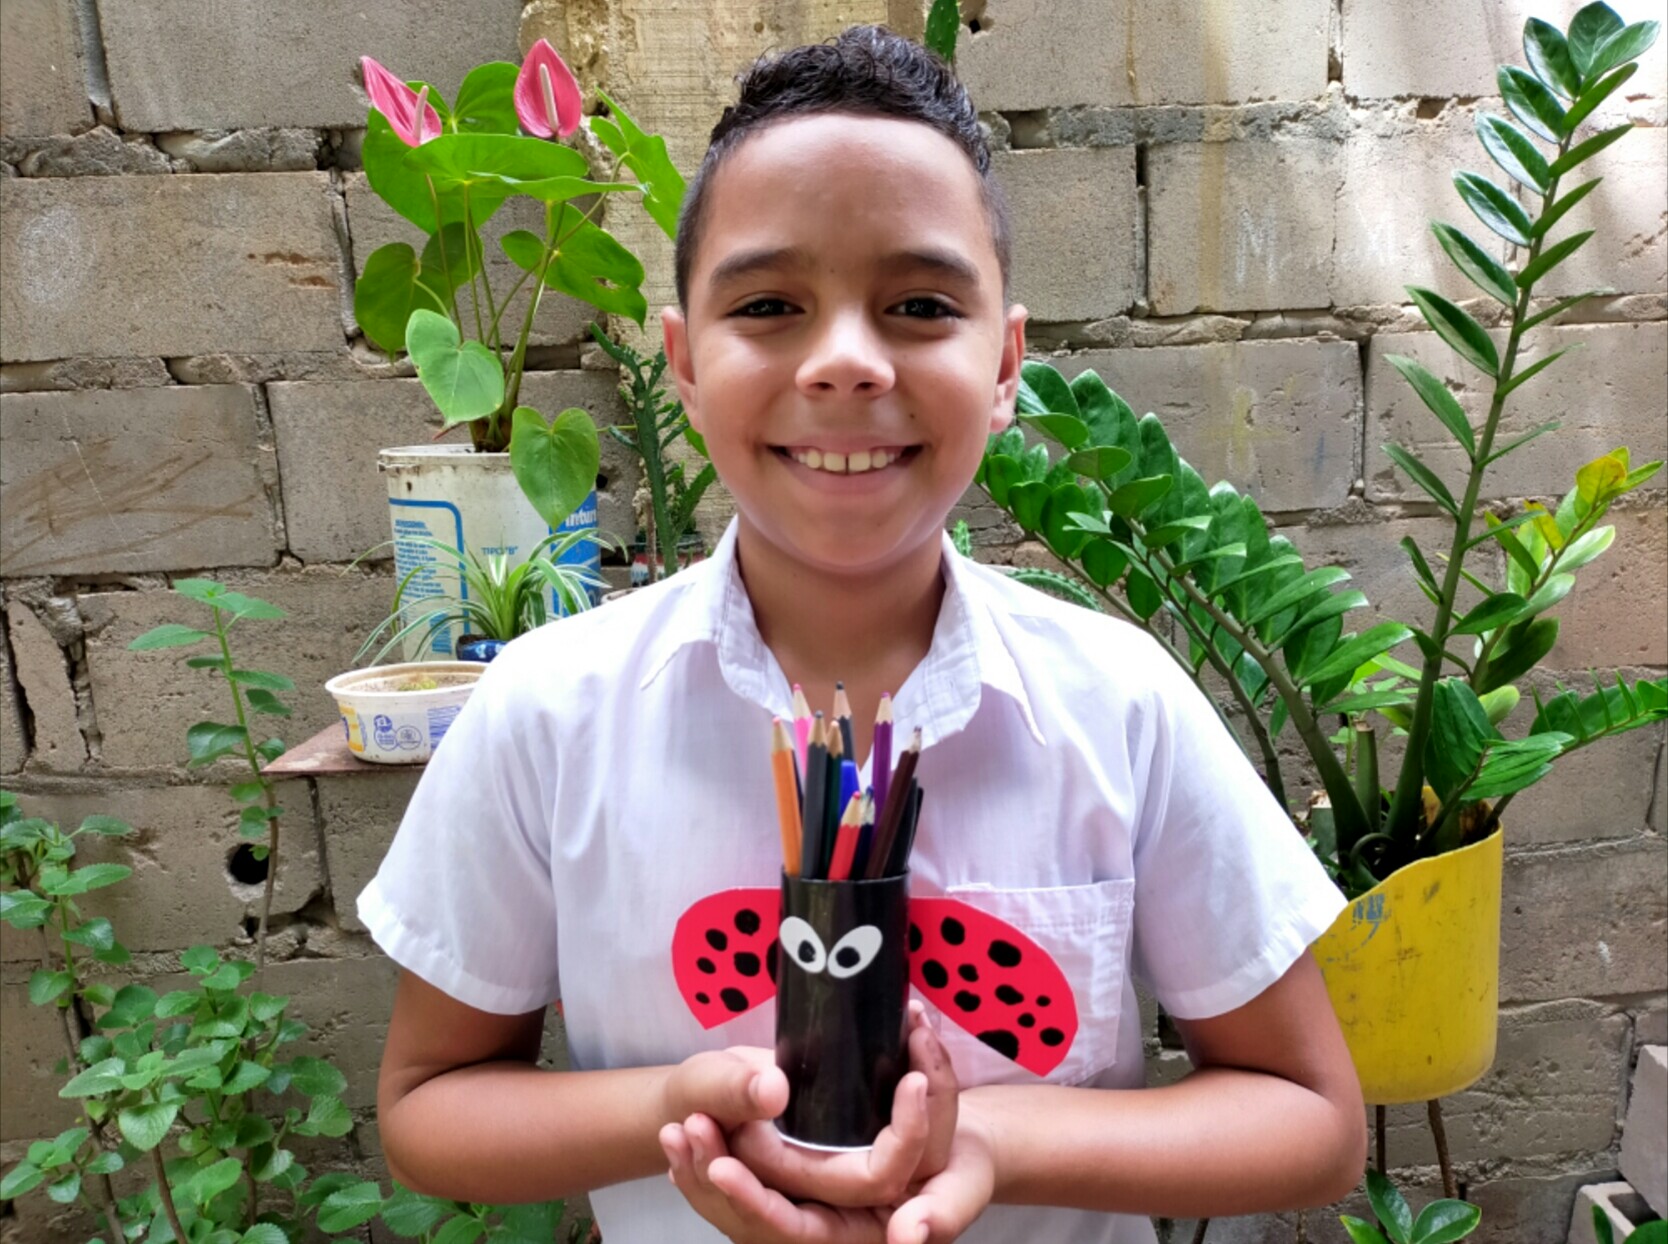
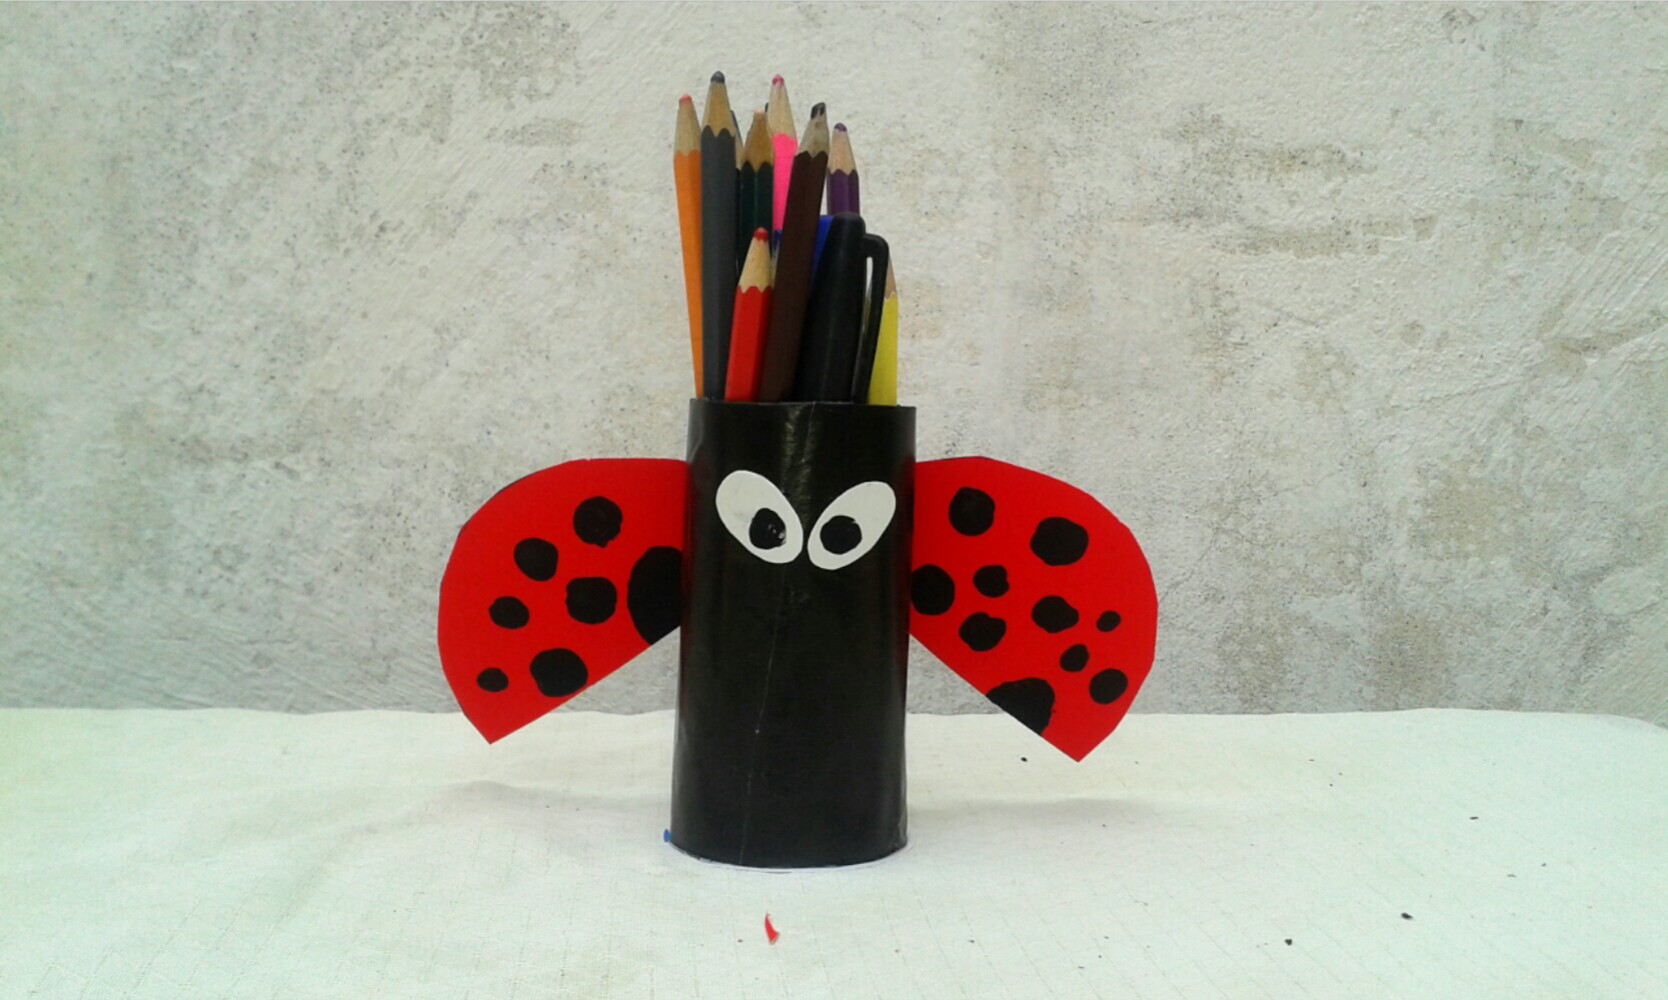
Resultado!
Aquí tenemos éste increíble resultado del súper organizador de colores de mariquita. Espero te haya gustado!
Here we have this amazing result of the super ladybug color organizer. I hope you liked it!
Gracias por visitar mi blog!
Saludos para todos! Hasta un próximo post!
Congratulations @josegregor! You have completed the following achievement on the Hive blockchain and have been rewarded with new badge(s) :
Your next target is to reach 20 posts.
You can view your badges on your board and compare yourself to others in the Ranking
If you no longer want to receive notifications, reply to this comment with the word
STOPTo support your work, I also upvoted your post!