¡Hola a todos! hoy vuelvo con una nueva entrada para ustedes, se trata de algo que me apasiona mucho y es la fotografía, y la edición fotográfica. Todo el proceso desde la idea, pasando por el set, la producción y la postproducción fotográfica es algo que me encanta.
Hello everyone! today I'm back with a new post for you, it's about something I'm very passionate about and that's photography, and photo editing. The whole process from the idea, through the set, production and post production is something I love.
Hay muchas cosas detrás de una buena fotografía, como la luz, el maquillaje, el sol, el ambiente, el set, un buen manejo de cámara y más. La fotografía nos sirve para contar historias, para dejar nuestras memorias y expresar nuestros sentimientos.
There are many things behind a good photograph, such as light, makeup, the sun, the environment, the set, good camera handling and more. Photography serves us to tell stories, to leave our memories and express our feelings.
El día de hoy les enseñaré el proceso de edición de una de mis fotografías, fue muy divertido experimentar con el maquillaje y los artículos de utilería para la misma y las poses. Les enseñaré la edición con una foto y luego les mostraré el resultado con varias poses, espero les guste.
Today I will show you the editing process of one of my photographs, it was a lot of fun to experiment with the makeup and props for it and the poses. I will show you the editing with one photo and then I will show you the result with various poses, I hope you like it.
Para la temática de esta foto decidí incluir a la naturaleza por eso me hice un maquillaje llamativo y agregué unas ramas para posar con ellas.
For the theme of this photo I decided to include nature so I did a flashy makeup and added some branches to pose with.
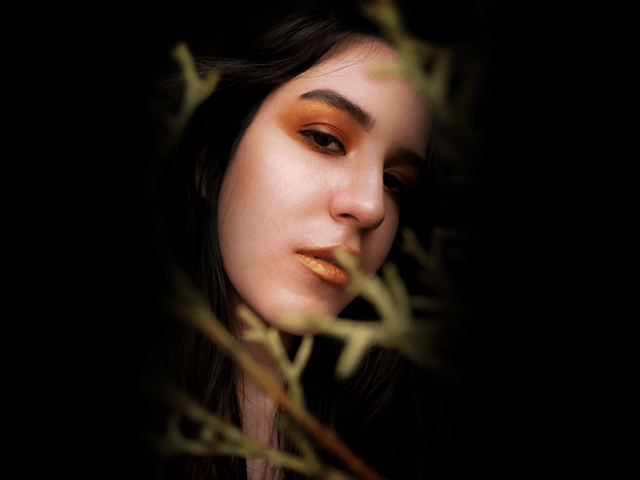
Aquí pueden ver la fotografía sin edición.
Here you can see the photo without editing.
Es el primer paso después de que tenemos la idea, los materiales, el maquillaje y nuestra pose. Yo recomiendo tomar las fotografías en formato RAW ya que nos permite trabajar con ellas y explotarlas al máximo sin perder calidad. En mi caso la foto la realicé en jpg pues mi celular no tiene la opción de disparar a raw. Cosa que me encantaría que tuviera 😅
This is the first step after we have the idea, the materials, the makeup and our pose. I recommend taking the pictures in RAW format because it allows us to work with them and exploit them to the maximum without losing quality. In my case I took the photo in jpg because my cell phone does not have the option to shoot in raw. Something I would love to have 😅
Luego de eso hacemos la corrección de piel, como pueden ver:
After that we do the skin correction, as you can see:
Para esto podemos usar dos métodos, en ambos casos se puede usar Photoshop, uno es la separación de frecuencias, donde podemos editar nuestra foto de manera no destructiva, el otro es ir trabajando por capas con Dodge and Burn, donde jugamos con los tonos y los unificamos, claro que también podemos usar otras herramientas como el pincel corrector puntual, el tampón de clonar y el parche corrector, se trata de ir experimentando, siempre trabajando en capas para no perder calidad y poder regresar el proceso en caso de equivocaciones.
For this we can use two methods, in both cases you can use Photoshop, one is the frequency separation, where we can edit our photo in a non-destructive way, the other is to work in layers with Dodge and Burn, where we play with the tones and unify them, of course we can also use other tools such as the spot correction brush, the clone buffer and the patch corrector, it is about experimenting, always working in layers to avoid losing quality and to be able to return the process in case of mistakes.
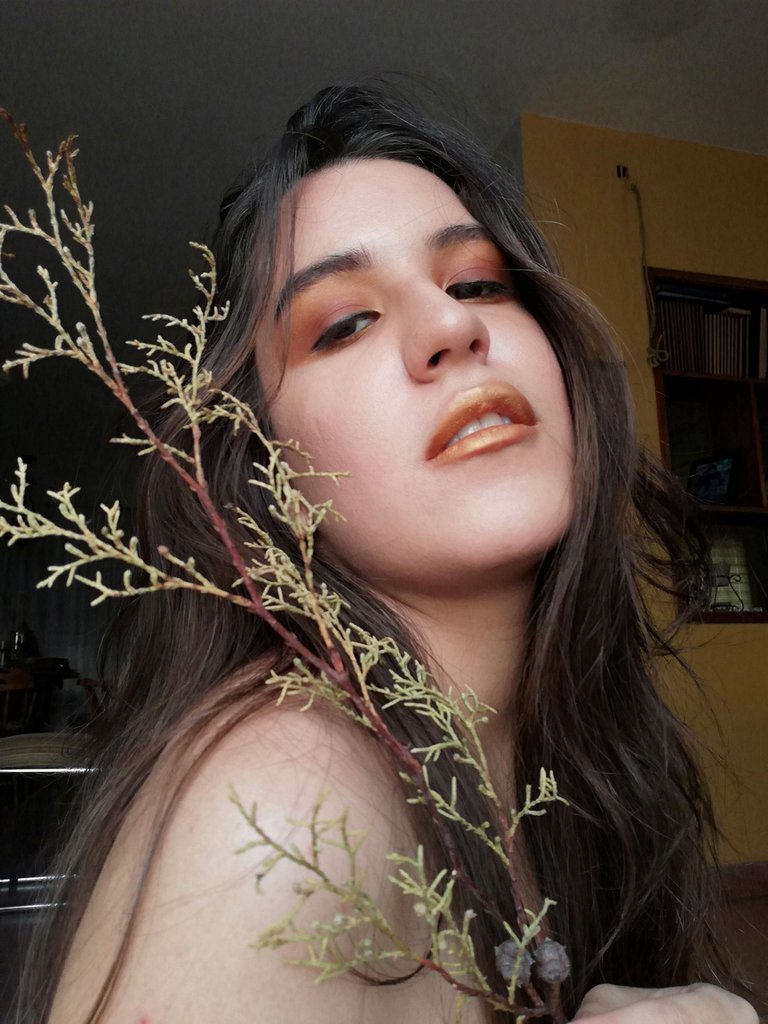
Ahora procedemos a hacer la edición de color
Now we proceed to make the color edition
Como pueden ver realcé mi maquillaje, mis ojos y el tono de las ramas. Esto se puede hacer en lightroom, y terminar en Photoshop si queremos trabajar a base de máscaras de capa. Yo trabaje de ambas maneras para la fotografía. Hice retoques puntuales en photoshop y luego di los toques finales en lightroom.
As you can see I enhanced my makeup, my eyes and the tone of the branches. This can be done in lightroom, and finished in Photoshop if we want to work with layer masks. I worked both ways for the photograph. I did spot retouching in photoshop and then did the finishing touches in lightroom.
Finalmente le damos los toques finales
Finally we put the finishing touches
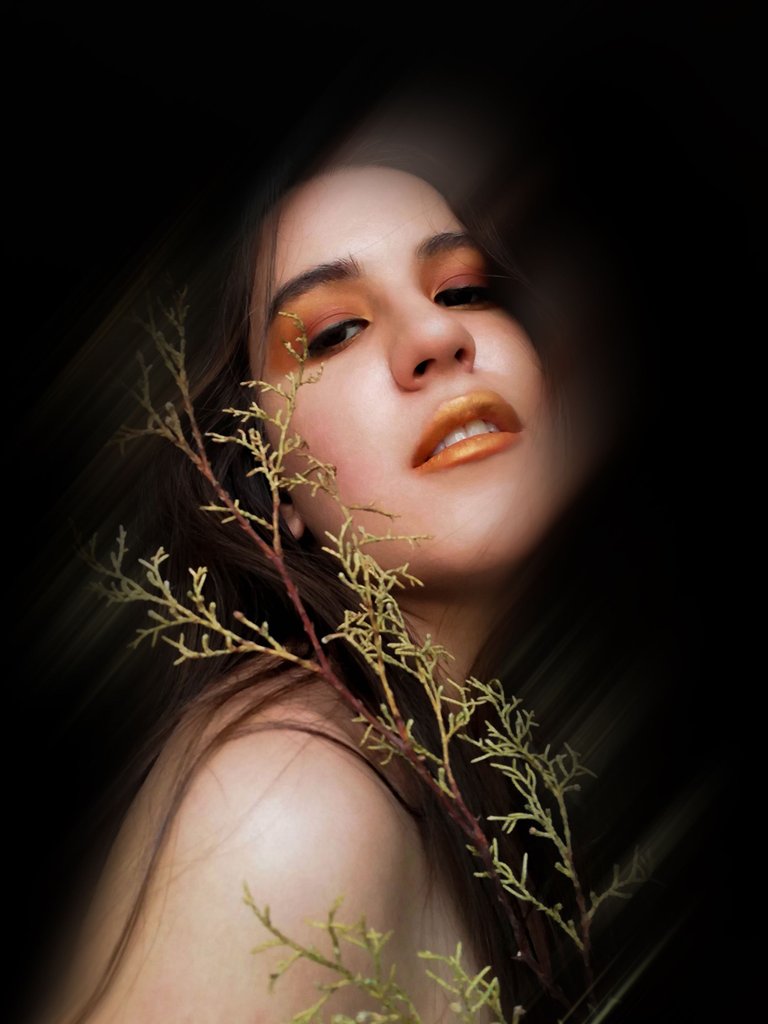
En este caso hice la corrección del fondo y agregué un efecto de movimiento a mi fotografía para que se viera más dinámica y destacara aún más.
In this case I did the background correction and added a motion effect to my photo to make it look more dynamic and stand out even more.
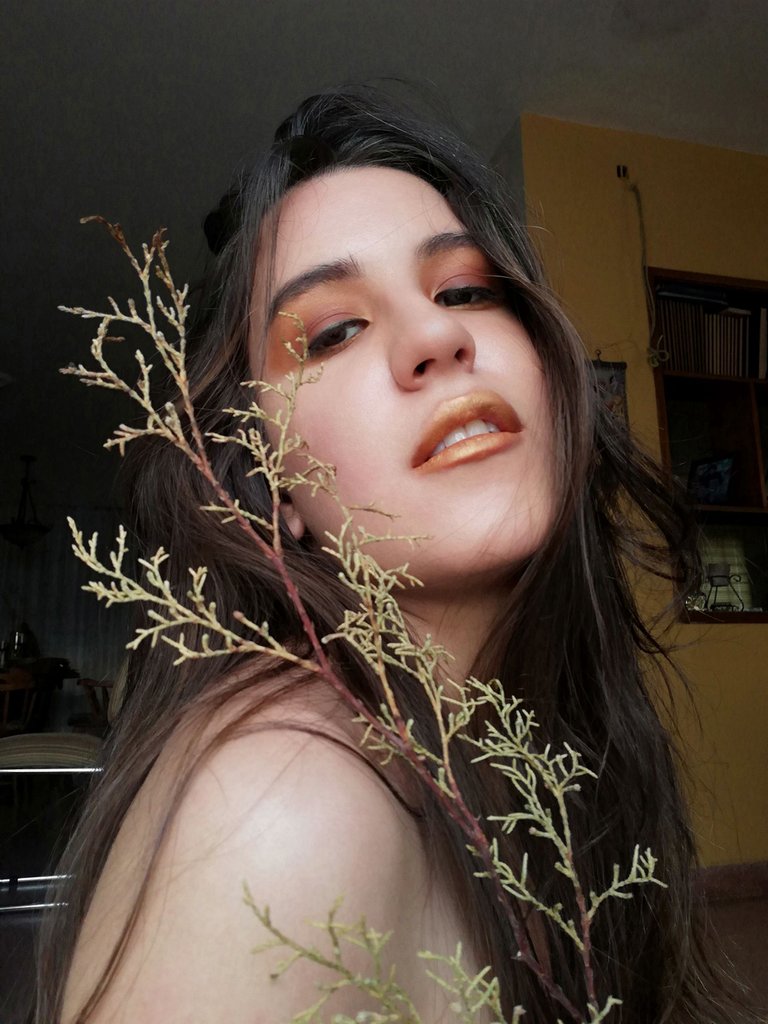
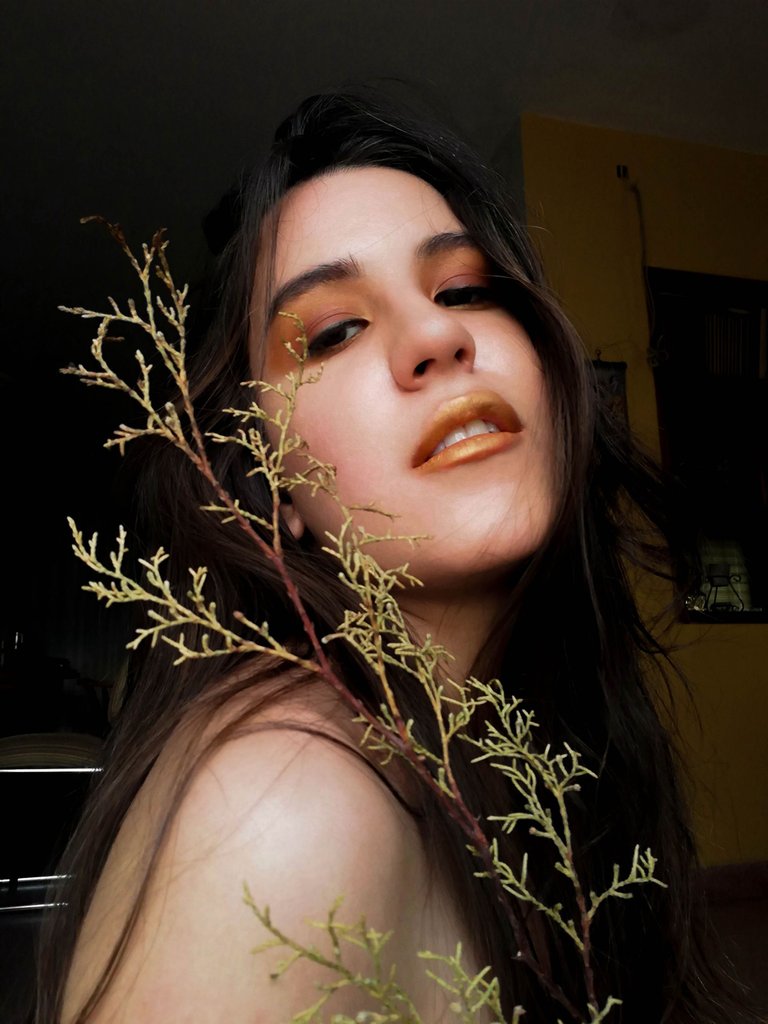
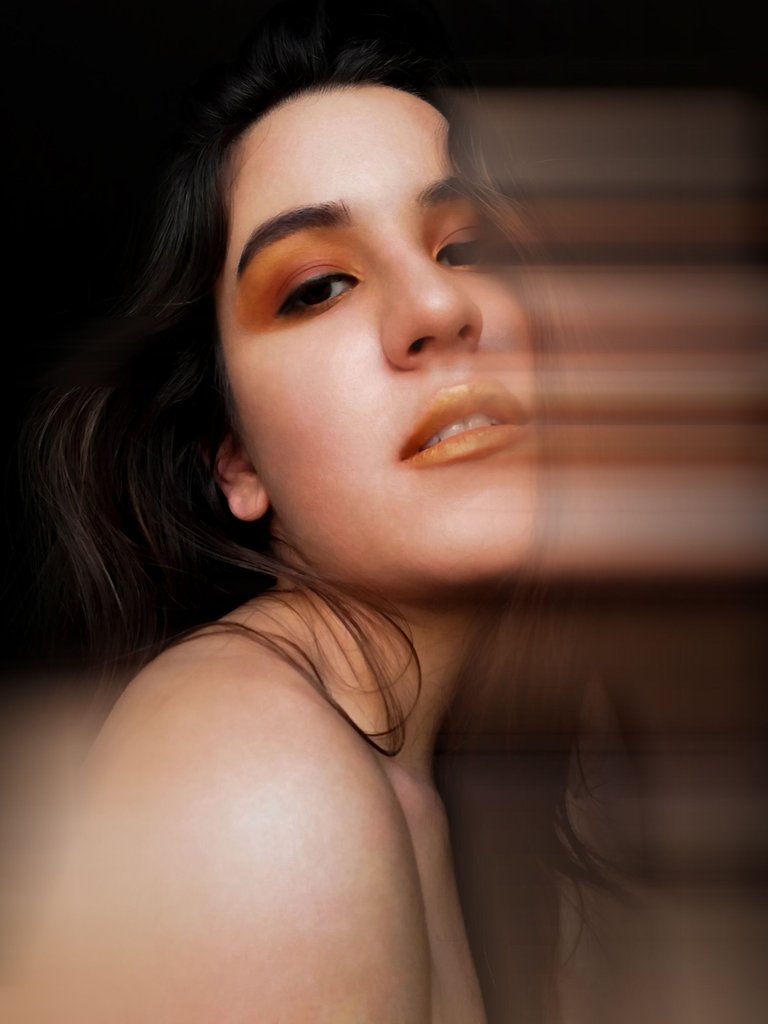
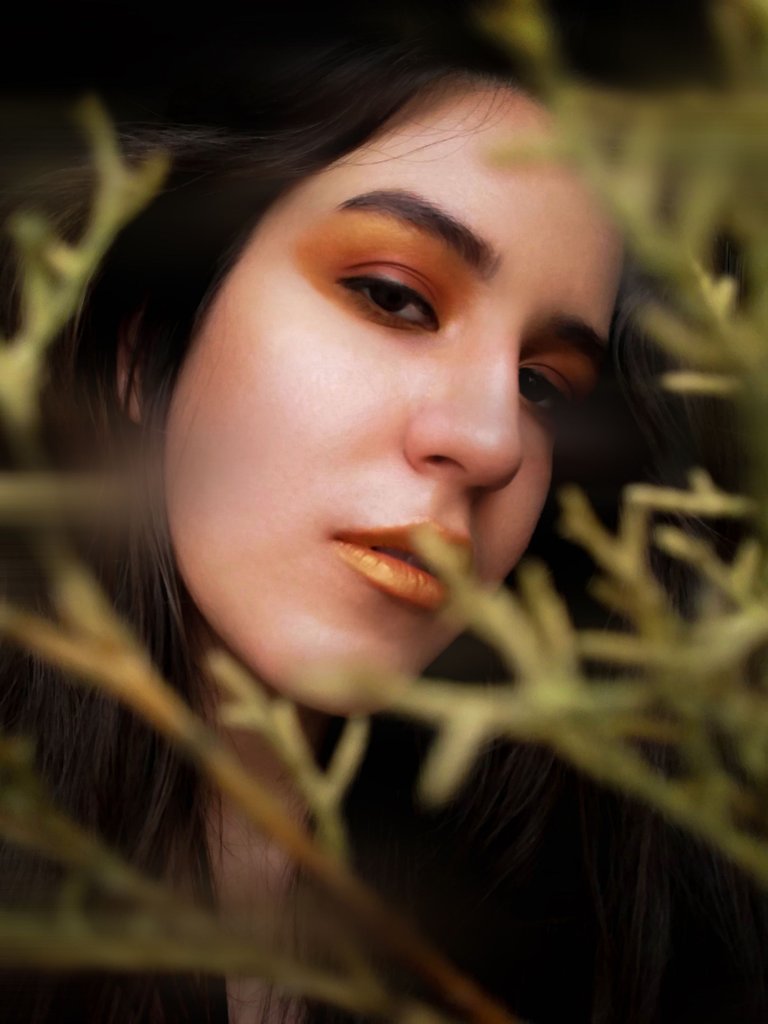
Aquí otras fotografías editadas bajo el mismo proceso:
Here are some other pictures edited under the same process:

Espero les haya gustado y se animen a hacer sus propias sesiones fotográficas 😘
I hope you liked it and I encourage you to do your own photo shoots 😘
¡Nos leemos pronto! 🤗
We will read us soon! 🤗